Home>Furniture & Design>Outdoor Furniture>How To Build An Outdoor Privacy Wall
Outdoor Furniture
How To Build An Outdoor Privacy Wall
Published: January 13, 2024
Learn how to create an outdoor privacy wall with our expert tips and ideas for outdoor furniture and design. Enhance your outdoor space today!
(Many of the links in this article redirect to a specific reviewed product. Your purchase of these products through affiliate links helps to generate commission for Storables.com, at no extra cost. Learn more)
Introduction
When it comes to creating a cozy outdoor space, privacy is often a key consideration. Whether you're looking to shield your patio from prying eyes, create a secluded oasis in your backyard, or simply add a touch of elegance to your outdoor area, building an outdoor privacy wall can be the perfect solution. This versatile and functional structure not only provides seclusion but also adds aesthetic appeal to your outdoor living space.
In this guide, we will delve into the essential steps and considerations for building an outdoor privacy wall that suits your style and needs. From planning and design to choosing materials, tools, and construction, we'll cover everything you need to know to embark on this rewarding DIY project. By the end of this article, you'll be equipped with the knowledge and inspiration to create a private and inviting outdoor sanctuary that reflects your unique taste and complements your outdoor furniture and design. So, let's roll up our sleeves and get ready to transform your outdoor space into a secluded haven!
Key Takeaways:
- Create a private outdoor oasis by building a stylish and sturdy privacy wall that complements your outdoor furniture and design, providing seclusion and aesthetic appeal to your outdoor space.
- Careful planning, precise construction, and thoughtful finishing touches are essential for building an outdoor privacy wall that enhances the intimacy and charm of your outdoor sanctuary while reflecting your unique style and creativity.
Read more: How To Build Wood Privacy Fence
Planning and Design
Before embarking on the construction of an outdoor privacy wall, thoughtful planning and meticulous design are crucial. Start by envisioning the purpose of the privacy wall. Are you aiming to block unsightly views, create a sense of intimacy, or simply enhance the aesthetics of your outdoor space? Understanding the primary goal will guide the entire design process.
Consider the style and architecture of your home and existing outdoor furniture to ensure that the privacy wall harmonizes with the overall look. Whether you prefer a modern, sleek design or a rustic, natural feel, the aesthetics of the wall should complement your outdoor design scheme. Additionally, take into account the dimensions of the area where the wall will be installed, ensuring that it provides the desired level of privacy without overwhelming the space.
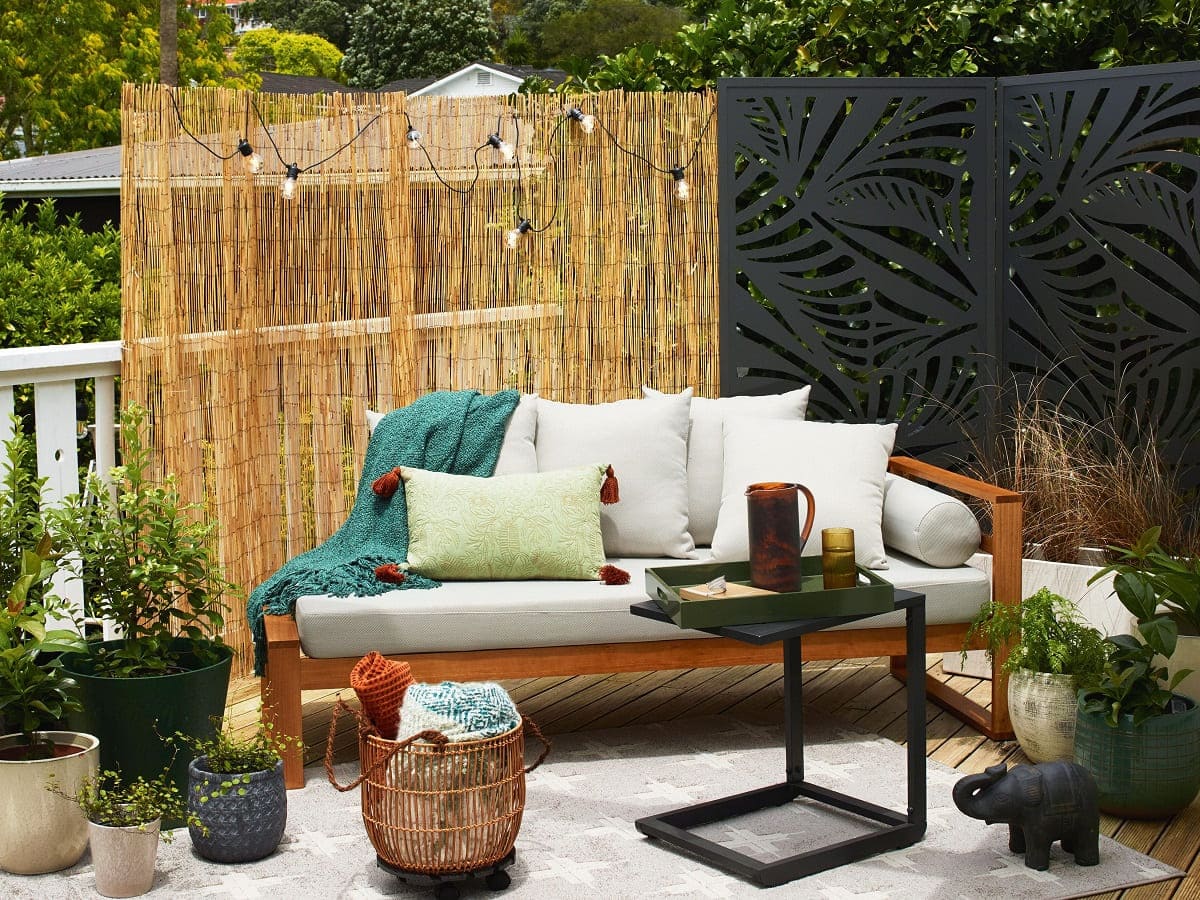
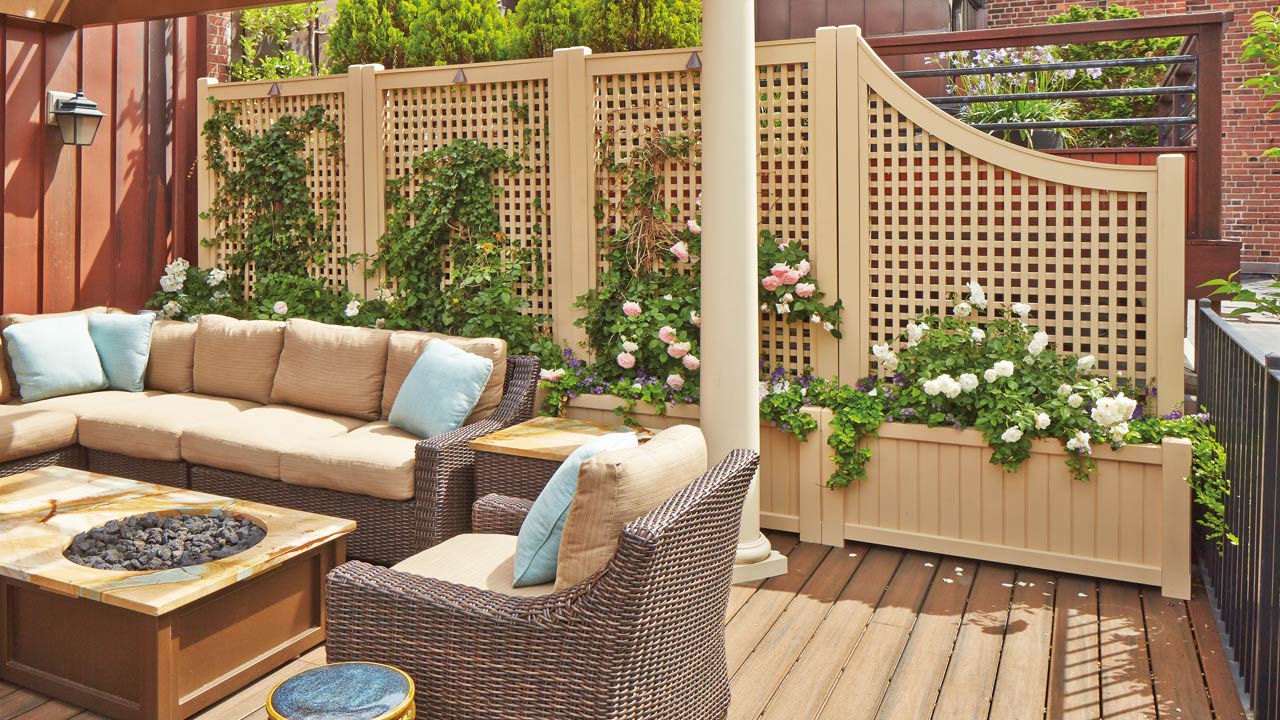
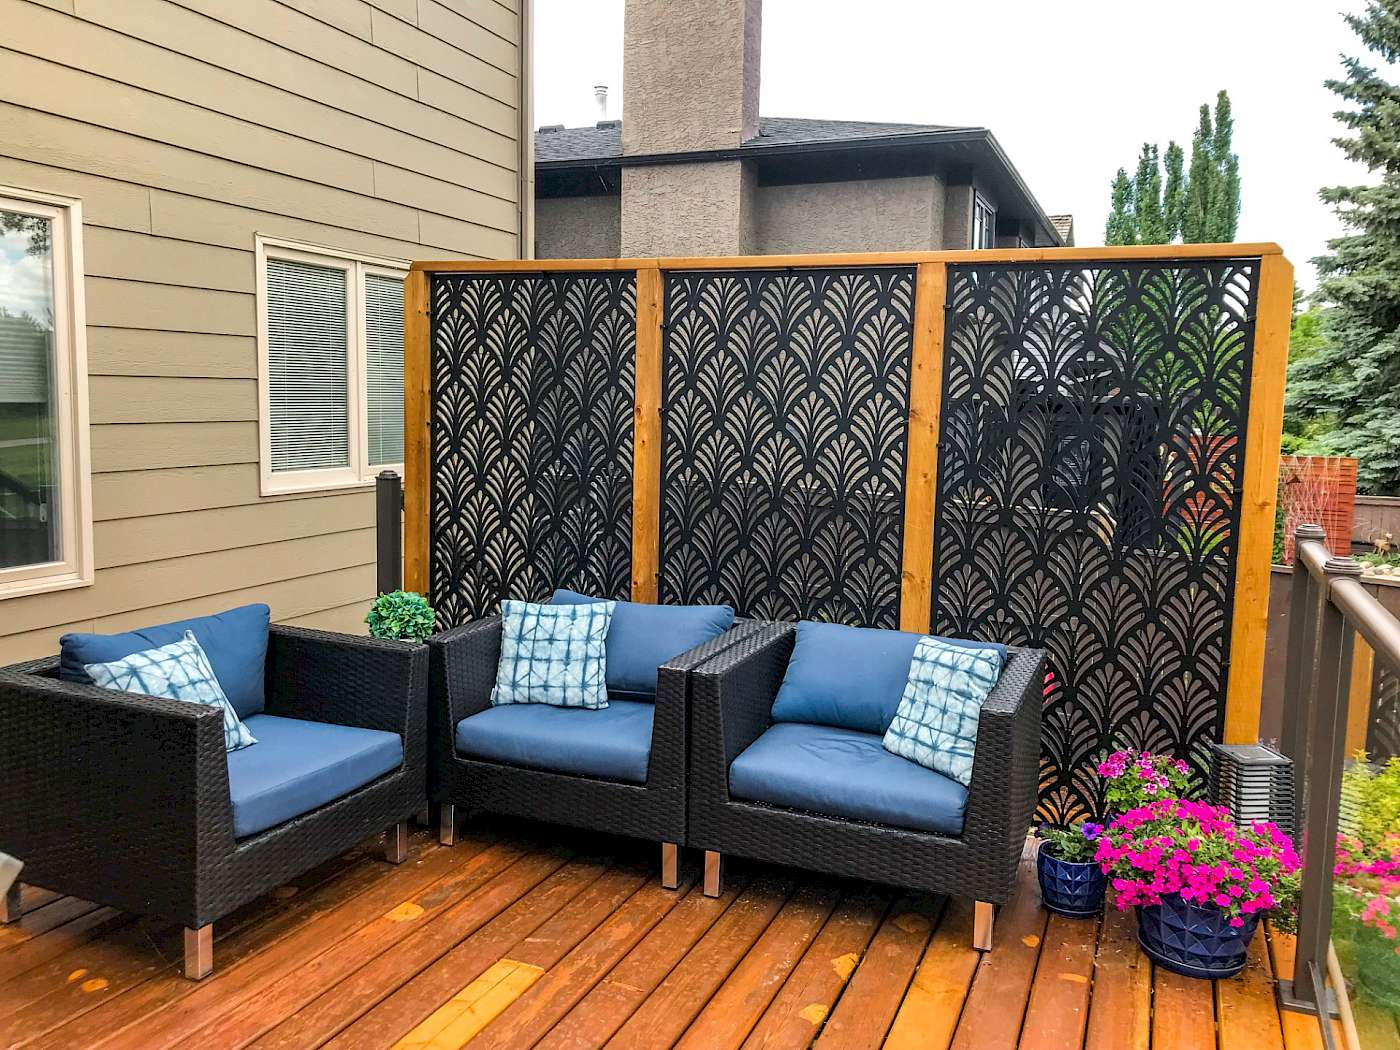
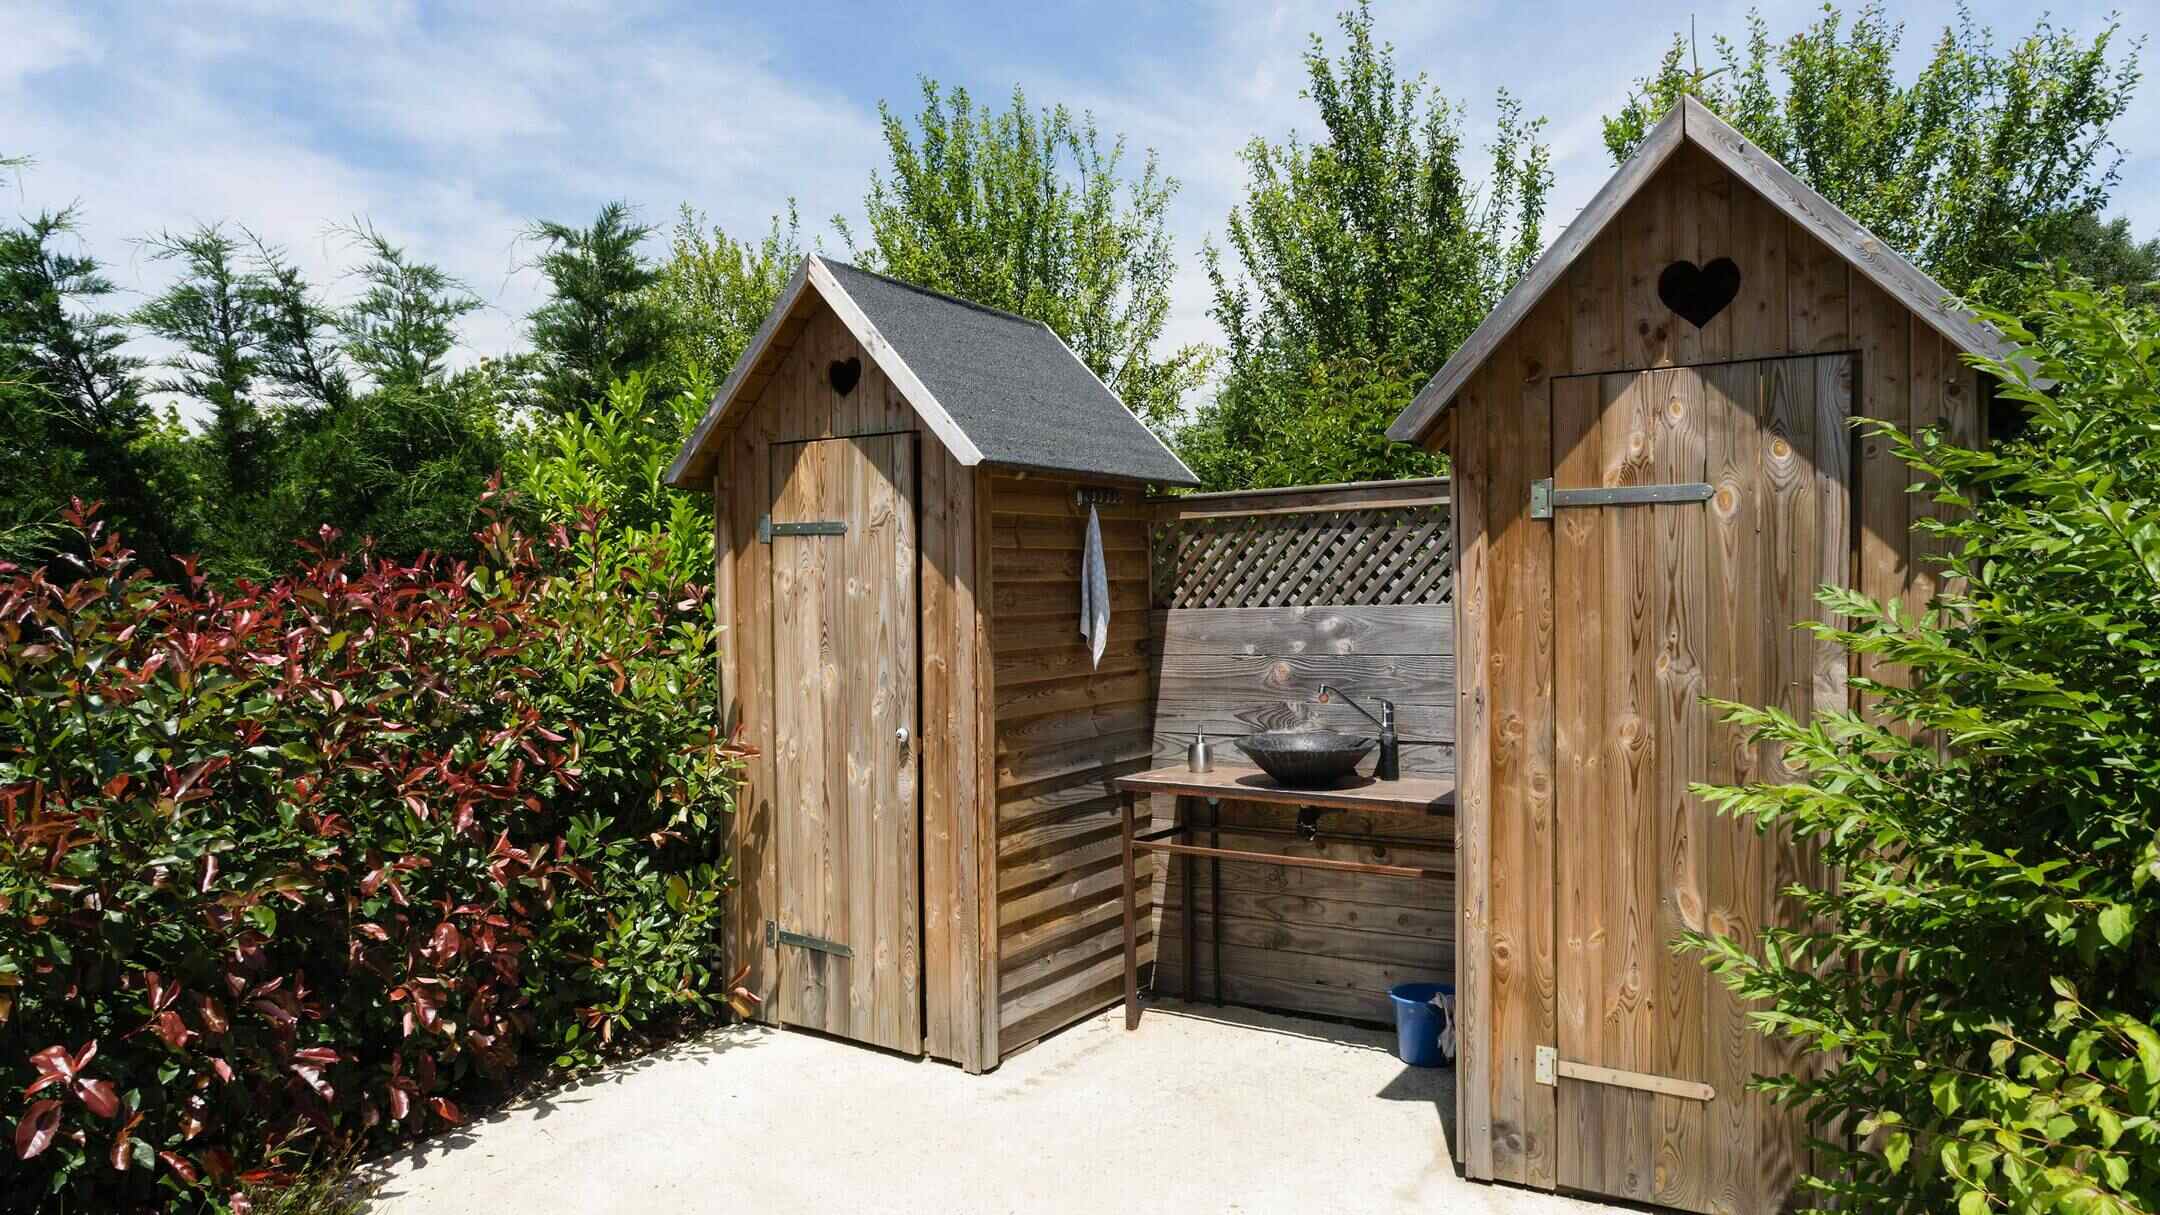
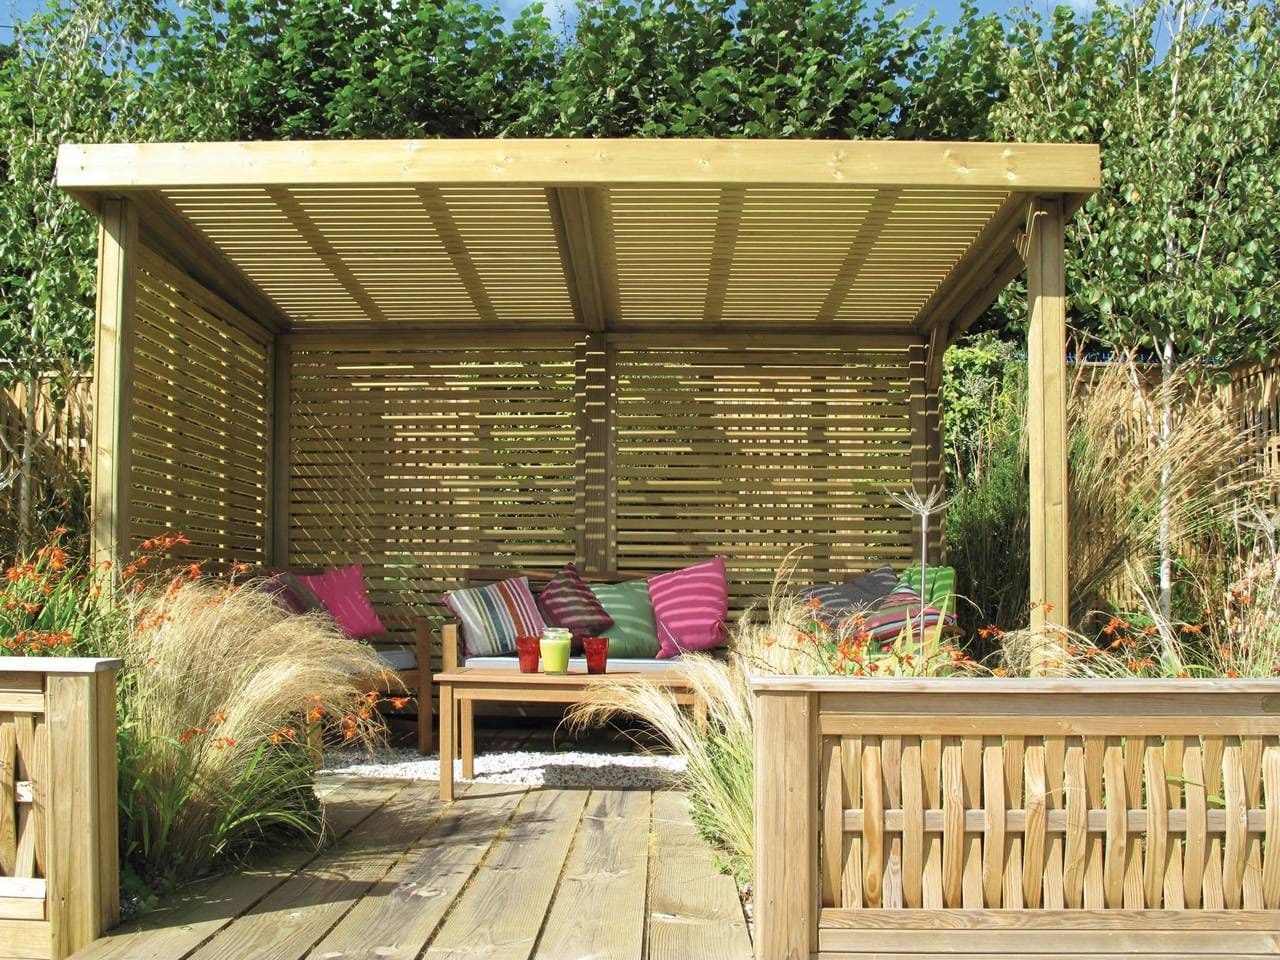
Furthermore, think about the materials that will best suit your design vision. Wood offers a warm, natural appeal, while metal conveys a contemporary and durable look. Alternatively, incorporating lattice panels can infuse a touch of elegance and allow for climbing plants to enhance the privacy wall’s beauty.
It’s also essential to check local building codes and regulations before finalizing your design. Some areas have specific height restrictions for structures, including privacy walls. Ensuring compliance with these regulations will prevent potential setbacks during the construction phase.
By carefully considering these factors during the planning and design stage, you’ll lay the foundation for a privacy wall that seamlessly integrates with your outdoor space and enhances its functionality and aesthetics.
Choosing Materials
When it comes to building an outdoor privacy wall, selecting the right materials is pivotal in achieving a durable, visually appealing structure. The choice of materials not only influences the wall’s appearance but also determines its longevity and maintenance requirements.
Wood is a popular choice for privacy walls, offering a timeless, natural look that blends well with various outdoor settings. Cedar and redwood are favored for their natural resistance to decay and insects, making them ideal for outdoor construction. Pressure-treated lumber is another option, known for its affordability and resistance to rot.
If you prefer a more contemporary and low-maintenance option, metal privacy panels can be an excellent choice. Aluminum and steel panels are durable, weather-resistant, and can be customized to achieve a modern or industrial aesthetic. Powder-coated metal panels offer added protection against corrosion and can be found in an array of colors to complement your outdoor design scheme.
For those seeking a blend of elegance and functionality, incorporating lattice panels into the privacy wall design can add a touch of sophistication. These panels allow air and light to pass through while providing partial privacy, and they serve as a versatile framework for climbing plants, adding a lush, natural element to the structure.
Consider the maintenance requirements of the chosen materials as well. While wood exudes a warm, natural charm, it typically requires periodic staining or sealing to preserve its appearance and structural integrity. In contrast, metal panels are relatively low-maintenance, requiring occasional cleaning to remove dirt and debris.
Ultimately, the choice of materials should align with your design preferences, maintenance capabilities, and the overall aesthetic of your outdoor space. By selecting high-quality materials that complement your outdoor furniture and design, you’ll ensure a privacy wall that not only fulfills its functional purpose but also enhances the visual appeal of your outdoor sanctuary.
Tools and Supplies
Equipping yourself with the right tools and supplies is essential for a successful outdoor privacy wall construction project. Before diving into the building process, gather the necessary items to streamline the construction and ensure a seamless workflow.
Here’s a list of tools and supplies you’ll likely need:
- Measuring Tape and Level: Accurate measurements and level lines are crucial for a well-constructed privacy wall.
- Saw: Depending on the chosen materials, a circular saw, miter saw, or reciprocating saw may be necessary for cutting lumber or metal panels to the desired dimensions.
- Drill and Screws: A power drill and appropriate screws are essential for securing the frame and attaching panels.
- Post Hole Digger: If the privacy wall will include posts, a post hole digger will expedite the process of creating sturdy foundations.
- Hammer and Nails: These traditional tools may be required for certain construction methods or for attaching lattice panels.
- Protective Gear: Safety goggles, work gloves, and ear protection are essential for safeguarding yourself during construction.
- Paint or Stain: If using wood materials, paint or stain will protect the surface from the elements and enhance its visual appeal.
- Decorative Elements: Depending on your design vision, consider any additional elements such as post caps, decorative trim, or climbing plants to adorn the privacy wall.
It’s important to ensure that all tools are in good working condition and that you have an adequate supply of screws, nails, or other fasteners to complete the project without interruptions. Additionally, consider the need for a sturdy workbench or sawhorses to facilitate cutting and assembling materials.
By having the necessary tools and supplies at your disposal, you’ll be well-prepared to tackle the construction of your outdoor privacy wall with confidence and efficiency, bringing your design vision to life.
Preparing the Area
Before commencing the construction of your outdoor privacy wall, it’s essential to prepare the designated area to ensure a smooth and efficient building process. Proper preparation sets the stage for a structurally sound and visually appealing end result.
Here are the key steps to prepare the area for the privacy wall construction:
- Clearing the Space: Remove any obstructions, debris, or vegetation from the area where the privacy wall will be installed. This includes trimming overhanging branches and clearing the ground to create a clean, level surface for construction.
- Marking the Layout: Use stakes and string to outline the dimensions and location of the privacy wall. This visual guide will help ensure that the construction stays within the intended boundaries and aligns with the planned design.
- Checking for Utility Lines: Before digging any post holes, contact the relevant authorities to check for the presence of underground utility lines. This precaution is crucial for safety and to avoid potential damage to utility infrastructure.
- Leveling the Ground: If the installation area is uneven, take the necessary steps to level the ground using a shovel, rake, and a tamper. A level foundation is essential for the stability and integrity of the privacy wall.
- Treating the Ground (Optional): Consider applying a layer of gravel or compacted base material to enhance drainage and stability, especially if the installation area is prone to moisture or erosion.
By meticulously preparing the area for the privacy wall construction, you’ll create a solid foundation for the subsequent building stages. This groundwork not only ensures the structural integrity of the wall but also contributes to a more efficient and organized construction process, bringing you closer to the realization of your outdoor sanctuary.
When building an outdoor privacy wall, make sure to use weather-resistant materials such as cedar or pressure-treated wood to ensure durability and longevity.
Read more: How To Build An Outdoor Climbing Wall
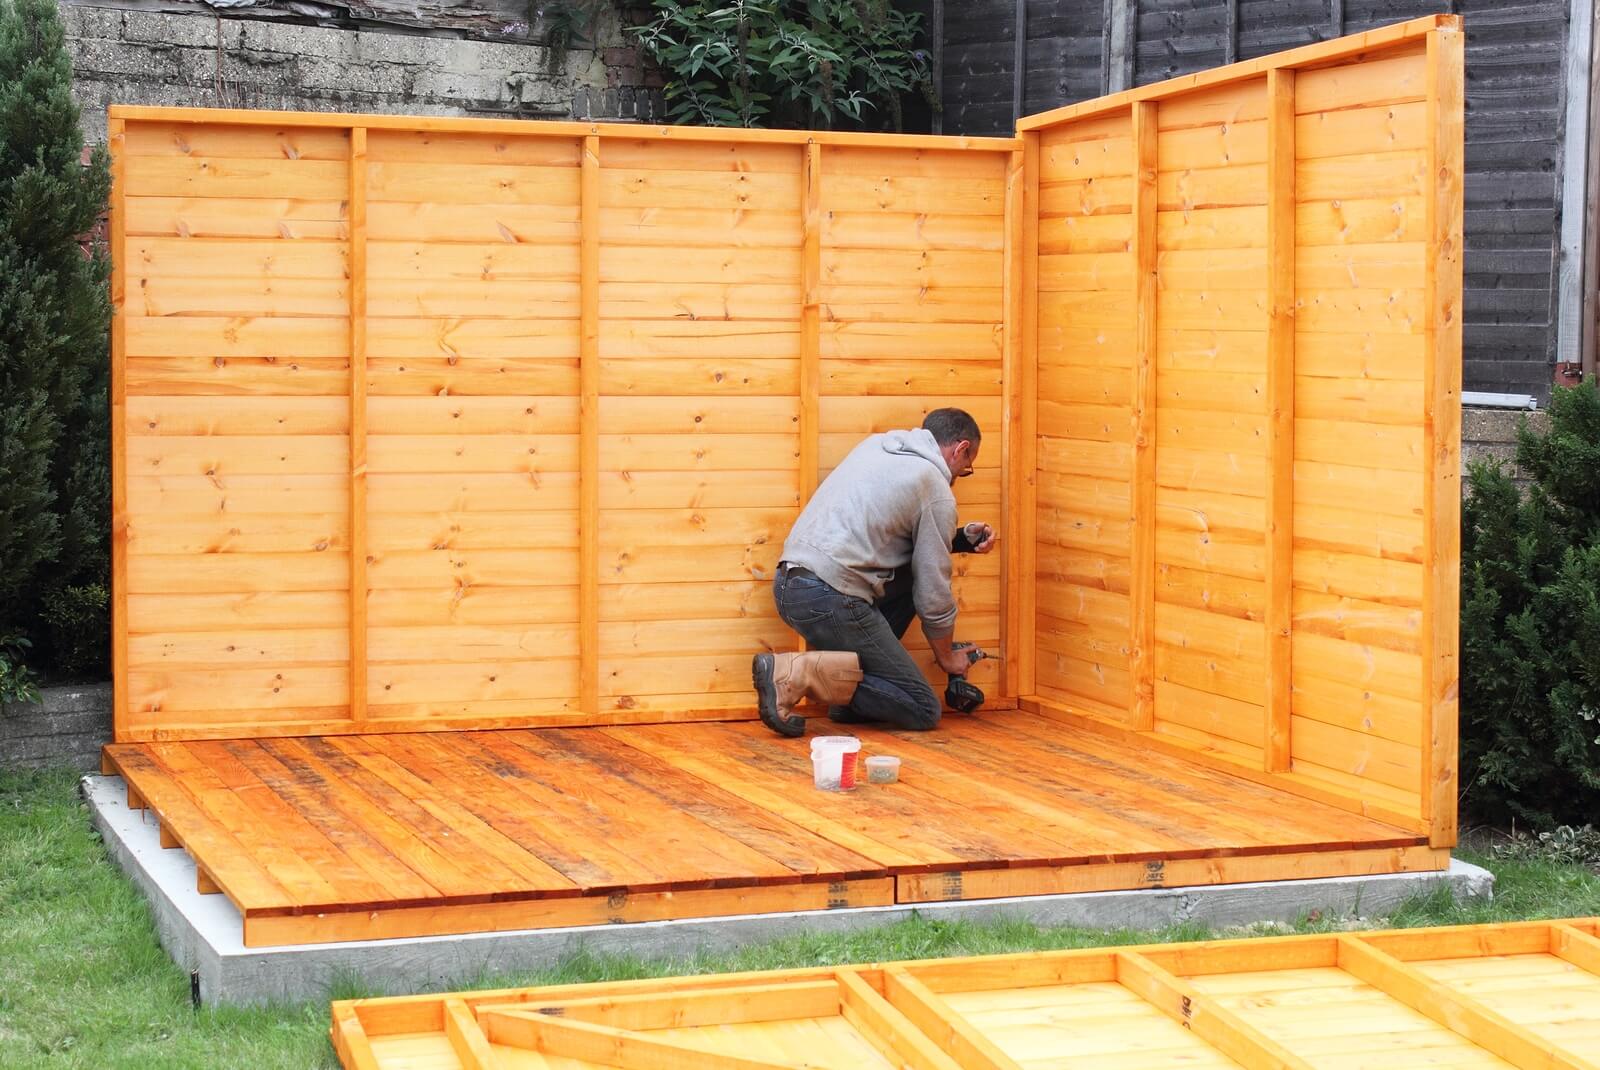
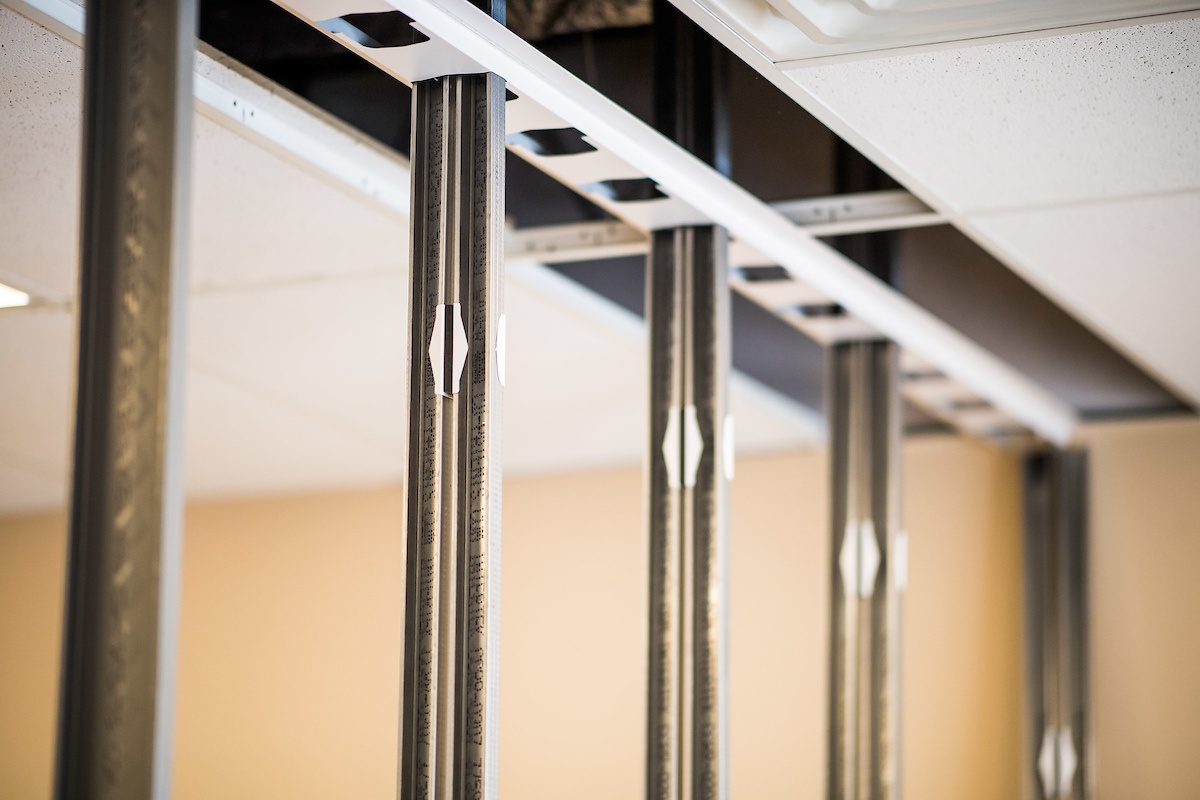
Building the Frame
Constructing a sturdy and well-structured frame is a fundamental step in building an outdoor privacy wall. The frame provides the framework for attaching panels and ensures the overall stability and durability of the structure. Whether using wood or metal materials, the frame serves as the backbone of the privacy wall.
Here’s a general outline of the process for building the frame:
- Measuring and Cutting: Begin by measuring and cutting the lumber or metal posts to the appropriate lengths, following the dimensions outlined in the design plan. Ensure precise cuts to achieve a uniform and level frame.
- Assembling the Posts: If using individual posts, position them at the designated intervals along the layout lines. Use a level to ensure that the posts are plumb and securely anchored in the ground, either with concrete footings or gravel and compacted base material.
- Attaching Horizontal Supports: Install horizontal support beams or rails between the posts to create the framework for attaching the panels. Secure the supports at uniform heights to maintain consistency and structural integrity.
- Securing the Frame: Use appropriate fasteners, such as screws or nails, to securely attach the horizontal supports to the posts. Ensure that the frame is rigid and stable, capable of withstanding external forces and supporting the weight of the panels.
Whether opting for a simple, clean-lined frame or a more intricate design, precision and attention to detail are essential for a well-constructed privacy wall frame. Properly aligning and securing the components will lay the groundwork for a visually appealing and resilient structure that complements your outdoor furniture and design.
Attaching the Panels
Once the frame of the outdoor privacy wall is in place, the next crucial step is to attach the panels that will provide the desired level of privacy and aesthetic appeal. The choice of panels, whether solid wood, metal, or lattice, significantly influences the wall’s functionality and visual impact. Careful and precise installation of the panels ensures a seamless and polished finish.
Here’s a step-by-step guide for attaching the panels to the frame:
- Measuring and Cutting: If the panels require customization to fit within the frame, accurately measure and cut them to the appropriate dimensions. Ensure that the cuts are clean and precise to achieve a professional-looking installation.
- Positioning the Panels: Place the panels within the frame, ensuring that they align evenly and securely. Depending on the design, you may alternate the orientation of the panels for added visual interest or stagger them for partial privacy with a decorative touch.
- Securing the Panels: Use suitable fasteners, such as screws or nails, to affix the panels to the frame. Ensure that the panels are firmly anchored, with no wobbling or gaps, to guarantee stability and privacy.
- Finishing Touches (Optional): If using wood panels, consider applying a protective sealant or stain to enhance their longevity and resistance to the elements. Additionally, for lattice panels, ensure that they are securely attached, allowing for the future growth of climbing plants if desired.
Throughout the panel attachment process, attention to detail and precision are paramount to achieve a professional and visually appealing outcome. Properly installed panels not only provide the desired level of privacy but also contribute to the overall aesthetic cohesion of your outdoor sanctuary, seamlessly complementing your outdoor furniture and design.
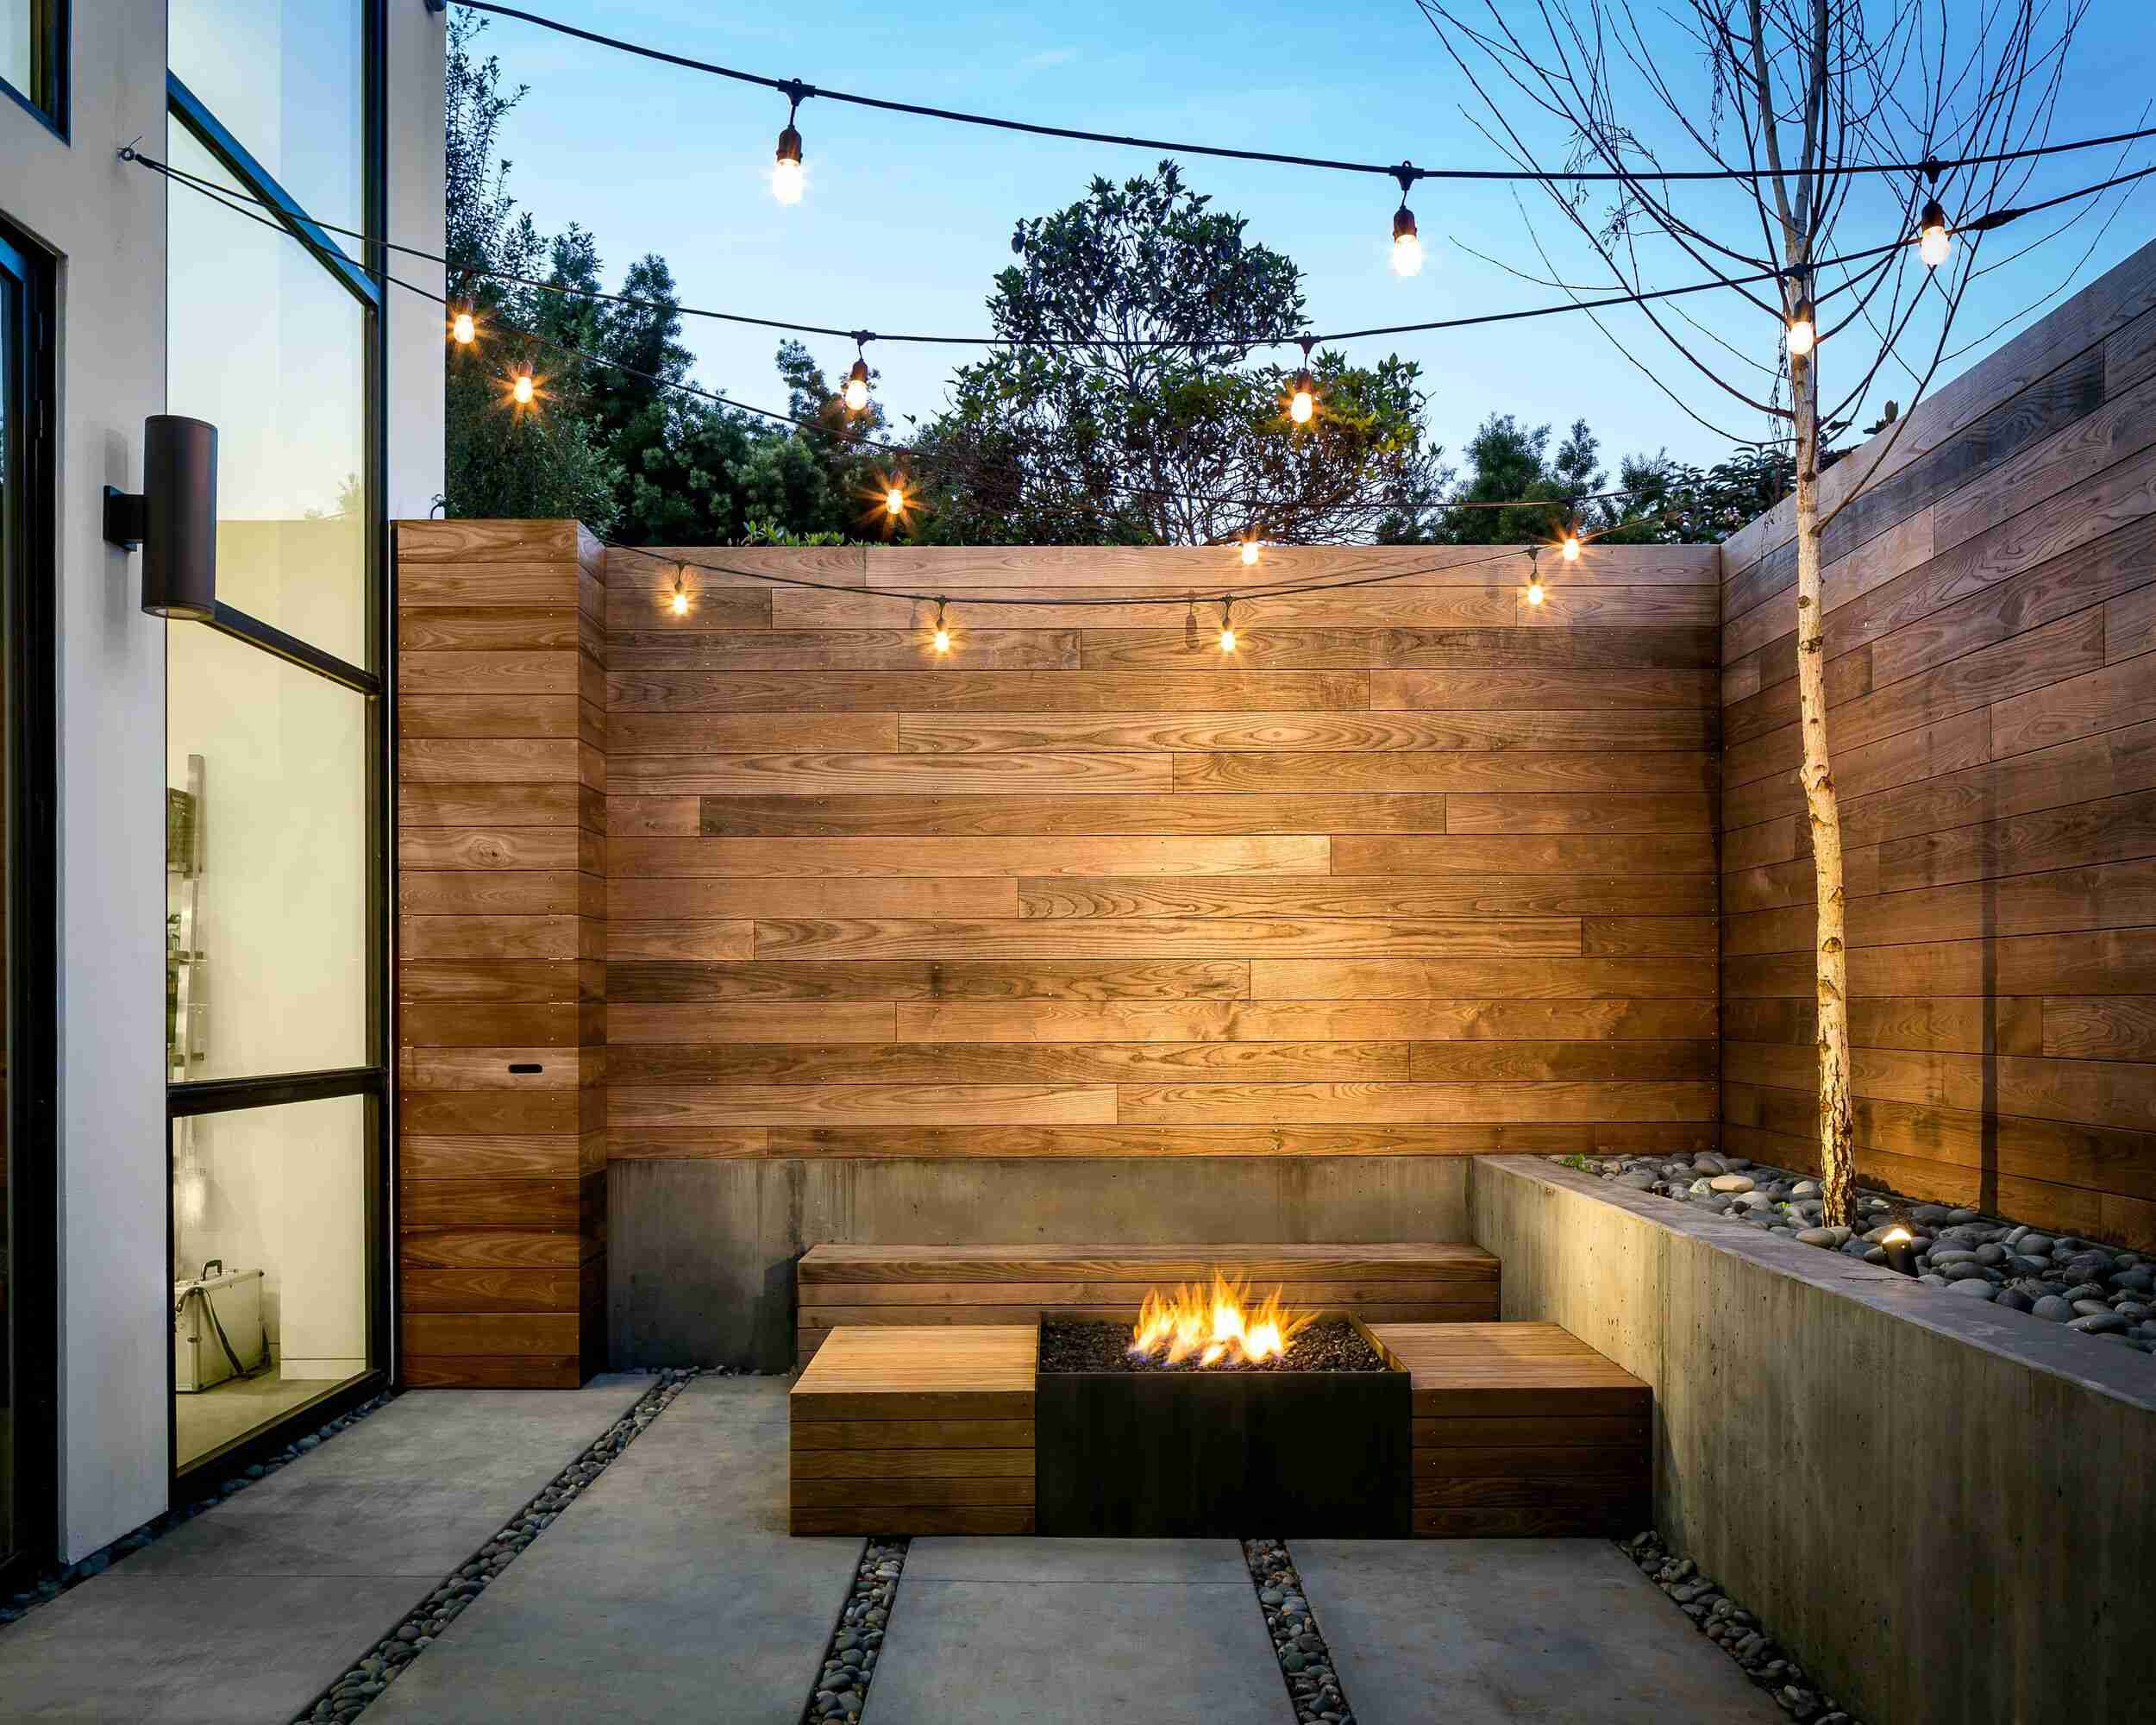
Adding Finishing Touches
As the construction of your outdoor privacy wall nears completion, adding thoughtful finishing touches can elevate its visual appeal and functionality, transforming it into a captivating focal point of your outdoor space. These final details not only enhance the aesthetics of the structure but also contribute to its cohesiveness with your outdoor furniture and design scheme.
Consider the following finishing touches to add a touch of finesse to your privacy wall:
- Decorative Accents: Incorporate decorative elements such as post caps, trim pieces, or ornamental hardware to infuse personality and style into the privacy wall. These accents can complement the existing design elements in your outdoor space, creating a harmonious and polished look.
- Planting Greenery: If your design incorporates lattice panels, consider planting climbing vines or trellising plants near the privacy wall. As the plants grow, they will intertwine with the panels, adding a lush, natural element and softening the structure’s appearance.
- Lighting Integration: Strategically placing outdoor lighting fixtures near or on the privacy wall can enhance its visual appeal and extend its functionality into the evening hours. Whether through subtle uplighting, string lights, or lanterns, lighting can create an inviting ambiance and accentuate the wall’s presence.
- Sealing and Protecting: If the privacy wall features wooden elements, applying a weather-resistant sealant or stain can protect the surface from moisture, UV exposure, and general wear, prolonging its lifespan and maintaining its aesthetic appeal.
By incorporating these finishing touches, you can infuse character and charm into your outdoor privacy wall, ensuring that it seamlessly integrates with your outdoor furniture and design while serving as a functional and visually captivating element of your outdoor sanctuary.
Conclusion
Embarking on the journey of building an outdoor privacy wall is a rewarding endeavor that not only enhances the seclusion and allure of your outdoor space but also allows for creative expression and personalization. By carefully considering the planning, design, materials, and construction process, you can create a privacy wall that harmonizes with your outdoor furniture and design while providing a tranquil retreat in your own backyard.
Throughout the construction process, attention to detail and precision are crucial, ensuring that the privacy wall not only fulfills its practical purpose but also contributes to the overall aesthetic cohesion of your outdoor sanctuary. From the initial vision to the final finishing touches, each step plays a pivotal role in bringing your design concept to life.
As you bask in the secluded ambiance of your newly constructed outdoor privacy wall, take pride in the craftsmanship and creativity that have transformed your outdoor space into a private oasis. Whether enjoying moments of relaxation, entertaining guests, or simply appreciating the beauty of your outdoor sanctuary, the privacy wall stands as a testament to your dedication to creating a space that reflects your unique style and complements your outdoor furniture and design.
With the completion of your outdoor privacy wall, you have not only added a functional and visually captivating element to your outdoor space but have also imbued it with a sense of intimacy and charm, elevating the overall appeal and comfort of your outdoor living area.
Frequently Asked Questions about How To Build An Outdoor Privacy Wall
Was this page helpful?
At Storables.com, we guarantee accurate and reliable information. Our content, validated by Expert Board Contributors, is crafted following stringent Editorial Policies. We're committed to providing you with well-researched, expert-backed insights for all your informational needs.


0 thoughts on “How To Build An Outdoor Privacy Wall”