Home>Furniture>Outdoor Furniture>How To Build A Screened-In Patio
Outdoor Furniture
How To Build A Screened-In Patio
Modified: August 27, 2024
Learn how to build a screened-in patio with essential tips and tricks. Create a cozy outdoor space with the perfect outdoor furniture.
(Many of the links in this article redirect to a specific reviewed product. Your purchase of these products through affiliate links helps to generate commission for Storables.com, at no extra cost. Learn more)
Introduction
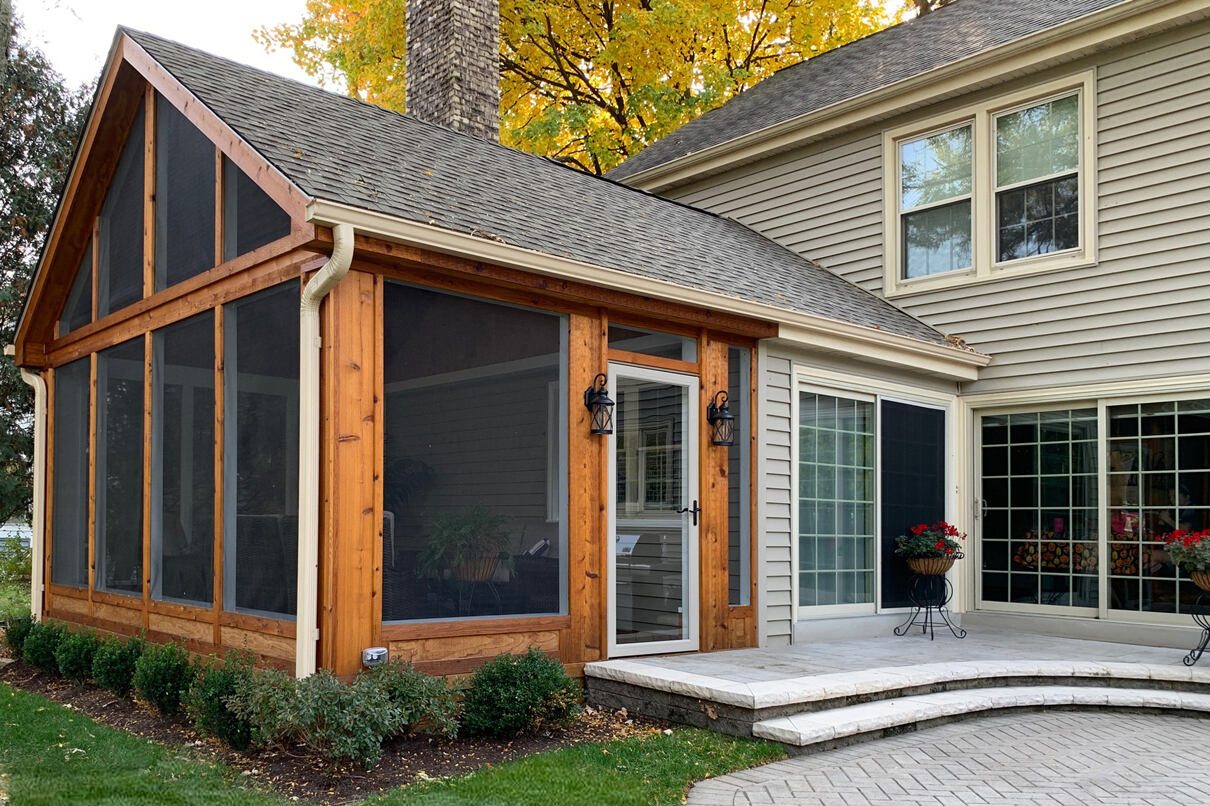
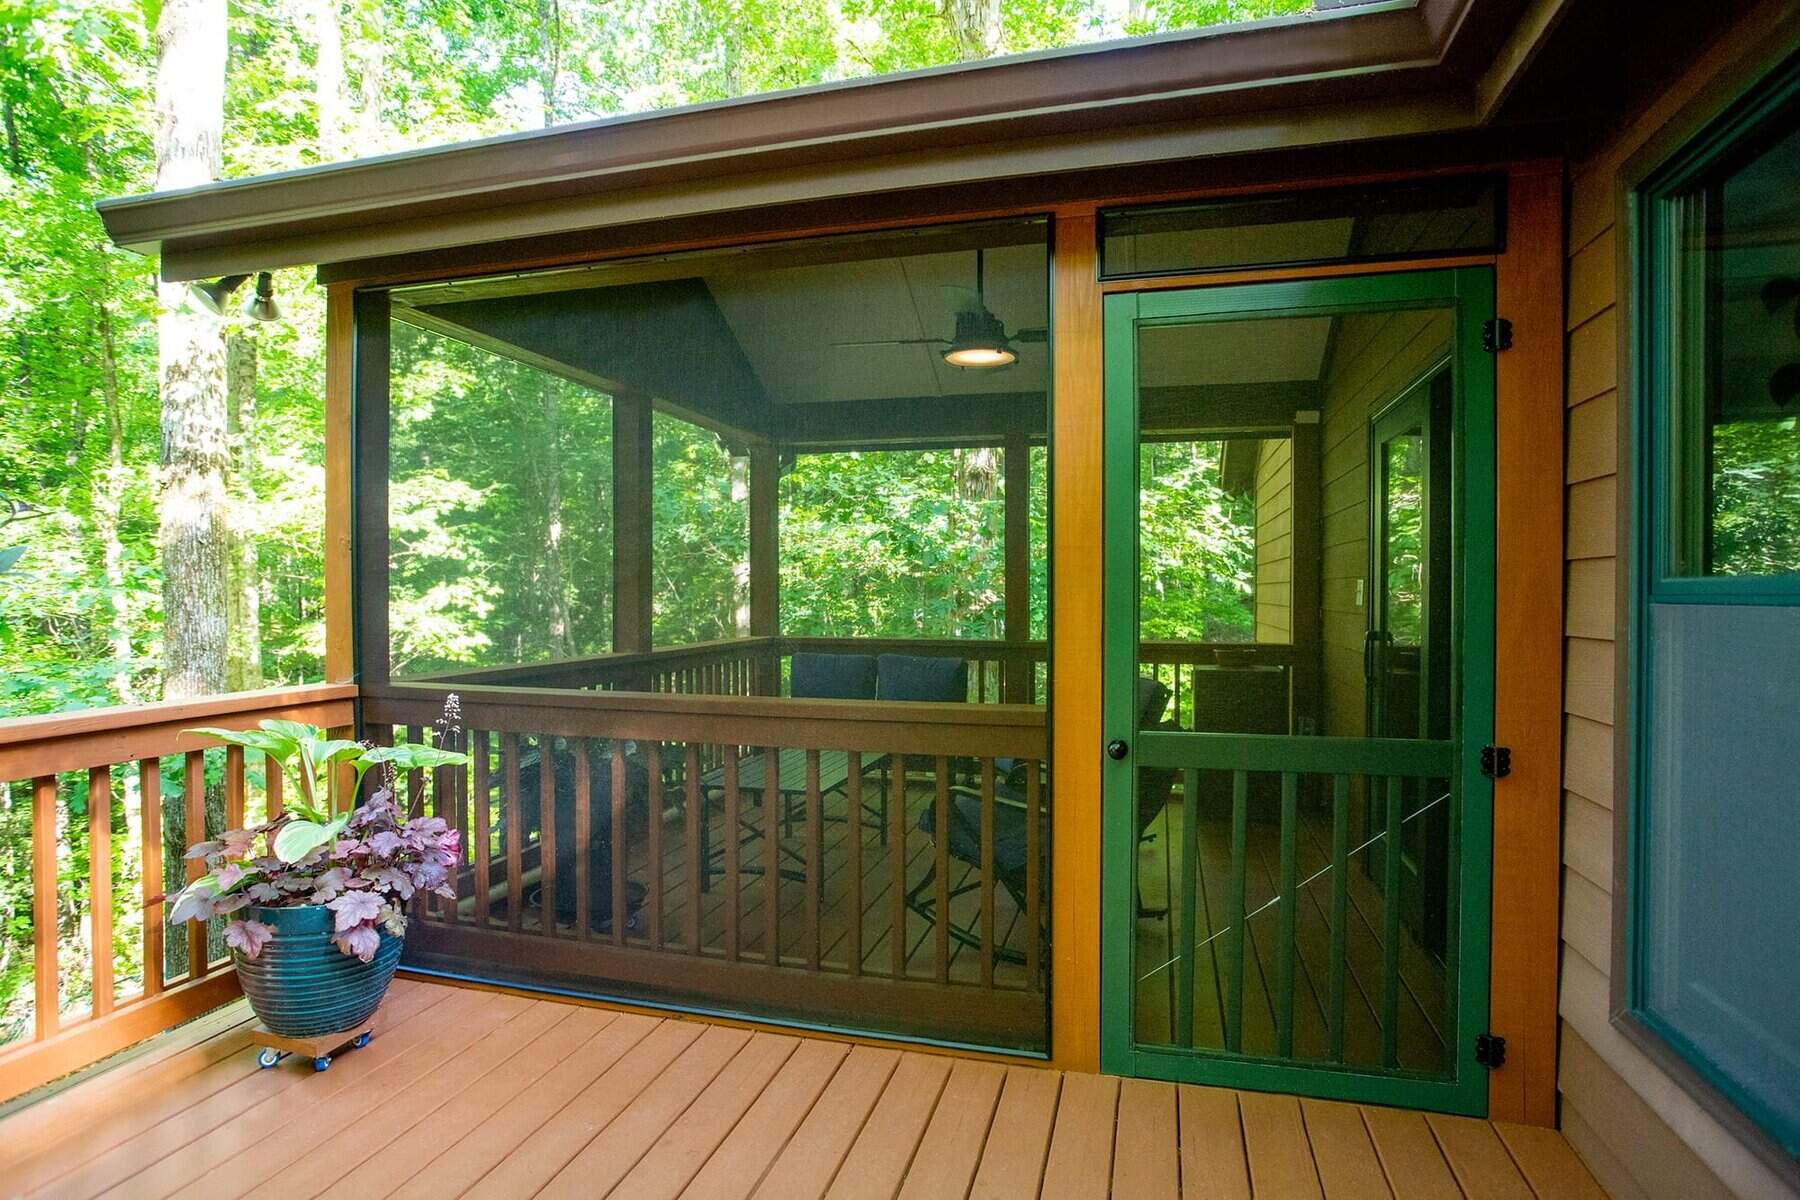
Welcome to our guide on how to build a screened-in patio. If you’re someone who loves spending time outdoors, a screened-in patio is a great addition to your home. It provides a comfortable and protected space where you can relax, entertain guests, or enjoy meals without the hassle of bugs or the harsh elements.
A screened-in patio, also known as a screened porch or screened enclosure, offers the best of both worlds: the benefits of being outdoors while still being shielded from insects and other outdoor nuisances. This versatile space can be enjoyed year-round, allowing you to extend your living area and enjoy the beauty of nature without any drawbacks.
In this article, we’ll take you through the step-by-step process of building a screened-in patio. Whether you’re a seasoned DIY enthusiast or a beginner looking to tackle a new project, our guide will provide you with all the information you need to create your own outdoor sanctuary.
Before we dive into the construction process, it’s important to consider several factors that will help you make the most of your screened-in patio. The first step is to choose the right location for your patio, taking into account factors such as the view, sunlight exposure, and accessibility.
Key Takeaways:
- Building a screened-in patio involves choosing the right location, gathering materials, framing the structure, and adding doors and windows. It creates a bug-free outdoor space for relaxation and entertainment.
- Personalize your screened-in patio with furniture, lighting, plants, and decor to create a cozy outdoor retreat. Regular maintenance ensures longevity and functionality for years of enjoyment.
Read more: How To Clean Patio Screens
Step 1: Choosing the Right Location
The location of your screened-in patio is crucial to ensure that you get the most out of your outdoor space. Here are a few factors to consider when choosing the best spot for your patio:
- View: Consider the surrounding landscape and choose a location that offers a pleasant view. Whether it’s overlooking your garden, a picturesque landscape, or a serene backyard, having an appealing view will enhance the overall experience of your screened-in patio.
- Sunlight Exposure: Think about the amount of sunlight you want on your patio. If you prefer a shady retreat, consider placing your patio in an area that is naturally shaded by trees or the positioning of your house. On the other hand, if you enjoy soaking up the sun, a more open and sunny location might be preferable.
- Accessibility: Ensure that your screened-in patio is easily accessible from your house. Consider the flow of traffic and how you will transition from indoor to outdoor space seamlessly. A patio that is conveniently located near your kitchen or living room will make serving meals and entertaining guests more convenient.
- Privacy: Take into account your desired level of privacy. If you have neighboring properties nearby, you may want to strategically place your patio so that it offers some privacy. This can be achieved by positioning it away from prying eyes or through the use of screens, trellises, or plants.
By carefully considering these factors, you can choose the perfect location for your screened-in patio that aligns with your preferences and needs. Once you have determined the ideal location, you can move on to the next step: gathering the necessary materials and tools.
Step 2: Gathering Materials and Tools
Before you begin construction on your screened-in patio, it’s important to gather all the necessary materials and tools. Having everything you need ahead of time will streamline the process and prevent unnecessary delays. Here’s a list of the materials and tools you’ll need:
Materials:
- Screens: Choose screening material that is durable and resistant to tears and insects. Options include fiberglass screens or aluminum screens.
- Screen Frame Material: Decide on the type of material you’ll use for the screen frame, such as aluminum, vinyl, or wood.
- Lumber: Purchase pressure-treated or weather-resistant lumber for the framing and construction of your patio.
- Fasteners: Get the appropriate screws, nails, and bolts for attaching the materials together securely.
- Sealant: Invest in a high-quality sealant to protect your patio from the elements and extend its lifespan.
- Door and Window Hardware: If you plan to include doors and windows in your screened-in patio, ensure you have the necessary hardware, including handles, hinges, and locks.
- Other Materials: Depending on your design preferences, you may need additional materials such as trim, paint, or decorative elements.
Tools:
- Tape Measure: Use a tape measure to accurately measure the dimensions of your patio and materials.
- Saw: Depending on the type of material you’re working with, you may need a circular saw or a miter saw to cut the lumber and screen frame.
- Drill: A drill with appropriate drill bits will be necessary for screwing and fastening the materials together.
- Level: Ensure that your patio is level by using a spirit level during the construction process.
- Hammer: A hammer is handy for pounding nails into place if needed.
- Screwdriver: Have a variety of screwdrivers on hand for attaching hardware and fasteners.
- Safety Gear: Don’t forget to wear safety glasses, gloves, and appropriate footwear to protect yourself during the construction process.
By gathering all the necessary materials and tools, you’ll be well-prepared to embark on your screened-in patio project. The next step involves preparing the area where you plan to build your patio.
Read more: How To Replace Patio Screen
Step 3: Preparing the Area
Now that you have your materials and tools ready, it’s time to prepare the area where you’ll be constructing your screened-in patio. Proper preparation is essential for ensuring a smooth and successful build. Follow these steps to prepare the area:
- Clear the space: Remove any obstacles, such as furniture, plants, or debris, from the area where your patio will be located. This will provide a clean slate for construction.
- Mark the boundaries: Use stakes and string to outline the boundaries of your patio. This will help you visually assess the space and ensure that the dimensions are accurate.
- Level the ground: If the ground is not level, you’ll need to make adjustments. Use a shovel or a mechanized tool to remove excess soil or add fill dirt as needed. Ensure that the ground is as level as possible to provide a solid foundation for your patio.
- Install a weed barrier: To prevent weeds and other vegetation from growing through the floor of your patio, lay down a weed barrier. This can be a landscaping fabric or a plastic sheeting that is resistant to weed growth.
- Create a drainage system: It’s important to ensure proper drainage on your patio to prevent water accumulation. Dig a shallow trench around the perimeter of your patio and fill it with gravel to facilitate water runoff. Ensure that the slope is away from your house to avoid any water-related issues.
By investing time in properly preparing the area, you’ll create a solid foundation for your screened-in patio. This will not only contribute to the structural integrity but also enhance the overall longevity and functionality of your outdoor space. With the area prepared, it’s time to move on to the next step: framing the structure of your patio.
Step 4: Framing the Structure
Once the area is prepared, it’s time to start framing the structure of your screened-in patio. The framing serves as the skeleton upon which the rest of the patio will be built. Follow these steps to frame the structure:
- Measure and cut the lumber: Using your tape measure and saw, carefully measure and cut the lumber according to the dimensions of your patio. Ensure that each piece is accurately measured and cut to create a sturdy frame.
- Secure the corner posts: Begin by securing the corner posts to the ground using stakes or concrete footings. These corner posts will serve as the foundation for the entire structure.
- Attach the horizontal and vertical beams: Connect the horizontal beams to the top of the corner posts, creating the framework for the roof of your patio. Then, attach the vertical beams to form the walls of your patio. Use screws or nails to secure the beams in place.
- Install additional support beams: Depending on the size and design of your patio, you may need to install additional support beams in the middle to ensure structural stability.
- Check for level and square: It’s important to regularly check that the frame is level and square as you work. Use a level to ensure that the beams are straight and a square to ensure that the corners are at right angles.
- Secure the frame: Once the frame is assembled and all the beams are in place, double-check that everything is secure. Use additional braces or brackets around the corners and joints to reinforce the frame.
By carefully framing the structure of your screened-in patio, you’re establishing a solid foundation that will support the remaining elements. Take the time to ensure accurate measurements, sturdy connections, and proper alignment to create a durable and reliable framework. With the structure in place, you’re ready to move on to the next step: installing the screen.
Step 5: Installing the Screen
Now that the frame of your screened-in patio is complete, it’s time to install the screen. The screen is a crucial component that will keep insects and debris out while allowing fresh air to flow through. Follow these steps to install the screen:
- Measure and cut the screen: Measure the dimensions of each wall and cut the screen material accordingly, leaving a small overlap on all sides.
- Attach the screen: Start by attaching one corner of the screen to the top of the wall using staple gun or screen spline. Gradually work your way down, pulling the screen taut as you go. Secure the screen along the bottom of the wall, again using staples or screen spline. Repeat this process for each wall.
- Trim the excess: Trim any excess screen material using scissors or a utility knife, ensuring a clean and neat finish.
- Check for any gaps or tears: Inspect the entire screen for any gaps, tears, or loose spots. If necessary, reinforce any weak areas by adding additional staples or using screen repair patches.
By carefully installing the screen, you’ll create a barrier that keeps insects out while still allowing fresh air to circulate. Make sure to take your time and ensure a tight and secure fit to maximize the functionality and durability of your screened-in patio. With the screen in place, you can now move on to the next step: adding doors and windows if desired.
When building a screened-in patio, make sure to use durable materials that can withstand outdoor elements. Consider using aluminum or vinyl for the frame and fiberglass or aluminum for the screens for longevity and low maintenance.
Step 6: Adding Doors and Windows
Adding doors and windows to your screened-in patio can enhance its functionality and versatility. Doors provide easy access to the patio, while windows allow for additional airflow and natural light. Follow these steps to add doors and windows to your screened-in patio:
- Measure and plan: Determine the size and placement of your doors and windows. Consider factors such as the flow of traffic, the layout of your patio, and your desired level of privacy.
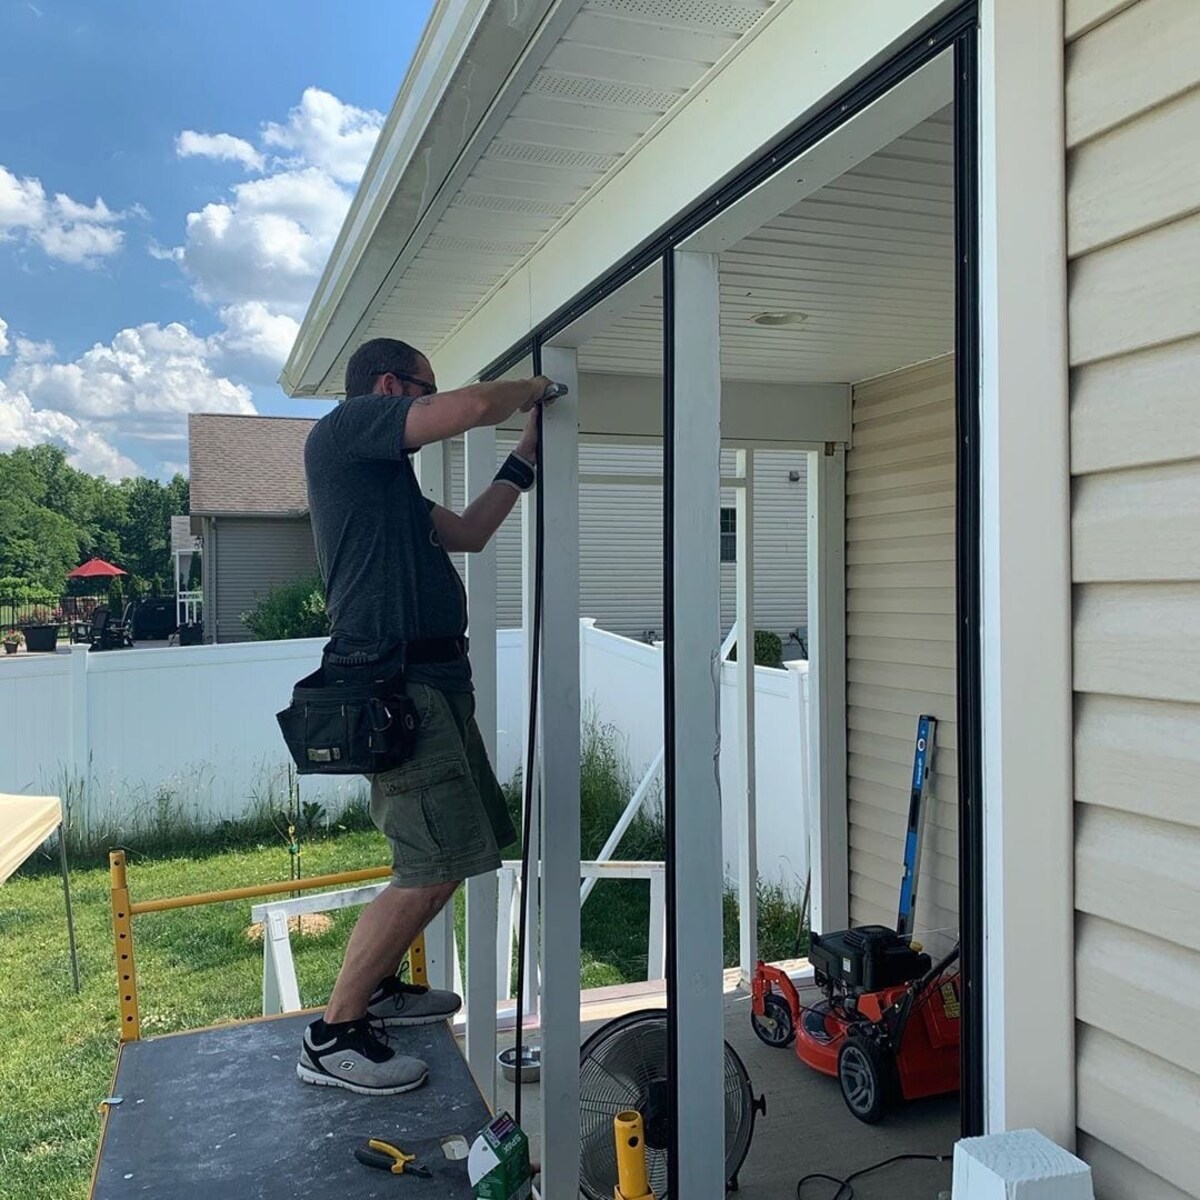
- Prepare the openings: Using your tape measure and saw, carefully measure and cut openings for the doors and windows in the appropriate locations. Ensure that the dimensions are accurate and align with the size of the doors and windows.
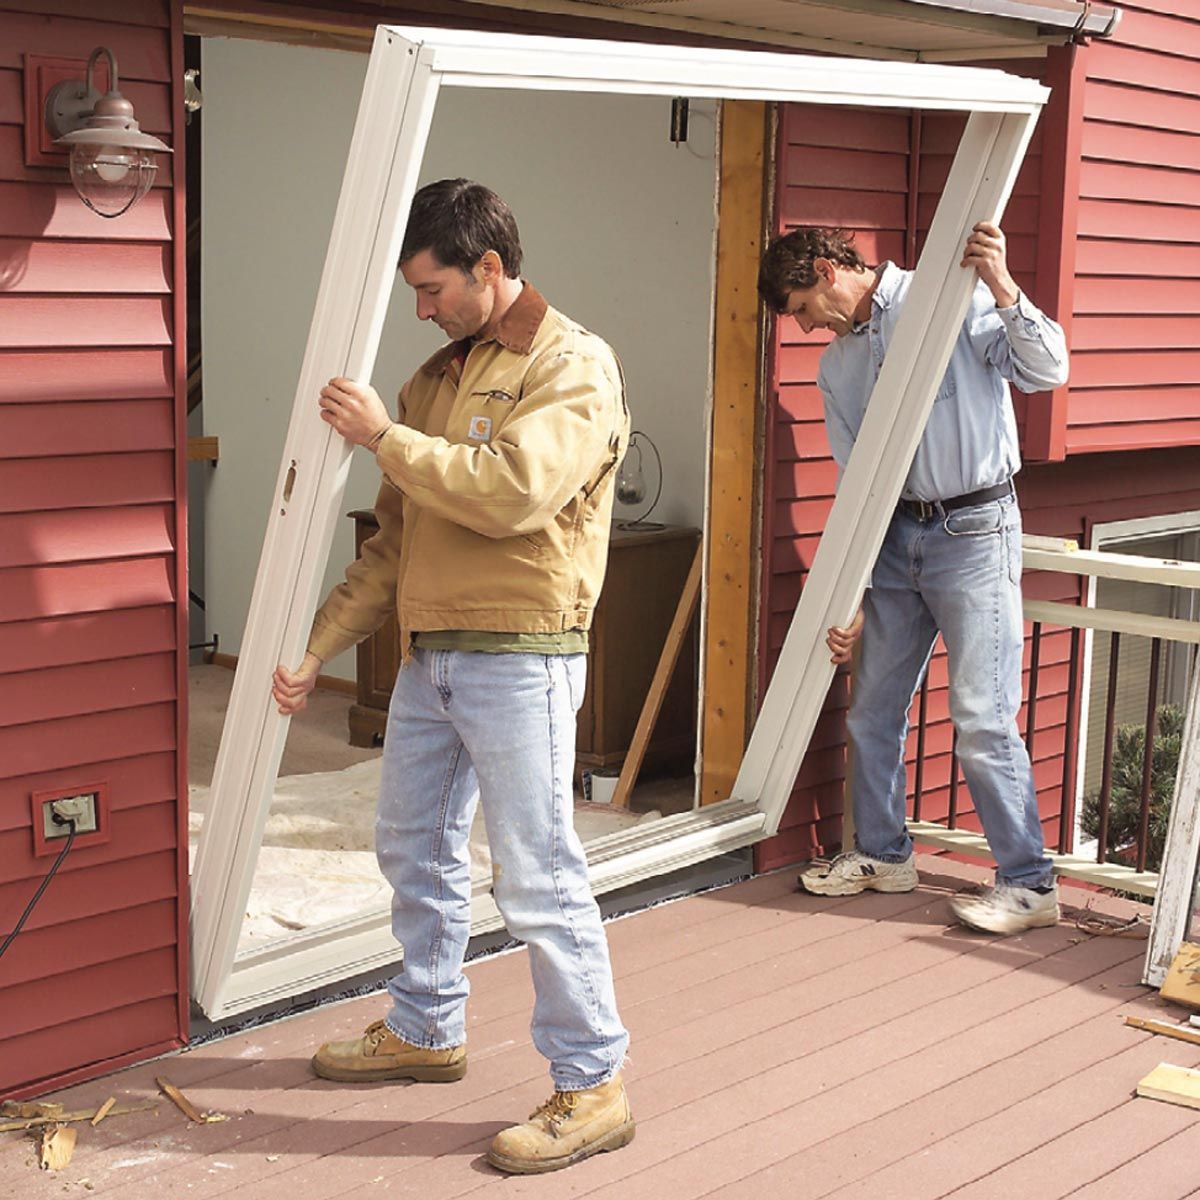
- Install the doors: Place the doors into the prepared openings and secure them according to the manufacturer’s instructions. Ensure that the doors are level, plumb, and properly aligned with the frame. Install hinges, handles, and locks as needed.
- Install the windows: Similarly, place the windows into the prepared openings and secure them properly. Use screws or nails to secure the windows in place, ensuring a tight and weatherproof fit. Install window hardware such as latches or screens as desired.
- Check for proper operation: Test the doors and windows to ensure that they open and close smoothly, and that they provide an airtight seal when closed. Make any necessary adjustments to the hardware or alignment if needed.
By adding doors and windows to your screened-in patio, you’ll create a more accessible and functional space. It will allow for easy entry and exit, as well as provide natural light and ventilation. Take your time during the installation process to ensure proper alignment and secure mounting. With the doors and windows in place, you’re ready for the final step: adding the finishing touches.
Read more: How Much To Screen In A Patio
Step 7: Finishing Touches
As you near the completion of your screened-in patio project, it’s time to add the finishing touches that will transform your outdoor space into a comfortable and inviting retreat. Consider the following details to put the final touches on your screened-in patio:
- Trim and molding: Install trim or molding along the edges of your screened-in patio to give it a polished and refined look. This will also help to cover any gaps or rough edges.
- Paint or stain: If you’re using wood for your patio, consider painting or staining it to enhance its appearance and protect it from the elements. Choose a color or stain that complements your outdoor aesthetics.
- Lighting: Install outdoor lighting fixtures to create a warm and inviting ambiance in the evening. Consider options such as string lights, lanterns, or wall-mounted fixtures to add both functionality and style.
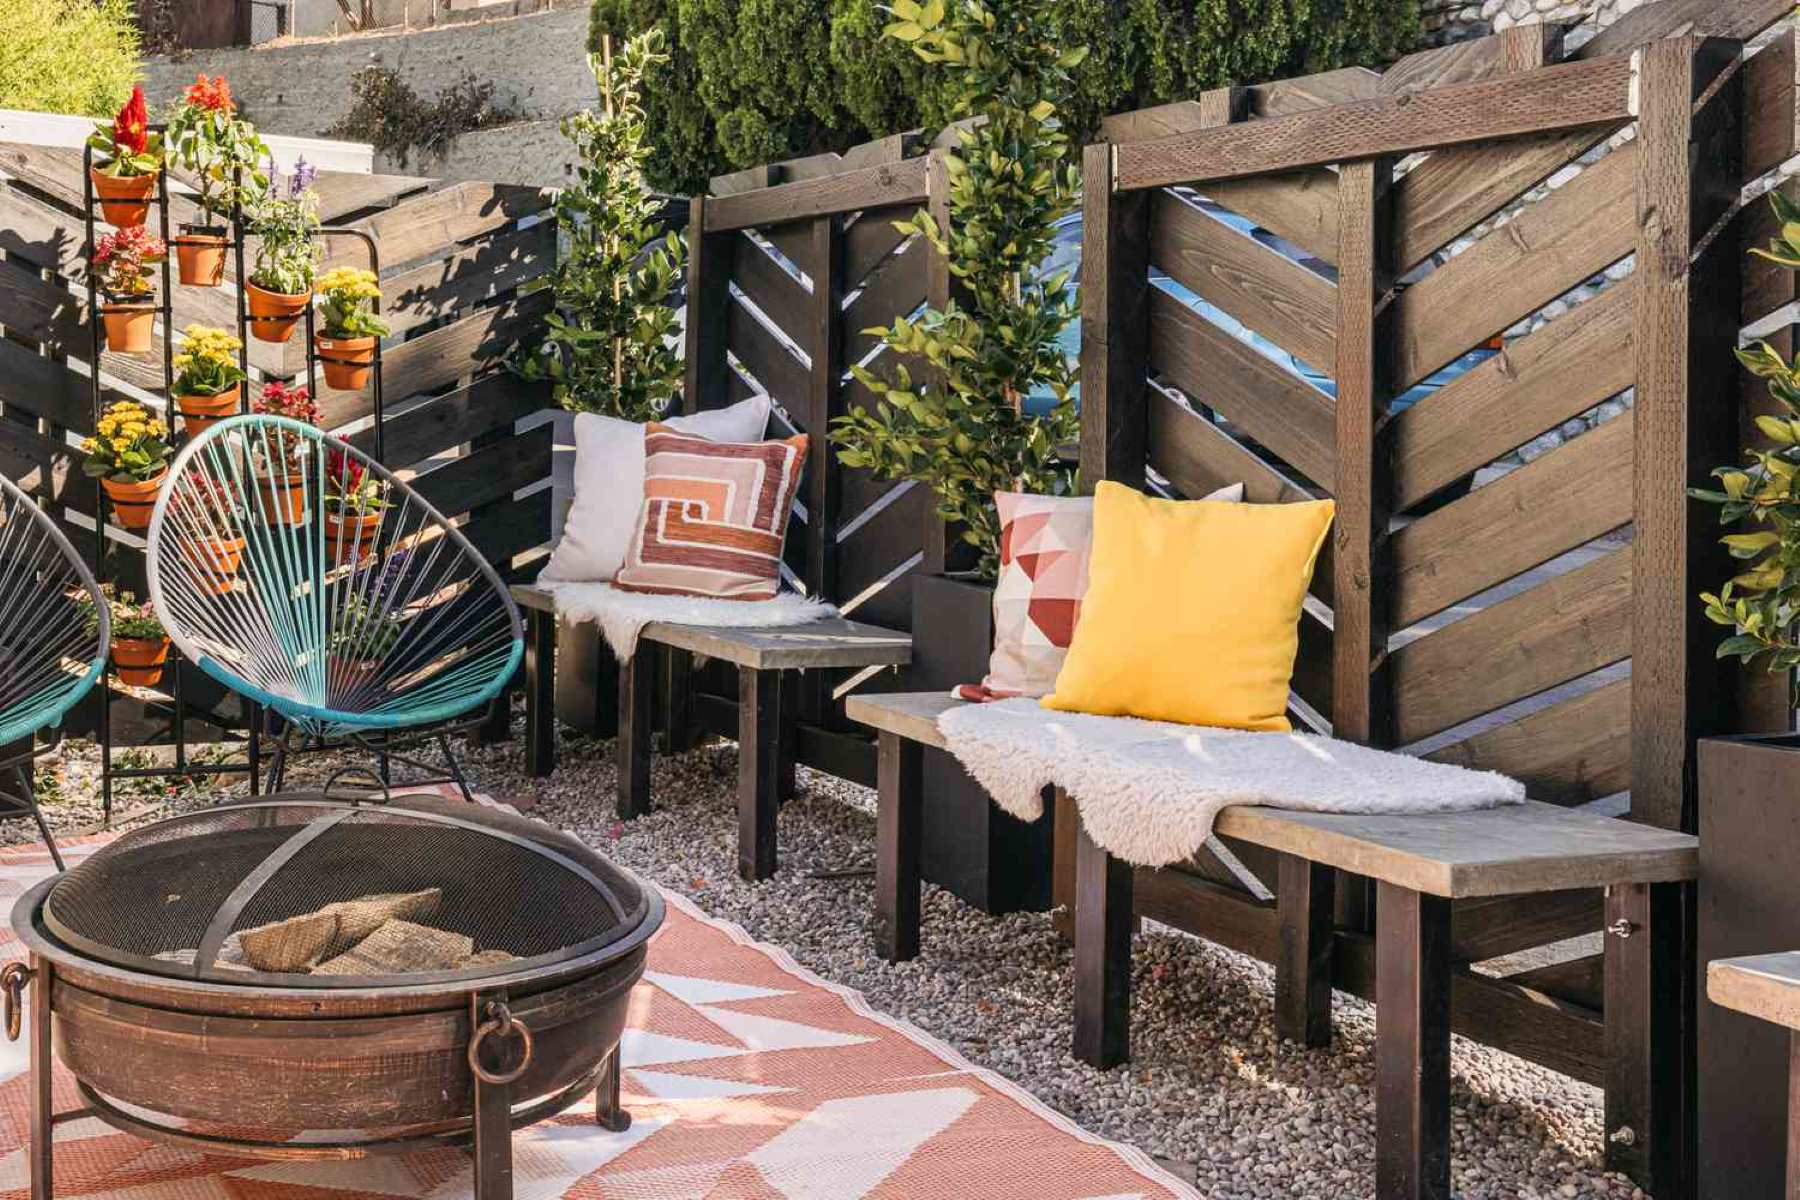
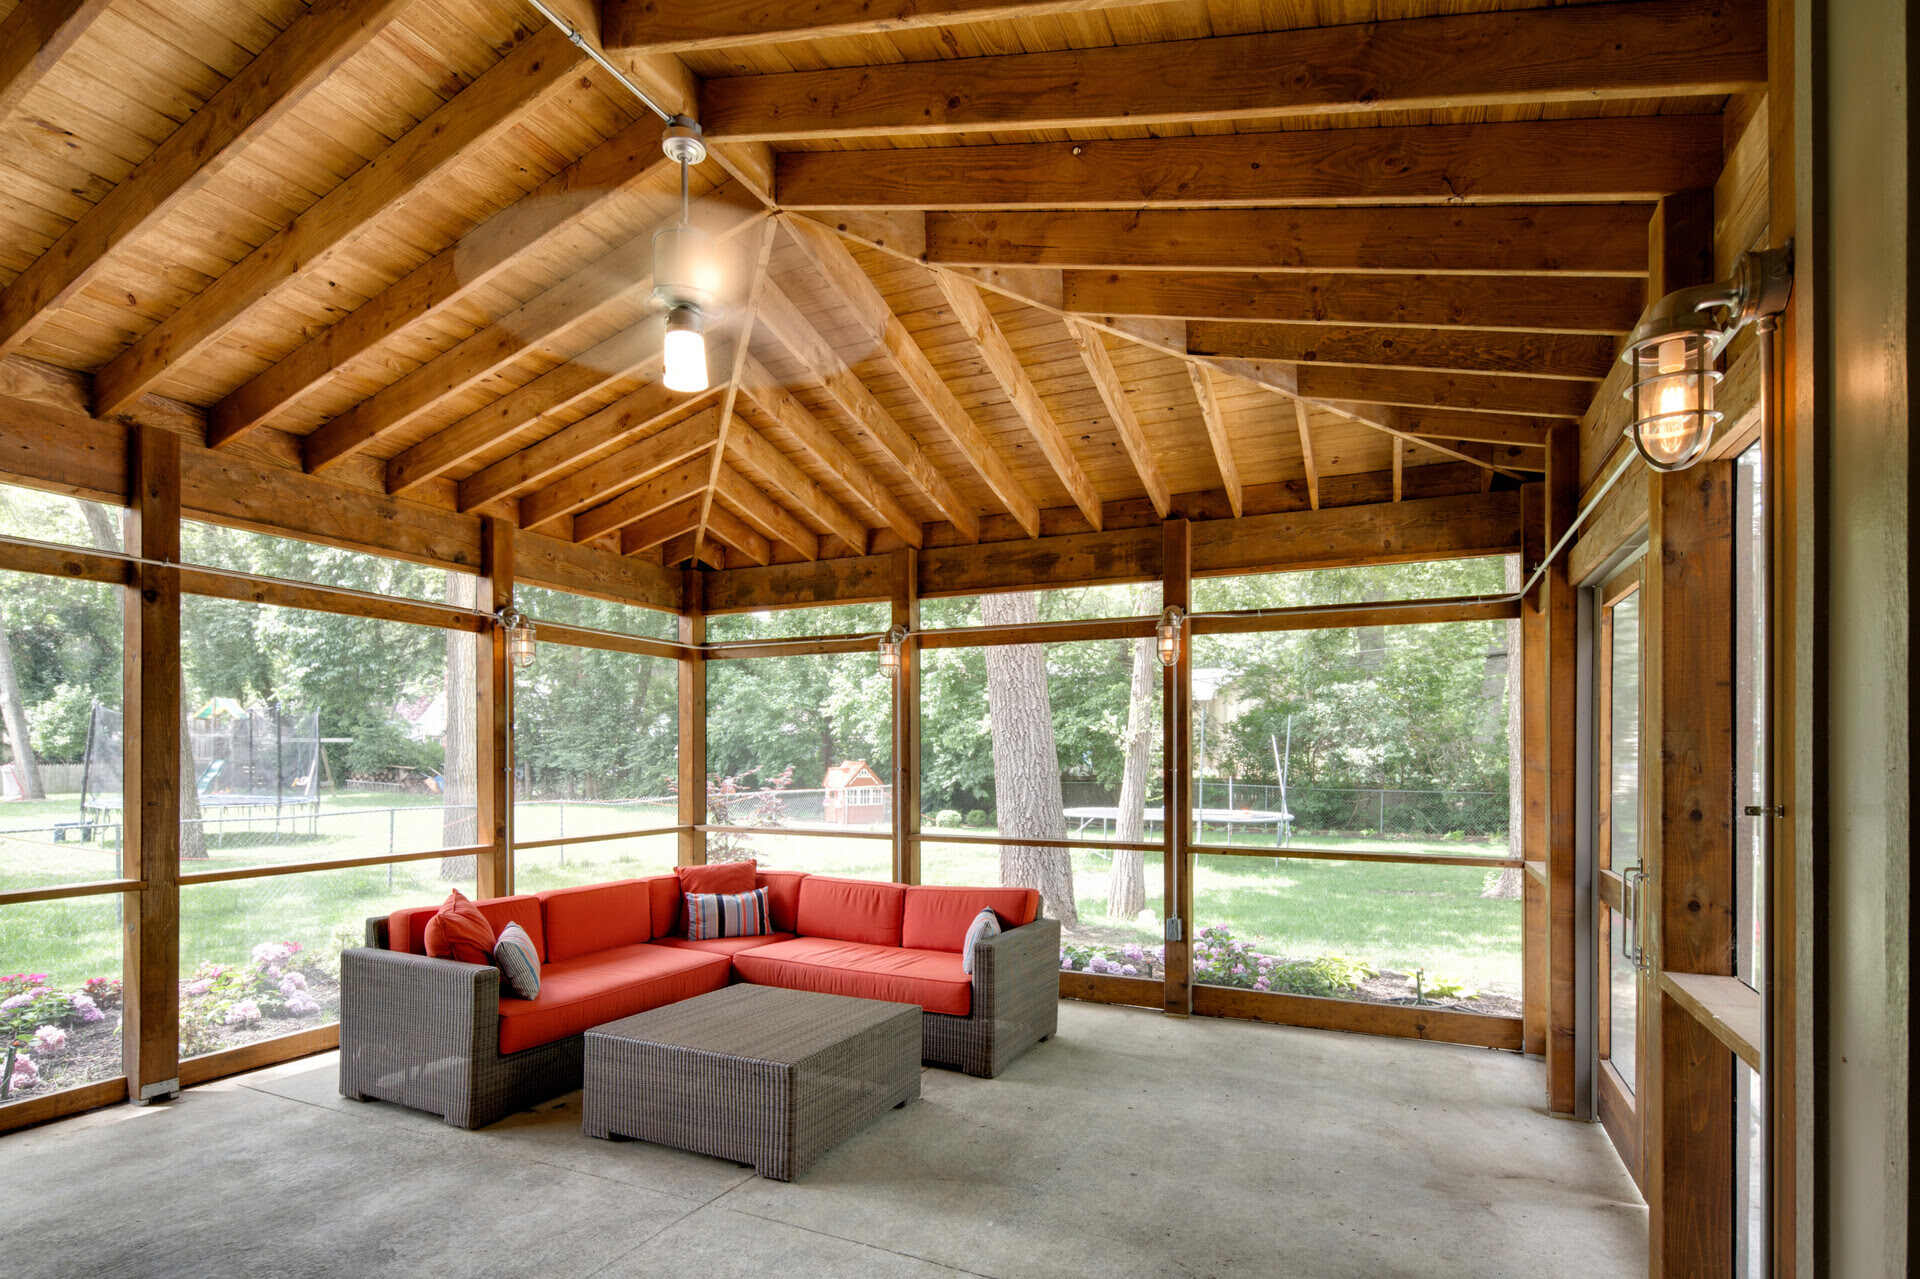
- Furniture and decor: Select comfortable outdoor furniture to furnish your screened-in patio. Think about the activities you plan to enjoy on your patio and choose furniture accordingly, such as loungers, chairs, or a dining set. Add decorative elements like throw pillows, rugs, and artwork to personalize the space and make it feel like an extension of your home.
- Plants and landscaping: Incorporate plants and greenery to bring life and vibrancy to your screened-in patio. Choose plants that can thrive in your climate and consider adding hanging baskets, potted plants, or a small garden bed to make your space feel like a lush oasis.
- Outdoor accessories: Complete your screened-in patio with outdoor accessories such as curtains or blinds to add privacy and shade. Install a ceiling fan or portable fan to keep the air circulating during hot summer days. Consider adding a tabletop fire pit or a portable heater to extend the usability of your patio into the cooler months.
By paying attention to these finishing touches, you can create a cozy and inviting atmosphere in your screened-in patio. Personalize the space to reflect your style and preferences, making it a place where you can truly relax and enjoy the outdoors.
Congratulations! You have successfully completed the process of building your very own screened-in patio. It’s now time to sit back, relax, and enjoy the fruits of your labor. Whether you’re hosting gatherings, reading a book, or simply unwinding, your screened-in patio will be a cherished space where you can connect with nature while still being protected from the elements.
Remember to periodically maintain and inspect your screened-in patio to ensure its longevity. Regularly clean the screens, check for any damage, and address any necessary repairs promptly.
Thank you for following our guide on how to build a screened-in patio. We hope this has been a helpful resource in bringing your outdoor oasis to life. Enjoy your newfound outdoor haven!
Conclusion
Building a screened-in patio is a rewarding project that allows you to create a versatile and comfortable outdoor space. By following the steps outlined in this guide, you can successfully construct your own screened-in patio and enjoy the benefits it offers.
From choosing the right location to gathering materials and tools, preparing the area, framing the structure, installing the screen, adding doors and windows, and finishing with the final touches, each step is crucial in creating a functional and inviting space. By carefully considering the design and taking your time in the construction process, you can ensure a patio that will provide years of enjoyment.
A screened-in patio not only protects you from insects but also allows you to enjoy the beauty of the outdoors without being bothered by harsh weather conditions. It provides a space for relaxation, entertaining guests, and enjoying meals in a comfortable and serene environment.
Remember to personalize your patio with furniture, decor, lighting, and plants to create a space that reflects your style and enhances your outdoor experience. Regular maintenance and inspection will help to keep your patio in top condition, ensuring its longevity and functionality.
We hope that this guide has been informative and helpful in guiding you through the process of building your own screened-in patio. Get started on your project today and create a retreat where you can truly enjoy the outdoors, protected from bugs and the elements.
Thank you for choosing our guide, and we wish you many enjoyable moments in your newly built screened-in patio!
Frequently Asked Questions about How To Build A Screened-In Patio
Was this page helpful?
At Storables.com, we guarantee accurate and reliable information. Our content, validated by Expert Board Contributors, is crafted following stringent Editorial Policies. We're committed to providing you with well-researched, expert-backed insights for all your informational needs.


0 thoughts on “How To Build A Screened-In Patio”