Home>Renovation & DIY>Home Renovation Guides>How To Build A Shed Dormer
Home Renovation Guides
How To Build A Shed Dormer
Modified: February 18, 2024
Learn how to build a shed dormer with our comprehensive home renovation guide. Get step-by-step instructions and expert tips for a successful project.
(Many of the links in this article redirect to a specific reviewed product. Your purchase of these products through affiliate links helps to generate commission for Storables.com, at no extra cost. Learn more)
Introduction
Adding a shed dormer to your home can significantly enhance its functionality and aesthetic appeal. Whether you're looking to create additional headroom in an attic space or add natural light to a room, a shed dormer can be a valuable addition to your home. This comprehensive guide will walk you through the step-by-step process of building a shed dormer, from assessing your roof to completing the finishing touches.
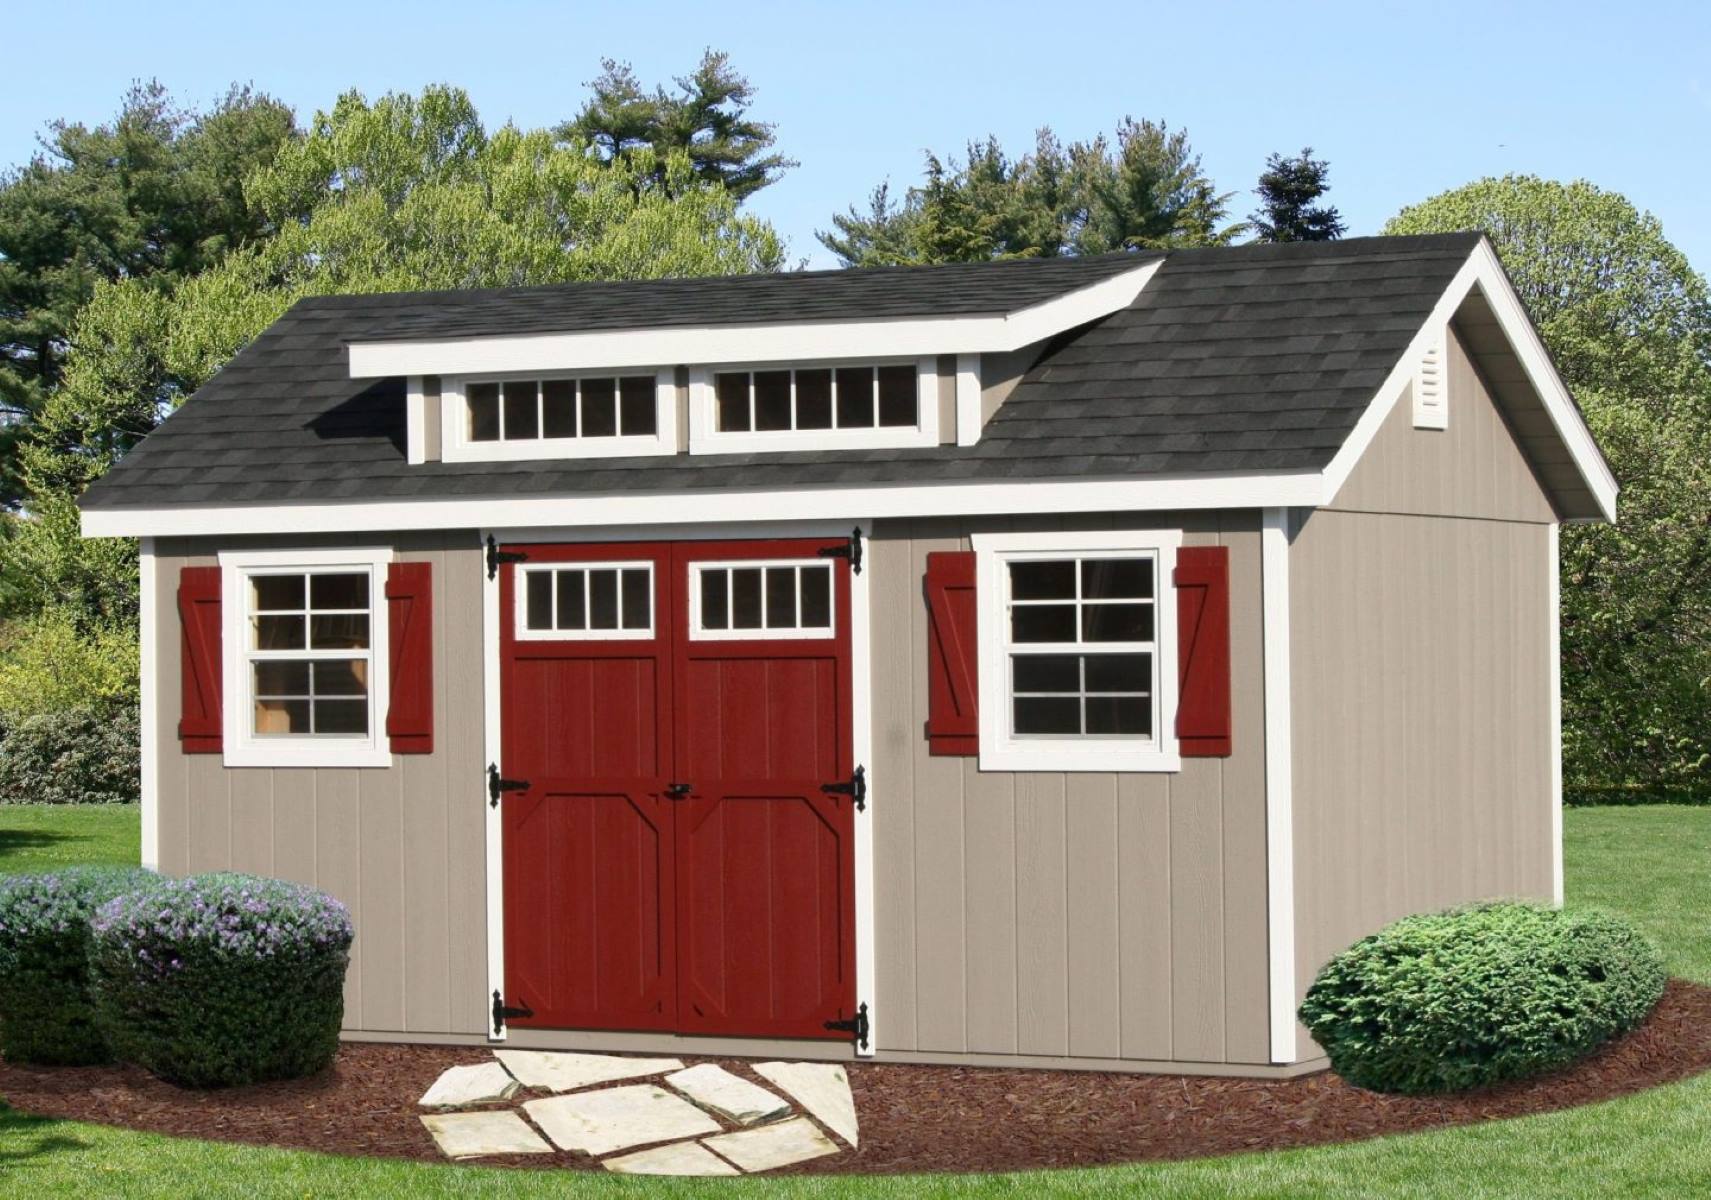
A shed dormer is a popular choice for homeowners seeking to maximize usable space within their homes. By extending outwards from the existing roofline, a shed dormer creates additional headroom and floor space, making it an ideal solution for converting an attic into a livable area or adding height and natural light to a room.
Throughout this guide, you'll learn how to assess your roof to determine if it can accommodate a shed dormer, design the dormer to complement your home's architecture, obtain the necessary permits, gather the required materials, frame the dormer, and complete the installation of windows and siding. Additionally, we'll cover the essential finishing touches that will transform your shed dormer from a construction project into a seamless and attractive extension of your home.
By following the steps outlined in this guide, you'll gain the knowledge and confidence to embark on this rewarding home improvement project. Whether you're a seasoned DIY enthusiast or a homeowner eager to expand your living space, building a shed dormer is a gratifying endeavor that can add value and functionality to your home. So, let's roll up our sleeves and dive into the exciting world of shed dormer construction!
Key Takeaways:
- Building a shed dormer involves meticulous planning, precise execution, and attention to detail. From assessing the roof to finishing touches, each step contributes to creating a functional and visually appealing addition to the home.
- The construction of a shed dormer is a transformative journey that enhances the livability, functionality, and aesthetic appeal of the home. It represents a significant investment that adds value and personalization to the living space.
Read more: What Is A Shed Dormer
Step 1: Assessing the Roof
Before embarking on the construction of a shed dormer, it's crucial to assess the existing roof to determine its suitability for the addition. Here's a detailed breakdown of the assessment process:
-
Roof Structure Evaluation: Begin by examining the current roof structure to identify its type, pitch, and framing. Assessing the roof's pitch is essential, as it influences the design and placement of the shed dormer. A lower pitch may require additional structural modifications to accommodate the dormer, while a steeper pitch may offer more flexibility.
-
Interior Space Assessment: Ascend to the attic or upper floor to evaluate the available space for the shed dormer. Measure the headroom, floor dimensions, and existing obstructions such as vents, chimneys, or electrical components. This assessment will help determine the size and placement of the dormer to maximize usable space and ensure a seamless integration with the existing layout.
-
Exterior Considerations: From the exterior, inspect the roof for any obstructions, such as trees, power lines, or neighboring structures that may impact the construction of the shed dormer. Additionally, assess the visual impact of the dormer on the overall aesthetics of the home, ensuring that it complements the existing architectural style.
-
Structural Integrity: Evaluate the structural integrity of the roof to ensure it can support the additional weight of the shed dormer. Consider consulting a structural engineer to assess the load-bearing capacity and recommend any necessary reinforcements.
-
Building Codes and Regulations: Familiarize yourself with local building codes and regulations pertaining to roof modifications and dormer construction. Understanding these requirements is essential for obtaining permits and ensuring compliance throughout the project.
By meticulously assessing the roof, both internally and externally, you'll gain valuable insights into the feasibility of adding a shed dormer to your home. This initial step lays the foundation for the subsequent design and construction phases, setting the stage for a successful and well-executed dormer addition.
Step 2: Designing the Dormer
Designing the shed dormer is a pivotal phase that demands careful consideration of both functional and aesthetic elements. This step involves translating the assessment findings into a well-crafted design that seamlessly integrates with the existing roofline and enhances the overall appeal of the home. Here's a detailed breakdown of the design process:
-
Dormer Style Selection: Begin by selecting a dormer style that complements the architectural character of your home. Shed dormers are known for their simplicity and versatility, making them an ideal choice for various architectural styles. Consider the roof pitch, window placement, and desired interior space when choosing the optimal dormer style.
-
Size and Proportion: Determine the size and proportion of the shed dormer based on the available space, interior requirements, and visual harmony with the existing roof. Striking a balance between functionality and visual appeal is essential to ensure that the dormer seamlessly integrates with the overall roof structure.
-
Window Placement and Size: Carefully plan the placement and size of windows within the dormer to maximize natural light and ventilation. Consider the interior layout and desired views when positioning the windows, ensuring that they enhance the functionality and aesthetics of the space.
-
Roof Integration: Pay close attention to how the shed dormer will integrate with the existing roof. The transition from the dormer roof to the main roof should be seamless, and the flashing and waterproofing details must be meticulously planned to prevent potential water infiltration.
-
Materials and Finishes: Select materials and finishes that harmonize with the existing exterior of the home. Whether it's matching the roofing material, siding, or trim, maintaining visual continuity is crucial for a cohesive and polished look.
-
Structural Considerations: Collaborate with a structural engineer or architect to finalize the structural details of the dormer design. This includes specifying the framing, load-bearing requirements, and any necessary reinforcements to ensure the structural integrity of the addition.
-
3D Visualization: Utilize 3D modeling or visualization tools to bring the dormer design to life. This step allows you to assess the visual impact of the dormer from different angles and make any necessary adjustments before moving forward with the construction phase.
By meticulously designing the shed dormer, you'll lay the groundwork for a successful and visually appealing addition to your home. This phase requires a thoughtful blend of creativity, functionality, and structural precision to bring your dormer vision to fruition.
Step 3: Obtaining Permits
Obtaining the necessary permits is a critical step in the process of building a shed dormer. Before commencing any construction, it is imperative to ensure compliance with local building codes and regulations. Here's a detailed breakdown of the permit acquisition process:
-
Research Local Regulations: Begin by researching the specific building codes and regulations governing roof modifications and dormer construction in your locality. Contact the local building department or visit their website to obtain detailed information regarding permit requirements, application procedures, and associated fees.
-
Consult with Professionals: Seek guidance from architects, contractors, or structural engineers who have experience in dormer construction. Their expertise can provide valuable insights into the permit application process and ensure that all necessary documentation and plans are in accordance with regulatory standards.
-
Prepare Detailed Plans: Create comprehensive plans and drawings of the proposed shed dormer, including structural details, elevations, and material specifications. These detailed plans are essential for the permit application and review process, demonstrating compliance with building codes and zoning ordinances.
-
Submit Permit Application: Complete the permit application form, providing accurate details about the proposed dormer addition. Along with the application, submit the detailed plans, engineering calculations (if required), and any additional documentation specified by the building department.
-
Review and Approval Process: Once the permit application is submitted, it undergoes a thorough review by the building department. This review ensures that the proposed dormer complies with structural, safety, and zoning requirements. The timeline for permit approval varies depending on the complexity of the project and the workload of the building department.
-
Addressing Feedback: In some cases, the building department may request revisions or additional information as part of the permit review process. It is essential to promptly address any feedback or requests for modifications to expedite the approval process.
-
Obtain the Permit: Upon successful review and approval, the building department issues the permit for the shed dormer construction. The permit outlines the specific conditions, requirements, and inspections necessary to ensure compliance with the approved plans and local regulations.
-
Adhere to Permit Conditions: Throughout the construction phase, it is crucial to adhere to the conditions stipulated in the permit. This includes scheduling and facilitating required inspections at key stages of the dormer construction to verify compliance with building codes and structural integrity.
By diligently navigating the permit acquisition process, you can proceed with the shed dormer construction with the assurance that it meets all regulatory standards and contributes to the overall safety and integrity of your home.
Step 4: Gathering Materials
Gathering the necessary materials is a crucial preparatory step before commencing the construction of a shed dormer. The selection of high-quality materials is essential to ensure the structural integrity, durability, and visual appeal of the dormer addition. Here's a comprehensive guide to the materials required for building a shed dormer:
Read more: Dormer Style Ideas: Shed Dormer Windows
Lumber and Framing Materials
- Lumber: Select high-grade lumber for framing the shed dormer, including dimensional lumber for rafters, joists, and studs. The specific dimensions and load-bearing requirements should align with the structural design and engineering calculations.
- Plywood or OSB: Choose plywood or oriented strand board (OSB) for sheathing the dormer walls and roof. These materials provide stability and serve as a base for attaching exterior finishes and roofing materials.
- Engineered Wood Products: Consider using engineered wood products such as laminated veneer lumber (LVL) or engineered I-joists for enhanced structural performance and stability.
Roofing and Waterproofing
- Roofing Shingles: Select roofing shingles that complement the existing roof and provide long-lasting weather protection. Ensure proper ventilation and flashing details to prevent water infiltration.
- Underlayment: Choose a high-quality roofing underlayment to serve as a secondary barrier against moisture and enhance the overall weatherproofing of the shed dormer.
- Flashing Materials: Acquire flashing materials, such as drip edge, valley flashing, and step flashing, to effectively seal roof penetrations and junctions.
Windows and Trim
- Windows: Select appropriately sized and energy-efficient windows for the shed dormer. Consider the desired style, operation, and glazing options to maximize natural light and ventilation.
- Exterior Trim: Choose durable exterior trim materials, such as PVC, composite, or treated wood, to provide a finished look and protect the edges of the dormer from moisture and wear.
Siding and Exterior Finishes
- Siding Materials: Depending on the existing exterior finish of the home, select siding materials that harmonize with the overall aesthetic. Options include vinyl, fiber cement, wood, or metal siding.
- Exterior Paint or Stain: If opting for wood siding, procure high-quality exterior paint or stain to protect and enhance the visual appeal of the shed dormer.
Read more: How To Build A Dormer
Hardware and Fasteners
- Structural Hardware: Acquire structural connectors, hangers, and fasteners designed for specific load requirements and building codes. This includes hurricane ties, joist hangers, and anchor bolts for secure attachment.
- Exterior Fasteners: Select corrosion-resistant nails, screws, and anchors suitable for exterior applications to ensure the longevity and stability of the shed dormer.
Miscellaneous Supplies
- Insulation: Depending on the intended use of the dormer space, obtain insulation materials to regulate temperature and enhance energy efficiency.
- Ventilation Components: If the shed dormer will accommodate livable space, consider ventilation components such as soffit vents and ridge vents to maintain air circulation.
- Sealants and Caulks: Procure high-quality sealants and caulks for weatherproofing and sealing gaps in the exterior envelope of the dormer.
By meticulously gathering the required materials, you can ensure a smooth and efficient construction process, laying the groundwork for a well-crafted and enduring shed dormer addition to your home.
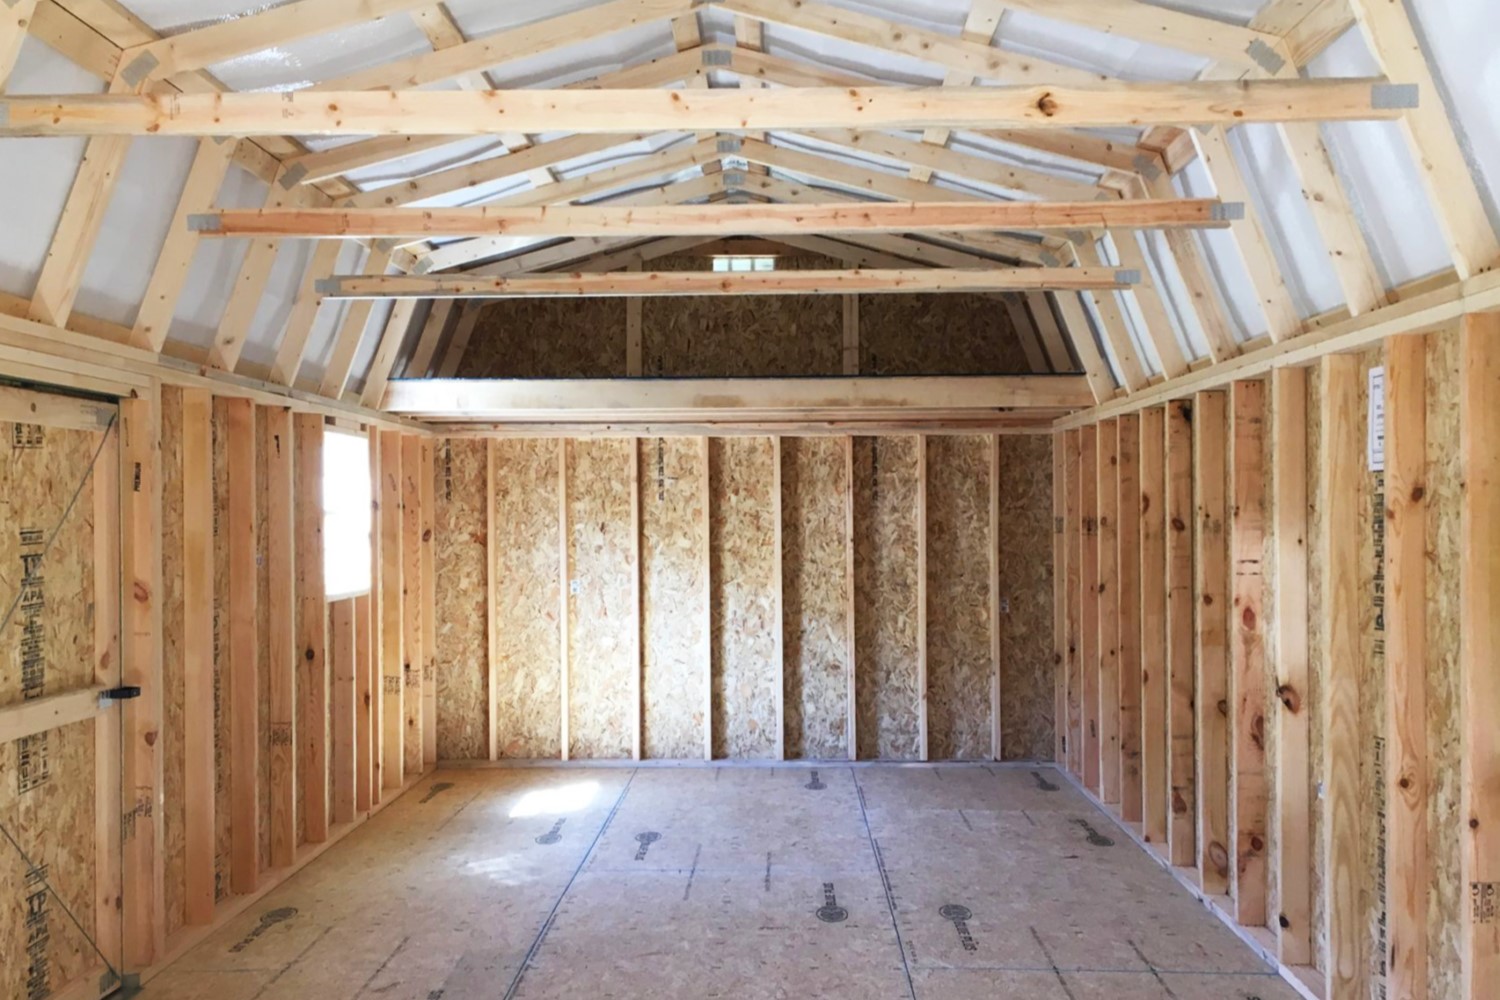
Step 5: Framing the Dormer
Framing the shed dormer is a pivotal phase that lays the structural foundation for the addition, ensuring stability, load-bearing capacity, and seamless integration with the existing roof. This step involves precise measurements, strategic framing techniques, and meticulous attention to detail to create a sturdy framework for the dormer. Here's a comprehensive guide to framing the shed dormer:
1. Layout and Marking
Begin by marking the layout of the shed dormer on the existing roof, clearly defining the perimeter and roof pitch transition points. Accurate measurements and layout markings are essential for aligning the dormer structure with the roof and ensuring a seamless integration.
Read more: How To Frame A Shed Dormer Roof
2. Rafters and Joists
Install the rafters and joists to create the framework of the shed dormer. The size, spacing, and orientation of the rafters should align with the structural design and load-bearing requirements. Carefully position the rafters to accommodate the desired window openings and ensure adequate headroom within the dormer space.
3. Ridge and Valley Framing
Construct the ridge and valley framing to define the peak and transitional points of the shed dormer roof. Properly aligning and securing the ridge and valley framing is crucial for maintaining structural integrity and facilitating efficient water runoff.
4. Wall Framing
Frame the walls of the shed dormer, ensuring precise alignment with the layout markings and existing exterior walls. Incorporate openings for windows and doors as per the design specifications, and secure the wall framing to the existing structure to establish a seamless connection.
5. Structural Reinforcements
Integrate structural reinforcements, such as collar ties, knee walls, and bracing, to enhance the stability and load-bearing capacity of the shed dormer. These reinforcements play a critical role in distributing the weight of the dormer and mitigating structural stresses.
Read more: How Much Space Does A Shed Dormer Add
6. Sheathing and Subfloor
Apply sheathing to the exterior walls and roof of the shed dormer to provide rigidity and serve as a base for attaching exterior finishes and roofing materials. Additionally, install the subfloor to establish a stable and level surface within the dormer space.
7. Window Openings
Frame the window openings according to the specified dimensions, ensuring proper support and alignment for the windows. Precise framing of the window openings is essential for seamless window installation and weatherproofing.
8. Inspections and Adjustments
Conduct thorough inspections of the framed dormer structure to verify alignment, plumbness, and overall structural integrity. Make any necessary adjustments to ensure that the framing meets the design specifications and complies with building codes.
By meticulously framing the shed dormer, you establish a solid framework that sets the stage for the subsequent installation of windows, siding, and roofing materials. This phase requires precision, attention to detail, and adherence to structural standards to create a durable and visually appealing dormer addition to your home.
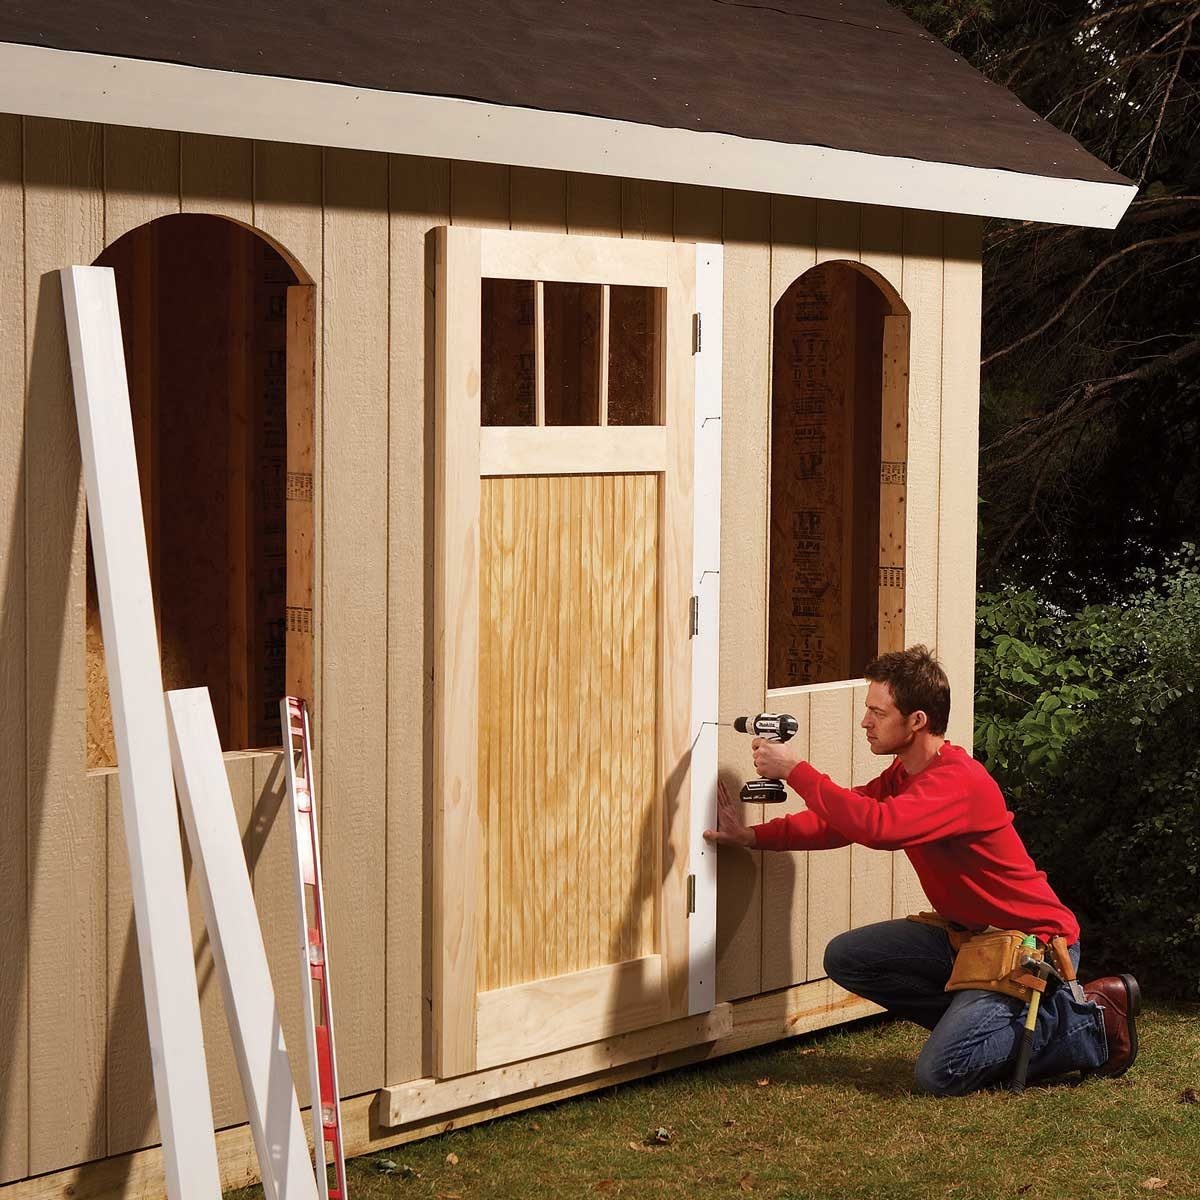
Step 6: Installing Windows and Siding
The installation of windows and siding marks a significant phase in the construction of a shed dormer, as it brings the exterior enclosure to completion while enhancing the functionality and visual appeal of the addition. This step involves precise window placement, weatherproofing measures, and the application of exterior finishes to achieve a seamless integration with the existing home. Here's a detailed breakdown of the process:
Read more: How To Build A Shed
Window Installation
Begin by carefully positioning and securing the windows within the framed openings of the shed dormer. Ensure that the windows align with the design specifications, providing an optimal balance of natural light, ventilation, and aesthetic appeal. Properly flashing the window openings is crucial to prevent water infiltration, safeguarding the interior space from moisture and ensuring long-term durability.
Weatherproofing Measures
Implement weatherproofing measures around the installed windows, including the application of flashing, sealants, and waterproof membranes. These measures create a protective barrier against the elements, safeguarding the dormer interior and contributing to the overall energy efficiency of the home. Attention to detail in weatherproofing is essential to mitigate potential water damage and maintain the structural integrity of the shed dormer.
Siding Application
Once the windows are in place and weatherproofed, proceed with the installation of the selected siding materials. Whether it's vinyl, fiber cement, wood, or metal siding, meticulous attention to alignment, fastening, and finishing details is essential to achieve a cohesive and visually appealing exterior. The siding application not only enhances the aesthetic continuity with the existing home but also provides crucial protection against environmental elements.
Trim and Finishing Touches
Incorporate exterior trim elements, such as corner boards, fascia, and soffits, to provide a polished and cohesive look to the shed dormer. The trim serves as a transition between the siding and other exterior elements, contributing to the overall architectural character and visual appeal. Additionally, consider the application of exterior paint or stain to further enhance the aesthetic impact of the dormer and ensure long-term protection of the siding materials.
Read more: How Build A Shed
Quality Assurance
Conduct thorough inspections of the installed windows, siding, and trim to verify proper alignment, secure attachment, and weatherproofing measures. Address any potential issues or discrepancies to ensure that the exterior enclosure of the shed dormer meets the highest standards of craftsmanship and durability.
By meticulously executing the installation of windows and siding, you bring the shed dormer one step closer to its final form, seamlessly integrating it with the existing home while enhancing its functionality and visual appeal. This phase requires precision, attention to detail, and a commitment to achieving a durable and visually captivating exterior enclosure for the dormer addition.
Step 7: Finishing Touches
As the construction of the shed dormer nears completion, attention turns to the essential finishing touches that elevate the functionality, aesthetics, and overall integration of the addition with the existing home. This phase encompasses a range of meticulous details and enhancements that contribute to the seamless transition from construction project to a fully realized and harmonious extension of the living space.
Interior Finishing
The interior of the shed dormer presents an opportunity to create a welcoming and functional space that aligns with the overall design intent. This includes the installation of insulation to regulate temperature and energy efficiency, as well as the application of interior finishes such as drywall, paint, and trim. Careful consideration of lighting fixtures, flooring materials, and storage solutions further enhances the livability and comfort of the dormer space.
Trim and Molding
Incorporating trim and molding elements within the interior and exterior of the shed dormer adds a layer of refinement and architectural detail. From crown molding to baseboards, these finishing touches contribute to a polished and cohesive aesthetic, seamlessly integrating the dormer with the existing home while accentuating its architectural character.
Read more: How To Build A Floor For A Shed
Electrical and HVAC Integration
Integration of electrical wiring, outlets, and lighting fixtures is essential to ensure the functionality and convenience of the dormer space. Similarly, if the shed dormer accommodates livable space, thoughtful integration of heating, ventilation, and air conditioning (HVAC) components is crucial to maintain comfort and climate control.
Exterior Landscaping and Integration
The exterior surroundings of the shed dormer play a significant role in its overall integration with the home. Landscaping elements such as pathways, plantings, and outdoor lighting contribute to a cohesive and inviting exterior environment, enhancing the visual impact of the dormer addition and its seamless connection to the surrounding landscape.
Final Inspections and Quality Assurance
Conducting comprehensive inspections and quality assurance checks at this stage ensures that all aspects of the shed dormer construction meet the highest standards of craftsmanship, safety, and compliance. This includes verifying the functionality of installed systems, assessing the integrity of finishes, and confirming adherence to building codes and regulations.
Personalization and Furnishing
Finally, the opportunity to personalize and furnish the shed dormer space arises, allowing homeowners to infuse their unique style and preferences into the newly created area. Whether it's selecting furniture, decor, or functional elements, this stage marks the transformation of the dormer into a fully realized and personalized extension of the home.
By meticulously attending to these finishing touches, the shed dormer evolves from a construction project into a seamless and fully integrated addition that enhances the livability, functionality, and visual appeal of the home. Each detail contributes to the overall cohesiveness and refinement of the dormer, culminating in a gratifying and transformative home improvement endeavor.
Read more: How To Build A Bar Shed
Conclusion
In conclusion, the construction of a shed dormer represents a transformative journey that encompasses meticulous planning, precise execution, and a keen eye for detail. From the initial assessment of the roof to the integration of finishing touches, each phase of the process contributes to the creation of a functional, visually appealing, and seamlessly integrated addition to the home.
Building a shed dormer is not merely a construction project; it is a testament to the homeowner's vision, creativity, and commitment to enhancing their living space. The decision to embark on this endeavor signifies a desire to expand the functionality of the home, maximize natural light, and elevate its architectural character.
Throughout the construction process, careful attention to structural integrity, weatherproofing measures, and aesthetic continuity ensures that the shed dormer becomes a harmonious extension of the existing home. The integration of windows, siding, and exterior finishes culminates in an exterior enclosure that not only complements the architectural style but also provides enduring protection against the elements.
The interior finishing touches, including insulation, trim, and integration of essential systems, elevate the dormer space into a welcoming and livable area that seamlessly integrates with the overall design of the home. The personalization and furnishing stage offer homeowners the opportunity to infuse their unique style and preferences, transforming the dormer into a personalized retreat or functional living space.
As the construction of the shed dormer reaches its conclusion, the sense of accomplishment and the tangible transformation of the home serve as a testament to the dedication and craftsmanship invested in the project. The addition of a shed dormer not only expands the usable space within the home but also enhances its overall value, functionality, and aesthetic appeal.
Ultimately, the construction of a shed dormer is a gratifying endeavor that embodies the fusion of creativity, structural precision, and personalized vision. It represents a significant investment in the home, both in terms of tangible value and the intangible satisfaction of creating a space that enriches daily living and reflects the unique identity of the homeowner.
Frequently Asked Questions about How To Build A Shed Dormer
Was this page helpful?
At Storables.com, we guarantee accurate and reliable information. Our content, validated by Expert Board Contributors, is crafted following stringent Editorial Policies. We're committed to providing you with well-researched, expert-backed insights for all your informational needs.


0 thoughts on “How To Build A Shed Dormer”