Home>Renovation & DIY>Home Renovation Guides>How To Shingle A Dormer
Home Renovation Guides
How To Shingle A Dormer
Modified: October 20, 2024
Learn how to shingle a dormer with our comprehensive home renovation guide. Follow our step-by-step instructions for a successful project.
(Many of the links in this article redirect to a specific reviewed product. Your purchase of these products through affiliate links helps to generate commission for Storables.com, at no extra cost. Learn more)
Introduction
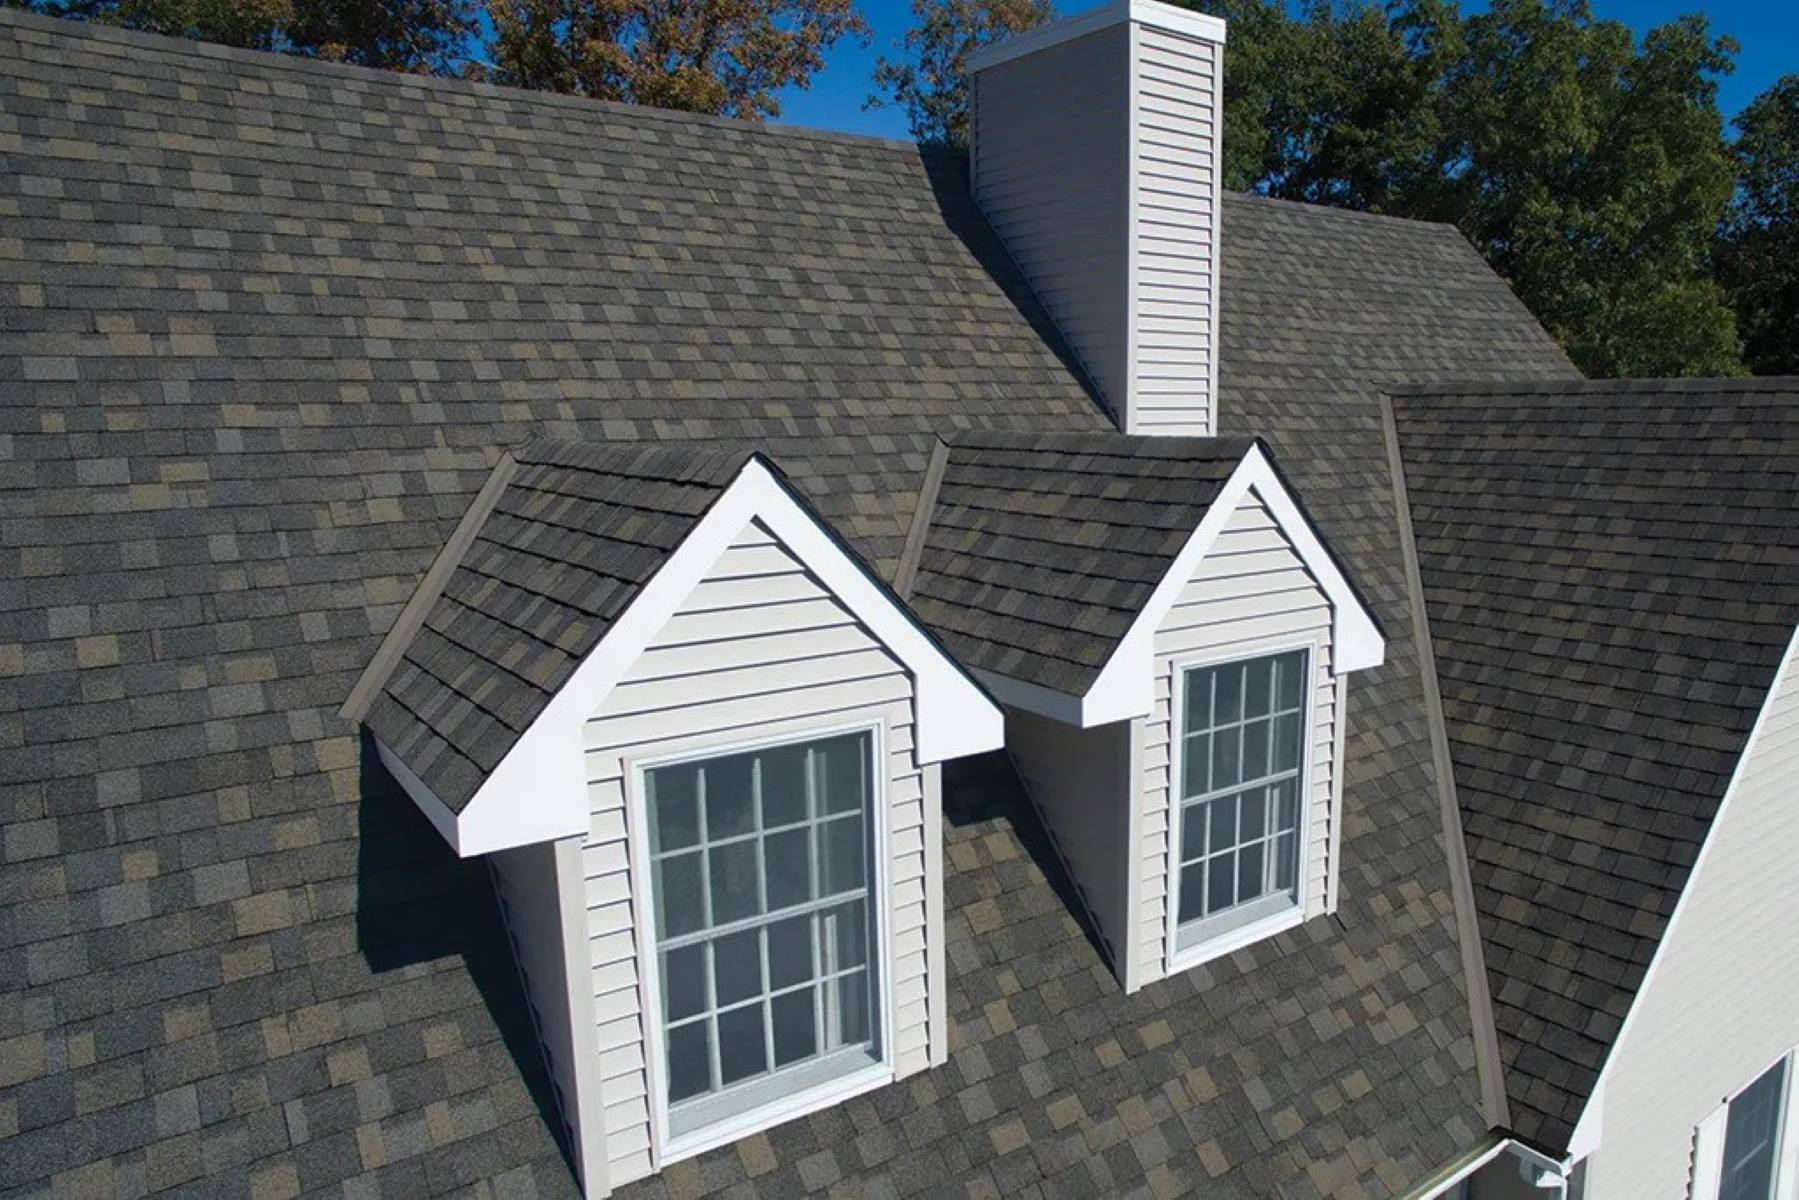
Shingling a dormer is a crucial aspect of home renovation that not only enhances the aesthetic appeal of your house but also provides essential protection against the elements. Whether you're a seasoned DIY enthusiast or a homeowner looking to tackle a new project, understanding the process of shingling a dormer is essential for maintaining the integrity and beauty of your home.
In this comprehensive guide, we will walk you through the step-by-step process of shingling a dormer, providing you with the knowledge and confidence to take on this rewarding project. From gathering the necessary materials and tools to the final inspection, each step is crucial in ensuring a professional and long-lasting result.
By following this guide, you will not only learn the technical aspects of shingling a dormer but also gain a deeper appreciation for the craftsmanship and attention to detail required for a successful renovation. So, roll up your sleeves, put on your work boots, and let's dive into the art of shingling a dormer!
Key Takeaways:
- Shingling a dormer involves gathering materials, precise measurements, and strategic installation to enhance the home’s appearance and protect it from the elements. It’s a rewarding project that requires attention to detail and craftsmanship.
- The process includes installing drip edge, underlayment, starter shingles, dormer shingles, and finishing the edges. Thorough clean-up and inspection ensure a visually appealing and resilient dormer roof, showcasing the dedication to home improvement.
Read more: Dormer Style Ideas: Shed Dormer Windows
Step 1: Gather Materials and Tools
Before embarking on the shingling process, it's essential to gather all the necessary materials and tools. This ensures a smooth and efficient workflow, allowing you to focus on the task at hand without interruptions. Here's a comprehensive list of the items you'll need:
Materials:
- Asphalt Shingles: These are the primary covering for your dormer and are available in a variety of colors and styles to complement your home's aesthetic.
- Drip Edge: This metal flashing is installed along the edges of the roof to prevent water from seeping under the shingles.
- Underlayment: Typically made of felt or synthetic material, the underlayment provides an additional layer of protection against moisture.
- Starter Shingles: These specialized shingles are installed at the eaves and rakes to provide a secure foundation for the rest of the shingles.
- Roofing Nails: High-quality, corrosion-resistant nails are essential for securing the shingles and other components in place.
- Roofing Cement: This waterproof adhesive is used to seal any gaps or overlaps in the shingles, enhancing the roof's weather resistance.
Tools:
- Hammer: A durable roofing hammer with a claw for removing old nails and a smooth face for driving in new nails.
- Utility Knife: Essential for cutting shingles and underlayment to the required size and shape.
- Chalk Line: Used for creating straight and uniform guidelines on the roof surface, ensuring precise shingle alignment.
- Roofing Nailer: While not mandatory, a roofing nailer can significantly expedite the installation process, especially for larger projects.
- Ladder: A sturdy, well-positioned ladder is crucial for safe access to the dormer roof and surrounding areas.
- Safety Gear: This includes gloves, safety goggles, and non-slip footwear to protect yourself during the project.
By ensuring that you have all the necessary materials and tools at your disposal, you can streamline the shingling process and minimize potential delays. Additionally, having everything organized and within reach promotes a safer and more efficient work environment, allowing you to focus on achieving professional results.
Step 2: Measure and Cut Shingles
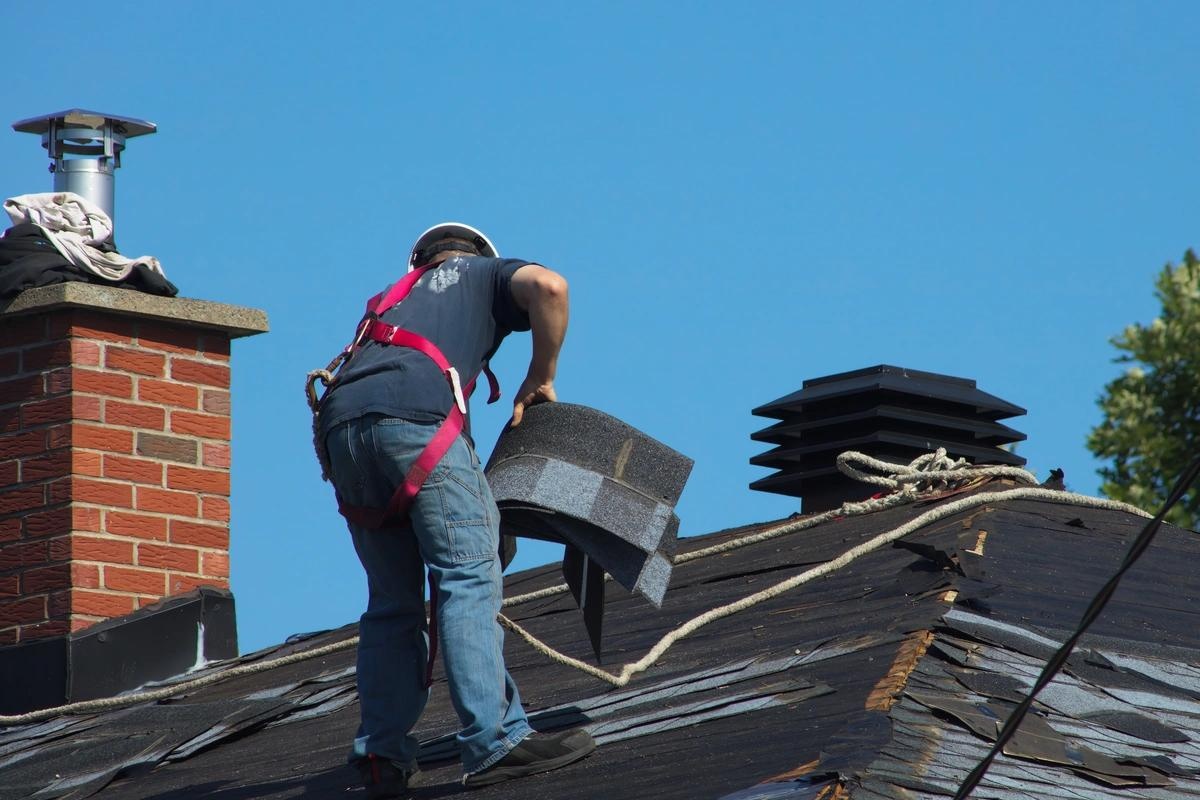
Accurate measurement and precise cutting of shingles are critical steps in ensuring a seamless and visually appealing dormer shingling project. Before diving into this process, it's essential to prioritize safety by wearing appropriate protective gear and ensuring stable footing on the roof.
Read more: How To Build A Dormer
Measuring the Roof Surface
Begin by measuring the dimensions of the dormer roof surface using a tape measure. Take precise measurements of the length and width, accounting for any protrusions or irregularities. It's crucial to record these measurements accurately to avoid material wastage and ensure a proper fit for the shingles.
Calculating Shingle Coverage
Once the measurements are obtained, calculate the total surface area of the dormer roof. This calculation will determine the quantity of shingles required for the project. Keep in mind that shingles are typically sold in bundles, with each bundle covering a specific area. By accurately calculating the shingle coverage, you can avoid unnecessary trips to the store and ensure a continuous workflow.
Cutting Shingles to Size
Using the measurements obtained earlier, transfer the dimensions onto the shingles using a chalk line or a pencil. A utility knife with a sharp blade is the ideal tool for cutting shingles to the required size. When cutting, ensure smooth and straight lines to maintain a professional finish.
Accounting for Overlaps and Angles
In the case of dormer roofs, angles and slopes may require custom cuts to ensure a snug fit for the shingles. Carefully measure and mark any angles or irregularities on the shingles before making the necessary cuts. Additionally, account for the recommended overlap between shingles to prevent water infiltration and enhance the roof's weather resistance.
Read more: What Is A Shed Dormer
Quality Control and Precision
Throughout the cutting process, prioritize quality control to ensure uniformity and precision in the shingle cuts. Consistent shingle dimensions and clean cuts contribute to a polished and visually appealing final result. Take the time to double-check measurements and cuts, as precision at this stage can significantly impact the overall aesthetic and functionality of the shingled dormer roof.
By meticulously measuring and cutting the shingles to fit the dormer roof, you set the stage for a successful and visually striking shingling project. These preparatory steps lay the foundation for seamless shingle installation, ensuring a professional outcome that enhances the overall appeal and durability of your home.
Step 3: Install Drip Edge
The installation of a drip edge is a critical component of shingling a dormer, playing a pivotal role in safeguarding the roof's edges from water damage and ensuring long-term structural integrity. The drip edge, typically made of metal, is designed to direct water away from the fascia and prevent it from seeping underneath the shingles. This essential element not only enhances the roof's weather resistance but also contributes to a professional and polished finish.
Understanding the Purpose of Drip Edge
Before delving into the installation process, it's important to grasp the significance of the drip edge. By effectively managing water runoff, the drip edge protects the underlying structure of the roof, including the fascia board and soffit, from moisture-related issues such as rot, mold, and deterioration. Additionally, the drip edge promotes proper water drainage, preventing potential water damage that could compromise the dormer's structural integrity.
Preparing for Installation
To commence the installation of the drip edge, ensure that the roof surface is clean and free of debris. Any existing roofing materials or protrusions along the edges should be carefully removed to create a smooth and uniform surface for the drip edge installation. Additionally, inspect the fascia board for any signs of damage or deterioration, addressing any issues before proceeding with the installation.
Read more: How To Design A House Dormer
Installing the Drip Edge
-
Begin at the Eaves: Position the drip edge along the eaves, ensuring that it overhangs the roof and extends into the gutter. Secure the drip edge in place using corrosion-resistant roofing nails, maintaining a consistent spacing to ensure a secure and uniform attachment.
-
Securing the Overlap: As you progress along the eaves, overlap successive sections of the drip edge to create a continuous barrier against water infiltration. The overlapping sections should be securely fastened to prevent any gaps or vulnerabilities along the roof's edge.
-
Addressing Corners and Angles: When encountering corners or angles on the dormer roof, carefully cut and bend the drip edge to conform to the specific contours of the roof. This meticulous approach ensures a seamless and effective barrier against water intrusion, regardless of the roof's architectural intricacies.
-
Completing the Installation: Once the drip edge is securely fastened along the eaves, proceed to install it along the remaining edges of the dormer roof, including the rakes and any additional protrusions. Consistent and precise installation is crucial to maximize the protective capabilities of the drip edge across the entire roof surface.
Ensuring a Secure and Watertight Seal
Throughout the installation process, prioritize the creation of a secure and watertight seal between the drip edge and the roof surface. Any gaps or inadequately secured sections can compromise the effectiveness of the drip edge, potentially leading to water infiltration and subsequent damage. By meticulously fastening the drip edge and addressing any irregularities, you establish a robust defense against water-related issues, bolstering the overall resilience of the dormer roof.
Final Inspection and Quality Assurance
Upon completing the installation of the drip edge, conduct a thorough inspection to verify the integrity and effectiveness of the installation. Ensure that the drip edge is uniformly aligned and securely fastened, with no visible gaps or loose sections. This meticulous attention to detail reinforces the protective capabilities of the drip edge, instilling confidence in the long-term durability and performance of the shingled dormer roof.
By meticulously installing the drip edge, you fortify the dormer roof against water infiltration and contribute to its overall resilience. This essential step not only enhances the roof's protective capabilities but also sets the stage for the subsequent installation of underlayment and shingles, paving the way for a successful and enduring shingling project.
Step 4: Install Underlayment
The installation of underlayment is a pivotal step in the process of shingling a dormer, serving as a crucial barrier against moisture and enhancing the overall weather resistance of the roof. Underlayment, typically made of felt or synthetic material, acts as a protective layer between the roof deck and the shingles, providing an additional defense against water infiltration and contributing to the long-term durability of the dormer roof.
Read more: How To Fix A Leak Around A Dormer
Understanding the Role of Underlayment
Before proceeding with the installation, it's essential to comprehend the significance of underlayment in the context of roofing. Underlayment serves as a secondary line of defense against water penetration, particularly in areas prone to wind-driven rain or ice dams. By creating a moisture-resistant barrier, underlayment safeguards the underlying structure of the roof, mitigating the risk of water-related damage and preserving the integrity of the dormer.
Preparing for Installation
To initiate the installation of underlayment, ensure that the roof surface is clean, dry, and free of any debris or protrusions. Any existing underlayment or roofing materials should be carefully inspected and, if necessary, replaced to ensure a uniform and secure foundation for the new underlayment. Additionally, verify that the drip edge and other essential components are correctly installed and functioning as intended before proceeding with the underlayment installation.
Installing the Underlayment
-
Commence at the Eaves: Begin by positioning the first layer of underlayment along the eaves of the dormer roof, ensuring a slight overhang into the gutter. Secure the underlayment in place using roofing nails, maintaining a consistent spacing to promote a secure attachment.
-
Overlapping Sections: As you progress along the eaves, overlap successive sections of the underlayment to create a continuous and watertight barrier. The overlapping sections should be securely fastened to prevent any gaps or vulnerabilities in the underlayment layer.
-
Addressing Corners and Protrusions: When encountering corners, angles, or other roof protrusions, carefully cut and fit the underlayment to conform to the specific contours of the roof. This meticulous approach ensures comprehensive coverage and protection across the entire roof surface, regardless of its architectural intricacies.
-
Completing the Installation: Once the first layer of underlayment is securely fastened along the eaves, proceed to install subsequent layers, ensuring proper overlap and alignment. The number of underlayment layers may vary based on regional building codes and climate considerations, with the goal of providing optimal protection against moisture infiltration.
Ensuring a Watertight Seal
Throughout the installation process, prioritize the creation of a secure and watertight seal between the underlayment layers and the roof surface. Any gaps or inadequately secured sections can compromise the effectiveness of the underlayment, potentially leading to water infiltration and subsequent damage. By meticulously fastening the underlayment and addressing any irregularities, you establish a robust defense against moisture-related issues, bolstering the overall resilience of the dormer roof.
Final Inspection and Quality Assurance
Upon completing the installation of the underlayment, conduct a thorough inspection to verify the integrity and effectiveness of the installation. Ensure that the underlayment is uniformly aligned, securely fastened, and free of any visible gaps or defects. This meticulous attention to detail reinforces the protective capabilities of the underlayment, instilling confidence in the long-term durability and performance of the shingled dormer roof.
By meticulously installing the underlayment, you fortify the dormer roof against moisture infiltration and contribute to its overall resilience. This essential step not only enhances the roof's protective capabilities but also sets the stage for the subsequent installation of shingles, paving the way for a successful and enduring shingling project.
Step 5: Install Starter Shingles
The installation of starter shingles marks a pivotal phase in the process of shingling a dormer, laying the groundwork for the subsequent placement of the main shingle courses. Starter shingles, also known as starter strips, serve as the initial row of shingles along the eaves and rakes of the roof, providing a secure foundation for the rest of the shingles while enhancing the overall weather resistance and aesthetic appeal of the dormer.
Understanding the Role of Starter Shingles
Starter shingles play a crucial role in safeguarding the vulnerable edges of the roof, particularly along the eaves and rakes, where the risk of wind uplift and water infiltration is heightened. By providing a secure and overlapping base for the main shingle courses, starter shingles effectively seal the edges of the roof, preventing potential water damage and enhancing the overall resilience of the dormer.
Preparing for Installation
Before commencing the installation of starter shingles, ensure that the roof surface is clean, dry, and free of any debris or protrusions. Additionally, verify that the drip edge and underlayment are correctly installed and functioning as intended, laying the groundwork for a seamless and effective installation of the starter shingles.
Read more: How To Shingle A Gable Roof
Installing the Starter Shingles
-
Eaves Installation: Begin by positioning the first starter shingle along the eaves of the dormer roof, ensuring that it overhangs the edge by the recommended amount. Secure the starter shingle in place using roofing nails, maintaining a consistent spacing to promote a secure attachment.
-
Overlapping Sections: As you progress along the eaves, overlap successive starter shingles to create a continuous and watertight barrier. The overlapping sections should be securely fastened to prevent any gaps or vulnerabilities in the starter shingle layer.
-
Rake Installation: Similarly, install starter shingles along the rakes of the dormer roof, ensuring a uniform and overlapping placement to reinforce the edges and enhance the overall wind resistance of the roof.
Ensuring a Secure Foundation
Throughout the installation process, prioritize the creation of a secure and uniform foundation for the main shingle courses. The proper alignment and fastening of the starter shingles are essential in establishing a robust defense against water infiltration and wind-related issues, contributing to the long-term durability and performance of the shingled dormer roof.
Final Inspection and Quality Assurance
Upon completing the installation of the starter shingles, conduct a thorough inspection to verify the integrity and effectiveness of the installation. Ensure that the starter shingles are uniformly aligned, securely fastened, and free of any visible gaps or defects. This meticulous attention to detail reinforces the protective capabilities of the starter shingles, setting the stage for the seamless integration of the main shingle courses and ensuring a professional and enduring shingling project.
By meticulously installing the starter shingles, you fortify the edges of the dormer roof and establish a solid foundation for the subsequent shingle courses, contributing to the overall resilience and visual appeal of the shingled dormer. This essential step not only enhances the roof's protective capabilities but also sets the stage for the seamless integration of the main shingle courses, paving the way for a successful and enduring shingling project.
Step 6: Install Dormer Shingles
The installation of dormer shingles represents a pivotal phase in the process of shingling a dormer, where meticulous attention to detail and precision craftsmanship converge to create a visually striking and resilient roof surface. Dormer shingles, also referred to as main shingle courses, form the primary covering of the dormer roof, providing essential protection against the elements while enhancing the overall aesthetic appeal of the home.
Preparing for Installation
Before commencing the installation of dormer shingles, it is imperative to ensure that the underlying components, including the drip edge, underlayment, and starter shingles, are correctly installed and functioning as intended. Additionally, verify that the roof surface is clean, dry, and free of any debris or protrusions, creating an optimal foundation for the shingle installation.
Strategic Placement and Alignment
Commence the installation of dormer shingles by strategically positioning the first shingle course along the bottom edge of the dormer roof, ensuring a slight overhang to promote effective water runoff. Secure the shingles in place using roofing nails, maintaining a consistent spacing and alignment to create a uniform and visually appealing surface. As you progress upward, overlap successive shingles according to the manufacturer's guidelines, ensuring a secure and weather-resistant barrier across the entire roof surface.
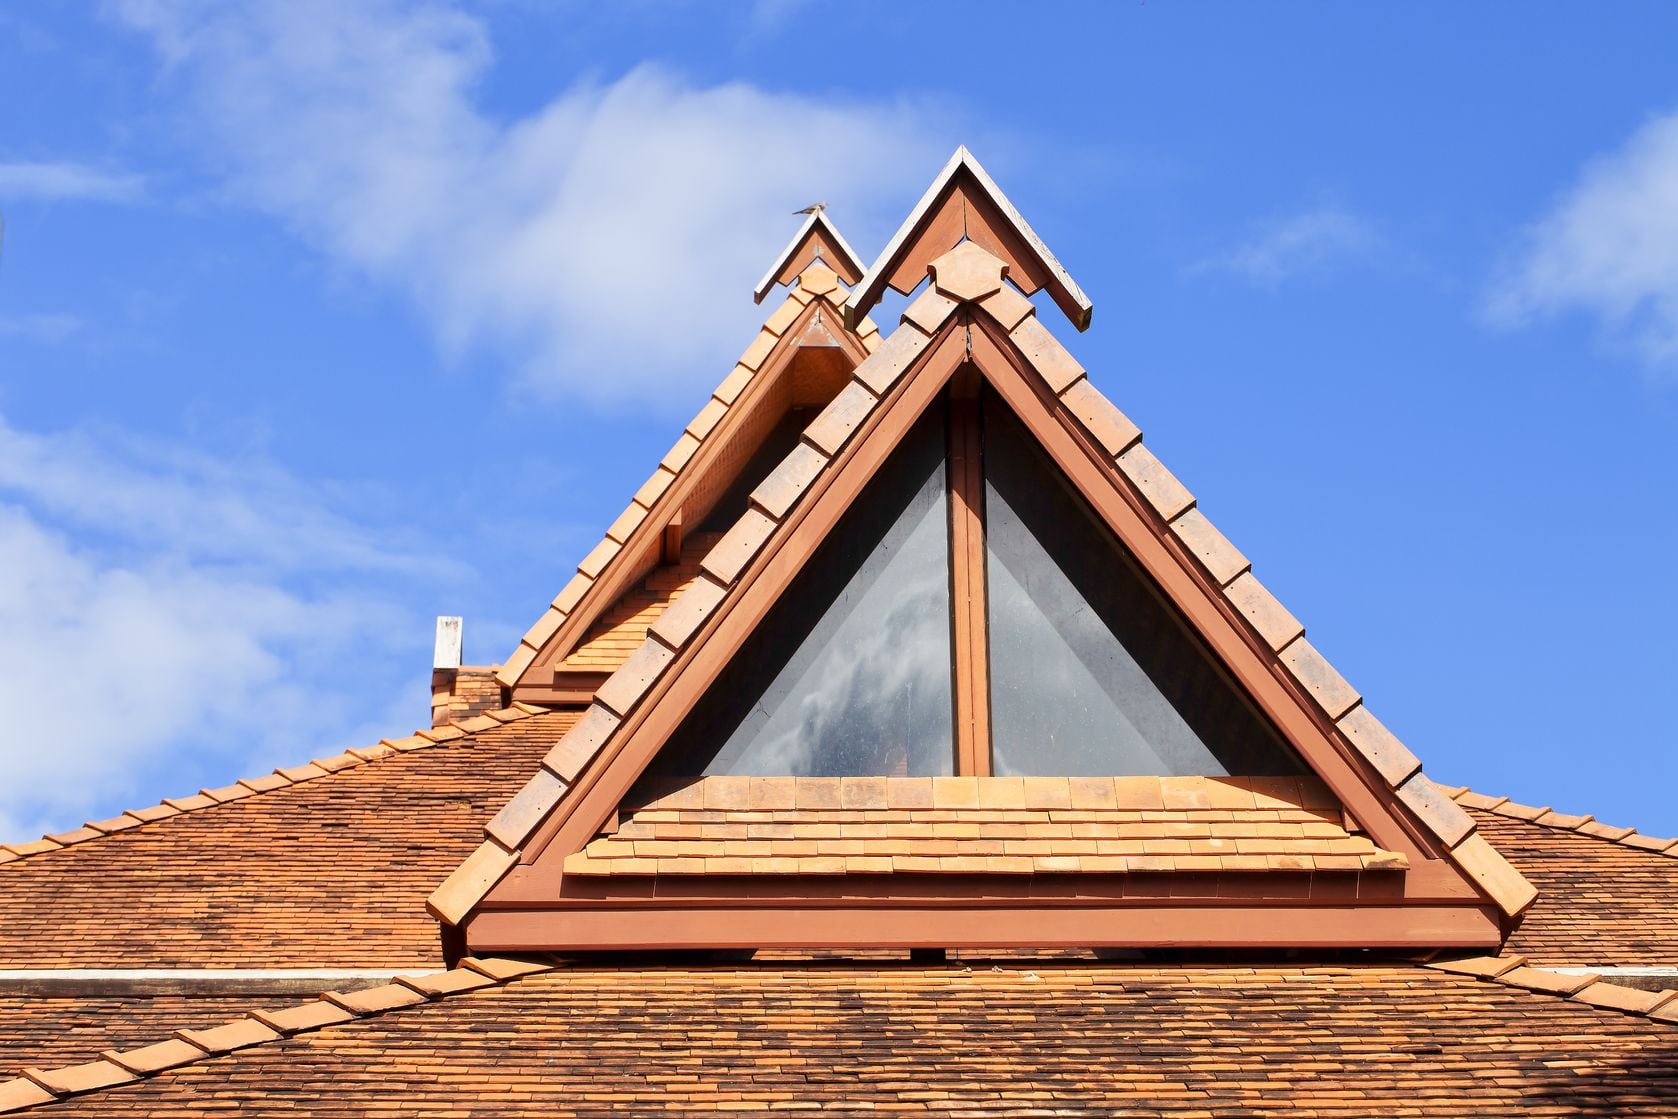
Addressing Architectural Complexities
When encountering architectural intricacies such as dormer windows, valleys, or intersecting rooflines, exercise precision and attention to detail to seamlessly integrate the shingles into these areas. Custom cuts and fitting may be necessary to ensure a snug and watertight fit, preserving the structural integrity and visual cohesiveness of the dormer roof. Additionally, maintain a uniform pattern and alignment to create a professional and polished finish that complements the overall architectural design of the home.
Weatherproofing and Aesthetic Enhancement
Throughout the installation process, prioritize the creation of a weatherproof and visually appealing roof surface by meticulously aligning and fastening the dormer shingles. Pay particular attention to the edges and intersections, ensuring a secure and overlapping placement to fortify the vulnerable areas against water infiltration and wind uplift. By adhering to best practices and manufacturer recommendations, you not only enhance the roof's protective capabilities but also elevate the overall curb appeal and value of the home.
Final Inspection and Quality Assurance
Upon completing the installation of dormer shingles, conduct a comprehensive inspection to verify the integrity and effectiveness of the installation. Ensure that the shingles are uniformly aligned, securely fastened, and free of any visible defects or irregularities. This meticulous attention to detail reinforces the protective capabilities of the shingles, instilling confidence in the long-term durability and performance of the shingled dormer roof.
By meticulously installing the dormer shingles, you elevate the visual appeal and weather resistance of the dormer roof, culminating in a professional and enduring shingling project. This essential step not only enhances the roof's protective capabilities but also contributes to the overall resilience and aesthetic harmony of the home.
Step 7: Finish the Edges
The meticulous attention to detail and precision craftsmanship exhibited in the previous steps culminates in the crucial phase of finishing the edges of the dormer roof. This pivotal step not only enhances the visual cohesiveness of the shingled surface but also fortifies the vulnerable edges against potential water infiltration and wind-related issues. By prioritizing the seamless integration of edge treatments, homeowners can elevate the overall resilience and aesthetic appeal of their shingled dormer.
Installing Hip and Ridge Shingles
Commence the edge finishing process by installing hip and ridge shingles along the intersecting planes and ridges of the dormer roof. These specialized shingles are designed to cap the peak of the roof and the intersecting hips, providing a protective and visually appealing transition between the shingled surfaces. Carefully align and secure the hip and ridge shingles, ensuring a uniform and overlapping placement to create a seamless and weather-resistant barrier.
Applying Roofing Cement
To reinforce the edges and intersections of the shingled dormer, apply roofing cement along the hip and ridge shingles as well as any exposed nail heads. This waterproof adhesive not only enhances the wind resistance and weatherproofing of the roof but also seals any potential entry points for water. By meticulously applying roofing cement, homeowners can bolster the overall protective capabilities of the dormer roof, mitigating the risk of water infiltration and ensuring long-term durability.
Read more: What Are The Best Roof Shingles
Addressing Architectural Details
When finishing the edges of the dormer roof, pay particular attention to any architectural details such as dormer windows, valleys, or intricate rooflines. Custom cuts and fitting may be necessary to seamlessly integrate the shingles into these areas, ensuring a snug and watertight fit that complements the overall aesthetic and structural integrity of the home. By addressing these architectural complexities with precision and care, homeowners can achieve a visually cohesive and resilient edge treatment.
Final Inspection and Quality Assurance
Upon completing the edge finishing process, conduct a comprehensive inspection to verify the integrity and effectiveness of the installation. Ensure that the hip and ridge shingles are uniformly aligned, securely fastened, and free of any visible defects or irregularities. Additionally, confirm the thorough application of roofing cement to fortify the vulnerable areas against water infiltration and wind uplift. This meticulous attention to detail reinforces the protective capabilities of the edge treatments, instilling confidence in the long-term durability and performance of the shingled dormer roof.
By meticulously finishing the edges of the dormer roof, homeowners elevate the visual appeal and weather resistance of the shingled surface, culminating in a professional and enduring shingling project. This essential step not only enhances the roof's protective capabilities but also contributes to the overall resilience and aesthetic harmony of the home.
Step 8: Clean Up and Inspection
As the final phase of the dormer shingling process, thorough clean up and meticulous inspection are essential to ensure the overall success and longevity of the project. This critical step not only contributes to the visual appeal of the newly shingled dormer but also provides an opportunity to identify and address any potential issues that could compromise the roof's performance.
Clearing Debris and Waste
Commence the clean-up process by removing any debris, packaging materials, and waste generated during the shingling project. This includes discarded shingle pieces, packaging materials, and any tools or equipment no longer required. By clearing the work area of debris, homeowners create a safer and more organized environment while enhancing the overall aesthetic appeal of the property.
Read more: How To Frame A Shed Dormer Roof
Inspecting the Shingled Surface
Following the clean-up, conduct a comprehensive inspection of the shingled dormer roof to assess the quality of the installation and identify any potential areas of concern. Pay particular attention to the alignment, fastening, and overall condition of the shingles, ensuring that they are uniformly placed and securely attached. Additionally, inspect the edge treatments, including hip and ridge shingles, to verify their integrity and weather resistance.
Addressing Potential Issues
During the inspection, if any irregularities or deficiencies are identified, take the necessary steps to address them promptly. This may involve repositioning or replacing individual shingles, reinforcing edge treatments, or applying additional roofing cement to seal any gaps or exposed nail heads. By addressing potential issues at this stage, homeowners can proactively safeguard the dormer roof against future complications and ensure its long-term performance.
Final Clean-Up and Site Evaluation
Once any necessary adjustments or repairs are completed, perform a final clean-up of the work area, ensuring that all tools, materials, and waste are properly disposed of or stored. Take a moment to evaluate the overall appearance and functionality of the shingled dormer, appreciating the transformation brought about by the meticulous installation and finishing process.
Celebrating the Achievement
Finally, take a moment to appreciate the hard work and dedication that went into shingling the dormer. Whether it was a DIY endeavor or a project completed with the assistance of professionals, celebrating the achievement of a beautifully shingled dormer is a testament to the commitment to home improvement and the enhancement of the property's value and resilience.
By prioritizing thorough clean up and meticulous inspection, homeowners can ensure that the newly shingled dormer not only looks visually appealing but also functions optimally, providing long-lasting protection and enhancing the overall aesthetic of the home.
Frequently Asked Questions about How To Shingle A Dormer
Was this page helpful?
At Storables.com, we guarantee accurate and reliable information. Our content, validated by Expert Board Contributors, is crafted following stringent Editorial Policies. We're committed to providing you with well-researched, expert-backed insights for all your informational needs.


0 thoughts on “How To Shingle A Dormer”