Home>Gardening & Outdoor>Outdoor Structures>How To Frame A Shed Dormer Roof
Outdoor Structures
How To Frame A Shed Dormer Roof
Modified: August 17, 2024
Learn how to frame a shed dormer roof for your outdoor structure with our step-by-step guide. Get expert tips and techniques for a successful project.
(Many of the links in this article redirect to a specific reviewed product. Your purchase of these products through affiliate links helps to generate commission for Storables.com, at no extra cost. Learn more)
**
Introduction
**
Welcome to the world of shed dormer roofs! If you're considering expanding the space and appeal of your home, a shed dormer roof might be just the solution you're seeking. Shed dormers not only add aesthetic charm to a structure but also provide functional benefits by creating additional headroom and space within an attic or upper level. In this comprehensive guide, we'll delve into the intricacies of framing a shed dormer roof, equipping you with the knowledge and confidence to undertake this project.
Whether you're a seasoned DIY enthusiast or a homeowner embarking on your first major construction endeavor, understanding the nuances of shed dormer roofs is essential. From planning and designing to framing and finishing, each phase demands careful consideration and skillful execution. By the end of this journey, you'll be well-versed in the art of crafting a shed dormer roof that seamlessly integrates with your home's architecture and elevates its functionality and allure.
So, let's roll up our sleeves and explore the world of shed dormer roofs together. Whether you're envisioning a cozy reading nook bathed in natural light or dreaming of a spacious home office with panoramic views, the possibilities with shed dormers are as vast as your imagination. Let's embark on this enlightening and rewarding journey of framing a shed dormer roof, where every angle and measurement holds the promise of transforming your living space into something extraordinary.
Key Takeaways:
- Shed dormer roofs add space and natural light to homes, enhancing both functionality and aesthetic appeal. Understanding their design and framing process is essential for homeowners considering this architectural addition.
- Framing a shed dormer roof involves meticulous planning, precise construction, and attention to detail. From creating the opening in the existing roof to installing roof sheathing and shingles, each step contributes to the dormer’s structural integrity and visual allure.
Read more: What Is A Shed Dormer
Understanding Shed Dormer Roofs
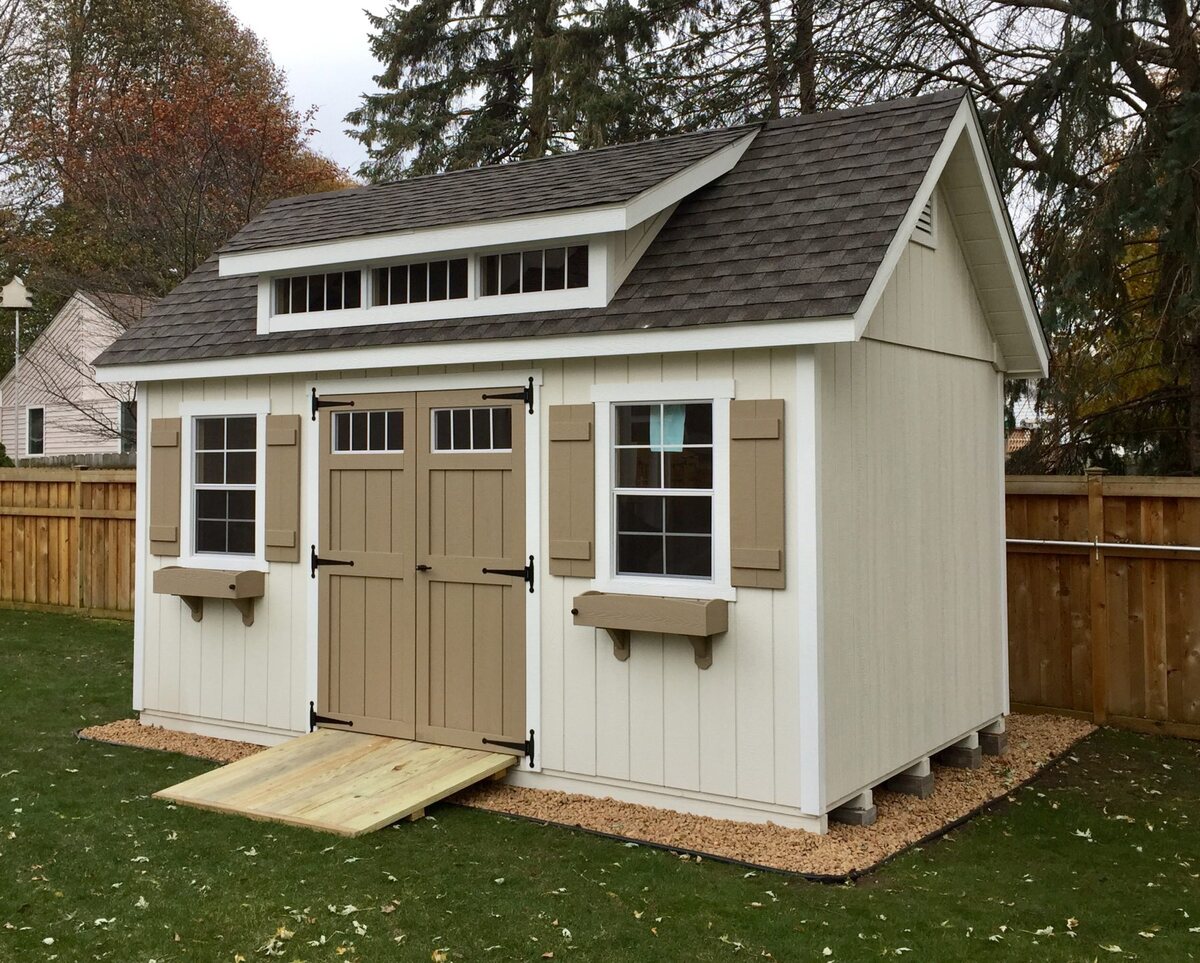
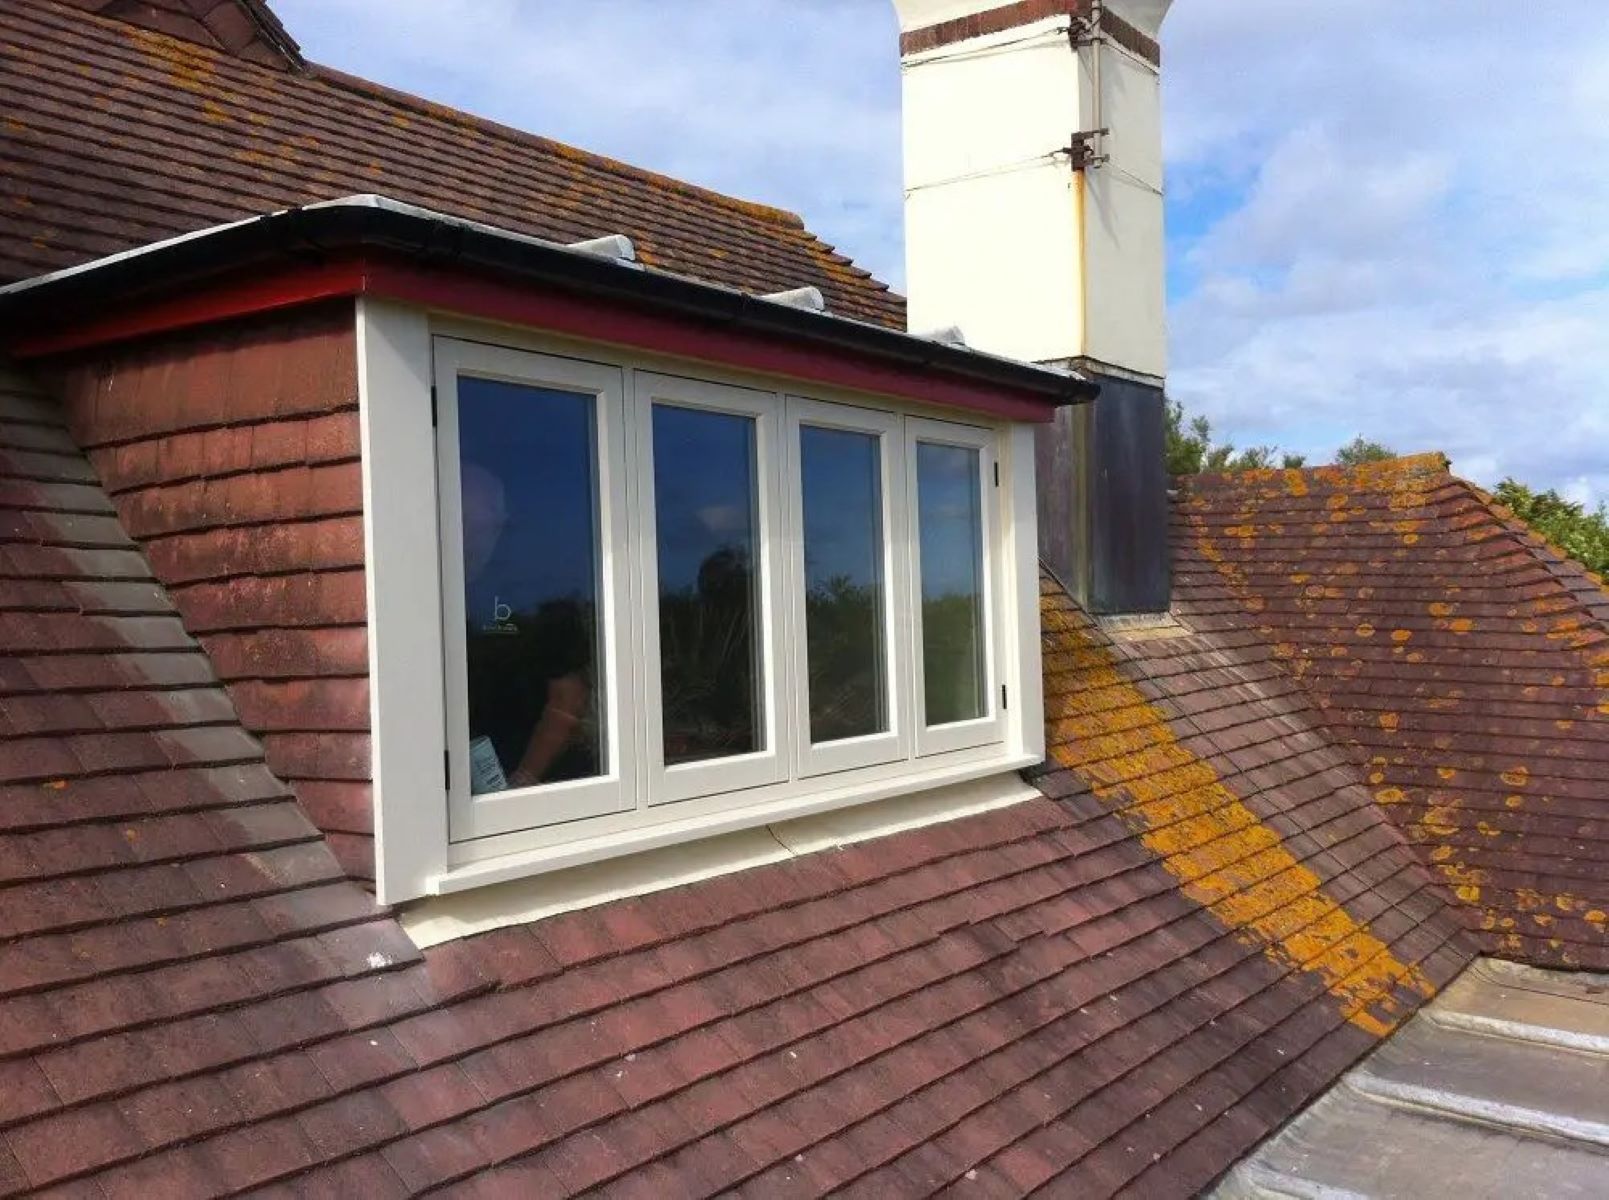
Before diving into the technicalities of framing a shed dormer roof, it's crucial to grasp the essence of this architectural element. Shed dormers are popular for their ability to introduce natural light and additional space into a home's upper level or attic. Unlike gable dormers, which feature a traditional triangular roof, shed dormers boast a single-sloped roof that extends outward from the main roofline.
One of the key advantages of shed dormers lies in their versatility. These dormers can be customized to suit various architectural styles, from contemporary to traditional, and are particularly well-suited for homes with low-pitched roofs. By extending the living space and headroom in attics, shed dormers offer a practical solution for homeowners seeking to maximize their property's potential without the complexities of a full-scale addition.
Furthermore, shed dormers are revered for their ability to enhance the aesthetic appeal of a home. The addition of a shed dormer not only introduces a captivating architectural dimension to the roofline but also infuses the interior with an abundance of natural light, creating an inviting and airy ambiance. Whether used as a charming window seat alcove or a spacious bedroom retreat, shed dormers have the power to transform underutilized attic spaces into functional and inviting areas.
Understanding the role and impact of shed dormer roofs is paramount before embarking on the framing process. By comprehending the unique benefits and design possibilities they offer, homeowners can make informed decisions that align with their vision for an enhanced living space. With this foundational knowledge in place, let's proceed to the next phase: planning and designing the shed dormer.
Planning and Designing the Dormer
Embarking on the journey of framing a shed dormer roof necessitates meticulous planning and thoughtful design considerations. The initial step involves evaluating the existing roof structure and determining the most suitable location for the shed dormer. Factors such as the home's architectural style, interior layout, and desired functionality of the dormer space play a pivotal role in this decision-making process.
When planning the shed dormer, it's essential to envision the intended purpose of the additional space. Whether it will serve as a serene reading nook, a cozy home office, or a well-lit crafting area, aligning the design with its future function is paramount. This involves contemplating the size, orientation, and window placement to optimize natural light and views while harmonizing with the existing architectural aesthetics.
Equally important is ensuring compliance with local building codes and regulations. Obtaining the necessary permits and adhering to structural requirements are vital steps in the planning phase. Engaging with a qualified architect or structural engineer can provide invaluable insights and ensure that the dormer design aligns with safety standards and building codes.
As the design takes shape, attention to detail becomes a hallmark of the planning phase. From selecting roofing materials that seamlessly integrate with the existing roof to determining the pitch and overhang of the shed dormer, each decision contributes to the overall functionality and visual appeal of the structure. Additionally, considerations such as insulation, ventilation, and drainage must be integrated into the design to ensure the longevity and comfort of the dormer space.
Ultimately, the planning and design phase sets the stage for a successful and harmonious integration of the shed dormer into the existing roofline. By meticulously considering the structural, aesthetic, and functional aspects of the dormer, homeowners can embark on the framing process with confidence, knowing that every detail has been thoughtfully curated to enhance their living space.
When framing a shed dormer roof, make sure to accurately measure and cut the roof rafters to the correct angle to ensure a proper fit and support for the dormer. Double check all measurements before cutting to avoid mistakes.
Framing the Shed Dormer Roof
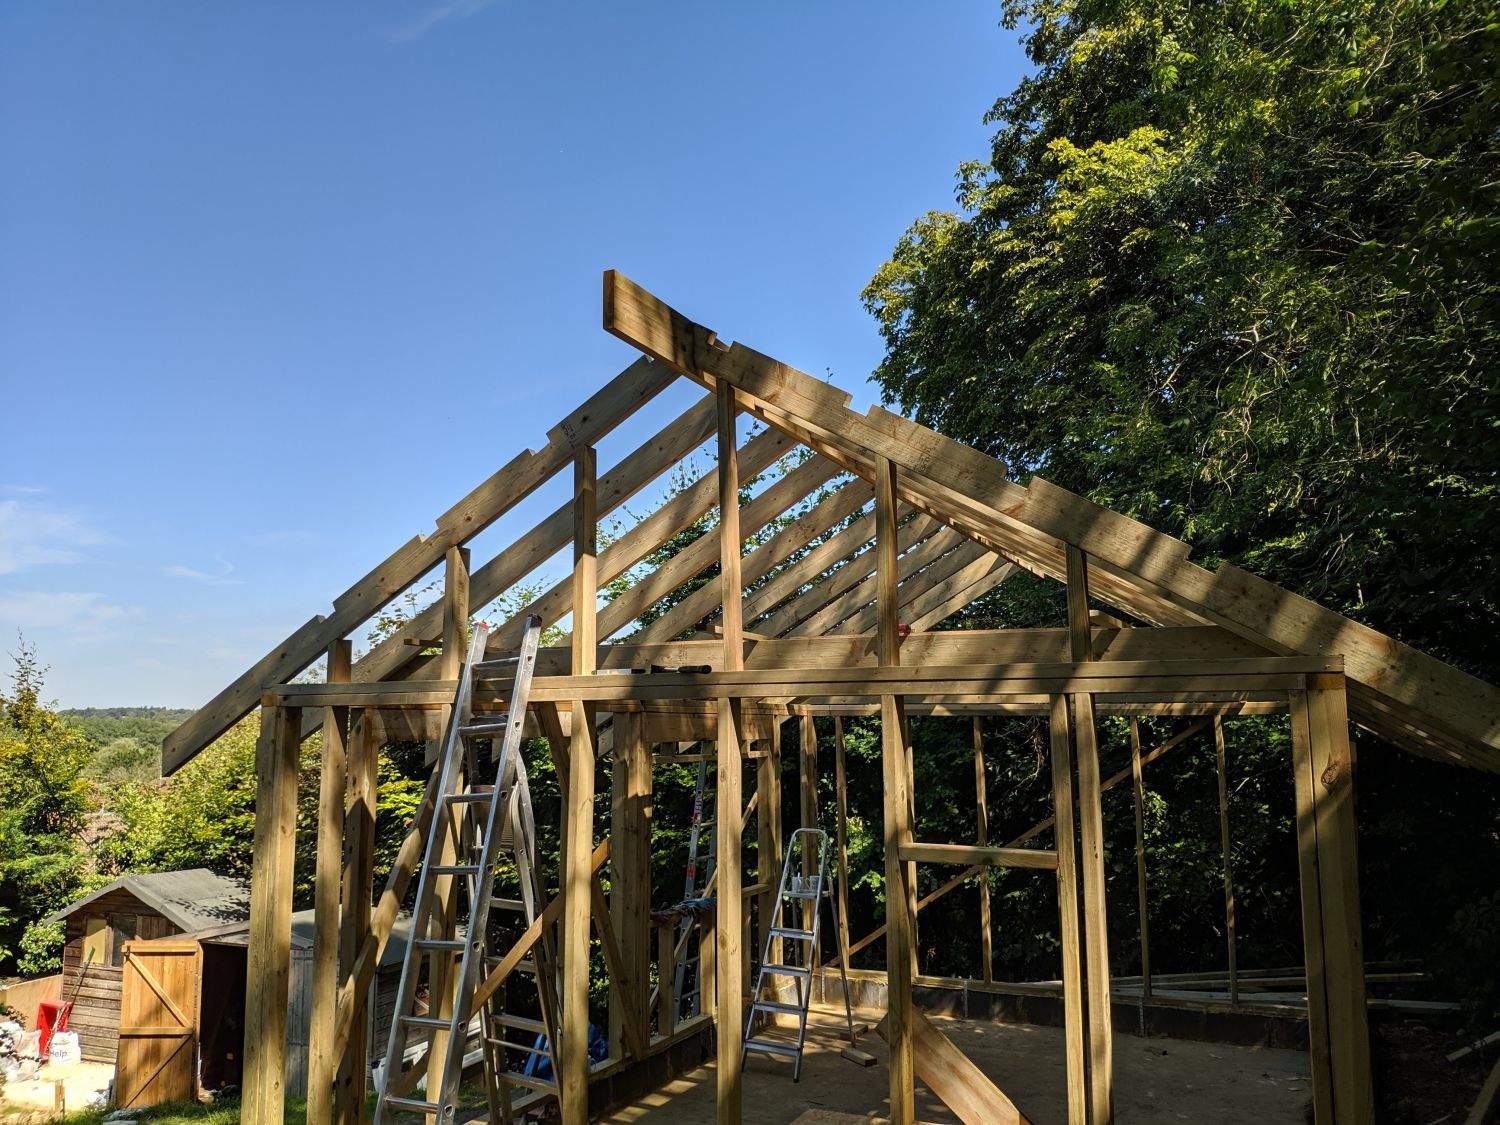
As the planning and design phase culminates, the focus shifts to the intricate process of framing the shed dormer roof. This pivotal stage demands precision, attention to detail, and a thorough understanding of the structural elements involved. The framing process begins with the creation of the dormer opening in the existing roof, followed by the construction of the dormer walls, roof structure, and support framework.
The first step in framing a shed dormer roof involves carefully marking and cutting the opening in the existing roof to accommodate the new dormer. This entails precise measurements, strategic removal of roofing materials, and reinforcement of the surrounding roof structure to support the dormer's weight and ensure structural integrity.
With the opening in place, the construction of the dormer walls commences. This entails assembling the wall framing using lumber of appropriate dimensions, ensuring that the walls align with the intended size and pitch of the shed dormer. Window and door openings are incorporated into the wall framing, allowing for the seamless integration of these elements into the dormer design.
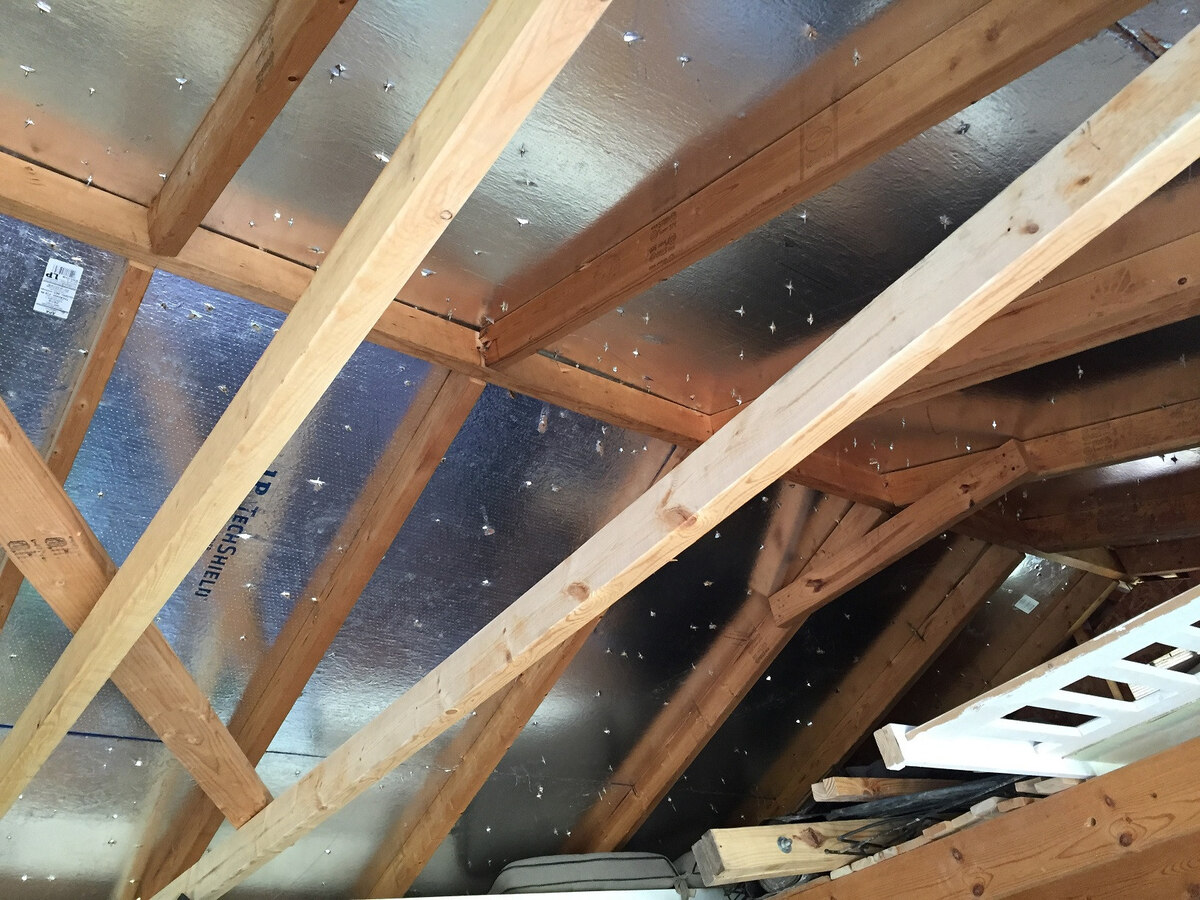
Simultaneously, the roof structure of the shed dormer takes shape, typically featuring a single-sloped design that extends from the existing roofline. Rafters or trusses are installed to create the framework for the dormer roof, with careful attention paid to the pitch, overhang, and integration with the main roof. This phase demands meticulous calculations to ensure that the roof structure harmonizes with the existing roof while providing adequate support and weather resistance.
Support framework, such as collar ties or ridge beams, is incorporated to fortify the structural integrity of the shed dormer roof, enhancing its stability and load-bearing capacity. This crucial step contributes to the long-term durability and safety of the dormer, underscoring the significance of precision and adherence to engineering principles.
As the framing process nears completion, the shed dormer begins to take on its distinctive form, embodying the vision conceived during the planning and design phase. The successful execution of the framing stage sets the stage for the subsequent steps of installing roof sheathing and shingles, bringing the shed dormer to fruition.
Installing Roof Sheathing and Shingles
With the framework of the shed dormer roof in place, the focus shifts to the installation of roof sheathing and shingles, pivotal elements that contribute to the durability, weather resistance, and aesthetic appeal of the structure. Roof sheathing serves as the foundation for the roofing materials, providing structural support and a solid base for the shingles, while the shingles safeguard the dormer from the elements and enhance its visual allure.
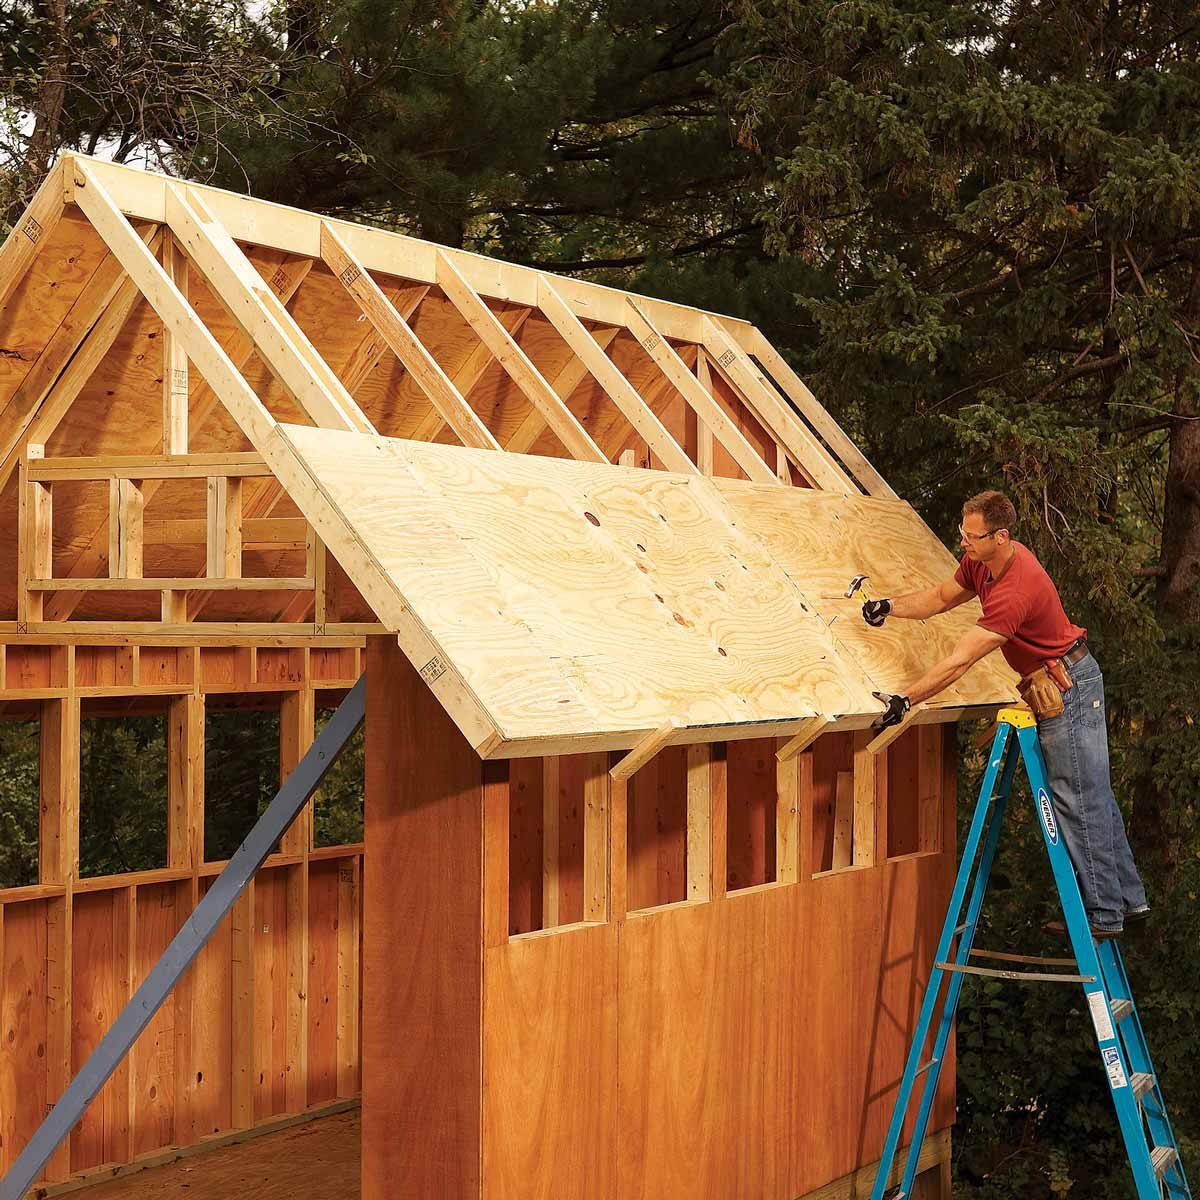
The process commences with the application of roof sheathing, typically composed of plywood or oriented strand board (OSB), onto the framework of the shed dormer roof. This step demands precision in cutting and fitting the sheathing to ensure a seamless and secure substrate for the shingles. Proper installation of roof sheathing is paramount, as it forms the structural backbone of the roof and contributes to its overall integrity.
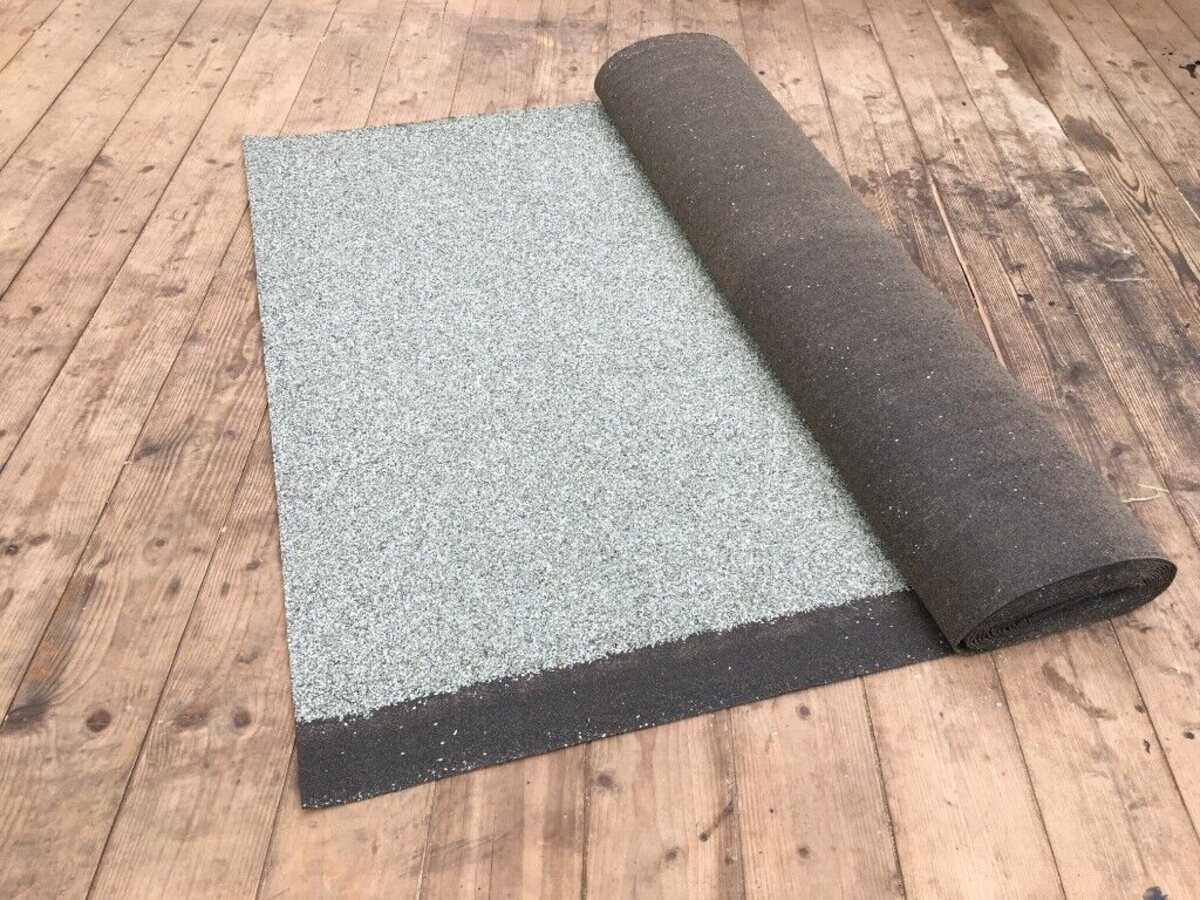
Following the installation of roof sheathing, the placement of underlayment further fortifies the dormer's defense against moisture and enhances its weatherproofing. The underlayment acts as a protective barrier, shielding the interior of the shed dormer from water infiltration while allowing for ventilation to prevent moisture buildup within the roof structure.
Once the sheathing and underlayment are in place, the installation of shingles commences, culminating in the crowning touch that bestows the shed dormer with weather resistance and visual appeal. Careful attention is paid to the selection of shingle materials, styles, and colors to ensure cohesiveness with the existing roof and overall architectural aesthetic.
The precise laying of shingles demands skill and attention to detail, with a focus on achieving proper alignment, weatherproofing, and aesthetic harmony. Whether opting for traditional asphalt shingles, wood shakes, or other roofing materials, the installation process involves meticulous placement and secure fastening to create a durable and visually striking roof surface.
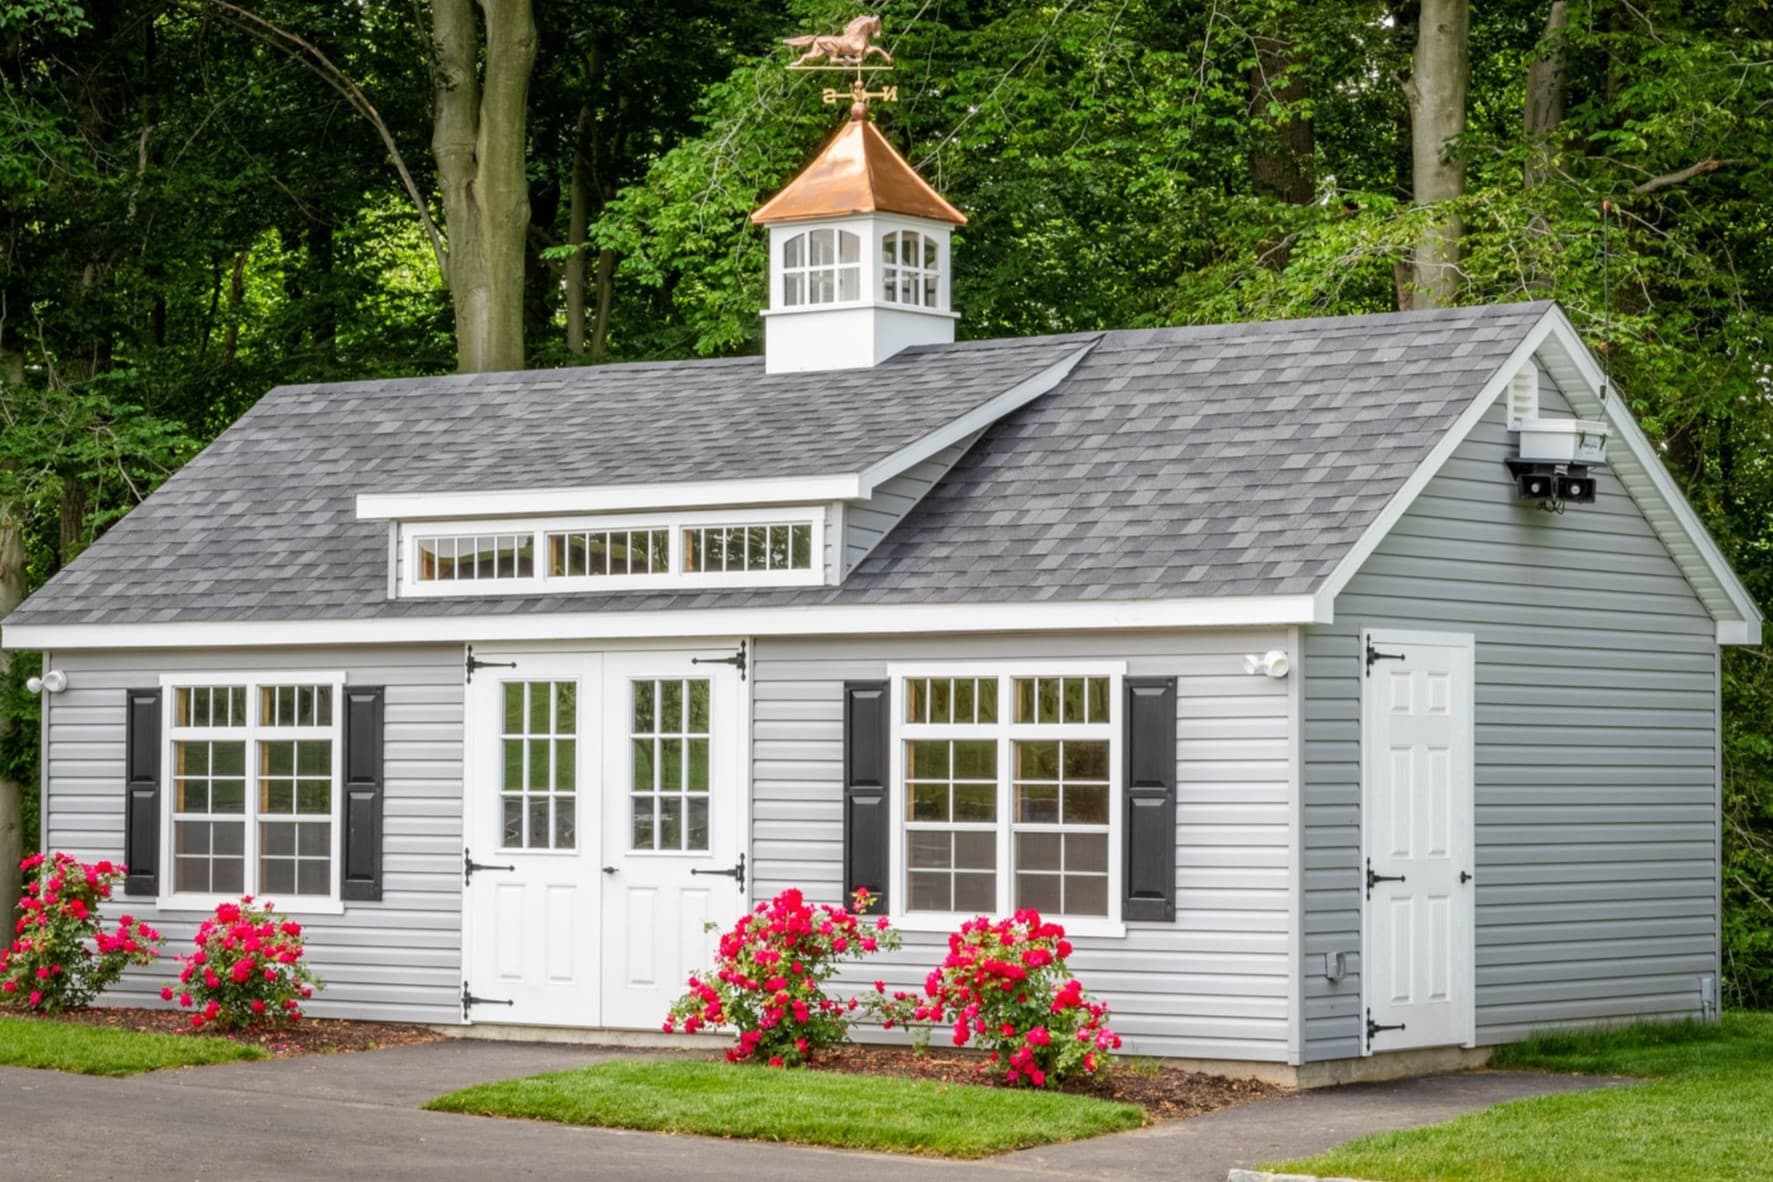
As the final shingle is secured in place, the shed dormer roof attains its completed form, exuding a seamless integration with the existing roofline while enhancing the overall charm and functionality of the home. The successful installation of roof sheathing and shingles marks a significant milestone in the construction of the shed dormer, bringing it one step closer to realizing its potential as a captivating and enduring architectural feature.
Read more: Dormer Style Ideas: Shed Dormer Windows
Finishing Touches and Considerations
As the construction of the shed dormer roof nears its culmination, attention turns to the finishing touches and essential considerations that elevate the dormer’s functionality, aesthetics, and longevity. From interior enhancements to exterior details, these final elements play a pivotal role in bringing the shed dormer to its full potential as a seamless and captivating addition to the home.
One of the key considerations in the final stages of the shed dormer construction is the integration of insulation and ventilation. Proper insulation ensures energy efficiency and climate control within the dormer space, enhancing comfort and reducing heating and cooling costs. Ventilation components, such as soffit and ridge vents, facilitate air circulation and moisture control, contributing to the long-term health of the dormer structure.
With the interior of the shed dormer taking shape, the addition of finishing materials, such as drywall, trim, and flooring, enhances the functionality and aesthetic appeal of the space. Thoughtful consideration of lighting fixtures, outlets, and other electrical elements further customizes the dormer to suit its intended purpose, whether as a cozy retreat, home office, or additional bedroom.
Exterior details, such as fascia, soffit, and trim, contribute to the cohesive integration of the shed dormer with the existing roofline and facade of the home. Careful attention to these elements ensures a harmonious transition between the dormer and the main structure, enhancing the overall visual impact and curb appeal of the property.
As the final touches are applied, it’s essential to consider the long-term maintenance and care of the shed dormer. Regular inspections, maintenance of roofing materials, and proactive measures to address any signs of wear or damage are essential for preserving the structural integrity and weather resistance of the dormer roof. By incorporating a maintenance plan into the overall considerations, homeowners can safeguard their investment and ensure the enduring beauty and functionality of the shed dormer.
With the completion of the finishing touches and considerations, the shed dormer emerges as a seamless and harmonious extension of the home, embodying the vision conceived during the planning and design phase. From its structural framework to its interior comfort and exterior charm, the shed dormer stands as a testament to meticulous craftsmanship and thoughtful design, enriching the living space and architectural character of the home.
Ready to take your building skills up a notch? If mastering the basics of roof framing sounds intriguing, our detailed guide on Roof Framing will surely help. For those curious about architectural styles, finding out exactly what Shed Dormer entails could spark new ideas for your next project. And if you're pondering a makeover for your space, our roundup of the Home Renovation best hardwood floors will provide the inspiration needed for a stunning transformation.
Frequently Asked Questions about How To Frame A Shed Dormer Roof
Was this page helpful?
At Storables.com, we guarantee accurate and reliable information. Our content, validated by Expert Board Contributors, is crafted following stringent Editorial Policies. We're committed to providing you with well-researched, expert-backed insights for all your informational needs.


0 thoughts on “How To Frame A Shed Dormer Roof”