Home>Renovation & DIY>Home Renovation Guides>How To Build A Dormer
Home Renovation Guides
How To Build A Dormer
Modified: October 20, 2024
Learn how to build a dormer with our comprehensive home renovation guide. Get expert tips and advice for your next project. Ideal for DIY enthusiasts and homeowners.
(Many of the links in this article redirect to a specific reviewed product. Your purchase of these products through affiliate links helps to generate commission for Storables.com, at no extra cost. Learn more)
Introduction
Building a dormer is an exciting and rewarding home renovation project that can add both functionality and aesthetic appeal to your living space. Whether you're looking to create additional headroom, increase natural light, or enhance the architectural charm of your home, a well-designed dormer can make a significant difference. This comprehensive guide will walk you through the step-by-step process of constructing a dormer, from initial planning to the finishing touches.
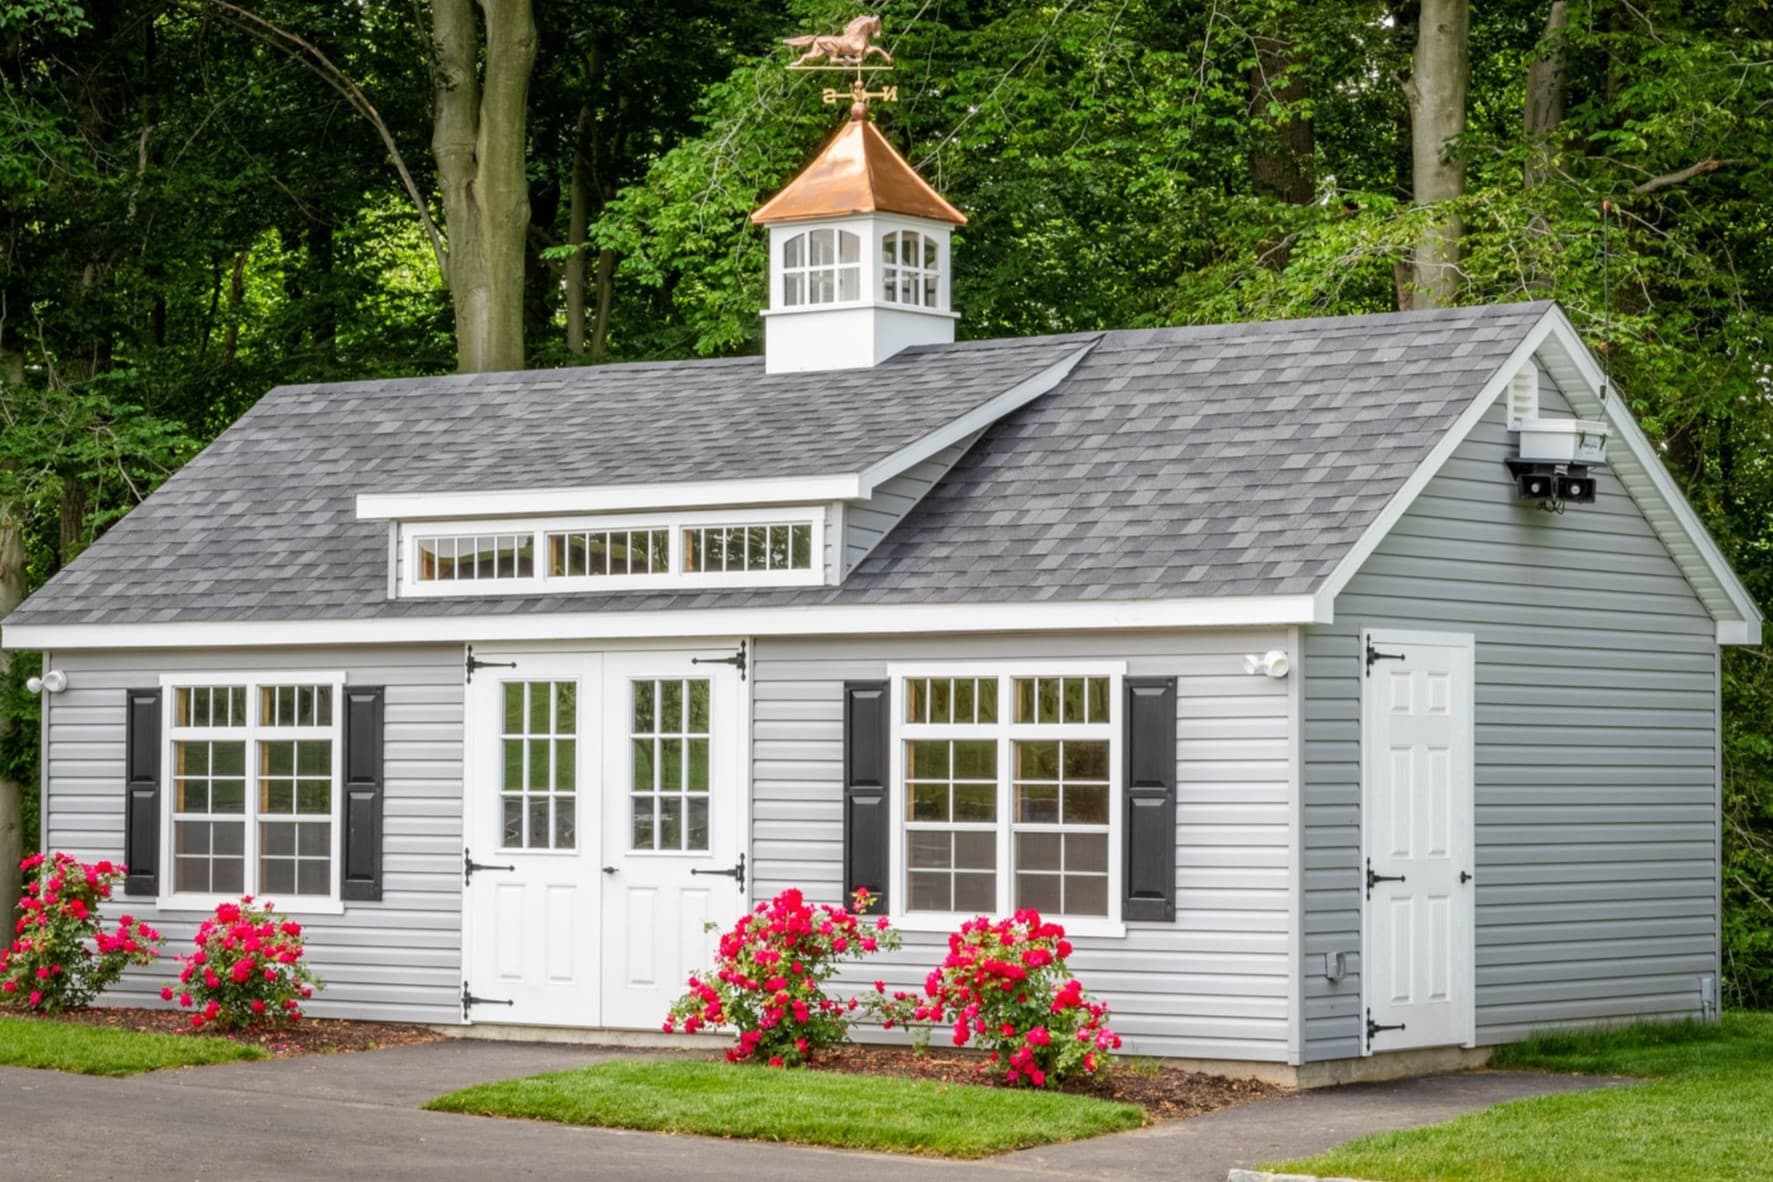
A dormer is a structural element that protrudes from the slope of a roof, typically containing a window. It not only adds character to a home's exterior but also creates valuable interior space, making it a popular choice for homeowners seeking to expand their living areas. Whether you envision a cozy reading nook, a spacious master suite, or a bright home office, a carefully crafted dormer can transform an underutilized attic into a functional and inviting part of your home.
Before embarking on this project, it's essential to familiarize yourself with the local building codes and regulations, as they may dictate the size, placement, and design of the dormer. Additionally, understanding the structural implications and ensuring proper waterproofing and insulation are crucial for a successful dormer installation. With the right knowledge and careful planning, you can embark on this endeavor with confidence and turn your vision into reality.
Throughout this guide, you'll learn about the key steps involved in building a dormer, including planning and design, obtaining permits, gathering materials and tools, framing the dormer, installing windows, roofing the dormer, and adding the finishing touches. Each step is essential to the overall success of the project, and by following this guide, you'll be well-equipped to tackle each phase with precision and skill.
By the end of this journey, you'll not only have a deeper understanding of the construction process but also the satisfaction of having created a beautiful and functional addition to your home. So, roll up your sleeves, gather your tools, and let's embark on this exciting venture of building a dormer that will elevate the charm and livability of your home.
Key Takeaways:
- Building a dormer adds space and charm to your home. From planning and permits to framing and finishing touches, it’s a rewarding project that requires careful attention to detail and creativity.
- Constructing a dormer involves steps like window installation, roofing, and interior finishing. Each phase contributes to creating a functional and visually appealing addition to your home.
Read more: Dormer Style Ideas: Shed Dormer Windows
Step 1: Planning and Design
The first and most crucial phase of building a dormer is meticulous planning and thoughtful design. This step sets the foundation for the entire project and significantly influences the outcome. Here's a detailed overview of the essential considerations during the planning and design phase:
Assessing Feasibility
Before diving into the design process, it's vital to assess the feasibility of adding a dormer to your home. Factors such as the existing roof structure, available space in the attic, and local building codes must be carefully evaluated. Additionally, consider the impact of the dormer on the overall aesthetics of your home and how it aligns with the existing architectural style.
Defining Purpose and Function
Clearly defining the purpose of the dormer is key to its successful design. Are you looking to create additional living space, enhance natural light, or improve ventilation? Understanding the intended function will guide the design process and ensure that the dormer fulfills your specific needs.
Design Considerations
The design of the dormer should seamlessly integrate with the existing roofline and complement the overall architecture of your home. Factors such as roof pitch, window size and placement, exterior cladding, and trim details must be carefully considered to achieve a harmonious and visually appealing result.
Read more: How To Shingle A Dormer
Structural and Safety Considerations
Engage a structural engineer or architect to assess the load-bearing capacity of the existing roof and ensure that the addition of a dormer does not compromise the structural integrity of your home. Safety considerations, such as proper waterproofing, insulation, and adequate ventilation, are paramount to the long-term durability and comfort of the dormer.
Obtaining Professional Guidance
Seeking professional guidance from architects, designers, or experienced contractors can provide valuable insights and ensure that the design aligns with building codes and regulations. Their expertise can help navigate potential challenges and streamline the design process.
Visualizing the End Result
Utilize design software, sketches, or architectural drawings to visualize the proposed dormer within the context of your home. This visual representation can help refine the design, make informed decisions, and ensure that the end result aligns with your vision.
By dedicating ample time to the planning and design phase, you'll lay a solid foundation for the successful construction of a dormer that not only enhances the functionality of your home but also adds to its aesthetic appeal.
Step 2: Obtaining Permits
Before commencing any construction work on your dormer, it is imperative to obtain the necessary permits and approvals from the local building authority. Building permits are mandated to ensure that the proposed dormer complies with safety standards, zoning regulations, and structural requirements. Here's a detailed overview of the essential steps involved in obtaining permits for your dormer construction:
-
Research Local Regulations: Begin by researching the specific building codes and regulations governing dormer construction in your locality. These regulations typically dictate aspects such as maximum allowable size, setback requirements, and architectural guidelines. Understanding these regulations is crucial for designing a dormer that meets the legal requirements.
-
Consult with Building Authority: Schedule a consultation with the local building authority or planning department to discuss your dormer construction plans. This meeting provides an opportunity to seek clarification on permit requirements, zoning restrictions, and any special considerations relevant to your property.
-
Prepare Permit Application: Compile all necessary documentation, including architectural drawings, structural plans, and specifications for the proposed dormer. The permit application package should clearly outline the scope of work, materials to be used, and adherence to relevant building codes.
-
Submit Permit Application: Once the permit application is complete, submit it to the local building authority along with the required fees. It's essential to ensure that the application is accurate and comprehensive to expedite the review process.
-
Review and Approval Process: The building authority will review the permit application to verify compliance with regulations and safety standards. This process may involve multiple departments, such as zoning, structural engineering, and fire safety. Upon successful review, the permit will be approved, granting authorization to proceed with the dormer construction.
-
Adhere to Permit Conditions: Upon receiving the permit, it is crucial to adhere to the specified conditions and timelines. Failure to comply with permit conditions can result in costly delays, fines, or the halting of construction activities.
-
Display Permit: Once the permit is issued, it must be prominently displayed at the construction site as per local regulations. This ensures that the authorized construction activities are easily identifiable to inspectors and passersby.
Obtaining permits for your dormer construction is a critical step that ensures compliance with legal requirements and safeguards the structural integrity of your home. By navigating the permit process diligently and proactively, you can embark on the construction phase with confidence, knowing that your dormer project is authorized and in accordance with the law.
Read more: What Is A Shed Dormer
Step 3: Gathering Materials and Tools
The successful construction of a dormer hinges on the availability of the right materials and tools. This pivotal step involves meticulous planning and procurement to ensure a seamless and efficient construction process. Here's a comprehensive guide to gathering the essential materials and tools for your dormer project:
Materials
-
Lumber: Select high-quality lumber for framing the dormer, including studs, rafters, and sheathing. The type and dimensions of lumber will depend on the design and structural requirements of the dormer.
-
Roofing Materials: Choose appropriate roofing materials such as shingles, metal roofing panels, or other preferred options. Ensure that the roofing material complements the existing roof and provides adequate weather protection.
-
Windows: Select windows that align with the design and functionality of the dormer. Consider factors such as size, style, energy efficiency, and compatibility with the overall architectural aesthetic.
-
Insulation: Invest in quality insulation to ensure energy efficiency and climate control within the dormer space. Proper insulation is crucial for maintaining comfortable indoor temperatures and reducing energy costs.
-
Exterior Cladding: Determine the exterior cladding material, whether it's siding, stucco, or another option. The chosen cladding should harmonize with the existing exterior of the home and withstand environmental elements.
-
Fasteners and Hardware: Stock up on an assortment of nails, screws, brackets, and other hardware required for assembling the dormer structure and securing various components.
-
Waterproofing and Flashing: Acquire waterproofing membranes, flashing materials, and sealants to safeguard the dormer against water infiltration and ensure long-term durability.
Tools
-
Power Tools: Essential power tools include a circular saw, cordless drill, nail gun, and reciprocating saw for efficient cutting, fastening, and general construction tasks.
-
Hand Tools: Gather a comprehensive set of hand tools, including hammers, screwdrivers, levels, chisels, and utility knives for precise and detailed work during the construction process.
-
Measuring and Layout Tools: Ensure the availability of measuring tapes, framing squares, chalk lines, and other layout tools to maintain accuracy and alignment throughout the construction.
-
Safety Equipment: Prioritize safety by obtaining personal protective equipment such as goggles, gloves, hard hats, and dust masks to mitigate potential hazards on the construction site.
-
Lifting and Support Equipment: Depending on the scale of the project, consider acquiring ladders, scaffolding, and hoisting equipment to facilitate safe access and maneuvering of materials.
-
Specialized Tools: If the dormer design involves specific features or architectural details, procure any specialized tools or equipment required for their installation and finishing.
By meticulously gathering the necessary materials and tools, you'll set the stage for a well-equipped and organized construction phase. This proactive approach ensures that you have everything at your disposal to execute the dormer project efficiently and with precision.
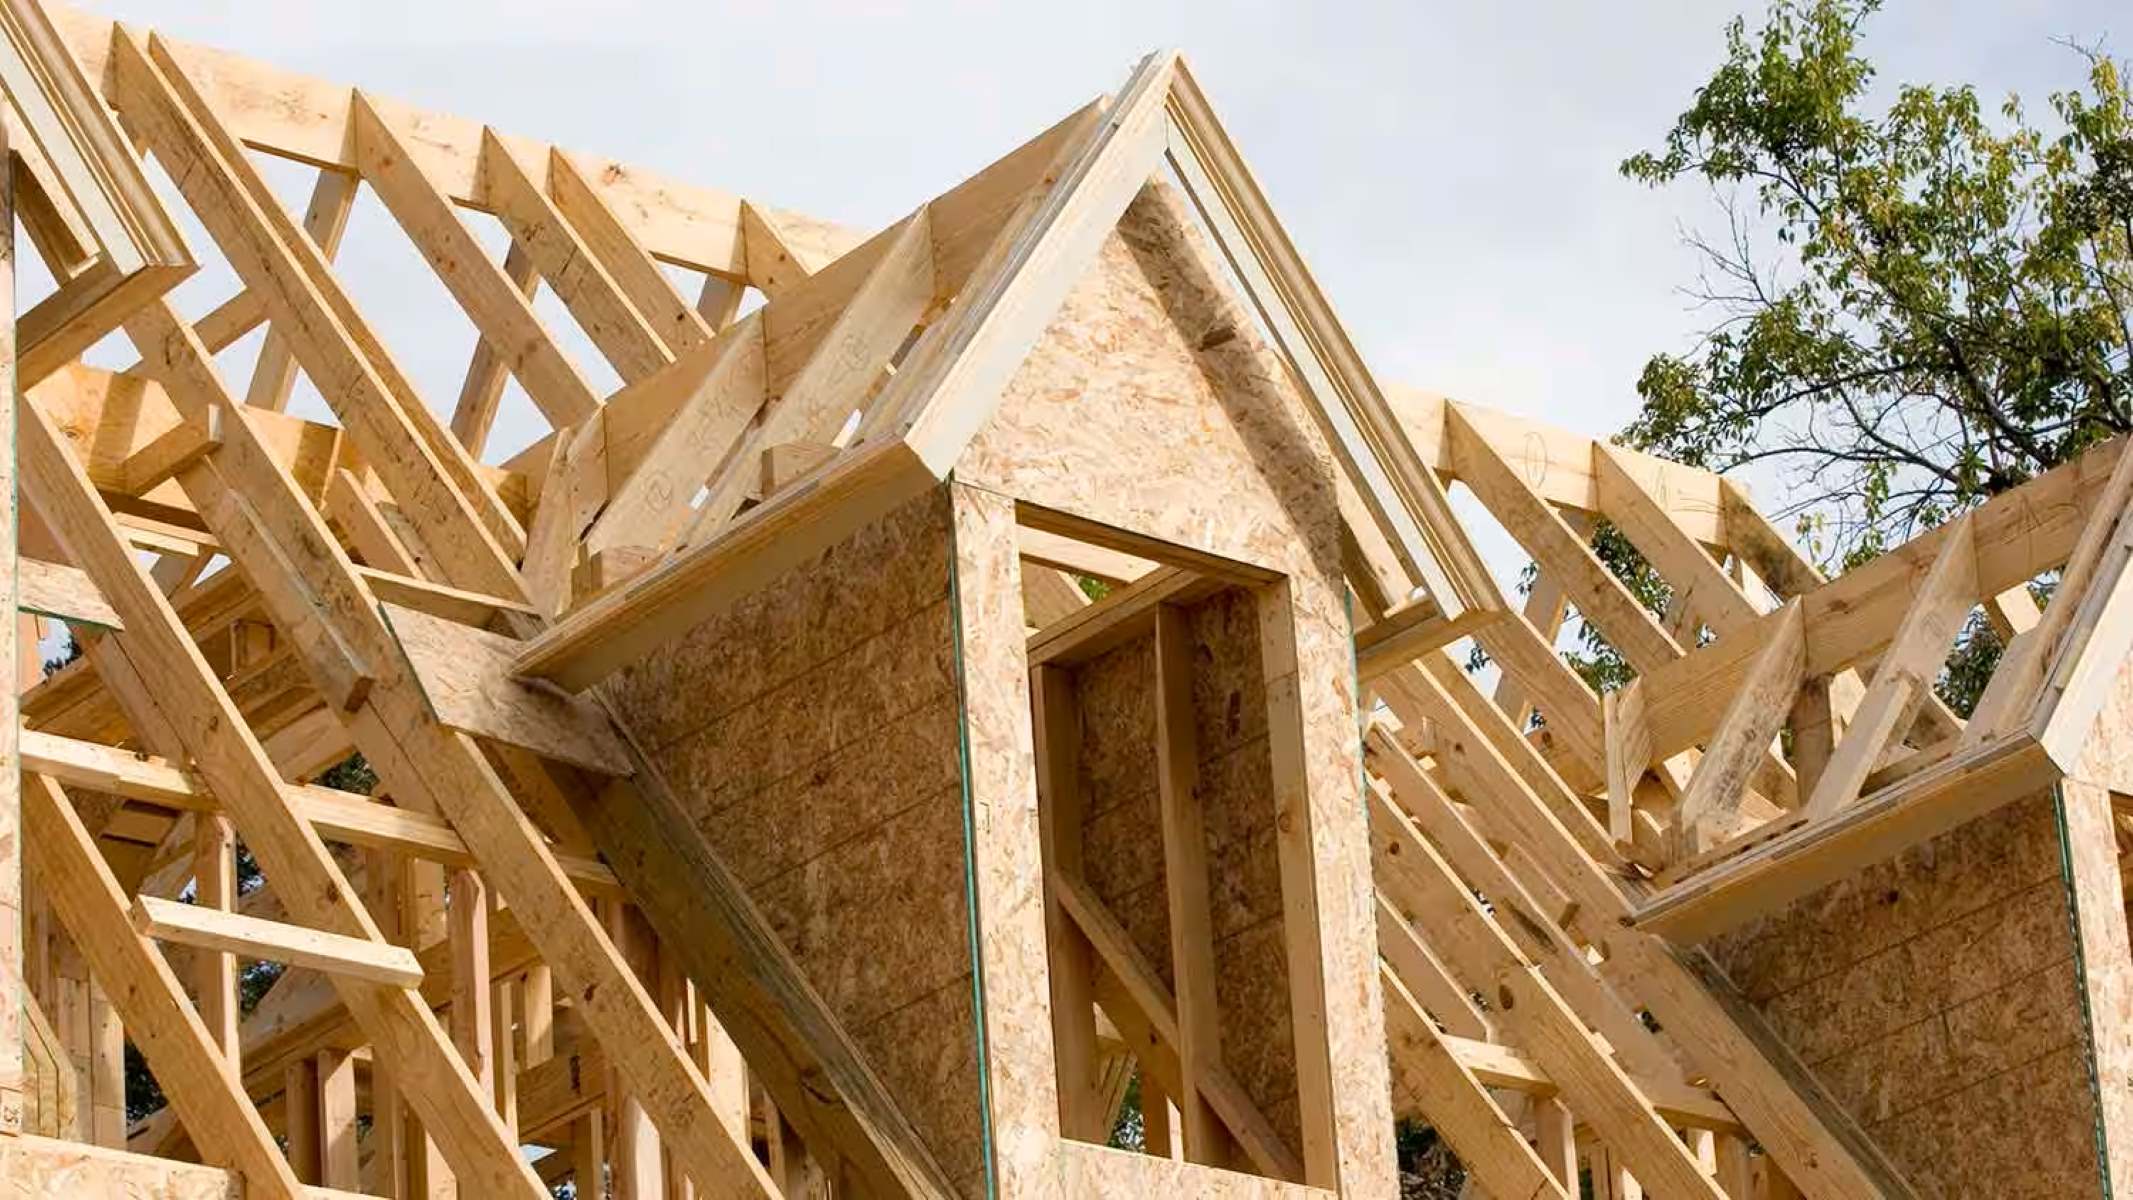
Step 4: Framing the Dormer
Framing the dormer is a critical phase that forms the structural skeleton of this architectural addition. The framing process involves creating the framework that defines the shape and support structure of the dormer. Here's a detailed overview of the essential steps involved in framing the dormer:
Read more: How To Design A House Dormer
1. Marking and Layout
Begin by marking the precise location of the dormer on the existing roof. Carefully transfer the dormer design measurements and layout from the architectural plans to the roof surface. This step ensures accuracy and alignment before any cutting or structural modifications take place.
2. Cutting and Framing
Using the marked layout as a guide, carefully cut and remove the sections of the existing roof to accommodate the dormer structure. Install the necessary framing members, including headers, rafters, and studs, to create the framework of the dormer. This process demands precision to ensure the structural integrity and load-bearing capacity of the dormer.
3. Structural Support
Integrate the dormer framing with the existing roof structure to provide seamless support and continuity. Properly secure the framing members to the adjacent roof components, ensuring a strong and stable connection. Attention to detail during this phase is crucial to prevent future issues related to structural stability.
4. Window Openings
If the dormer design includes windows, carefully frame the openings to accommodate the window units. Ensure that the window openings align with the specified dimensions and are properly supported within the framing structure. This step sets the stage for the seamless integration of windows into the dormer design.
Read more: How To Fix A Leak Around A Dormer
5. Roof Connection
Establish a secure connection between the dormer roof and the existing roof to create a watertight seal. Proper flashing and waterproofing techniques are essential to prevent water infiltration and ensure the long-term durability of the dormer. Attention to detail during this phase is crucial to prevent future issues related to water damage.
6. Insulation and Sheathing
Once the framing is in place, install insulation within the dormer walls and roof to enhance energy efficiency and climate control. Subsequently, apply sheathing to provide a solid base for the exterior cladding and roofing materials. Proper insulation and sheathing are vital for creating a comfortable and well-protected interior space within the dormer.
By meticulously executing the framing phase, you'll establish a robust and well-engineered framework for the dormer, setting the stage for the subsequent stages of window installation, roofing, and finishing touches. This foundational work forms the backbone of the dormer's structural integrity and ensures a successful and enduring architectural addition to your home.
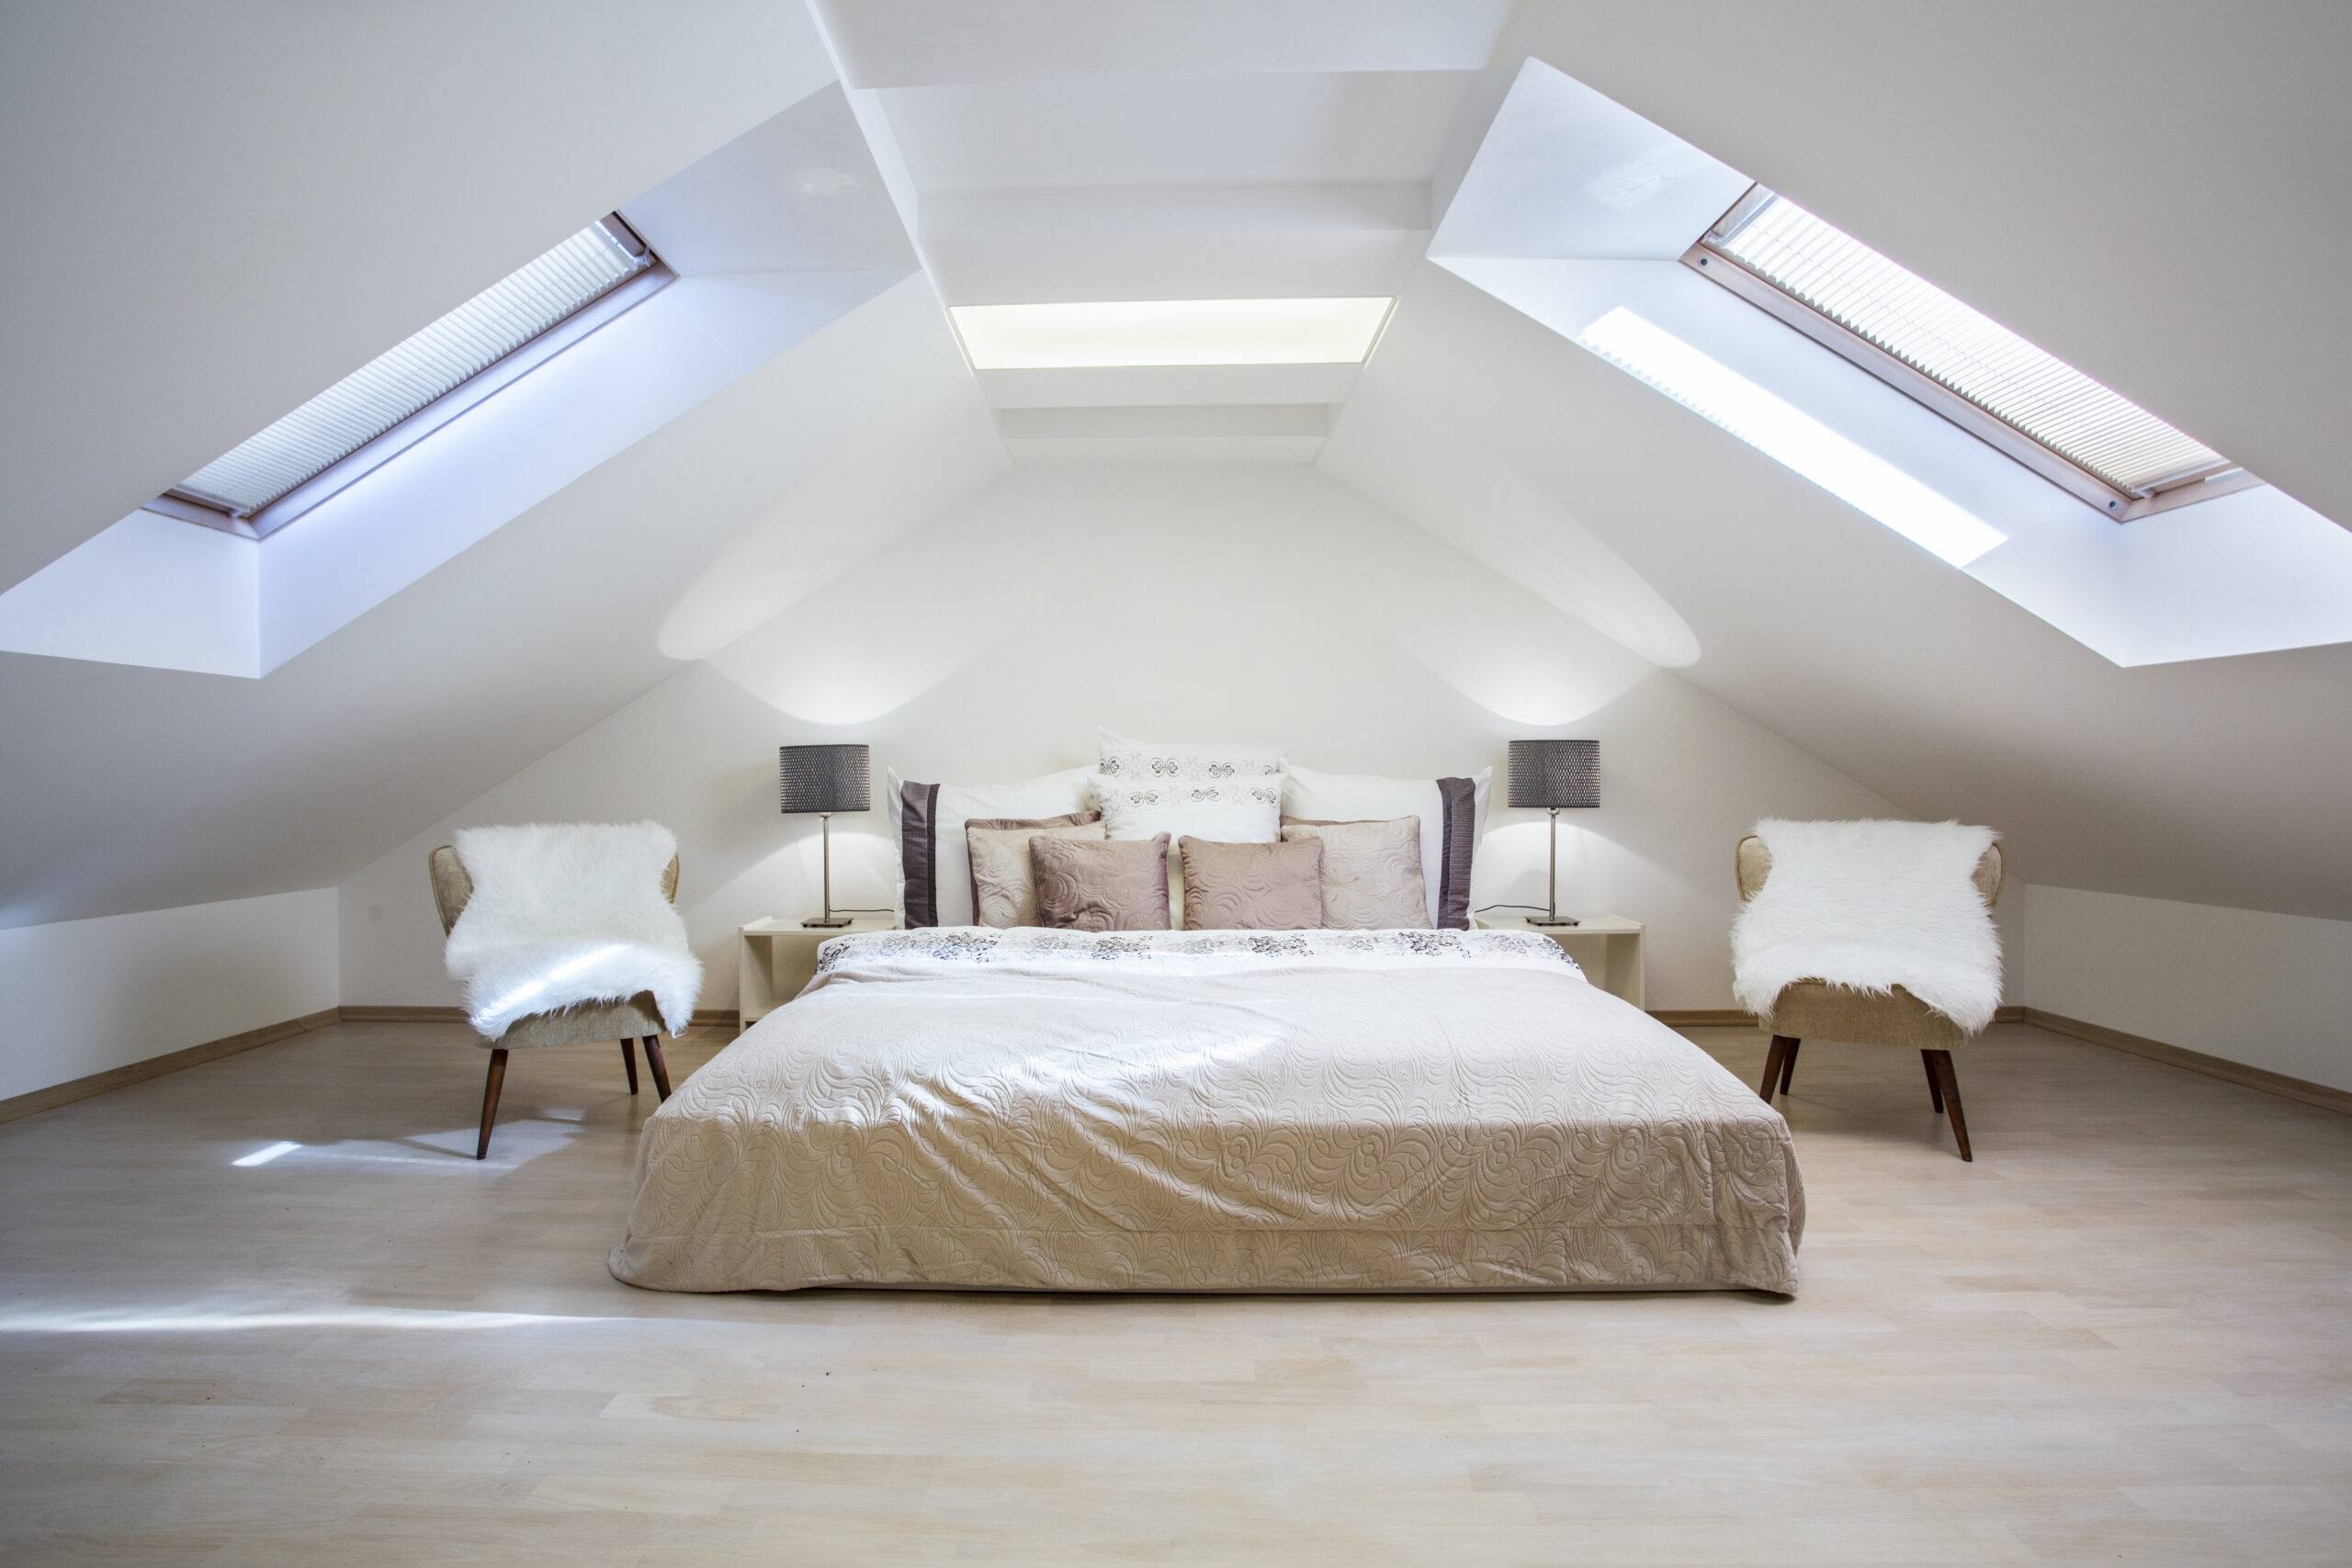
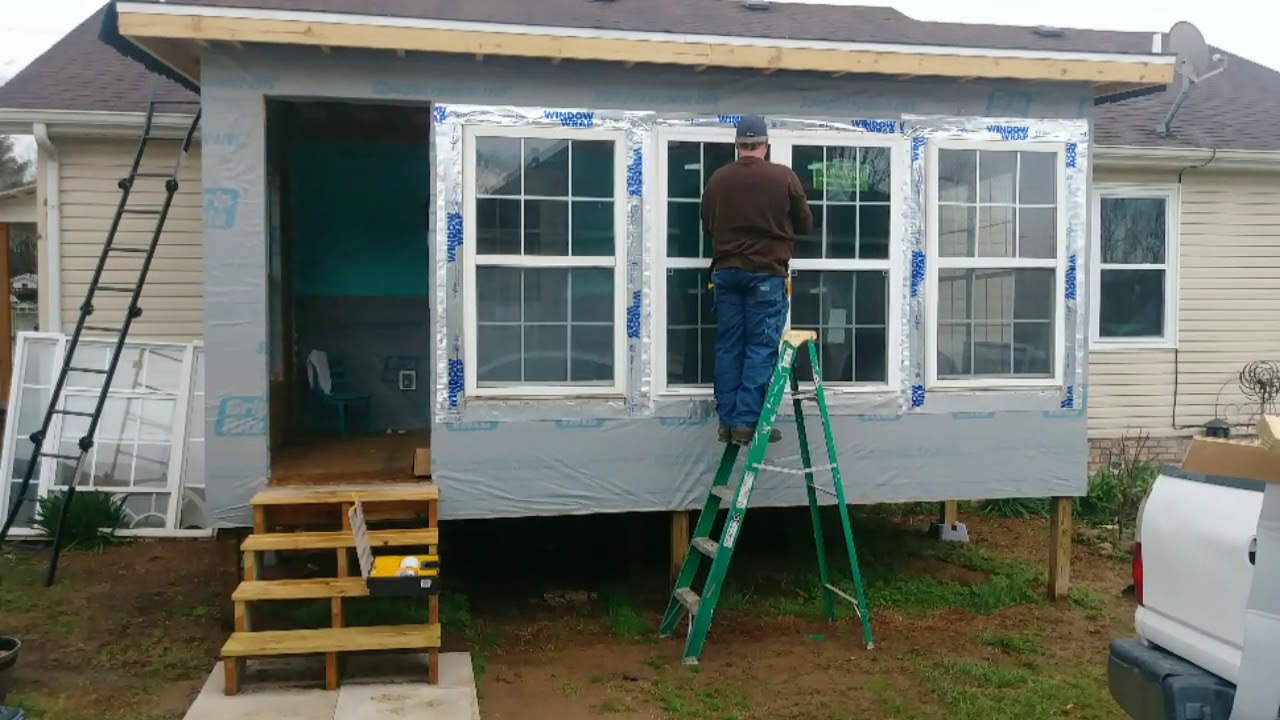
Step 5: Installing Windows
The installation of windows is a pivotal phase in the construction of a dormer, as it not only enhances the visual appeal of the structure but also introduces natural light and ventilation to the interior space. Careful attention to detail and precision is essential to ensure a seamless and weather-tight integration of windows into the dormer design. Here's a comprehensive guide to the essential steps involved in installing windows for your dormer:
1. Window Selection
Begin by selecting windows that align with the design, functionality, and aesthetic vision for the dormer. Consider factors such as the size, style, material, and energy efficiency of the windows. It's important to choose windows that complement the overall architectural style of your home and provide the desired level of natural light and ventilation.
Read more: How To Install Dormer Flashing
2. Window Placement
Based on the architectural plans and design specifications, determine the precise placement of the windows within the dormer structure. Carefully mark the window openings on the framed walls, ensuring accurate alignment and dimensions. This step is crucial to ensure that the windows are positioned optimally for both visual appeal and functional benefits.
3. Weatherproofing Preparation
Prior to installing the windows, prepare the window openings for weatherproofing. Apply a high-quality waterproof membrane around the perimeter of the window openings to create a protective barrier against moisture infiltration. Proper weatherproofing is essential to safeguard the interior space from water damage and ensure the longevity of the dormer structure.
4. Window Installation
Carefully position the windows within the prepared openings, ensuring a snug and secure fit. Utilize shims to level and align the windows, maintaining consistent spacing and ensuring squareness. Secure the windows in place using appropriate fasteners, following the manufacturer's guidelines for installation. Attention to detail during this phase is crucial to achieve a seamless and weather-tight window installation.
5. Insulation and Sealing
Once the windows are securely in place, insulate the gaps between the window frames and the surrounding openings to enhance energy efficiency and prevent air leakage. Apply a durable and flexible sealant around the exterior perimeter of the windows to create a watertight seal. Proper insulation and sealing contribute to the overall energy performance and weather resistance of the dormer.
Read more: How To Add A Dormer To An Existing Roof
6. Trim and Finishing
Complete the window installation by adding interior and exterior trim to provide a polished and cohesive look. The trim not only enhances the visual appeal of the windows but also serves to conceal the joints and create a seamless transition between the window frames and the surrounding walls. Choose trim materials that complement the overall design aesthetic of the dormer and the existing home architecture.
By meticulously following these steps, you'll achieve a successful and visually striking installation of windows within the dormer structure. The careful integration of windows not only enhances the functionality and aesthetics of the dormer but also contributes to the overall comfort and livability of the interior space.
Step 6: Roofing the Dormer
Roofing the dormer is a pivotal phase that demands precision, attention to detail, and a thorough understanding of roofing techniques. The successful integration of the dormer roof with the existing roof structure is essential to ensure weather resistance, structural integrity, and visual harmony. Here's a comprehensive guide to the essential steps involved in roofing the dormer:
1. Roof Framing Assessment
Begin by assessing the existing roof framing and determining the optimal method for seamlessly integrating the dormer roof. Evaluate the pitch, orientation, and material of the existing roof to plan the dormer roof's connection and transition. This assessment sets the foundation for a cohesive and structurally sound dormer roofing installation.
2. Dormer Roof Structure
Construct the framework for the dormer roof, ensuring that it aligns with the architectural plans and design specifications. Install rafters, ridge boards, and any necessary structural elements to create a sturdy and supportive framework for the dormer roof. Attention to precise measurements and alignment is crucial to ensure a seamless connection with the existing roof.
Read more: How To Frame A Shed Dormer Roof
3. Roofing Material Selection
Select roofing materials that complement the existing roof while meeting the functional and aesthetic requirements of the dormer. Whether opting for shingles, metal panels, or another roofing material, ensure that it harmonizes with the overall architectural style of the home. Consider factors such as durability, weather resistance, and visual appeal when choosing the roofing material.
4. Integration with Existing Roof
Carefully integrate the dormer roof with the existing roof, ensuring a watertight and visually cohesive connection. Proper flashing and sealing techniques are essential to prevent water infiltration and maintain the structural integrity of the dormer. Attention to detail during this phase is critical to achieving a seamless transition and weather-resistant junction.
5. Roofing Installation
Install the selected roofing material on the dormer roof, following industry best practices and manufacturer guidelines. Whether laying shingles, securing metal panels, or applying another roofing system, ensure proper fastening, alignment, and weatherproofing. Attention to detail during the installation process is paramount to achieving a durable and visually appealing dormer roof.
6. Finishing Touches
Complete the dormer roofing installation by adding trim, fascia, and soffits to create a polished and cohesive look. The finishing touches not only enhance the visual appeal of the dormer but also contribute to the overall weather resistance and architectural charm. Choose trim materials and details that harmonize with the existing roof and the overall design aesthetic of the home.
By meticulously following these steps, you'll achieve a successful and visually harmonious integration of the dormer roof with the existing roof structure. The careful execution of the roofing phase ensures that the dormer not only enhances the architectural charm of your home but also provides lasting weather protection and structural integrity.
Read more: What To Do With Fake Dormer Windows
Step 7: Finishing Touches
The finishing touches phase marks the culmination of the dormer construction process, where meticulous attention to detail and thoughtful design elements come together to elevate the visual appeal and functionality of the dormer. This phase encompasses a range of essential tasks that add polish, character, and practicality to the completed dormer structure.
1. Exterior Cladding and Trim
Carefully select and install the exterior cladding material, whether it's siding, stucco, or another preferred option, to harmonize with the existing exterior of the home. The choice of cladding should not only enhance the aesthetic appeal but also provide durable protection against the elements. Additionally, add trim details such as fascia, soffits, and corner boards to create a cohesive and visually appealing exterior finish.
2. Interior Finishing
Transform the interior space of the dormer into a functional and inviting area by adding finishing touches such as drywall, paint, and trim. Ensure that the interior design aligns with the overall aesthetic vision for the dormer, creating a seamless transition from the existing interior spaces. Consider factors such as color schemes, lighting, and flooring to enhance the ambiance and usability of the dormer.
3. Electrical and HVAC Integration
If the dormer space will be utilized for living or working, integrate electrical wiring, outlets, and lighting fixtures to ensure functionality and convenience. Additionally, consider the integration of heating, ventilation, and air conditioning (HVAC) elements to provide comfort and climate control within the dormer. Proper installation and integration of these systems are essential for the usability and livability of the space.
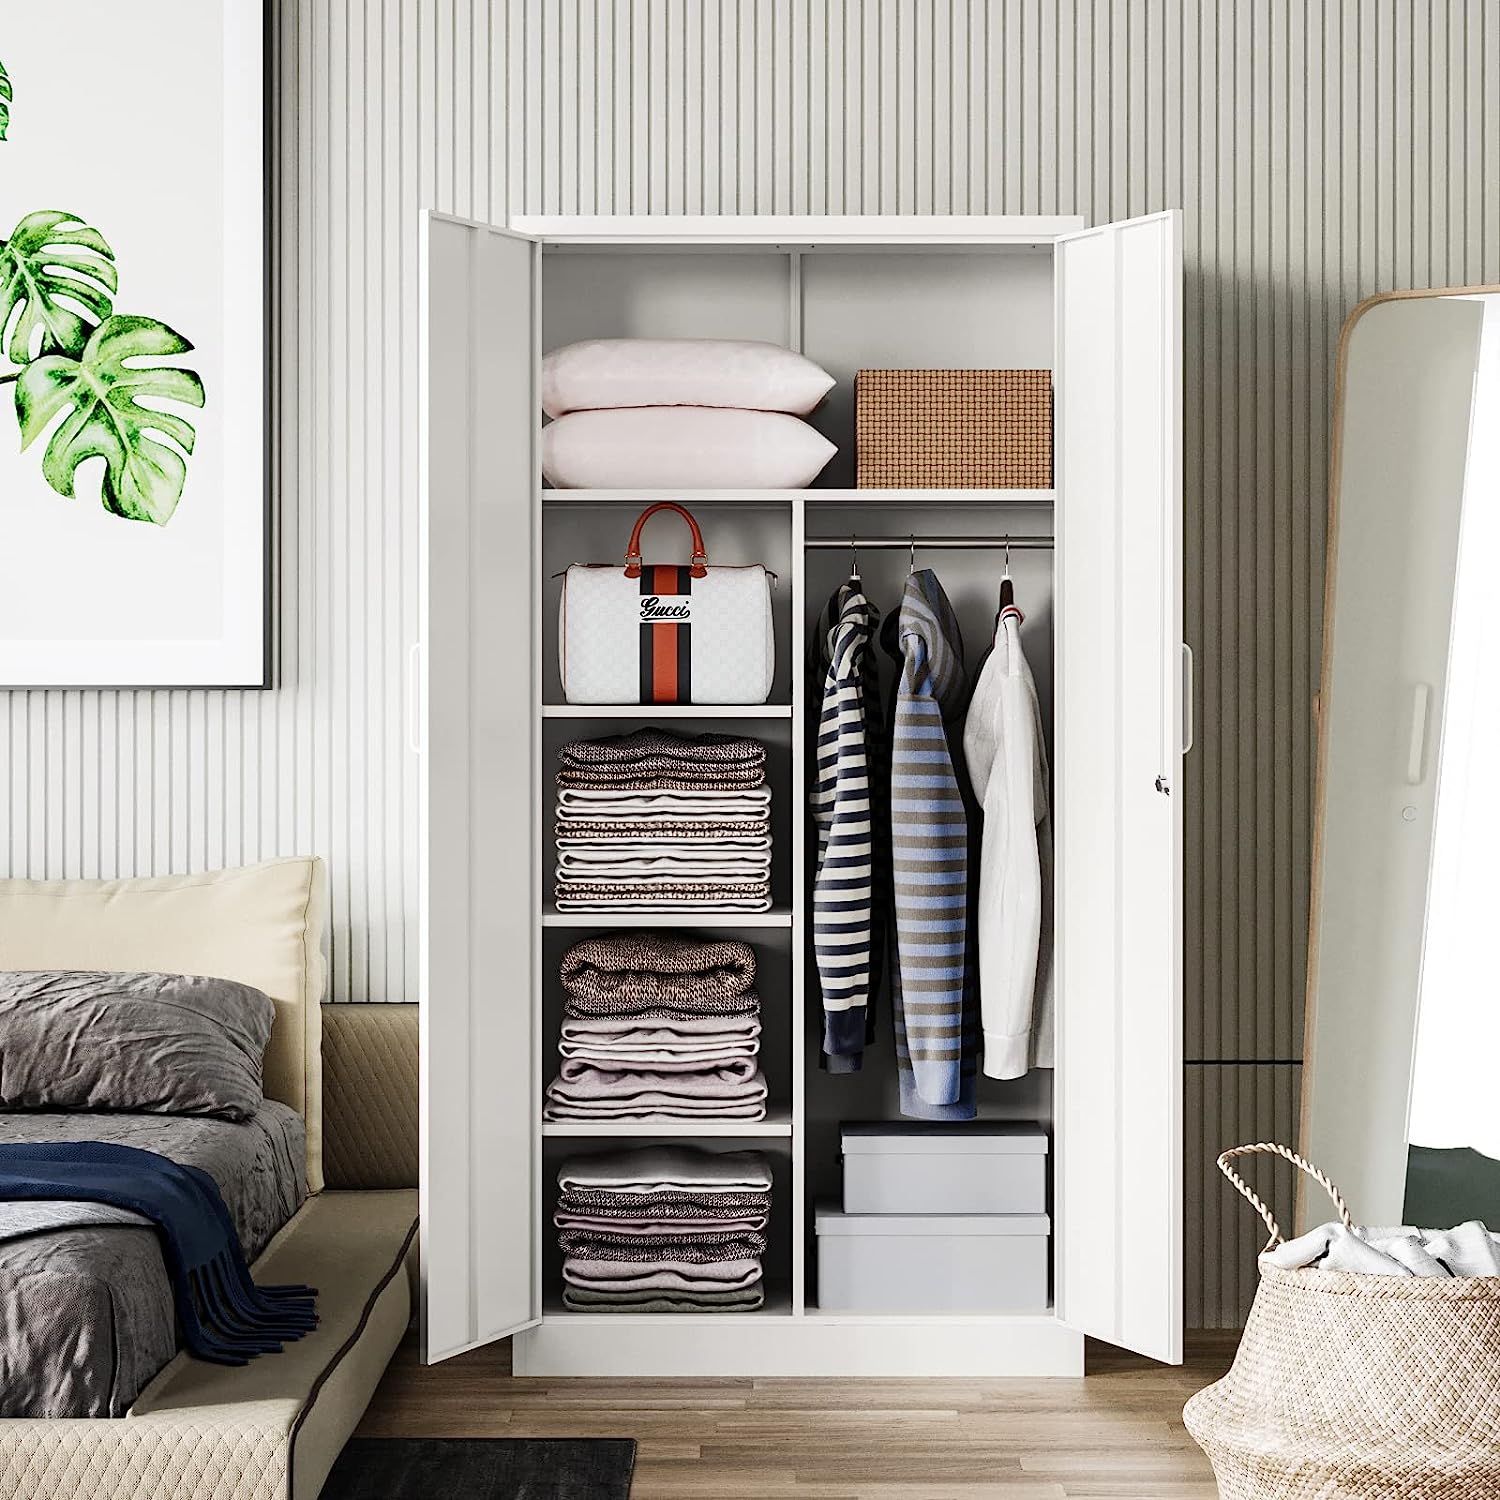
4. Decor and Furnishings
Add personal touches and furnishings to the dormer space to make it inviting and functional. Whether creating a cozy reading nook, a home office, or a relaxing retreat, carefully select decor elements, furniture, and accessories that maximize the usability and comfort of the space. Consider the placement of furniture, storage solutions, and decorative accents to optimize the functionality and visual appeal of the dormer.
5. Exterior Landscaping
Complement the newly constructed dormer with thoughtful landscaping and outdoor enhancements. Consider elements such as pathways, plantings, and outdoor lighting to create a cohesive and inviting exterior environment around the dormer. The integration of landscaping elements enhances the overall curb appeal and visual impact of the dormer within the context of the home's exterior.
By meticulously attending to these finishing touches, you'll bring the dormer construction project to its full realization, creating a seamless and visually striking addition to your home. The thoughtful integration of exterior and interior elements, along with practical considerations, ensures that the dormer not only enhances the architectural charm of your home but also provides a functional and inviting space for years to come.
Conclusion
In conclusion, the construction of a dormer is a transformative endeavor that not only enhances the architectural appeal of a home but also creates valuable additional space and functionality. Throughout the comprehensive process of planning, obtaining permits, gathering materials and tools, framing, installing windows, roofing, and adding finishing touches, the careful integration of design, structural considerations, and craftsmanship is essential.
By embarking on the journey of building a dormer, homeowners have the opportunity to elevate the livability and aesthetic charm of their properties. The thoughtful planning and design phase set the stage for a well-executed project, ensuring that the dormer seamlessly integrates with the existing architecture while fulfilling the intended purpose, whether it be creating a cozy reading nook, a spacious master suite, or a bright home office.
Obtaining permits and adhering to local regulations are crucial steps that not only ensure legal compliance but also guarantee the safety and structural integrity of the dormer. The meticulous gathering of materials and tools sets the foundation for a well-equipped construction phase, enabling homeowners to execute the project with precision and efficiency.
Framing the dormer, installing windows, roofing, and adding finishing touches are stages that demand attention to detail and skilled craftsmanship. The successful integration of these elements results in a dormer that not only enhances the visual appeal of the home but also provides a comfortable and functional living space.
As the finishing touches are added, the dormer becomes a seamless and harmonious extension of the home, offering a blend of practicality and aesthetic allure. Whether it's the exterior cladding, interior finishing, integration of electrical and HVAC elements, or the addition of decor and furnishings, each detail contributes to the overall ambiance and usability of the dormer.
Ultimately, the construction of a dormer represents a significant investment in the enhancement of a home. It is a testament to the homeowner's vision, attention to detail, and commitment to creating a space that not only meets practical needs but also enriches the overall living experience. The completed dormer stands as a testament to the fusion of creativity, craftsmanship, and thoughtful design, adding enduring value and charm to the home for years to come.
Frequently Asked Questions about How To Build A Dormer
Was this page helpful?
At Storables.com, we guarantee accurate and reliable information. Our content, validated by Expert Board Contributors, is crafted following stringent Editorial Policies. We're committed to providing you with well-researched, expert-backed insights for all your informational needs.

0 thoughts on “How To Build A Dormer”