Home>Gardening & Outdoor>Outdoor Structures>How To Build A Rafter For A Shed
Outdoor Structures
How To Build A Rafter For A Shed
Modified: February 26, 2024
Learn how to build a sturdy rafter for your outdoor shed with our step-by-step guide. Create a durable structure for your outdoor space.
(Many of the links in this article redirect to a specific reviewed product. Your purchase of these products through affiliate links helps to generate commission for Storables.com, at no extra cost. Learn more)
Introduction
When it comes to constructing a sturdy and reliable shed, understanding the intricacies of building a rafter is crucial. Rafters play a fundamental role in providing the structural framework for the roof, ensuring that it can withstand the elements and the test of time. In this comprehensive guide, we will delve into the step-by-step process of crafting a rafter for a shed, equipping you with the knowledge and skills needed to embark on this fulfilling DIY project.
Embarking on the journey of building a rafter for your shed not only adds a personal touch to the structure but also allows you to tailor it to your specific needs and preferences. Whether you're a seasoned DIY enthusiast or a novice looking to expand your construction prowess, this guide will walk you through the essential tools, materials, and techniques necessary to execute this task with precision and confidence.
From calculating the rafter length and pitch to cutting and assembling the pieces, each stage of the process contributes to the overall stability and functionality of the shed. By understanding the core principles of rafter construction and embracing the hands-on nature of this endeavor, you'll gain a deeper appreciation for the craftsmanship involved in creating a robust and enduring outdoor structure.
So, roll up your sleeves, gather your tools, and let's embark on this enriching journey of building a rafter for a shed that will stand as a testament to your dedication and skill. As we navigate through the intricacies of this project, you'll discover the gratifying experience of bringing a vision to life through meticulous planning, precise execution, and a dash of creativity. Let's dive in and unlock the art of crafting a rafter that not only shelters your belongings but also stands as a testament to your craftsmanship.
Key Takeaways:
- Crafting a rafter for a shed involves precise calculations, cutting, and assembly, showcasing dedication and skill while enhancing the shed’s resilience and visual appeal.
- Building a rafter for a shed not only shelters belongings but also embodies the transformative power of craftsmanship, empowering DIY enthusiasts with structural knowledge and construction techniques.
Read more: How To Build Rafters For A Shed
Tools and Materials Needed
Before embarking on the construction of a rafter for your shed, it’s essential to gather the necessary tools and materials to ensure a smooth and efficient building process. Here’s a comprehensive list to guide you through the preparation phase:
Tools:
- Measuring Tape: An essential tool for accurately measuring the dimensions of the rafter components.
- Pencil: Used for marking and outlining the cutting lines on the lumber.
- Circular Saw: Ideal for precisely cutting the lumber to the required dimensions.
- Square: A framing square is indispensable for ensuring the accuracy of the cuts and angles.
- Power Drill: Necessary for pre-drilling holes and attaching the rafter components securely.
- Level: Ensures that the rafters are installed evenly and in alignment with the shed's structure.
- Safety Gear: Including goggles, gloves, and a dust mask to prioritize safety during the construction process.
Materials:
- Lumber: Select high-quality, pressure-treated lumber for the rafters, ensuring durability and longevity.
- Nails or Screws: Choose corrosion-resistant fasteners to secure the rafter components firmly in place.
- Metal Brackets: Provides additional structural support at the connections between the rafters and the shed walls.
- Rafter Hangers: Essential for attaching the rafters to the ridge board and the top plates of the shed walls.
- Roofing Material: Depending on your design preferences, you may require shingles, metal roofing panels, or other roofing materials.
- Rafter Ties: Optional for reinforcing the connection between the rafters and the top plates, enhancing stability.
By ensuring that you have these tools and materials at your disposal, you’ll be well-prepared to commence the rafter construction process with confidence and precision. The seamless integration of these components will lay the foundation for a structurally sound and visually appealing shed roof, elevating both the functionality and aesthetic appeal of your outdoor space.
Calculating Rafter Length and Pitch
Before delving into the physical construction of the rafters, it’s crucial to calculate the rafter length and pitch to ensure that the roof structure fits seamlessly atop the shed walls and provides adequate support for the chosen roofing material. Here’s a step-by-step guide to help you determine these essential measurements:
Read more: How Build A Shed
Rafter Length:
To calculate the rafter length, you’ll need to consider the span of the roof, which is the horizontal distance from the outside edge of one shed wall to the opposite side. Additionally, the roof pitch, expressed as a ratio (e.g., 4:12), represents the incline of the roof. With these values in hand, you can employ the Pythagorean theorem to determine the rafter length accurately.
The formula for calculating the rafter length is as follows:
L = sqrt((span/2)^2 + (pitch * span)^2) + overhang
Where:
L = Rafter Length
Span = Horizontal distance between the shed walls
Pitch = Roof pitch ratio
Overhang = Desired overhang of the rafters beyond the shed walls
Rafter Pitch:
The roof pitch, often represented as a ratio, signifies the vertical rise for every 12 inches of horizontal run. For instance, a 4:12 pitch indicates that for every 12 inches of horizontal distance, the roof rises by 4 inches. Determining the desired pitch is crucial, as it influences the aesthetics, shedding of water and snow, and overall structural integrity of the roof.
By understanding and applying these fundamental calculations, you’ll be equipped to derive the precise rafter length and pitch, laying the groundwork for a well-proportioned and structurally resilient roof. These measurements serve as the cornerstone for the subsequent stages of rafter construction, guiding the cutting and assembly processes with accuracy and foresight.
With the rafter length and pitch accurately calculated, you’ll embark on the next phases of the project with clarity and confidence, knowing that the foundational elements of the roof structure align harmoniously with the dimensions and requirements of your shed.
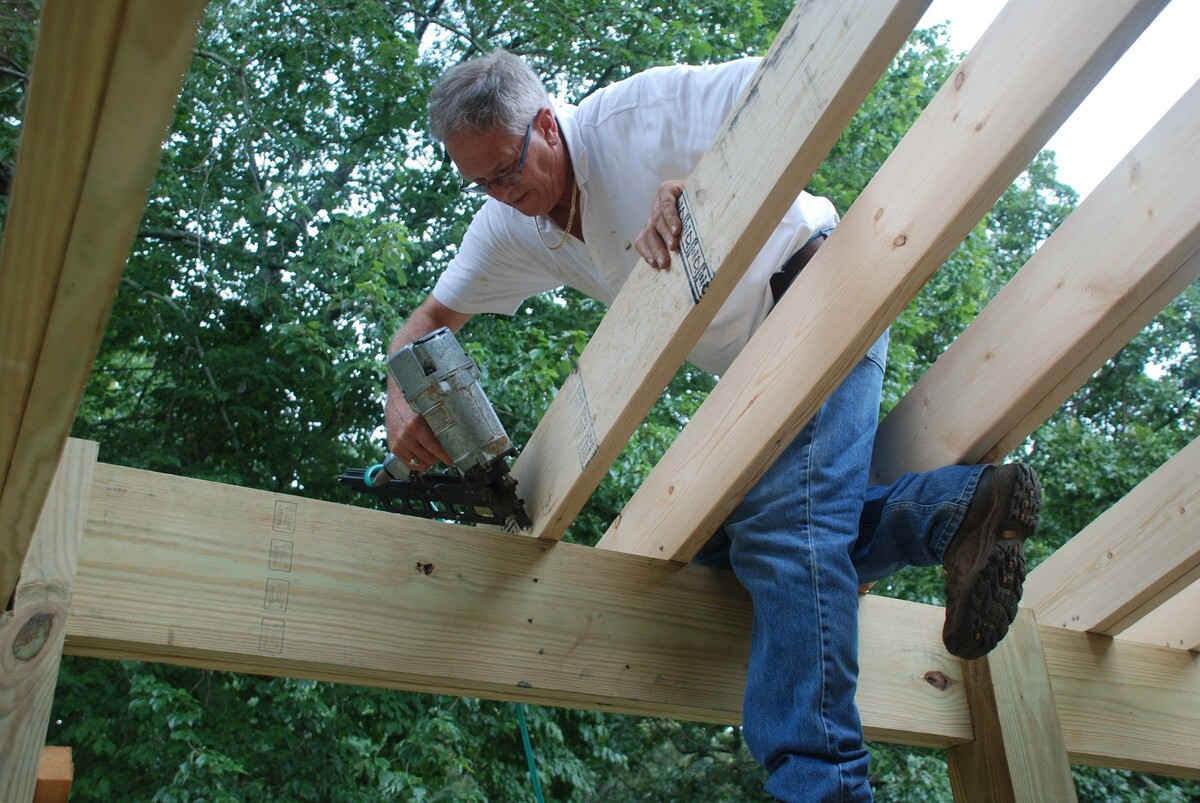
Cutting the Rafter Pieces
With the rafter length and pitch meticulously calculated, it’s time to transform raw lumber into the individual rafter components that will form the core of your shed’s roof structure. The cutting phase is a critical step that demands precision and attention to detail. Here’s a comprehensive guide to help you navigate this crucial stage of rafter construction:
Marking and Measuring:
Begin by marking the lumber according to the calculated rafter length and pitch. Use a measuring tape, pencil, and framing square to delineate the cutting lines, ensuring accuracy and consistency across all rafter pieces. Pay close attention to the angles and dimensions, as these elements directly influence the structural integrity and alignment of the roof framework.
Read more: How To Build A Shed
Cutting Techniques:
Utilize a circular saw to execute the precise cuts along the marked lines, following the designated angles and measurements. It’s advisable to perform a test fit of the first rafter piece to verify its alignment and fit within the shed’s framework. This step allows for adjustments before cutting the remaining rafter components, ensuring uniformity and cohesion in the roof structure.
Additional Considerations:
Depending on the design and architectural nuances of your shed, you may need to incorporate specific features such as bird’s mouth cuts or notches to facilitate secure connections between the rafters and the shed walls. These tailored adjustments contribute to the overall stability and functionality of the roof, accommodating the unique characteristics of your shed’s construction.
By approaching the cutting phase with meticulous planning and a keen eye for precision, you’ll transform raw lumber into purposeful rafter components that form the backbone of your shed’s roof. The seamless integration of these elements sets the stage for the subsequent assembly process, culminating in a robust and visually appealing roof structure that embodies your craftsmanship and attention to detail.
As you progress through the cutting phase, embrace the opportunity to refine and perfect each rafter piece, recognizing the transformative power of this stage in shaping the overall quality and resilience of your shed’s roof.
Assembling the Rafters
As the individual rafter pieces are meticulously crafted, the next pivotal phase in the construction process involves assembling these components into a cohesive framework that forms the basis of the shed’s roof structure. This stage demands precision, attention to detail, and a methodical approach to ensure the seamless integration of the rafters. Here’s a comprehensive guide to assist you in this transformative process:
Layout and Alignment:
Begin by laying out the rafter pieces on a flat, spacious surface, arranging them in the predetermined sequence and orientation. Pay close attention to the alignment and spacing between the rafters, ensuring uniformity and consistency in the layout. This preparatory step sets the stage for the seamless assembly of the rafters into a unified framework.
Read more: How To Build A Bar Shed
Connection and Reinforcement:
Utilize metal brackets, rafter ties, and fasteners to securely connect the rafter components, reinforcing their structural integrity and stability. Employ a power drill to pre-drill holes for the fasteners, ensuring precise and secure connections that withstand the rigors of varying weather conditions. Emphasize the importance of robust connections, as they form the backbone of the rafter framework’s resilience and load-bearing capacity.
Verification and Adjustment:
Throughout the assembly process, periodically verify the alignment and stability of the rafters, making any necessary adjustments to maintain uniformity and structural integrity. A level can be invaluable in ensuring that the assembled rafters are even and in alignment, laying the groundwork for a balanced and resilient roof framework.
Adherence to Building Codes:
It’s imperative to adhere to local building codes and regulations governing rafter construction, ensuring that the assembled framework meets the prescribed standards for safety and structural integrity. By aligning with these guidelines, you can instill confidence in the robustness and reliability of your shed’s roof, prioritizing the well-being of its occupants and the longevity of the structure.
As you progress through the assembly of the rafters, embrace the transformative power of this phase, recognizing that each connection and alignment contributes to the overall resilience and functionality of the shed’s roof. By meticulously assembling the rafters, you’re laying the foundation for a sheltering structure that embodies precision, craftsmanship, and enduring strength.
Attaching the Rafters to the Shed
With the rafters assembled into a cohesive framework, the pivotal stage of attaching them to the shed walls marks a significant leap towards realizing the structural integrity and functionality of the roof. This process demands meticulous planning, precise execution, and a keen understanding of the shed’s architectural nuances. Here’s a comprehensive guide to assist you in this transformative phase:
Read more: How To Build A Tuff Shed
Positioning and Alignment:
Begin by positioning the assembled rafters atop the shed walls, ensuring that they align seamlessly with the predetermined layout and overhang. Employ a level to verify that the rafters are evenly positioned and in alignment with the shed’s structure, setting the stage for a balanced and aesthetically pleasing roof framework.
Rafter Hangers and Secure Connections:
Utilize rafter hangers to securely attach the rafters to the ridge board and the top plates of the shed walls, reinforcing their connection and load-bearing capacity. Employ corrosion-resistant nails or screws to fasten the rafter hangers, prioritizing robust and enduring connections that withstand the test of time and varying weather conditions.
Structural Reinforcement:
Consider incorporating additional structural reinforcements, such as rafter ties, to further enhance the stability and resilience of the roof framework. These elements contribute to the overall integrity of the shed’s roof, fortifying its ability to withstand external forces and maintain its structural integrity over time.
Adhering to Building Codes:
It’s imperative to align with local building codes and regulations governing the attachment of rafters to shed structures, ensuring that the installation meets the prescribed standards for safety and structural resilience. By prioritizing adherence to these guidelines, you instill confidence in the robustness and reliability of the shed’s roof, prioritizing the well-being of its occupants and the longevity of the structure.
As you progress through the process of attaching the rafters to the shed, recognize the transformative impact of this phase, as each secure connection and alignment contributes to the overall stability and functionality of the shed’s roof. By meticulously attaching the rafters, you’re advancing towards the realization of a sheltering structure that embodies precision, craftsmanship, and enduring strength.
Read more: How To Build A Roof For A Shed
Conclusion
Congratulations on navigating the intricate and rewarding process of building a rafter for your shed! Throughout this comprehensive guide, we’ve embarked on a transformative journey, from the meticulous calculations of rafter length and pitch to the precise cutting, assembly, and attachment of the rafters to the shed. As you conclude this enriching endeavor, it’s essential to reflect on the significance of this undertaking and the enduring impact it has on your outdoor space.
By embracing the art of rafter construction, you’ve not only fortified the structural integrity of your shed but also infused it with a touch of craftsmanship and personalized ingenuity. Each phase of this project, from the initial measurements to the final attachment of the rafters, represents a testament to your dedication, precision, and unwavering commitment to creating a resilient and aesthetically pleasing outdoor structure.
As you stand back and admire the completed roof framework, adorned with securely attached rafters that embody precision and resilience, take pride in the transformative journey you’ve undertaken. The shed’s roof now stands as a testament to your craftsmanship, a sheltering structure that harmoniously integrates functionality and visual appeal, embodying the fruits of your labor and attention to detail.
Moreover, the skills and knowledge acquired throughout this process extend far beyond the construction of a rafter. They represent a gateway to further DIY endeavors, empowering you to embark on future projects with confidence and a deepened understanding of structural principles and construction techniques.
As you revel in the satisfaction of completing this project, remember that the shed’s roof, with its meticulously crafted rafters, not only shelters your belongings but also stands as a testament to your dedication and skill. It embodies the transformative power of hands-on craftsmanship and the gratifying experience of bringing a vision to life through meticulous planning, precise execution, and a dash of creativity.
So, as you bask in the fulfillment of completing this enriching journey, may the shed’s roof and its steadfast rafters serve as a constant reminder of your ability to transform raw materials into enduring, functional, and visually striking outdoor structures.
Frequently Asked Questions about How To Build A Rafter For A Shed
Was this page helpful?
At Storables.com, we guarantee accurate and reliable information. Our content, validated by Expert Board Contributors, is crafted following stringent Editorial Policies. We're committed to providing you with well-researched, expert-backed insights for all your informational needs.


0 thoughts on “How To Build A Rafter For A Shed”