Home>Renovation & DIY>Tools & Equipment>How To Clean Craftsman Screwdriver Handles

Tools & Equipment
How To Clean Craftsman Screwdriver Handles
Published: December 20, 2023
Learn how to effectively clean and maintain Craftsman screwdriver handles and other tools and equipment with our expert tips and techniques. Keep your tools in top condition for optimal performance.
(Many of the links in this article redirect to a specific reviewed product. Your purchase of these products through affiliate links helps to generate commission for Storables.com, at no extra cost. Learn more)
**
Introduction
**
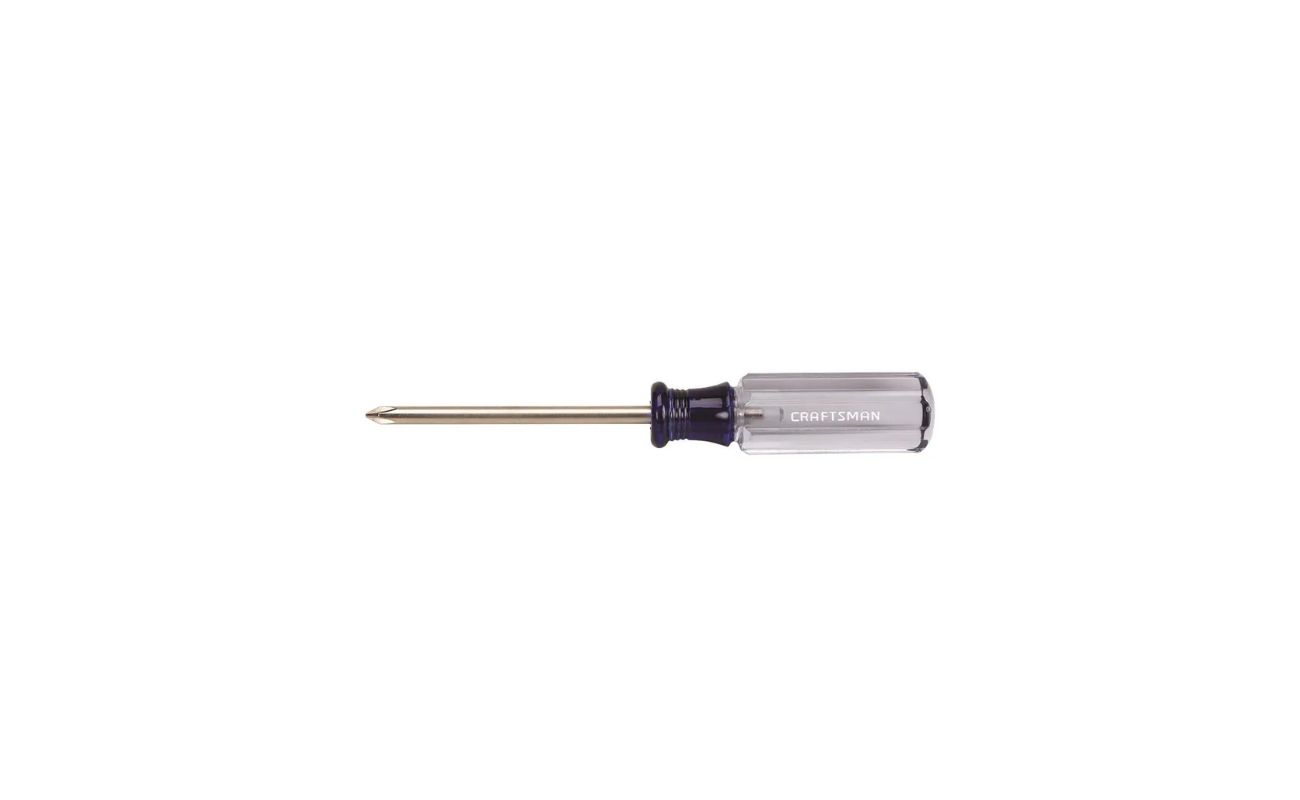
Craftsman screwdrivers are essential tools for various tasks, from household repairs to automotive maintenance. Over time, the handles of these screwdrivers can accumulate dirt, grease, and grime, making them less comfortable to use and diminishing their overall appearance. However, with the right approach, it's possible to restore the handles of Craftsman screwdrivers to their former glory.
In this guide, we'll explore a simple yet effective method for cleaning Craftsman screwdriver handles. By following these steps, you can ensure that your screwdrivers not only look pristine but also provide a comfortable grip for your next project. With just a few materials and a bit of effort, you can revitalize your trusty Craftsman screwdrivers and ensure they remain reliable tools in your arsenal. Let's dive into the process of rejuvenating these essential hand tools.
**
Key Takeaways:
- Keep your Craftsman screwdriver handles clean for a comfortable grip and professional appearance. Use mild detergent, warm water, and gentle scrubbing to remove dirt and grime, ensuring reliable and visually appealing tools.
- Regular cleaning and maintenance of your Craftsman screwdriver handles prolong their lifespan and enhance your work experience. Thorough drying and reassembly are essential for preserving functionality and ensuring long-term reliability.
Materials Needed
**
Before you begin the process of cleaning your Craftsman screwdriver handles, it’s essential to gather the necessary materials. Fortunately, the items required for this task are readily available and easy to acquire. Here’s what you’ll need:
- A mild detergent or dish soap
- Warm water
- Soft-bristled brush or sponge
- Clean, dry cloth
- Rubbing alcohol or mild solvent (optional)
These basic materials will enable you to effectively remove dirt, grease, and grime from the handles of your Craftsman screwdrivers. The mild detergent or dish soap, along with warm water, will serve as the primary cleaning agents, while a soft-bristled brush or sponge will aid in the gentle scrubbing process. Additionally, a clean, dry cloth will be used for drying the handles after cleaning. If the handles require more intensive cleaning, rubbing alcohol or a mild solvent can be utilized as an optional step.
With these materials at your disposal, you’ll be well-equipped to restore the cleanliness and functionality of your Craftsman screwdriver handles, ensuring that they remain reliable tools for your upcoming projects.
**
Step 1: Remove Dirt and Grime
**
Before initiating the cleaning process, it’s important to address the accumulation of dirt and grime on the handles of your Craftsman screwdrivers. Over time, these handles can become coated with various substances, affecting both their appearance and usability. To effectively remove this buildup, follow these steps:
- Assess the Condition: Examine the handles of your screwdrivers to determine the extent of dirt and grime buildup. This initial assessment will help you gauge the level of cleaning required and identify any specific areas that need attention.
- Loosen Stubborn Debris: For any stubborn debris or hardened grime, gently use a soft-bristled brush to loosen and dislodge the buildup. Be cautious not to apply excessive force, as this could potentially damage the handle’s surface.
- Wipe Away Loose Debris: Once the stubborn debris has been loosened, use a clean, dry cloth to wipe away the loosened dirt and grime. This step will help prepare the handles for the subsequent cleaning process.
By systematically addressing the dirt and grime buildup on the screwdriver handles, you’ll pave the way for a more thorough and effective cleaning process. This initial step sets the stage for the subsequent cleaning procedures, ensuring that the handles are primed for restoration.
**
To clean Craftsman screwdriver handles, use a mild soap and water solution to wipe down the handles. Avoid using harsh chemicals that can damage the handle material. Dry the handles thoroughly after cleaning to prevent rust or corrosion.
Step 2: Clean with Soap and Water
**
Once you’ve addressed the initial dirt and grime buildup on the handles of your Craftsman screwdrivers, it’s time to proceed with the primary cleaning process using soap and water. This step involves a gentle yet effective method to lift away remaining residue and restore the handles to their original cleanliness. Follow these guidelines to ensure a thorough cleaning:
- Prepare the Cleaning Solution: In a container, mix a small amount of mild detergent or dish soap with warm water to create a soapy cleaning solution. Ensure that the soap is thoroughly dissolved in the water to form a uniform mixture.
- Submerge the Handles: Submerge the handles of the screwdrivers in the soapy water solution, allowing them to soak for a few minutes. This soaking period will help loosen any remaining grime and facilitate easier cleaning.
- Scrub Gently: Using a soft-bristled brush or sponge, gently scrub the handles while they are submerged in the soapy water. Pay attention to areas with persistent residue, applying slightly more pressure as needed while avoiding abrasive scrubbing.
- Rinse Thoroughly: Once the handles have been scrubbed, remove them from the soapy water and rinse them thoroughly under clean, running water. Ensure that all traces of soap and loosened grime are completely washed away.
- Dry the Handles: Use a clean, dry cloth to thoroughly dry the handles, ensuring that no moisture remains. This step is crucial to prevent any potential rust or corrosion on the metal components of the screwdrivers.
By meticulously following these steps, you’ll effectively cleanse the handles of your Craftsman screwdrivers, removing embedded dirt and grime to restore their appearance and functionality. The gentle yet thorough approach using soap and water will leave the handles looking revitalized and ready for use in your next project.
**
Step 3: Dry and Reassemble
**
After completing the cleaning process with soap and water, it’s essential to ensure that the handles of your Craftsman screwdrivers are thoroughly dried and reassembled for optimal functionality. Proper drying and reassembly will help maintain the integrity of the screwdrivers while preventing any potential issues that may arise from moisture retention. Follow these steps to conclude the cleaning process:
- Air Dry the Handles: Allow the handles of the screwdrivers to air dry completely in a well-ventilated area. Ensure that they are placed on a clean, dry surface to facilitate thorough drying. This step is crucial to prevent any moisture-related issues and ensure that the handles are entirely free of residual water.
- Inspect for Residue: Once the handles are dry, inspect them closely to ensure that no residue or moisture remains. If any stubborn residue persists, consider gently wiping the handles with a clean, dry cloth to remove any lingering traces.
- Reassemble the Screwdrivers: Once the handles are confirmed to be dry and clean, reassemble the screwdrivers by securely attaching the cleaned handles to their respective shafts. Ensure that the reassembly is performed meticulously to guarantee the proper alignment and functionality of the screwdrivers.
- Store in a Suitable Location: After reassembly, store the Craftsman screwdrivers in a suitable location, such as a toolbox or designated storage area. Proper storage will help protect the cleaned handles and maintain their cleanliness until they are needed for future use.
By diligently following these final steps, you’ll complete the cleaning process for the handles of your Craftsman screwdrivers, ensuring that they are thoroughly dried, free of residue, and ready for reassembly and storage. This meticulous approach will help preserve the cleanliness and functionality of your essential hand tools, allowing you to tackle your next project with confidence.
**
Read more: How To Start Craftsman Leaf Blower
Conclusion
**
Revitalizing the handles of your Craftsman screwdrivers through a comprehensive cleaning process not only enhances their appearance but also ensures their continued reliability and comfort during use. By following the steps outlined in this guide, you’ve taken proactive measures to maintain the quality of your essential hand tools. Here’s a recap of the key points:
- Assessment and Preparation: The initial assessment and preparation phase allowed you to identify the extent of dirt and grime buildup, setting the stage for effective cleaning.
- Gentle Cleaning with Soap and Water: The use of a mild detergent or dish soap, combined with gentle scrubbing and thorough rinsing, facilitated the removal of embedded dirt and grime from the screwdriver handles.
- Thorough Drying and Reassembly: Proper drying and meticulous reassembly of the screwdrivers ensured that the handles were free of moisture and residue, ready for storage and future use.
By incorporating these cleaning practices into your maintenance routine, you’ll prolong the lifespan of your Craftsman screwdrivers while preserving their functionality and visual appeal. Additionally, the comfort and grip provided by clean handles contribute to a more enjoyable and efficient work experience, whether you’re tackling DIY projects or professional tasks.
Remember that regular cleaning and maintenance are key components of responsible tool ownership, and the effort invested in preserving your Craftsman screwdrivers will yield long-term benefits. With clean and well-maintained handles, your screwdrivers will continue to be reliable companions in your endeavors, ready to assist you in accomplishing tasks with precision and ease.
By following this guide, you’ve not only restored the cleanliness of your Craftsman screwdriver handles but also demonstrated a commitment to the care and maintenance of your valuable tools. With these rejuvenated handles, you’re now equipped to take on your next project with confidence and efficiency, knowing that your trusty screwdrivers are in optimal condition.
Frequently Asked Questions about How To Clean Craftsman Screwdriver Handles
Was this page helpful?
At Storables.com, we guarantee accurate and reliable information. Our content, validated by Expert Board Contributors, is crafted following stringent Editorial Policies. We're committed to providing you with well-researched, expert-backed insights for all your informational needs.




0 thoughts on “How To Clean Craftsman Screwdriver Handles”