Articles
How To Use A Craftsman Laser Level
Modified: October 27, 2024
Learn how to effectively use a Craftsman laser level with our informative articles. Find expert tips and step-by-step instructions to achieve accurate and precise leveling results.
(Many of the links in this article redirect to a specific reviewed product. Your purchase of these products through affiliate links helps to generate commission for Storables.com, at no extra cost. Learn more)
Introduction
Welcome to the world of precision and accuracy with the Craftsman Laser Level. Whether you’re a professional contractor or a DIY enthusiast, having a reliable laser level can greatly simplify your work and ensure that your measurements are spot-on. In this article, we’ll walk you through the process of using the Craftsman Laser Level effectively, from setting it up to making fine adjustments. So let’s dive in and discover how to harness the power of this incredible tool!
Key Takeaways:
- Precision and Ease of Use
Craftsman Laser Level offers precise measurements and easy setup, making it ideal for professionals and DIY enthusiasts. With features like self-leveling and selectable beam colors, it simplifies a wide range of tasks. - Troubleshooting and Maintenance
The tool’s troubleshooting tips and maintenance guidelines ensure optimal performance. From addressing weak laser beams to handling excessive vibration, users can maintain accuracy and overcome common issues effectively.
Read also: 10 Best Craftsman Laser Level for 2025
Overview of Craftsman Laser Level
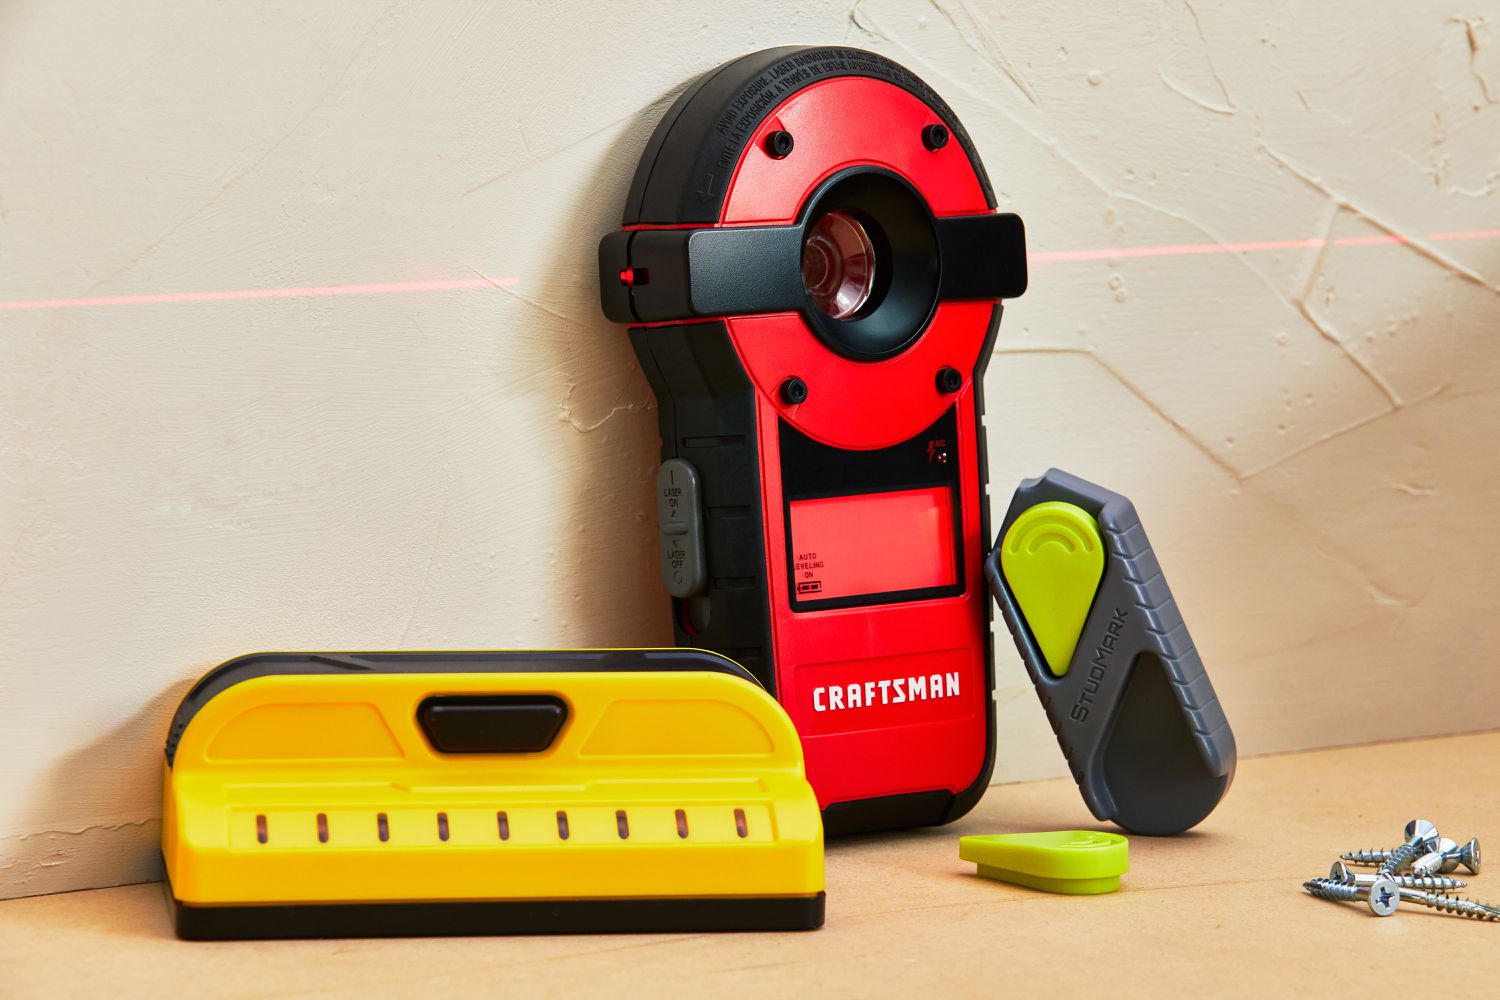
The Craftsman Laser Level is a versatile and feature-packed tool that helps you achieve precise leveling and alignment across various projects. It utilizes laser technology to project a straight and accurate beam onto surfaces, making it essential for tasks like hanging pictures, installing shelves, laying tiles, and more.
Craftsman offers a range of laser levels, each with its own unique features and capabilities. You can find models that offer both horizontal and vertical leveling functions, making them suitable for a wide range of applications. Some advanced models even provide additional features like self-leveling, selectable beam colors, and dual-axis slopes.
The Craftsman Laser Level typically comes in a compact and handheld design, making it portable and easy to use in different work environments. With a sturdy construction and durable materials, it is built to withstand the rigors of professional use while still being user-friendly for homeowners.
Equipped with precise laser technology, the Craftsman Laser Level is designed to deliver accurate measurements with minimal effort. Its laser beam projects a straight line that can extend over long distances, ensuring that your measurements are consistent and reliable.
Furthermore, Craftsman Laser Levels often come with mounting options, including clamps, magnets, or tripod compatibility, allowing for hands-free operation. This feature is especially useful when you need to work on large projects or align multiple points simultaneously.
With its user-friendly interface and intuitive controls, the Craftsman Laser Level makes it easy for users of all skill levels to achieve professional-level results. Whether you’re a seasoned contractor or a DIY enthusiast, this tool will become an indispensable part of your toolkit.
Now that you have an overview of the Craftsman Laser Level, let’s move on to how to prepare it for use in the next section.
Preparing the Laser Level for Use
Before you start using your Craftsman Laser Level, it’s important to properly prepare it for optimal performance. Follow these steps to ensure that your laser level is ready to deliver accurate results:
- Check the batteries: Ensure that your laser level has fresh batteries installed or is properly charged if it has a rechargeable battery. This will prevent any interruptions during your work and ensure that the laser beam remains consistent throughout.
- Inspect the laser lens: Take a moment to examine the laser lens and make sure it is clean and free from any dirt or debris. Any obstruction on the lens can affect the quality and accuracy of the laser beam projection.
- Calibrate the laser level: Some Craftsman Laser Level models may require calibration, especially if they have been stored for a long time or have been subjected to rough handling. Refer to the user manual for instructions on how to calibrate your specific model.
- Adjust the leveling vials: If your laser level features built-in vials for manual leveling, ensure that they are properly adjusted. These vials help you achieve initial leveling before activating the laser beam.
- Secure the mount: If you plan on using a tripod or any other mounting option, make sure it is securely attached to the laser level. This will prevent any wobbling or instability during operation, ensuring accurate measurements.
- Test the laser level: Before using the laser level on your actual project, it’s a good idea to do a quick test to ensure that it is functioning correctly. Turn on the laser beam and observe if it projects a straight and consistent line.
By completing these preparation steps, you’ll have a laser level that is ready to deliver accurate and reliable measurements. Now let’s move on to the next section, where we’ll guide you through the process of setting up the Craftsman Laser Level.
Setting up the Craftsman Laser Level
Properly setting up your Craftsman Laser Level is crucial to ensure accurate measurements and optimal performance. Follow these steps to set up your laser level effectively:
- Choose a suitable location: Find a stable and level surface to place your laser level. This can be a table, countertop, or any other flat surface that is free from vibrations and movement.
- Attach the laser level to a tripod: If your laser level is tripod-compatible, attach it securely to the tripod. Make sure the tripod is placed on a stable surface to prevent any wobbling or instability.
- Turn on the laser level: Once your laser level is set up, turn it on according to the manufacturer’s instructions. Most Craftsman Laser Levels have a power button that you need to press and hold to activate the laser beam.
- Level the laser level: Some models of Craftsman Laser Levels have built-in self-leveling capabilities, which means they automatically level themselves when positioned within a certain range. If your laser level requires manual leveling, use the bubble vials or other leveling mechanisms to adjust it until it is perfectly level.
- Align the laser beam: Once your laser level is level or self-leveled, adjust the position and direction of the laser beam to align it with your desired reference point. This can be a wall, a mark on the floor, or any other surface that you want to align with.
- Secure the laser level: Once the laser beam is aligned, ensure that your laser level is securely fastened or positioned to prevent any movement or misalignment during your work. You can use clamps, magnets, or other mounting options provided by your laser level.
By following these steps, you’ll have your Craftsman Laser Level properly set up and ready to assist you with your project. In the next sections, we’ll dive into how to utilize the horizontal and vertical leveling functions of the laser level. So let’s move on to the next section!
Using the Horizontal Leveling Function
The horizontal leveling function of the Craftsman Laser Level allows you to create straight and level lines horizontally, making it ideal for tasks such as installing cabinets, aligning tiles, or hanging picture frames. Here’s how to use the horizontal leveling function effectively:
- Position the laser level: Place your laser level in a suitable location, ensuring that it is stable and properly secured. This can be done by attaching it to a tripod or using the mounting options provided by your laser level.
- Turn on the horizontal leveling mode: Activate the horizontal leveling mode on your laser level, usually by pressing a specific button or selecting a mode from the control panel. Once activated, the laser level will project a horizontal line.
- Align the laser beam: Adjust the position and direction of the laser beam to align it with your desired reference point. This can be a mark on the wall, a guideline, or any other visual reference you want to work with.
- Make adjustments if needed: If the laser line is not perfectly level, you may need to make fine adjustments to the position or angle of the laser level. Refer to the user manual for instructions on how to fine-tune the horizontal leveling function of your specific Craftsman Laser Level.
- Utilize the laser line: Once the horizontal line is projected, you can use it as a guide for your project. For example, when hanging picture frames, simply align the top edge of the frame with the laser line to ensure it is perfectly level.
Remember to double-check your measurements and alignments before proceeding with any installations or markings. The horizontal leveling function of the Craftsman Laser Level ensures that your lines are straight and level, providing you with precise results for your projects.
Now let’s move on to the next section, where we’ll explore how to utilize the vertical leveling function of the Craftsman Laser Level.
When using a Craftsman laser level, make sure to calibrate it before each use to ensure accurate measurements. Follow the manufacturer’s instructions for calibration to achieve the best results.
Read more: How To Use A Laser Level
Using the Vertical Leveling Function
The vertical leveling function of the Craftsman Laser Level allows you to create straight and plumb lines vertically, making it perfect for tasks like installing vertical cabinets, aligning shelves, or mounting TV brackets. Here’s how to use the vertical leveling function effectively:
- Position the laser level: Place your laser level in a suitable location, ensuring it is stable and securely attached. Consider using a tripod or other mounting options provided by your laser level.
- Activate the vertical leveling mode: Turn on the vertical leveling mode on your Craftsman Laser Level. This is typically done by pressing a specific button or selecting the mode from the control panel. Once activated, the laser level will project a plumb line vertically.
- Align the laser beam: Adjust the laser beam’s position and direction to align it with your desired reference point. This can be a mark on the wall, a guideline, or any other visual reference you want to work with.
- Make fine adjustments if needed: If the laser line is not perfectly plumb, you may need to make slight adjustments to the position or angle of the laser level. Refer to the user manual for instructions specific to your Craftsman Laser Level model.
- Utilize the laser line: Once the vertical line is projected, it can serve as a guide for your project. For example, when installing shelves, align the edge of the shelf bracket with the laser line to ensure it is perfectly plumb.
Always double-check your measurements and alignments before proceeding with any installations or markings. The vertical leveling function of the Craftsman Laser Level ensures that your lines are straight and plumb, providing you with accurate results for your projects.
Now that you’ve learned how to use the vertical leveling function, let’s move on to the next section where we’ll explore how to make fine adjustments with the Craftsman Laser Level.
Making Fine Adjustments with the Craftsman Laser Level
While the Craftsman Laser Level is designed to provide accurate measurements, there may be instances where you need to make fine adjustments to ensure precise alignment. Here are some tips on how to make fine adjustments with your laser level:
- Using manual leveling mechanisms: Some Craftsman Laser Level models have built-in vials or knobs that allow for manual adjustments. These mechanisms can help you fine-tune the leveling of the laser level before activating the laser beam.
- Using the tilt mode: Certain models of Craftsman Laser Levels feature a tilt mode that allows you to adjust the angle of the laser beam. This can be helpful when you encounter slopes or need to project a line at a specific angle.
- Using micro-adjustment knobs: Advanced Craftsman Laser Level models may offer micro-adjustment knobs that enable you to make precise adjustments to the laser beam’s position and direction. These knobs allow for minute changes to ensure exact alignment.
- Utilizing the lock feature: Some laser levels have a lock feature that helps keep the laser beam in a fixed position. This is especially useful when you need to maintain a specific alignment for an extended period without the risk of accidental movement.
- Verifying measurements: After making any adjustments, it’s important to verify your measurements to ensure accuracy. Use a measuring tape or other appropriate tools to confirm that your laser level is providing the desired alignment.
By utilizing these fine adjustment techniques, you can achieve precise alignment and ensure that your projects are completed with accuracy. Don’t hesitate to consult the user manual specific to your Craftsman Laser Level model for guidance on making fine adjustments.
Now that you’ve learned how to fine-tune your laser level, let’s move on to the next section where we’ll explore additional features and tips for using the Craftsman Laser Level.
Additional Features and Tips for Using the Craftsman Laser Level
Along with its core functionality, the Craftsman Laser Level offers additional features and tips that can enhance your user experience and improve the accuracy of your measurements. Here are some notable features and tips to keep in mind:
- Self-leveling capability: Some Craftsman Laser Level models feature self-leveling functionality, which automatically adjusts the laser beam to ensure it is perfectly level or plumb. This feature eliminates the need for manual adjustments and saves time.
- Selectable beam colors: Certain models offer the option to choose different beam colors, such as red or green. Green beams are known to be more visible in bright environments, while red beams are effective in low-light conditions. Select the beam color that suits your specific project requirements.
- Dual-axis slopes: Advanced Craftsman Laser Level models may have the ability to project lines at both horizontal and vertical angles simultaneously. This is useful for tasks that involve slopes or alignment on multiple axes.
- Using laser glasses: In situations where the laser beam may be challenging to see, it is recommended to wear laser glasses specifically designed to enhance the visibility of the beam. This ensures that you can easily spot the laser line and make accurate alignments.
- Keeping the laser level clean and protected: Regularly clean the laser lens to ensure clear and accurate projections. Additionally, store the Craftsman Laser Level in a protective case or pouch to prevent damage during transportation and when not in use.
- Calibrating as needed: Depending on the frequency and intensity of use, it may be necessary to occasionally recalibrate your Craftsman Laser Level to maintain optimal accuracy. Refer to the user manual for instructions on how to calibrate your specific model.
By utilizing these additional features and following these tips, you can enhance the performance and accuracy of your Craftsman Laser Level. Remember, practice and familiarity with your laser level will improve your efficiency and overall results.
Now that you’re well-equipped with additional features and tips, let’s move on to the next section where we’ll discuss common issues that may arise with the Craftsman Laser Level and how to troubleshoot them.
Troubleshooting Common Issues with the Craftsman Laser Level
While the Craftsman Laser Level is a reliable tool, there may be times when you encounter common issues. Here are some troubleshooting tips for addressing these common issues:
- Weak laser beam: If the laser beam appears weak or faint, first check the batteries or power source to ensure they are fully charged or replaced. Additionally, clean the laser lens and ensure it is free from any dirt or debris that may obstruct the beam.
- Inconsistent leveling: If the laser level is not consistently leveling, check the positioning and stability of the laser level. Ensure it is securely attached or mounted and placed on a stable surface to prevent any wobbling or movement that may affect the leveling accuracy.
- Inaccurate measurements: If you are experiencing inaccurate measurements, double-check that the laser level is properly calibrated. If calibration is required, follow the instructions in the user manual to recalibrate the laser level.
- Laser beam not visible: In situations where the laser beam is difficult to see, try adjusting the beam color if your laser level offers that feature. Alternatively, use laser glasses specifically designed to enhance the visibility of the laser beam.
- Interference from ambient light: Bright ambient light can make it challenging to see the laser beam clearly. Move to a location with less ambient light or, if possible, use a laser target or laser detector that can help identify and locate the laser beam more easily.
- Excessive vibration: If your laser level is experiencing excessive vibration, ensure that it is securely mounted or attached to a stable surface. Consider using a tripod or other stabilization methods to minimize vibrations that may affect the accuracy of the laser beam.
If you have followed these troubleshooting tips and continue to experience issues with your Craftsman Laser Level, it’s recommended to consult the user manual or reach out to the manufacturer’s customer support for further assistance.
By addressing common issues and applying troubleshooting techniques, you’ll be able to overcome challenges and maintain the optimal performance of your Craftsman Laser Level.
Now that you have a better understanding of troubleshooting common issues, let’s conclude our guide to using the Craftsman Laser Level.
Read more: How To Use A Self Leveling Laser Level
Conclusion
Congratulations! You have now learned how to effectively use the Craftsman Laser Level and make precise measurements for a variety of projects. This versatile tool offers horizontal and vertical leveling functions, allowing you to create straight and level lines with ease. With additional features such as self-leveling, selectable beam colors, and micro-adjustments, you have the flexibility to tackle a wide range of tasks.
Remember to properly prepare and set up your laser level, checking batteries, cleaning the lens, and ensuring stable mounting. Making fine adjustments when necessary will guarantee that your measurements are accurate and align perfectly with your reference points. Take advantage of the additional features offered by the Craftsman Laser Level, such as self-leveling, dual-axis slopes, and using laser glasses to enhance visibility in challenging lighting conditions.
In the event that you encounter common issues like weak laser beams, inconsistent leveling, or inaccurate measurements, refer to the troubleshooting tips provided to resolve these problems. And if all else fails, don’t hesitate to consult the user manual or contact the manufacturer’s customer support for further assistance.
The Craftsman Laser Level is a reliable and valuable tool for both professionals and DIY enthusiasts. Its accuracy and ease of use will undoubtedly contribute to the success of your projects, whether it’s hanging pictures, installing shelves, or laying tiles. So go ahead and embark on your next project with confidence, knowing that the Craftsman Laser Level will help you achieve precise and professional results!
Happy measuring and leveling!
Frequently Asked Questions about How To Use A Craftsman Laser Level
Was this page helpful?
At Storables.com, we guarantee accurate and reliable information. Our content, validated by Expert Board Contributors, is crafted following stringent Editorial Policies. We're committed to providing you with well-researched, expert-backed insights for all your informational needs.


0 thoughts on “How To Use A Craftsman Laser Level”