Articles
How To Set Grade With A Laser Level
Modified: August 21, 2024
Learn how to set accurate grades with a laser level in this informative article. Find step-by-step instructions and valuable tips for achieving precision in your projects.
(Many of the links in this article redirect to a specific reviewed product. Your purchase of these products through affiliate links helps to generate commission for Storables.com, at no extra cost. Learn more)
Introduction
Welcome to this comprehensive guide on how to set grade with a laser level. Whether you’re a seasoned professional or a DIY enthusiast, using a laser level can greatly simplify the process of setting a precise grade. Whether you’re working on a landscaping project, constructing a driveway, or building a foundation, a laser level is an invaluable tool for ensuring accuracy and efficiency.
In this article, we’ll walk you through the step-by-step process of setting grade with a laser level. From choosing the right laser level to checking grade accuracy, we’ll cover everything you need to know to successfully complete your project. So let’s dive in and get started!
Key Takeaways:
- Choose the right laser level by considering type, range, self-leveling capability, durability, and budget to ensure accurate and reliable grade setting for your project.
- Calibrate, set up, adjust, and double-check your laser level to achieve precise grade alignment, providing a clear guide for future construction or landscaping work.
Read more: How To Use Laser Level For Grading
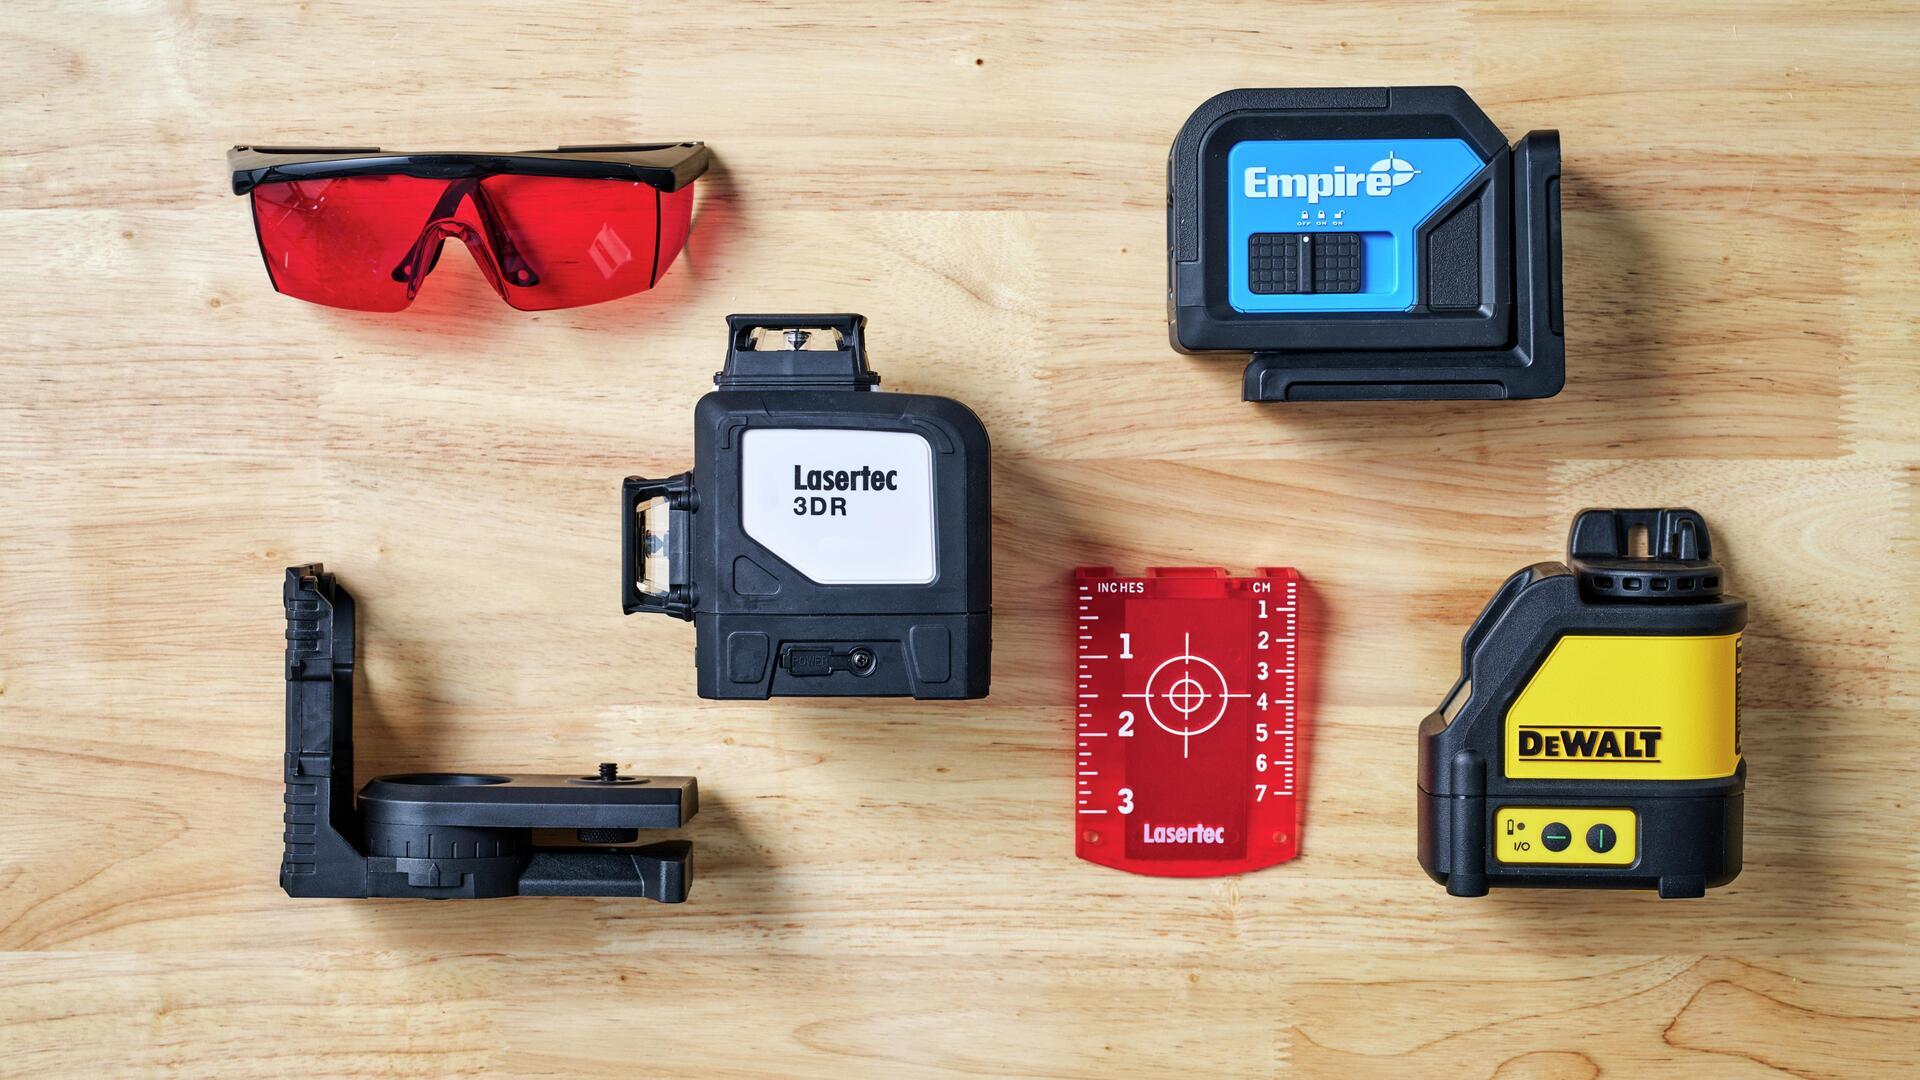
Step 1: Choose the Right Laser Level
Choosing the right laser level is crucial for achieving accurate and reliable results. There are several factors to consider when selecting a laser level:
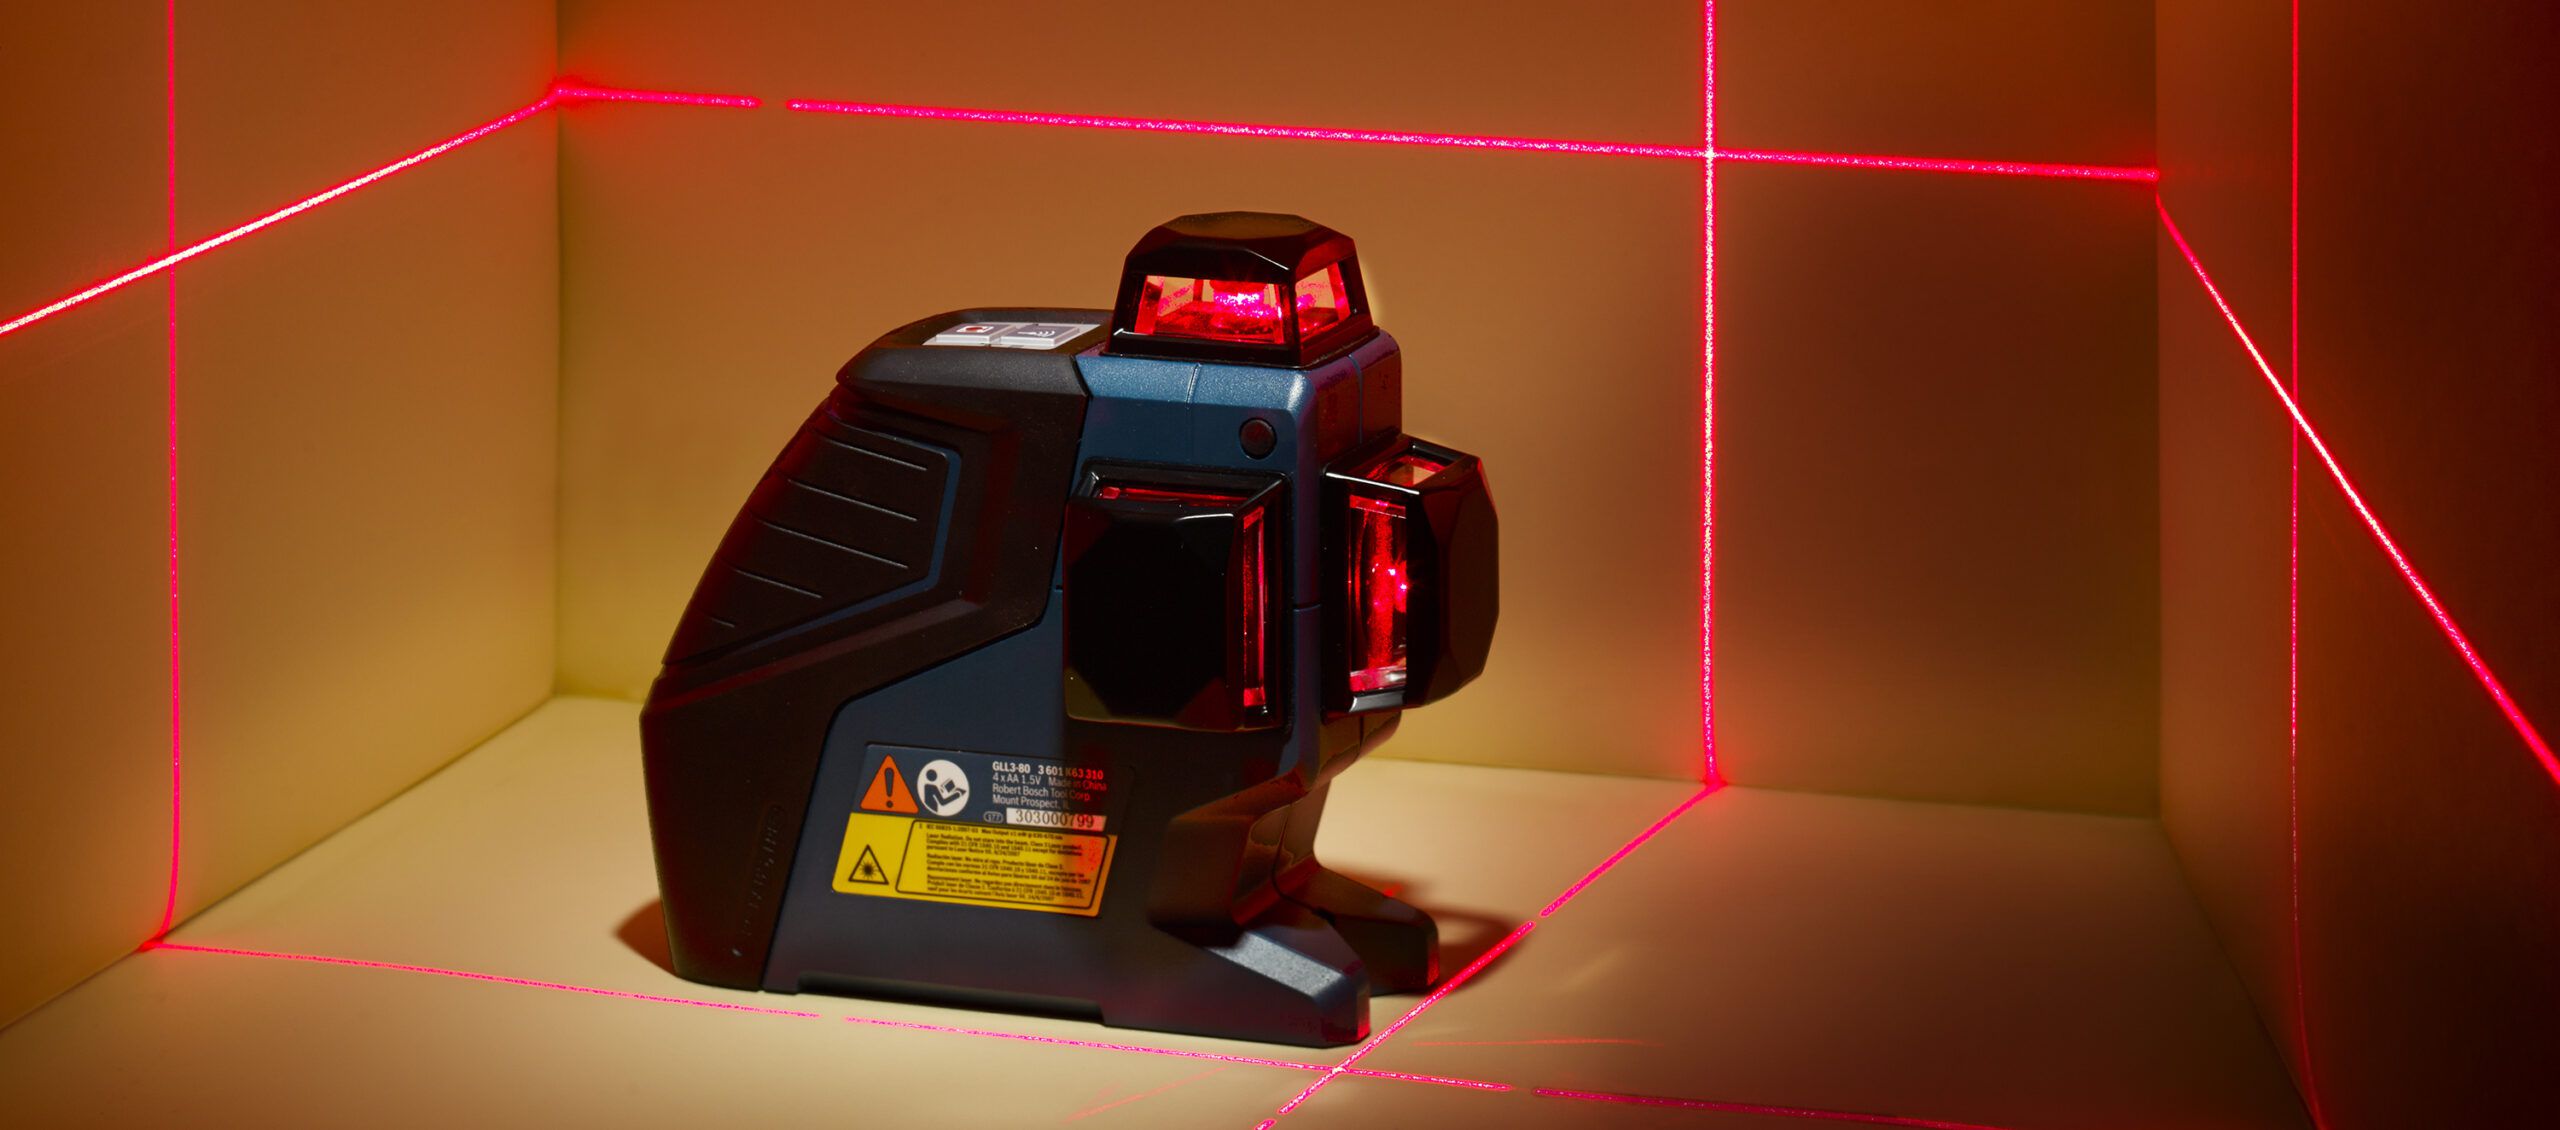
- Type of Laser Level: Laser levels come in various types, such as line laser levels, rotary laser levels, and dot laser levels. Line laser levels project a horizontal and vertical line, making them suitable for indoor applications. Rotary laser levels emit a rotating laser beam that covers a larger area, making them ideal for outdoor projects. Dot laser levels emit multiple laser dots, useful for tasks like tile alignment.
- Range and Accuracy: The range and accuracy of the laser level are essential considerations. The range determines how far the laser beam can project, while accuracy refers to how precise the leveling is. Consider the distance you need to cover and the level of precision required for your project.
- Self-Leveling Capability: Opt for a laser level with self-leveling capability as it automatically adjusts to ensure accurate readings. This feature saves time and effort, especially when working on uneven surfaces.
- Durability and Waterproofing: Depending on the nature of your project, durability and waterproofing may be important features to consider. Look for laser levels that are built to withstand harsh working conditions and have an IP rating for water resistance.
- Budget: Lastly, consider your budget. Laser levels range in price, so it’s important to find a balance between your requirements and affordability.
By considering these factors, you can select a laser level that best suits your needs and ensures accurate grade setting for your project.
Step 2: Calibrate the Laser Level
Calibrating the laser level is an essential step to ensure accurate readings and precise grade setting. Here’s how you can calibrate your laser level:
- Consult the User Manual: Start by reading the user manual provided with your laser level. Each model may have specific instructions for calibration, so familiarize yourself with the manufacturer’s guidelines.
- Set Up on a Stable Surface: Place the laser level on a stable surface, making sure it is level. This can be done by using a bubble level or built-in leveling mechanisms.
- Select the Calibration Method: Depending on your laser level, there may be different calibration methods available. Some laser levels have a manual calibration feature, while others have an automatic calibration process. Follow the instructions provided to select the appropriate calibration method.
- Activate the Calibration Process: Follow the steps outlined in the user manual to activate the calibration process. This may involve pressing specific buttons or following a sequence of actions.
- Observe the Calibration Process: Pay close attention to the laser level’s display or indicators during the calibration process. It may take a few seconds for the calibration to complete, and the laser level will typically emit a signal or change its display to indicate calibration success.
- Verify Calibration Accuracy: Once the calibration is complete, verify the accuracy of the laser level by checking the leveling indicators. Ensure that the bubble level or built-in leveling mechanisms indicate that the laser level is level.
By calibrating your laser level before use, you can ensure accurate measurements and precise grade setting throughout your project. It’s essential to follow the manufacturer’s instructions and guidelines to achieve the best results.
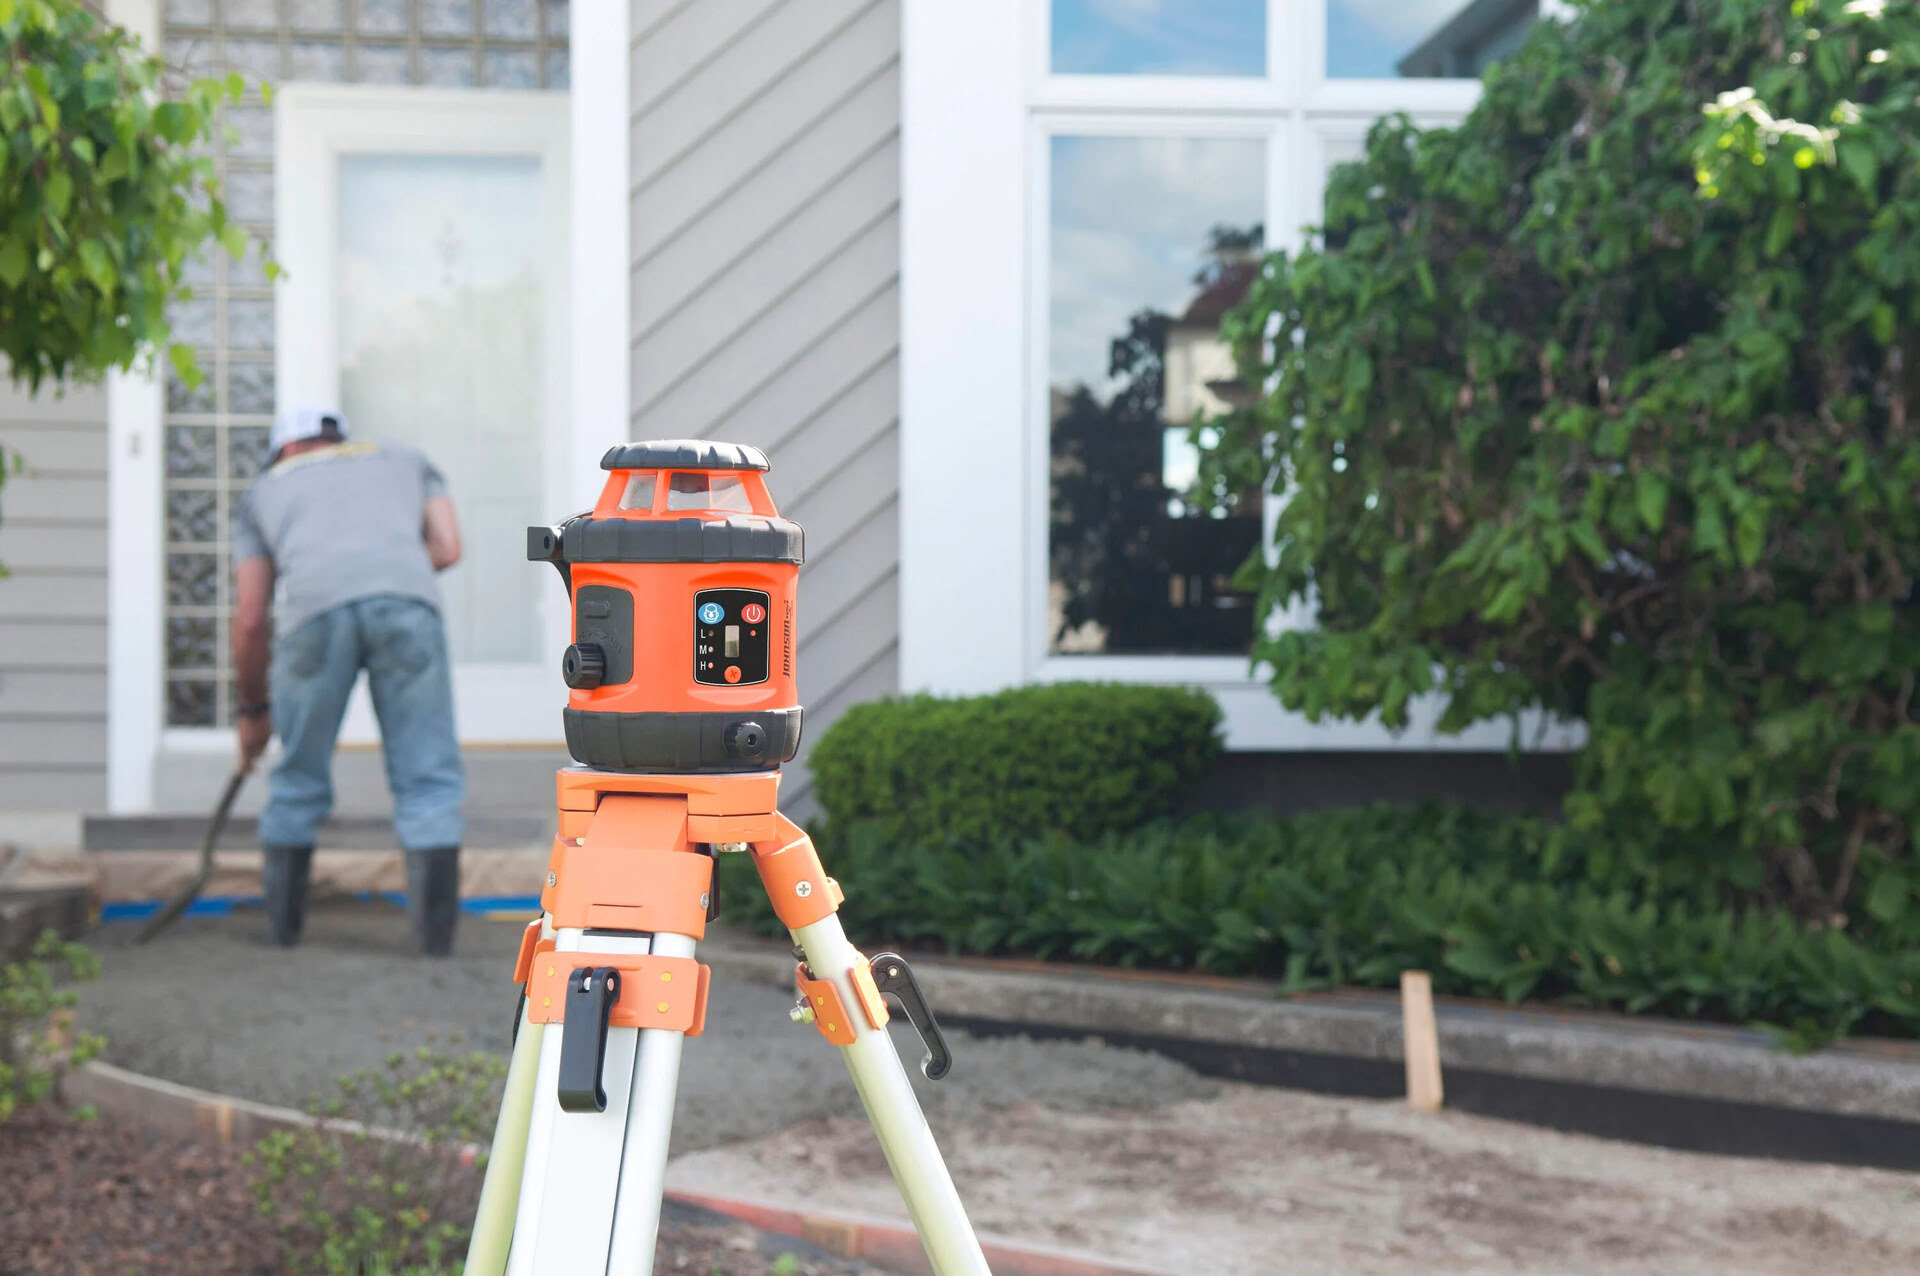
Step 3: Set up the Laser Level
Once you have chosen and calibrated your laser level, it’s time to set it up for the grade-setting process. Here are the steps to set up the laser level:
- Choose a Stable Location: Find a stable location to set up the laser level. This can be a tripod, a sturdy platform, or even a flat surface.
- Position the Laser Level: Place the laser level in the desired position, ensuring that it is secure and stable. Make sure the laser beam is projected at the desired height and angle for your grade-setting requirements.
- Adjust the Laser Level: Use the built-in leveling mechanisms or the bubble level attached to the laser level to ensure it is perfectly level. This is crucial for accurate grade setting.
- Secure the Laser Level: Once the laser level is correctly positioned and leveled, securely tighten any knobs or locks to hold it in place. This will help prevent any movement or vibrations during the grade-setting process.
- Activate the Laser Beam: Turn on the laser level and activate the laser beam. Depending on your laser level, you may need to press a button or switch to turn on the laser.
By setting up the laser level in a stable and secure manner, you ensure that the laser beam remains consistent and accurate throughout the grade-setting process. Taking the time to properly position and level the laser level will yield precise and reliable results for your project.
Step 4: Determine the Desired Grade
Before you can begin setting the grade with a laser level, it’s important to determine the desired grade for your project. The grade refers to the slope or incline of the surface, and it can vary depending on the specific application. Here’s how you can determine the desired grade:
- Project Requirements: Start by understanding the requirements of your project. Are you working on a driveway, a patio, or a landscaping project? Each application may have different grade specifications.
- Research and Guidelines: Research the guidelines or standards specific to your project or location. This could include building codes, municipal regulations, or construction standards that dictate the acceptable grade range.
- Consult Professionals: If you’re unsure about the desired grade, it’s always a good idea to consult professionals or experts in the field. They can provide valuable insights and recommendations based on their experience and knowledge.
- Consider Drainage: Take into account the drainage requirements for your project. Ensure that the desired grade allows for proper water runoff and prevents pooling or water accumulation on the surface.
- Use a Grade Calculator: To determine the specific slope or incline required, you can use a grade calculator. These tools allow you to input the length and the desired rise or fall, and they will calculate the grade percentage or angle for you.
By properly determining the desired grade, you can ensure that the surface is functional, aesthetically pleasing, and meets the necessary requirements for your project. Take the time to research, seek guidance if needed, and use the appropriate tools to accurately determine the desired grade.
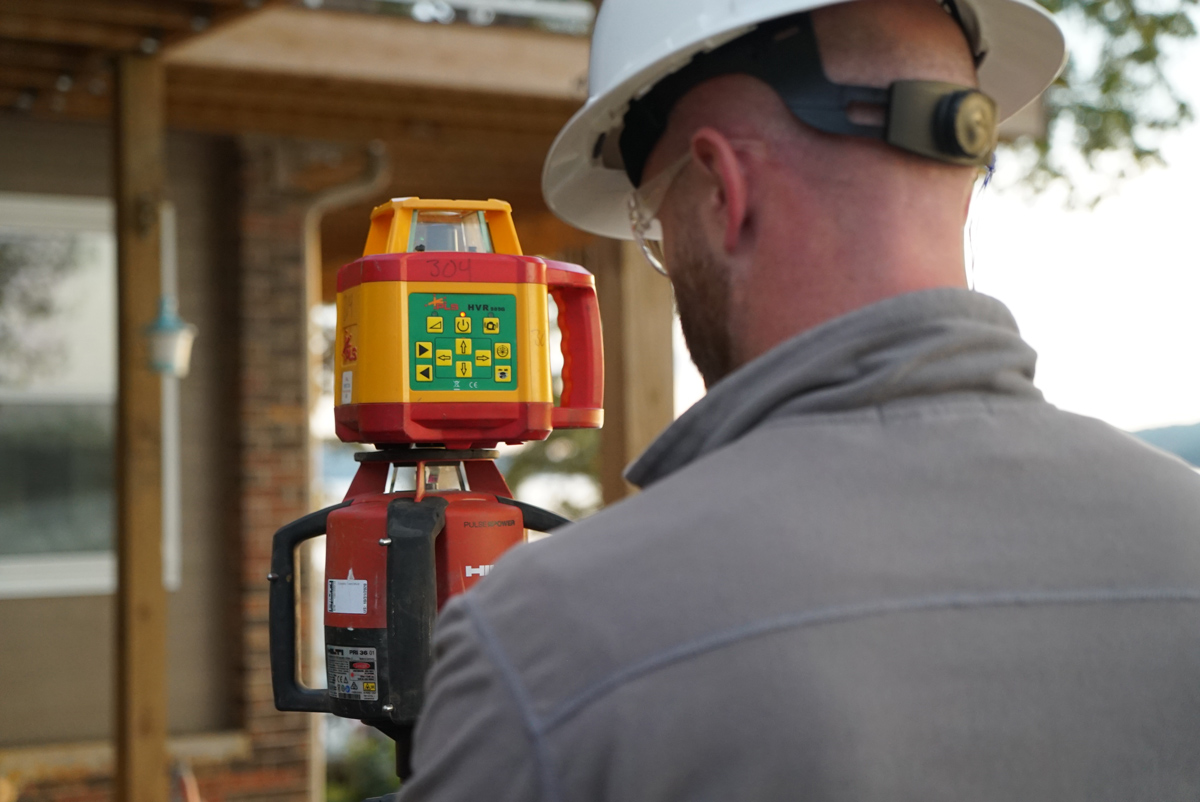
Step 5: Adjust the Laser Level
With the desired grade in mind, it’s time to adjust the laser level to align with the slope or incline you want to achieve. Here are the steps to adjust the laser level:
- Refer to the User Manual: Consult the user manual that came with your laser level to understand the specific adjustment features and methods it offers.
- Vertical Adjustment: If you need to adjust the laser level vertically, use the appropriate controls or mechanisms to raise or lower the laser beam to the desired height. Refer to the user manual for specific instructions on how to make these adjustments.
- Horizontal Adjustment: To adjust the laser level horizontally, use the provided controls or mechanisms to rotate the laser beam until it aligns with the desired slope or incline. Again, consult the user manual for detailed instructions.
- Incremental Adjustments: Make incremental adjustments to the laser level and continuously check the alignment with the desired grade. This will ensure that you achieve the precise slope or incline you want.
- Test the Adjustment: Once you make the necessary adjustments, check the laser level against a reference point to verify its accuracy. A leveling rod or a measuring device can be used to confirm that the laser beam aligns with the desired grade.
- Fine-Tune if Required: If the laser level is not perfectly aligned with the desired grade, make additional adjustments until the alignment is correct. Take your time to achieve the highest level of precision.
By adjusting the laser level to align with the desired slope or incline, you ensure that your project reflects the precise grade you have planned. Pay attention to the specific adjustment mechanisms of your laser level and take the necessary steps to achieve accurate alignment.
When setting grade with a laser level, always ensure that the laser is properly calibrated and the receiver is accurately positioned to receive the signal. This will help you achieve precise and accurate grade measurements.
Step 6: Check the Grade
Once you have adjusted the laser level to align with the desired grade, it’s important to check the grade to ensure accuracy. Here’s how you can check the grade:
- Set Up a Grade Rod: Place a grade rod or a leveling rod at the desired starting point of the grade. Make sure the rod is securely positioned and that the zero mark aligns with the laser beam.
- Measure the Grade Points: Move the grade rod along the surface, keeping it perpendicular to the laser beam. Take measurements at specific intervals or points to determine if the surface matches the desired grade.
- Compare Measurements: Compare the measurements you obtained from the grade rod with the desired grade for your project. Use a measuring tape or a digital level to ensure accuracy.
- Adjust if Necessary: If the measurements deviate from the desired grade, make adjustments to the laser level accordingly. Fine-tune the alignment until the measurements consistently match the intended grade.
- Verify Multiple Points: It’s essential to check the grade at multiple points along the surface, not just at one location. This will ensure that the grade is consistent throughout the area of your project.
Checking the grade helps confirm that the laser level’s alignment accurately reflects the desired slope or incline. By measuring multiple points along the grade, you can identify any inconsistencies and make adjustments as needed to achieve a consistent grade.
Remember, regular checks throughout the grade-setting process are essential to maintain accuracy and ensure the desired results for your project.
Step 7: Fine-tune the Grade
After checking the grade and making any necessary adjustments, it’s time to fine-tune the grade to ensure precision and accuracy. Here’s how you can fine-tune the grade with your laser level:
- Refine Vertical Adjustment: If there are minor discrepancies in the vertical alignment, make slight adjustments to the laser level’s height. Use the controls or mechanisms provided to raise or lower the laser beam incrementally until it aligns perfectly with the desired grade.
- Make Incremental Horizontal Adjustments: If the laser beam deviates slightly from the desired slope or incline, use the controls or mechanisms to make small incremental adjustments horizontally. This will help achieve the precise grade you are aiming for.
- Recheck with Grade Rod: Regularly check the grade with a grade rod or leveling rod at different points along the surface. Compare the measurements with the desired grade to ensure consistent alignment and make any necessary fine-tuning adjustments.
- Continuously Monitor the Laser Level: While fine-tuning the grade, keep a close eye on the laser level’s indicators or display. Ensure that it remains level and maintains a stable projection of the laser beam throughout the process.
- Take Your Time: Fine-tuning the grade requires patience and attention to detail. Don’t rush through the process. Take the time to make precise adjustments and verify the results to achieve the desired grade accurately.
By fine-tuning the grade, you can refine the alignment of your laser level to achieve maximum accuracy and ensure that the surface follows the intended slope or incline. Regularly checking and making incremental adjustments will help you achieve a smooth and consistent grade for your project.
Step 8: Mark the Grade
Once you have achieved the desired grade with your laser level, it’s time to mark the grade on the surface. Properly marking the grade will serve as a guide for any further construction or landscaping work. Here’s how you can mark the grade:
- Gather Marking Tools: Collect the necessary tools for marking the grade, such as marking paint, stakes, and a measuring tape.
- Identify Key Points: Determine the specific points along the grade where you need to mark the surface. These points can include the starting point, endpoints, or intervals depending on the requirements of your project.
- Measure and Stake: Measure the distance from each key point to the nearest reference point, such as a corner of the structure or an existing feature. Use stakes to mark these measurements on the surface.
- Connect the Marks: Connect the marked points with a straight line or a series of lines to indicate the desired grade visually. This will provide a clear guide for any subsequent work.
- Double-Check the Markings: Ensure that the marked lines accurately reflect the desired grade. Use a measuring tape and a level to verify their alignment and accuracy.
- Use High-Visibility Marking Paint: Consider using high-visibility marking paint to make the grade lines more visible, especially if your project extends over a large area or if there are changes in light conditions that may affect visibility.
By marking the grade, you provide a visual reference for future work and ensure that the desired slope or incline is maintained throughout your project. Accurately marking the grade will help guide any additional construction, landscaping, or excavation efforts.
Remember to take your time and be meticulous when marking the grade to ensure the best results for your project.
Read more: How To Level A Laser Level Tripod
Step 9: Double-check the Grade Accuracy
Before moving forward with your project, it’s crucial to double-check the accuracy of the grade you have set with your laser level. This final step ensures that the grade is precise and meets the requirements of your project. Here’s how you can double-check the grade accuracy:
- Recheck with Grade Rod: Use a grade rod or leveling rod to measure the grade at multiple points along the marked lines. Compare these measurements with the desired grade to verify the accuracy.
- Verify Using a Digital Level: Use a digital level to check the slope or incline of the grade lines. Place the digital level on the marked lines and ensure that it confirms the desired grade range.
- Conduct a Visual Inspection: Walk along the grade lines and visually inspect the surface for any inconsistencies or deviations. Look for any unevenness or areas that do not align with the intended grade.
- Make Adjustments if Needed: If you find any discrepancies or inaccuracies in the grade, make the necessary adjustments to your laser level and recheck the accuracy. Repeat the fine-tuning process to achieve the desired grade.
- Consult a Professional if Uncertain: If you are unsure about the accuracy of the grade or are experiencing difficulties in achieving the desired results, consider consulting a professional or expert in the field. They can provide guidance and help ensure the accuracy of the grade.
Double-checking the grade accuracy is a crucial step to ensure that the surface meets the intended slope or incline. By verifying the grade through multiple methods, you can have confidence in the accuracy of your grade-setting efforts.
Remember, it’s better to take the time to double-check and make adjustments if needed rather than proceed with an inaccurate grade that could lead to issues in the future.
Conclusion
Setting grade with a laser level is a valuable skill that can greatly enhance the accuracy and efficiency of your construction or landscaping projects. By following the step-by-step process outlined in this guide, you can ensure precise grade alignment and achieve the desired slope or incline for your surfaces.
Choosing the right laser level, calibrating it properly, and setting it up in a stable position are essential for accurate grade setting. Determining the desired grade, adjusting the laser level, and checking the grade at various points help ensure consistency and accuracy throughout your project.
Fine-tuning the grade and marking it on the surface provide a clear guide for future work and help maintain the intended slope or incline. Double-checking the grade accuracy through measurements and visual inspections is vital to ensure the final grade aligns with your project requirements.
Always remember to consult the user manual provided with your laser level for specific instructions and guidelines. If you encounter challenges or uncertainties, don’t hesitate to seek the advice of a professional to ensure the best possible results.
Mastering the art of setting grade with a laser level will not only enhance your project outcomes but also save you time and effort. With practice and experience, you’ll become proficient in using this powerful tool to achieve accurate and precise grades for a wide range of applications.
So go ahead, grab your laser level, and start setting precise grades with confidence!
Frequently Asked Questions about How To Set Grade With A Laser Level
Was this page helpful?
At Storables.com, we guarantee accurate and reliable information. Our content, validated by Expert Board Contributors, is crafted following stringent Editorial Policies. We're committed to providing you with well-researched, expert-backed insights for all your informational needs.


0 thoughts on “How To Set Grade With A Laser Level”