Home>Renovation & DIY>Tools & Equipment>How To Distress Painted Wood With Sandpaper

Tools & Equipment
How To Distress Painted Wood With Sandpaper
Published: December 20, 2023
Learn how to distress painted wood with sandpaper using the right tools and equipment. Transform your furniture into a vintage masterpiece with this easy DIY technique.
(Many of the links in this article redirect to a specific reviewed product. Your purchase of these products through affiliate links helps to generate commission for Storables.com, at no extra cost. Learn more)
Introduction
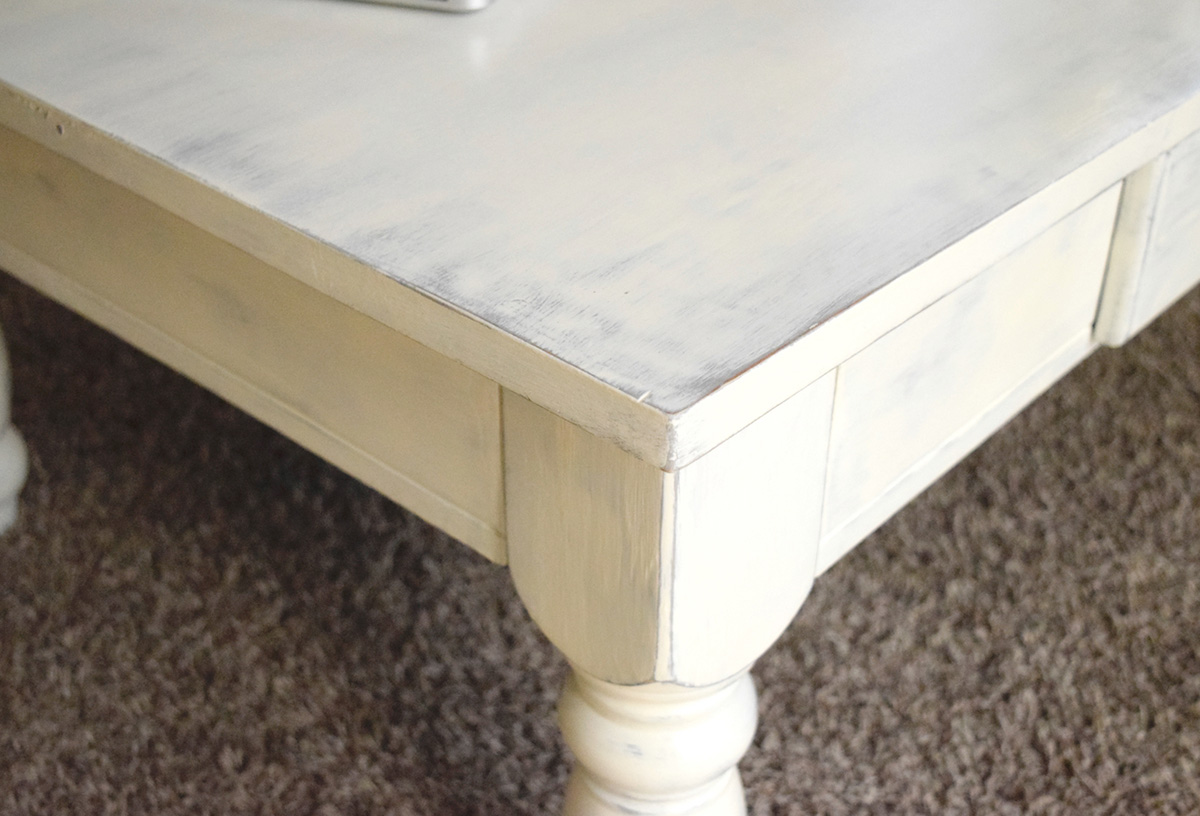
We all love the rustic charm of distressed furniture, and one of the best ways to achieve that look is by distressing painted wood using sandpaper. Distressing painted wood can give it a weathered, aged appearance, adding character and depth to any piece of furniture or decor. Whether you’re a seasoned DIY enthusiast or a beginner looking to try your hand at a new project, this guide will provide you with step-by-step instructions on how to distress painted wood with sandpaper.
Distressed furniture has become increasingly popular in recent years, with its ability to add a touch of vintage charm to any space. By distressing the paint, you can create the illusion of years of wear and tear, giving your furniture a unique and timeless appeal. With just a few materials and a little bit of patience, you can transform a plain painted surface into a stunning distressed masterpiece.
In this guide, we will walk you through the process of distressing painted wood using sandpaper. We will cover everything from preparing the painted wood surface to selecting the right grit sandpaper for each stage of distressing. We will also explore additional techniques to create different distressing effects, such as using steel wool or a wire brush. By the end of this guide, you’ll have the knowledge and confidence to distress painted wood and create beautiful, one-of-a-kind pieces.
Before we jump into the step-by-step instructions, let’s take a look at the materials you’ll need for this project. Having everything prepared in advance will make the entire process smoother and more efficient. So, gather your supplies and let’s get started on distressing painted wood with sandpaper!
Key Takeaways:
- Transform ordinary furniture into unique, vintage pieces by distressing painted wood with sandpaper. Follow step-by-step instructions to achieve beautifully aged and weathered surfaces, adding character and charm to any space.
- Gather materials and follow the process to distress painted wood effectively. Experiment with additional techniques like steel wool or a wire brush to create unique distressed effects and preserve the wood’s appearance for years to come.
Read more: What Grit Sandpaper Before Painting Wood
Materials needed
To distress painted wood with sandpaper, you will need the following materials:
1. Painted wood surface: Choose a piece of furniture, such as a table, chair, or cabinet, that has already been painted. This project works best on surfaces with a flat or matte paint finish.
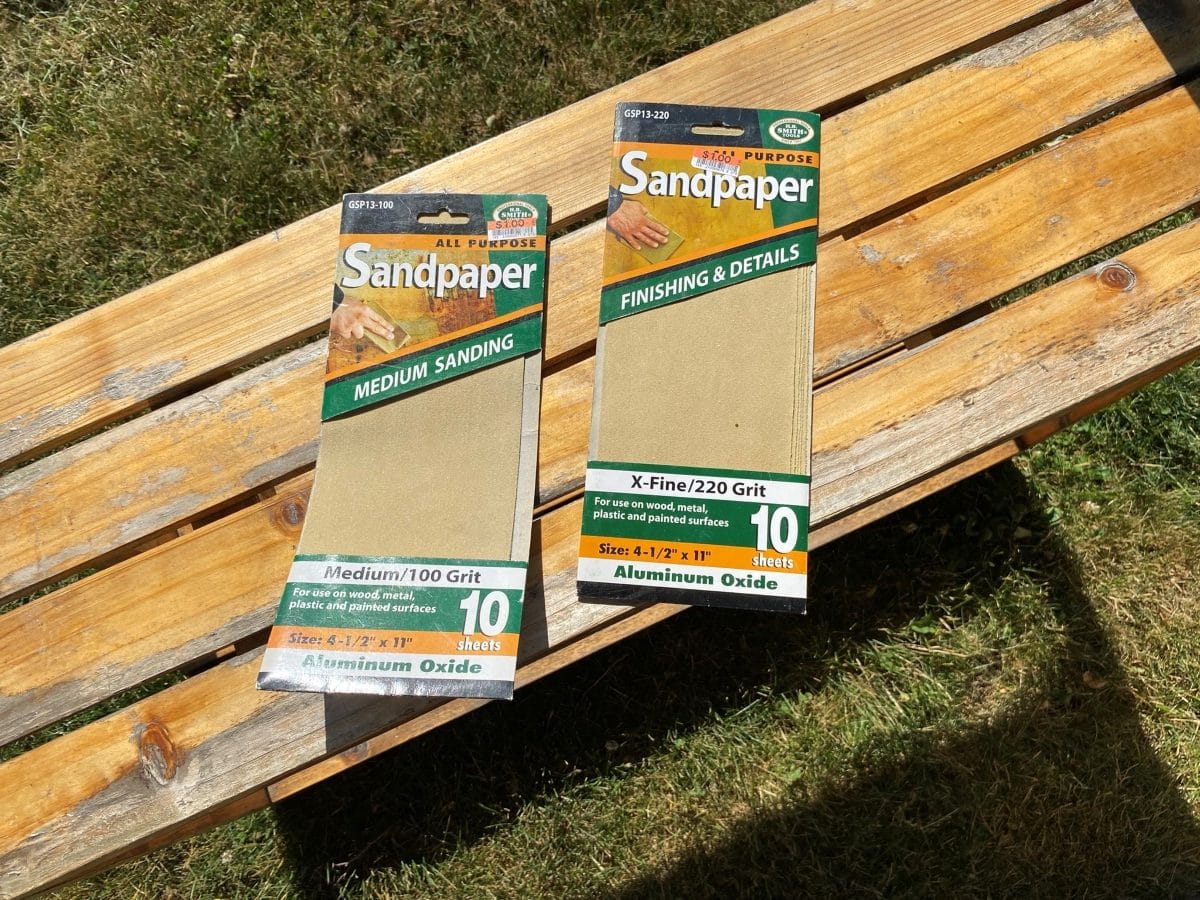
2. Sandpaper: You will need sandpaper in various grits to achieve different levels of distressing. Start with coarse grit (around 60-80), followed by medium grit (around 120-150), and finish with fine grit (around 220-320).
3. Sanding block or sandpaper holder: Using a sanding block or sandpaper holder will help you maintain a consistent pressure while distressing the wood surface.
4. Steel wool or wire brush (optional): If you want to create more pronounced distressing effects, you can use steel wool or a wire brush to add texture and depth to the wood surface.
5. Dust mask and safety goggles: It is crucial to protect your lungs and eyes while sanding. Wear a dust mask and safety goggles to prevent inhalation of dust particles and any potential eye injuries.
6. Clean cloth or tack cloth: You’ll need a clean cloth or tack cloth to wipe away dust and debris from the wood surface during and after sanding.
7. Protective finish or sealant (optional): Once you’re satisfied with the level of distressing, you may choose to apply a protective finish or sealant to preserve the distressed look and protect the wood surface.
Now that you have gathered all the necessary materials, let’s dive into the step-by-step process of distressing painted wood with sandpaper.
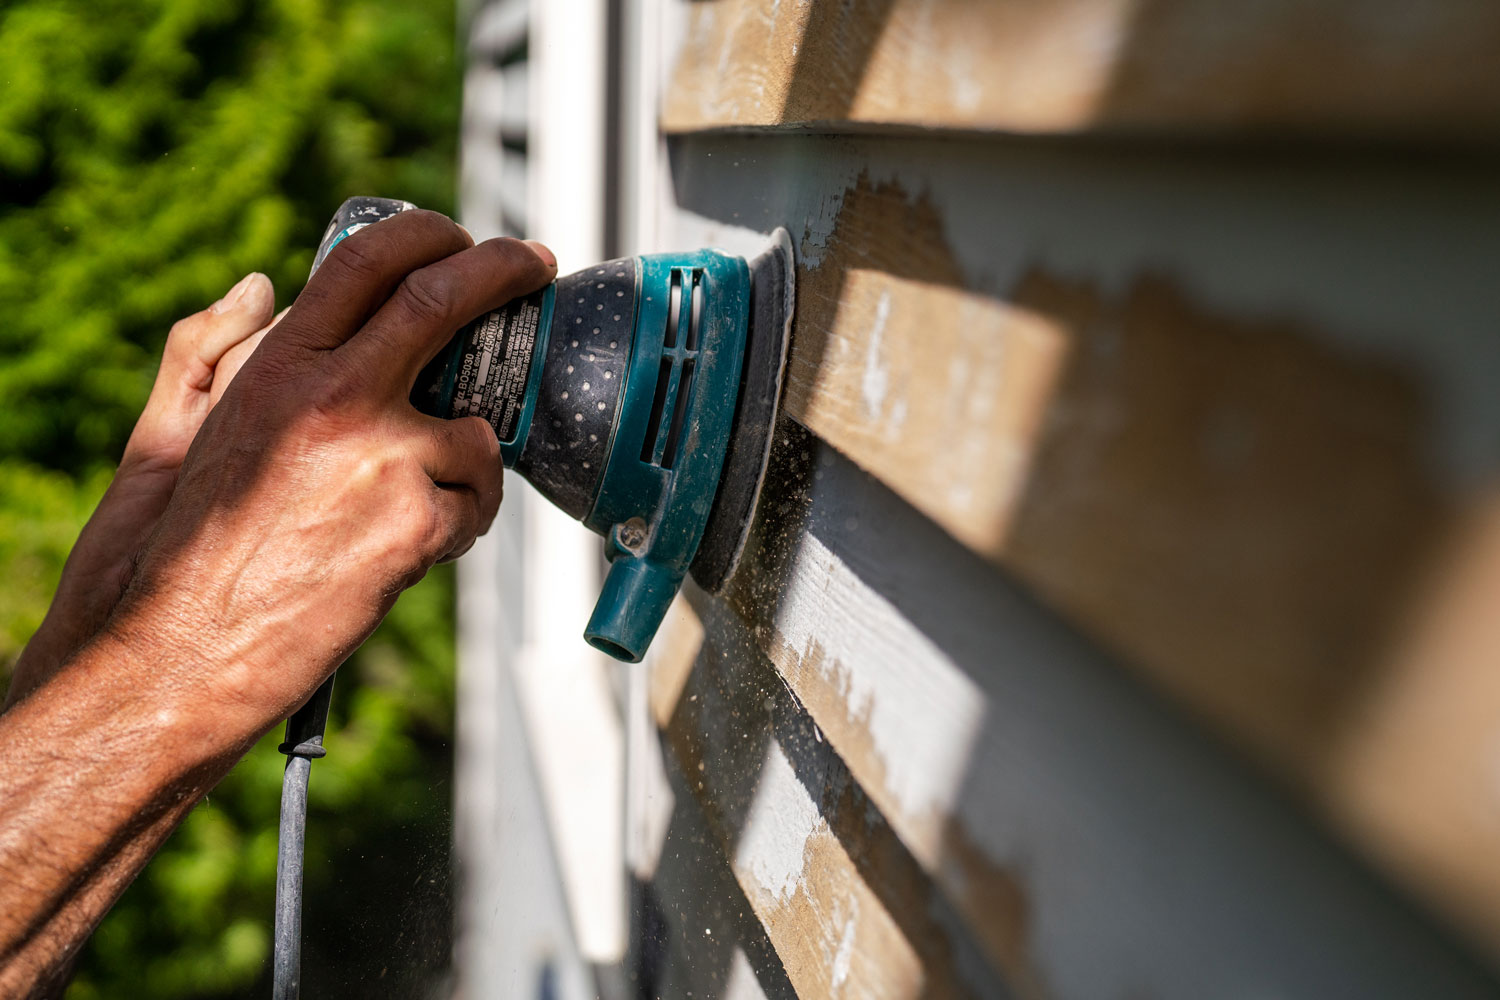
Step 1: Prepare the painted wood surface
Before you begin distressing the painted wood, it’s essential to prepare the surface properly. This will ensure that the distressing process goes smoothly and allows the paint to adhere effectively to the wood.
Start by cleaning the painted wood surface using a mild detergent and water. Gently scrub the surface to remove any dirt, dust, or grease that may have accumulated. Rinse thoroughly and allow the wood surface to dry completely.
Next, inspect the painted surface for any imperfections like bumps, drips, or uneven areas. Use sandpaper with a medium grit (around 120-150) to smooth out these imperfections. Sand in the direction of the wood grain to avoid creating cross-grain scratches.
Once the surface is smooth and free of imperfections, wipe it down with a clean cloth or tack cloth to remove any remaining dust or debris. This step is crucial for achieving a clean and polished distressed finish.
If there are any areas of the painted surface where the paint has chipped or flaked, you may choose to leave them as they are or touch them up with additional paint before distressing. This will depend on the desired look you want to achieve.
Now that the painted wood surface is prepped and ready, it’s time to move on to the next step: gathering the necessary sandpaper.
Step 2: Gathering the necessary sandpaper
To achieve the desired distressed effect on your painted wood surface, you will need sandpaper in various grits. Different grits of sandpaper will help you achieve different levels of distressing and smoothness. Here’s a breakdown of the grits you’ll need:
1. Coarse grit sandpaper: Start with a coarse grit sandpaper, typically around 60-80. This grit will help you remove larger areas of paint and create more noticeable distressing effects. Coarse grit sandpaper is ideal for creating deep grooves or exposing the wood underneath the paint.
2. Medium grit sandpaper: Once you have achieved the desired level of distressing with the coarse grit sandpaper, switch to a medium grit sandpaper, around 120-150. The medium grit will help you smooth out the rough areas and refine the distressed look. This step is essential to create a balanced and even distressed finish.
3. Fine grit sandpaper: Finally, finish off the distressing process with a fine grit sandpaper, around 220-320. The fine grit will further smooth out the surface and remove any remaining roughness. It will help achieve a polished and refined distressed look.
When selecting sandpaper, you can choose between individual sheets or sandpaper rolls that can be cut into smaller pieces. Keep in mind that the size and shape of the furniture or wood piece you are distressing will determine the quantity and size of sandpaper needed.
To make the distressing process more convenient and efficient, consider using a sanding block or sandpaper holder. These tools provide a sturdy grip and help maintain a consistent pressure while distressing the wood surface.
Now that you have gathered the necessary sandpaper and tools, you are ready to begin distressing the painted wood surface. Follow along with the next steps to achieve a beautifully aged and weathered look.
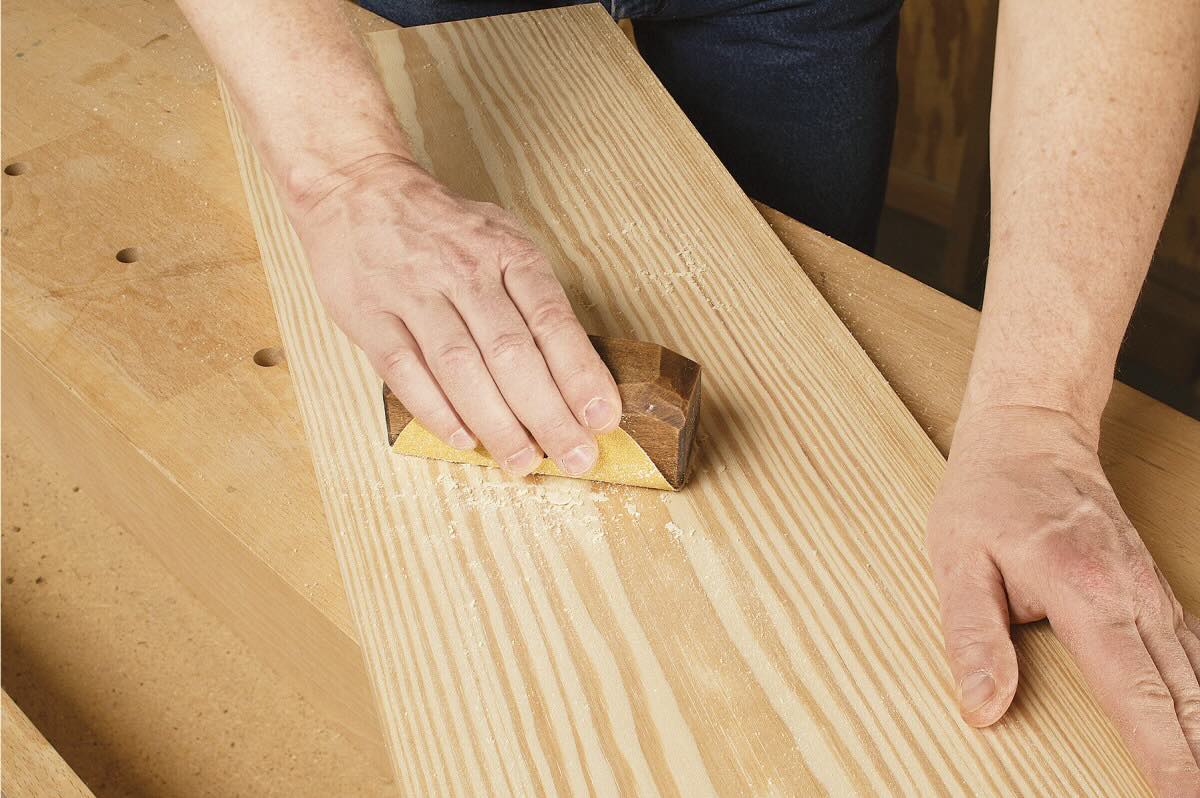
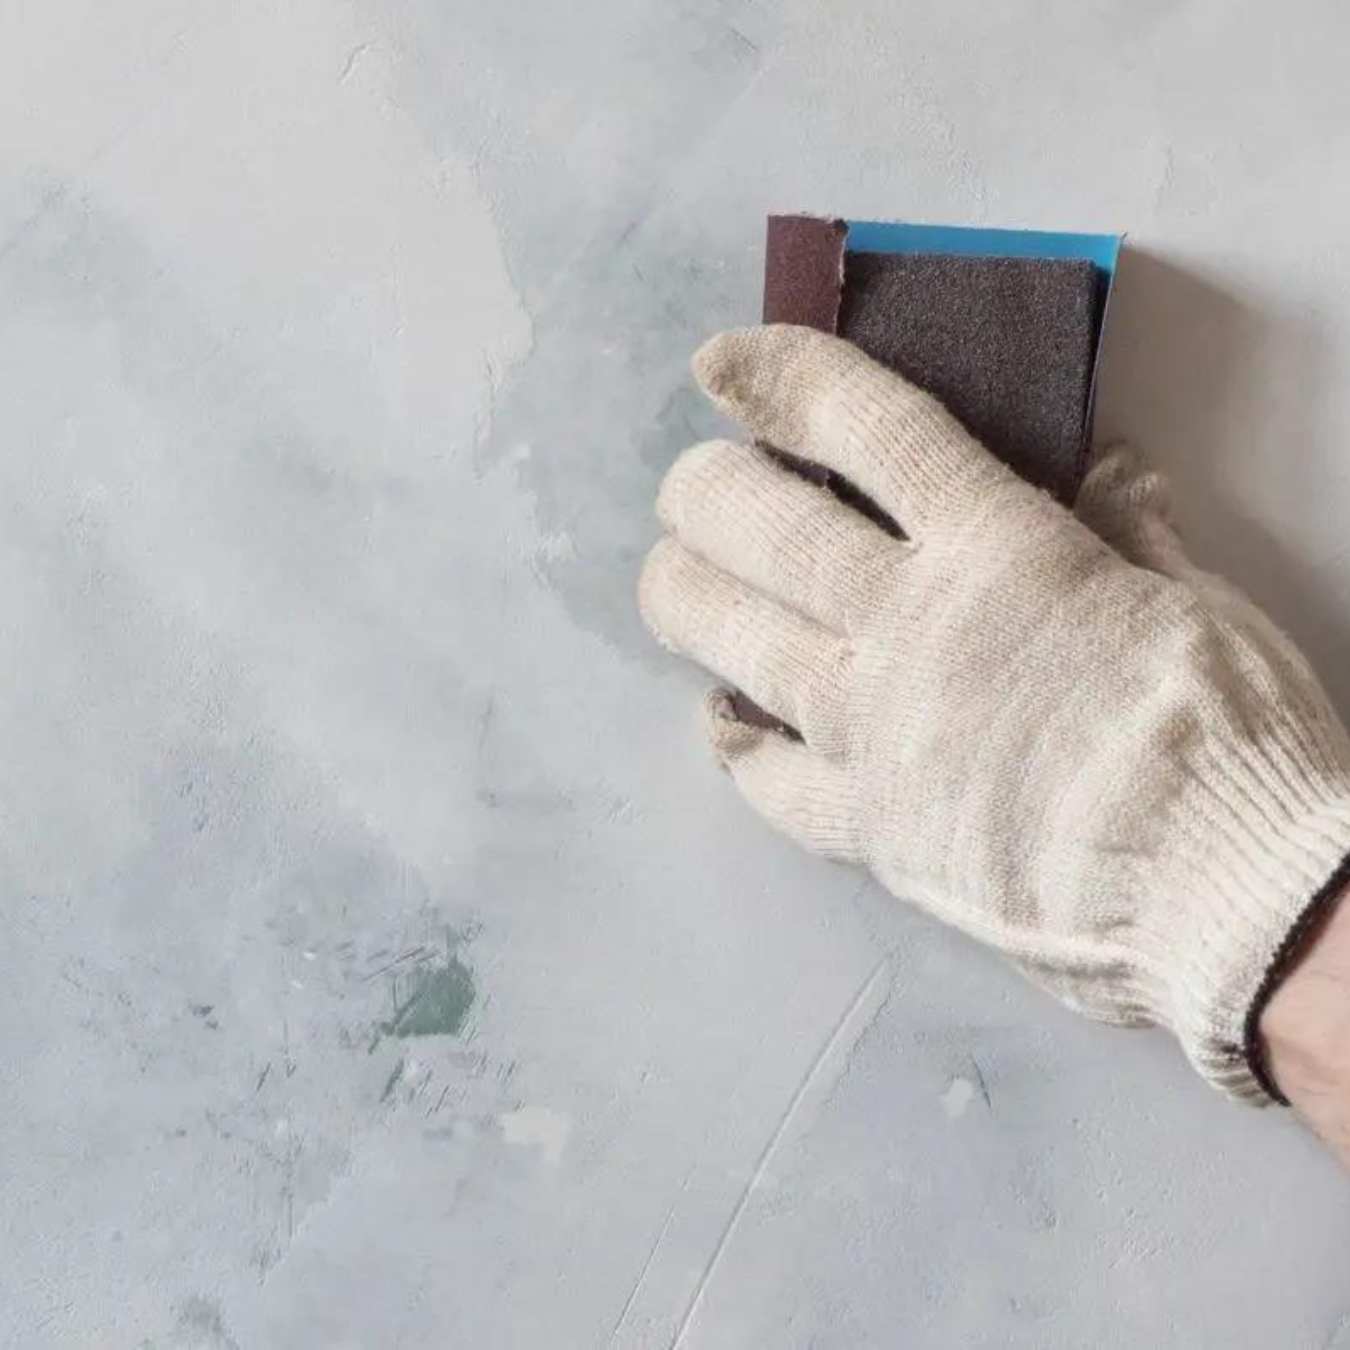
Step 3: Begin distressing the wood with coarse sandpaper
Now that you have prepared the painted wood surface and gathered the necessary sandpaper, it’s time to start the distressing process. Begin with the coarsest grit sandpaper, typically around 60-80, to remove larger areas of paint and create prominent distressing effects.
Here’s how to proceed:
1. Hold the sandpaper firmly or attach it to a sanding block or sandpaper holder. This will provide a better grip and make it easier to apply consistent pressure while distressing.
2. Start distressing the painted wood surface by sanding in the direction of the wood grain. This will help create natural-looking distressing patterns and avoid damaging the wood.
3. Apply even pressure and make long, sweeping motions as you sand. Begin with light pressure and gradually increase if needed. Remember, the goal is to remove some of the paint and reveal the underlying wood, but not to sand down to bare wood entirely.
4. Concentrate on areas that would naturally experience wear and tear, such as corners, edges, and areas where hands would commonly touch. These areas tend to distress more easily and give a more authentic aged appearance.
5. As you sand, periodically brush away the dust and debris with a clean cloth or tack cloth to better assess the progress and prevent any particles from interfering with the sanding process.
6. Continue distressing the painted wood surface with the coarse sandpaper until you achieve the desired level of distressing. Remember, it’s always better to start with less distressing and gradually add more as needed.
7. Take breaks and step back to evaluate the distressing effects. This will help you maintain a balanced and visually appealing distressed look.
Once you are satisfied with the level of distressing achieved with the coarse sandpaper, you can proceed to the next step: progressing to a medium-grit sandpaper. This will further refine the distressing and create a smoother surface.
Read more: How To Sand Wood Without Sandpaper
Step 4: Progress to medium-grit sandpaper
In the previous step, you used coarse-grit sandpaper to create prominent distressing effects on the painted wood surface. Now, it’s time to progress to medium-grit sandpaper, typically around 120-150, to refine the distressing and achieve a smoother finish.
Follow these steps to continue distressing with medium-grit sandpaper:
1. Switch to the medium-grit sandpaper by replacing the coarse-grit sandpaper or using a new sheet or piece.
2. Hold the sandpaper securely, whether by hand or using a sanding block or sandpaper holder, to maintain control and apply even pressure.
3. Begin sanding the distressed areas created with the coarse-grit sandpaper, focusing on smoothing out any roughness or unevenness.
4. Sand in the direction of the wood grain, using long, sweeping motions to create a consistent distressed look.
5. Be mindful not to sand away too much of the distressed areas you created with the coarse-grit sandpaper. Rather, focus on blending the transitions between the distressed and non-distressed areas to achieve a more natural appearance.
6. As with the previous step, periodically wipe away dust and debris with a clean cloth or tack cloth to evaluate the progress, avoiding any interference with the sanding process.
7. Continue distressing with the medium-grit sandpaper until you have achieved the desired level of refinement. Remember to take breaks and assess the overall appearance to maintain consistency and balance.
Keep in mind that the intensity of distressing with the medium-grit sandpaper should be less than that of the coarse-grit sandpaper. The goal is to create a smoother surface while still retaining the distressed look.
Once you are satisfied with the distressing achieved using the medium-grit sandpaper, you are ready to move on to the next step: finishing the distressing process with fine-grit sandpaper.
When distressing painted wood with sandpaper, start with a coarse grit and gradually move to a finer grit for a more natural and gradual distressed look. Sand along the edges and high-traffic areas for an authentic worn appearance.
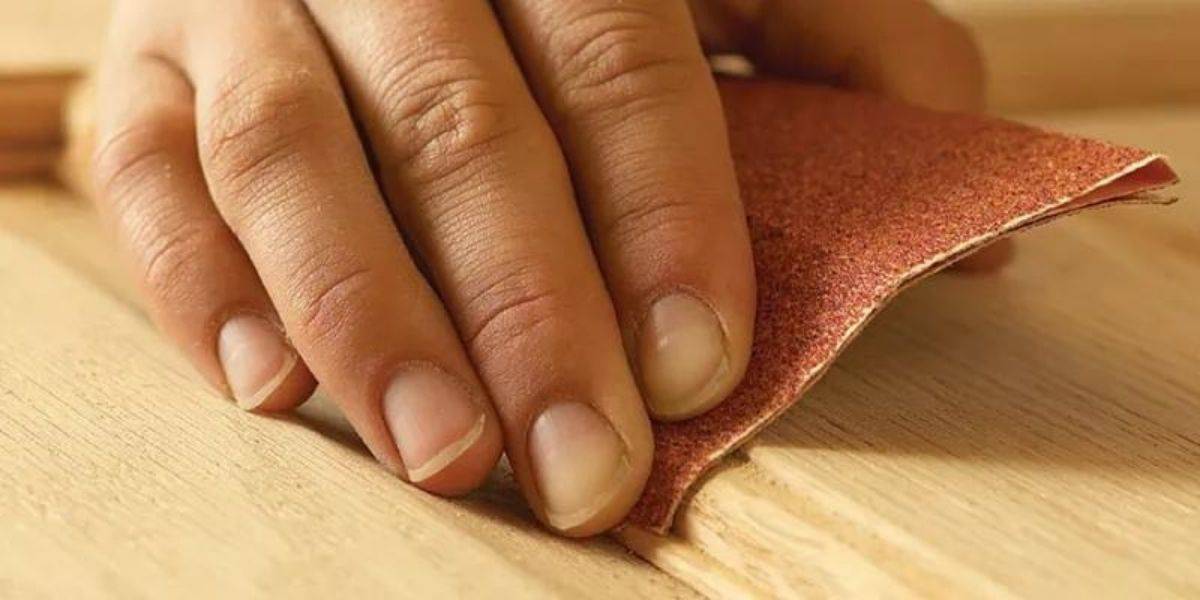
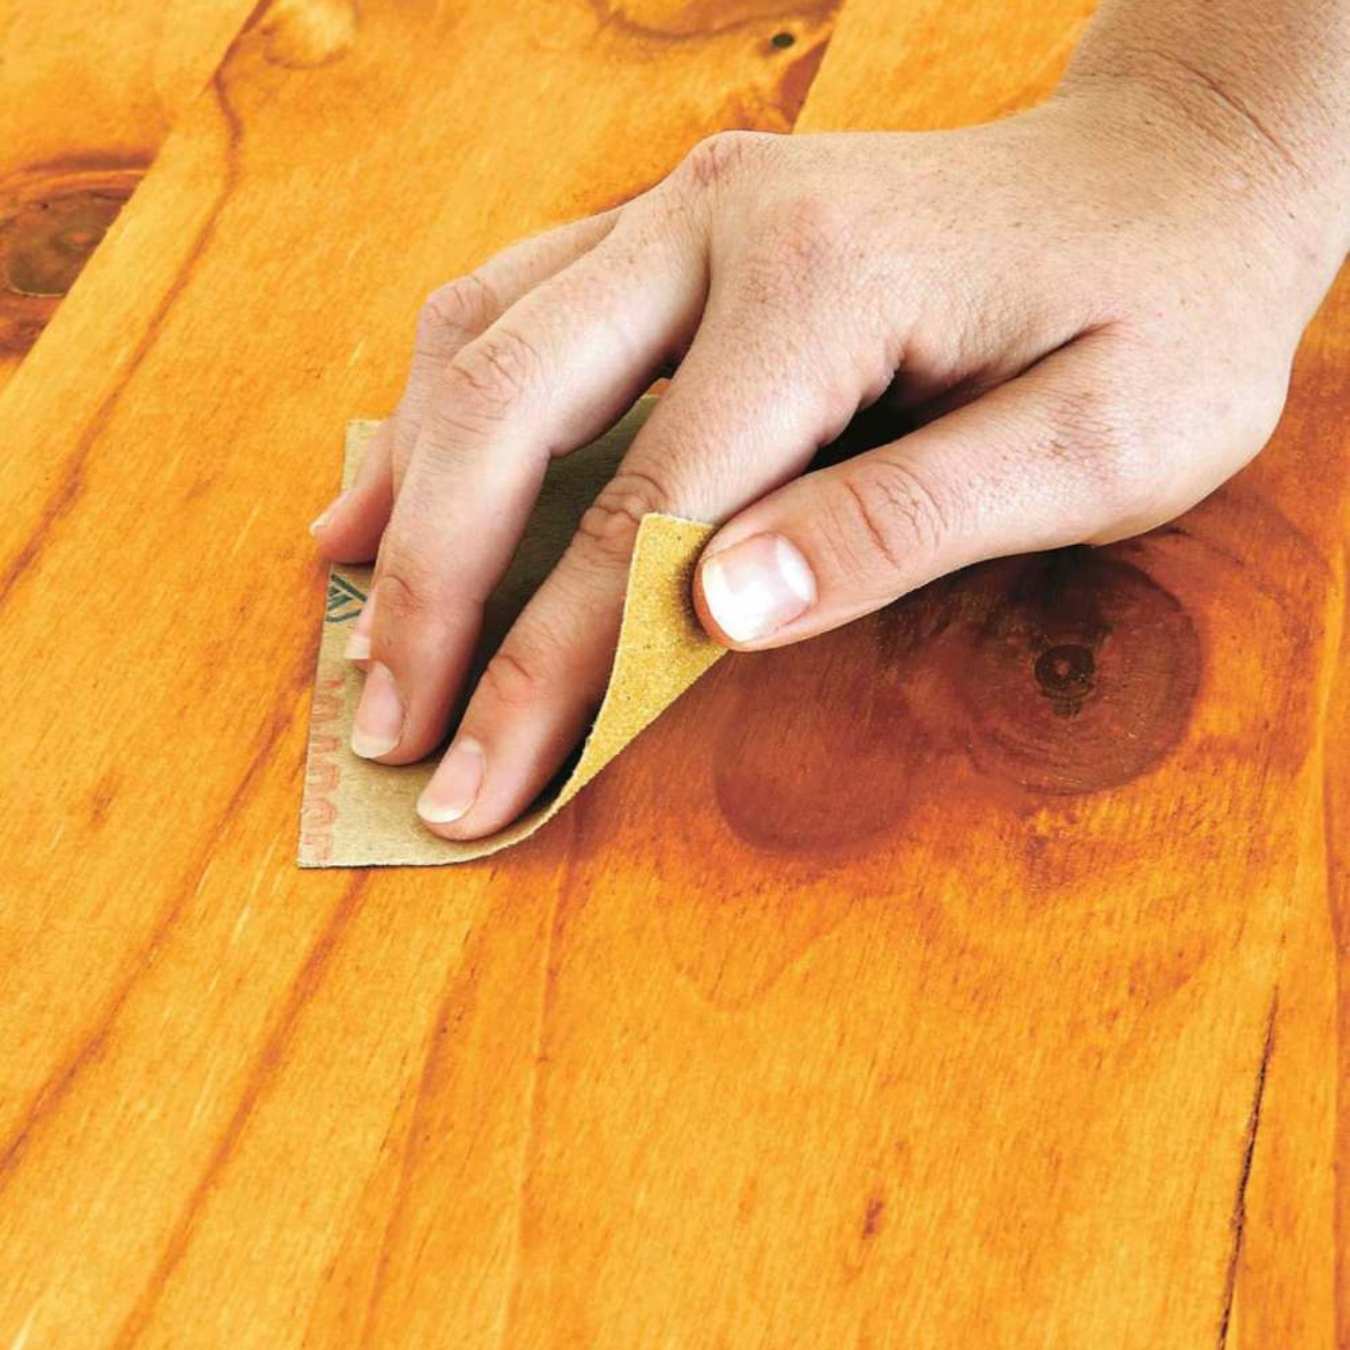
Step 5: Finish distressing with fine-grit sandpaper
After progressing from coarse-grit to medium-grit sandpaper, it’s time to refine the distressed surface even further with fine-grit sandpaper. The fine-grit sandpaper, typically around 220-320, will smooth out any remaining roughness and create a polished look while maintaining the distressed appearance.
Follow these steps to finish distressing with fine-grit sandpaper:
1. Replace the medium-grit sandpaper or use a new sheet or piece of fine-grit sandpaper. Ensure that it is securely held either by hand or using a sanding block or sandpaper holder.
2. With the same approach as before, sand the distressed areas using the fine-grit sandpaper. Continue sanding in the direction of the wood grain, applying even pressure and using long, sweeping motions.
3. Focus on smoothing out any lingering rough patches or unevenness, while still maintaining the distressed character of the wood.
4. Take the time to inspect the surface frequently, wiping away dust and debris to evaluate the progress. This will allow you to make any necessary adjustments and ensure a consistent distressed appearance.
5. As you work with the fine-grit sandpaper, be cautious not to over-sand or remove too much paint. The goal is to achieve a refined, smoothed-out surface while preserving the natural distressed look.
6. Once you are satisfied with the overall distressed appearance and the smoothness of the surface, wipe away any residual dust and debris with a clean cloth or tack cloth.
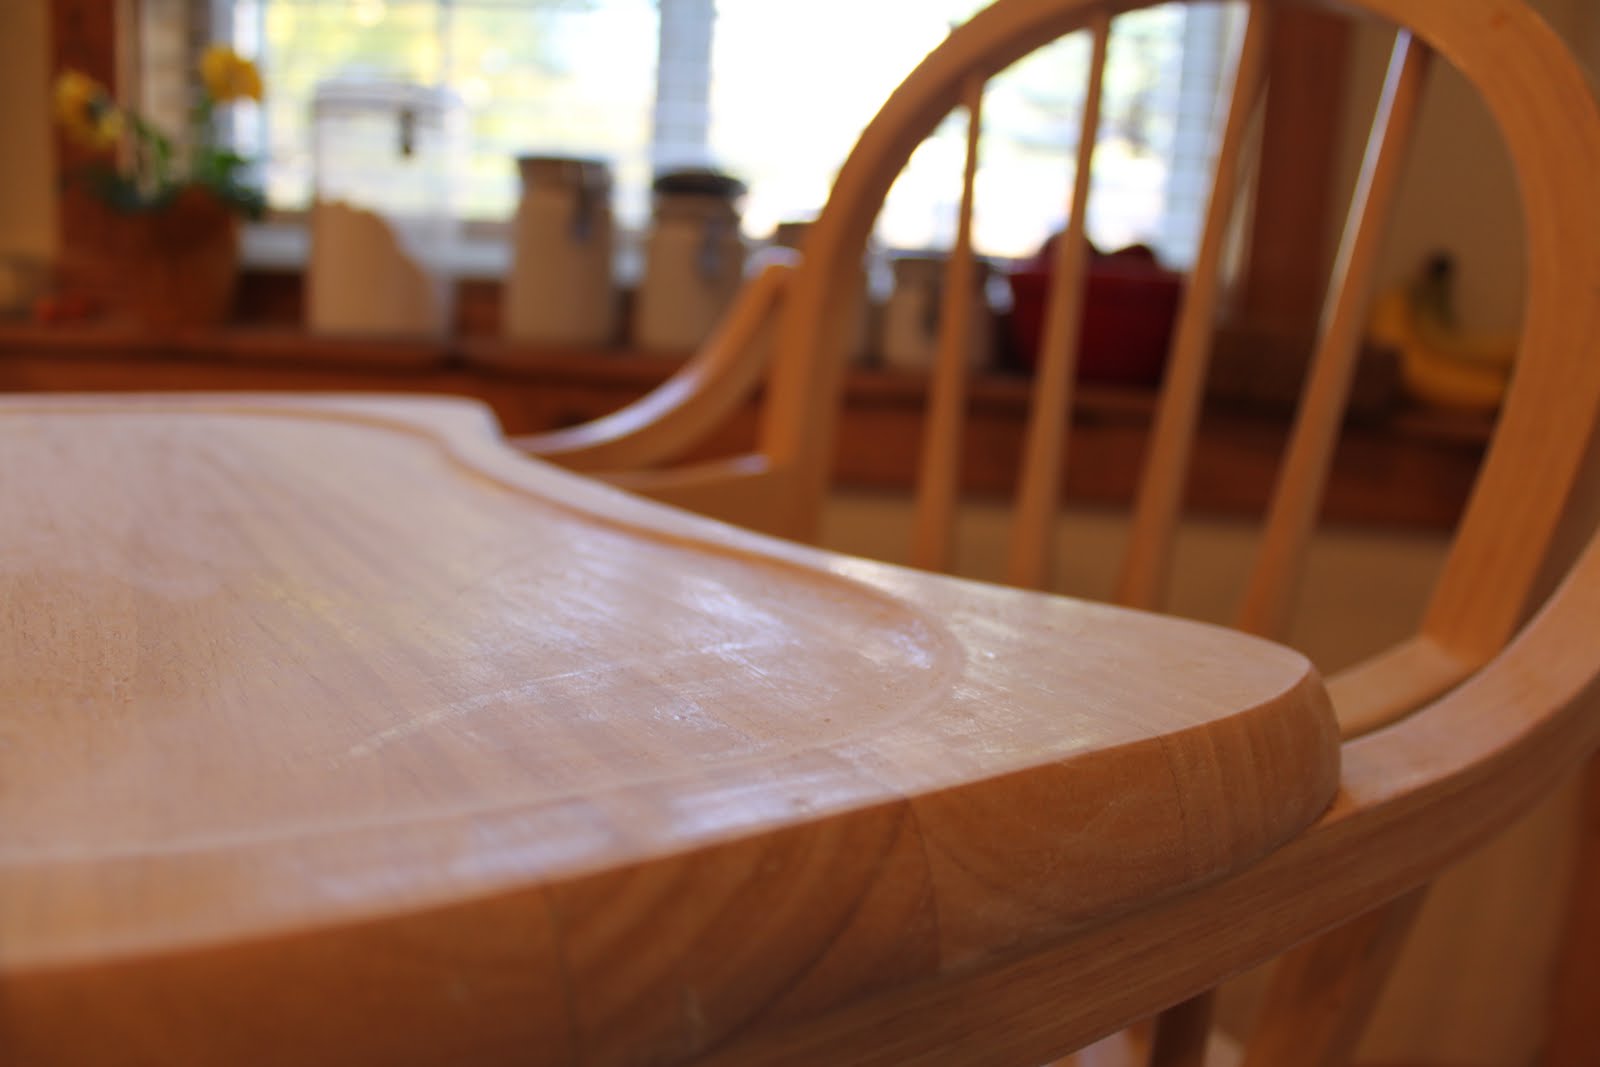
At this point, you have successfully completed the distressing process using sandpaper. The painted wood should now exhibit a beautifully aged and weathered appearance.
Remember, distressing is a matter of personal preference, and you can adjust the level of distressing based on your desired result. If the distressed look is sufficient for your liking, you can proceed to the next step, which involves creating additional distressing effects using steel wool or a wire brush. However, if you’re content with the distressing achieved through sandpaper alone, you can skip ahead to Step 7: Dust off the wood and clean the surface.
Step 6: Create additional distressing effects with steel wool or a wire brush
If you desire to enhance the distressed look further and add more depth and texture to your painted wood surface, you can use steel wool or a wire brush to create additional distressing effects. These tools can help create unique and interesting patterns that mimic natural wear and tear.
Here’s how you can create additional distressing effects:
1. Ensure that the painted wood surface is clean and free from any dust or debris before starting this step.
2. If you are using steel wool, choose a fine-grade steel wool pad. If you are using a wire brush, select one with medium or coarse bristles, depending on the level of texture you want to achieve.
3. Gently rub the steel wool or wire brush over the surface of the painted wood, focusing on areas that would naturally experience more wear, such as corners, edges, and high-touch areas.
4. Apply varying degrees of pressure and use different motions, such as circular or back-and-forth, to create a random and organic distressed effect.
5. Don’t forget to step back periodically and evaluate the overall appearance to ensure that the distressing effects are balanced and visually appealing. Remember, less is often more, so start with light distressing and gradually build up if desired.
6. Experiment with different techniques and patterns to achieve the desired level of distressing. You can also layer the effects by using both steel wool and a wire brush for a more intricate and unique look.
7. Continue distressing until you are satisfied with the added texture and depth. Remember to dust off the wood surface with a clean cloth or tack cloth to remove any loose particles generated during this process.
By incorporating the use of steel wool or a wire brush, you can create a more realistic and authentic distressed appearance on your painted wood surface. These additional distressing techniques add character and charm to your piece.
Once you have achieved the desired level of distressing with steel wool or a wire brush, it’s time to move on to the next step: dusting off the wood and cleaning the surface to prepare it for the final touches.
Step 7: Dust off the wood and clean the surface
After distressing the painted wood surface and creating the desired level of distressing effects, it’s important to remove any dust and debris that may have accumulated. This step will ensure a clean and polished final result.
Follow these steps to dust off the wood and clean the surface:
1. Use a clean cloth or a soft-bristle brush to gently brush away any loose dust and debris from the distressed wood surface. Pay close attention to cracks, crevices, and hard-to-reach areas.
2. If there is stubborn dust or residue, you can use a vacuum cleaner with a soft brush attachment to gently remove it. Avoid using excessive suction or placing the nozzle directly on the wood surface to prevent any accidental damage.
3. Once the loose dust is removed, take a slightly dampened cloth and wipe down the distressed wood surface. This will help remove any remaining fine dust particles and ensure a clean canvas for the final steps.
4. If there are any stubborn stains or marks on the painted wood surface that cannot be removed with a damp cloth, you can try using a mild soap or detergent solution. Dip a clean cloth into the solution, wring out any excess liquid, and gently dab or wipe the affected area. Remember to rinse the cloth and wipe the surface again with clean water to remove any soap residue.
5. After cleaning, allow the distressed wood surface to air dry completely. Avoid exposing it to direct sunlight or heat sources, which could cause the wood to warp or the paint to fade.
By thoroughly dusting off and cleaning the distressed wood surface, you will ensure that the final touches, such as applying a protective finish or sealant, adhere properly and achieve the desired outcome.
Now that you’ve dusted off and cleaned the surface, you’re ready to move on to the final step: applying a protective finish or sealant to preserve the distressed look and protect the wood surface.
Read more: How To Sand Wood Using Sandpaper
Step 8: Apply a protective finish or sealant
After distressing and cleaning the painted wood surface, it’s important to apply a protective finish or sealant to preserve the distressed look and protect the wood from further damage. This step will ensure that your newly distressed piece of furniture or decor remains in good condition for years to come.
Here’s how to apply a protective finish or sealant:
1. Choose the appropriate finish or sealant based on the type of paint used on your wood surface. If you’re unsure, consult with a paint or hardware store professional for recommendations.
2. Before applying the protective finish or sealant, ensure that the distressed wood surface is clean and completely dry. Any residual moisture can prevent proper adhesion and affect the final appearance.
3. If using a liquid-based finish or sealant, stir or shake the product according to the manufacturer’s instructions to ensure proper consistency.
4. Use a clean brush or roller to apply an even coat of the protective finish or sealant to the entire distressed wood surface. Follow the manufacturer’s recommendations regarding the specific application method and drying times.
5. Pay extra attention to any areas that may have been sanded more aggressively during the distressing process. These areas may be more susceptible to damage and can benefit from an additional layer of protection.
6. Let the first coat of the protective finish or sealant dry completely according to the manufacturer’s instructions. This typically takes a few hours, but it’s best to refer to the product’s specific drying times to ensure optimal results.
7. If necessary, lightly sand the dried first coat with a fine-grit sandpaper to smooth out any imperfections or brush marks. Make sure to wipe away any dust generated from sanding before proceeding.
8. Apply a second coat of the protective finish or sealant, following the same application technique as before. This additional coat will provide an extra layer of protection and enhance the longevity of the distressed wood.
9. Allow the second coat to dry completely before using or placing any objects on the distressed wood surface. This may take a few hours or longer, depending on the product and environmental conditions.
By applying a protective finish or sealant, you not only preserve the distressed look but also safeguard the wood from everyday wear and tear, spills, and other potential hazards.
With the application of the protective finish or sealant complete, your distressed painted wood is now ready to be displayed and enjoyed. The final result will be a beautifully aged and weathered piece that showcases your creativity and adds charm to any space.
Conclusion
Distressing painted wood with sandpaper is a fantastic way to transform ordinary furniture or decor into unique pieces with a charming, vintage appeal. By following the step-by-step instructions outlined in this guide, you can achieve beautifully distressed wood surfaces that add character and depth to any space.
Starting with proper surface preparation, including cleaning and smoothing out imperfections, sets the foundation for successful distressing. Gathering the necessary sandpaper in varying grits allows you to create different levels of distressing and achieve the desired result. Starting with coarse-grit sandpaper, progressing to medium-grit, and finishing with fine-grit ensures a well-balanced and refined distressed appearance.
For those seeking an even more pronounced distressed effect, incorporating additional techniques such as using steel wool or a wire brush can add texture and depth to the wood surface. These techniques create natural-looking patterns of wear and tear that further enhance the overall distressed look.
After distressing, it’s important to dust off and clean the wood surface to remove any loose particles and maintain a polished finish. Finally, applying a protective finish or sealant not only preserves the distressed appearance but also safeguards the wood from future damage, extending the lifespan of your piece.
Remember, distressing painted wood with sandpaper allows for creativity and personalization. Adjust the level of distressing based on your preferences and the particular piece you are working with. Take breaks, step back, and evaluate the progress to ensure a consistent and visually appealing look.
Whether you’re revamping old furniture, adding character to new pieces, or simply exploring a new DIY project, distressing painted wood with sandpaper offers endless possibilities. Embrace your creativity, experiment with techniques, and enjoy the process of transforming ordinary pieces into beautifully distressed works of art.
With this comprehensive guide, you now have the knowledge and confidence to distress painted wood effectively. So, gather your materials, roll up your sleeves, and let your imagination guide you as you embark on this creative and rewarding endeavor. Happy distressing!
Frequently Asked Questions about How To Distress Painted Wood With Sandpaper
Was this page helpful?
At Storables.com, we guarantee accurate and reliable information. Our content, validated by Expert Board Contributors, is crafted following stringent Editorial Policies. We're committed to providing you with well-researched, expert-backed insights for all your informational needs.


0 thoughts on “How To Distress Painted Wood With Sandpaper”