Home>Furniture>Living Room Furniture>How To Distress A Coffee Table
Living Room Furniture
How To Distress A Coffee Table
Modified: March 16, 2024
Learn how to distress your living room coffee table for a rustic touch with our step-by-step guide. Transform your living room furniture with this easy DIY project.
(Many of the links in this article redirect to a specific reviewed product. Your purchase of these products through affiliate links helps to generate commission for Storables.com, at no extra cost. Learn more)
Introduction
Creating a distressed coffee table can add a unique and rustic touch to your living room decor. By giving your coffee table a distressed look, you can achieve a vintage, aged appearance that adds character and charm to your space. Whether you have an old coffee table that needs a makeover or a brand new one that you want to distress, this article will guide you through the process step by step.
Distressing a coffee table involves various techniques, such as sanding, painting, and sealing. It requires some patience and attention to detail, but the end result will be a beautifully distressed coffee table that you can proudly display in your living room. Not only does distressing add a unique aesthetic appeal, but it can also help to hide any existing imperfections or wear and tear.
In this article, we will explore the materials needed for the project, as well as the step-by-step process for distressing a coffee table. From sanding the surface to applying layers of paint and creating distressed marks, we will cover it all. By the end, you will have all the knowledge and skills necessary to transform your coffee table into a stunning piece of distressed furniture.
So, let’s gather our materials and get started on this exciting DIY project to create a one-of-a-kind distressed coffee table for your living room!
Key Takeaways:
- Transform your coffee table into a vintage masterpiece by distressing it with sanding, painting, and sealing. Embrace imperfections for a unique, rustic charm that adds character to your living room decor.
- Gather materials and unleash your creativity to distress your coffee table. Experiment with techniques like hammering, chaining, and burning to achieve a one-of-a-kind, weathered look.
Read more: How To Distress Picture Frames
Materials Needed
Before you begin the process of distressing your coffee table, it’s important to gather all the necessary materials. Having these items ready will help you complete the project smoothly and efficiently. Here’s a list of the materials you’ll need:
- Sanding block or sandpaper – Choose a medium grit sandpaper (around 120-150) for initial sanding and a finer grit (around 220-300) for smoothing the surface.
- Paint – Select a paint color that matches your desired distressed look. Chalk paint or acrylic paint work well for this project.
- Paintbrushes – Use brushes of different sizes for different areas of the table.
- Lint-free cloth – Essential for wiping away dust and excess paint.
- Paint roller (optional) – A roller can be handy for applying paint to large areas quickly and evenly.
- Wax or sealant – Apply sealing wax or polyurethane to protect and provide a finished look to the distressed table.
- Dust mask and safety goggles – Protect yourself from dust and fumes while sanding and painting.
- Drop cloth or old sheets – Cover your work area to protect it from paint spills and drips.
- Painter’s tape – Use tape to mask off areas you don’t want to paint, such as table legs or hardware.
- Scraper or putty knife – Useful for removing old paint or smoothing the surface.
By having these materials on hand, you’ll be well-prepared to tackle the process of distressing your coffee table and achieve the desired results. Now that you have everything you need, let’s move on to the preparation steps before starting the distressing process.
Preparing the Coffee Table
Before you begin distressing your coffee table, it’s important to properly prepare the surface. This step ensures that the paint and distressing techniques adhere well and create the desired effect. Here are the steps to prepare your coffee table for distressing:
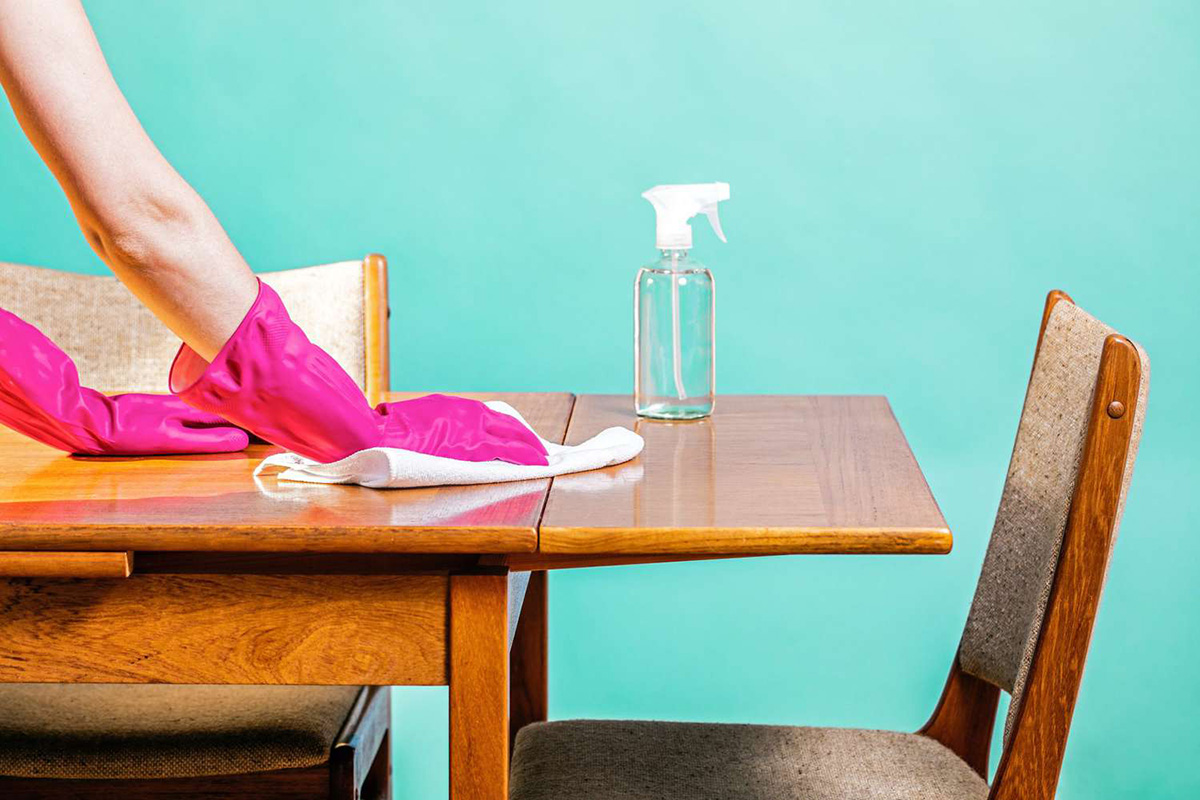
- Clean the table: Start by cleaning the coffee table to remove any dust, dirt, or grime. Use a damp cloth or mild cleaning solution to wipe down the entire surface. Allow the table to dry completely before moving on to the next step.
- Remove hardware (if necessary): If your coffee table has any knobs, handles, or other hardware, consider removing them to make the distressing process easier. Use a screwdriver or appropriate tool to carefully take off the hardware.
- Repair any damages: Inspect the coffee table for any scratches, dents, or loose parts. Use a scraper or putty knife to fill in any holes or cracks with wood filler. Once filled, sand the filled areas until smooth for a seamless surface.
- Sand the table: To create a better surface for the paint to adhere, sand the entire coffee table. Use a sanding block or sandpaper with medium grit (around 120-150) and sand in the direction of the wood grain. Sanding will also help to remove any varnish or existing paint on the table.
Remember to wear a dust mask and safety goggles while sanding to protect yourself from inhaling dust particles. After sanding, use a clean cloth to wipe away any dust and debris from the surface. Once the table is clean and smooth, you are now ready to move on to the next step – sanding the coffee table to create distressed marks.
Sanding the Coffee Table
Sanding the coffee table is a crucial step in achieving the distressed look you desire. This step will help create textured and worn areas on the surface to give the table an aged appearance. Follow these steps to sand the coffee table effectively:
- Choose the right sandpaper: For distressing purposes, select a finer grit sandpaper (around 220-300). This will help create a smoother and more subtle distressed look.
- Sand the edges and corners: Start by sanding the edges and corners of the table to create a worn and aged effect. Use light pressure and sand in a back-and-forth or circular motion. Gradually increase or decrease pressure to achieve the desired level of distressing.
- Sand the tabletop: Next, move on to sanding the tabletop. Focus on areas that naturally receive more wear and tear, such as the center or around the edges. Apply different amounts of pressure to create a varied distressed look.
- Blend the distressed marks: After distressing specific areas, lightly sand the surrounding surface to blend the distressed marks with the rest of the tabletop. This will create a cohesive distressed look.
- Wipe away dust: After sanding, use a clean, lint-free cloth to wipe away any residual dust from the surface of the coffee table. This will ensure a smooth and clean surface for the next steps of the distressing process.
Remember to take breaks during sanding to assess the progress and ensure you are achieving the desired distressed effect. Don’t worry about creating perfect and uniform marks – the beauty of distressing lies in its imperfections. Once you have finished sanding the coffee table, it’s time to move on to the next step – creating distressed marks using various techniques.
Creating Distressed Marks
Creating distressed marks on the coffee table is a key step in achieving an authentic and aged look. These marks will simulate years of use and wear on the furniture surface. There are several techniques you can use to create distressed marks, including:
- Hammering: Use a hammer to gently tap the surface of the table. Focus on areas that would naturally receive more impact, such as the edges or corners. Vary the intensity of the strikes to create a realistic distressed effect.
- Chaining: Take a chain and lightly strike it against the tabletop. This technique creates small dings and nicks, mimicking the wear and tear that comes with years of use.
- Sanding block: Take a sanding block with a rough grit and randomly sand the surface of the table. This technique creates subtle texture and gives the appearance of natural aging.
- Scraping: Use a putty knife or scraper to scrape the surface along the grain of the wood. This technique creates gouges and scratches to add character and distressing.
- Burning: For a more dramatic distressed effect, use a blowtorch or a heat gun to create burn marks on the table. Be cautious and practice safety measures when using this technique.
Experiment with these techniques on a inconspicuous area of the table first to see which method achieves the desired result. Remember to keep the distressing marks natural and uneven, as this will give the table an authentic and aged appearance. Once you are satisfied with the distressed marks, move on to the next step – applying a base coat of paint.
Sand the surface of the coffee table to remove any existing finish. Use a hammer, chain, or wire brush to create dents and scratches. Apply a wood stain or paint, then sand again to reveal the distressed look. Finish with a clear sealant.
Read more: How To Redo A Coffee Table
Applying a Base Coat
Now that you have created the distressed marks on your coffee table, it’s time to apply a base coat of paint. The base coat will serve as the foundation for the distressed look, adding depth and dimension to the surface. Follow these steps to apply the base coat effectively:
- Choose the right paint color: Select a paint color that matches your desired distressed look. Neutral tones such as off-white, light gray, or beige work well for creating a vintage and worn appearance.
- Prepare the paint: If using chalk paint or acrylic paint, mix it well to ensure consistency. If necessary, thin the paint with a small amount of water to achieve a smoother application.
- Apply the base coat: Use a paintbrush or roller to apply an even layer of paint to the coffee table’s surface. Apply the paint in the direction of the wood grain for a more natural look. Let the first coat dry completely before adding additional layers, if necessary.
- Create texture (optional): For a more textured and distressed effect, consider using a dry brush technique. Dip a brush into the paint and remove most of it by wiping it on a cloth. Lightly brush the paint onto the table, focusing on areas where wear and tear would naturally occur. This technique adds depth and visual interest to the base coat.
Remember, the purpose of the base coat is to provide a foundation for the distressing process. Don’t worry if the coverage is not perfect or even – imperfections and unevenness will contribute to the overall distressed look. Once the base coat has dried, you can move on to adding additional layers of paint and enhancing the distressed effect further.
Adding Additional Layers of Paint
After applying the base coat, it’s time to add additional layers of paint to create depth and enhance the distressed look of your coffee table. This step will give the table a weathered appearance, as if the paint has faded or peeled over time. Follow these steps to add additional layers of paint effectively:
- Choose complementary paint colors: Select one or two additional paint colors that complement the base coat. These colors can be lighter or darker shades of the same color or different hues that work well together.
- Prepare the paint: Just like with the base coat, make sure to mix the additional paint colors thoroughly. If required, thin the paint with water for a more translucent effect.
- Apply the second layer: Use a brush or roller to apply the second layer of paint unevenly over the table’s surface. Leave some portions of the base coat exposed to mimic natural wear and fading. Apply the paint lightly and sporadically, focusing on areas that would receive more wear and tear, such as the edges and corners.
- Add a third layer (optional): If you desire more depth and dimension, you can add a third layer of paint using a different color. Apply it sparingly and strategically to create a multi-toned distressed effect.
- Dry brush technique: For an even more realistic distressed look, consider using the dry brush technique to lightly apply paint using a mostly dry brush. This technique adds subtle highlights and lowlights, mimicking the appearance of aging and natural wear.
Throughout the process, step back and assess the progress to ensure that the distressed look is developing as desired. Remember, the goal is to create a worn and weathered effect, so embrace the imperfections and irregularities in the paint layers. Once the additional layers of paint have dried, you can move on to the next step – sanding the edges for an aged look.
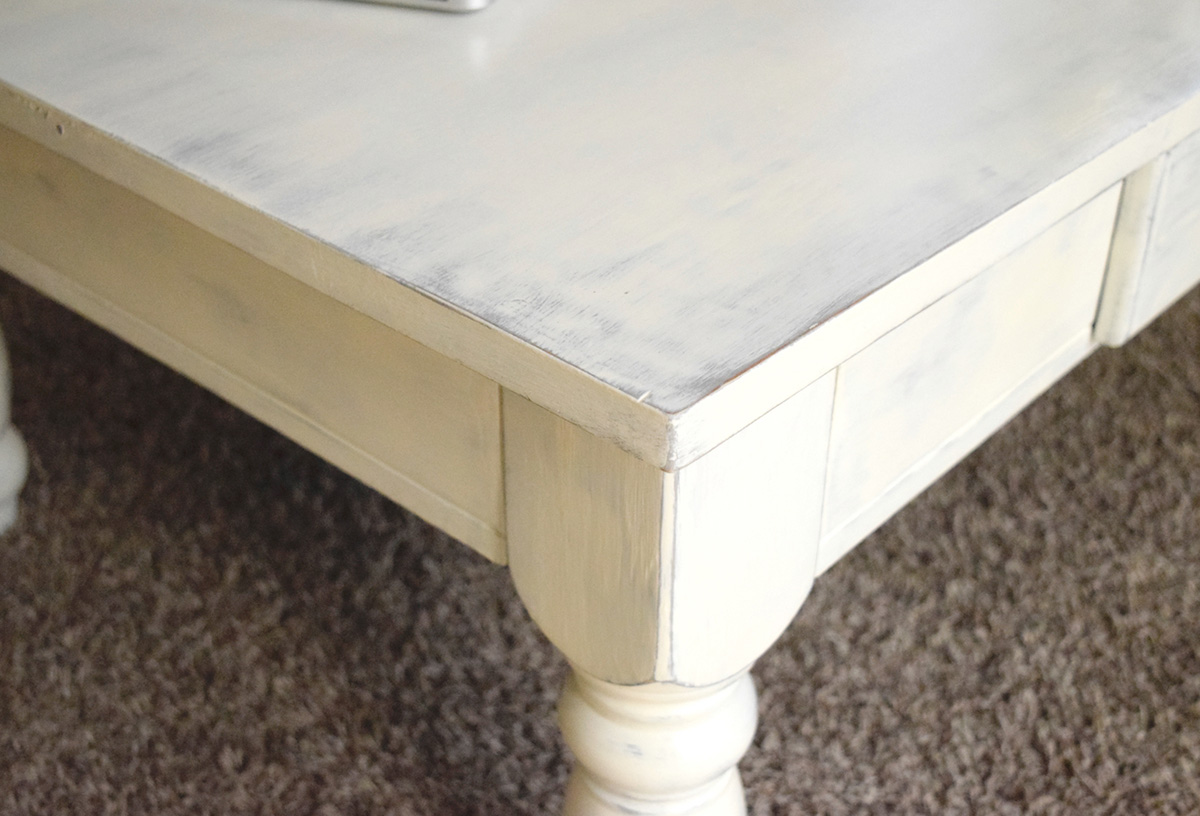
Sanding the Edges for an Aged Look
Sanding the edges of your distressed coffee table is a crucial step in achieving an authentic aged appearance. By sanding the edges, you will expose the underlying layers of paint, creating a worn and weathered effect. Follow these steps to sand the edges effectively:
- Select the right sandpaper: Choose a fine-grit sandpaper (around 220-300) to gently sand the edges of the table. This will help remove some paint and reveal the layers beneath.
- Identify the areas to sand: Examine the coffee table and determine which edges and corners would naturally experience more wear, such as the corners, edges, and high-contact areas. These are the areas you will focus on during the sanding process.
- Sand with a light touch: Using the sandpaper, gently sand the edges and corners in a back-and-forth or circular motion. Apply light pressure to gradually remove the paint and expose the layers beneath. Keep in mind that you don’t need to sand the entire edge uniformly; a random and uneven approach will create a more authentic aged look.
- Blend the sanded areas: After sanding, use a clean, lint-free cloth to wipe away any dust and paint particles. Gently blend the sanded areas with the rest of the table’s surface to create a seamless transition between the distressed edges and the rest of the table.
Sanding the edges adds depth and character to your distressed coffee table, making it appear aged and well-loved. Take your time during this step and occasionally step back to assess the progress. Remember, the goal is to create a natural and organic appearance, so embrace imperfections and variations in the level of distressing. Once you are satisfied with the sanded edges, it’s time to move on to the final step – sealing the distressed coffee table.
Sealing the Distressed Coffee Table
Sealing your distressed coffee table is an essential final step to protect the finish and ensure its longevity. A sealant will also enhance the overall look of the table, giving it a polished and finished appearance. Follow these steps to seal the distressed coffee table effectively:
- Choose the right sealant: Depending on your preference, you can choose between a wax or a polyurethane sealant. Wax provides a matte finish and is easy to apply, while polyurethane offers a durable and glossy finish.
- Prepare the workspace: Ensure that the area you’ll be working in is well-ventilated and free from dust. Lay down a drop cloth or old sheets to protect your work surface from any spills or drips.
- Apply the sealant: If using wax, dip a clean, lint-free cloth into the wax and apply it to the distressed coffee table in circular motions. Ensure even coverage and work in small sections. If using polyurethane, use a high-quality brush or sponge applicator to apply a thin, even layer of sealant to the table’s surface.
- Follow the manufacturer’s instructions: Different sealants have different curing times and application instructions. Follow the directions provided by the manufacturer to ensure proper drying and curing of the sealant. Apply additional coats, if necessary, to achieve the desired level of protection and finish.
- Allow the sealant to dry: Give the sealant ample time to dry and cure. This typically takes a few hours to overnight, depending on the type of sealant used. Avoid placing any objects or using the table during this drying period.
Once the sealant has fully dried, your distressed coffee table is ready to be displayed in your living room. The sealant not only protects the distressed finish but also adds a lustrous sheen, highlighting the distressed marks and giving the table a polished appearance. Regularly clean and maintain the table as recommended by the sealant manufacturer to preserve its beauty and prolong its lifespan.
Congratulations! You have successfully transformed your coffee table into a stunning piece of distressed furniture that will add charm and character to your living room. Sit back, relax, and enjoy the vintage vibes of your newly distressed coffee table!
Read more: How To Whitewash A Coffee Table
Final Thoughts and Tips
Distressing a coffee table is a fun and creative DIY project that allows you to customize your furniture and add a unique touch to your living room. Here are some final thoughts and tips to keep in mind as you complete your distressed coffee table:
- Experiment with distressing techniques: Don’t be afraid to try different distressing techniques to achieve the desired look. Mix and match approaches like sanding, hammering, or scraping to create a varied and realistic distressed effect.
- Take breaks and step back: Throughout the process, take breaks and step back to evaluate your progress. This will help you determine if more distressing is needed or if you’re achieving the desired outcome.
- Embrace imperfections: Remember that the beauty of a distressed coffee table lies in its imperfections. Don’t strive for uniformity, as natural wear and tear are irregular. Embrace the unique marks and blemishes that add character to your piece.
- Protect your work area: Always protect your work area with a drop cloth or old sheets to prevent paint spills and drips. This will make cleanup easier and keep your surroundings clean.
- Follow safety precautions: Wear a dust mask and safety goggles while sanding to protect yourself from dust particles. If using heat for distressing, exercise caution and prioritize safety measures.
- Enjoy the transformation: Once your distressed coffee table is complete, take a moment to appreciate the transformation. Admire the vintage, rustic charm it brings to your living room and be proud of your DIY accomplishment.
Distressing a coffee table is a labor of love that can make a significant impact on your living room decor. By following the steps outlined in this guide and incorporating your creativity, you can create a one-of-a-kind piece that adds character and warmth to your space. So, gather your materials, unleash your creativity, and let the distressed masterpiece unfold before your eyes!
Frequently Asked Questions about How To Distress A Coffee Table
Was this page helpful?
At Storables.com, we guarantee accurate and reliable information. Our content, validated by Expert Board Contributors, is crafted following stringent Editorial Policies. We're committed to providing you with well-researched, expert-backed insights for all your informational needs.


0 thoughts on “How To Distress A Coffee Table”