Home>Storage Ideas>Bedroom Storage>How To Remove Halloween Stains To Avoid A Cleaning Nightmare
Bedroom Storage
How To Remove Halloween Stains To Avoid A Cleaning Nightmare
Modified: October 20, 2024
Learn how to remove Halloween stains from your bedroom storage to avoid a cleaning nightmare. Protect your bedroom storage with our helpful tips and tricks!
(Many of the links in this article redirect to a specific reviewed product. Your purchase of these products through affiliate links helps to generate commission for Storables.com, at no extra cost. Learn more)
Introduction
With Halloween just around the corner, it’s time to start planning for the spookiest night of the year. From costume parties to trick-or-treating, Halloween brings fun and excitement. However, with all the festivities comes the inevitable risk of stains and messes. Whether it’s pumpkin guts, candy smears, fake blood, or face paint, dealing with Halloween stains can be a nightmare.
But fret not! In this article, we will guide you through the process of removing Halloween stains and help you avoid a cleaning nightmare. With our expert tips and tricks, you’ll be able to restore your belongings to their pre-spookiness glory.
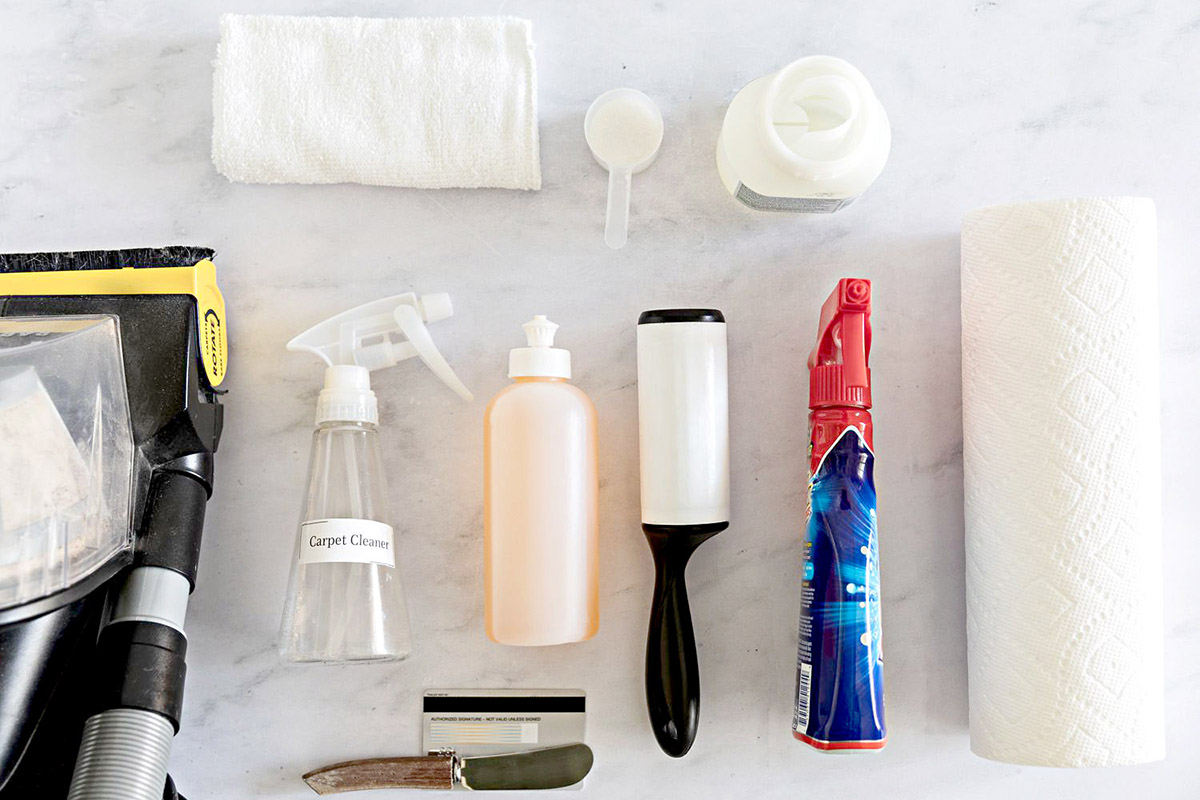
Before we dive into the specifics of stain removal, it’s essential to be prepared. Having a few basic supplies on hand can make all the difference when it comes to effectively treating and removing stains.
Here’s a quick checklist of items you should consider having ready:
- Mild dish soap
- Baking soda
- White vinegar
- Hydrogen peroxide
- Clean cloth or sponge
- Soft-bristled brush
- Lukewarm water
- Stain remover spray (preferably non-bleaching)
- Laundry detergent
- Old toothbrush
- Plastic scraper (for wax stains)
By having these items at the ready, you’ll be well-equipped to tackle any Halloween stains that come your way. Now, let’s move on to the specific stain removal techniques for some of the most common Halloween mishaps.
Key Takeaways:
- Don’t let Halloween stains haunt you! Be prepared, act quickly, and follow expert tips to remove pumpkin guts, candy smears, fake blood, and more. Enjoy a spooktacular, worry-free Halloween!
- Keep the spooky spirit alive without fear of stains. From costumes to decorations, be equipped with the right tools and techniques to conquer any Halloween mess. Enjoy the festivities with confidence!
Preparing for Halloween Stains
Before the Halloween festivities begin, it’s essential to take some precautionary measures to minimize the risk of stains and make the cleaning process easier. Here are a few tips to help you prepare:
a) Set up a stain-free zone: Designate a specific area in your home where Halloween-related activities will take place. This could be a covered porch, a garage, or even a designated room. By confining the mess to one area, you can limit the chances of stains spreading throughout your home.
b) Lay down protective materials: Cover your floors and furniture with plastic sheets, old newspapers, or drop cloths, especially in high-traffic areas. This will provide a barrier against accidental spills and stains. Don’t forget to use washable mats or rugs near entrances to catch dirt and moisture from shoes.
c) Create a cleanup station: Set up a designated spot with all the necessary cleaning supplies. This can include paper towels, wet wipes, stain remover sprays, and a trash can for easy access. Having everything in one place will make it more convenient to address stains promptly.
d) Pre-treat fabrics: If you’re planning to wear or use fabric items, such as costumes or tablecloths, consider applying a fabric protector spray beforehand. This will create a protective barrier and make it easier to remove any potential stains. Just make sure to test it on a small, inconspicuous area first to ensure it doesn’t damage the fabric.
e) Keep stain removal essentials handy: Have a small kit of stain removal essentials close by. This should include items like mild dish soap, baking soda, white vinegar, and clean cloths. Being prepared ahead of time will save you valuable minutes when dealing with stains.
f) Know the material: Before attempting to remove a stain, it’s crucial to know the material you’re dealing with. Different fabrics and surfaces require specific cleaning methods, so consult the care labels or manufacturer’s instructions to avoid causing further damage.
By following these simple steps, you can create a stain-resistant environment and be better prepared to handle any Halloween-related messes that come your way. Now, let’s jump into the specific stain removal techniques for pumpkin stains.
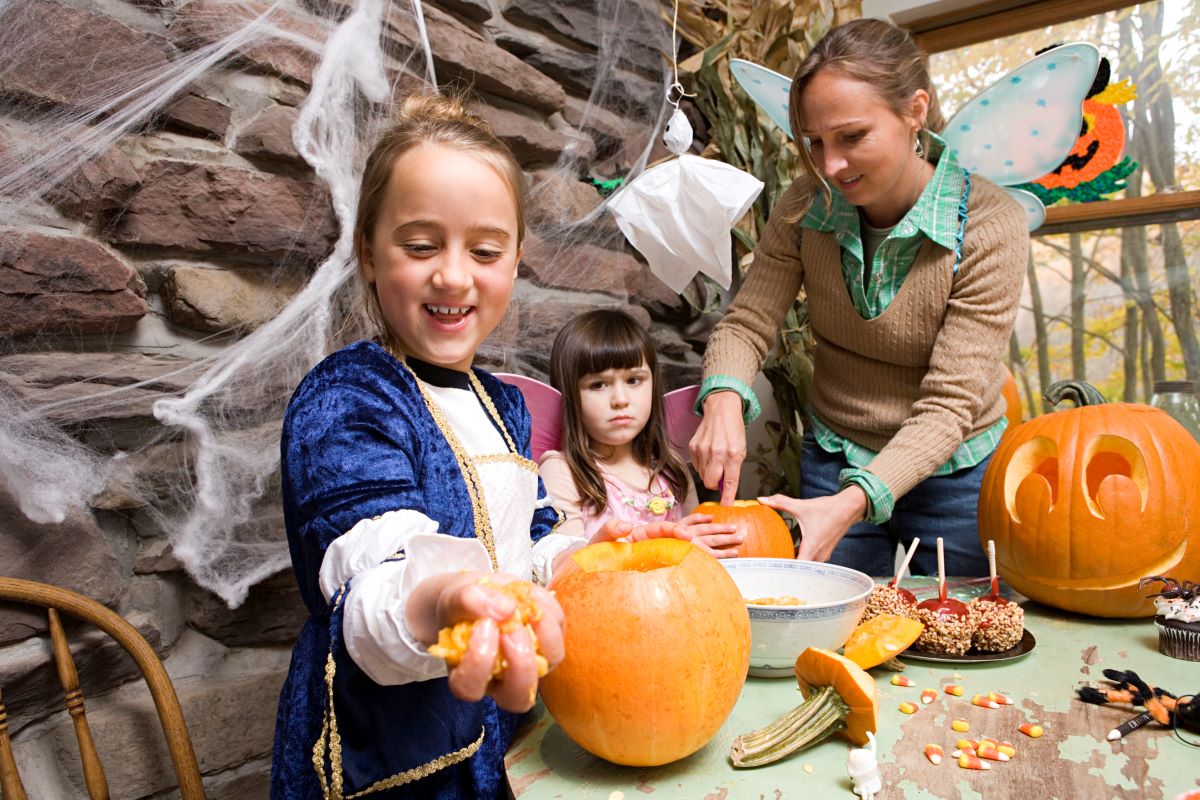
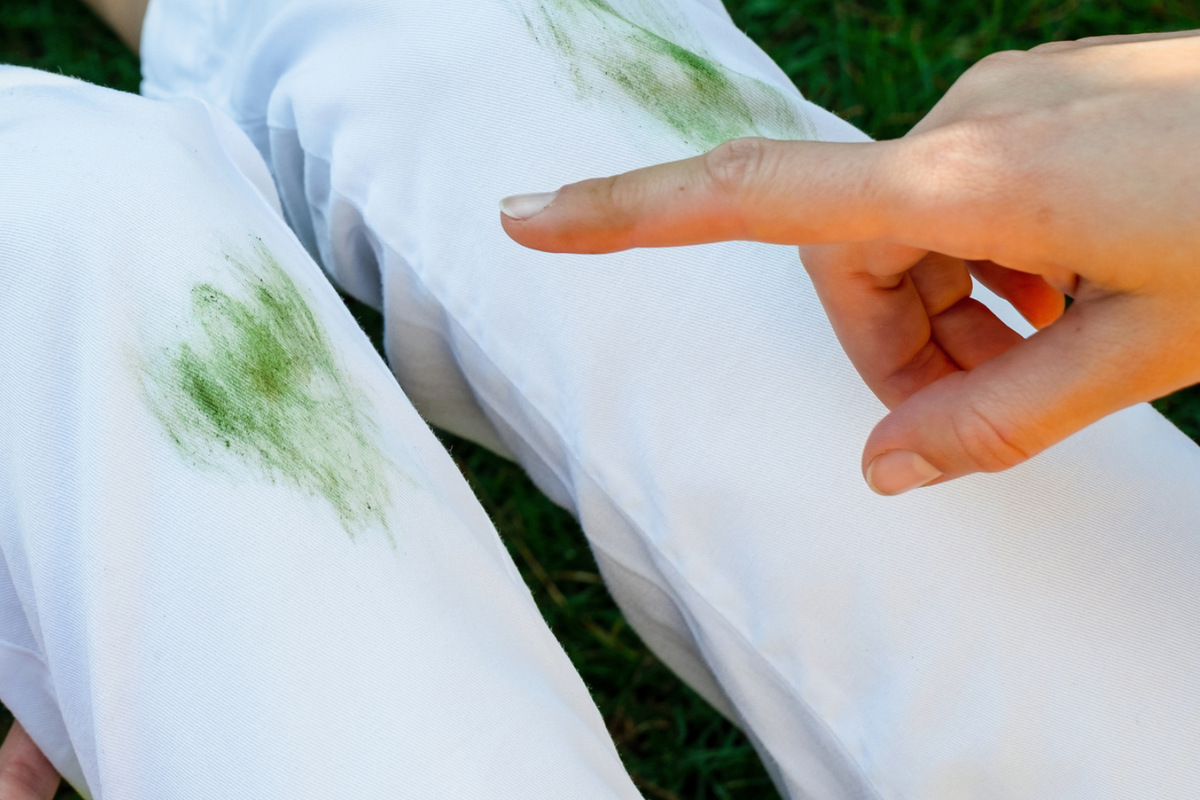
Removing Pumpkin Stains
No Halloween season is complete without carving pumpkins. However, dealing with pumpkin stains can be quite challenging. The vibrant orange color and sticky nature of pumpkin guts can easily leave stubborn stains on clothing, carpets, and surfaces. Here’s how you can effectively remove pumpkin stains:
a) Scrape off excess: Start by gently scraping off any excess pumpkin pulp or seeds from the stained surface. Be careful not to spread the stain further.
b) Rinse with cold water: Rinse the stained area with cold water from the backside to prevent pushing the stain deeper into the fabric. Avoid using hot water as it can cause the stain to set.
c) Treat with dish soap: Apply a small amount of mild dish soap to the stained area and gently rub it in with your fingers or a soft brush. Let it sit for a few minutes to penetrate the stain.
d) Rinse and repeat: Rinse the area thoroughly with cold water and check if the stain has faded. If not, repeat the dish soap treatment until the stain is significantly reduced.
e) Launder as usual: Once the stain has been treated, wash the garment as you normally would, following the care instructions on the label. Use a stain remover or pre-treatment spray for extra assurance.
f) Cleaning pumpkin stains on carpets or upholstery: For pumpkin stains on carpets or upholstery, start by blotting the stain with a clean cloth or paper towel to remove any excess moisture. Then, mix a solution of two cups of cool water and one tablespoon of dish soap. Blot the stain with the solution using a clean cloth, working from the outside in to prevent spreading. Continue blotting until the stain is lifted. Rinse the area with cold water and blot dry.
Remember, the key to successfully removing pumpkin stains is to act quickly and avoid heat, as heat can set the stain. By following these steps, you can say goodbye to those pesky pumpkin stains and enjoy the Halloween festivities without worry.
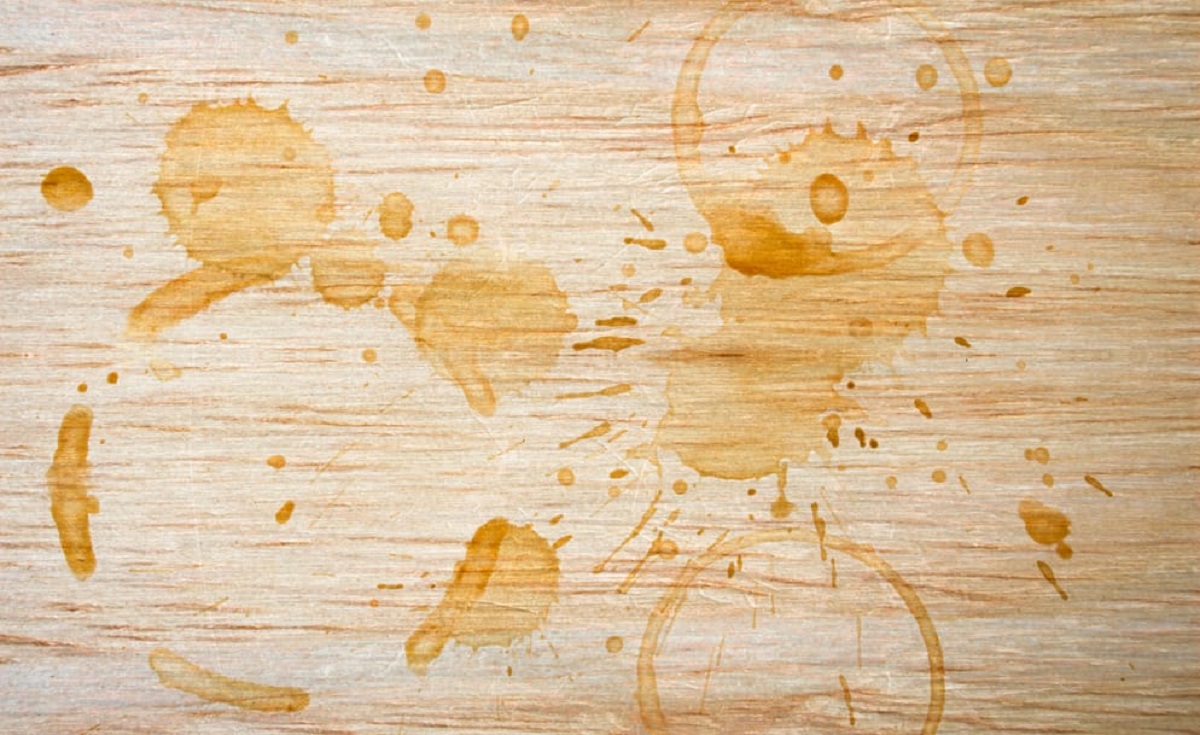
Treating Candy and Chocolate Stains
No Halloween celebration is complete without indulging in delicious candy and chocolate treats. However, accidents happen, and candy stains can be quite stubborn. Whether it’s chocolate smears or sticky candy residue, here’s how you can effectively treat candy and chocolate stains:
a) Scrape off excess: If there’s any solid candy or chocolate on the surface, gently scrape it off using a spoon or a dull knife. Be careful not to spread the stain further.
b) Blot, don’t rub: For fresh stains, start by blotting the stained area with a clean cloth or paper towel to absorb as much of the stain as possible. Avoid rubbing the stain, as it can push it deeper into the fabric or carpet fibers.
c) Pre-treat with mild dish soap: Create a solution of one teaspoon of mild dish soap and one cup of lukewarm water. Gently dab the stained area with the solution using a clean cloth or sponge. Blot, don’t rub, the stain, working from the outside in to prevent spreading. Let the solution sit on the stain for a few minutes to loosen it.
d) Rinse and assess: Rinse the treated area thoroughly with cold water to remove the soap solution. Check if the stain has faded. If the stain is still visible, repeat the pre-treatment process until the stain is significantly reduced.
e) Launder as usual: Once the stain has been treated, wash the clothing or fabric according to the care instructions. Use a laundry detergent that is suitable for the fabric type and the water temperature recommended on the care label. For carpets or upholstery, blot the area with a clean cloth moistened with cold water to remove any remaining soap residue.
f) Dealing with sticky residue: If you’re left with sticky candy residue on hard surfaces, such as tables or countertops, mix a solution of equal parts warm water and white vinegar. Dip a clean cloth into the solution and gently scrub the sticky residue. Rinse the area with water and dry it thoroughly.
Remember, treating candy and chocolate stains promptly is crucial for successful removal. The longer a stain sits, the harder it becomes to remove. By following these steps, you can enjoy your Halloween treats without worrying about pesky stains.
Tackling Fake Blood Stains
Fake blood is a popular accessory for Halloween costumes, but it can leave behind stubborn stains if not treated properly. Don’t let fake blood ruin your favorite costume! Here’s how you can effectively tackle fake blood stains:
a) Act quickly: The key to successful stain removal is to act as soon as possible. Start by rinsing the stained area under cold water to remove as much of the fake blood as you can.
b) Pre-treat with hydrogen peroxide: Hydrogen peroxide is an effective stain remover for fake blood stains. Apply a small amount of hydrogen peroxide directly to the stain and let it sit for a few minutes. Be sure to test it on a small, inconspicuous area first to ensure it doesn’t affect the fabric or surface.
c) Blot, don’t rub: After letting the hydrogen peroxide sit, blot the stain with a clean cloth or paper towel. Avoid rubbing the stain, as it can spread the fake blood further.
d) Rinse and reassess: Rinse the treated area with cold water to remove the hydrogen peroxide and check if the stain has faded. If the stain is still visible, repeat the pre-treatment process until the stain is noticeably lighter.
e) Launder as recommended: For clothing items, follow the care instructions on the label and launder the garment as recommended. Use a laundry detergent that is suitable for the fabric type and water temperature indicated on the label. Check the stain after laundering, and if any traces remain, repeat the stain removal process or consider using a stain remover spray.
f) Removing fake blood from carpets or upholstery: If fake blood has stained your carpets or upholstery, start by blotting the stain with a clean cloth or paper towel to remove any excess. Mix a solution of mild dish soap and cool water. Gently blot the stain with the solution, working from the outside in to prevent spreading. Rinse the area with cold water and continue blotting until the stain is lifted.
g) Seek professional help if needed: If you’re dealing with a particularly stubborn fake blood stain or you’re unsure about cleaning certain fabrics or surfaces, it’s always best to seek professional assistance. Professional cleaners have the expertise and specialized products to tackle even the toughest stains.
By following these steps and treating fake blood stains promptly, you can ensure that your Halloween costumes remain blood-free, allowing you to enjoy the spooky festivities without any lingering stains.
Dealing with Face Paint and Makeup Stains
Face paint and makeup can add the finishing touch to your Halloween look, but they can also leave behind stubborn stains. Whether it’s smudged face paint or spilled makeup, here’s how you can effectively deal with face paint and makeup stains:
a) Act quickly: The sooner you address a face paint or makeup stain, the easier it will be to remove. As soon as you notice a stain, gently blot the area with a clean cloth or paper towel to remove any excess makeup.
b) Pre-treat with stain remover: Apply a small amount of stain remover directly to the stained area and gently rub it into the stain. Allow the stain remover to penetrate the fabric for a few minutes, following the instructions on the product.
c) Dab with mild dish soap: After pre-treating with stain remover, dab the stain with a mixture of mild dish soap and cool water. Use a clean cloth or sponge and work the soap mixture into the stain gently. Avoid rubbing, as it can push the stain deeper into the fabric.
d) Rinse and assess: Rinse the area under cold water to remove the soap mixture. Check if the stain has lightened. If the stain is still visible, repeat the pre-treatment and dabbing process until the stain is significantly reduced.
e) Launder according to instructions: For clothing items, check the garment’s care label for specific washing instructions. Launder the garment as recommended, using a laundry detergent suitable for the fabric type and water temperature indicated on the label. If possible, air dry the garment so you can check if the stain is completely removed before applying heat from a dryer.
f) Removing face paint and makeup from carpets or upholstery: If face paint or makeup has stained your carpets or upholstery, start by gently scraping off any excess makeup using a spoon or dull knife. Blot the stained area with a mixture of water and mild dish soap, working from the outside in to prevent spreading. Rinse the area with cold water and blot dry with a clean cloth.
g) Seek professional help if needed: If the face paint or makeup stain persists or if you’re dealing with delicate fabrics or surfaces, it may be best to seek professional assistance. Professional cleaners have the knowledge and specialized products to effectively remove stubborn stains without damaging the material.
By following these steps and treating face paint and makeup stains promptly, you can ensure that your Halloween makeup mishaps don’t leave a lasting mark on your clothes or surroundings. So, go ahead and get creative with your Halloween looks without worrying about the aftermath!
For pumpkin stains, scrape off excess and soak in cold water with detergent before washing. For candy stains, blot with a damp cloth and treat with a stain remover before washing.
Removing Grease and Oil Stains from Costumes
Grease and oil stains can be a common occurrence during Halloween, especially if you’re indulging in delicious fried snacks or handling greasy props. If your costume falls victim to these stubborn stains, don’t panic! Here’s how you can effectively remove grease and oil stains:
a) Blot excess: Start by blotting the stained area with a clean cloth or paper towel to absorb as much of the grease or oil as possible. Avoid rubbing, as this can spread the stain further.
b) Apply baking soda or cornstarch: Sprinkle baking soda or cornstarch over the stained area and let it sit for about 15 minutes. Both baking soda and cornstarch are excellent absorbents and will help draw out the grease or oil from the fabric.
c) Gently brush off: After the powder has had time to absorb the grease, gently brush off the baking soda or cornstarch using a soft-bristled brush. Be careful not to brush too hard, as this could embed the grease back into the fabric.
d) Pre-treat with dish soap: Apply a small amount of mild dish soap directly to the stain and gently rub it in using your fingers or a soft brush. Let the dish soap sit for a few minutes to break down the grease.
e) Rinse and assess: Rinse the stained area under cold water, checking to see if the stain has significantly faded. If the stain persists, repeat the pre-treatment process until the stain is noticeably lighter.
f) Launder as recommended: Check the care label on the costume for specific washing instructions. Launder the garment as indicated, using a laundry detergent suitable for the fabric type and water temperature recommended. For added stain-fighting power, consider using a stain remover spray or adding a scoop of oxygen bleach to the wash.
g) Air dry and check: After washing, air dry the costume and carefully inspect it to ensure the stain is completely removed before applying any heat from a dryer. Heat can set residual stains, making them more difficult to remove.
h) Seek professional help: If the stain persists or if the costume is delicate or valuable, consider seeking professional help. Professional cleaners have the expertise and specialized products to tackle grease and oil stains effectively without damaging the fabric.
By following these steps and treating grease and oil stains promptly, you can restore your costume to its pre-stain glory and continue enjoying your Halloween festivities without worry. So, deck out in your favorite costume and let the fun begin!
Cleaning up Sticky Residue from Halloween Decorations
Halloween decorations often come with stickers, tape, or adhesive residue that can leave a sticky mess behind. Whether it’s on windows, walls, or decorations themselves, here’s how you can effectively clean up sticky residue from Halloween decorations:
a) Remove stickers or tape: Start by gently peeling off any stickers or tape from the surface. If they leave behind adhesive residue, proceed to the next steps.
b) Heat and peel: If the residue is still sticky, use a hairdryer to heat the area for a few seconds. The heat will soften the adhesive, making it easier to peel off. Use a plastic scraper or your fingernail to gently lift and remove the residue. Be cautious not to scratch or damage delicate surfaces.
c) Use oil-based substances: For stubborn residue, use a cotton ball or cloth soaked in an oil-based substance, such as cooking oil, rubbing alcohol, or WD-40. Apply the substance to the affected area and let it sit for a few minutes to dissolve the sticky residue.
d) Gently scrub: After letting the oil-based substance work its magic, gently scrub the residue with a soft cloth or sponge. Move in circular motions, applying gentle pressure to lift off the residue. Avoid using abrasive materials that can damage the surface.
e) Wipe clean: Once the residue has been loosened, wipe the area clean with a cloth or sponge dampened with warm, soapy water. Rinse the surface with clean water to remove any remaining residue and dry thoroughly.
f) Consider adhesive removers: If the sticky residue persists, you can try using adhesive remover products specifically designed for removing sticky residue. Follow the instructions provided with the product for safe and effective use.
g) Test before applying: Before using any cleaning substance or adhesive remover, test it on a small, inconspicuous area of the surface to ensure it doesn’t cause damage or discoloration.
h) Repaint or touch-up if needed: In some cases, sticky residue may leave behind marks or discoloration on painted or finished surfaces. If necessary, repaint or touch up the area to restore its original appearance.
By following these steps, you can effectively remove sticky residue from Halloween decorations and restore the surfaces to their pristine condition. Say goodbye to sticky messes and enjoy the spooky ambiance without any lingering remnants!
Handling Wax Stains from Candle Drips
Candles are a popular choice for creating a spooky atmosphere during Halloween. However, candle drips can leave behind wax stains on various surfaces. Don’t let wax stains ruin your decorations or furniture! Here’s how you can effectively handle wax stains:
a) Let the wax harden: Allow the wax to fully harden before attempting to remove it. Trying to remove hot or semi-liquid wax can spread the stain and potentially burn your skin.
b) Scrape off excess: Once the wax has hardened, use a plastic scraper or a credit card to gently scrape off as much of the wax as possible. Be careful not to scratch or damage the surface.
c) Heat and absorb: Place a clean paper towel or brown paper bag over the remaining wax stain. Set an iron to the lowest heat setting, and gently press the iron over the paper towel or bag. The heat will melt the wax, and the paper will absorb it. Move the paper towel or bag frequently to a clean area to avoid spreading the wax back onto the surface.
d) Pre-treat with dish soap: If there’s any residual wax or stain remaining, pre-treat the area with a small amount of mild dish soap and warm water solution. Gently scrub the stain with a soft-bristle brush or cloth to loosen the residue.
e) Rinse and assess: Rinse the area with clean water to remove the soap solution. Check if the wax stain is still visible. If necessary, repeat the pre-treatment process until the stain is significantly reduced.
f) Consider using a solvent: For stubborn wax stains, you can try using a solvent like rubbing alcohol or white vinegar. Soak a clean cloth or sponge in the solvent and gently dab the stain. Test the solvent on an inconspicuous area first to ensure it doesn’t damage or discolor the surface.
g) Seek professional help if needed: If you’re dealing with sensitive or delicate surfaces, or if the wax stain persists despite your efforts, it’s best to seek professional assistance. Professional cleaners have the expertise and proper tools to handle wax stains without causing further damage.
h) Polish or restore: Depending on the surface that was affected by the wax stain, you may need to polish or restore it to its original condition. Follow the appropriate methods and products recommended for that specific material.
By following these steps, you can effectively remove wax stains and restore the beauty of your belongings. Don’t let wax drips take away from your Halloween ambiance – shine bright with clean surfaces!
Tips for Laundering Halloween-Themed Clothing
Halloween-themed clothing adds an extra layer of fun and creativity to your holiday attire. However, taking care of these unique garments requires some special considerations. To ensure your Halloween-themed clothing stays vibrant and in great condition, follow these tips for laundering:
a) Read and follow the care label: Before laundering any clothing, always check the care label for specific washing instructions. The care label provides valuable information on the appropriate water temperature, washing cycle, and drying method for the garment.
b) Pre-treat stains promptly: If your Halloween-themed clothing gets stained during the festivities, it’s essential to address the stains as soon as possible. Pre-treat the stains using the appropriate stain removal method for the specific type of stain. Remember, the longer a stain sits, the harder it is to remove.
c) Separate by color: When washing multiple Halloween-themed garments, sort them by color to prevent any bleeding or color transfer. Dark and vibrant colors, such as black, orange, and red, are particularly prone to bleeding. Wash them separately or with similar colors to avoid any mishaps.
d) Turn the garments inside out: To preserve the vibrant designs and colors on your Halloween-themed clothing, turn them inside out before washing. This helps to protect the surface from friction and rubbing against other items in the washing machine.
e) Use a gentle washing cycle: Opt for a delicate or gentle cycle on your washing machine when laundering Halloween-themed clothing. This reduces the harsh agitation, which can cause fading or damage to delicate fabrics or decorations.
f) Choose a mild detergent: Select a mild, color-safe laundry detergent specifically designed for delicates or vibrant colors. Avoid bleach or harsh detergents that may cause fading or discoloration.
g) Avoid high heat: When drying Halloween-themed clothing, choose a low heat or delicate setting, or better yet, air dry them if possible. High heat can cause shrinking, fading, or damage to any decorative elements, such as prints or appliques.
h) Handle with care: When removing the garments from the washing machine, handle them with care to prevent stretching or snagging. Smooth out any wrinkles gently and reshape as needed before drying.
i) Store properly: After laundering, store your Halloween-themed clothing in a cool, dry place away from direct sunlight. Avoid overcrowding the storage space to prevent unnecessary wrinkles or creases in the fabric.
By following these tips, you can ensure that your Halloween-themed clothing retains its vibrancy and stays in great condition wash after wash. Enjoy wearing your spooky and stylish garments with confidence, knowing they are properly cared for!
Conclusion
Halloween is a time of creativity, fun, and spooky celebrations. While the festivities bring joy, they can also bring along stains and messes that can turn into cleaning nightmares. However, with the right knowledge and techniques, you can effectively remove Halloween stains and keep your belongings looking their best.
In this comprehensive guide, we covered various types of Halloween stains and provided expert tips for their removal. From pumpkin stains to candy and chocolate smears, fake blood, face paint, grease and oil stains, sticky residue, wax drips, and even laundering Halloween-themed clothing, we’ve got you covered.
Remember, the key to successful stain removal is taking quick action. Act promptly, following the specific stain removal methods outlined in this guide. Pre-treat stains, utilize common household items like dish soap, vinegar, and baking soda, and follow proper laundering techniques to maintain the integrity of your Halloween-themed clothing.
Additionally, we highlighted the importance of being prepared, having the necessary cleaning supplies on hand, and creating a stain-free zone to minimize the potential for messes. By taking these precautions, you can mitigate the risk of stains and make the cleanup process more manageable.
Lastly, it’s important to enjoy the Halloween festivities without worrying about potential stains. Embrace the creativity and excitement of the season, and don’t be afraid to get messy. With the knowledge and tips provided in this guide, you can confidently tackle any Halloween stain and keep the spooky spirit alive.
So, go ahead and dress up, carve pumpkins, enjoy the treats, and decorate your home without fretting about the aftermath. Have a spooktacular Halloween filled with good memories, and rest assured that if stains do occur, you now have the know-how to conquer them!
Frequently Asked Questions about How To Remove Halloween Stains To Avoid A Cleaning Nightmare
Was this page helpful?
At Storables.com, we guarantee accurate and reliable information. Our content, validated by Expert Board Contributors, is crafted following stringent Editorial Policies. We're committed to providing you with well-researched, expert-backed insights for all your informational needs.


0 thoughts on “How To Remove Halloween Stains To Avoid A Cleaning Nightmare”