Home>Storage Ideas>Storage Baskets>How To Clean Fryer Baskets
Storage Baskets
How To Clean Fryer Baskets
Modified: August 25, 2024
Learn how to effectively clean and maintain your storage baskets, including fryer baskets, with our helpful guide. Keep your baskets looking and functioning their best for long-lasting use.
(Many of the links in this article redirect to a specific reviewed product. Your purchase of these products through affiliate links helps to generate commission for Storables.com, at no extra cost. Learn more)
Introduction
Fryer baskets are an essential component of any commercial kitchen or even a home kitchen that frequently uses deep fryers. They are responsible for holding the food being fried and ensuring even cooking and crispiness. However, over time, these baskets can become coated with oil, grease, and food debris, affecting the quality and taste of the fried food. To maintain the highest standards of hygiene and ensure the longevity of your fryer baskets, regular cleaning is necessary.
In this article, we will guide you through the process of cleaning fryer baskets effectively. From preparing the fryer for cleaning to scrubbing off stubborn grease stains and properly drying the baskets, we will cover all the essential steps to help you keep your fryer baskets in tip-top condition.
But why is it so important to clean fryer baskets? Firstly, a clean basket ensures that the fried food is not contaminated with leftover residues from previous batches. It guarantees that your customers can enjoy food that is not only delicious but also safe to consume. Additionally, proper cleaning of fryer baskets prevents the buildup of stubborn grease, which can impair the frying process and lead to unevenly cooked or soggy food. Lastly, regular cleaning and maintenance help extend the lifespan of your fryer baskets, saving you money in the long run by avoiding the need for frequent replacements.
Before we dive into the cleaning process, there are a few necessary supplies you’ll need to gather.
Key Takeaways:
- Regularly cleaning fryer baskets is crucial for food safety, taste, and cooking efficiency. It also extends the lifespan of the baskets, saving money in the long run.
- Utilize proper cleaning supplies and techniques to maintain clean fryer baskets, ensuring safe and delicious fried food for satisfied customers.
Read more: How To Clean Bamboo Steamer Baskets
Importance of Cleaning Fryer Baskets
Cleaning fryer baskets is not just about maintaining a clean and hygienic kitchen; it also plays a significant role in ensuring the quality of the fried food. Here are a few reasons why cleaning fryer baskets is important:
- Food Safety: Leftover residues from previous batches can accumulate in the fryer baskets, becoming a breeding ground for bacteria and other harmful pathogens. Failure to properly clean the baskets can result in cross-contamination and pose serious health risks to your customers.
- Enhanced Taste: When fryer baskets are not cleaned regularly, the remnants of old oil and food particles can transfer unwanted flavors to the fried food. This can greatly affect the taste and overall satisfaction of your customers. A clean fryer basket ensures that the food maintains its natural flavors and tastes as intended.
- Improved Cooking Efficiency: Over time, fryer baskets can become coated with layers of grease. This can affect the heating process and result in uneven cooking. When fryer baskets are clean, they allow for better heat circulation, ensuring that the food is cooked evenly and achieves that desirable crispy texture.
- Prolonged Lifespan: Regular cleaning and maintenance of fryer baskets help prolong their lifespan. When grease and food particles are allowed to build up, they can corrode the basket material, leading to deterioration and potentially costly replacements. By keeping the baskets clean, you can extend their usability and save money in the long run.
By understanding the importance of cleaning fryer baskets and implementing a regular cleaning regimen, you can ensure the safety and satisfaction of your customers, optimize the taste of your fried food items, maintain the efficiency of your fryer, and extend the lifespan of your fryer baskets.
Necessary Supplies
Before you begin the process of cleaning your fryer baskets, it’s important to gather the necessary supplies. Here are the items you will need:
- Gloves: It’s essential to protect your hands while cleaning fryer baskets. Disposable gloves made from nitrile or latex can provide adequate protection against hot water and cleaning agents.
- Brushes and Scrubbers: Choose brushes and scrubbers that are specifically designed for cleaning fryer baskets. Look for sturdy bristles that can effectively remove grease and food debris without causing damage to the basket’s surface.
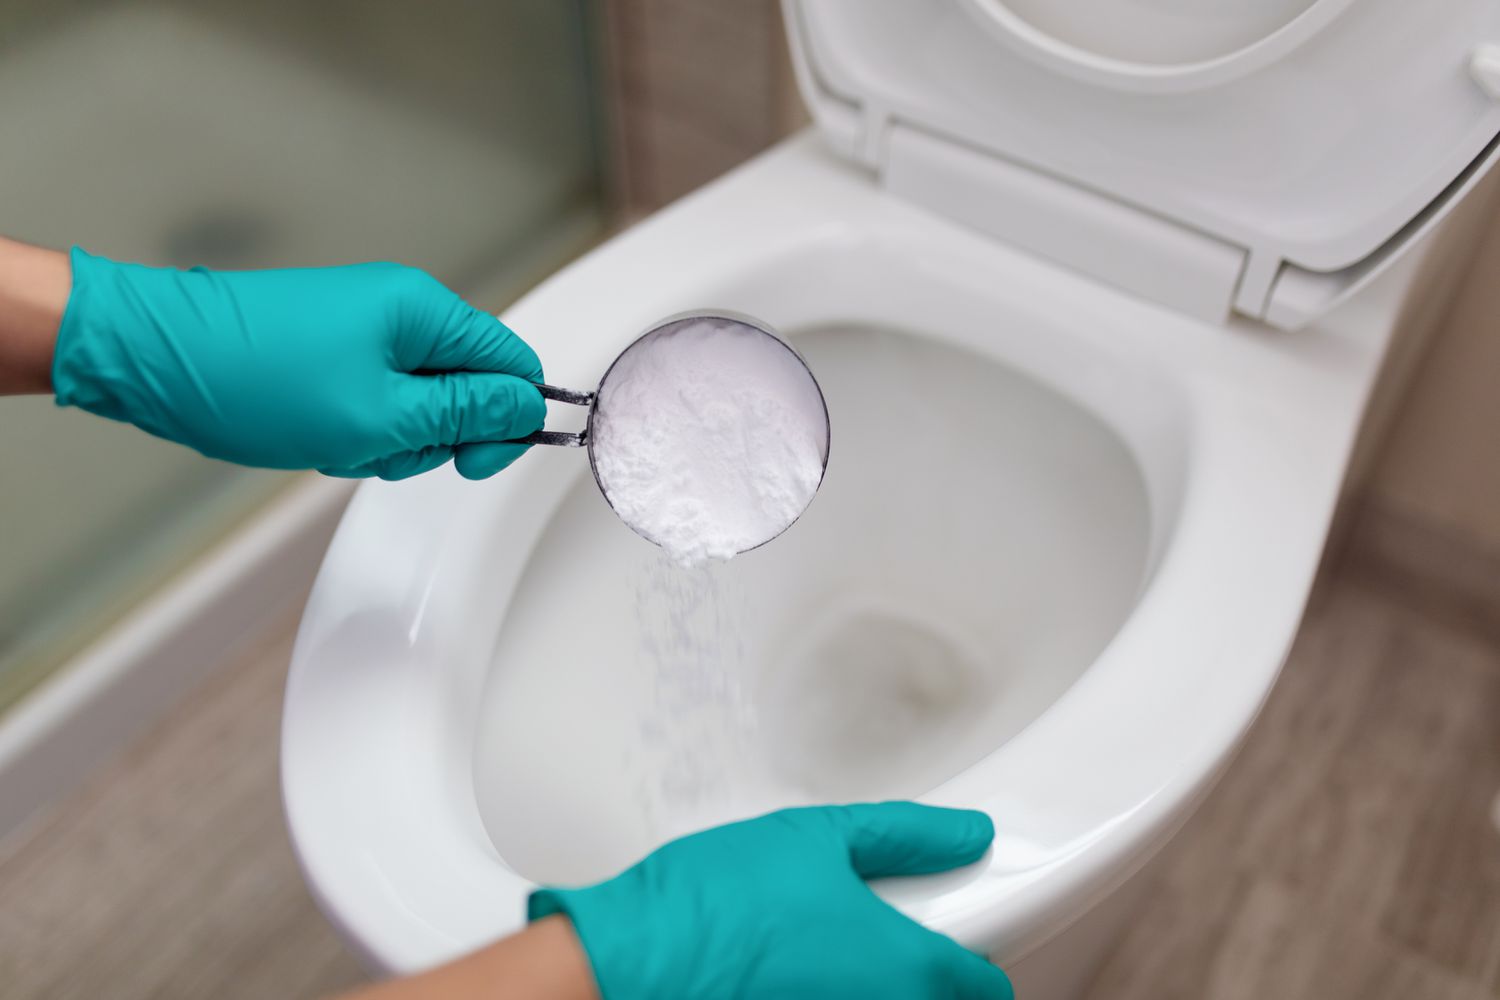
- Detergent or Cleaning Solution: Select a commercial degreaser or a dishwashing detergent that is suitable for removing tough grease and grime. Alternatively, you can also create a homemade cleaning solution using warm water and a mixture of baking soda and vinegar.
- Hot Water: Hot water is an effective tool for breaking down grease and food residues. Make sure to have a large container or sink filled with hot water to soak the fryer baskets.
- Towels or Paper Towels: You will need clean towels or paper towels for wiping down the fryer baskets after cleaning to remove any remaining moisture.
- Drying Rack: To ensure proper drying of the fryer baskets, have a drying rack or a clean, dry surface ready to place them on. This will help prevent moisture buildup and potential bacterial growth.
- Fryer Cleaner: If your fryer manufacturer recommends a specific fryer cleaner, make sure to have it on hand. These cleaners are designed to break down stubborn grease and provide a thorough cleaning.
By having these supplies readily available, you can streamline the cleaning process and ensure that you have everything you need to effectively clean your fryer baskets.
Preparing the Fryer for Cleaning
Before cleaning the fryer baskets, it is important to prepare the fryer itself for the cleaning process. Here are the steps to follow:
- Turn off the fryer and unplug it: Safety should always come first. Ensure that the fryer is completely turned off and unplugged to avoid any accidents during the cleaning process.
- Allow the fryer to cool down: Deep fryers can reach extremely high temperatures during use, so it’s crucial to allow them to cool down before beginning the cleaning process. This will help prevent burns and other injuries.
- Drain the oil: Carefully drain the oil from the fryer into a suitable container or follow the manufacturer’s instructions for proper oil disposal.
- Remove the fryer baskets: Take out the fryer baskets from the fryer and place them on a heat-resistant surface. This will make them accessible for cleaning.
- Scrape off excess food debris: Use a spatula or a mesh strainer to scrape off any large food particles or debris from the fryer basket. Dispose of these in a trash bin.
- Wipe down the fryer interior: Use a clean cloth or paper towel to wipe down the inside of the fryer, removing any residual grease or crumbs. Pay attention to the heating element and other hard-to-reach areas.
By following these steps to prepare the fryer, you are ensuring a safe and clean environment for cleaning the fryer baskets. Once the fryer is prepped and ready, you can move on to the next steps of removing excess oil and food debris from the baskets.
Removing Excess Oil and Food Debris
After preparing the fryer for cleaning, the next step is to remove excess oil and food debris from the fryer baskets. This step is crucial for achieving a thorough and effective clean. Here’s how to do it:
- Use a scraper or spatula: Start by using a scraper or spatula to gently scrape off any large chunks of food or stubborn residue from the fryer baskets. Be careful not to scratch or damage the surface of the baskets.
- Shake off loose debris: Holding the fryer basket over a trash bin or sink, shake it vigorously to dislodge any loose food debris or particles. This will help remove any remaining crumbs or residue.
- Vacuum or use compressed air: For a more thorough clean, you can use a vacuum cleaner with a brush attachment or compressed air to remove any stubborn debris that may be stuck in the crevices of the fryer baskets. Pay close attention to the corners and seams.
- Inspect and remove trapped debris: Inspect the fryer basket closely and remove any small pieces of food or debris that may be stuck between the wires of the basket. You can use a toothbrush or a small brush to gently dislodge the trapped debris.
- Dispose of oil and debris: Properly dispose of the oil and food debris collected during this process. Follow local regulations for the disposal of oil and food waste.
By removing excess oil and food debris from the fryer baskets, you are ensuring a clean surface to work with during the subsequent steps of the cleaning process. Once the excess debris has been removed, it’s time to move on to soaking the fryer baskets to further loosen stubborn residue.
Read more: How To Clean Mold From Wicker Baskets
Soaking the Fryer Baskets
Soaking the fryer baskets is an essential step in the cleaning process as it helps to loosen stubborn grease and food residue. Here’s how to effectively soak the fryer baskets:
- Find a suitable container: Choose a container large enough to accommodate the fryer baskets. It should be deep enough to fully submerge the baskets in water or cleaning solution.
- Fill the container with hot water: Fill the container with hot water. The water should be hot enough to break down grease and food residue but not boiling, as this may damage the fryer baskets.
- Add cleaning solution: Depending on your preference, you can add a commercial fryer cleaning solution or create a homemade solution using warm water and a mixture of baking soda and vinegar. Follow the instructions on the cleaning solution’s packaging or use a ratio of approximately 1 cup of baking soda and 1 cup of vinegar per gallon of water.
- Submerge the fryer baskets: Place the fryer baskets in the container, ensuring they are fully submerged in the water or cleaning solution. Use a spoon or your hands (while wearing gloves) to gently press down on the baskets to ensure they are soaked.
- Let the baskets soak: Allow the fryer baskets to soak for at least 15 to 30 minutes. This will give the hot water and cleaning solution enough time to work on breaking down grease and loosening the food residue.
Soaking the fryer baskets helps to soften and loosen any stubborn dirt and grime, making the cleaning process easier and more effective. After the required soaking time, you can proceed to the next step of scrubbing and cleaning the baskets.
To clean fryer baskets, start by removing excess oil and food particles. Then, soak the baskets in hot, soapy water and scrub with a brush. Rinse thoroughly and allow to air dry before using again.
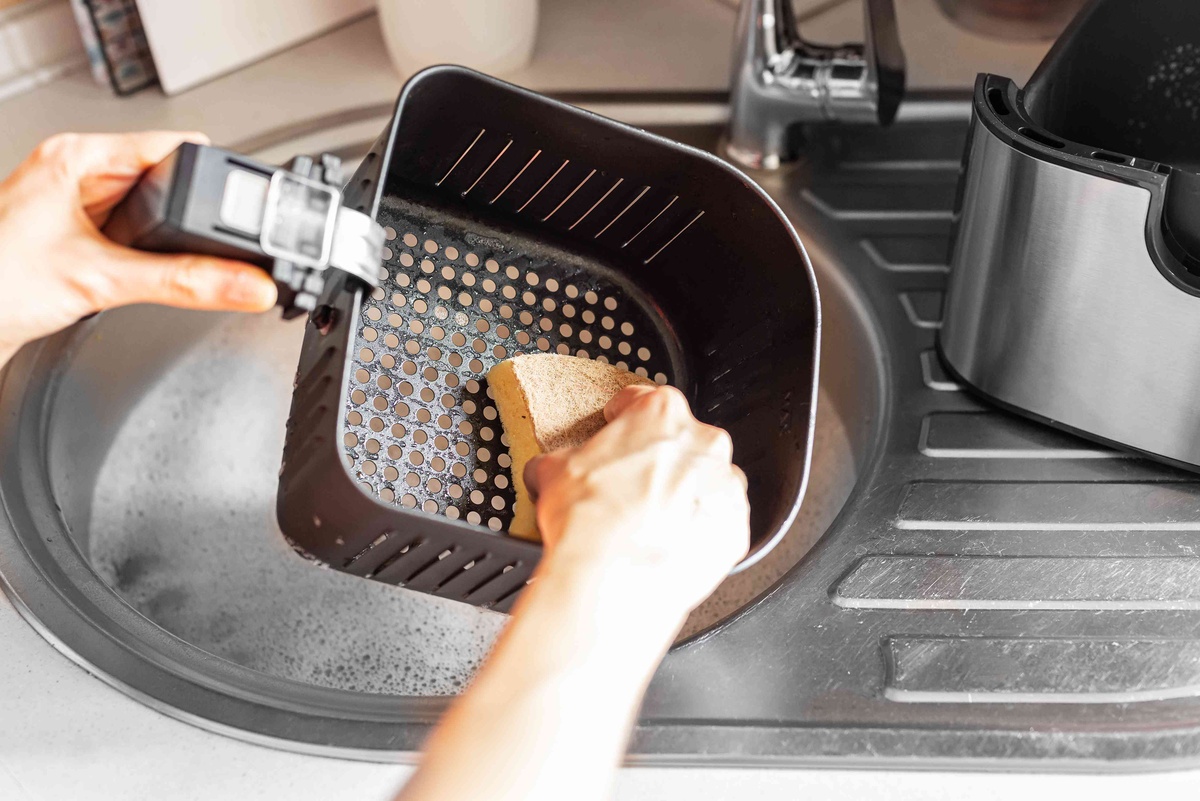
Scrubbing and Cleaning the Baskets
Once the fryer baskets have finished soaking, it’s time to scrub and clean them to remove any remaining grease and food residue. Follow these steps to effectively clean the fryer baskets:
- Put on gloves: Before you begin scrubbing, put on a pair of gloves to protect your hands from hot water and cleaning agents.
- Use a brush or scrubber: Take a brush or scrubber specifically designed for cleaning fryer baskets. Start scrubbing the basket, paying close attention to areas with visible grease or stubborn residue. Apply gentle pressure and use circular motions to loosen the dirt.
- Focus on problem areas: Pay extra attention to any areas with heavy buildup, such as the corners and seams of the fryer basket. These areas may require more vigorous scrubbing or the use of a small brush to reach the tight spaces.
- Apply detergent or cleaning solution: If needed, apply a small amount of detergent or cleaning solution directly onto the brush or scrubber. This can help break down stubborn grease and grime.
- Rinse the brush or scrubber: Rinse the brush or scrubber periodically in hot water to remove any accumulated grease and debris. This will ensure that you are working with a clean tool throughout the cleaning process.
- Continue scrubbing: Keep scrubbing the fryer basket until you have thoroughly cleaned all surfaces, removing as much grease and residue as possible.
- Rinse the baskets: Once scrubbed, rinse the fryer baskets under hot running water to remove any remaining detergent or cleaning solution. Make sure to rinse both the inside and outside of the baskets.
- Inspect for cleanliness: After rinsing, inspect the baskets to ensure that they are clean and free of any visible residue. If needed, repeat the scrubbing process in areas that may still require attention.
Scrubbing and cleaning the fryer baskets is a crucial step to remove tough grease and food residue. It’s important to be thorough and ensure that the baskets are completely clean before moving on to the next steps of rinsing and drying.
Rinsing and Drying the Baskets
After scrubbing and cleaning the fryer baskets, it’s time to rinse off any remaining residue and ensure they are properly dried before reassembling. Follow these steps to rinse and dry the baskets:
- Rinse under running water: Place the cleaned fryer baskets under hot running water, making sure to rinse both the inside and outside thoroughly. This will help remove any remaining detergent or cleaning solution.
- Inspect for cleanliness: While rinsing, visually inspect the baskets to ensure that they are free of any lingering residue. If necessary, repeat the rinsing process to ensure they are completely clean.
- Shake off excess water: After rinsing, gently shake the baskets to remove any excess water. This will help speed up the drying process.
- Place on a drying rack or clean surface: Set up a drying rack or find a clean, dry surface to place the fryer baskets on. Make sure they are elevated to allow proper airflow for drying.
- Promptly dry with a towel or paper towels: Use a clean towel or paper towels to carefully dry the fryer baskets. Pay close attention to the wires and corners, as these areas may retain moisture. Properly drying the baskets will prevent water spots and potential bacterial growth.
- Allow thorough air drying: To ensure complete drying, leave the fryer baskets in a well-ventilated area for a sufficient amount of time. This will allow any remaining moisture to evaporate naturally.
- Check for dryness: Once the baskets are dry to the touch, do a final check to ensure they are completely dry before reassembling them into the fryer.
Proper rinsing and drying of the fryer baskets is crucial to prevent water spots, bacteria growth, and potential oil splattering during the next use. By following these steps, you will ensure that your fryer baskets are clean, dry, and ready for reassembly.
Reassembling and Testing the Fryer
After the fryer baskets have been cleaned, rinsed, and thoroughly dried, it’s time to reassemble them and test the fryer to ensure everything is in working order. Follow these steps for reassembly and testing:
- Inspect the fryer components: Before reassembling, inspect all components of the fryer, including the heating element, power cord, and any other detachable parts, to ensure they are clean and in good condition.
- Place the fryer baskets back into the fryer: Carefully insert the clean and dry fryer baskets back into their designated slots in the fryer. Ensure they are securely in place before proceeding.
- Plug in the fryer and turn it on: Plug the fryer back into its power source and turn it on. Follow the manufacturer’s instructions for proper heat settings and operation.
- Monitor the fryer and check for proper functionality: Pay close attention to the fryer as it heats up. Ensure that the heating element is functioning correctly and that the temperature is reaching the desired level. Observe the fryer baskets for any signs of malfunction or unusual behavior.
- Perform a test fry: To double-check the functionality of the fryer, perform a test fry with a small batch of food. Observe the cooking process to ensure the food is cooked evenly and achieves the desired crispiness.
- Monitor the quality of the fried food: Assess the quality and taste of the fried food. If the fryer baskets have been properly cleaned and maintained, the food should have a fresh and clean flavor, free from any residual grease or debris.
- Make any necessary adjustments: If you notice any issues or problems during the testing phase, such as uneven cooking or unusual smells, consult the fryer’s instruction manual or contact a professional for assistance. It’s important to address any operational or maintenance issues promptly.
By successfully reassembling and testing the fryer, you can ensure that it is ready for use and that the fryer baskets have been cleaned and reinstalled properly. This will result in high-quality fried food and a well-functioning fryer.
Additional Tips for Maintaining Clean Fryer Baskets
Maintaining clean fryer baskets is essential for both hygiene and the longevity of your fryer. Here are some additional tips to help you keep your fryer baskets in excellent condition:
- Regular cleaning schedule: Establish a regular cleaning schedule for your fryer baskets. This will ensure that they are consistently maintained and prevent the buildup of stubborn grease and food residue.
- Remove excess oil daily: After each use, remove excess oil from the fryer baskets to prevent it from hardening and becoming more difficult to clean later on.
- Pre-treat stubborn stains: For stubborn grease stains or burnt-on food residue, consider pre-treating the fryer baskets by soaking them in a mixture of hot water and dish soap or a degreasing solution before proceeding with the regular cleaning process.
- Keep an eye on oil quality: Regularly monitor the quality of the frying oil used in your fryer. Overused or deteriorating oil can contribute to increased grease buildup on the fryer baskets. Replace the oil at the recommended intervals to maintain the cleanliness of the fryer baskets.
- Practice proper frying techniques: Proper frying techniques can help minimize oil splatters and reduce the amount of grease that accumulates on the fryer baskets. Use a splatter guard when frying, and avoid overcrowding the fryer to ensure even cooking and prevent excessive oil residue.
- Utilize a fryer filter system: Consider investing in a fryer filter system. These systems help remove impurities and extend the life of the frying oil, reducing the amount of debris that ends up on the fryer baskets.
- Train staff on cleaning procedures: If you operate a commercial kitchen, provide proper training to your staff on how to clean and maintain fryer baskets. This will ensure consistency in cleaning procedures and promote a clean and hygienic environment.
- Inspect and replace worn-out baskets: Regularly inspect the fryer baskets for signs of wear and tear. If the baskets are bent, rusted, or have broken wires, it may be time to replace them. Worn-out baskets can make cleaning more difficult and may compromise the quality of the fried food.
By following these additional tips, you can maintain the cleanliness and functionality of your fryer baskets, creating a safer and more efficient frying environment.
Conclusion
Cleaning fryer baskets is a critical aspect of maintaining a clean and hygienic kitchen, whether in a commercial setting or at home. Regular cleaning not only ensures the safety and satisfaction of your customers but also prolongs the lifespan of your fryer baskets.
In this article, we’ve provided a comprehensive guide on how to clean fryer baskets effectively. We discussed the importance of cleaning fryer baskets to ensure food safety, enhance taste, improve cooking efficiency, and extend their lifespan. We also covered the necessary supplies for cleaning, as well as the steps involved in preparing the fryer, removing excess oil and food debris, soaking the baskets, scrubbing and cleaning, rinsing and drying, and reassembling and testing the fryer.
Additionally, we provided some valuable tips to help you maintain clean fryer baskets. Establishing a regular cleaning schedule, pre-treating stubborn stains, monitoring oil quality, practicing proper frying techniques, utilizing a fryer filter system, training staff on cleaning procedures, and inspecting and replacing worn-out baskets are all essential practices to maintain the cleanliness and functionality of your fryer baskets.
By following these guidelines and incorporating them into your cleaning routine, you can ensure that your fryer baskets are always in top-notch condition. Clean fryer baskets not only contribute to the quality and taste of your fried food but also create a safe and efficient frying environment for both you and your customers.
Remember, a clean fryer is a happy fryer, so prioritize regular cleaning and maintenance to enjoy delectable and perfectly cooked fried delights for years to come.
Frequently Asked Questions about How To Clean Fryer Baskets
Was this page helpful?
At Storables.com, we guarantee accurate and reliable information. Our content, validated by Expert Board Contributors, is crafted following stringent Editorial Policies. We're committed to providing you with well-researched, expert-backed insights for all your informational needs.


0 thoughts on “How To Clean Fryer Baskets”