Home>Technology>Security & Surveillance>How To Take Off Door Handle With Lock
Security & Surveillance
How To Take Off Door Handle With Lock
Modified: January 5, 2024
Learn how to safely remove a door handle with a lock for your security and surveillance needs. Our step-by-step guide makes it easy and convenient.
(Many of the links in this article redirect to a specific reviewed product. Your purchase of these products through affiliate links helps to generate commission for Storables.com, at no extra cost. Learn more)
Introduction
So, you've decided to upgrade your door handle with a new, more stylish one. Or perhaps you need to replace a faulty lock. Whatever the reason, removing a door handle with a lock may seem like a daunting task, especially if you're not a seasoned DIY enthusiast. However, with the right tools and a clear understanding of the process, you can easily take off a door handle with a lock in no time.
In this guide, we'll walk you through the step-by-step process of removing a door handle with a lock, providing you with the confidence and know-how to tackle this task like a pro. Whether you're a homeowner looking to make some home improvements or a security-conscious individual seeking to upgrade your door lock, this guide is tailored to help you accomplish your goal with ease.
Before we dive into the nitty-gritty of removing a door handle with a lock, it's essential to gather the necessary tools and materials. Having these items at your disposal will streamline the process and ensure that you can complete the task efficiently and effectively. So, let's start by taking a look at the tools and materials you'll need for this DIY endeavor.
Key Takeaways:
- Easily upgrade your door handle and lock with the right tools and step-by-step guidance. Gain confidence and DIY skills for home improvement projects.
- Embrace a methodical approach, attention to detail, and new hardware installation for a successful door handle and lock removal. Empower yourself as a capable DIY enthusiast.
Read more: How To Lock A Door Handle
Tools and Materials Needed
Before embarking on the door handle removal process, it’s crucial to gather the essential tools and materials. Here’s a list of items you’ll need:
- Screwdriver: A screwdriver is indispensable for removing the screws that hold the door handle and lock in place. Depending on the type of screws used, you may require a flathead or Phillips head screwdriver.
- Replacement Door Handle/Lock: If you’re planning to install a new door handle or lock, ensure that you have the replacement hardware ready. This could include a new handle, lock mechanism, screws, and any additional components specific to your new hardware.
- Allen Wrench: Some door handles are secured with set screws that require an Allen wrench for removal. Check the existing handle to determine if an Allen wrench is necessary for this task.
- Container: Having a small container or bowl on hand can be helpful for storing screws and small components as you disassemble the door handle and lock. This will prevent any parts from getting misplaced during the process.
- Lubricant (Optional): In some cases, the door handle or lock mechanism may be stiff or difficult to remove. A lubricant such as WD-40 can aid in loosening any stubborn components, making the removal process smoother.
- Rag or Cloth: Keeping a rag or cloth nearby is useful for wiping away any dirt or grime that may have accumulated around the door handle and lock, ensuring a clean and tidy work area.
By ensuring that you have these tools and materials at your disposal, you’ll be well-equipped to proceed with the door handle removal process efficiently and with confidence. With everything in place, you’re ready to move on to the first step: removing the screws that secure the door handle.
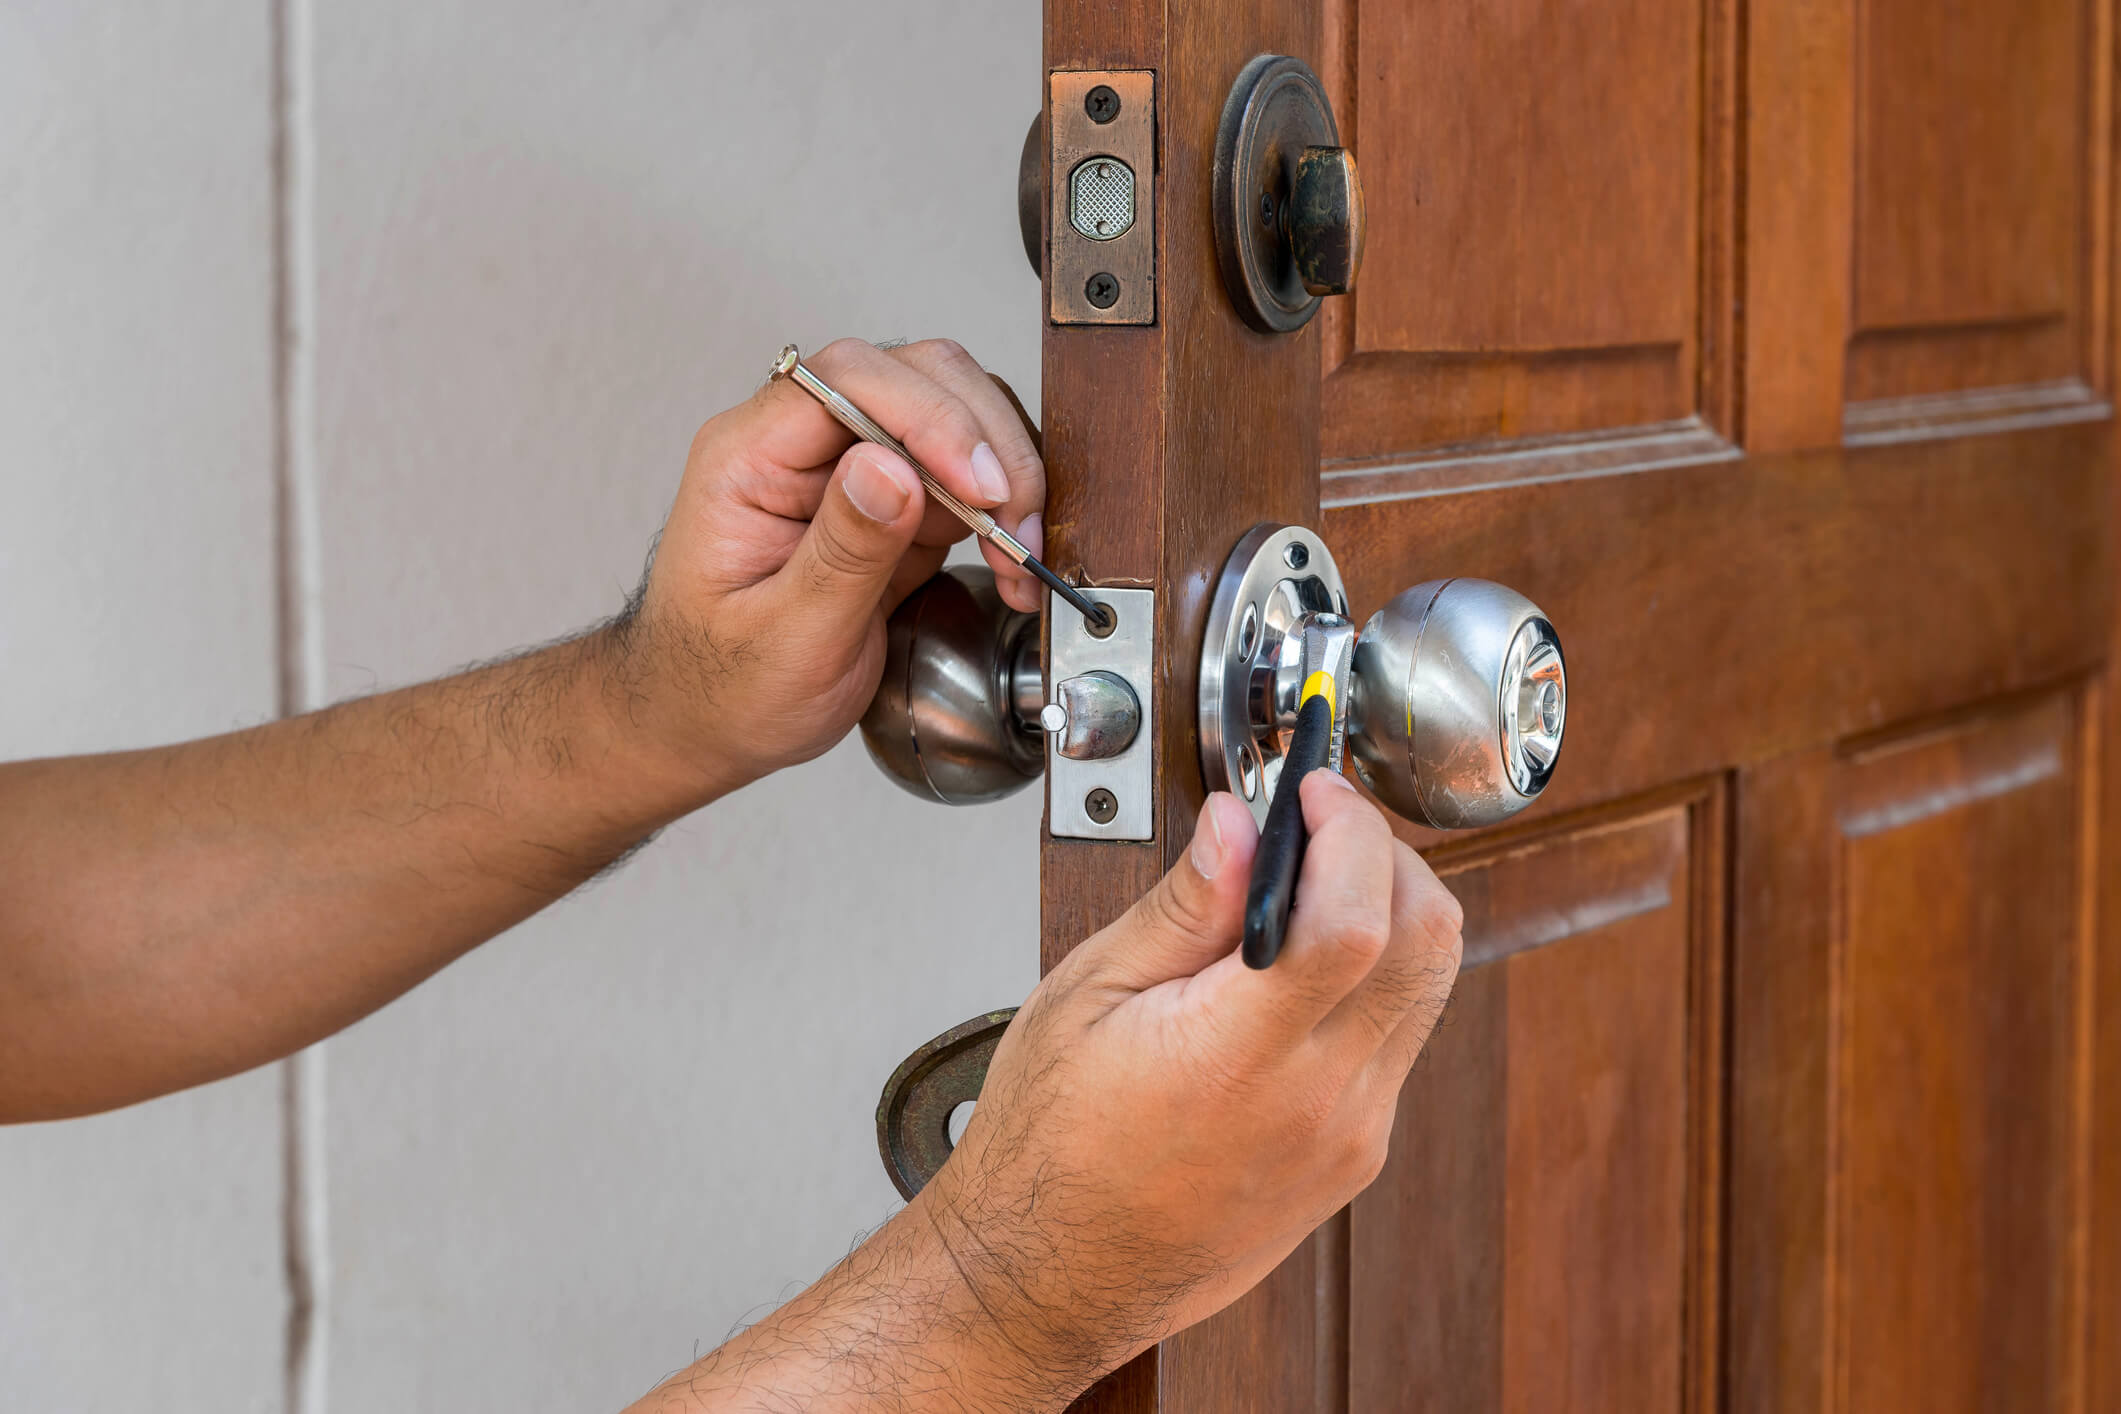
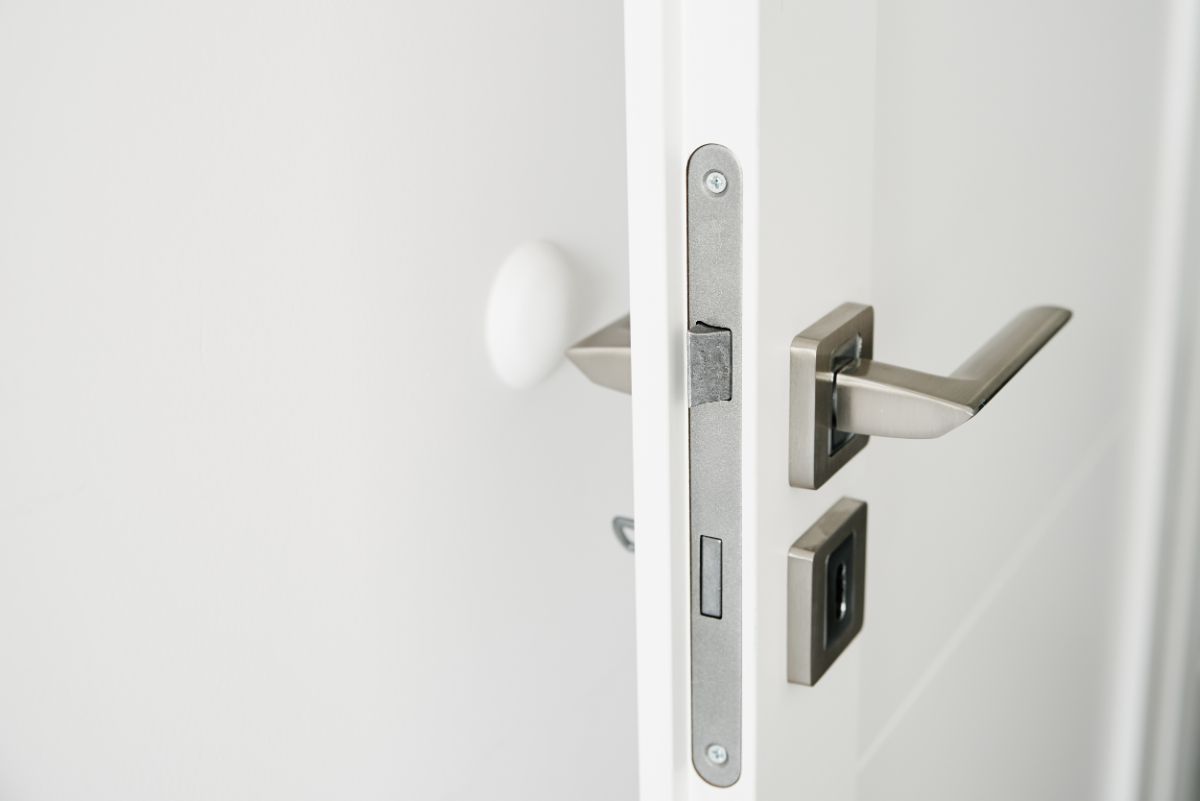
Step 1: Remove the Screws
The initial step in taking off a door handle with a lock is to remove the screws that hold the handle in place. Depending on the design of your door handle, you may find screws on the trim plate, the handle itself, or both. Here’s how to proceed:
- Locate the Screws: Inspect the door handle and trim plate to identify the screws that secure them. In most cases, these screws are located on the interior side of the door.
- Use the Correct Screwdriver: Based on the type of screws present, select the appropriate screwdriver – either a flathead or Phillips head – to fit the screw slots.
- Unscrew the Fasteners: Carefully unscrew each fastener, ensuring that you keep track of the screws and place them in the container or bowl to prevent misplacement. If the screws are stubborn or tightly secured, applying a small amount of lubricant to the screw threads can help loosen them.
- Remove the Trim Plate: Once the screws are detached, gently pull the trim plate away from the door. Be mindful of any hidden latches or additional fasteners that may be securing the trim plate in place.
- Detach the Handle: With the trim plate removed, you can access the screws that hold the handle to the door. Unscrew these fasteners and carefully detach the handle from both sides of the door.
By successfully removing the screws and detaching the handle, you’ve completed the first crucial step in the process. With the handle removed, you can now proceed to the next step: detaching the lock mechanism from the door.
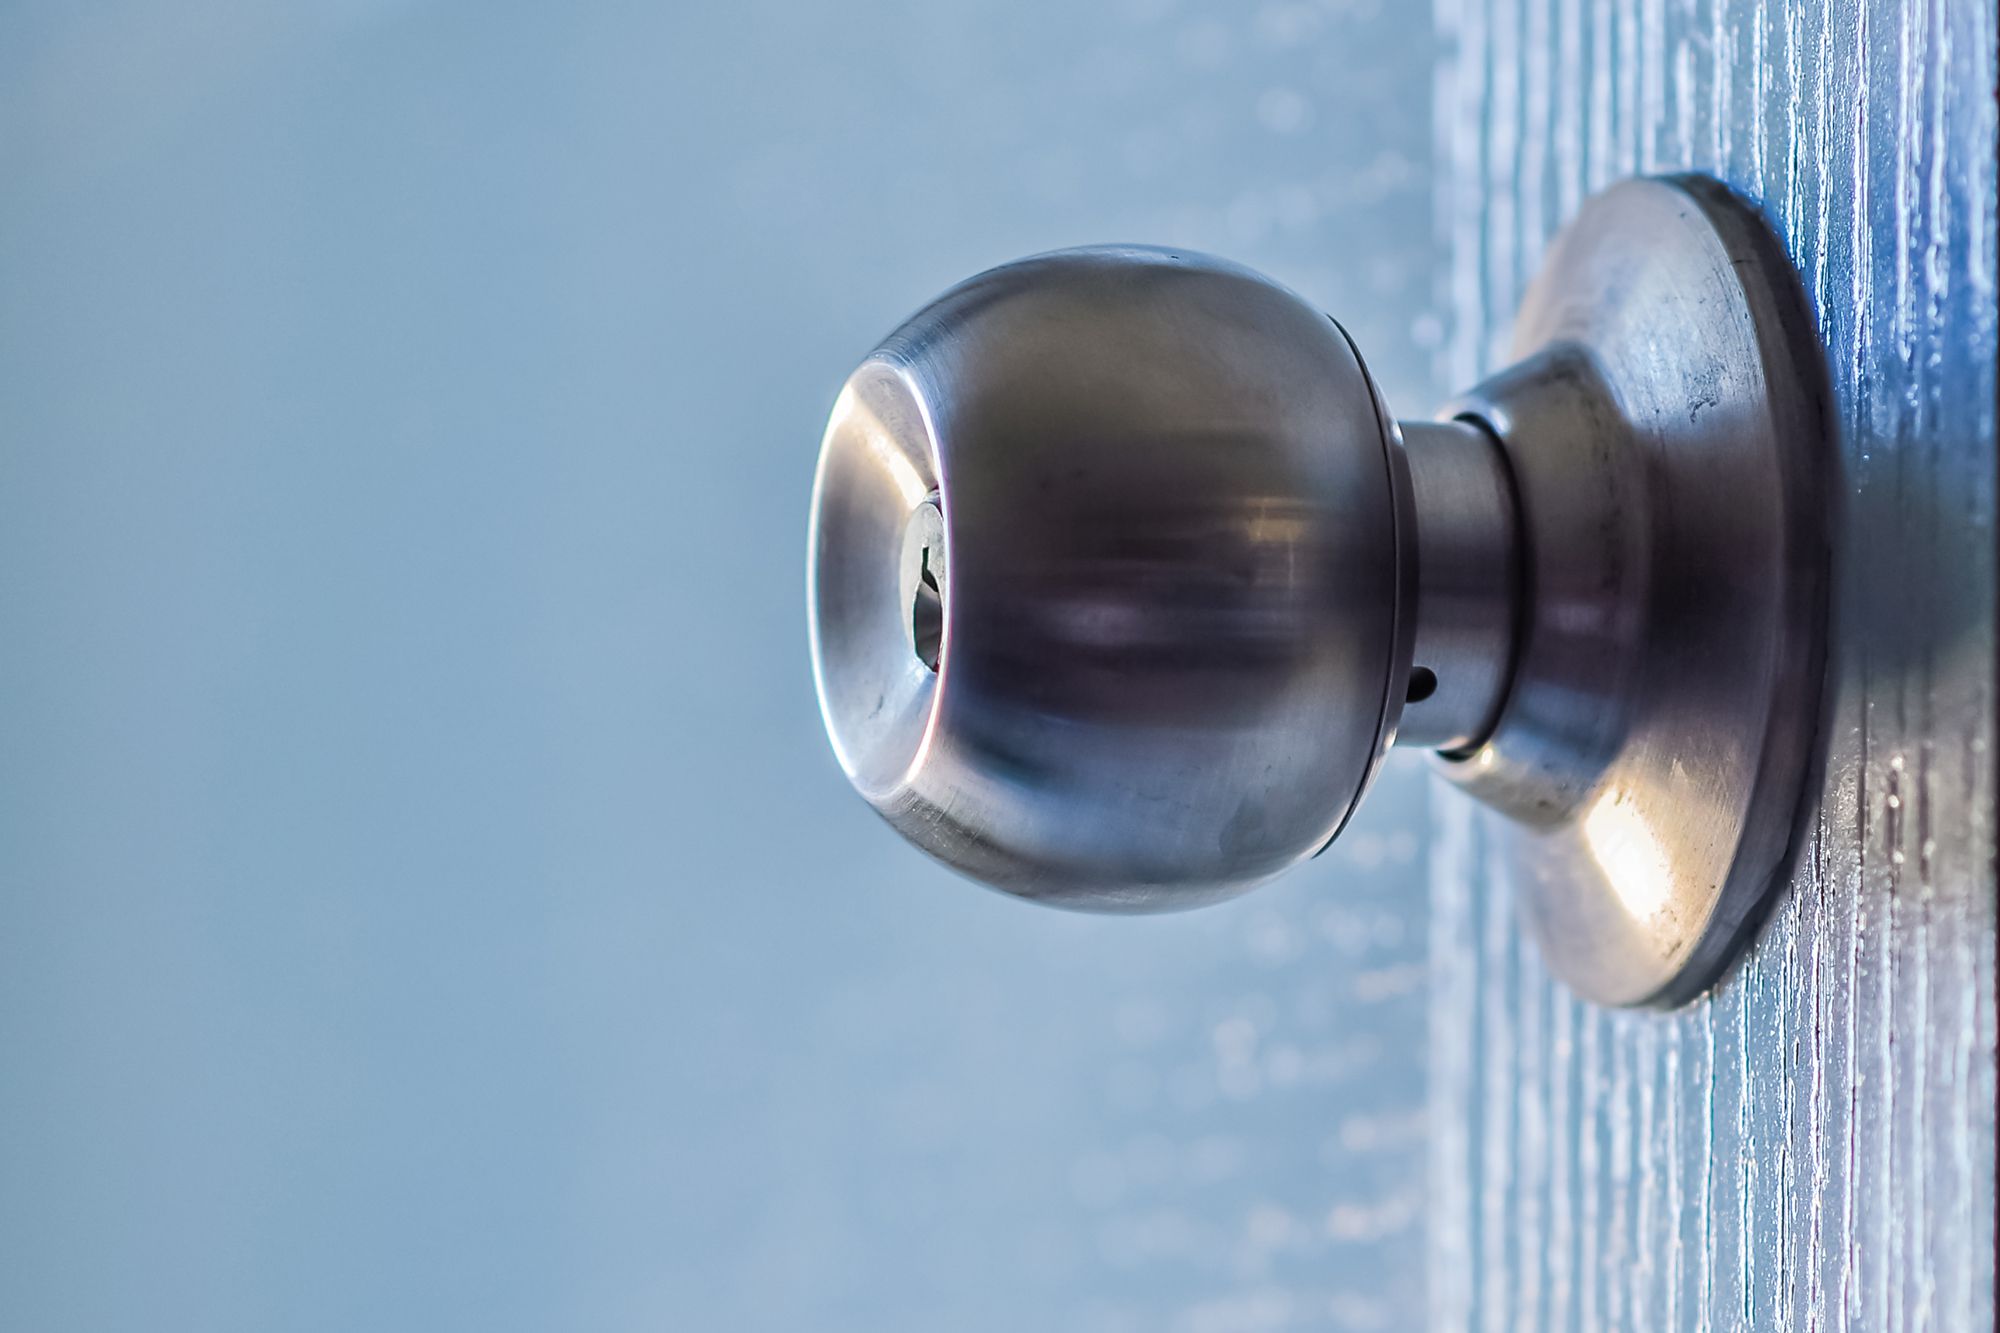
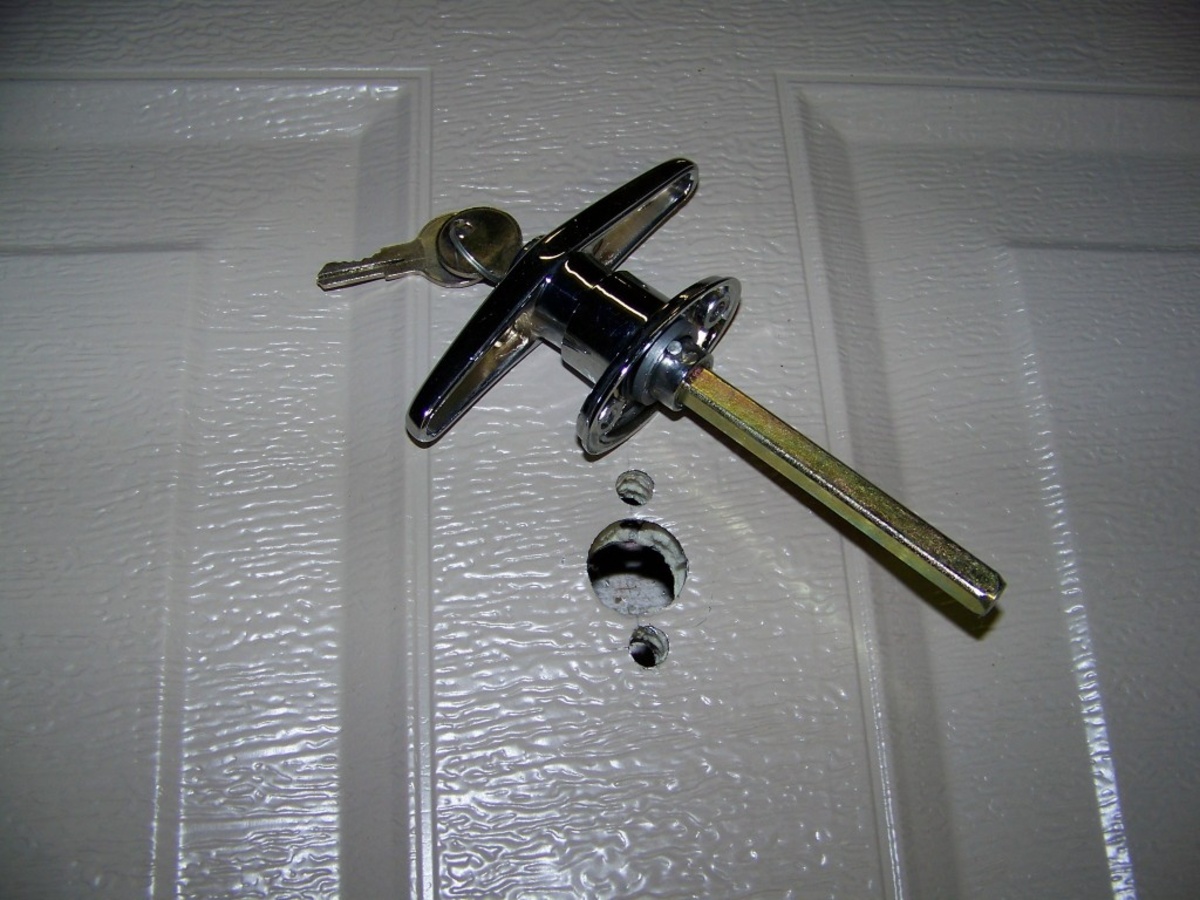
Step 2: Detach the Handle
After removing the screws and separating the handle from the door, the next phase involves detaching the lock mechanism from the door. This step is essential for gaining access to the internal components of the lock and facilitating its removal. Here’s a detailed guide on how to proceed:
- Inspect the Lock Mechanism: Take a moment to examine the lock and identify any securing mechanisms that hold it in place. Depending on the type of lock, there may be screws, bolts, or additional fasteners that need to be addressed.
- Remove Securing Components: Using the appropriate tools, such as a screwdriver or wrench, carefully remove any securing components that hold the lock in position. Ensure that you keep track of all screws and fasteners, placing them in the container to prevent loss.
- Separate the Lock: Once the securing components are detached, gently separate the lock from the door, taking care not to damage the surrounding area. If the lock is connected to the door by a spindle, carefully maneuver it out of the door, ensuring that it doesn’t get stuck or cause any obstructions.
- Handle Any Set Screws: In some cases, the handle may be secured to the door by set screws that require an Allen wrench for removal. If your door handle features set screws, locate them and use the appropriate tool to loosen and remove them, allowing you to fully detach the handle from the door.
By successfully detaching the handle and removing the lock mechanism, you’ve completed the crucial steps necessary to access and remove the door handle with a lock. With these components removed, you’re now ready to proceed to the next phase: removing the lock itself from the door.
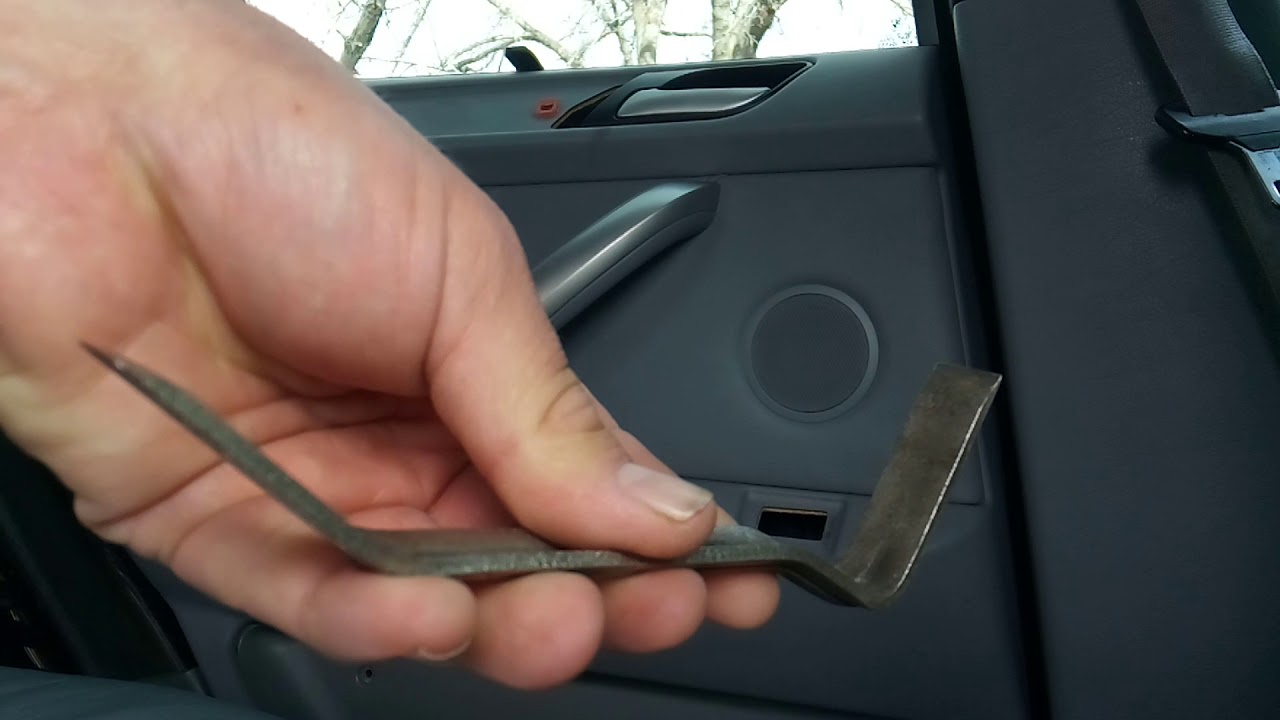
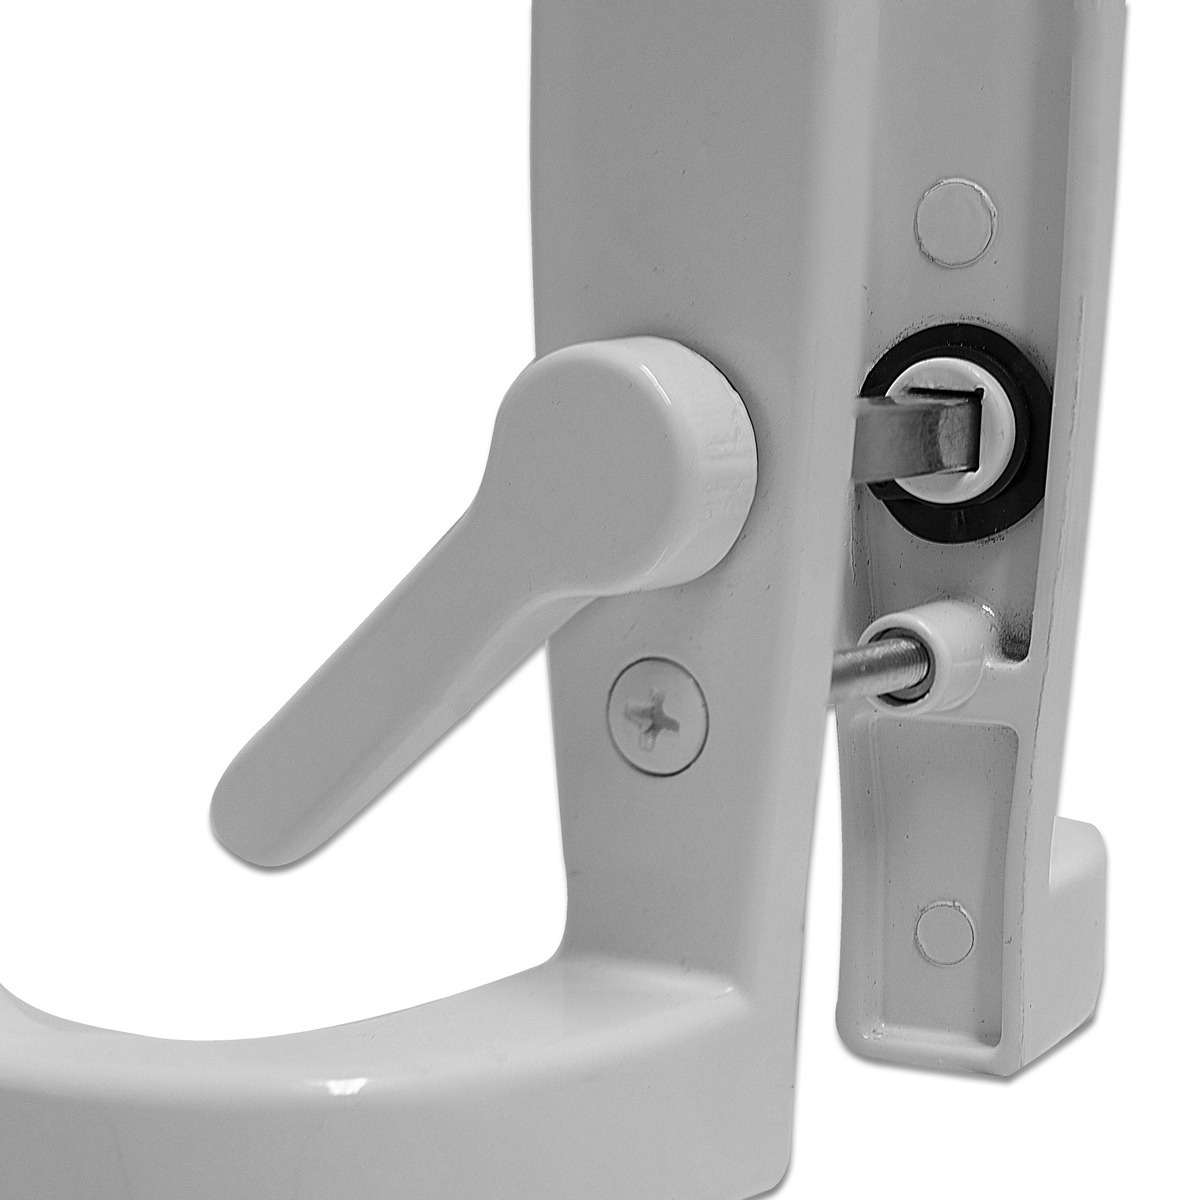
Use a screwdriver to remove the screws on the door handle. Pull the handle off and then use a key to turn the lock and release it from the door.
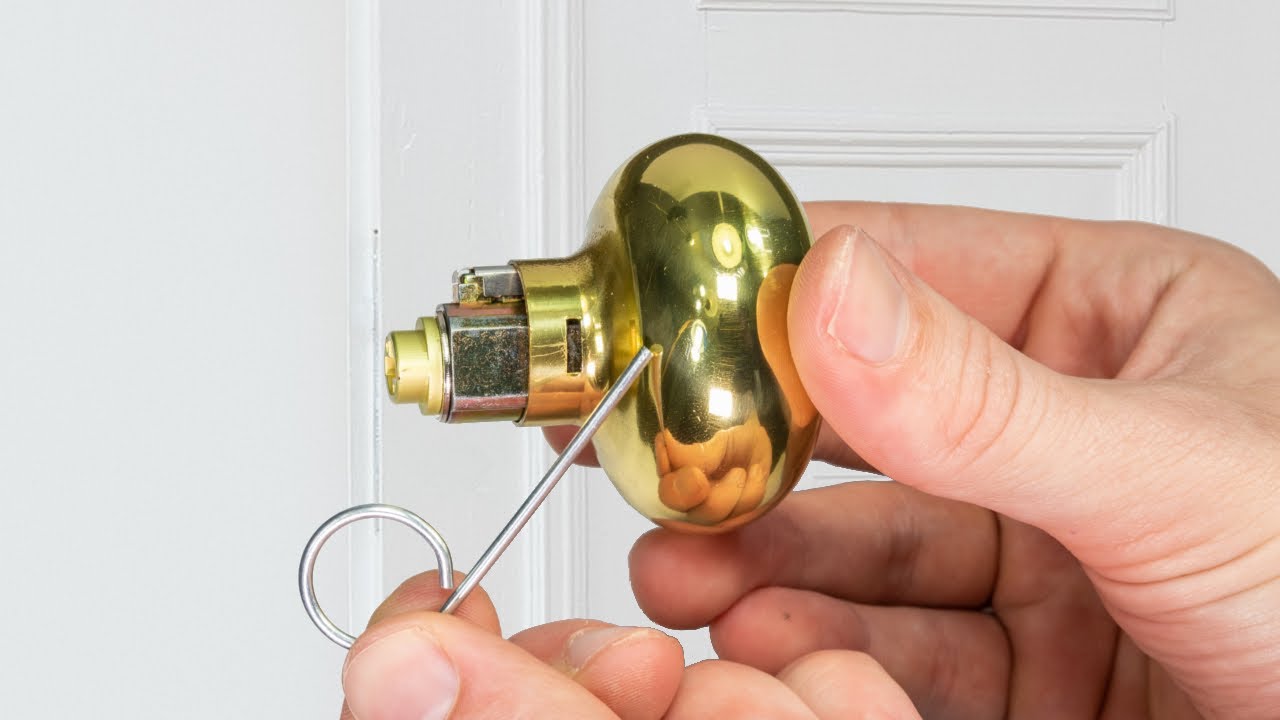
Step 3: Remove the Lock
With the handle and lock mechanism detached, the next key step is to remove the lock itself from the door. This process allows for a comprehensive inspection of the lock and prepares the door for the installation of a new lock, if necessary. Here’s a detailed guide on how to proceed:
- Assess the Lock Position: Examine the positioning of the lock within the door to identify any additional securing elements or fasteners that may need to be addressed. This assessment will provide clarity on the steps required for safe and efficient lock removal.
- Address Any Remaining Fasteners: If there are any remaining screws, bolts, or fasteners holding the lock in place, carefully remove them using the appropriate tools. It’s essential to exercise caution and precision to avoid any damage to the door or surrounding components.
- Extract the Lock: Once all securing elements are addressed, gently extract the lock from the door, ensuring that you maneuver it out smoothly and without causing any unnecessary strain on the surrounding area. If the lock is connected to the door by a spindle, take care to guide it out without any resistance.
- Inspect the Door: With the lock removed, take a moment to inspect the door and the area previously occupied by the lock. This inspection allows you to address any accumulated debris, clean the surface, and prepare it for the installation of a new lock or handle.
By successfully removing the lock and preparing the door for the next steps, you’ve completed a critical phase in the door handle removal process. With the lock removed and the door inspected, you’re now poised to move on to the final step: reassembling the door handle with a new lock or hardware.
Read more: How To Replace A Door Handle With Lock
Step 4: Reassemble the Door Handle
After successfully removing the old door handle and lock, the final phase involves reassembling the door handle with a new lock or hardware, if applicable. This step allows you to install upgraded or replacement components, ensuring that your door is equipped with a functional and secure handle and lock. Here’s a comprehensive guide on how to proceed:
- Prepare the New Hardware: If you’re installing a new door handle or lock, ensure that you have the replacement hardware readily available. This may include the new handle, lock mechanism, screws, and any additional components specific to your chosen hardware.
- Position the New Lock: If you’re installing a new lock, carefully position it within the door, aligning it with the designated recesses and ensuring that it fits securely in place. Take care to orient the lock correctly to facilitate smooth operation once installed.
- Secure the Lock: Using the provided screws or fasteners, secure the new lock in place, ensuring that it is firmly and evenly positioned within the door. Exercise caution to avoid over-tightening the screws, which could potentially damage the lock or door surface.
- Attach the Handle: If you’re installing a new handle, affix it to both sides of the door, ensuring that it aligns seamlessly with the lock mechanism. Secure the handle in place using the appropriate screws, bolts, or set screws, as dictated by the hardware design.
- Test the Operation: Once the new handle and lock are installed, test the operation of the door to ensure that the handle functions smoothly and the lock engages properly. This step allows you to verify the correct installation of the new hardware and address any potential issues promptly.
By successfully reassembling the door handle with a new lock or hardware, you’ve completed the final phase of the process, culminating in the installation of upgraded or replacement components. With the new hardware in place and the door fully operational, you’ve accomplished the task of taking off the door handle with a lock and ushered in a fresh, functional upgrade for your entryway.
Conclusion
Congratulations! You’ve successfully navigated the process of taking off a door handle with a lock, equipping yourself with the knowledge and skills to tackle this task with confidence. By following the step-by-step guide outlined in this article, you’ve gained a comprehensive understanding of the removal process, empowering you to upgrade your door handle and lock with ease.
Throughout this endeavor, you’ve embraced the following key aspects:
- Preparation: By gathering the necessary tools and materials, you set the stage for a smooth and efficient removal process, ensuring that you were well-equipped to handle each step with confidence.
- Methodical Approach: Through a systematic approach, you meticulously removed the screws, detached the handle, and extracted the lock, navigating each phase with precision and care.
- Attention to Detail: Your attention to detail ensured that each component was handled with care, preventing damage to the door and surrounding areas during the removal process.
- Installation of New Hardware: If applicable, you successfully reassembled the door handle with a new lock or hardware, ushering in an upgraded and functional addition to your entryway.
By embracing these elements, you’ve not only accomplished the task at hand but also gained valuable insight into the intricacies of door handle and lock removal. Whether you embarked on this journey to enhance the aesthetics of your home or to address security concerns, your newfound expertise positions you as a capable and confident DIY enthusiast.
As you reflect on this experience, remember that the knowledge and skills you’ve acquired can be applied to future home improvement endeavors, empowering you to take on new challenges with a sense of assurance and proficiency. With each successful project, you further cultivate your DIY prowess and expand your ability to transform your living space according to your vision.
So, as you admire your newly upgraded door handle and lock, take pride in the accomplishment and the journey of learning and growth that accompanied it. Your home reflects not only your personal style and preferences but also the dedication and skill with which you enhance and maintain it.
With your newfound expertise, you’re well-prepared to embark on future projects, equipped with the confidence and know-how to bring your home improvement aspirations to fruition. Whether it’s a new door handle, a fresh coat of paint, or a complete renovation, you’re ready to embrace the next endeavor with enthusiasm and proficiency.
Frequently Asked Questions about How To Take Off Door Handle With Lock
Was this page helpful?
At Storables.com, we guarantee accurate and reliable information. Our content, validated by Expert Board Contributors, is crafted following stringent Editorial Policies. We're committed to providing you with well-researched, expert-backed insights for all your informational needs.

0 thoughts on “How To Take Off Door Handle With Lock”