Home>Technology>Smart Home Devices>How To Clean A HP LaserJet Printer

Smart Home Devices
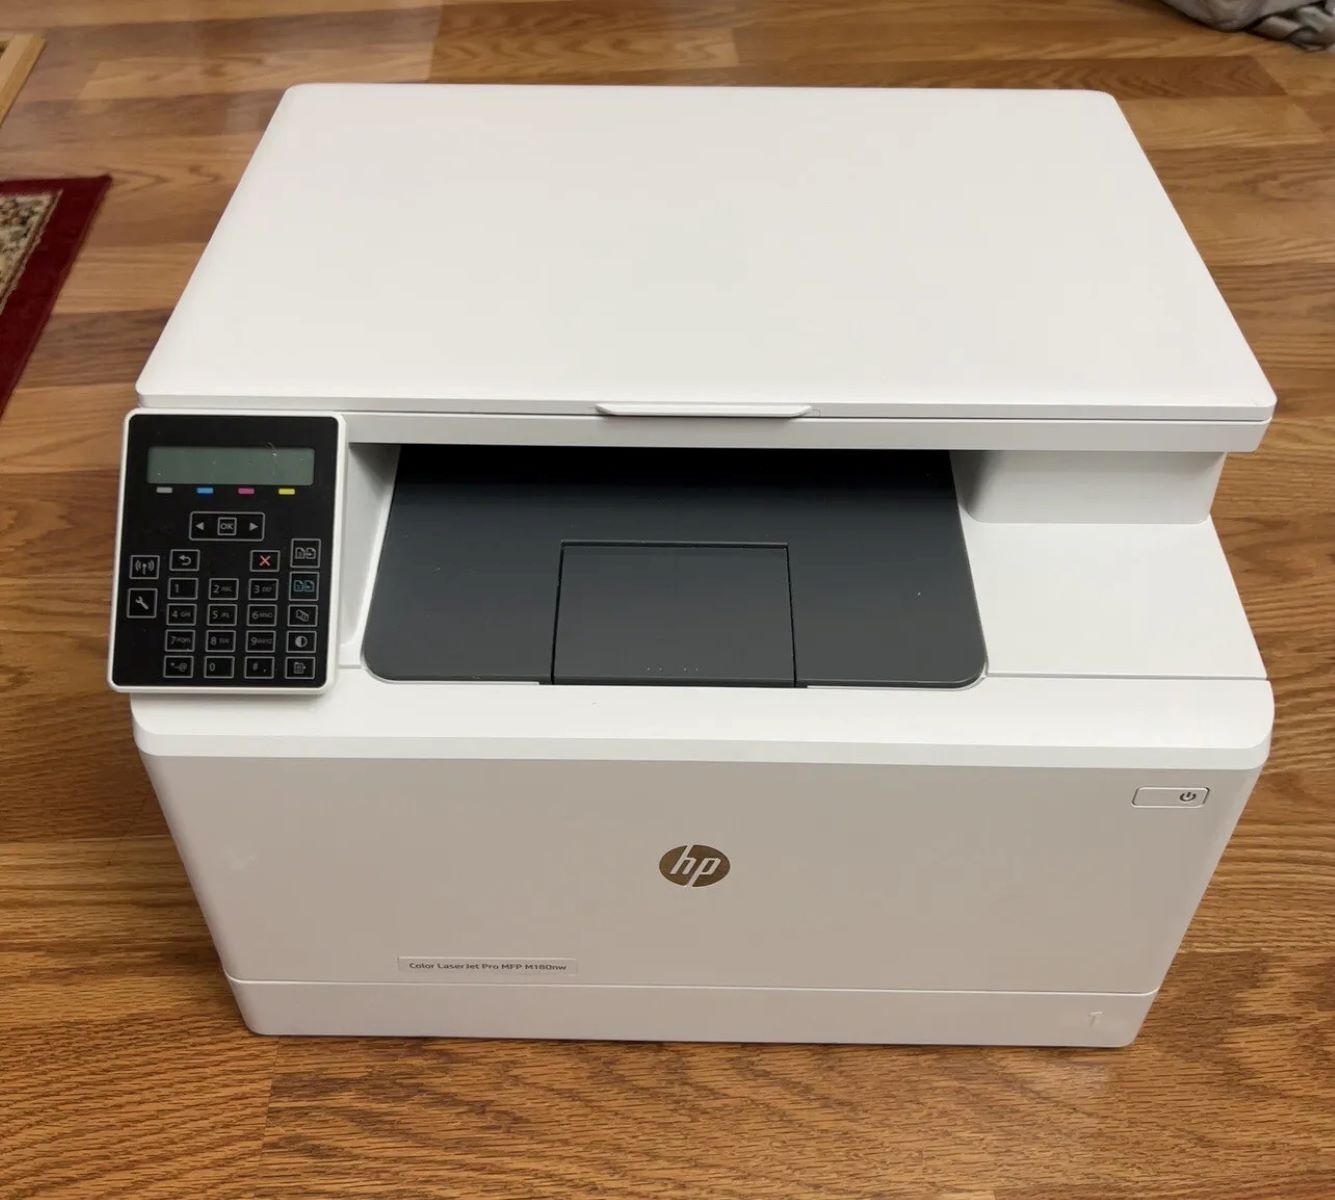
How To Clean A HP LaserJet Printer
Modified: March 24, 2024
Learn how to effectively clean your HP LaserJet printer to ensure optimal performance and longevity. Discover smart home devices for easy maintenance.
(Many of the links in this article redirect to a specific reviewed product. Your purchase of these products through affiliate links helps to generate commission for Storables.com, at no extra cost. Learn more)
Introduction
Welcome to the world of HP LaserJet printers! These powerful machines are the workhorses of the modern office, churning out page after page of crisp, professional documents. However, like any piece of technology, they require regular maintenance to keep them running smoothly. One essential aspect of this maintenance is cleaning the printer, which not only ensures the longevity of the machine but also maintains the quality of the printed output.
In this comprehensive guide, we will walk you through the step-by-step process of cleaning your HP LaserJet printer. Whether you are a seasoned office manager, a home-based entrepreneur, or simply a conscientious printer owner, this guide is designed to equip you with the knowledge and confidence to perform this essential task.
Cleaning your HP LaserJet printer not only helps to prevent smudges, streaks, or paper jams but also contributes to the overall health of the machine. By following the instructions outlined in this guide, you can maintain the optimal performance and extend the lifespan of your printer, ultimately saving you time and money in the long run.
So, roll up your sleeves, gather your supplies, and let's dive into the process of giving your HP LaserJet printer the tender loving care it deserves!
Key Takeaways:
- Regularly cleaning your HP LaserJet printer with simple supplies like cloths and isopropyl alcohol can extend its lifespan and maintain print quality, saving time and money in the long run.
- Safely power off and on your HP LaserJet printer after cleaning to ensure it operates smoothly, producing clear, smudge-free prints without any defects.
Read more: How To Clear Printer Queue On HP Laserjet
Step 1: Gather Your Supplies
Before embarking on the cleaning process, it’s crucial to gather all the necessary supplies to ensure a thorough and efficient job. Here’s what you’ll need:
- Clean, lint-free cloths or wipes: These are essential for wiping down the exterior and interior of the printer, as well as for cleaning the toner cartridge. Microfiber cloths are ideal for this purpose, as they are gentle and won’t leave behind any lint.
- Isopropyl alcohol: A small amount of isopropyl alcohol, commonly known as rubbing alcohol, is effective for cleaning certain printer components. It evaporates quickly and leaves no residue, making it ideal for cleaning sensitive areas.
- Cotton swabs: These are useful for reaching small and intricate areas within the printer, such as the toner cartridge cavity and the paper path. They can be dipped in isopropyl alcohol for more effective cleaning.
- Toner vacuum or toner-specific cleaning cloths (if available): If you have access to a toner vacuum or specialized toner cleaning cloths, they can be helpful for removing toner residue from the printer’s interior.
- Protective gloves: While not mandatory, wearing gloves can prevent toner and dirt from transferring onto your hands during the cleaning process.
- Trash can or bag: Have a designated receptacle nearby for disposing of any accumulated toner or debris that may be cleaned from the printer.
By ensuring that you have all the necessary supplies at hand, you can streamline the cleaning process and achieve optimal results. With these items in your arsenal, you’re ready to embark on the journey of revitalizing your HP LaserJet printer.
Step 2: Power Off the Printer
Before delving into the cleaning process, it’s crucial to power off the HP LaserJet printer and unplug it from the electrical outlet. This step is essential to ensure your safety and prevent any potential damage to the printer during the cleaning process.
Powering off the printer and disconnecting it from the power source serves several purposes:
- Preventing electrical hazards: By disconnecting the printer from the power supply, you reduce the risk of electrical shock or other hazards while cleaning the internal components.
- Allowing components to cool: Laser printers generate heat during operation, particularly when in use for extended periods. By powering off the printer, you allow the internal components to cool down, reducing the risk of accidental burns during the cleaning process.
- Preventing damage to the printer: Performing maintenance tasks such as cleaning with the printer powered on can lead to damage to the internal mechanisms or electrical components. Powering off the printer eliminates this risk.
Once the printer is powered off and unplugged, it’s advisable to wait for a few minutes to allow any residual electrical charge to dissipate. This simple precaution can further enhance safety and minimize the risk of electrical hazards during the cleaning process.
By following this crucial initial step, you set the stage for a safe and effective cleaning process, ensuring that both you and your HP LaserJet printer are well-protected throughout the maintenance procedure.
Step 3: Open the Printer Cover
With the printer safely powered off and unplugged, it’s time to access the internal components by opening the printer cover. The process of opening the printer cover may vary slightly depending on the specific model of your HP LaserJet printer, so it’s advisable to consult the printer’s user manual for detailed instructions.
Generally, the steps to open the printer cover are as follows:
- Locate the latches or buttons: Identify the latches, buttons, or release mechanisms that secure the printer cover in place. These are typically located on the sides or front of the printer, and they may be marked with icons or text indicating their function.
- Follow the manufacturer’s instructions: Some printers may require pressing a specific button or sliding a latch to release the cover, while others may simply lift open. Refer to the user manual for your specific printer model to ensure that you follow the correct procedure.
- Exercise caution: As you open the printer cover, be mindful of any internal components or moving parts that may be exposed. Exercise care to avoid placing excessive pressure on delicate components or causing any damage to the printer’s mechanisms.
Once the printer cover is open, take a moment to visually inspect the internal components for any visible accumulation of toner, dust, or debris. This preliminary assessment can provide valuable insights into the areas that may require focused cleaning attention during the subsequent steps.
By carefully opening the printer cover and conducting a brief visual inspection, you set the stage for the thorough cleaning process that follows, ensuring that you can access and address the internal components of your HP LaserJet printer effectively.
Step 4: Remove the Toner Cartridge
With the printer cover open, the next crucial step in the cleaning process is to remove the toner cartridge from the printer. The toner cartridge houses the toner powder, which is used to create the text and images on the printed page. Removing the toner cartridge provides access to the interior of the printer and allows for thorough cleaning of both the cartridge and the surrounding areas.
Here’s how to safely remove the toner cartridge from your HP LaserJet printer:
- Locate the toner cartridge: Depending on the specific model of your HP LaserJet printer, the toner cartridge is typically housed within the printer’s main compartment, beneath the printer cover. It may be easily accessible or situated behind a protective panel.
- Handle with care: Toner cartridges are sensitive components, and mishandling can lead to spills or damage. Carefully grasp the toner cartridge by its designated handles or sides, ensuring that you avoid touching the toner drum or the electrical contacts.
- Follow the release mechanism: Many printers are equipped with a release lever or button that needs to be activated to disengage the toner cartridge from its slot. Refer to the printer’s user manual or follow any on-screen prompts to execute the proper removal procedure.
- Place the toner cartridge in a safe location: Once removed, place the toner cartridge on a flat, stable surface, preferably on a piece of paper or cloth to prevent toner from transferring to the surrounding area.
After the toner cartridge has been safely removed, take a moment to inspect it for any signs of spills, leaks, or excessive toner buildup. This visual assessment can help identify any areas that require cleaning or maintenance before reinserting the cartridge into the printer.
By carefully removing the toner cartridge from your HP LaserJet printer, you pave the way for comprehensive cleaning of both the cartridge and the internal components, ensuring that your printer continues to deliver high-quality prints without any issues.
Regularly clean the exterior and interior of your HP LaserJet printer using a soft, lint-free cloth and a small amount of water or mild detergent. Be sure to power off the printer and unplug it before cleaning.
Read also: 8 Amazing HP Laserjet Printer For 2024
Step 5: Clean the Inside of the Printer
With the toner cartridge safely removed, it’s time to focus on cleaning the interior of your HP LaserJet printer. Over time, toner residue, paper dust, and other debris can accumulate within the printer, potentially leading to print quality issues and mechanical problems. By following the steps outlined below, you can effectively clean the interior of the printer and maintain its optimal performance.
Here’s a systematic approach to cleaning the inside of your printer:
- Use a clean, lint-free cloth or wipes: Gently wipe the interior surfaces of the printer, including the toner cavity, paper path, and any accessible areas where toner or dust may have accumulated. Avoid using excessive force, as delicate components may be present.
- Inspect for debris: Use a flashlight or adequate lighting to inspect the interior of the printer for any loose toner, paper scraps, or foreign objects. Carefully remove any debris using a soft brush or a lint-free cloth, taking care not to dislodge any critical components.
- Clean the paper path: If visible paper dust or toner residue is present along the paper path, use a dry cotton swab or a lint-free cloth lightly dampened with isopropyl alcohol to gently clean these areas. Ensure that the paper path is free from any obstructions that may affect the smooth movement of paper during printing.
- Address toner spills or buildup: If the toner cavity or surrounding areas show signs of toner spills or buildup, use a toner-specific cleaning cloth or a toner vacuum, if available, to carefully remove the excess toner. Exercise caution to prevent spreading toner to other areas of the printer.
Throughout the cleaning process, it’s essential to maintain a gentle and meticulous approach, avoiding aggressive cleaning methods that may damage the sensitive components of the printer. By taking the time to thoroughly clean the interior of your HP LaserJet printer, you can ensure that it continues to produce flawless prints and operates at its best.
Step 6: Clean the Toner Cartridge
After removing the toner cartridge from the printer, it’s essential to perform a meticulous cleaning to maintain its functionality and prevent print quality issues. The toner cartridge, which contains the toner powder used in the printing process, can accumulate residual toner and debris over time, affecting its performance. By following the steps outlined below, you can effectively clean the toner cartridge of your HP LaserJet printer.
Here’s a comprehensive approach to cleaning the toner cartridge:
- Inspect the toner cartridge: Before proceeding with the cleaning process, carefully examine the toner cartridge for any signs of toner spills, leaks, or excess buildup. Pay particular attention to the toner outlet and the electrical contacts.
- Use a clean, lint-free cloth: Gently wipe the exterior of the toner cartridge with a clean, dry cloth to remove any loose toner or debris. Take care to avoid touching the toner outlet or the electrical contacts to prevent damage or contamination.
- Clean the toner outlet: If the toner outlet shows signs of clogging or toner buildup, use a dry cotton swab or a lint-free cloth lightly dampened with isopropyl alcohol to carefully clean the area. Ensure that the toner outlet is free from any obstructions that may impede the flow of toner during printing.
- Address toner spills or leaks: If the toner cartridge has experienced a spill or leak, use a toner-specific cleaning cloth or toner vacuum, if available, to remove any excess toner from the cartridge’s exterior. Exercise caution to prevent spreading toner to other surfaces.
- Inspect the drum and blade: While handling the toner cartridge, avoid touching the drum or the blade inside the cartridge, as these components are sensitive and can be easily damaged. If necessary, refer to the printer’s user manual for specific instructions on inspecting or cleaning these internal components.
By meticulously cleaning the toner cartridge, you can ensure that it remains in optimal condition, allowing for consistent and high-quality prints. Taking the time to maintain the toner cartridge contributes to the overall performance and longevity of your HP LaserJet printer.
Step 7: Reassemble the Printer
After completing the essential cleaning steps, it’s time to reassemble your HP LaserJet printer, ensuring that all components are securely in place and ready for operation. Proper reassembly is crucial to the printer’s functionality and print quality, so it’s important to follow the steps outlined below to ensure a seamless and effective reassembly process.
Here’s a systematic approach to reassembling your printer:
- Reinsert the toner cartridge: Carefully place the cleaned toner cartridge back into its designated slot within the printer, following the manufacturer’s instructions for proper alignment and insertion. Ensure that the cartridge is securely seated and latched in place.
- Close the printer cover: Gently lower the printer cover and ensure that it securely latches or clicks into place. Verify that the cover is completely closed to prevent any dust or debris from entering the printer’s interior during operation.
- Reconnect the power cord: Plug the power cord back into the printer and the electrical outlet. Ensure that the power cord is securely connected and that there are no exposed wires or potential tripping hazards.
- Power on the printer: Once the printer is reassembled and the power cord is connected, power on the printer using the designated power button or switch. Allow the printer to complete its startup sequence before initiating any print jobs.
- Perform a test print: To verify that the printer is functioning correctly after reassembly, initiate a test print. This allows you to confirm that the printer is producing high-quality prints without any issues or error messages.
By following these reassembly steps, you can ensure that your HP LaserJet printer is restored to its operational state, ready to deliver exceptional print quality and reliable performance. Proper reassembly is the final step in the cleaning process, setting the stage for continued productivity and flawless printing.
Step 8: Power On the Printer
Once the printer has been reassembled and the necessary components are securely in place, it’s time to power on your HP LaserJet printer and prepare it for regular use. Powering on the printer after the cleaning and reassembly process allows you to confirm that it operates smoothly and produces high-quality prints without any issues.
Here’s a guide to safely powering on your printer:
- Verify the power cord connection: Before powering on the printer, double-check that the power cord is securely connected to both the printer and the electrical outlet. Ensure that there are no exposed wires or potential safety hazards.
- Press the power button: Activate the printer by pressing the designated power button or switch. Depending on the model, the power button may be located on the printer’s control panel or in a prominent position on the printer’s exterior.
- Observe the startup sequence: As the printer powers on, observe the startup sequence to ensure that the display lights up, and the printer initializes without displaying any error messages or unusual sounds. A smooth startup sequence indicates that the printer has been reassembled correctly.
- Allow the printer to warm up: Laser printers typically require a brief warm-up period after being powered on. This allows the internal components to reach the optimal operating temperature, ensuring consistent print quality and performance.
- Perform a test print: To confirm that the printer is fully operational, initiate a test print. Choose a sample document or test page and send it to the printer to verify that it produces clear, smudge-free prints without any defects.
By following these steps, you can safely power on your HP LaserJet printer and confirm that it is ready to resume its regular printing tasks. A successful power-on sequence indicates that the printer has been cleaned and reassembled effectively, ensuring that it continues to deliver exceptional print quality and reliable performance.
Read more: How Does A Laserjet Printer Work
Conclusion
Congratulations on successfully completing the comprehensive cleaning process for your HP LaserJet printer! By following the step-by-step instructions outlined in this guide, you have taken proactive measures to maintain the optimal performance and print quality of your printer. Regular cleaning and maintenance are essential to ensure that your printer continues to function flawlessly, producing professional-quality documents with precision and clarity.
By adhering to the cleaning process, you have contributed to the longevity of your HP LaserJet printer, preventing potential issues such as toner buildup, print quality degradation, and mechanical malfunctions. Additionally, regular maintenance can minimize the risk of paper jams, streaks, or smudges, allowing you to enjoy uninterrupted printing operations.
Remember that periodic cleaning is a proactive investment in the health and efficiency of your printer, ultimately saving you time and resources in the long run. By incorporating this maintenance routine into your printer care regimen, you can optimize the lifespan and performance of your HP LaserJet printer, ensuring that it remains a reliable asset in your home or office.
As you continue to utilize your freshly cleaned printer, consider establishing a regular maintenance schedule to uphold its pristine condition. Whether you’re a dedicated home user, a small business owner, or an office manager, the benefits of a well-maintained printer extend to every aspect of your printing needs.
Thank you for your commitment to the care and maintenance of your HP LaserJet printer. We hope that this guide has empowered you with the knowledge and confidence to keep your printer in peak condition, ensuring that it continues to deliver exceptional print quality and reliable performance for years to come.
Frequently Asked Questions about How To Clean A HP LaserJet Printer
Was this page helpful?
At Storables.com, we guarantee accurate and reliable information. Our content, validated by Expert Board Contributors, is crafted following stringent Editorial Policies. We're committed to providing you with well-researched, expert-backed insights for all your informational needs.

0 thoughts on “How To Clean A HP LaserJet Printer”