Home>Technology>Smart Home Devices>How To Replace Drum On Brother Printer
Smart Home Devices
How To Replace Drum On Brother Printer
Modified: August 28, 2024
Learn how to easily replace the drum on your Brother printer and keep your smart home devices running smoothly. Step-by-step guide for hassle-free maintenance.
(Many of the links in this article redirect to a specific reviewed product. Your purchase of these products through affiliate links helps to generate commission for Storables.com, at no extra cost. Learn more)
Introduction
Welcome to the world of efficient and reliable printing with Brother printers! Brother printers are known for their exceptional performance and durability, but like all mechanical devices, they require regular maintenance to ensure optimal functionality. One crucial component of a Brother printer is the drum unit, which plays a vital role in the printing process by transferring toner to the paper. Over time, the drum unit may wear out, leading to diminished print quality and potential operational issues.
In this comprehensive guide, we will walk you through the process of replacing the drum unit on your Brother printer. Whether you are experiencing fading prints, streaks, or error messages prompting you to replace the drum, this step-by-step tutorial will empower you to seamlessly install a new drum unit and restore your printer's performance to its peak.
By following these instructions, you can not only extend the lifespan of your Brother printer but also ensure that it continues to deliver professional-quality prints with every use. Without further ado, let's dive into the process of replacing the drum unit on your Brother printer and rejuvenating its printing capabilities.
Key Takeaways:
- Replacing the drum unit in your Brother printer is essential for maintaining high-quality prints. By following the step-by-step guide, you can easily rejuvenate your printer’s performance and ensure consistent print clarity.
- Gathering the necessary supplies and carefully installing the new drum unit will extend your printer’s lifespan and contribute to sustainable printing practices. Embrace the convenience and reliability of your revitalized Brother printer!
Step 1: Gather Necessary Supplies
Before embarking on the drum replacement process, it’s essential to gather all the necessary supplies to facilitate a smooth and efficient procedure. Here’s a list of items you will need:
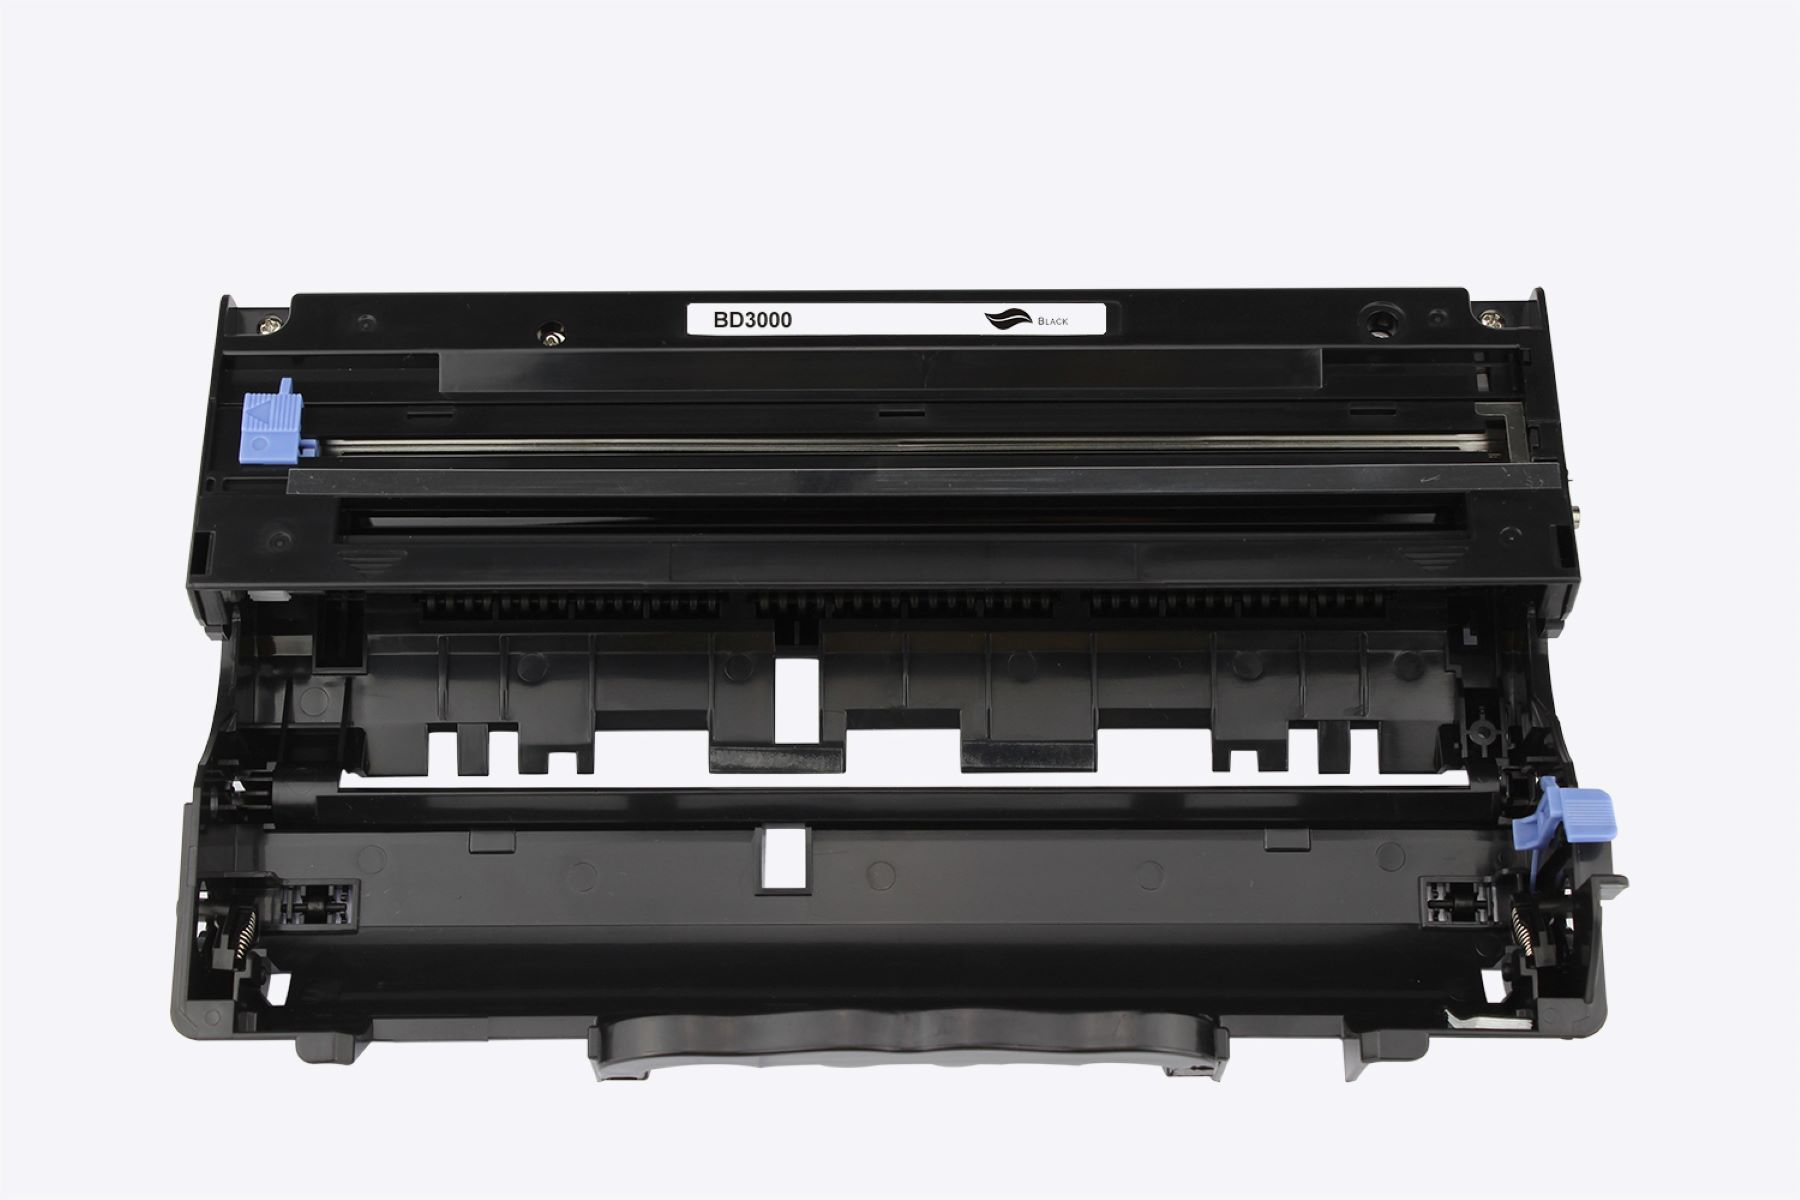
- New Drum Unit: Ensure you have the correct replacement drum unit compatible with your specific Brother printer model. Refer to the printer’s manual or the manufacturer’s website to identify the compatible drum unit.
- Clean, Lint-Free Cloth: A soft, lint-free cloth will be useful for wiping any residual toner or dust from the printer’s interior components.
- Protective Gloves: It’s advisable to wear protective gloves to prevent contact with toner and to keep the drum unit free from fingerprints and smudges.
- Trash Bag or Container: Have a trash bag or container on hand to dispose of the old drum unit properly. This will help maintain a clean and organized workspace.
- Printer Manual: Keep the printer manual accessible for reference, especially if you encounter any specific instructions or troubleshooting during the drum replacement process.
By ensuring that you have all these supplies readily available, you can proceed with confidence and tackle the drum replacement task without interruptions. With the necessary supplies at your disposal, you are well-prepared to embark on the journey of rejuvenating your Brother printer’s printing capabilities.
Step 2: Open the Printer
Now that you have gathered the essential supplies, it’s time to begin the drum replacement process by opening the printer. Follow these steps carefully to access the drum unit:
- Power Off the Printer: Before proceeding, ensure that the printer is powered off and unplugged from the electrical outlet. This precautionary measure prevents any potential mishaps during the drum replacement process.
- Open the Printer Cover: Depending on the specific Brother printer model, the drum unit is typically located behind the front cover or within the printer’s interior. Gently open the printer cover or access panel to reveal the internal components.
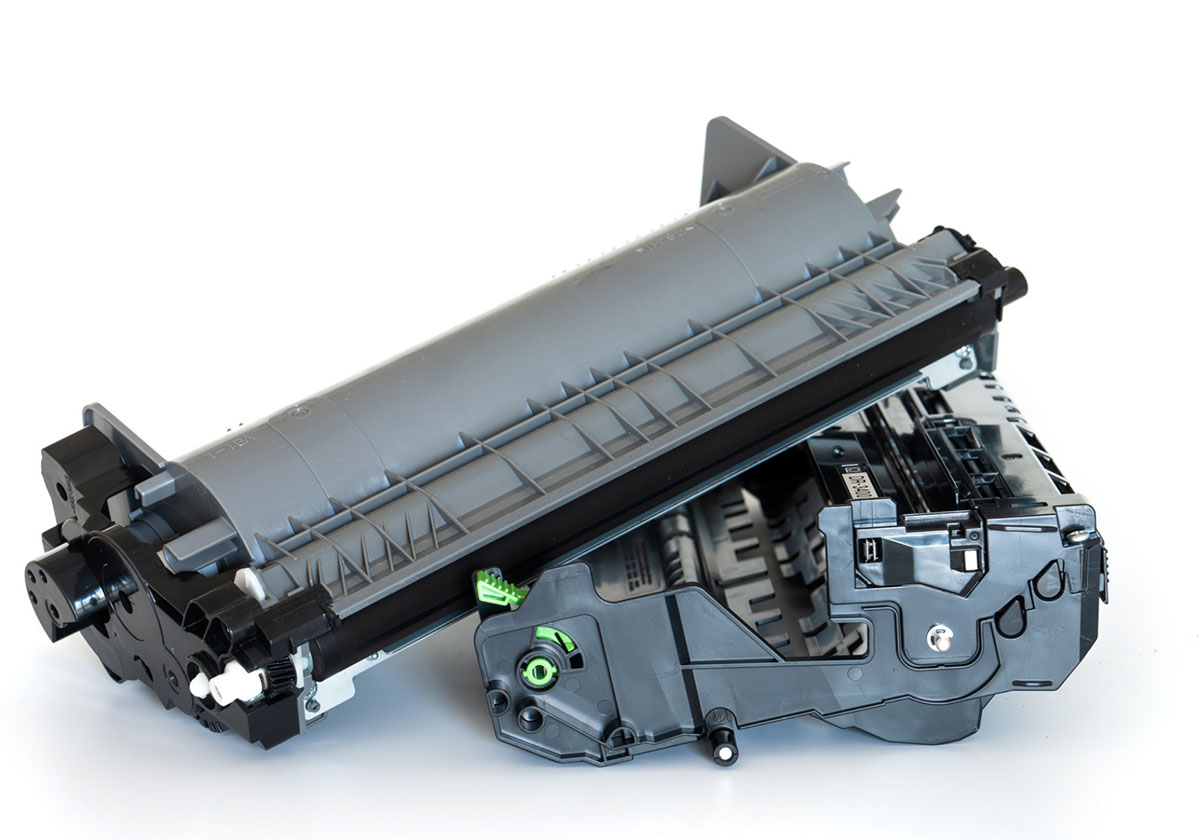
- Locate the Drum Unit: Once the printer cover is open, locate the drum unit assembly. The drum unit is often situated near the toner cartridge and may be secured in place with locking tabs or levers.
- Secure Opened Components: Use any included mechanisms or features, such as release buttons or levers, to secure the opened components in place. This prevents the cover from accidentally closing while you work on replacing the drum unit.
By carefully following these steps to open the printer and access the drum unit, you are now ready to proceed to the next crucial phase of the drum replacement process. Opening the printer cover sets the stage for seamlessly removing the old drum unit and installing the new one, ultimately revitalizing your printer’s performance and print quality.
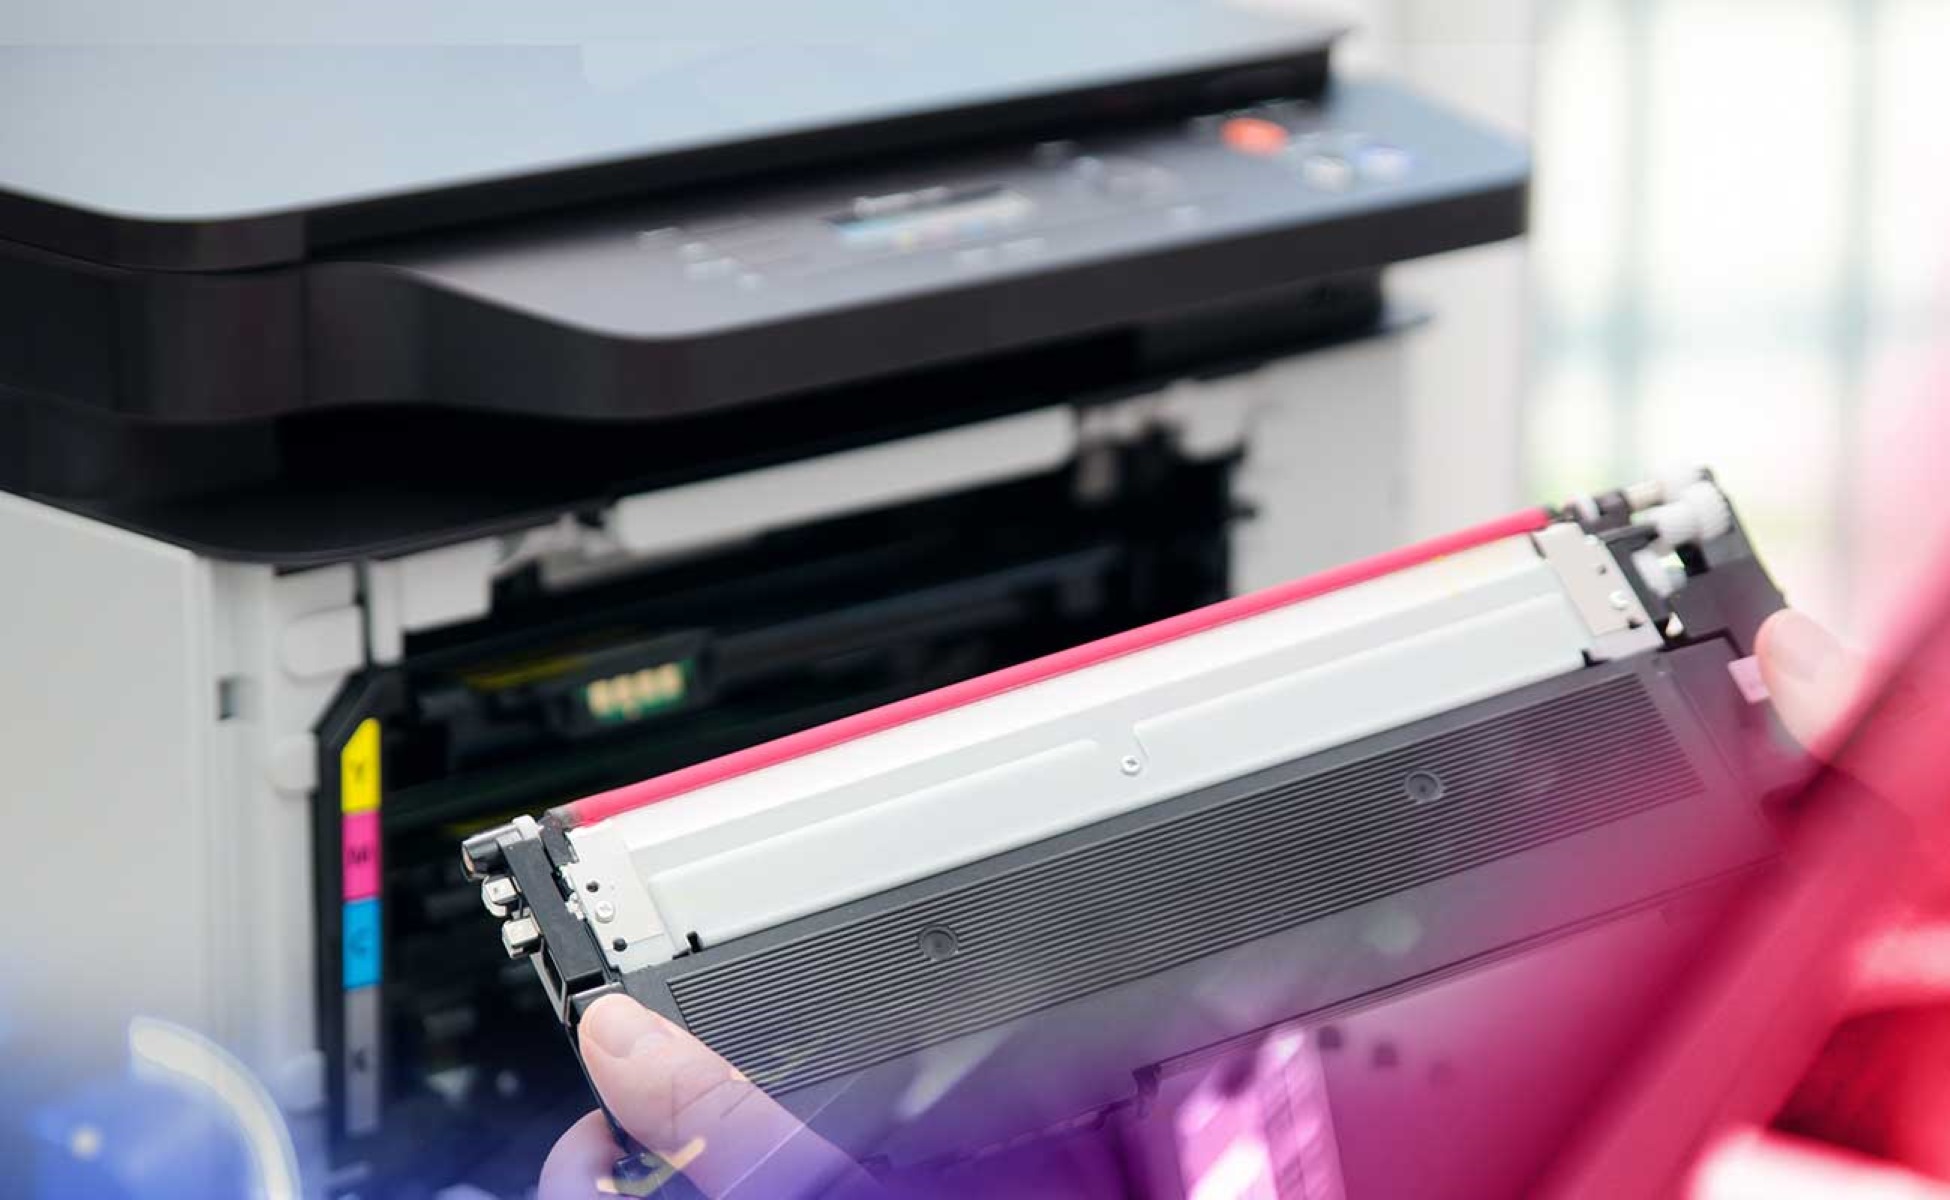
Step 3: Remove the Old Drum Unit
With the printer cover open, you are now poised to remove the old drum unit from your Brother printer. Follow these systematic steps to ensure a hassle-free removal process:
- Release the Toner Cartridge: If the drum unit is secured in place with the toner cartridge, carefully release the toner cartridge by pressing the release button or lever. Gently remove the toner cartridge from the drum unit assembly.
- Release Locking Tabs or Levers: Depending on the printer model, the drum unit may be secured in place by locking tabs or levers. Locate these securing mechanisms and carefully release them to free the drum unit.
- Remove the Drum Unit: Once the locking tabs or levers are disengaged, carefully slide the old drum unit out of the printer. Exercise caution to avoid tilting or jostling the drum unit excessively during removal.
- Place Old Drum Unit in a Trash Bag: To maintain cleanliness and prevent toner residue from spreading, place the old drum unit in a designated trash bag or container. This ensures proper containment and disposal of the old drum unit.
- Inspect the Printer Interior: While the drum unit is removed, take a moment to inspect the interior of the printer for any accumulated toner or debris. Use a clean, lint-free cloth to gently wipe away any dust or toner particles.
By diligently following these steps, you have successfully removed the old drum unit from your Brother printer, paving the way for the installation of a new drum unit. With the old drum unit safely contained and the printer interior inspected, you are now ready to proceed to the next pivotal phase of the drum replacement process.
When replacing the drum on a Brother printer, make sure to turn off the printer and wait for it to cool down. Follow the manufacturer’s instructions for removing the old drum and installing the new one to ensure proper functioning.
Step 4: Install the New Drum Unit
Now that the old drum unit has been removed, it’s time to install the new drum unit into your Brother printer. Follow these precise steps to ensure a seamless installation process:
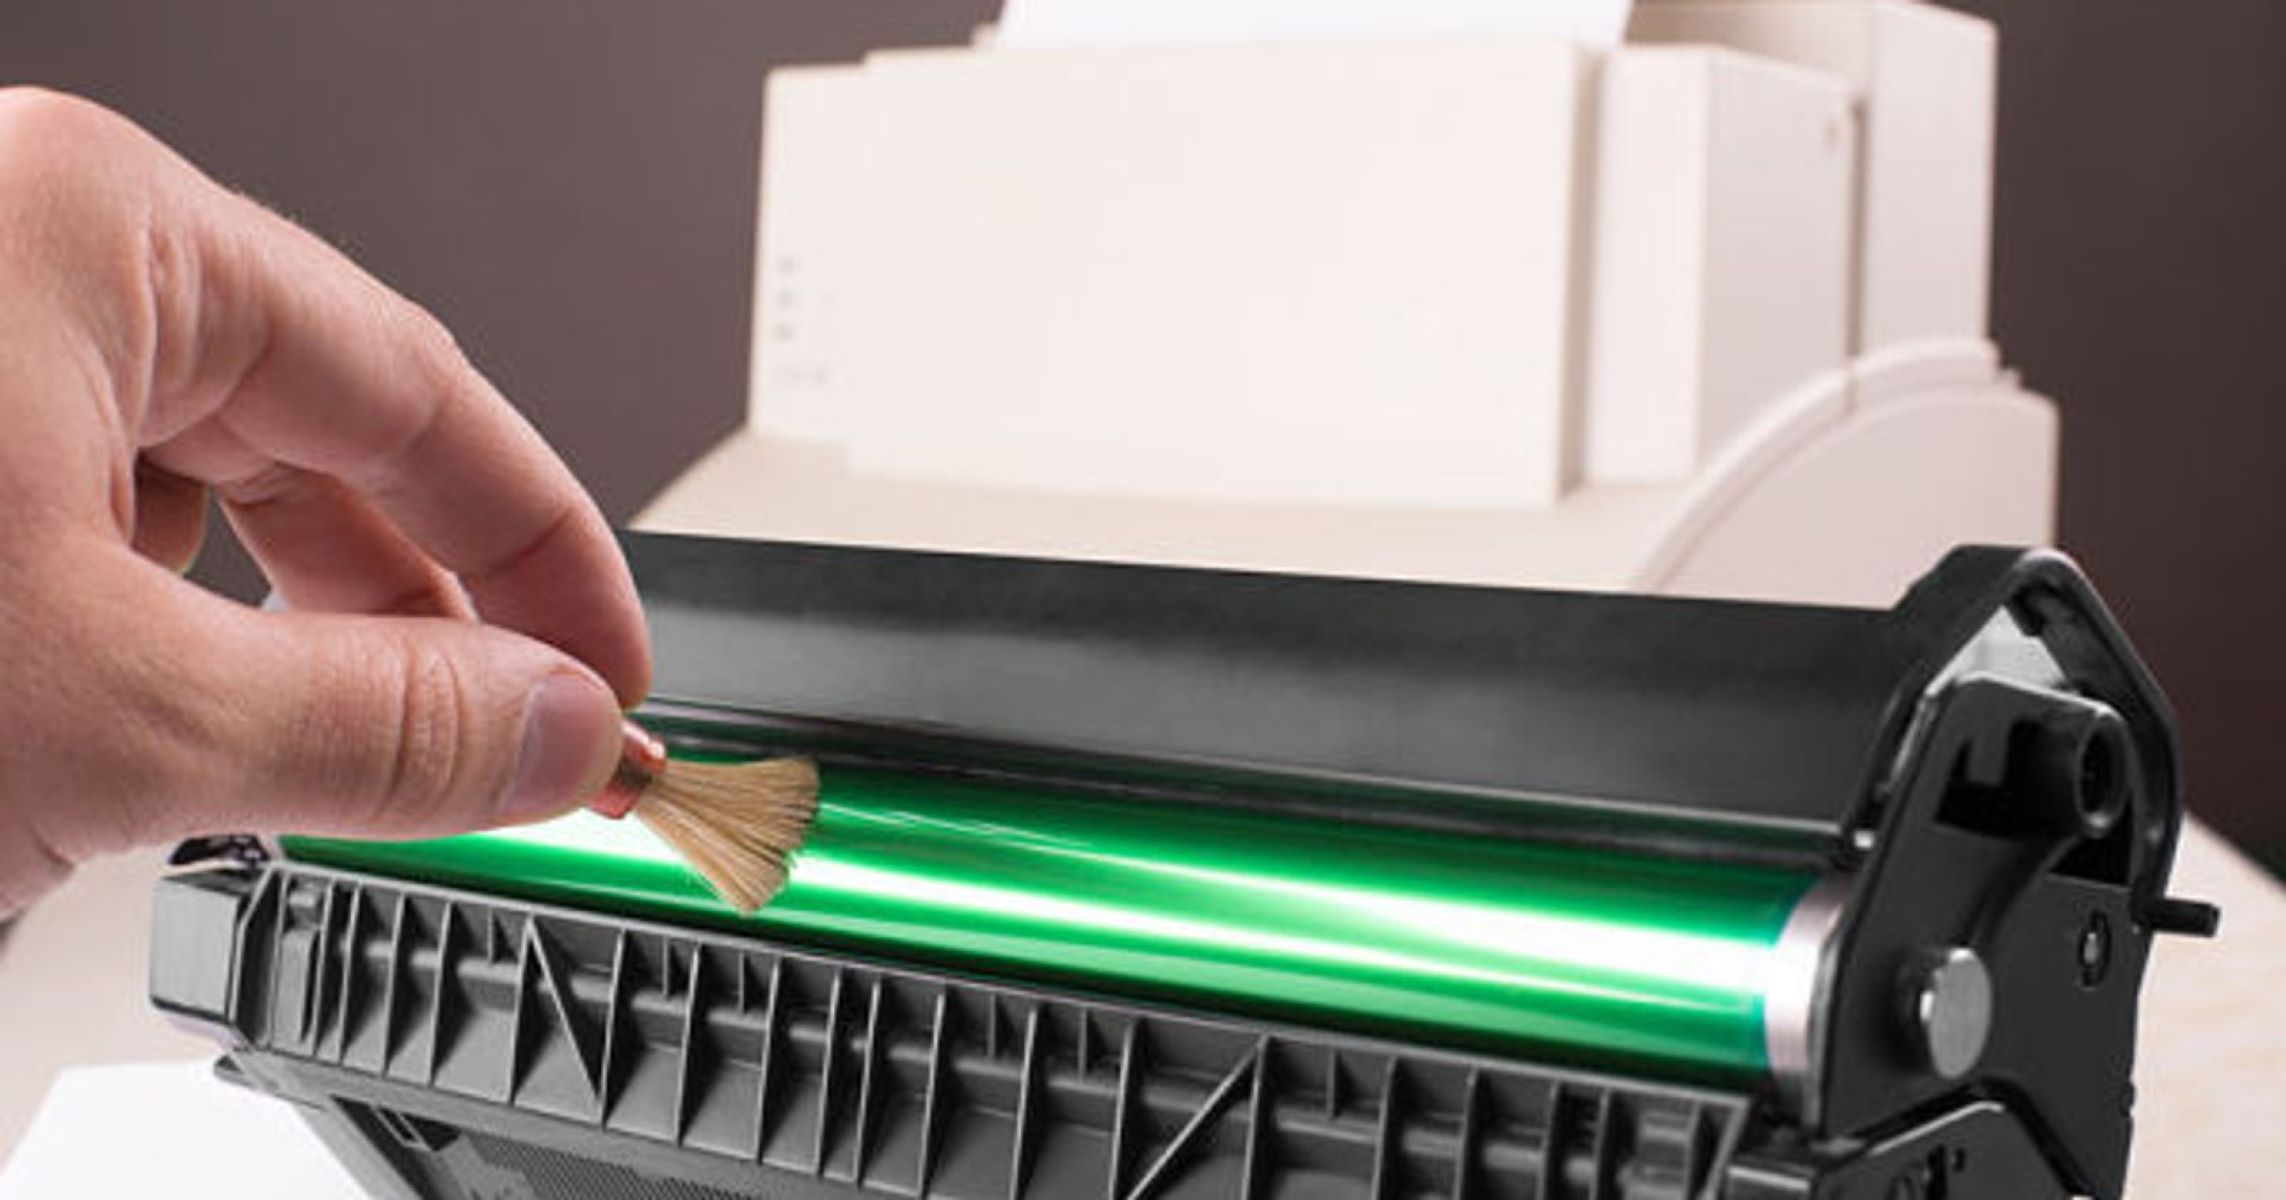
- Unpack the New Drum Unit: Carefully remove the new drum unit from its packaging, ensuring that you handle it gently and avoid touching the green drum or exposing it to direct light.
- Remove Protective Covering: Before installing the new drum unit, check for any protective coverings or tabs that need to be removed. These coverings are designed to safeguard the drum and should be detached before installation.
- Slide the New Drum Unit In: Align the new drum unit properly with the designated grooves or tracks within the printer. Slide the new drum unit into place, ensuring that it moves smoothly and securely fits into the printer.
- Secure the Drum Unit: Once the new drum unit is in position, ensure that it is securely seated and aligned within the printer. Engage any locking tabs or levers to lock the drum unit in place, providing stability during printing operations.
- Reinstall the Toner Cartridge: If the toner cartridge was removed along with the old drum unit, carefully reinstall it into the printer, ensuring that it securely interfaces with the new drum unit.
- Close the Printer Cover: With the new drum unit successfully installed, carefully close the printer cover or access panel, ensuring that it latches securely and aligns with the printer’s body.
By meticulously following these steps, you have effectively installed the new drum unit into your Brother printer, setting the stage for enhanced print quality and continued reliable performance. With the new drum unit seamlessly integrated into your printer, you are now prepared to advance to the final phase of the drum replacement process.
Read more: How To Reset Drum On A Brother Printer
Step 5: Close the Printer
As the drum replacement process nears completion, the final step involves securely closing the printer to prepare it for regular printing operations. Follow these essential steps to ensure that the printer is properly closed and ready for use:
- Power On the Printer: After successfully installing the new drum unit and securing all components, power on the printer by plugging it back into the electrical outlet and pressing the power button. Allow the printer to initialize and prepare for operation.
- Perform Test Prints: To verify that the new drum unit is functioning optimally, initiate a few test prints. Check for consistent print quality, clarity, and uniformity to confirm that the new drum unit is effectively translating toner to the paper.
- Dispose of Old Drum Unit: If you have not already done so, dispose of the old drum unit in accordance with local regulations and environmental guidelines. Ensure that it is properly contained and labeled for disposal.
- Reset Drum Counter (If Required): Depending on the Brother printer model, you may need to reset the drum counter to synchronize it with the new drum unit. Refer to the printer’s manual for specific instructions on resetting the drum counter.
- Close and Seal Toner Compartment: If the toner compartment was opened during the drum replacement process, ensure that it is securely closed and sealed to prevent dust and debris from entering the compartment.
- Resume Regular Printing: With the new drum unit successfully installed and the printer fully operational, resume your regular printing tasks with the confidence of improved print quality and reliability.
By meticulously following these steps to close the printer and perform necessary post-installation procedures, you have effectively completed the drum replacement process, ensuring that your Brother printer is primed for continued exceptional performance and professional-quality prints.
Conclusion
Congratulations on successfully replacing the drum unit in your Brother printer! By diligently following the step-by-step instructions outlined in this guide, you have revitalized your printer’s performance and set the stage for consistent, high-quality prints. The meticulous process of replacing the drum unit ensures that your printer remains a reliable and indispensable tool for various printing needs.
As you embark on your printing endeavors with the new drum unit in place, you can expect enhanced print clarity, improved toner transfer, and overall superior print quality. The seamless installation of the new drum unit not only prolongs the lifespan of your printer but also contributes to the sustainability of your printing equipment, reducing the need for frequent replacements.
Remember to refer to your printer’s manual for any model-specific instructions or additional maintenance recommendations. Regular maintenance and timely replacement of consumable components, such as the drum unit, are essential for preserving the longevity and efficiency of your Brother printer.
Embrace the convenience and reliability of your rejuvenated Brother printer as it continues to meet your printing needs with precision and excellence. By investing a little time and effort into the maintenance of your printer, you ensure that it remains a steadfast ally in producing professional-quality prints for both personal and professional applications.
Thank you for entrusting us with guiding you through the drum replacement process. We hope this comprehensive guide has empowered you to seamlessly replace the drum unit in your Brother printer, setting the stage for uninterrupted printing excellence.
Frequently Asked Questions about How To Replace Drum On Brother Printer
Was this page helpful?
At Storables.com, we guarantee accurate and reliable information. Our content, validated by Expert Board Contributors, is crafted following stringent Editorial Policies. We're committed to providing you with well-researched, expert-backed insights for all your informational needs.

0 thoughts on “How To Replace Drum On Brother Printer”