Home>Articles>20 DIY Outdoor Decorating Projects That Take 30 Minutes Or Less
Articles
20 DIY Outdoor Decorating Projects That Take 30 Minutes Or Less
Modified: January 20, 2024
Discover 20 quick and easy DIY outdoor decorating projects that you can complete in 30 minutes or less with these helpful articles.
(Many of the links in this article redirect to a specific reviewed product. Your purchase of these products through affiliate links helps to generate commission for Storables.com, at no extra cost. Learn more)
Introduction
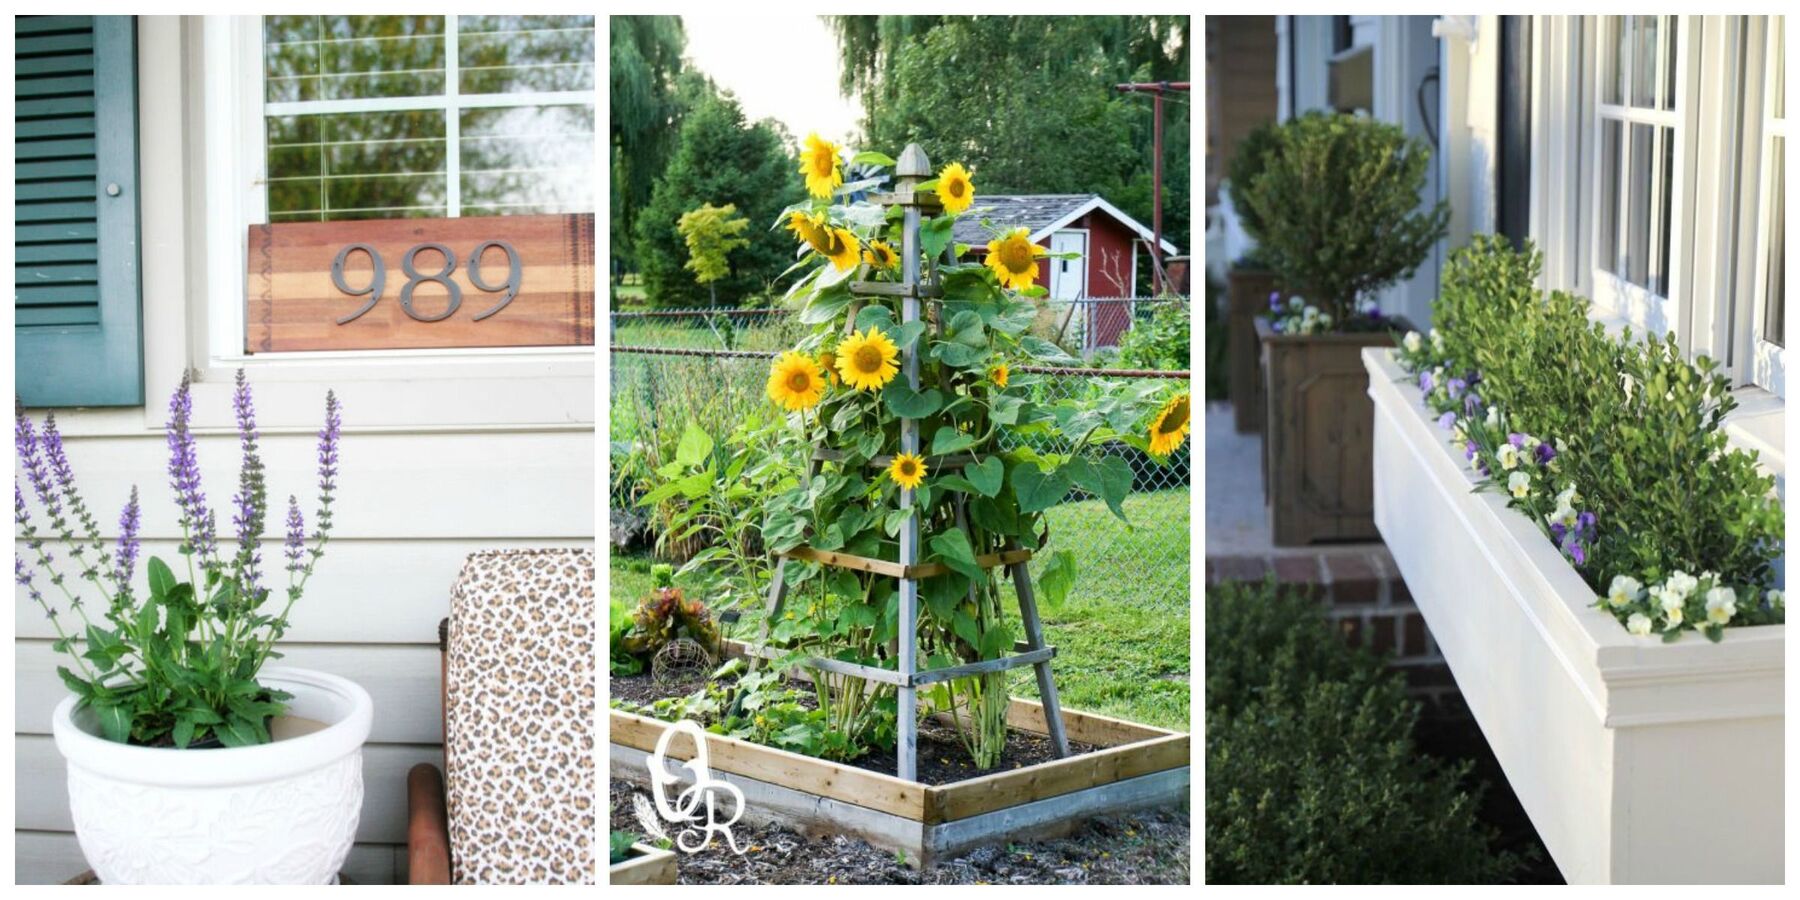
Welcome to the world of outdoor decorating projects! If you’re looking to spruce up your outdoor space and add a touch of creativity, you’ve come to the right place. In this article, we’ll explore 20 DIY projects that you can easily complete in 30 minutes or less. From hanging planters to repurposed furniture, these quick and easy projects are sure to transform your outdoor area into a cozy and inviting oasis.
Whether you have a spacious backyard, a small balcony, or just a few feet of outdoor space, these projects are designed to work in any setting. With just a few materials and a bit of imagination, you can personalize your outdoor area to reflect your unique style and personality.
Not only will these DIY projects add aesthetic appeal to your outdoor space, but they will also provide a sense of accomplishment and pride knowing that you created something beautiful with your own two hands. So, grab your tools and let’s get started on these exciting outdoor decorating projects!
Key Takeaways:
- Transform your outdoor space with 20 quick and easy DIY projects, from hanging planters to upcycled furniture. Add a touch of creativity and personality to create a cozy and inviting oasis in just 30 minutes or less.
- Revitalize your outdoor area with personalized touches like painted garden rocks, mason jar solar lights, and upcycled patio furniture. Embrace sustainability and creativity to breathe new life into your outdoor decor.
DIY Hanging Planters
If you want to bring life and color to your outdoor space, creating your own hanging planters is a fantastic way to do it. Not only are they easy to make, but they also add a touch of greenery that can instantly elevate the ambiance of any patio, balcony, or garden.
To start, gather some empty tin cans or mason jars, and thoroughly clean them. Next, use a nail and hammer to punch several small drainage holes in the bottom of each can or jar. This will ensure that excess water can escape and prevent your plants from becoming waterlogged.
Once you have prepared your containers, it’s time to get creative! You can choose to paint the cans or jars in vibrant colors or use adhesive tape to create fun patterns. Alternatively, you can wrap them with twine or rope for a rustic touch. Let your imagination run wild and experiment with different designs.
After decorating the containers, it’s time to add the plants. Choose small, low-maintenance plants that thrive in hanging conditions, such as ivy, ferns, or petunias. Fill the containers with potting soil and gently place the plants inside, making sure they are secure.
Finally, attach a sturdy hook or bracket to your outdoor structure, whether it’s a beam, a railing, or a tree branch. Hang the planters at different heights to create visual interest and depth. Be sure to water your plants regularly and provide them with the appropriate amount of sunlight for optimal growth.
Your DIY hanging planters will not only add beauty and life to your outdoor space but also serve as a conversation starter. Guests and passersby will be impressed by your creativity and green thumb.
Pro tip: To achieve an eclectic look, mix and match different-sized planters and vary the types of plants you choose. This will create a visually stunning display that is unique to your outdoor area.
Outdoor Pillow Refresh
If your outdoor pillows have seen better days and are in need of a refresh, don’t worry! With just a few simple steps, you can give them a new lease on life and make them look brand new.
Start by removing the pillow covers from the inserts. Assess the condition of the covers and decide if they can be salvaged or if it’s time to replace them. If they are still in good shape, simply move on to the next step. However, if they are torn or stained beyond repair, consider purchasing new pillow covers or repurposing old fabric to create new ones.
If you are keeping the existing covers, give them a thorough clean. Check the care instructions on the label and follow the recommended washing method. Most outdoor pillow covers can be machine washed on a gentle cycle with mild detergent. Once clean, allow them to air dry completely.
Once the covers are dry, it’s time to add a pop of color and pattern. You can achieve this by adding new pillow inserts or by using fabric paint or dye to create unique designs and patterns directly on the covers. Get creative and let your imagination shine!
If you prefer a no-sew option, consider using fabric glue to attach embellishments such as pom-poms, ribbons, or buttons to the covers. This is a fun and easy way to customize your outdoor pillows and give them a fresh, personalized look.
After decorating the covers, insert the pillows back inside. Fluff them up for maximum comfort and place them back on your outdoor furniture. Not only will they provide a cozy spot to relax, but they will also add a touch of style and personality to your outdoor space.
Pro tip: Change your outdoor pillow covers seasonally to keep your outdoor space feeling fresh and updated. Consider using bright, vibrant colors in the summer and warmer, earthy tones in the fall.
Upcycled Tin Can Lanterns
If you’re looking for a unique and eco-friendly way to light up your outdoor space, upcycled tin can lanterns are the perfect DIY project for you. These charming lanterns add a magical glow and ambiance to any outdoor setting.
Start by collecting empty tin cans of various sizes. Make sure to clean them thoroughly and remove any labels or residue. Once clean, you can either leave the cans as-is for a rustic look or paint them in your desired color.
Next, plan your lantern design. Using a pencil, draw your desired pattern or design directly onto the tin cans. You can create simple shapes, intricate patterns, or even spell out words or phrases. Let your creativity guide you!
After drawing your design, follow the lines with a hammer and nail to create small holes. Space the holes closely together for a more intricate design or farther apart for a simpler look. Be careful when hammering to avoid bending or denting the tin cans.
Once you have finished creating the pattern on all of your tin cans, you can now add the lighting element. Place a small tea light or an LED candle inside each can, ensuring it is secure and level. You can also use battery-operated fairy lights for a twinkling effect.
To hang your tin can lanterns, use a drill to create two small holes near the top rim of each can, directly across from each other. Thread a sturdy wire or string through the holes and tie them securely. Hang the lanterns from tree branches, hooks, or a pergola for a whimsical touch.
When lit, these upcycled tin can lanterns create a warm and inviting atmosphere. They are perfect for evening gatherings, outdoor dinners, or a cozy night spent under the stars.
Pro tip: Experiment with different sizes and shapes of tin cans to create a visually interesting display. Hang them at different heights for added depth and dimension.
Recycled Tire Swing
Transforming an old tire into a swing is not only a fun DIY project, but also a great way to repurpose and recycle materials. This classic outdoor activity will provide endless hours of enjoyment for kids and adults alike.
To start, find an old tire that is in good condition. Make sure the tire is clean and free from any sharp edges or protruding objects. Thoroughly inspect it to ensure it is safe for swinging.
Next, find a sturdy tree branch or swing set frame to hang the tire from. Make sure the support structure is strong enough to hold the weight of the tire and the person who will be using the swing.
Once you have chosen the location, securely attach a heavy-duty nylon rope to the tire. Thread the rope through the inside of the tire and tie it in a tight knot, ensuring it is secure and will not slip or come undone.
Prepare the hanging mechanism by tying the opposite ends of the rope to the tree branch or swing set frame. Use a secure knot, such as a bowline or square knot, to ensure the swing is safe and stable.
Before giving the green light for swinging, ensure that the tire swing is at an appropriate height from the ground. It should not be too low, as it may scrape against the ground, or too high, as it may be difficult for small children to reach. Adjust the length of the rope accordingly.
Once the tire swing is properly attached and the height is adjusted, it’s time for some swinging fun! Kids (and adults who are young at heart) can climb onto the swing and hold onto the durable tire for a thrilling ride through the air.
Pro tip: Enhance the comfort of the tire swing by adding cushions or padding to the inside. This will make swinging even more enjoyable and provide a soft surface for sitting or lying down.
With a little creativity and resourcefulness, you can turn an old tire into a fantastic recycled swing that will bring joy to your outdoor space for years to come.
Read more: How To Install Outdoor Landscape Lighting
Painted Garden Rocks
Adding a touch of color and creativity to your garden is as easy as picking up a few rocks and some paint. Painted garden rocks are a simple and fun DIY project that can turn ordinary stones into unique pieces of art.
Start by collecting smooth rocks of various shapes and sizes. Look for rocks that have a flat surface, as they will provide the best canvas for your designs. Clean the rocks thoroughly to remove any dirt or debris.
Next, prepare your painting area. Lay down newspaper or a drop cloth to protect your work surface. Place your rocks on the protected surface to ensure that they won’t roll or move while you paint.
Choose your paint colors and brushes. Acrylic paints are a popular choice for this project, as they adhere well to the rocks and provide vibrant colors. Use small brushes for precise designs or larger brushes for broader strokes.
Now comes the fun part – painting! Let your imagination run wild as you create patterns, designs, or even miniature scenes on the rocks. You can paint flowers, animals, mandalas, or abstract designs. Experiment with different colors and techniques to achieve the desired effect.
Allow the paint to dry completely before moving on to the next step. Depending on the thickness of the paint layers, this may take a few hours or overnight. Once dry, you can add a protective sealant to ensure that your designs stay intact even under the elements.
Once the rocks are dry and sealed, it’s time to find their place in the garden. You can arrange them along garden pathways, place them in flower beds, or stack them as decorative accents. These painted garden rocks will add a charming and personalized touch to your outdoor space.
Pro tip: Get the whole family involved in this project by hosting a rock painting session. Each family member can paint their own rocks and create a unique collection of garden art.
Painted garden rocks are a wonderful way to unleash your creativity and add a whimsical touch to your outdoor space. Whether you’re a beginner or an experienced artist, this DIY project is sure to bring joy and color to your garden.
Mason Jar Solar Lights
Creating your own mason jar solar lights is a fantastic way to add enchanting and eco-friendly illumination to your outdoor space. These DIY lights are not only easy to make, but they also provide a warm and inviting glow once the sun goes down.
To start, gather a few mason jars of various sizes. Clean the jars thoroughly and remove any labels or residue. Make sure the jars are dry before moving on to the next step.
Next, you’ll need solar-powered lids or tops specifically designed for mason jars. These can be easily found online or at your local craft store. The solar lids contain built-in solar panels that charge during the day and automatically illuminate the jars at night.
Once you have your solar lids, attach them to the mason jars according to the package instructions. Ensure that they are securely fastened so that they won’t fall off or become loose over time.
Now comes the fun part – customizing your mason jar solar lights! You can decorate the jars with ribbons, twine, or paint to match your outdoor theme or personal style. Consider adding decorative elements such as sea glass, shells, or pebbles inside the jars for an extra touch of charm.
Place your mason jar solar lights in an area that receives ample sunlight during the day. The solar panels on the lids will charge the built-in batteries, enabling them to light up automatically once it gets dark. You can also place them along pathways, hang them from tree branches, or use them as table centerpieces for outdoor gatherings.
As the sun sets, your mason jar solar lights will create a magical ambiance in your outdoor space. They provide a soft and warm glow that adds a cozy and inviting atmosphere for evening relaxation or entertaining.
Pro tip: Add a few drops of essential oils or citronella oil to the inside of the jars to repel mosquitoes and create a pleasant scent.
With mason jar solar lights, you can create beautiful and sustainable lighting that will enhance the charm of your outdoor space while reducing your carbon footprint.
DIY Welcome Mat
A DIY welcome mat is a delightful way to personalize your entryway and add a warm greeting to your home. With just a few materials and a little creativity, you can create a unique and inviting mat that will make a statement before guests even step foot inside.
To start, gather a plain coir or rubber mat as your base. Coir mats are made from natural fibers and have a rough texture that is ideal for scraping dirt off shoes. Rubber mats are durable and weather-resistant. Choose the type of mat that suits your preferences and needs.
Next, think about the design or message you want to convey on your welcome mat. You can choose to write a warm greeting such as “Welcome,” “Hello,” or “Home Sweet Home.” Alternatively, you can add a fun or personal touch with a quirky phrase or design that reflects your personality.
Once you have decided on your design, gather stencils, letter stickers, or painter’s tape to create your desired pattern or message. If you’re feeling confident, you can even freehand the design directly onto the mat.
Carefully position your stencils or stickers onto the mat and press them down firmly to ensure they adhere well. If you’re using painter’s tape, use it to create the desired shape or pattern by outlining and masking off the areas you want to paint.
Now it’s time to add color! Acrylic paint works well on coir and rubber mats. Choose paint colors that complement your home’s exterior or go for bold, vibrant hues to make a statement. Use a small brush to paint within the stencils or taped-off areas, making sure to keep your strokes even and smooth.
Allow the paint to dry completely before removing the stencils, stickers, or tape. To ensure longevity, consider adding a clear sealant or waterproof spray to protect the painted design from the elements.
Place your DIY welcome mat at your entryway, either indoors or outdoors, to greet guests with style and charm. Not only will it add a personal touch to your home, but it will also serve its purpose by keeping your floors clean from dirt and debris.
Pro tip: Consider adding a non-slip backing or rug pad to your mat to keep it in place and prevent it from sliding on smooth surfaces.
A customized DIY welcome mat is a wonderful way to make your visitors feel warm and invited as they enter your home. Let your creativity shine and create a unique mat that reflects your personal style and creates a memorable first impression.
Easy Outdoor Candle Holders
Creating your own outdoor candle holders is a simple and cost-effective way to add a touch of elegance and ambience to your outdoor space. These DIY candle holders can be made from various materials, and they provide a warm and inviting glow that enhances evening gatherings and creates a cozy atmosphere.
One of the easiest ways to make outdoor candle holders is by repurposing everyday items. For example, you can use glass jars, tin cans, or even wine bottles. These items can be easily transformed into beautiful candle holders with just a few simple steps.
To start, collect the containers you want to use as candle holders and clean them thoroughly. Make sure they are completely dry before moving on to the next step.
Next, choose your preferred method for decorating the containers. You can paint them in a solid color or create intricate designs using glass paint or adhesive stencils. Consider using colors that complement your outdoor decor or opt for metallic finishes for an elegant touch.
If you’re feeling adventurous, you can also wrap the containers with decorative wire, twine, or ribbon. Secure the material with glue or tie it in a bow for added visual interest.
Once your containers are decorated, it’s time to add the candles. Use small votive or tea light candles that are designed for outdoor use. If you’re using glass jars, secure the candles inside by placing a small amount of sand or decorative stones at the bottom.
Place your finished candle holders strategically around your outdoor space. They can be arranged along pathways, on tables, or even hung from tree branches. The soft glow of the candles will create a cozy and enchanting atmosphere for outdoor parties or romantic evenings.
Pro tip: For a unique touch, consider using scented candles that repel insects, such as citronella or lavender, to keep bugs away while adding a pleasant fragrance to the air.
Creating easy outdoor candle holders allows you to add a personal touch to your outdoor space while providing beautiful lighting for your evenings. Get creative with your materials and designs to make candle holders that reflect your personal style and enhance the ambiance of your outdoor oasis.
Pallet Planter Box
Transforming wooden pallets into a planter box is a creative and eco-friendly way to add a rustic touch to your outdoor space. This DIY project allows you to showcase your green thumb and create a beautiful home for your favorite plants and flowers.
To start, find a wooden pallet in good condition. Ensure that the pallet is clean, free from any chemical treatments, and has intact boards. If needed, sand the pallet to remove any rough edges or splinters.
Next, determine the desired size and shape of your planter box. You can choose to use the entire pallet or cut it into a specific size to fit your space. Measure and mark the appropriate dimensions, then use a saw or reciprocating saw to carefully cut the pallet into sections.
Once you have the desired sections, it’s time to assemble the planter box. Use screws or nails to attach the pallet pieces together, forming a rectangular box shape. reinforce the corners for stability and durability.
Before placing plants in the pallet planter box, consider lining the bottom with landscape fabric or a layer of geotextile to prevent soil from falling out while allowing proper drainage. This ensures that your plants have proper moisture control.
Once your planter box is assembled and lined, fill it with potting mix, ensuring that it is well-draining and suitable for your chosen plants. You can mix in compost or organic matter to enrich the soil and promote healthy plant growth.
Now it’s time to add your plants! Choose a variety of flowers, herbs, or vegetables depending on your preference and the growing conditions of your outdoor space. Arrange the plants in the planter box, ensuring they have enough space to grow and thrive.
Place your pallet planter box in a location that receives adequate sunlight for your plants. Water your plants regularly, paying close attention to their specific watering needs.
Pro tip: Enhance the visual appeal of your pallet planter box by painting or staining it in a color that complements your outdoor decor. You can also add wheels to the bottom of the planter box for easy mobility.
A pallet planter box is not only functional but also adds a rustic and charming touch to your outdoor space. With a little creativity and green thumb, you can enjoy a beautiful garden that brings life and color to your outdoor oasis.
Colorful Wind Chimes
Creating your own colorful wind chimes is a delightful way to add a whimsical touch to your outdoor space. These DIY chimes not only provide a soothing and melodic sound but also add a vibrant pop of color that dances in the breeze.
To start, gather materials such as metal rods or tubes, colorful beads, bells, and strong string or fishing line. You can find these supplies at your local craft store or repurpose items you already have at home.
Next, cut the metal rods or tubes into various lengths to create different pitches. You can experiment with different lengths to achieve the desired sound for each chime. Make sure to file or sand the edges to avoid any sharp or rough spots.
Now it’s time to decorate your chimes! Thread colorful beads, small bells, or other decorative elements onto the metal rods. Arrange them in a visually appealing pattern or mix and match colors for a playful look.
Once you have decorated the metal rods, tie a strong string or fishing line to each rod. Ensure that the line is secure and will not come loose in case of strong winds.
At the top of each string, create a loop for hanging the chimes. You can use a small metal ring or tie a knot in the string to form the loop.
Lastly, find the perfect spot to hang your colorful wind chimes. Choose a location where there is a gentle breeze so that the chimes can sway and produce beautiful sounds. A porch, patio, or tree branch are great options.
When the wind blows, your vibrant wind chimes will create a melodic tune that adds a calming and serene atmosphere to your outdoor space. The colorful beads and decorative elements will catch the sunlight and create marvelous visual displays.
Pro tip: Consider adding chimes made of different materials, such as seashells or wooden pieces, to create a varied and harmonious combination of sounds.
With colorful wind chimes, you can create a harmonious and visually captivating display that brings joy and tranquility to your outdoor oasis. Enjoy the tinkling melodies and the mesmerizing dance of colors as you relax and unwind in your backyard.
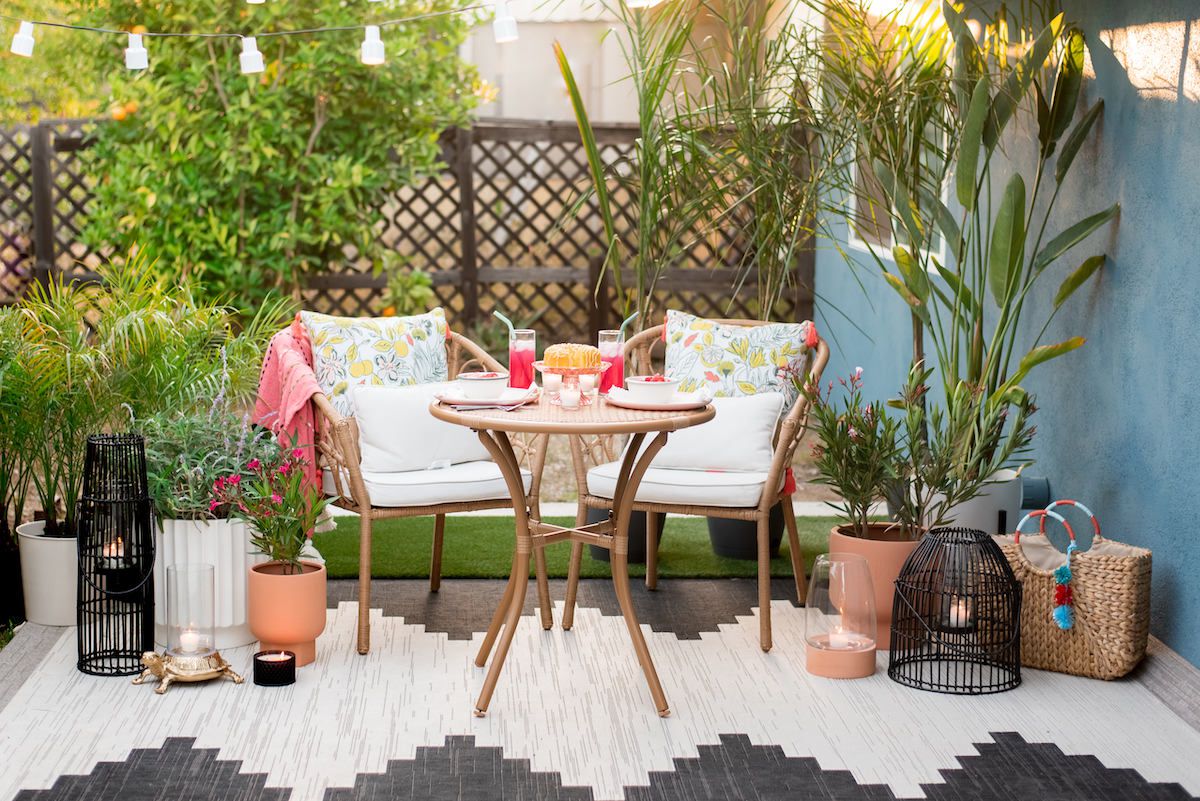
Create a simple outdoor seating area by arranging a few colorful outdoor pillows on a bench or chairs. This quick and easy project can instantly add a pop of color and comfort to your outdoor space.
Repurposed Wine Bottle Torch
Repurposing wine bottles into torches is not only a creative way to give new life to old bottles but also a practical and stylish way to add soft, flickering lighting to your outdoor space. These DIY torches create a warm and inviting ambiance, perfect for evening gatherings or quiet nights under the stars.
To start, you’ll need empty wine bottles. Make sure to remove any labels or residue and clean them thoroughly. Choose bottles with interesting shapes or colors to add visual interest to your torches.
Next, you’ll need wick holders and fiberglass wicks, which can be found at your local hardware or craft store. The wick holders are designed to fit into the top of the wine bottle and hold the wick securely.
Fill the bottom of the wine bottle with a small amount of citronella torch fuel or lamp oil. This helps repel mosquitoes and provides a pleasant aroma while burning. Be sure to leave enough space for the wick holder to fit into the bottle without overflowing.
Insert the wick holder into the neck of the bottle, making sure it is secure and the wick extends into the fuel. The fiberglass wick will absorb the fuel and provide a steady flame when lit.
Allow the wick to soak up the fuel for a few minutes before lighting it. To light the torch, use a long lighter or a match and carefully ignite the end of the wick. The flame should be steady and emit a warm glow.
Place your repurposed wine bottle torches in a safe location in your outdoor space. Make sure they are stable and won’t be easily knocked over by wind or movement. They can be placed along pathways, on outdoor tables, or even hung from hooks or tree branches.
As the sun sets, your wine bottle torches will cast a beautiful, soft light and create a cozy and inviting atmosphere for outdoor gatherings. They also provide a stylish and sustainable way to repurpose old wine bottles.
Pro tip: Consider using wine bottles with different colored glass to create an eclectic and visually striking display. You can also wrap wire or decorative elements around the neck of the bottle to further enhance their aesthetics.
With repurposed wine bottle torches, you can transform your outdoor space into an enchanting and intimate setting. Enjoy the warm glow and the mesmerizing flickering of the flames as you relax and unwind in your outdoor oasis.
Outdoor Tic-Tac-Toe Board
Creating an outdoor Tic-Tac-Toe board is a fantastic way to bring fun and entertainment to your outdoor space. This DIY project is simple, customizable, and perfect for both kids and adults to enjoy during backyard gatherings or lazy afternoons in the sun.
To start, gather your materials. You’ll need a large piece of wood, such as plywood or a wooden board, that is big enough to accommodate the Tic-Tac-Toe grid. Make sure the wood is sturdy and weather-resistant.
Next, measure and mark the dimensions of the Tic-Tac-Toe grid on the wood. Divide the board into a 3×3 square grid using a pencil and ruler. Make sure the lines are straight and evenly spaced.
Once you have marked the grid, choose your preferred method for decorating it. You can use outdoor paint to fill in the squares with alternating colors, such as X’s in one color and O’s in another. Consider using bright, vibrant colors that stand out against the natural wood.
If you prefer a more rustic look, you can use a wood-burning tool to etch the X’s and O’s directly into the wood. This method adds a unique and natural touch to your outdoor Tic-Tac-Toe board.
Once your grid is decorated and the paint or wood burnings are dry, it’s time to make the X’s and O’s game pieces. You can use stones, wooden discs, or even mini chalkboards cut into the shape of X’s and O’s.
Place the X’s and O’s game pieces neatly next to the Tic-Tac-Toe board, ensuring they are easily accessible for playing. Consider storing them in a small drawstring bag or basket to keep them organized and prevent them from getting lost.
Now, invite your family and friends to enjoy a game of Tic-Tac-Toe in your outdoor space. Take turns strategically placing your game pieces and try to get three in a row. The first player to achieve three in a row, either horizontally, vertically, or diagonally, wins the game!
Pro tip: To protect your outdoor Tic-Tac-Toe board from the elements, consider applying a coat of weather-resistant sealant or using outdoor varnish on the wood.
An outdoor Tic-Tac-Toe board provides endless entertainment and friendly competition for all ages. Whether you’re hosting a backyard barbecue or enjoying a lazy day outside, this DIY project is sure to bring fun and laughter to your outdoor gatherings.
DIY Garden Sign
Creating your own garden sign is a wonderful way to personalize your outdoor space and add a touch of charm and whimsy to your garden. This DIY project allows you to showcase your creativity and showcase your gardening enthusiasm.
To start, gather materials such as a wooden board, a paintbrush, paint or markers, and stencils or letter stickers. You can choose a board of any size and shape that fits your personal preference and the space available in your garden.
Next, prepare the wooden board by sanding it to create a smooth surface. This will allow the paint or markers to adhere better and create clean, crisp lines for your design or message.
Decide on the design or message for your garden sign. You can keep it simple by painting words such as “Garden,” “Welcome,” or “Bloom” directly onto the board. Alternatively, you can get creative and paint images of flowers, birds, or gardening tools to represent your garden theme.
If you’re not confident in your freehand painting skills, you can use stencils or letter stickers to create your desired design. Place the stencils or stickers onto the wooden board and press them down firmly to ensure they adhere well.
Once your design is ready, it’s time to add color! Use paint or markers to fill in your design or letters. Choose colors that complement your garden’s color palette or go for bold and vibrant hues to make a statement. Allow the paint or markers to dry completely before moving on to the next step.
After the paint or markers have dried, you can add a protective coating to your garden sign. This will help preserve the colors and protect the sign from the elements. Consider using a clear varnish or a weather-resistant sealer to ensure longevity.
Find the perfect spot in your garden to display your DIY sign. You can place it near a flowerbed, hang it on a garden fence, or lean it against a tree. Choose a location where it can be easily seen and admired.
Pro tip: Add a personal touch to your garden sign by incorporating elements of your garden design, such as flowers, herbs, or foliage. You can use pressed flowers or leaf imprints to create beautiful and unique embellishments.
A DIY garden sign adds a personal and artistic touch to your outdoor space, allowing you to showcase your gardening passion and create a warm and inviting atmosphere in your garden. Get creative, let your imagination flourish, and enjoy the beauty of your handmade sign.
Tree Stump Side Table
Transforming a tree stump into a side table is a creative and eco-friendly way to add a rustic and natural touch to your outdoor space. This DIY project allows you to repurpose a fallen or cut tree stump into a functional and visually appealing piece of furniture.
To start, find a suitable tree stump that is sturdy and has a flat surface. Make sure the stump is clean and free from any loose bark or debris. If needed, give it a good scrub or sanding to smooth out any rough edges.
Next, determine the desired height for your side table. You can leave the stump as-is for a more natural and rustic look, or you can trim it down to a preferred height using a chainsaw or a hand saw.
Once you have the desired height, thoroughly clean the stump again to remove any sawdust or debris. You may also want to apply a wood sealant or preservative to protect the stump from insects and weathering.
If you want to add extra stability and durability, attach furniture legs or metal hairpin legs to the bottom of the stump. This will elevate the table and provide a more balanced and sturdy support.
To enhance the visual appeal of your tree stump side table, consider adding a protective top. You can use a round piece of wood, a glass panel, or even a custom-made tabletop that fits the shape and dimensions of the stump. This will add a smooth surface for placing items and protect the stump from water or stains.
Place your newly transformed tree stump side table in your outdoor space. It can serve as a functional surface for holding beverages, books, or potted plants. You can also use it as an extra seat or as a decorative pedestal for outdoor sculptures or lanterns.
Pro tip: If you want to add a pop of color or a touch of personalization, consider painting or staining the tree stump with outdoor wood paint or stain. Choose colors that complement your outdoor decor scheme and apply multiple layers for a durable finish.
A tree stump side table not only adds a unique and natural element to your outdoor space but also serves as a practical and versatile piece of furniture. Embrace the beauty of nature and enjoy the functional and aesthetic benefits of your one-of-a-kind side table.
DIY Birdfeeder
Creating your own birdfeeder is a delightful way to attract and nourish various bird species while adding a charming touch to your outdoor space. This DIY project allows you to connect with nature and enjoy the beauty of birds up close.
To start, gather materials such as a small wooden or plastic tray, a long dowel or stick, strong string or wire, and birdseed. You can choose a tray that suits your style and fits the size of birds you wish to attract.
Next, determine the design of your birdfeeder. You can opt for a simple platform feeder, a hanging feeder, or even a more complex design such as a bottle or teacup feeder.
If you’re making a platform feeder, drill two small holes near the upper corners of the tray. Thread the string or wire through the holes and tie it securely, creating a loop for hanging the feeder.
If you prefer a hanging feeder, drill a small hole through the center of the tray and insert the dowel or stick. The dowel should extend outwards on each side, serving as a perch for the birds to land on while they eat.
Once your birdfeeder is constructed, it’s time to fill it with birdseed. Consider using a variety of seeds to attract different bird species. Black oil sunflower seeds are a popular choice and attract a wide range of birds.
Hang or place your birdfeeder in a location where it can be easily seen by birds and where they will feel safe. You can hang it from a tree branch, a hook, or even a pergola. Make sure it is easily accessible for birds to land and feed.
As birds discover your DIY birdfeeder, they will be drawn to the abundant food source and provide you with a joyful display of fluttering wings and beautiful melodies. It’s a wonderful way to connect with nature and enjoy the presence of these feathered visitors.
Pro tip: To keep squirrels and other larger pests away, consider using squirrel-proof or cage-style birdfeeders. You can also sprinkle cayenne pepper or use squirrel baffles to deter them from reaching the birdseed.
A DIY birdfeeder not only benefits and supports local bird populations but also provides you with endless entertainment and a deeper appreciation for nature. Sit back and enjoy the sights and sounds of birds flocking to your homemade feeder.
Painted Flower Pots
Transforming plain flower pots into colorful works of art is a fun and creative way to add personality and style to your garden or indoor space. This DIY project allows you to showcase your artistic talents while giving your plants a beautiful and unique home.
To start, gather terracotta or ceramic flower pots in various sizes. Make sure the pots are clean and free from any dirt or debris. You can find affordable flower pots at your local garden center, or repurpose old ones you already have.
Next, decide on the design or pattern you want to paint. You can create simple geometric shapes, intricate floral designs, or even personalize the pots with initials or names. Allow your creativity to flow and choose colors that complement your existing decor or reflect your personal style.
Before painting, it’s a good idea to apply a base coat of paint or primer to the pots. This will help the paint adhere better and provide a smooth surface for your design. Choose a color that will enhance the vibrancy of your chosen design or opt for a neutral base for a more subtle look.
Once the base coat is dry, you can start painting your design. Use acrylic craft paints or waterproof outdoor paints for a durable finish. Consider using a variety of brushes or even sponge and stencils for added texture and detail.
If you’re not confident in your freehand painting skills, you can use masking tape or adhesive stencils to create crisp lines and shapes. This technique allows you to achieve intricate patterns and precise designs with ease.
Allow the paint to dry completely before moving or planting your flowers. Once the pots are dry, you can add potting soil and your favorite plants or flowers. Be sure to choose plants that are appropriate for the size and drainage needs of the pots.
Place your painted flower pots in your garden, patio, or indoor space, and watch them instantly brighten up the area. They will not only provide a beautiful home for your plants but also act as stunning decorative accents.
Pro tip: To protect your painted flower pots from weathering and fading, apply a clear waterproof sealant or varnish. This will help preserve the colors and keep your designs looking fresh for longer.
With painted flower pots, you can unleash your creativity and create custom pieces of functional art. Enjoy the beauty of your hand-painted pots and the vibrant display they bring to your garden or indoor space.
Read more: 17 Do-It-Yourself Outdoor Project Ideas
Outdoor Lanterns with LED Candles
Outdoor lanterns with LED candles are a wonderful way to add a cozy and intimate atmosphere to your outdoor space while ensuring safety and convenience. This DIY project allows you to enjoy the soft glow of candlelight without the risk of an open flame.
To start, gather materials such as metal or glass lanterns, LED candles, and strong string or wire. You can choose lanterns of different sizes and styles to suit your personal taste and the desired look for your outdoor space.
Next, determine how you will secure the LED candles within the lanterns. You can use adhesive putty or tape to hold them in place, ensuring they won’t move or fall out. Make sure the LED candles fit snugly inside the lanterns for a secure and stable fit.
Place the LED candles inside the lanterns and turn them on to test the lighting effect. LED candles are a safe and long-lasting alternative to traditional candles, providing a realistic flickering flame without the risk of fire or melting wax.
Once you are satisfied with the arrangement, you can add decorative elements to the lanterns to further enhance their aesthetic appeal. Consider tying ribbons, twine, or dried flowers around the handles or suspending small ornaments from the top of the lanterns.
Determine the best location(s) for your outdoor lanterns. You can place them on outdoor tables, hang them from tree branches or hooks, or even line pathways or garden borders with a row of lanterns. Make sure they are easily accessible and properly secured to prevent accidental falls.
As evening falls, the soft glow of the LED candles within the lanterns will create a warm and inviting ambiance. Enjoy the subtle flickering light and the cozy atmosphere they provide for outdoor gatherings or a peaceful night outdoors.
Pro tip: Opt for LED candles with built-in timers or remote controls. This allows you to easily control the lighting without having to physically turn each candle on or off.
With outdoor lanterns featuring LED candles, you can enjoy the enchanting beauty of candlelight without the worry of fire hazards. Relax and bask in the gentle glow as your outdoor space is transformed into a tranquil and inviting haven.
Upcycled Patio Furniture
Upcycling your patio furniture is a creative and sustainable way to breathe new life into old or worn-out pieces, while adding a unique and personalized touch to your outdoor space. This DIY project allows you to repurpose and revitalize furniture, reducing waste and saving money.
To start, assess your existing patio furniture and determine which pieces are suitable for upcycling. Look for furniture made of materials such as wood, metal, or plastic that can be easily transformed with a fresh coat of paint or new upholstery.
Next, clean the furniture thoroughly and make any necessary repairs. Sand rough or chipped areas, replace broken pieces, and tighten any loose screws or bolts. This will ensure that the furniture is sturdy and ready for the upcycling process.
Decide on the design or style you want to achieve with your upcycled patio furniture. You can choose a cohesive look by painting all the pieces in the same color and using matching cushions and accessories. Alternatively, you can create an eclectic look by using different colors and patterns.
If you’re working with wooden furniture, consider sanding it down to create a smooth surface for painting or staining. Apply a primer to help the paint adhere better and apply multiple coats of outdoor paint or a weather-resistant wood stain for a durable finish.
For metal furniture, remove any rust or peeling paint by using sandpaper or a wire brush. Apply a rust-resistant primer before covering the furniture with weather-resistant spray paint. Choose a color that complements your outdoor decor or go for metallic finishes for a contemporary look.
If your patio furniture has cushions, you can give them a fresh look by reupholstering or replacing the fabric. Choose outdoor fabric that is fade-resistant and waterproof to ensure it withstands the elements.
After upcycling your patio furniture, arrange the pieces in a way that maximizes comfort and functionality. Create different seating areas or lounging corners, and add outdoor accessories such as pillows, rugs, and plants to complete the look.
Pro tip: Consider incorporating sustainable materials into your upcycled patio furniture. Use eco-friendly paint and stains, as well as cushions made from recycled or organic materials.
Upcycled patio furniture adds character and style to your outdoor space while minimizing waste. Embrace your creativity and give your old furniture a new lease on life, transforming it into eye-catching and functional pieces that you will enjoy for years to come.
Outdoor Rug Makeover
Giving your outdoor rug a makeover is a fantastic way to refresh and revitalize your outdoor space. This DIY project allows you to transform a worn-out or faded rug into a vibrant and stylish centerpiece that ties together your outdoor decor.
To start, choose the rug you want to makeover. Look for a rug made specifically for outdoor use, as it will be more durable and able to withstand the elements. Ensure that the rug is clean and dry before beginning the makeover process.
Next, decide on the design or pattern you want to create. You can opt for a simple design such as geometric shapes or stripes, or you can get creative and paint intricate designs or motifs. Consider using stencils or tape to create sharp lines and patterns.
Before painting, make sure the rug is placed on a clean and protected surface. Lay down a drop cloth or old newspapers to avoid any accidental spills or paint splatters. This will also protect the surface underneath the rug from any paint seeping through.
Choose outdoor fabric paint in your desired colors. Test the paint on a small, inconspicuous area of the rug to ensure it adheres well and achieves the desired effect. Once you are satisfied, begin painting your design onto the rug using a brush or sponge.
Allow the painted areas to dry completely before moving on to the next section. This will help prevent smudging or transferring of the paint. Depending on the size of your rug and the complexity of your design, you may need to work in sections to ensure proper drying time.
Once the paint is dry, apply a coat of clear sealant or waterproof spray to protect the design from the elements. This will help preserve the colors and increase the longevity of your outdoor rug makeover.
Once the sealant is dry, place your revamped outdoor rug in its designated spot in your outdoor space. It can serve as a stylish focal point under a patio dining set, in a conversation area, or even as a welcoming rug at your front entrance.
Pro tip: Consider adding a non-slip rug pad underneath your newly painted rug to prevent it from slipping or sliding on smooth surfaces. This will provide extra safety and stability.
An outdoor rug makeover breathes new life into your outdoor space, adding color, texture, and personality. Get creative, unleash your imagination, and transform your tired old rug into a stunning piece of art that ties your outdoor decor together.
DIY Hammock
Creating your own hammock is a rewarding and relaxing DIY project that allows you to enjoy the ultimate level of comfort and tranquility in your outdoor space. This project enables you to relax and unwind while basking in the gentle sway of a personalized hammock.
To start, gather your materials. You’ll need a durable and weather-resistant fabric, such as canvas or outdoor-grade nylon, to serve as the base of your hammock. Choose a fabric that can support your weight and withstand outdoor conditions.
Next, measure and cut your fabric to the desired length and width. Keep in mind that the length will determine the sag of the hammock, so ensure it is long enough to provide a comfortable and relaxing experience.
To reinforce the edges of the fabric, fold over about 2-3 inches along each side and sew a sturdy seam. This will help prevent fraying and increase the overall strength and durability of your hammock.
Once the edges are reinforced, it’s time to attach the hammock to the support system. You can use sturdy ropes or webbing straps to connect the ends of the fabric to two solid anchor points, such as trees or posts.
Ensure that the anchor points can withstand the weight and movement of the hammock. Make sure to double-check the strength and stability of the support system before use to prevent accidents or injuries.
Attach the ropes or webbing straps to the ends of the fabric using secure knots or carabiners. Ensure that the fabric is taut but not overly tight, as it should provide a comfortable and relaxing hammock experience.
Hang the hammock at a height that allows for easy access and comfortable relaxation. Make sure it is not too high off the ground and can be easily reached without the risk of falling.
Test the hammock by gently sitting or lying in it to ensure it feels secure and comfortable. Make any necessary adjustments to the placement or tension of the fabric before fully enjoying your DIY hammock.
Pro tip: Consider adding additional comfort to your homemade hammock by using a foam or inflatable pad as a makeshift mattress. This will provide cushioning and alleviate any pressure points while you relax.
With your DIY hammock in place, you can now kick back, relax, and enjoy the blissful moments of swinging gently in the breeze. Let the stresses of the day melt away as you indulge in the ultimate comfort and serenity of your homemade hammock.
Frequently Asked Questions about 20 DIY Outdoor Decorating Projects That Take 30 Minutes Or Less
Was this page helpful?
At Storables.com, we guarantee accurate and reliable information. Our content, validated by Expert Board Contributors, is crafted following stringent Editorial Policies. We're committed to providing you with well-researched, expert-backed insights for all your informational needs.

0 thoughts on “20 DIY Outdoor Decorating Projects That Take 30 Minutes Or Less”