Home>Articles>How To Make This Charming DIY Outdoor Bar In A Weekend
Articles
How To Make This Charming DIY Outdoor Bar In A Weekend
Modified: August 16, 2024
Get step-by-step instructions and inspiration on creating your own outdoor bar with this charming DIY guide. Perfect for a weekend project.
(Many of the links in this article redirect to a specific reviewed product. Your purchase of these products through affiliate links helps to generate commission for Storables.com, at no extra cost. Learn more)
Introduction
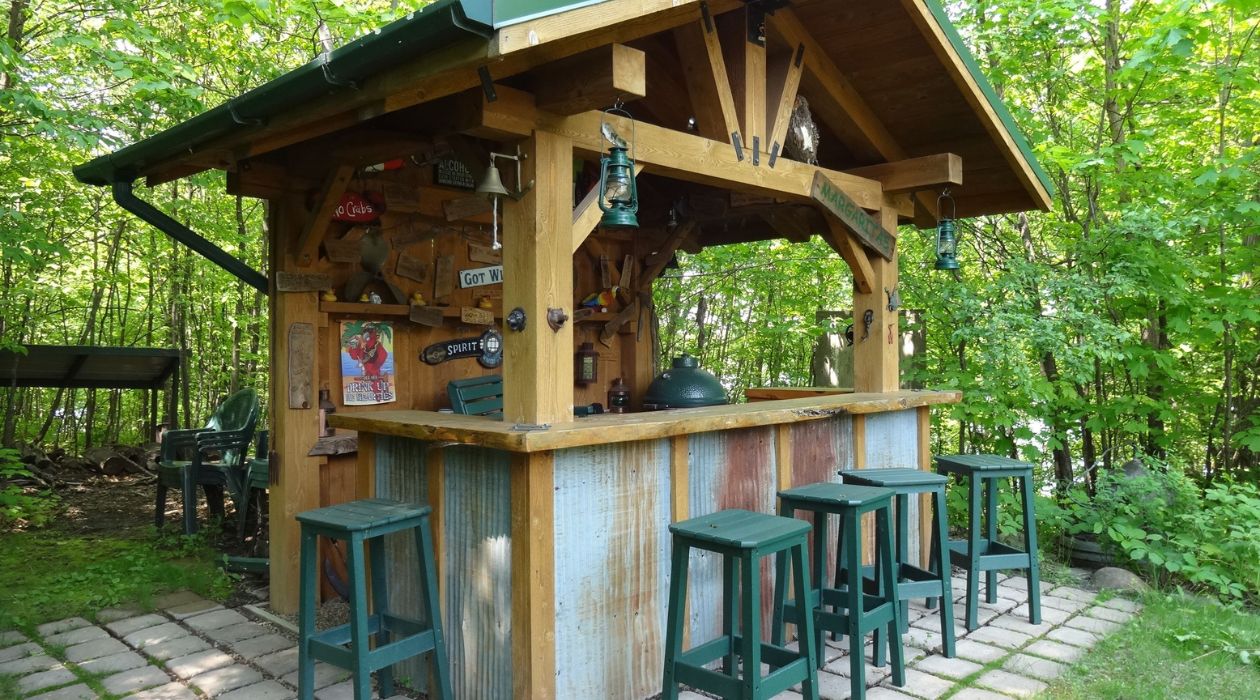
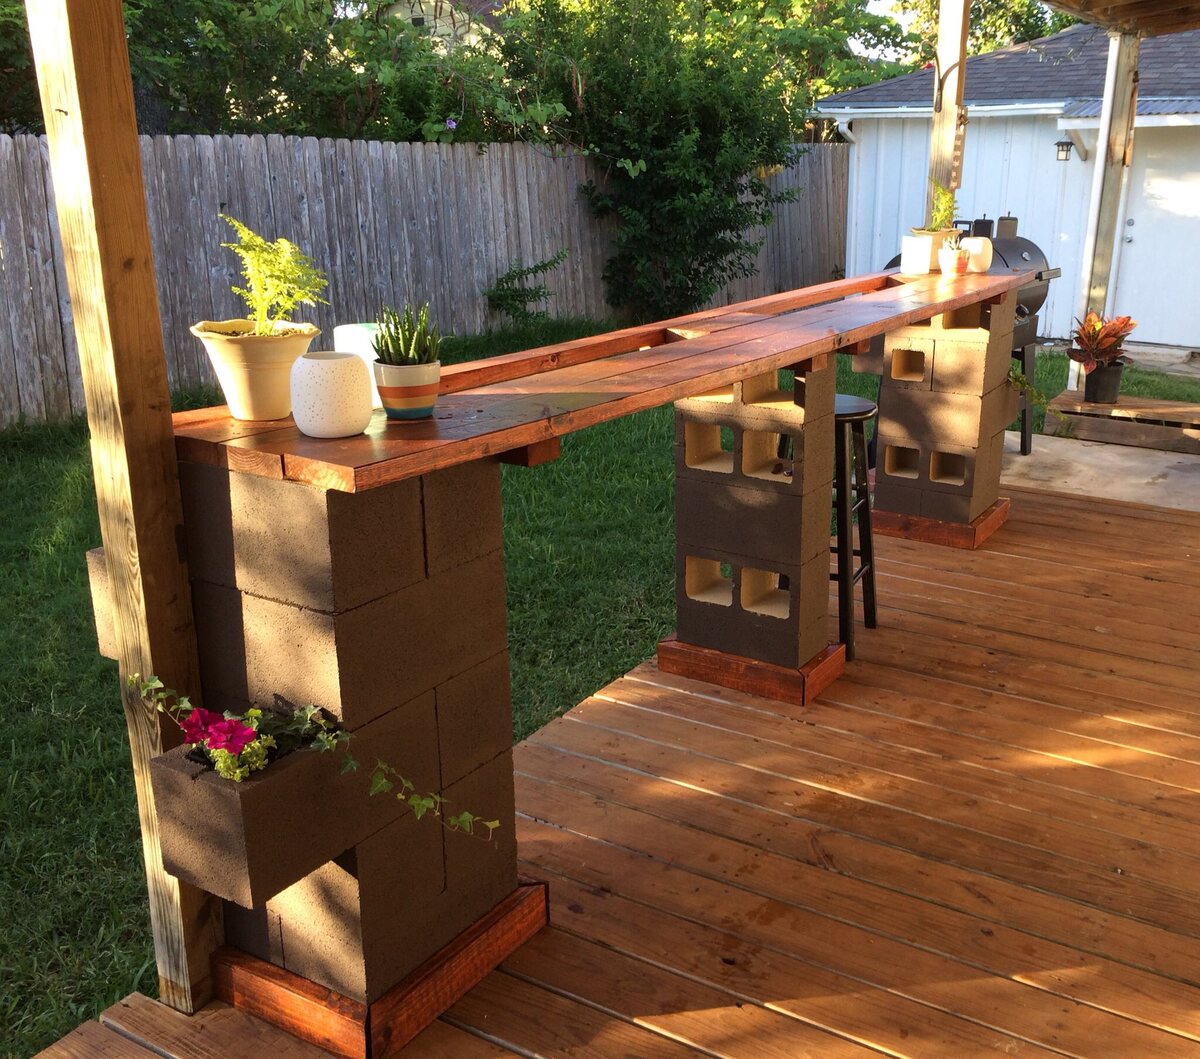
Are you dreaming of having your own outdoor bar? Somewhere you can relax and unwind with friends and family while enjoying the beautiful weather? Creating a DIY outdoor bar can be a fun and rewarding project that will not only add charm to your outdoor space but also provide a convenient place to entertain guests. The best part is, you can build this charming outdoor bar in just one weekend!
Having your own outdoor bar allows you to bring the feeling of a cozy pub or beachside tiki bar right to your backyard. It’s the perfect place to gather for casual get-togethers or even special occasions. Plus, building it yourself allows you to customize the design and ensure it fits perfectly with your outdoor aesthetic.
If you’re ready to roll up your sleeves and get started on this DIY project, we’ve got you covered. In this article, we’ll walk you through each step of the process, from planning and gathering supplies to adding the finishing touches. So grab your tools and let’s get started on creating your very own charming outdoor bar!
Key Takeaways:
- Building a DIY outdoor bar is a fun and rewarding project that can be completed in just one weekend. With careful planning, precise construction, and personalized finishing touches, you can create a charming and functional space for entertaining and relaxation.
- From gathering materials to adding the final decorative touches, the process of building an outdoor bar involves careful planning, precise construction, and personalized finishing touches. The end result is a charming and functional space for entertaining and relaxation.
Read more: How To Make An Outdoor Bar
Materials Needed
Before diving into the construction of your DIY outdoor bar, it’s important to gather all the necessary materials and tools. Here’s a list of what you’ll need:
- Wood: Choose a high-quality lumber that is suitable for outdoor use. Pressure-treated or cedar wood are popular choices due to their durability and resistance to weathering.
- Screws: Opt for corrosion-resistant screws that are appropriate for outdoor applications. Stainless steel or coated screws are ideal to prevent rusting.
- Nails: Have a selection of nails on hand, including both finishing nails for smaller details and larger nails for construction purposes.
- Drill: A cordless drill will be your best friend during this project. Make sure it’s charged up and ready to go.
- Saw: You’ll need a saw to cut the wood to the desired lengths and angles. A circular saw or miter saw would be suitable for this task.
- Measuring Tape: Accurate measurements are crucial for ensuring precise cuts and a well-fitted final product. Keep a measuring tape handy.
Additionally, depending on your design and personal preferences, you may also need other materials such as sandpaper for sanding the wood, wood glue for extra reinforcement, and outdoor paint or stain for finishing touches. Take some time to carefully plan out your project and make a comprehensive list of all the materials you’ll need before getting started.
Step 1: Planning and Designing
Before you start building your outdoor bar, it’s essential to spend some time planning and designing your project. This step will help you determine the size, shape, and layout of your bar, as well as consider any additional features you may want to incorporate. Here’s how to get started:
- Measure your space: Begin by measuring the area where you plan to place your outdoor bar. Consider the dimensions of your available space, taking into account any existing structures or landscaping features.
- Decide on the size: Based on your measurements, determine the size of your bar. Consider how many people you want it to be able to accommodate comfortably.
- Choose a design: Research different outdoor bar designs and styles to find inspiration. Consider your personal taste and the overall aesthetic of your outdoor space. Whether you prefer a rustic wooden bar or a sleek modern design, there are countless options to choose from.
- Determine the layout: Think about how you want the bar to be arranged. Consider where you’ll place the countertop, shelves, and any additional features such as a sink or mini-fridge. Make sure to take functionality and convenience into account.
- Create a materials list: Based on your design and measurements, create a comprehensive list of materials needed for the project. This will help ensure that you have everything you need before getting started.
- Draw a plan: Draw a detailed plan or sketch of your outdoor bar design. Include measurements, angles, and any specific features you want to incorporate. This will serve as a guide throughout the construction process.
Remember, this planning phase is crucial in order to avoid errors and ensure that you end up with the outdoor bar of your dreams. Take your time, gather inspiration, and create a solid plan before moving on to the next step.
Step 2: Gathering Supplies
Now that you’ve completed the planning and design phase of your DIY outdoor bar project, it’s time to gather all the necessary supplies. Here’s what you’ll need:
- Wood: Purchase the appropriate amount and type of wood based on the measurements and design of your bar. Remember to choose a high-quality lumber that is suitable for outdoor use.
- Screws: Get a variety of corrosion-resistant screws in different sizes to accommodate the various parts of your bar.
- Nails: Stock up on both finishing nails and larger nails for construction purposes.
- Drill: Make sure you have a functioning cordless drill with a fully charged battery. If necessary, ensure you have a backup battery or access to a power source.
- Saw: Depending on the design of your bar and the cuts required, have a circular saw or miter saw on hand for precise cutting.
- Measuring tape: Double-check that you have a reliable measuring tape for accurate measurements throughout the construction process.
- Additional tools: Consider any other tools you may need to complete the project, such as a level, hammer, screwdriver, clamps, and a sander.
- Optional materials: If you plan to add extra features to your outdoor bar, make sure you have all the necessary materials for those as well. This may include things like a sink, faucet, mini-fridge, or lighting fixtures.
Once you have all the supplies organized, take a moment to double-check your materials list against what you have gathered. This will ensure that you’re fully prepared and have everything you need before you start constructing your outdoor bar. It’s always better to have all the supplies on hand to avoid unnecessary interruptions or delays during the building process.
Step 3: Cutting the Wood
With the supplies gathered, it’s time to move on to the construction phase of your DIY outdoor bar project. The first step in building the bar is cutting the wood to the necessary sizes and angles. Follow these steps to ensure accurate cuts:
- Review your plan: Refer back to your detailed plan or sketch to determine the specific dimensions and angles at which you need to cut the wood.
- Measure and mark: Use your measuring tape to measure and mark the wood according to the dimensions outlined in your plan. Double-check your measurements before making any cuts to avoid wastage or errors.
- Prepare your saw: Set up your circular saw or miter saw according to the manufacturer’s instructions. Ensure that the blade is installed correctly and is suitable for cutting through the type of wood you are using.
- Cut the wood: Carefully and slowly guide the saw along the marked lines, making precise cuts. Follow all safety precautions and always be cautious while operating power tools.
- Label the cut pieces: As you cut each piece of wood, label it with a pencil or marker to indicate its purpose and placement in the construction of the bar. This will help you stay organized during assembly.
- Make any additional cuts: Depending on your bar design, you may need to make additional cuts for features such as the countertop, shelves, or decorative elements. Follow the same measuring and cutting process for these pieces as well.
Remember to take your time and work carefully when cutting the wood. Accurate cuts will ensure that your pieces fit together properly during assembly and that your finished outdoor bar looks pristine. It’s always a good idea to double-check measurements before making any cuts, as it’s easier to fix errors at this stage than later on in the process.
Read more: How To Make A Wooden Towel Bar
Step 4: Assembling the Frame
With the wood pieces cut to the correct dimensions, it’s time to start assembling the frame of your DIY outdoor bar. This step will form the foundation of your bar and provide support for the countertop and other components. Follow these steps to assemble the frame:
- Organize the pieces: Lay out all the pieces of wood in their designated positions, referring to your labeled pieces to ensure you have everything you need.
- Start with the base: Begin by attaching the legs to the base of the outdoor bar. Use screws to secure them tightly, ensuring they are level and parallel to each other.
- Attach the side panels: Connect the side panels to the legs, using screws to secure them in place. Make sure to keep everything square and level throughout this process.
- Construct the back panel: Install the back panel of the bar, screwing it into place. This will provide stability and structural support to the frame.
- Add cross braces: Depending on the size and design of your bar, you may need to add additional cross braces for extra support. Attach these braces securely to the frame using screws or nails.
- Reinforce the joints: To ensure maximum stability, consider adding wood glue to the joints of the frame before securing them with screws or nails. This will provide added strength and durability.
- Check for stability: Once the frame is assembled, make sure it is stable and level. Adjust as necessary, tightening screws or making any necessary modifications.
Remember to take your time and double-check your work at each step to ensure the frame is solid and well-constructed. A sturdy frame will provide a stable base for the rest of the bar components. Next, you’ll move on to adding the countertop and other features to complete your outdoor bar.
When building your outdoor bar, make sure to use weather-resistant materials such as cedar or pressure-treated wood to ensure durability and longevity.
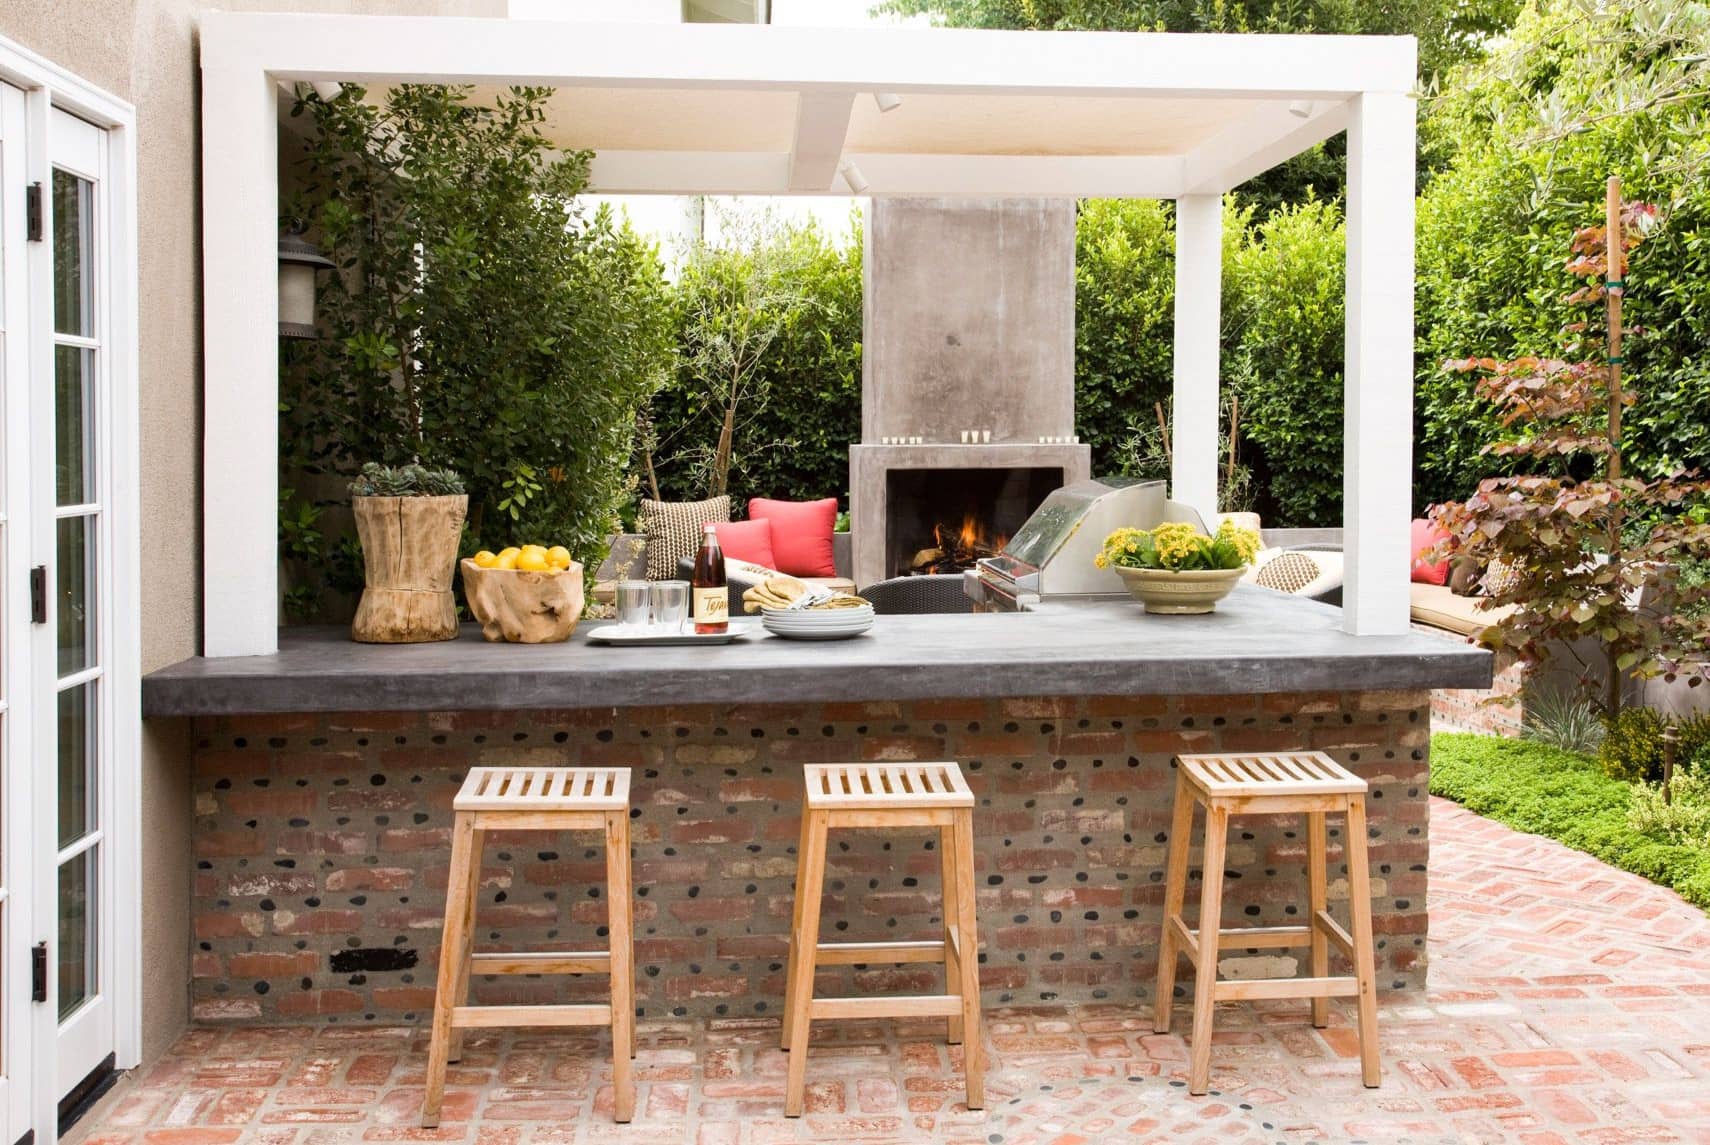
Step 5: Adding the Countertop
Now that you have assembled the frame of your outdoor bar, it’s time to add the countertop. The countertop will not only provide a functional workspace but also enhance the overall look of your bar. Follow these steps to add the countertop:
- Measure and cut the countertop: Measure the dimensions of the top of the bar frame and cut your chosen countertop material to fit. This can be a piece of plywood or a more durable material like granite or quartz.
- Prepare the surface: Ensure that the top of the bar frame is clean and free from any debris. If needed, sand down any rough edges or imperfections.
- Position the countertop: Carefully place the countertop onto the bar frame, ensuring it is centered and level. You may need assistance to align it properly.
- Secure the countertop: Use screws or adhesive to securely attach the countertop to the frame. Make sure to place screws or apply adhesive in strategic locations to provide adequate support.
- Check for stability: Once the countertop is secured, check that it is stable and level. Make any necessary adjustments or tighten screws if needed.
- Trim or finish the edges: If desired, add trim pieces to the edges of the countertop for a polished look. Alternatively, you can sand and finish the edges for a smooth and sleek appearance.
The countertop is an important feature of your outdoor bar, as it is where you and your guests will gather and prepare drinks and snacks. Take your time during this step to ensure a secure and aesthetically pleasing installation. With the countertop in place, your DIY outdoor bar is starting to take shape!
Step 6: Attaching the Shelves and Storage
Adding shelves and storage to your DIY outdoor bar will not only increase its functionality but also provide a space to store bar accessories, glasses, and other essentials. Follow these steps to attach shelves and storage to your outdoor bar:
- Determine the location: Decide where you want to position the shelves and storage within your bar. Consider both practicality and aesthetics.
- Measure and mark: Use a measuring tape to mark the desired height and position of each shelf or storage unit. Ensure that the measurements are consistent and level.
- Attach shelf brackets: Install shelf brackets or supports onto the inside of the bar frame at the marked locations. Use screws to secure them in place, ensuring they are level.
- Place the shelves: Position the shelves on top of the installed brackets. Make sure they fit securely and are level. If necessary, adjust the placement of the brackets or trim the shelves to ensure a proper fit.
- Secure the shelves: Use screws to fasten the shelves to the brackets, ensuring they are securely attached.
- Add storage compartments: If you plan to incorporate storage compartments, such as drawers or cabinets, assemble them according to the manufacturer’s instructions. Install them within the bar frame, securing them with screws and ensuring they are level.
- Test for stability: Once the shelves and storage units are in place, test them for stability. Ensure that they can hold the weight of your desired items without wobbling or sagging. Make any necessary adjustments to reinforce their stability.
Adding shelves and storage to your outdoor bar allows for easy organization of bar tools, glasses, and other accessories. It also enhances the functionality of your bar, providing convenient storage options. Take your time during this step to ensure proper installation and a cohesive design. With the shelves and storage attached, your outdoor bar is one step closer to completion!
Step 7: Sanding and Finishing
Once the main structure of your outdoor bar is assembled, it’s time to give it a smooth and finished appearance. Sanding and finishing the wood will not only enhance its aesthetic appeal but also protect it from the elements. Follow these steps to sand and finish your DIY outdoor bar:
- Sand the surfaces: Begin by sanding all visible surfaces of the bar, including the frame, countertop, and shelves. Use sandpaper with a medium grit to remove any rough edges, splinters, or imperfections.
- Smooth the edges: Pay special attention to the edges of the wood pieces. Round them off slightly with sandpaper to create a more polished and comfortable feel.
- Remove dust: After sanding, wipe down the entire bar using a clean cloth or tack cloth to remove any dust or debris.
- Choose a finish: Decide on the type of finish you want for your outdoor bar. Options include paint, stain, or a waterproof sealant. Consider the look you want to achieve and the level of protection required for your specific wood type.
- Apply the finish: Using a brush or applicator, apply the chosen finish to the wood surfaces. Follow the manufacturer’s instructions for the specific product you are using.
- Allow for drying time: Give the finish adequate time to dry, ensuring proper ventilation in the area. Avoid using or placing any items on the bar until the finish has fully cured.
- Inspect for any touch-ups: After the finish has dried, inspect the bar for any areas that may require touch-ups. Apply additional coats or touch up any imperfections as needed.
Sanding and finishing not only improves the appearance of your outdoor bar but also helps protect it from moisture, UV rays, and other outdoor elements. Take your time during this step to ensure a smooth and professional-looking finish. Once the finish is dry, your outdoor bar will be ready for the final touches.
Read more: Build An Outdoor Room This Weekend
Step 8: Painting or Staining
Painting or staining your outdoor bar is the next step in the process of bringing it to life. Adding color and protective layers will not only enhance its visual appeal but also ensure the longevity of the wood. Follow these steps to paint or stain your DIY outdoor bar:
- Clean the surfaces: Before applying any paint or stain, make sure the surfaces of the bar are clean and free from dust or debris. Use a cloth or brush to remove any loose particles.
- Choose your finish: Determine whether you want to paint or stain the wood. Consider the desired color, level of opacity, and overall look you want to achieve.
- Prepare the surface: If you have chosen to paint, you may need to apply a coat of primer to ensure better adhesion and coverage. If you have chosen to stain, make sure the wood is properly prepped and ready for staining.
- Apply the paint or stain: Use a brush, roller, or sprayer to apply the paint or stain evenly to the surfaces of the outdoor bar. Follow the manufacturer’s instructions regarding drying time and application techniques.
- Allow for drying or curing: Depending on the product used, allow the paint or stain to dry or cure completely. This may take several hours or even days, so be patient and ensure the bar is kept in a well-ventilated area.
- Inspect and touch up: Once the initial coat is dry, inspect the bar for any areas that may require additional coats or touch-ups. Apply additional paint or stain as needed to achieve the desired finish.
- Protect with a sealant: After the paint or stain has fully dried and cured, apply a waterproof sealant to protect the wood from moisture and outdoor elements. Follow the instructions on the sealant product for the proper application method.
Painting or staining your outdoor bar allows you to personalize its appearance and protect it from weathering. Take your time during this step to achieve the desired finish and ensure that the wood is properly sealed. Once complete, your outdoor bar will be one step closer to serving as a beautiful and functional addition to your outdoor space.
Step 9: Installing the Bar Accessories
Now that your DIY outdoor bar is almost complete, it’s time to add the finishing touches and install the bar accessories. These accessories will not only enhance the functionality of your bar but also add a touch of personality and style. Follow these steps to install the bar accessories:
- Determine the accessories: Decide on the specific bar accessories you want to incorporate into your outdoor bar. This can include items such as a bottle opener, towel hooks, a sink, a mini-fridge, or even a built-in sound system.
- Plan the placement: Consider the layout and design of your outdoor bar to determine the best locations for each accessory. Take into account accessibility and convenience.
- Prepare the mounting areas: If needed, make any necessary modifications to the bar frame to accommodate the installation of the accessories. This may involve creating openings or reinforcing certain areas.
- Secure the accessories: Use screws, bolts, or adhesive, depending on the specific accessory, to securely attach them to the designated areas of the bar. Follow the manufacturer’s instructions for proper installation techniques.
- Connect any electrical components: If you have chosen to include electrical accessories such as lighting or a sound system, ensure that the necessary wiring is properly installed and connected. Follow all safety guidelines during this process.
- Test functionality: Once the accessories are installed, test their functionality to ensure they are working properly. Check that the bottle opener is secure and functional, the sink is connected to the plumbing, or the mini-fridge is cooling effectively.
- Make any necessary adjustments: If any accessories are not functioning as desired or need additional adjustments, take the time to make the necessary changes. This will ensure that everything is in working order before you start enjoying your outdoor bar.
Adding the bar accessories is an exciting step that will bring your outdoor bar to life. Take your time during this process to properly install and test each accessory. Once complete, you’ll be ready to enjoy all the conveniences and amenities your outdoor bar has to offer!
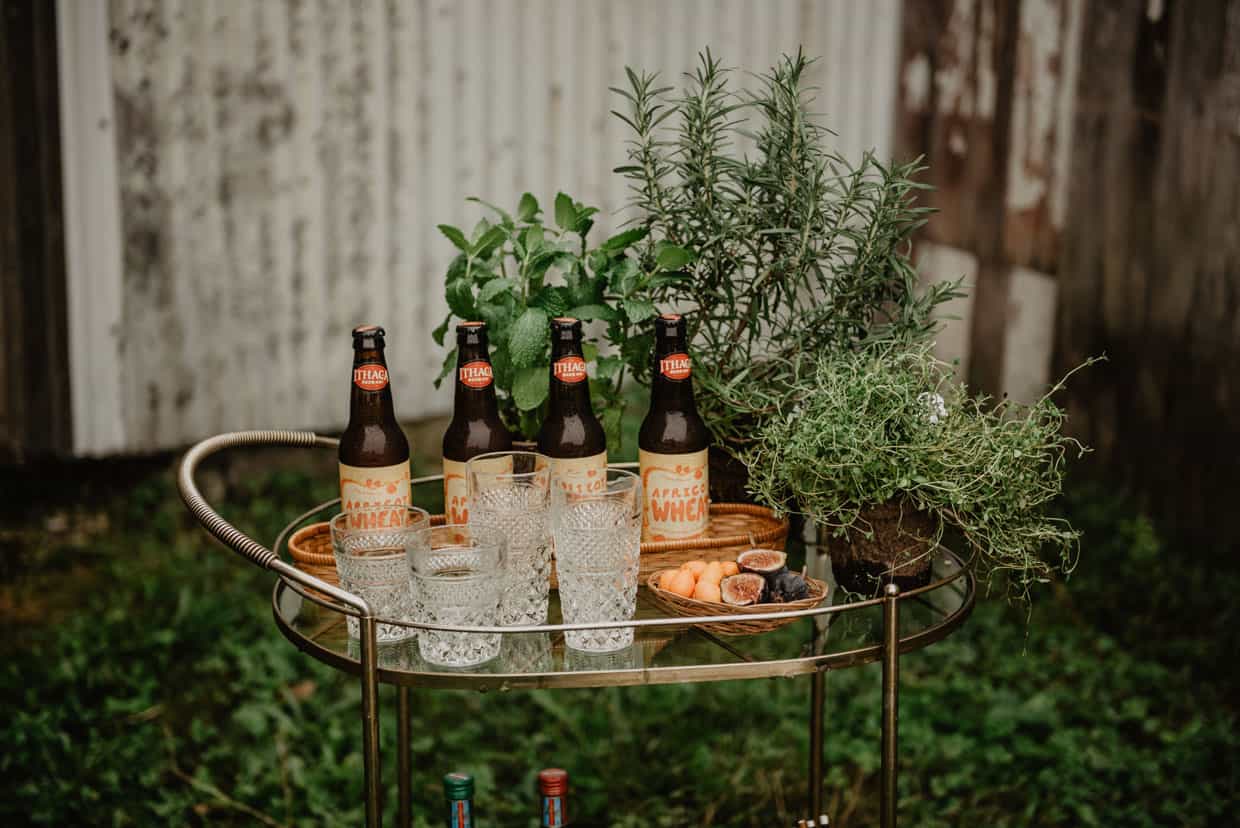
Step 10: Enjoying Your DIY Outdoor Bar
Congratulations! You have successfully completed your DIY outdoor bar project. It’s now time to step back, relax, and enjoy the fruits of your labor. Here are a few final steps to fully enjoy your outdoor bar:
- Clean and organize: Before you start using your outdoor bar, give it a thorough cleaning. Wipe down surfaces, dust off any debris, and organize your bar accessories and supplies.
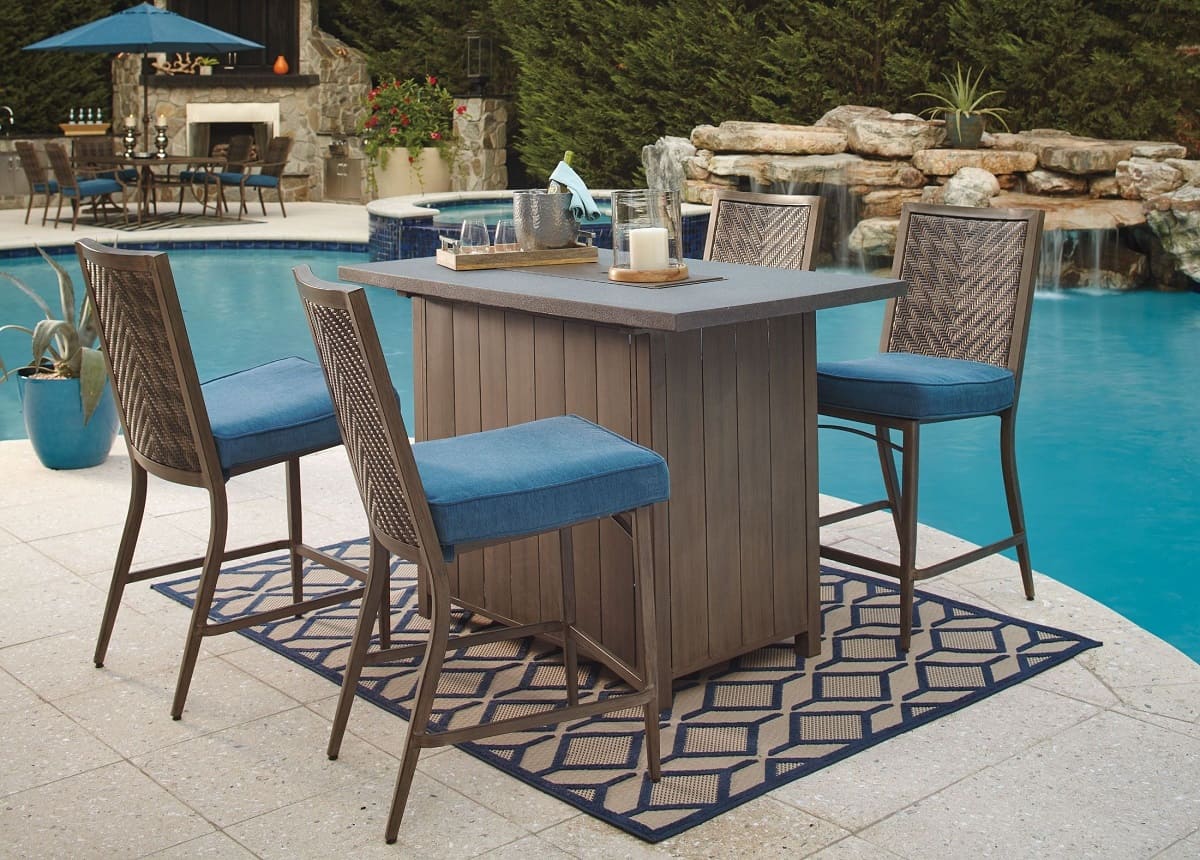
- Add the finishing touches: Consider adding some final decorative touches to your outdoor bar, such as potted plants, outdoor lights, or comfortable seating. Personalize the space to make it inviting and reflective of your style.
- Stock up on supplies: Ensure that you have all the necessary supplies for drinks and refreshments. Fill your bar with your favorite spirits, mixers, glasses, and garnishes. Make it convenient to have all your bar essentials at your fingertips.
- Invite friends and family: Share the joy of your new outdoor bar with your loved ones. Arrange a gathering or BBQ to celebrate the completion of your project and enjoy the company of family and friends in your newly transformed outdoor space.
- Experiment with cocktails and recipes: Embrace your inner bartender and have fun trying out new cocktails and recipes. Explore different flavors, experiment with ingredients, and create signature drinks to impress your guests.
- Maintain and care for your bar: Regularly clean and maintain your outdoor bar to keep it in great condition. Regularly inspect for any signs of wear or damage and fix them promptly to ensure your bar remains sturdy and functional for years to come.
Now that your DIY outdoor bar project is complete, it’s time to sit back, relax, and enjoy the fruits of your labor. Take pride in your accomplishment, and savor the countless memorable moments you’ll create in your outdoor space. Cheers to your own personal oasis!
Now that you've got a taste for creating with your hands, why not delve deeper into the rewards of DIY projects? Each project not only enhances your space but also builds skills and confidence. Ready to take your deck to the next level? Our tips on outdoor living will transform your space with vibrant decor and functional add-ons. For enthusiasts eager to expand their craft, the woodworking article offers a sneak peek at the top techniques and projects for 2024. Each guide is tailored to inspire and facilitate your next big DIY adventure.
Frequently Asked Questions about How To Make This Charming DIY Outdoor Bar In A Weekend
Was this page helpful?
At Storables.com, we guarantee accurate and reliable information. Our content, validated by Expert Board Contributors, is crafted following stringent Editorial Policies. We're committed to providing you with well-researched, expert-backed insights for all your informational needs.


0 thoughts on “How To Make This Charming DIY Outdoor Bar In A Weekend”