Home>Articles>How To Build A Pergola For A Dreamy Outdoor Getaway
Articles
How To Build A Pergola For A Dreamy Outdoor Getaway
Modified: October 20, 2024
Learn how to build the perfect pergola with our comprehensive articles. Create your dreamy outdoor getaway today!
(Many of the links in this article redirect to a specific reviewed product. Your purchase of these products through affiliate links helps to generate commission for Storables.com, at no extra cost. Learn more)
Introduction
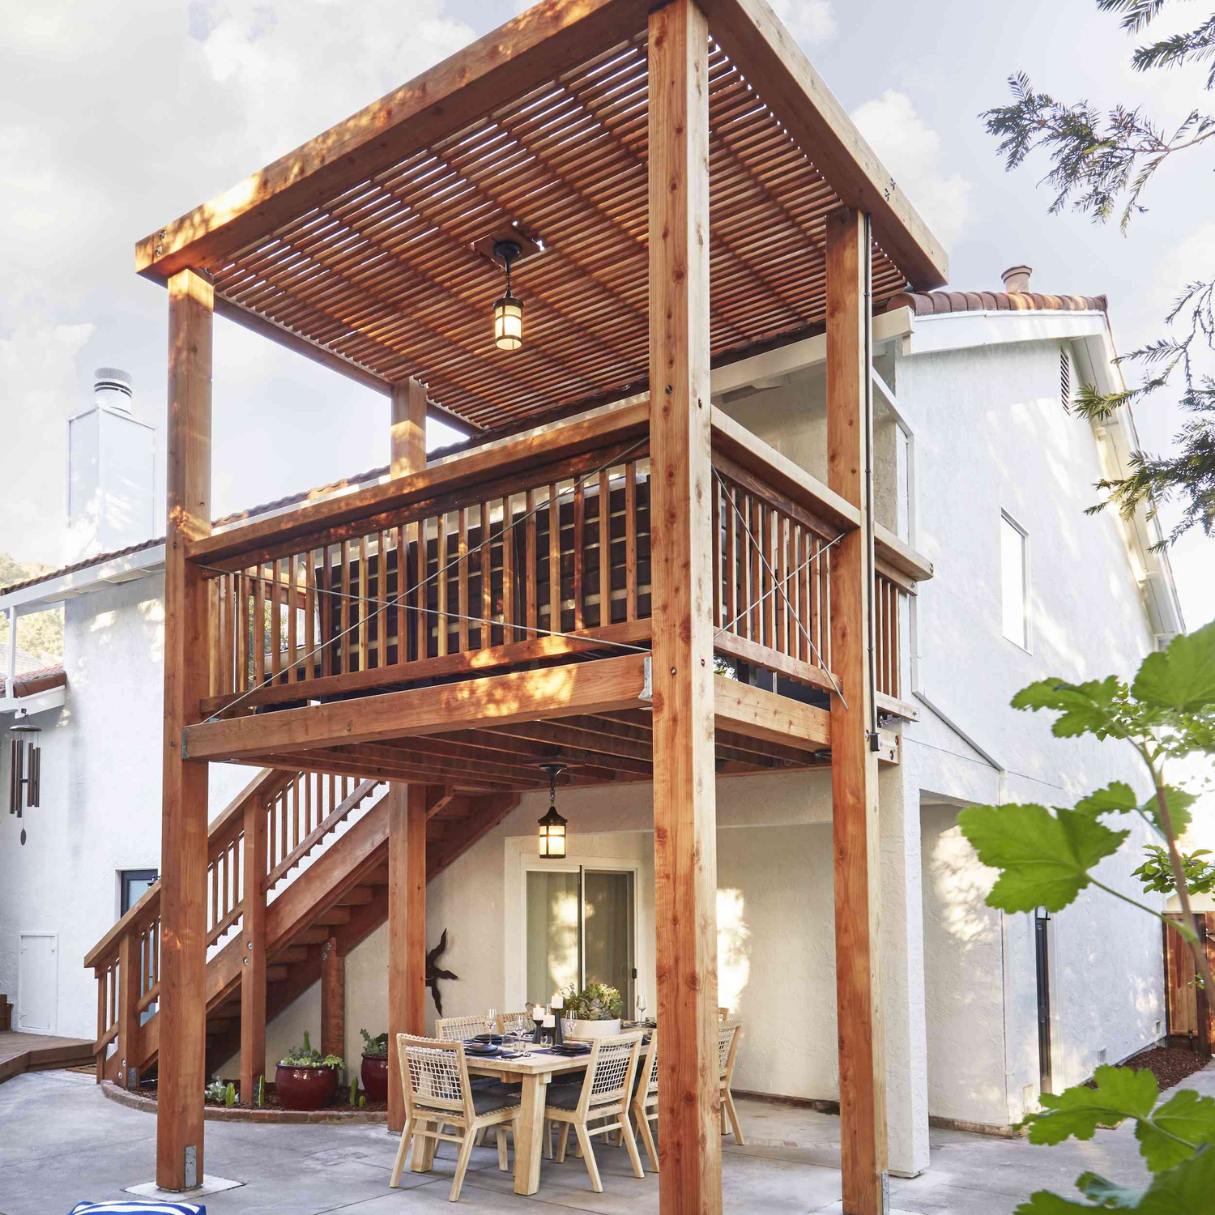
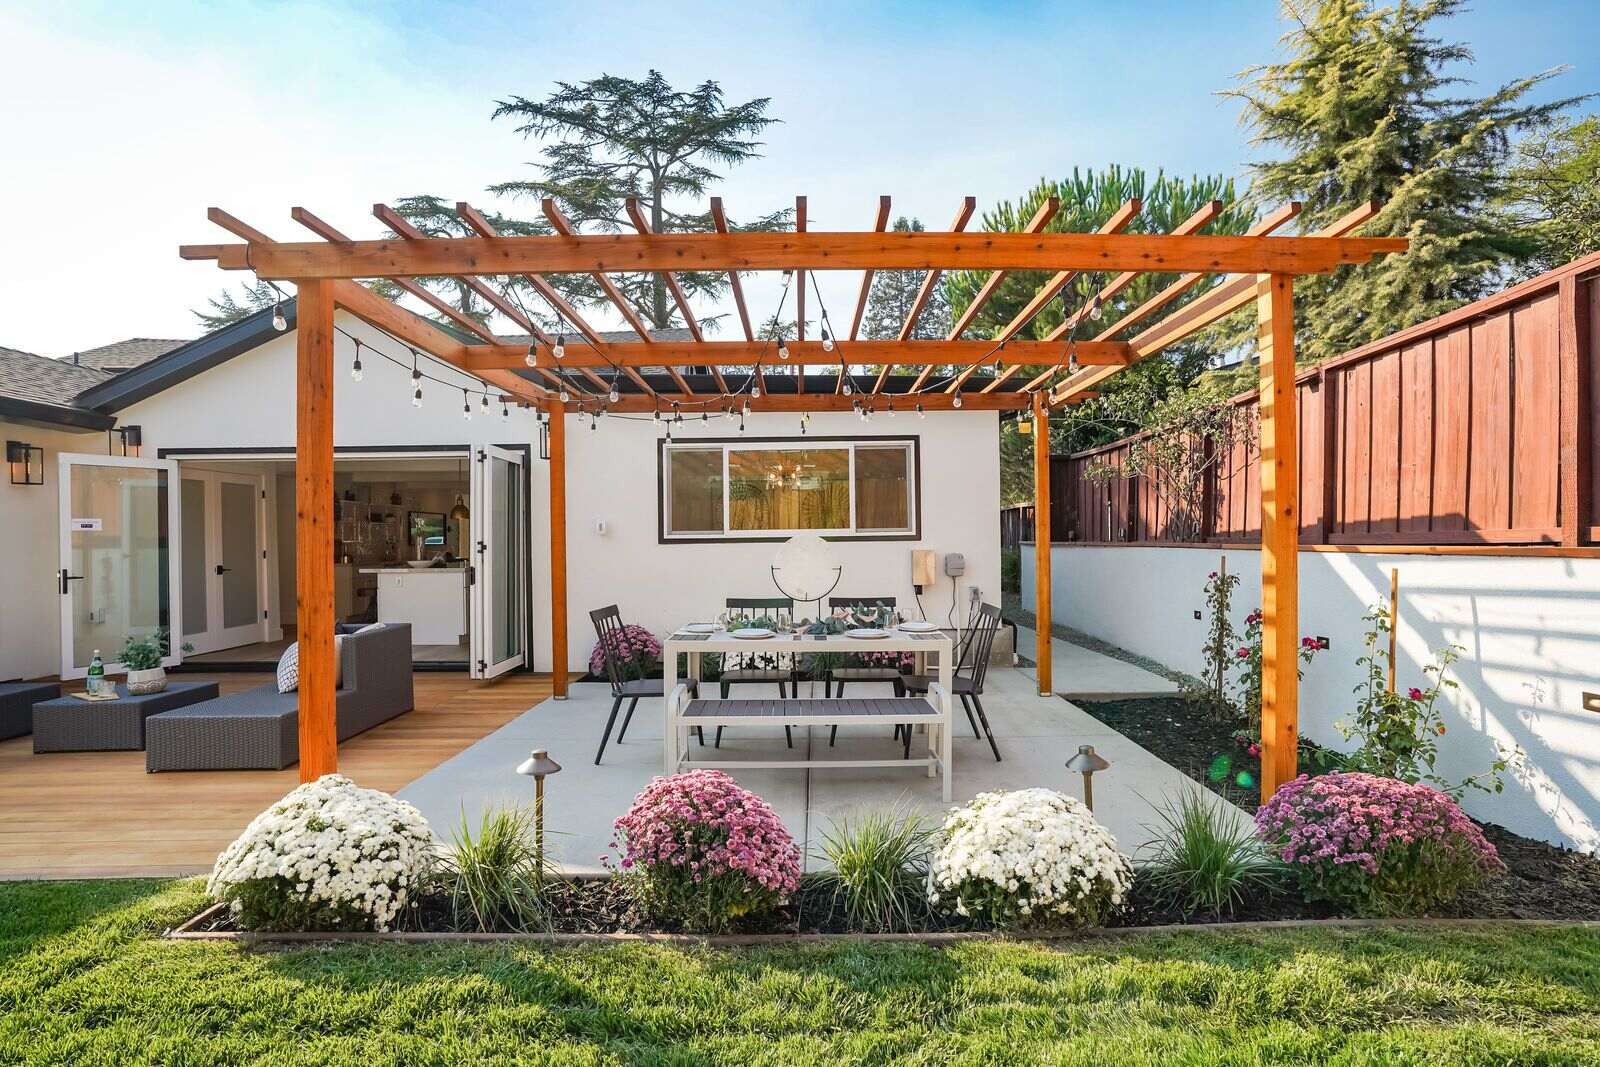
A pergola is a beautiful and functional addition to any outdoor space. It provides shade, creates a comfortable outdoor living area, and adds a touch of elegance to the overall design. Building a pergola may seem like a daunting task, but with proper planning and a step-by-step approach, it can be a rewarding DIY project.
In this article, we will guide you through the process of building a pergola, from initial planning to adding the finishing touches. Whether you’re looking to create a cozy retreat in your backyard, a shaded area for outdoor dining, or simply enhance the aesthetic appeal of your outdoor space, a pergola is a versatile solution.
By following our step-by-step instructions and taking into account factors such as location, materials, and design, you can create a dreamy outdoor getaway that suits your personal style and functional needs.
Before you embark on this project, it’s important to understand the scope and requirements of building a pergola. Consider factors such as your budget, available space, and local regulations, as they may impact your design choices and construction process.
Now, let’s dive into the steps involved in building a pergola and create your own outdoor oasis!
Key Takeaways:
- Building a pergola is a rewarding DIY project that requires careful planning, gathering of materials, and step-by-step construction. From securing the posts to adding optional features, each step contributes to creating a dreamy outdoor retreat.
- Personalizing your pergola with optional additions and finishing touches, such as shade solutions, decorative elements, and comfortable seating, transforms it into a tranquil haven. Regular maintenance ensures its longevity and continued enjoyment.
Read more: How To Build A Pergola Roof
Step 1: Planning your pergola
Planning is the foundation of any successful project, and building a pergola is no exception. Taking the time to carefully plan your pergola will help ensure that you end up with a structure that meets your needs and complements your outdoor space.
Here are some important factors to consider during the planning phase:
- Location: Determine where you want to build your pergola. Consider the size and shape of your outdoor space, as well as the natural elements such as sunlight and wind direction. Take into account any existing structures or plants that may impact the positioning of your pergola.
- Size and Shape: Decide on the size and shape of your pergola. Consider the purpose of your pergola and how many people you want it to accommodate. You may also want to consider the architectural style of your home and choose a shape that complements it.
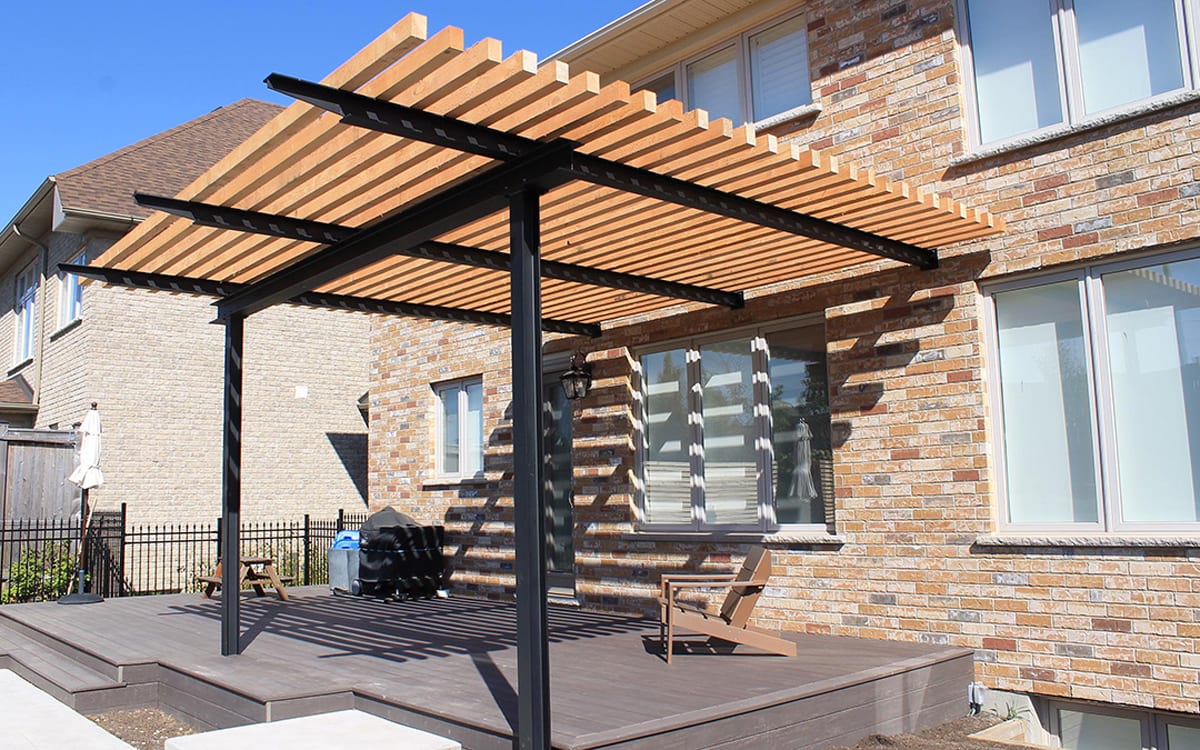
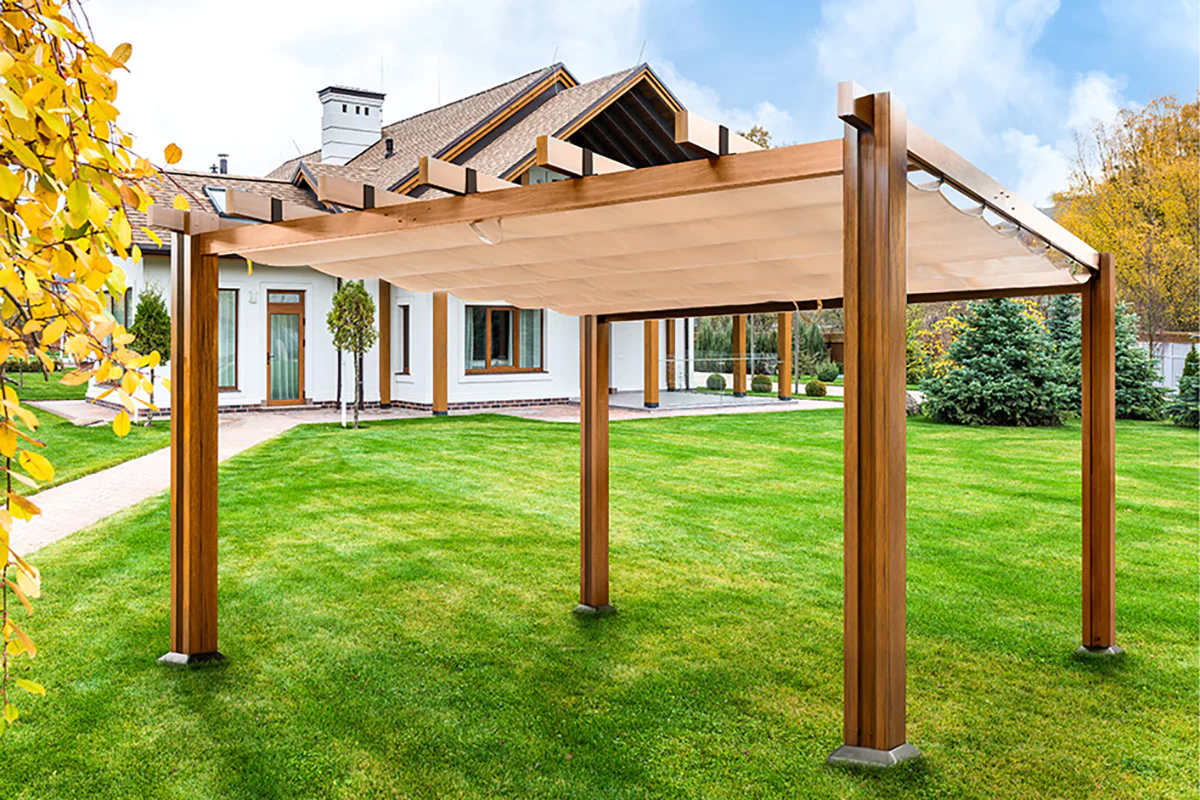
- Material: Choose the material for your pergola. Common options include wood, metal, and vinyl. Each material has its own pros and cons in terms of durability, maintenance, and aesthetic appeal. Select a material that matches both your style preferences and the climate of your area.
- Design: Explore different design options for your pergola. From classic to contemporary, there are numerous styles to choose from. Consider elements such as the roof style, column design, and decorative details. Remember to strike a balance between functionality and aesthetics.
- Budget: Determine your budget for the project. This will help you make decisions about the size, material, and extras for your pergola. Consider both the upfront cost and any long-term maintenance expenses.
Once you have a clear vision of what you want, it’s a good idea to create a rough sketch or use a design software to visualize your pergola. This will help you make adjustments and fine-tune your plans before moving on to the construction phase.
Take the time to research and gather inspiration from magazines, websites, and local home improvement stores. By gathering ideas and creating a solid plan, you’ll be well-prepared to move forward with building your pergola.
Step 2: Gathering materials
Once you have a clear plan in place, the next step in building your pergola is to gather all the necessary materials. Having everything on hand before you begin construction will ensure a smoother and more efficient process.
Here is a list of materials you will typically need to build a pergola:
- Posts and beams: These are the main structural components of your pergola. Choose sturdy and durable materials such as pressure-treated wood or metal. The number of posts and beams will depend on the size and design of your pergola.
- Hardware: Gather the necessary screws, bolts, and brackets to secure the various components together. Opt for corrosion-resistant hardware that can withstand outdoor conditions.
- Roofing materials: Depending on your design preference, you may need roofing materials such as wooden slats, lattice panels, or a solid roof. Ensure that the materials are weather-resistant and provide the desired amount of shade and protection.
- Additional materials: Consider any additional features you plan to incorporate into your pergola design. This may include decorative elements, lighting fixtures, or vine support systems. Make a list of these materials to ensure you have everything required.
- Tools: Don’t forget the essential tools you’ll need for construction, such as a drill, saw, level, tape measure, and safety equipment. Having the right tools will make the construction process easier and safer.
It’s important to note that the specific materials you need may vary based on your design choices and the availability of materials in your area. Consider consulting with a local home improvement store or a professional to ensure you have all the necessary materials for your specific pergola design.
Before making any purchases, take accurate measurements of your outdoor space and refer to your plan to determine the quantities of materials required. This will help you avoid any last-minute trips to the store and keep the construction process on track.
By gathering all the materials ahead of time, you’ll be well-prepared to move on to the next step of the construction process and bring your pergola vision to life.
Step 3: Preparing the site
Before you can start building your pergola, it’s essential to properly prepare the site where it will be installed. This step involves clearing the area, ensuring a level foundation, and marking the layout of your pergola.
Here’s a breakdown of the key tasks involved in preparing the site:
- Clearing the area: Begin by clearing the site of any debris, plants, or obstacles that may hinder the construction process. Remove rocks, roots, and other obstructions to create a clean and even surface for your pergola.
- Marking the layout: Use stakes and string to mark the layout of your pergola. This will help you visualize the final placement and ensure accurate measurements. Take into account any setbacks or regulations specified by local building codes.
- Leveling the ground: Use a shovel or a tiller to level the ground where your pergola will be installed. Remove any high spots and fill in any low areas to create a level foundation. This will ensure the stability and durability of your pergola.
- Installing footings: Depending on the size and design of your pergola, you may need to install footings to provide additional support. Dig holes below the frost line and pour concrete to create solid footings for the posts. Follow local building codes and safety guidelines when installing footings.
- Confirming measurements: Double-check your measurements and layout to ensure accuracy before proceeding with the construction process. Take into account the dimensions of your pergola and the required spacing for posts and beams.
Take your time during the site preparation phase to ensure that the foundation is solid and the layout is correct. A well-prepared site will provide a stable base for your pergola and contribute to its longevity.
Remember to wear appropriate safety gear such as gloves and safety glasses when clearing the area and using tools. If you’re unsure about any aspect of site preparation, consult a professional or seek advice from a local building authority.
With the site prepared, you’re now ready to move on to the exciting part of the construction process – installing the posts!
Step 4: Installing the posts
Once the site is prepared, it’s time to start building your pergola by installing the posts. The posts are the main support structure of the pergola and provide the stability and strength needed to withstand outdoor elements.
Here’s a step-by-step guide to help you install the posts:
- Mark the post locations: Use your layout plan to mark the exact spots where the posts will be installed. Ensure that the spacing between the posts is even and aligns with the design of your pergola.
- Dig the post holes: Use a post hole digger or an auger to dig the holes for the posts. The depth and diameter of the holes will depend on the size and height of your pergola. As a general rule, aim for a hole depth of at least one-third the height of the post.
- Insert the posts: Place the posts into the holes, ensuring they are straight and level. Use temporary supports or braces to hold the posts in position until they are secured.
- Secure the posts: Mix and pour concrete into the holes around the posts to secure them in place. Ensure that the posts are aligned properly and level before the concrete sets. Use a level and temporary braces to double-check the positioning.
- Allow the concrete to cure: Follow the manufacturer’s instructions on the concrete mix for the recommended curing time. Be patient and avoid putting any weight or pressure on the posts until the concrete has fully cured.
When installing the posts, it’s essential to pay attention to their alignment and levelness. The stability of your pergola relies on properly positioned and secure posts. Take your time to ensure that the posts are straight and plumb before proceeding to the next step.
Consider treating or sealing the base of the posts with wood preservative to protect them against moisture and rot. This step will help prolong the lifespan of your pergola and ensure its durability.
With the posts securely installed, you’ve completed a major milestone in building your pergola. It’s time to move on to the next step – attaching the support beams!
Read more: How To Build A Lean-To Pergola
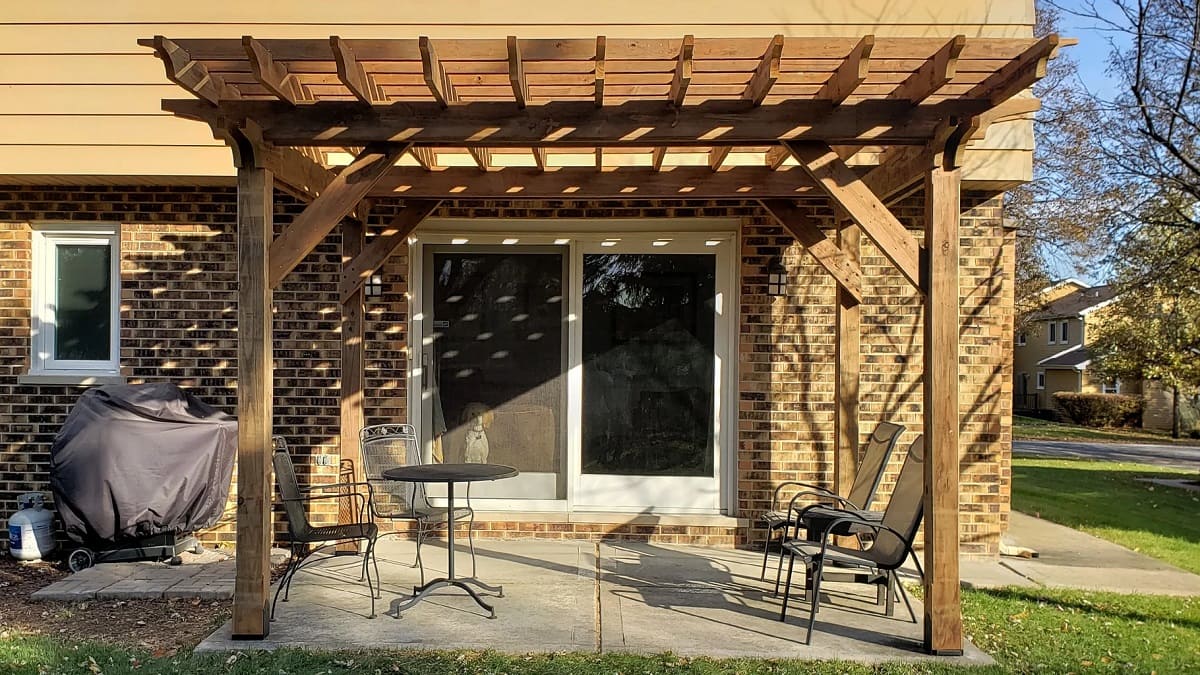
Step 5: Attaching the support beams
With the posts securely in place, it’s time to move on to the next step in building your pergola – attaching the support beams. The support beams provide the framework for the roof of your pergola and help distribute the weight evenly.
Here’s a step-by-step guide to help you attach the support beams:
- Measure and cut the beams: Measure the distance between each pair of posts to determine the length of the support beams. Use a saw to cut the beams to the appropriate size.
- Place the beams: Position the support beams onto the top of the posts. Ensure that they are aligned and evenly spaced. Use temporary supports or clamps to hold the beams in place while you secure them.
- Pre-drill holes: Use a drill and appropriate drill bit to pre-drill holes through the beams and into the posts. This will prevent the wood from splitting when you attach the beams.
- Attach the beams: Using screws or bolts, secure the beams to the posts through the pre-drilled holes. Make sure they are firmly attached and do not wobble. Repeat this process for each pair of support beams.
- Verify the levelness: Use a level to ensure that the support beams are horizontal and level. Make any necessary adjustments by tightening or loosening the screws or bolts.
It’s important to note that the number and arrangement of support beams will depend on the design and size of your pergola. Some pergolas may have two beams running parallel across the posts, while others may have multiple beams to create a more intricate design.
Pay attention to the positioning and alignment of the support beams to ensure a sturdy and balanced structure. The support beams should be strong enough to bear the weight of the roof and any additional features or decorations you plan to add to your pergola.
Take pride in your progress so far! With the support beams securely attached, your pergola is taking shape. The next step – adding the rafters – will bring it even closer to completion.
When building a pergola, make sure to use pressure-treated wood to prevent rot and decay. It will ensure that your pergola lasts for many years to come.
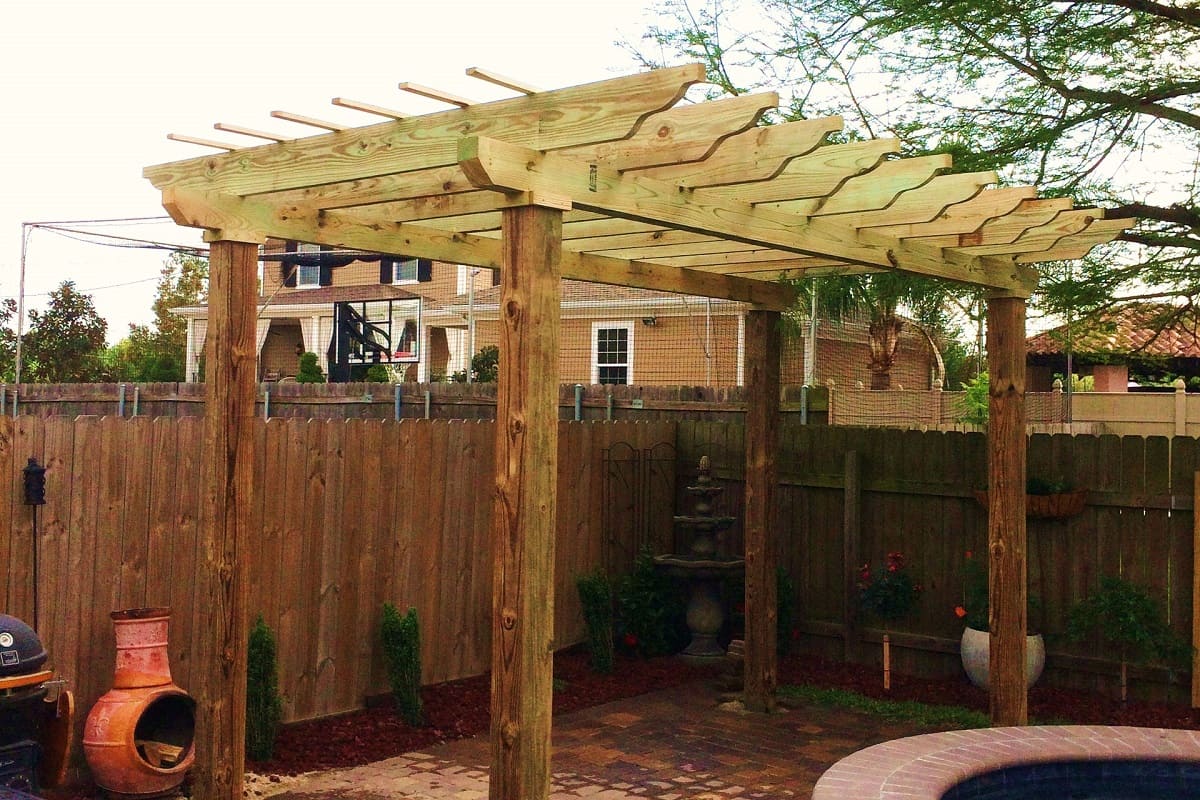
Step 6: Adding the rafters
Adding the rafters is a crucial step in building your pergola as they form the roof structure and provide shade and support to the overall design. The arrangement and style of your rafters will depend on the look you want to achieve.
Follow this step-by-step guide to add the rafters to your pergola:
- Measure and cut the rafters: Measure the length of the space between each pair of support beams to determine the length of the rafters. Use a saw to cut the rafters to the appropriate size.
- Arrange the rafters: Decide on the arrangement of the rafters. You can opt for a parallel design with the rafters running horizontally across the support beams, or a diagonal design for a more decorative touch.
- Position the first rafter: Place the first rafter at one end of the pergola, ensuring it overhangs the support beams evenly. Use temporary supports or clamps to hold the rafter in place while you secure it.
- Secure the rafter: Use screws or nails to attach the rafter to the support beams. Make sure it is firmly attached and level. Repeat this process for each rafter, ensuring equal spacing between them.
- Install additional support: Depending on the length and weight of the rafters, you may need to add additional support to prevent sagging. This can be in the form of cross beams or braces that connect the rafters to the support beams.
- Verify the levelness: Use a level to ensure that the rafters are horizontal and level. Make any necessary adjustments to ensure a straight and balanced roof structure.
When positioning and securing the rafters, it’s important to maintain equal spacing between them to achieve a uniform and visually appealing design. Consider using a spacer or a template to ensure consistent spacing throughout.
As you add the rafters, take the opportunity to check and reinforce the overall stability of your pergola. Ensure that all connections are secure, and make any necessary adjustments to ensure a sturdy and durable structure.
With the rafters in place, your pergola is taking its final shape. It’s time to move on to the next step – installing the cross beams – to further strengthen and enhance the design of your pergola.
Step 7: Installing the cross beams
Installing the cross beams is an important step that adds structural integrity and visual interest to your pergola. These beams run perpendicular to the rafters, providing additional support and creating a unique design element.
Follow these steps to properly install the cross beams on your pergola:
- Measure and cut the cross beams: Measure the distance between each pair of rafters to determine the length of the cross beams. Use a saw to cut the cross beams to the appropriate size.
- Position the cross beams: Place the first cross beam perpendicular to the rafters and centered between the support posts. Use temporary supports or clamps to hold the cross beam in place while you secure it.
- Secure the cross beams: Use screws or nails to attach the cross beam to the rafters. Make sure it is firmly attached and level. Repeat this process for each cross beam, ensuring equal spacing between them.
- Check for levelness: Use a level to ensure that the cross beams are horizontal and level. Make any necessary adjustments to ensure a straight and balanced structure.
When positioning the cross beams, you can choose to have them extend beyond the rafters for a decorative touch. This overhang can also provide additional shade and add dimension to your pergola design.
Consider the spacing between the cross beams to achieve the desired aesthetic appeal. You can opt for equal spacing or vary the distances for a more unique look. Use a spacer or a template to ensure consistent spacing throughout.
The cross beams not only enhance the visual appeal of your pergola but also add structural strength by reinforcing the connection between the rafters. They help distribute the weight evenly and provide stability to your pergola, ensuring its longevity.
With the cross beams securely in place, your pergola is nearing completion. It’s time to move on to the next step – securing the pergola to ensure its stability and long-lasting use.
Step 8: Securing the pergola
Ensuring the stability and safety of your pergola is of utmost importance. In this step, we will discuss how to properly secure your pergola to the ground or any surrounding structures to withstand various weather conditions and external forces.
Follow these steps to securely anchor your pergola:
- Assess the anchoring options: Determine the best method to secure your pergola based on your site conditions and local regulations. There are several common anchoring options to consider:
- Ground anchors: These are buried in the ground and provide stability by creating a strong base. Options include concrete footings, ground screws, or ground stakes.
- Post brackets: These attach the pergola posts to a concrete slab or deck surface using anchor bolts.
- Wall-mounted brackets: If your pergola is attached to a pre-existing wall or structure, use wall-mounted brackets to secure it with screws or bolts.
- Prepare the anchoring equipment: Depending on the chosen method, gather the necessary equipment, such as concrete mix, gravel, screws, bolts, brackets, or other securing devices.
- Install the anchors: Follow the manufacturer’s instructions to correctly install the chosen anchor type. This may involve digging holes, pouring concrete, attaching brackets, or securing stakes into the ground.
- Attach the pergola to the anchors: Once the anchors are in place, use appropriate hardware to attach your pergola to them. This may involve using screws, bolts, or other fasteners to secure the pergola posts, beams, or brackets to the anchors.
- Verify stability: Check the stability of your pergola by applying pressure and ensuring it does not wobble or shift. Make any necessary adjustments or reinforcement to ensure a firm and secure structure.
Securing your pergola is essential to ensure it can withstand strong winds, heavy rain, or other external forces. Consult local building codes or a professional if you are uncertain about the proper anchoring method for your specific situation.
By properly anchoring your pergola, you can enjoy peace of mind knowing that it is well-secured and able to withstand various weather conditions, ensuring its long-lasting durability and safety for years to come.
With the pergola securely anchored, you’re almost there! The final steps will add those optional features and finishing touches that will make your outdoor getaway truly dreamy.
Read more: How To Build A Pergola Swing
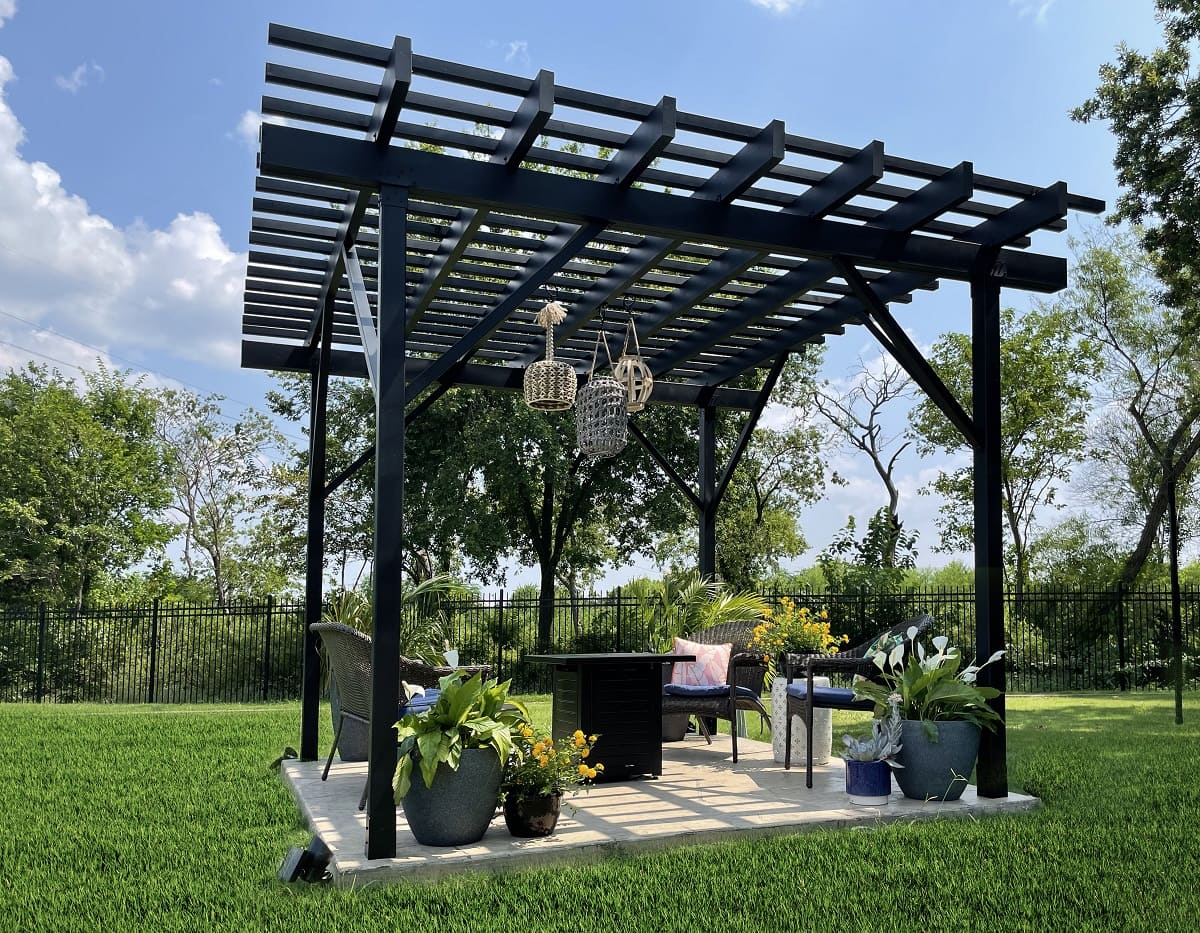
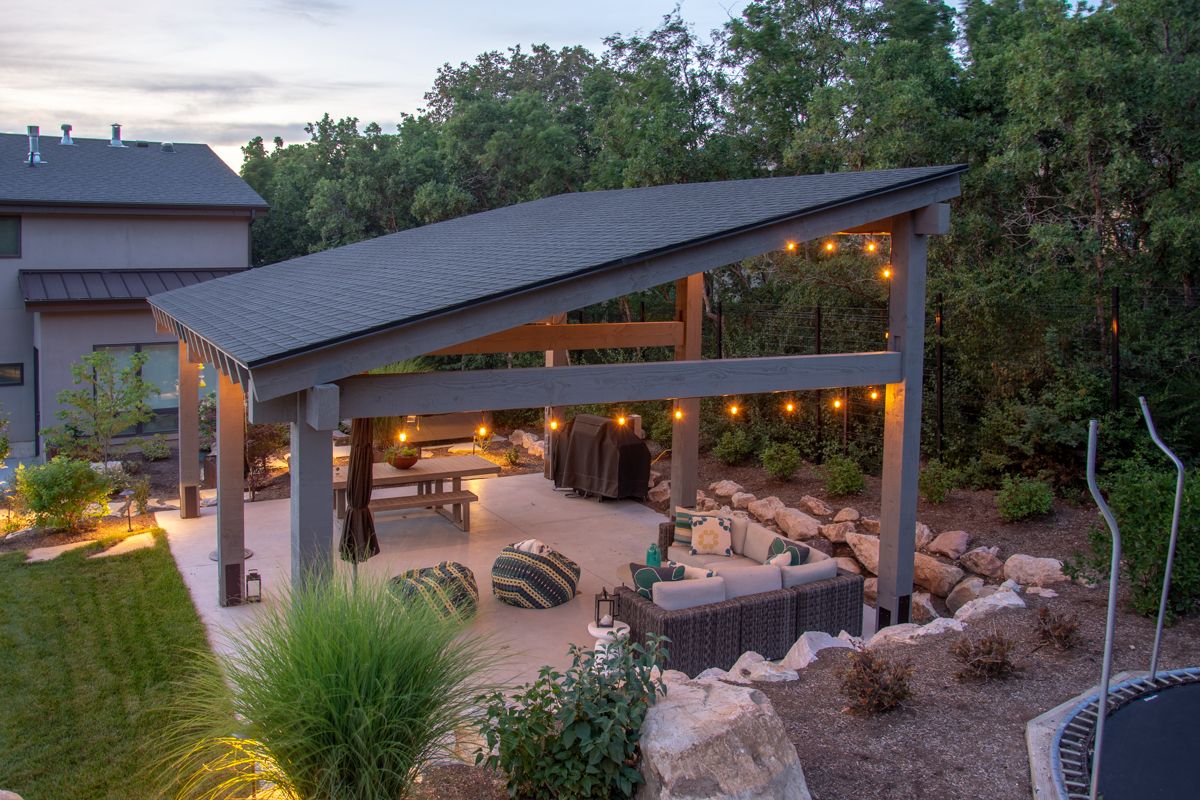
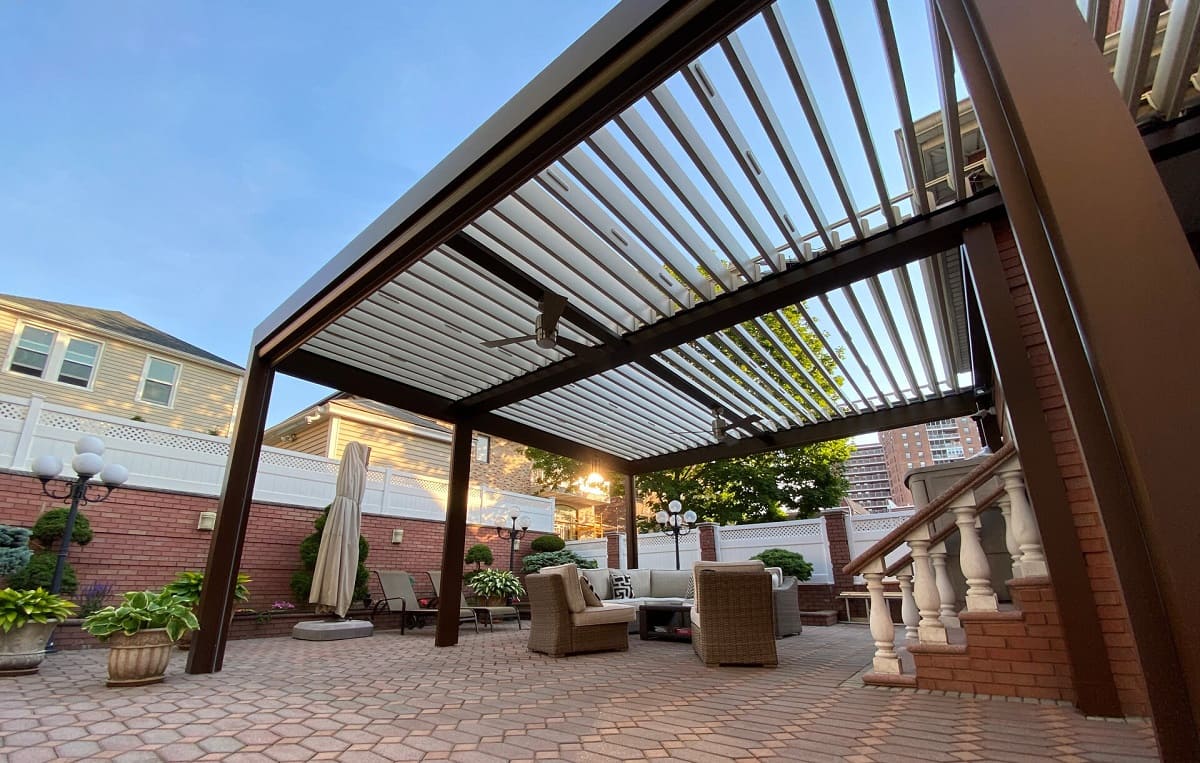
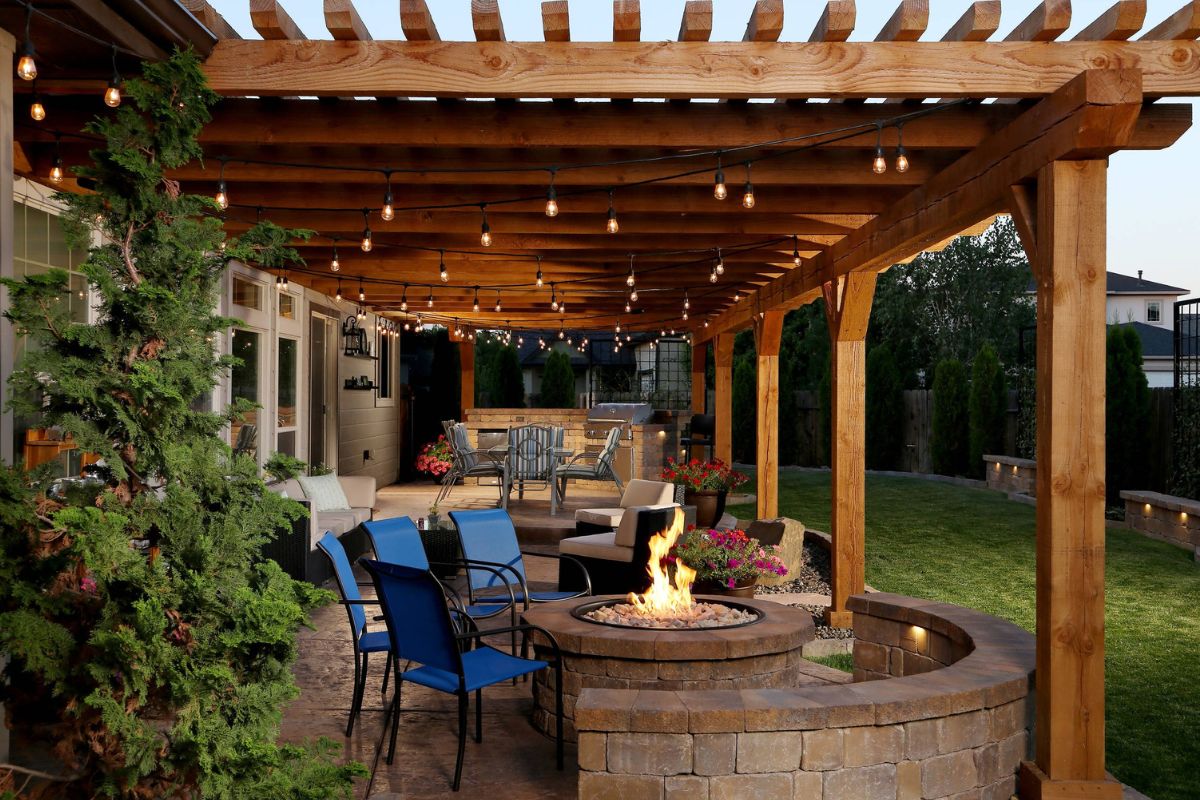
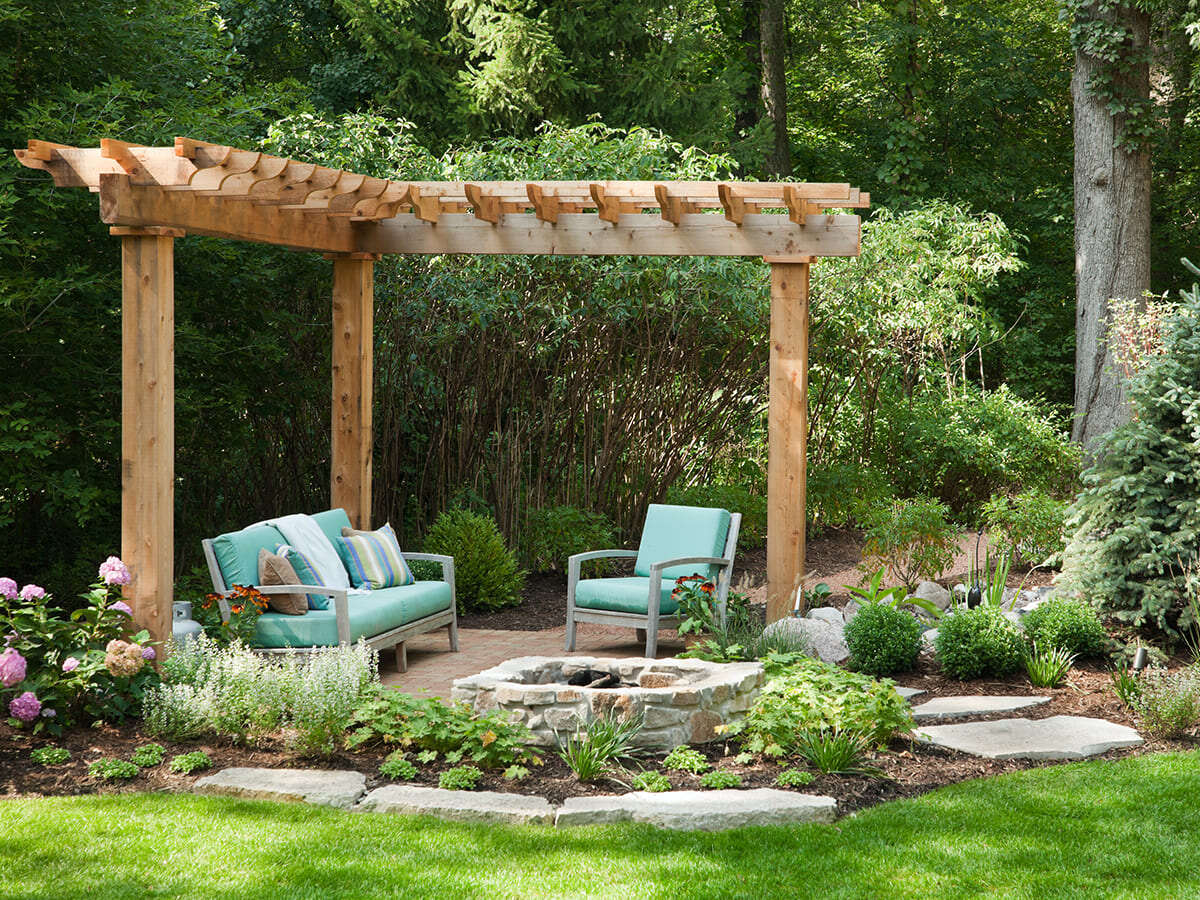
Step 9: Optional additions
Now that your pergola is structurally sound, it’s time to consider optional additions that can further enhance its functionality, aesthetics, and overall appeal. These optional features can be customized to reflect your personal style and create a truly dreamy outdoor getaway.
Here are some popular optional additions to consider for your pergola:
- Shade and privacy solutions: Depending on your preferences, you may want to add additional shade or privacy features to your pergola. This can include installing retractable awnings, fabric shade sails, or curtains to provide protection from the sun or create a more intimate atmosphere.
- Vines and greenery: Incorporating climbing plants or vines into your pergola design can create a lush and natural ambiance. Consider adding trellises or wire mesh panels for the vines to grow on, creating a stunning green canopy above your outdoor space.
- Outdoor lighting: Install outdoor lighting fixtures to illuminate your pergola and create a cozy atmosphere during evenings. This can include string lights, lanterns, or even built-in LED lighting integrated into the structure.
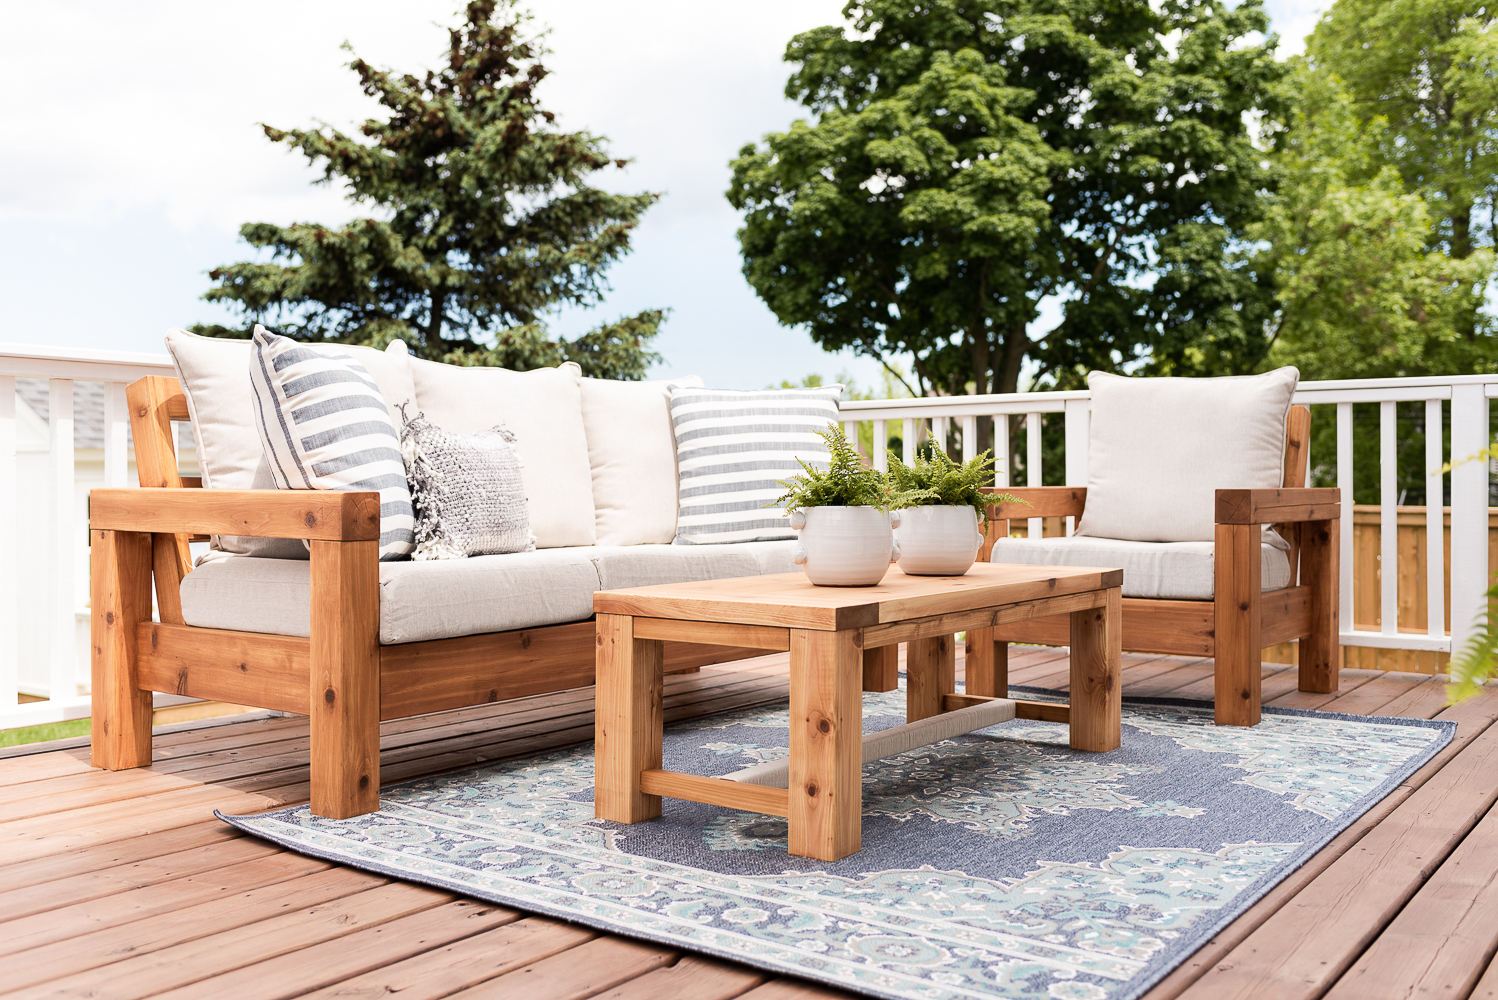
- Seating and furniture: Add seating and furniture that complements the style and functionality of your pergola. From comfortable lounge chairs to a dining table and chairs, choose pieces that invite relaxation and make your outdoor space inviting.
- Decorative elements: Personalize your pergola with decorative elements that reflect your style and create a welcoming ambiance. This can include hanging planters, outdoor artwork, decorative screens, or even a wall-mounted water feature.
Remember that these optional additions can be tailored to your preferences and the overall design of your pergola. Consider the purpose of your pergola and how you envision using the outdoor space to guide your choices.
When incorporating optional additions, ensure that they are installed safely and securely. Follow manufacturer instructions and consult professionals if needed, especially when dealing with electrical installations or complex structural modifications.
These optional features will elevate your pergola from a simple structure to a personal oasis where you can relax, unwind, and enjoy your outdoor space to the fullest extent.
Now that you have considered these optional additions, it’s time to add the finishing touches to complete your dreamy outdoor getaway.
Step 10: Finishing touches
The finishing touches will add the final details and personalization to your pergola, transforming it into a truly dreamy outdoor getaway. These small yet significant details will bring your vision to life and create a space that reflects your style and personality.
Consider these final touches to complete your pergola:
- Paint or stain: Choose a paint or stain color that complements your outdoor space and enhances the natural beauty of the wood or material used for your pergola. Apply multiple coats for durability and protection against the elements.
- Decorative elements: Add decorative elements that express your personal taste, such as hanging baskets, wind chimes, or outdoor artwork. These features will add charm and character to your pergola.
- Comfortable cushions and pillows: Make your pergola cozy and inviting by adding cushions and pillows to seating areas. Choose weather-resistant fabrics and colors that coordinate with your outdoor decor.
- Outdoor rugs: Define the seating area and add warmth by placing an outdoor rug underneath your furniture. Opt for a rug that is durable and easy to clean.
- Accessorize with plants and flowers: Integrate pots, planters, and flower boxes filled with vibrant plants and flowers to bring life and color to your pergola. Choose low-maintenance plants that thrive in your climate.
- Outdoor curtains or drapes: Create a sense of privacy and elegance by adding outdoor curtains or drapes. These accessories can be practical for blocking out excessive sunlight or adding an element of sophistication to your pergola.
Pay attention to the details that truly enhance the ambiance and functionality of your pergola. Embrace your creativity and personal style to make it a retreat that you and your guests will love spending time in.
Completing the finishing touches will require some experimenting and trial-and-error. Step back, evaluate, and make adjustments as needed until you achieve the desired look and feel for your dreamy outdoor getaway.
Congratulations! You have successfully built and personalized your pergola, creating a stunning outdoor space that will provide relaxation, entertainment, and enjoyment for many years to come.
Remember to regularly maintain and care for your pergola to ensure its longevity. Clean it regularly, inspect for any damage or wear, and make any necessary repairs or modifications to keep it in pristine condition.
Now, step into your transformed outdoor retreat and bask in the beauty and serenity of your newly completed pergola.
Conclusion
Building a pergola is a rewarding DIY project that allows you to create a dreamy outdoor getaway right in your own backyard. By following the steps outlined in this guide, you can confidently construct a pergola that adds both functionality and style to your outdoor space.
From carefully planning and gathering materials to securing the pergola and adding the finishing touches, each step plays a crucial role in the construction process. With attention to detail and a bit of creativity, you can create a pergola that reflects your personal taste and provides a tranquil haven for relaxation, entertaining, or simply enjoying the beauty of nature.
Remember to consider your location, budget, and design preferences throughout the process. Take the time to properly prepare the site, ensuring a level foundation and secure anchoring to ensure the longevity and stability of your pergola.
Don’t be afraid to add optional features, such as shade solutions, greenery, outdoor lighting, or seating, to customize your pergola according to your specific needs and desires. These additions will make your pergola truly unique and tailored to your lifestyle.
As you add the finishing touches, remember to evaluate the final result and make any necessary adjustments to ensure the perfect blend of aesthetics and functionality.
Lastly, regularly maintain and care for your pergola to preserve its beauty and durability. Clean it, inspect for any wear or damage, and make repairs or modifications as needed.
Now, step back and admire your hard work as you enjoy the serenity and joy that your newly constructed pergola brings. Whether you’re lounging with a book, hosting a gathering, or simply embracing the beauty of the outdoors, your pergola will provide a magical oasis for years to come.
Frequently Asked Questions about How To Build A Pergola For A Dreamy Outdoor Getaway
Was this page helpful?
At Storables.com, we guarantee accurate and reliable information. Our content, validated by Expert Board Contributors, is crafted following stringent Editorial Policies. We're committed to providing you with well-researched, expert-backed insights for all your informational needs.

0 thoughts on “How To Build A Pergola For A Dreamy Outdoor Getaway”