Articles
How To Make Jewelry Boxes
Modified: January 19, 2024
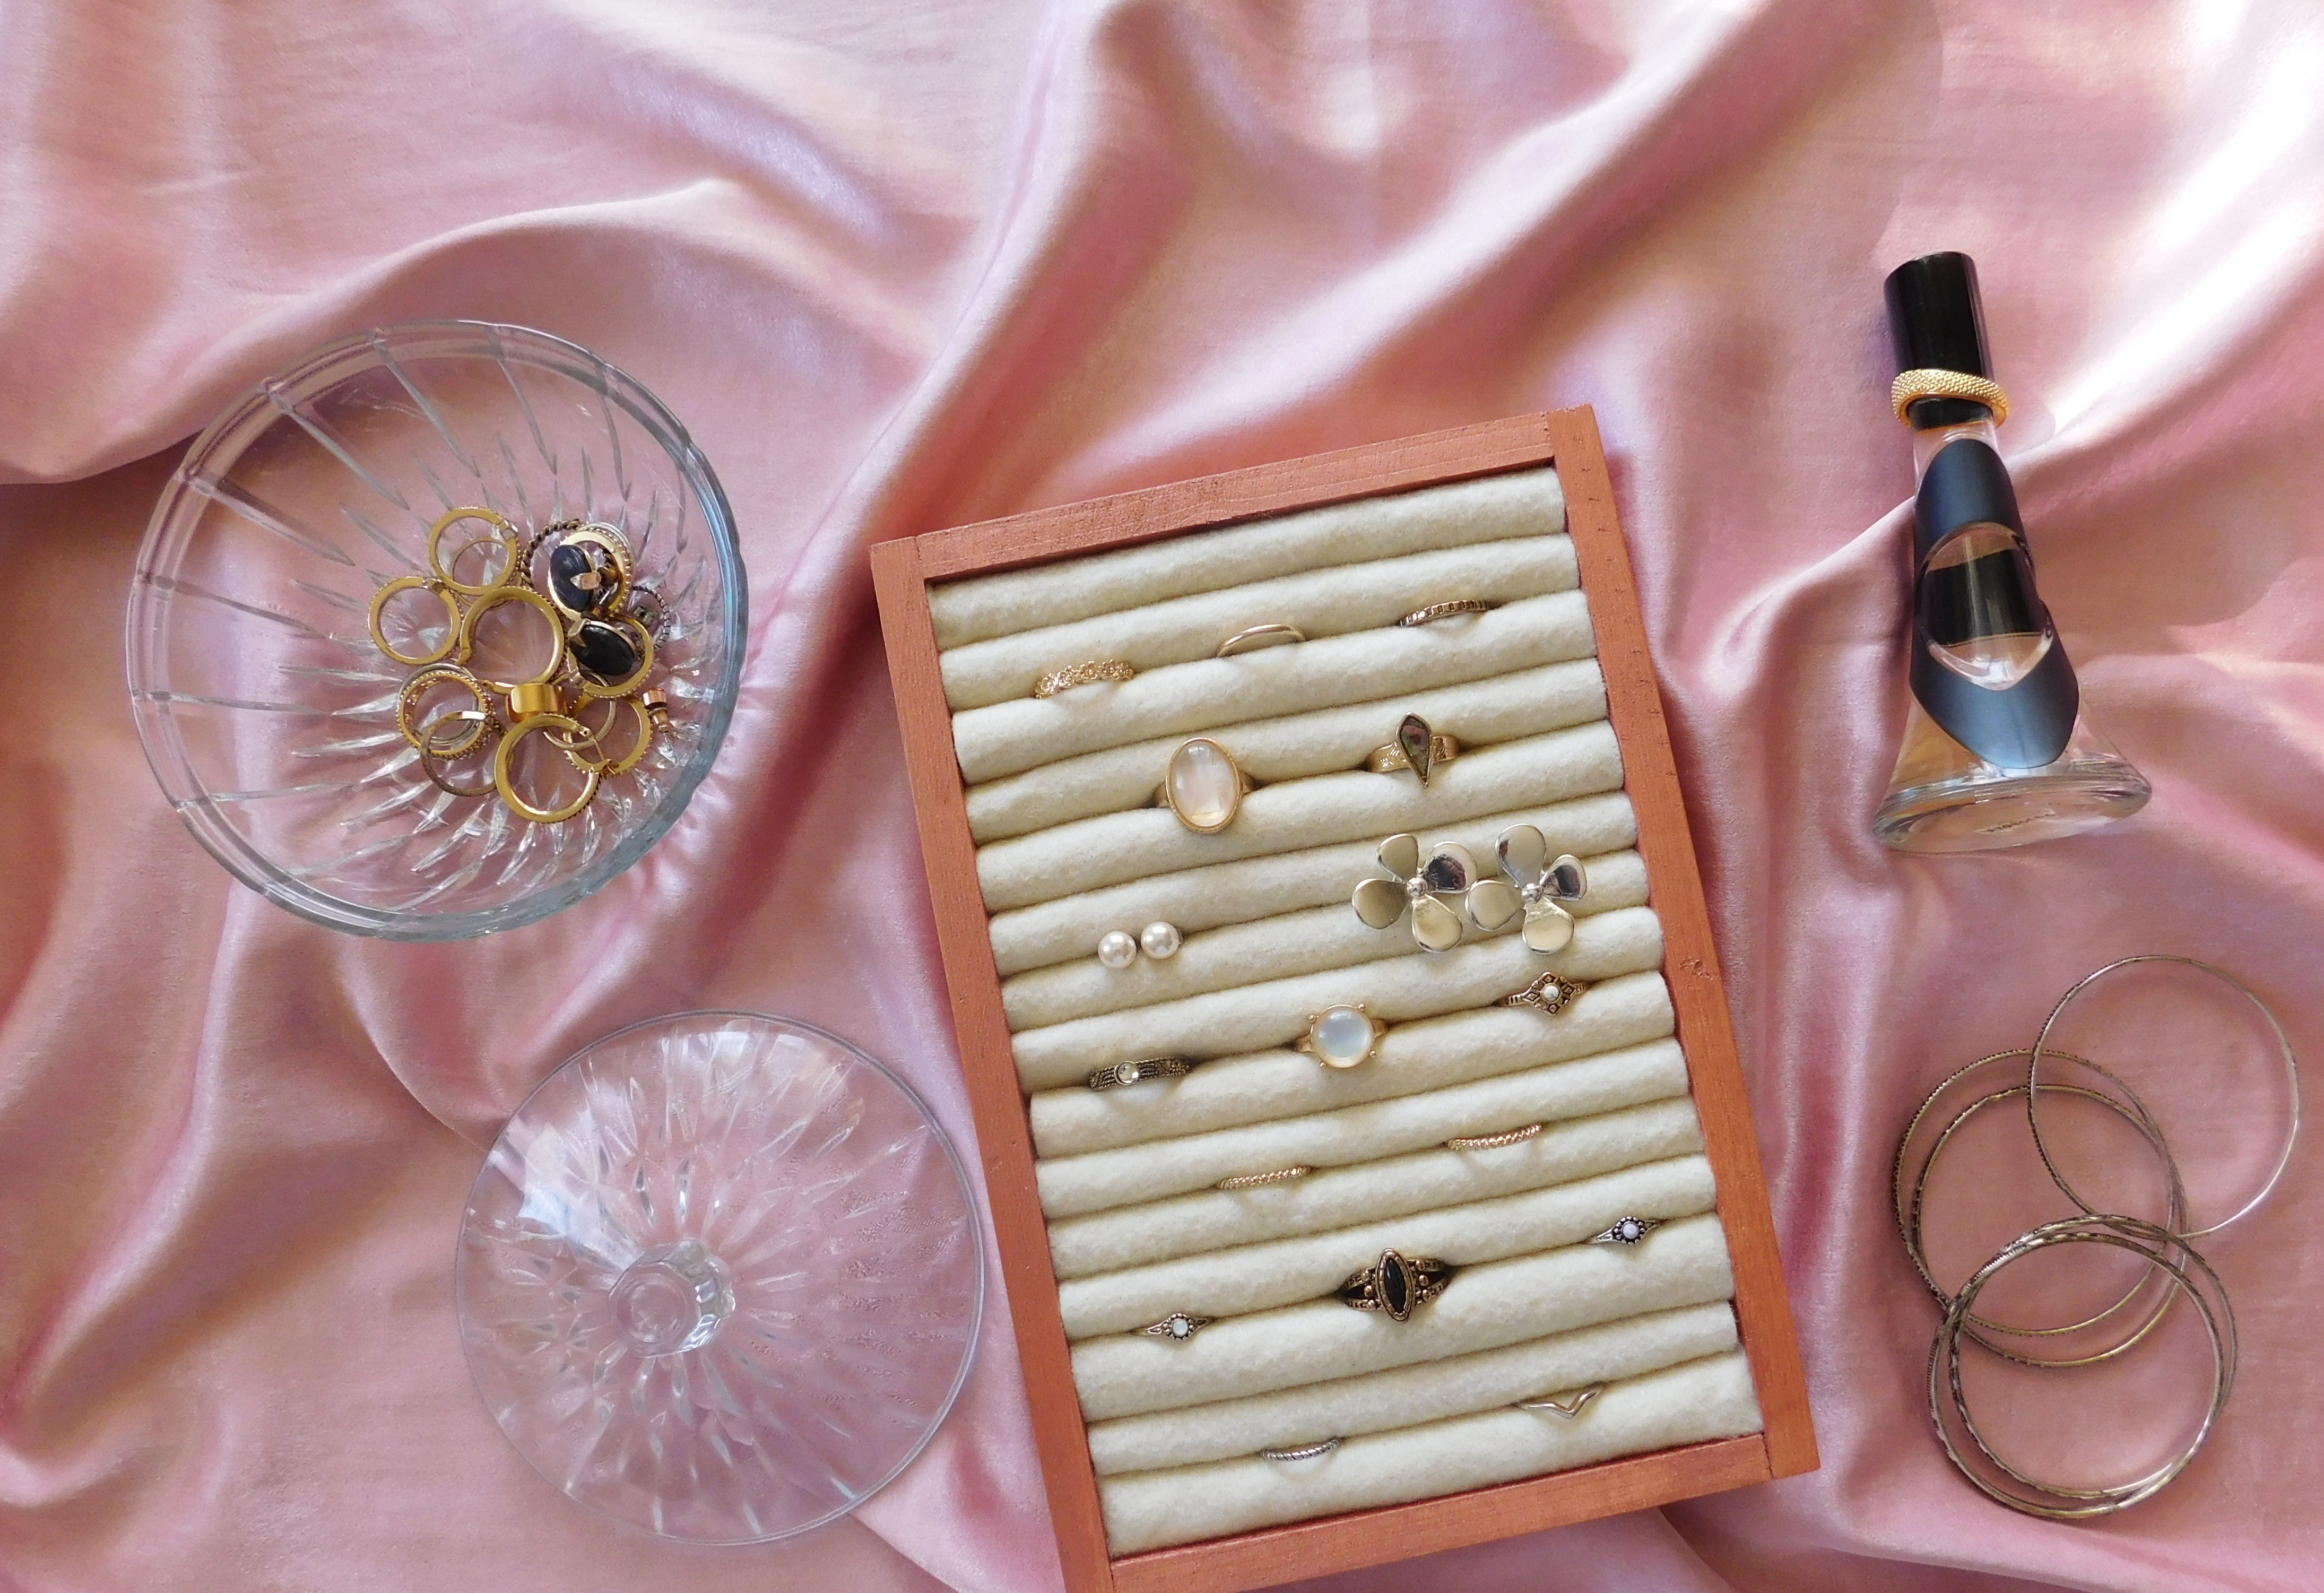
Looking to declutter your bedroom? Learn how to make beautiful jewelry boxes for stylish and practical bedroom storage. Enhance your organization with DIY bedroom storage solutions.
(Many of the links in this article redirect to a specific reviewed product. Your purchase of these products through affiliate links helps to generate commission for Storables.com, at no extra cost. Learn more)
Introduction
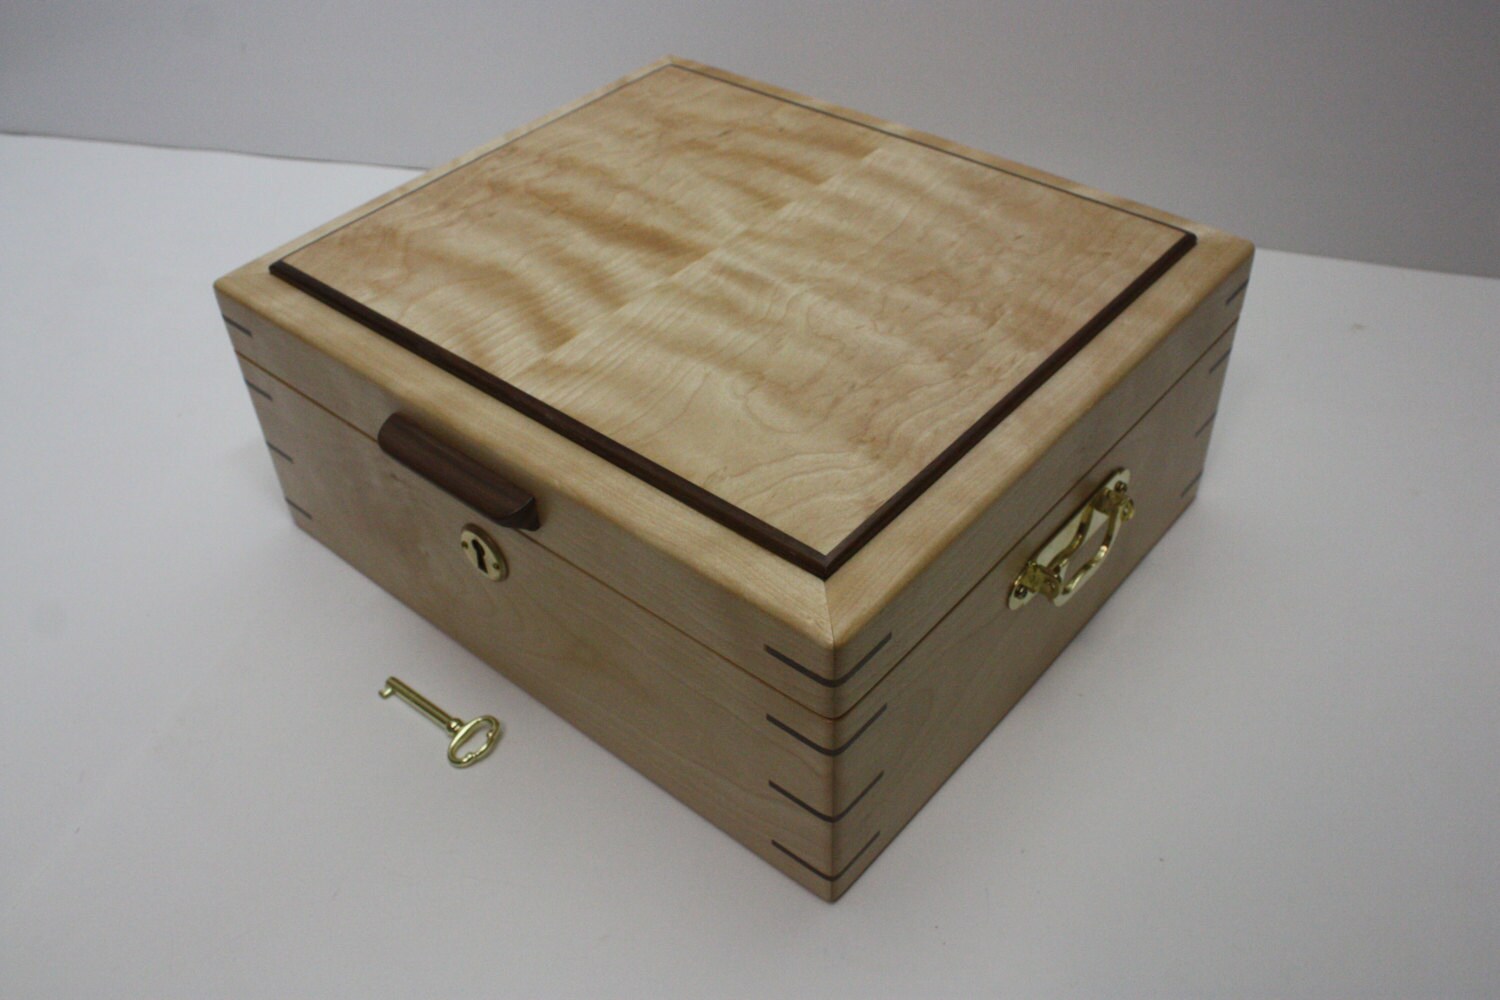
Creating your own jewelry boxes can be a rewarding and satisfying craft project that allows you to showcase your creativity and provide a beautiful storage solution for your precious jewelry pieces. Whether you are a jewelry enthusiast looking to organize your collection or a craft lover seeking a DIY project, making jewelry boxes is a fun and fulfilling endeavor.
In this article, we will guide you through the step-by-step process of creating your own jewelry boxes. We will explore the materials needed, the design options, and the various techniques involved in constructing and decorating these boxes. So, grab your tools and let’s get started!
Before diving into the project, it’s essential to gather all the necessary materials. Here’s a list of the items you will need to create your custom jewelry boxes:
Key Takeaways:
- Craft a personalized jewelry box using wood, hinges, and decorative elements to showcase your creativity and provide a functional and beautiful storage solution for your precious jewelry pieces.
- From measuring and cutting wood to adding a luxurious interior lining, follow the step-by-step guide to create a unique and elegant jewelry box that reflects your personal style and craftsmanship.
Read more: How To Make Music Boxes
Materials Needed
- Wood boards – choose a hardwood like oak or walnut for durability
- Saw – a table saw or a hand saw will suffice for cutting the wood
- Sandpaper – select different grits for smoothing the wood surfaces
- Wood glue – for securely joining the wood pieces together
- Hinges – choose high-quality hinges to ensure smooth functionality
- Latch – a decorative latch to keep the box securely closed
- Finishing materials – such as wood stain, varnish, or paint
- Interior lining material – velvet, felt, or satin for a luxurious touch
- Decorative elements – beads, gemstones, ribbons, or paint for personalization
- Measuring tape, pencil, and ruler – for accurate measurements and markings
- Safety goggles, gloves, and a dust mask – to protect yourself during the woodworking process
Now that you have gathered the materials, let’s move on to the step-by-step process of creating your jewelry boxes.
Key Takeaways:
- Craft a personalized jewelry box using wood, hinges, and decorative elements to showcase your creativity and provide a functional and beautiful storage solution for your precious jewelry pieces.
- From measuring and cutting wood to adding a luxurious interior lining, follow the step-by-step guide to create a unique and elegant jewelry box that reflects your personal style and craftsmanship.
Read more: How To Make Music Boxes
Materials Needed
When it comes to creating jewelry boxes, having the right materials is essential to ensure a successful and beautiful end result. Here’s a detailed list of the materials you will need for this project:
- Wood boards: Choose hardwood boards like oak or walnut for durability and a luxurious look. You can find them at your local hardware store or online.
- Saw: A table saw or a hand saw will be needed to cut the wood into the desired pieces. Make sure you have a sharp blade for clean and precise cuts.
- Sandpaper: Select sandpaper with different grits to smooth the wood surfaces and prepare them for painting or staining.
- Wood glue: Use high-quality wood glue to securely join the wood pieces together. Look for a glue that dries clear for a seamless finish.
- Hinges: Choose hinges that are sturdy and suitable for the size and weight of your jewelry box. Brass or nickel-plated hinges are popular choices for their durability and aesthetic appeal.
- Latch: A decorative latch will not only secure the contents of the box but also add a touch of elegance to its overall design. Look for latches that complement the style of your jewelry box.
- Finishing materials: Depending on your preference, you can use wood stain, varnish, or paint to give your jewelry box a finished look. Consider the aesthetics you want to achieve and select the appropriate finishing materials accordingly.
- Interior lining material: To protect your precious jewelry and add a touch of luxury, consider using velvet, felt, or satin as the interior lining of your jewelry box. These materials will help prevent scratches and keep your jewelry in pristine condition.
- Decorative elements: If you want to add a personal touch to your jewelry box, consider incorporating decorative elements such as beads, gemstones, ribbons, or even hand-painted designs. Let your creativity shine and make the box truly unique.
- Measuring tape, pencil, and ruler: Accurate measurements and markings are crucial when working with wood. Make sure you have a measuring tape, pencil, and ruler at hand to ensure precision during the construction process.
- Safety goggles, gloves, and a dust mask: Safety should always be a priority when working with tools and materials. Protect your eyes with safety goggles, wear gloves to avoid splinters, and use a dust mask to prevent inhaling wood particles.
Now that you have gathered all the necessary materials, you’re ready to embark on the exciting journey of creating your own jewelry boxes. In the next steps, we will guide you through the process of choosing a design, measuring and cutting the wood, assembling the box, adding hinges and latches, applying a finish, and adding the final touches. Let’s get started!
Step 1: Choosing the Design
When it comes to creating jewelry boxes, choosing the right design is crucial to ensure that the final product reflects your personal style and meets your functional needs. Here are a few considerations to keep in mind when selecting a design:
- Size and Shape: Determine the size and shape of the jewelry box based on the amount and type of jewelry you plan to store inside. Consider whether you need compartments for specific items like rings or earrings.
- Style: Think about the overall style you want to achieve. Do you prefer a classic and elegant look, a modern and minimalist design, or something more whimsical and unique? Take inspiration from existing jewelry box designs or let your creativity guide you.
- Accessibility: Consider how easy it will be to access and organize your jewelry in the chosen design. Make sure there are enough compartments or drawers to accommodate your collection and that the opening and closing mechanisms are convenient to use.
- Materials: The choice of materials can greatly impact the aesthetic appeal and durability of the jewelry box. Decide whether you want to use a single type of wood or incorporate other materials like glass, metal accents, or decorative fabric.
- Personalization: Do you want to add any personal touches or customizations to your jewelry box? Think about whether you want to incorporate engraving, a monogram, or a unique decorative element that reflects your personality or the recipient’s preferences if it’s a gift.
Once you have considered these factors, it’s time to explore different jewelry box designs and gather inspiration. You can browse through magazines, visit craft stores, or search online for design ideas. Pinterest and other crafting websites can provide a wealth of inspiration and DIY tutorials to help you find the perfect design for your jewelry box.
Remember, the design you choose should not only be visually appealing but also functional and practical for your specific needs. It’s important to strike a balance between aesthetics and usability to create a jewelry box that you will love to use and display.
Once you have finalized your design, it’s time to move on to the next step: measuring and cutting the wood. This step is crucial to ensure that each piece of the jewelry box is cut accurately and fits together seamlessly. Let’s continue our journey in creating your very own bespoke jewelry box!
Step 2: Measuring and Cutting the Wood
Now that you have chosen the design for your jewelry box, it’s time to begin the process of measuring and cutting the wood. This step is essential to ensure that each piece fits together perfectly and forms the foundation of your jewelry box.
Here’s how to proceed:
- Gather all the necessary tools: Before you begin measuring and cutting the wood, make sure you have the appropriate tools available. This includes a saw (table saw or hand saw) with a sharp blade, a measuring tape, a pencil, and a ruler.
- Plan your cuts: Carefully study your chosen design and determine the dimensions of each piece of wood required. Measure the length, width, and height for the sides, top, bottom, and any dividers or compartments.
- Mark the measurements: Use a pencil and ruler to mark the measurements on the wood pieces. It’s important to be precise and ensure that the lines are straight and accurate.
- Double-check the measurements: Before making any cuts, double-check your measurements to avoid any mistakes. Measure twice to be sure, as they say.
- Cut the wood: Using a table saw or hand saw, carefully cut along the marked lines. Take your time and use steady, controlled movements to achieve clean and precise cuts. Always follow proper safety precautions and use protective gear.
- Sand the cut edges: After cutting the pieces, use sandpaper to smooth the rough edges and any imperfections. This will ensure a professional and polished look for your jewelry box.
Remember, accuracy is key in this step. Take your time and be patient when measuring and cutting the wood. A little extra caution and precision will go a long way in creating a high-quality jewelry box.
Once you have successfully measured and cut the wood pieces, you’re ready for the next step: sanding the wood. This process will help refine the surface and prepare it for assembly. Join us in the upcoming step as we continue crafting your one-of-a-kind jewelry box!
Read more: How To Make A Box Garden
Step 3: Sanding the Wood Pieces
After measuring and cutting the wood pieces for your jewelry box, it’s time to focus on refining the surface and achieving a smooth finish. Sanding the wood is an essential step that will enhance the overall appearance and feel of your jewelry box.
Follow these steps to sand the wood pieces effectively:
- Gather your materials: You will need sandpaper in various grits (such as 80, 120, and 220), a sanding block or sanding pad, and a clean cloth or brush to remove the sawdust.
- Start with a coarse grit: Begin sanding with the coarsest grit of sandpaper (around 80) to remove any rough spots, irregularities, or high points on the wood surface. Hold the sandpaper securely and move it in the direction of the wood grain, applying even pressure.
- Progress to a finer grit: Gradually switch to a finer grit (around 120) to smooth out the surface further. This will help to eliminate the scratches left by the coarse grit sandpaper. Continue sanding in the direction of the wood grain.
- Finish with a fine grit: Finally, use the finest grit of sandpaper (around 220) to achieve a polished and smooth finish. This step will remove any remaining imperfections and leave the wood surface silky to the touch.
- Sanding the edges and corners: Pay special attention to sanding the edges and corners of the wood pieces. You can use a sanding block or sandpaper folded into a small square to reach these areas and ensure they are smooth and well-rounded.
- Remove sawdust: After sanding each wood piece, use a clean cloth or brush to remove any sawdust. This will prevent it from getting trapped in the finish or the glue during the subsequent steps of the jewelry box assembly.
Sanding the wood not only improves the appearance of your jewelry box but also prepares the surface for any paint, staining, or finishing applications you plan to apply later. It creates a smooth canvas for a flawless end result.
Remember to take your time with the sanding process and be thorough in ensuring all surfaces are smooth and free from imperfections. Once you have sanded all the wood pieces, you’re ready to move on to the exciting step of assembling your jewelry box. Join us as we bring all the components together in the upcoming step!
Step 4: Assembling the Box
Now that you have measured, cut, and sanded the wood pieces for your jewelry box, it’s time to bring them together and start assembling the box itself. This step is where all your hard work begins to take shape, and your jewelry box starts to come alive.
Follow these steps to assemble your jewelry box:
- Gather your materials: Make sure you have all the necessary tools and materials at hand, including the wood pieces, wood glue, clamps, and a clean cloth or brush for any excess glue.
- Apply wood glue: Apply a thin, even layer of wood glue to the edges of the wood pieces that will be joined together. Be careful not to apply too much glue, as this can lead to a messy finish.
- Join the pieces together: Carefully align the edges of the wood pieces and press them together firmly. Use clamps to hold the pieces in place while the glue dries, ensuring a tight and secure bond.
- Wipe off excess glue: Immediately wipe off any excess glue that squeezes out from the joints using a clean cloth or brush. This will prevent it from drying and interfering with the final finish.
- Allow the glue to dry: Follow the manufacturer’s instructions for the recommended drying time of the wood glue. It is essential to allow sufficient drying time to ensure a strong and sturdy assembly.
- Reinforce with nails or screws (optional): Depending on the design and your preference, you may choose to reinforce the joints with small nails or screws for added stability and longevity.
- Check for any gaps or misalignments: Once the glue has dried, inspect the assembled box for any gaps or misalignments. If necessary, use sandpaper to lightly sand any uneven surfaces or edges.
Remember to work carefully and take your time during the assembly process. A properly assembled box will provide a strong foundation for the remaining steps of your jewelry box creation.
With the box now assembled, we are ready to move on to the next step: adding the hinges. The hinges will allow the lid of your jewelry box to open and close smoothly, providing easy access to your precious items. Join us in the upcoming step to learn how to install the hinges for your stunning jewelry box!
When making jewelry boxes, consider using soft, padded lining to protect delicate pieces. You can use velvet, satin, or felt to cushion the interior and keep the jewelry safe from scratches and damage.
Step 5: Adding the Hinges
Adding hinges to your jewelry box is a crucial step that will allow the lid to open and close smoothly while providing easy access to your precious items. Properly installing the hinges will ensure that your jewelry box functions correctly and stands the test of time. Follow these steps to add hinges to your jewelry box:
- Gather your materials: You will need your assembled jewelry box, hinges, screws, a screwdriver, and a pencil or marker for marking the hinge placement.
- Decide on the hinge placement: Determine where you want to position the hinges on the back of the box and the lid. Ensure that the lid is aligned properly with the box when closed.
- Mark the hinge locations: Use a pencil or marker to mark the hinge placement on both the back of the box and the lid. Make sure the markings are precise and aligned with the edges of the wood.
- Align and attach the hinges: Place the hinge against the marked locations and align it with the edges. Secure the hinges to the box and the lid by screwing them in using a screwdriver.
- Ensure smooth movement: Once all the hinges are attached, carefully open and close the lid to test the movement. Make any necessary adjustments to ensure proper alignment and smooth operation.
- Reinforce if needed: If you feel that the hinges need additional support, you can reinforce them by adding small screws in the existing holes or adding additional screws into adjacent areas.
When adding hinges, it’s important to ensure that they are properly aligned and securely attached. Take your time and be meticulous in this step to achieve the desired functionality and aesthetics of your jewelry box.
With the hinges successfully installed, you’re one step closer to completing your custom jewelry box. In the next step, we’ll guide you through installing a latch to keep your jewelry box securely closed. Join us in the upcoming step to learn how to add the perfect finishing touch to your creation!
Step 6: Installing the Latch
Installing a latch on your jewelry box is an important step to secure its contents and ensure that the lid stays closed when not in use. A well-installed latch adds both functionality and a touch of elegance to your jewelry box. Follow these steps to install a latch:
- Gather your materials: You will need a latch, screws, a screwdriver, and a pencil or marker for marking the latch placement.
- Choose the latch type: There are various latch options available, including magnetic, hook-and-eye, or decorative clasps. Select a latch that complements the design and size of your jewelry box.
- Determine latch placement: Decide where you want to position the latch on the front of the box and the corresponding placement on the lid. Ensure that the latch aligns properly and securely when closed.
- Mark the latch location: Use a pencil or marker to mark the placement of the latch on both the box and the lid. Make sure the markings are precise and aligned with the edges of the wood.
- Attach the latch: Position the latch against the marked locations and ensure it aligns properly. Secure the latch to the box and the lid by screwing it in using a screwdriver.
- Test the latch: Once the latch is attached, carefully open and close the lid to test the latch mechanism. Ensure that it securely holds the lid closed and operates smoothly.
Proper installation of the latch will keep your jewelry box securely closed and add a finishing touch to your creation. Take your time to align the latch accurately and attach it securely, ensuring that it functions properly with each use.
Now that you have successfully installed the latch, you’re nearing the completion of your jewelry box project. In the next step, we’ll guide you through the process of applying a finish to your box, enhancing its appearance and protecting the wood. Join us in the upcoming step to learn how to add a beautiful and long-lasting finish to your jewelry box!
Read more: How To Make Boxes For Gifts
Step 7: Applying a Finish
Applying a finish to your jewelry box is a crucial step that not only enhances the appearance of the wood but also provides protection and durability. The right finish can transform your box into a stunning piece of craftsmanship. Follow these steps to apply a finish to your jewelry box:
- Gather your materials: You will need your jewelry box, the chosen finish (such as wood stain, varnish, or paint), a paintbrush or foam brush, clean cloth, and painter’s tape (if needed).
- Prepare the workspace: Lay down a protective covering over your work surface to prevent any damage. Ensure proper ventilation in the area as some finishes may have strong odors.
- Prepare the wood: Ensure that the wood surface is clean and free from dust. Sand any rough spots or imperfections. If desired, use painter’s tape to protect certain areas from the finish.
- Apply the finish: Dip the brush into the finish, then apply a thin, even layer to the wood surface. Brush with the grain for a smooth and consistent finish. Take care to avoid drips or excess pooling of the finish.
- Allow drying time: Follow the manufacturer’s instructions regarding the drying time of the chosen finish. Ensure that the box is placed in a well-ventilated area and protected from dust or debris during this time.
- Inspect and repeat if necessary: Once the first coat is dry, inspect the finish for any uneven areas or imperfections. If needed, lightly sand those areas with fine-grit sandpaper and apply another coat of finish. Repeat this process until you achieve the desired finish.
- Final touches: Once the finish is completely dry, gently polish the surface with a clean cloth to remove any residual particles. Remove any painter’s tape that may have been used during the application process.
Choosing the right finish is crucial as it can dramatically impact the final look and feel of your jewelry box. Consider the natural beauty of the wood, your desired level of shine or color, and the overall aesthetic you want to achieve when selecting a finish.
By applying a finish, you not only protect the wood from moisture and wear but also add depth and richness to the appearance of your jewelry box. The finish will enhance the grain and highlight the craftsmanship, ensuring that your jewelry box is truly a work of art.
With the finish beautifully applied, your jewelry box is nearly complete. In the next step, we will guide you through the process of adding an interior lining, providing an elegant and protective layer for your precious jewelry pieces. Join us in the upcoming step to learn how to create a luxurious interior for your jewelry box!
Step 8: Adding the Interior Lining
Adding an interior lining to your jewelry box not only adds a touch of luxury and elegance but also helps protect your precious jewelry pieces from scratches and damage. The interior lining provides a soft and secure space for your jewelry collection. Follow these steps to add an interior lining to your jewelry box:
- Gather your materials: You will need your jewelry box, interior lining material (such as velvet, felt, or satin), scissors, ruler, pencil, and fabric glue or adhesive.
- Measure and mark: Measure the dimensions of the interior surfaces of your jewelry box. Mark these dimensions on the backside of your chosen lining material using a pencil and ruler. Ensure that you leave some excess material to fold over the edges and provide a clean finish.
- Cut the lining material: Using scissors, carefully cut along the marked lines to create pieces of lining material that will fit each interior surface of your jewelry box.
- Apply adhesive: Apply fabric glue or adhesive to the backside of each piece of lining material. Make sure to spread the adhesive evenly and cover the entire surface, especially the edges.
- Place the lining material: Carefully place the adhesive side of the lining material onto the corresponding interior surface of your jewelry box. Press it firmly, making sure there are no wrinkles or bubbles. Smooth out any imperfections with gentle pressure.
- Fold and secure the edges: Fold the excess material over the edges of your jewelry box, trimming any excess if necessary. Use fabric glue or adhesive to secure the folded edges in place, ensuring a neat and clean finish.
- Allow drying time: Follow the manufacturer’s instructions regarding the drying time of the fabric glue or adhesive. Allow sufficient drying time to ensure that the lining material is firmly attached to the interior of the box.
- Check and adjust: Once the adhesive has dried, inspect the interior lining for any loose areas or imperfections. Make any necessary adjustments or reapply adhesive to ensure a seamless and professional-looking lining.
By adding an interior lining, you are not only enhancing the overall appearance of your jewelry box but also providing a soft and protective environment for your precious jewelry pieces. The lining material adds a luxurious and refined touch, making your jewelry box feel truly special.
With the interior lining in place, your jewelry box is almost complete. In the next step, we will guide you through the process of decorating the exterior of your box, adding personal touches and making it truly unique. Join us in the upcoming step to unleash your creativity!
Step 9: Decorating the Exterior
Decorating the exterior of your jewelry box is a wonderful opportunity to add personal touches and make it uniquely yours. Whether you prefer a simple and elegant design or a more elaborate and eclectic style, this step allows you to showcase your creativity. Here’s how you can decorate the exterior of your jewelry box:
- Gather your materials: You will need your jewelry box, decorative elements (such as beads, gemstones, ribbons, or paint), glue or adhesive suitable for the chosen materials, scissors, and a paintbrush (if painting).
- Choose your design: Decide on the design or theme you want to incorporate into the exterior of your jewelry box. It could be a nature-inspired motif, a geometric pattern, or anything that reflects your personal style.
- Painting option: If you choose to paint the exterior, start by selecting the desired paint color and type suitable for the material of your box. Apply the paint evenly using a paintbrush, ensuring you cover all surfaces.
- Decorative elements: If you prefer to add decorative elements, such as beads, gemstones, or ribbons, plan where you want to place them on the box. Use an appropriate adhesive to securely attach these elements to the surface.
- Experiment and be creative: Let your imagination guide you as you decorate the exterior. Try different arrangements, combine colors and textures, and experiment with various materials to achieve the desired look.
- Attention to detail: Pay attention to the small details to ensure a polished finish. Check for any loose or unevenly attached elements and make any necessary adjustments. Take your time and let the creativity flow.
- Drying time: Allow sufficient drying time for any paint or adhesive used in the decoration process. Follow the instructions provided by the manufacturers to ensure a proper and long-lasting finish.
Decorating the exterior of your jewelry box is a chance to express your individuality and create a unique piece. Whether you opt for a minimalist design or go all-out with intricate details, make sure to bring your personal style to the forefront. The result will be a jewelry box that truly reflects your taste and creativity.
With the exterior of your jewelry box beautifully adorned, it’s time for the final step: adding the finishing touches and providing care instructions. Join us in the last step to complete your jewelry box project with finesse!
Step 10: Final Touches and Care Instructions
Congratulations! You’ve reached the final step of creating your jewelry box. This step involves adding the final touches to your masterpiece and providing care instructions to ensure its longevity and beauty. Follow these steps to complete your jewelry box project:
- Inspect and clean: Take a moment to inspect your jewelry box for any smudges, fingerprints, or dust. Use a soft cloth or brush to gently clean the surfaces, ensuring a pristine finish.
- Add hardware: If desired, you can enhance the functionality and aesthetics of your jewelry box by adding decorative hardware, such as knobs, handles, or drawer pulls. Choose hardware that complements the overall design and install it securely.
- Personalize (optional): Consider adding personal touches to your jewelry box, such as an engraved nameplate or a small message inside the lid. This will make your jewelry box even more special and meaningful.
- Care instructions: Provide care instructions to ensure the longevity and beauty of your jewelry box. Advise on how to clean it, avoid exposure to direct sunlight or extreme temperatures, and recommend periodic maintenance, such as reapplying the finish or tightening hardware.
- Display and enjoy: Find a special place to display your jewelry box, whether it’s on a vanity table, a dresser, or a dedicated jewelry cabinet. Arrange your cherished jewelry items inside and take pleasure in using your custom-made jewelry box.
Adding the final touches to your jewelry box allows you to perfect the overall look and functionality. Whether it’s a small hardware addition or a personalized engraving, these details make the box uniquely yours.
Remember to provide care instructions to ensure the longevity of your jewelry box. Proper care will keep it looking its best and protect your jewelry pieces. Regularly clean the box, handle it with care, and take preventive measures to avoid excessive exposure to sunlight or extreme conditions.
Now that your jewelry box is complete, take a moment to appreciate your craftsmanship and creativity. It is not merely a storage container for your jewelry but a beautiful piece of art you have crafted with dedication and passion.
Thank you for joining us on this jewelry box-making journey. We hope you have enjoyed creating your one-of-a-kind treasure. Now, display your jewelry box proudly and let its charm and functionality bring joy to your jewelry collection.
Read more: How To Make Lunch Box
Conclusion
Creating your own jewelry box has been a rewarding and fulfilling journey. From choosing the design to adding the final touches, you have crafted a personalized storage solution for your precious jewelry pieces. Through measuring, cutting, sanding, and assembling the wood, you have built a sturdy and functional box. The addition of hinges, a latch, and an interior lining has transformed it into a beautiful and practical piece.
By applying a finish and adding decorative elements, you have made your jewelry box truly unique and reflective of your personal style. The care and attention you have put into each step of the process will ensure that your jewelry box stands the test of time and brings joy for years to come.
Not only does your jewelry box provide a safe and organized space for your jewelry collection, but it also serves as a testament to your creativity and craftsmanship. It is a tangible representation of your dedication and passion for creating something with your own hands.
As you display and enjoy your jewelry box, take pride in your creation. It is a testament to your ability to transform raw materials into a functional and beautiful work of art. Remember to follow the care instructions to keep your jewelry box in pristine condition and maintain its charm.
We hope this step-by-step guide has inspired and empowered you to explore your creativity and embark on more craft projects. Whether you gift your jewelry box to a loved one or keep it for yourself, it is a reminder of your ability to turn an idea into a tangible creation.
Thank you for joining us on this creative journey, and we wish you many more successful crafting adventures in the future!
Frequently Asked Questions about How To Make Jewelry Boxes
Was this page helpful?
At Storables.com, we guarantee accurate and reliable information. Our content, validated by Expert Board Contributors, is crafted following stringent Editorial Policies. We're committed to providing you with well-researched, expert-backed insights for all your informational needs.


0 thoughts on “How To Make Jewelry Boxes”