Home>Furniture & Design>Outdoor Furniture>How To Build Outdoor Steps On A Slope

Outdoor Furniture
How To Build Outdoor Steps On A Slope
Modified: October 19, 2024
Learn how to build outdoor steps on a slope with our expert tips and advice. Create a functional and stylish outdoor space with our outdoor furniture and design ideas.
(Many of the links in this article redirect to a specific reviewed product. Your purchase of these products through affiliate links helps to generate commission for Storables.com, at no extra cost. Learn more)
Introduction
Welcome to the world of outdoor design and construction! Building outdoor steps on a slope can be a challenging yet rewarding project that adds both functionality and aesthetic appeal to your outdoor space. Whether you are enhancing a garden pathway or creating access to a patio or deck, the careful construction of outdoor steps on a slope requires thoughtful planning, precise execution, and a touch of creativity.
In this comprehensive guide, we will walk you through the step-by-step process of building outdoor steps on a slope, from assessing the incline of the terrain to adding the finishing touches. By the end of this journey, you will have the knowledge and confidence to embark on this exciting endeavor, transforming an uneven landscape into a beautifully integrated and accessible outdoor environment.
So, roll up your sleeves, gather your tools, and let's delve into the art and science of constructing outdoor steps on a slope. Whether you are a seasoned DIY enthusiast or a novice looking to expand your skills, this guide will equip you with the essential know-how to tackle this project with finesse and precision. Let's get started!
Key Takeaways:
- Building outdoor steps on a slope requires careful planning, precise execution, and attention to detail. It transforms challenging terrain into a visually appealing and functional addition to your outdoor space.
- By assessing the slope, planning meticulously, and adding finishing touches, you can create a safe and visually striking staircase. This project empowers you to enhance your outdoor environment with creativity and determination.
Read more: How To Build An Outdoor Step
Assessing the Slope
Before diving into the construction process, it is crucial to thoroughly assess the slope where the outdoor steps will be built. Understanding the terrain and its incline will lay the groundwork for a successful and structurally sound project.
Begin by evaluating the angle of the slope. Use a level, measuring tape, and stakes to mark the starting and ending points of the steps. This will help you visualize the rise and run of the steps and determine the overall height and length of the staircase. Pay close attention to any irregularities or variations in the slope, as these will influence the design and construction of the steps.
Next, consider the soil composition and drainage in the area. If the soil is loose or prone to erosion, additional measures may be necessary to stabilize the ground and prevent shifting or settling of the steps over time. Proper drainage is essential to avoid water accumulation, which can compromise the integrity of the steps and create safety hazards.
Furthermore, take note of any existing vegetation, rocks, or obstacles that may impact the layout and construction of the steps. Clearing the area of debris and obstructions will ensure a smooth and unobstructed path for the installation of the staircase.
Lastly, assess the accessibility and usability of the steps from a practical standpoint. Consider the anticipated foot traffic, the desired flow of movement, and any specific design preferences that align with the overall landscape and architectural style.
By thoroughly assessing the slope, you will gain valuable insights that will inform the planning and construction stages, setting the stage for a well-executed and visually appealing outdoor staircase.
Planning and Preparation
Once you have assessed the slope and gained a comprehensive understanding of the terrain, it’s time to delve into the planning and preparation phase. This stage is pivotal in ensuring that the construction process unfolds seamlessly and results in a durable and visually striking set of outdoor steps.
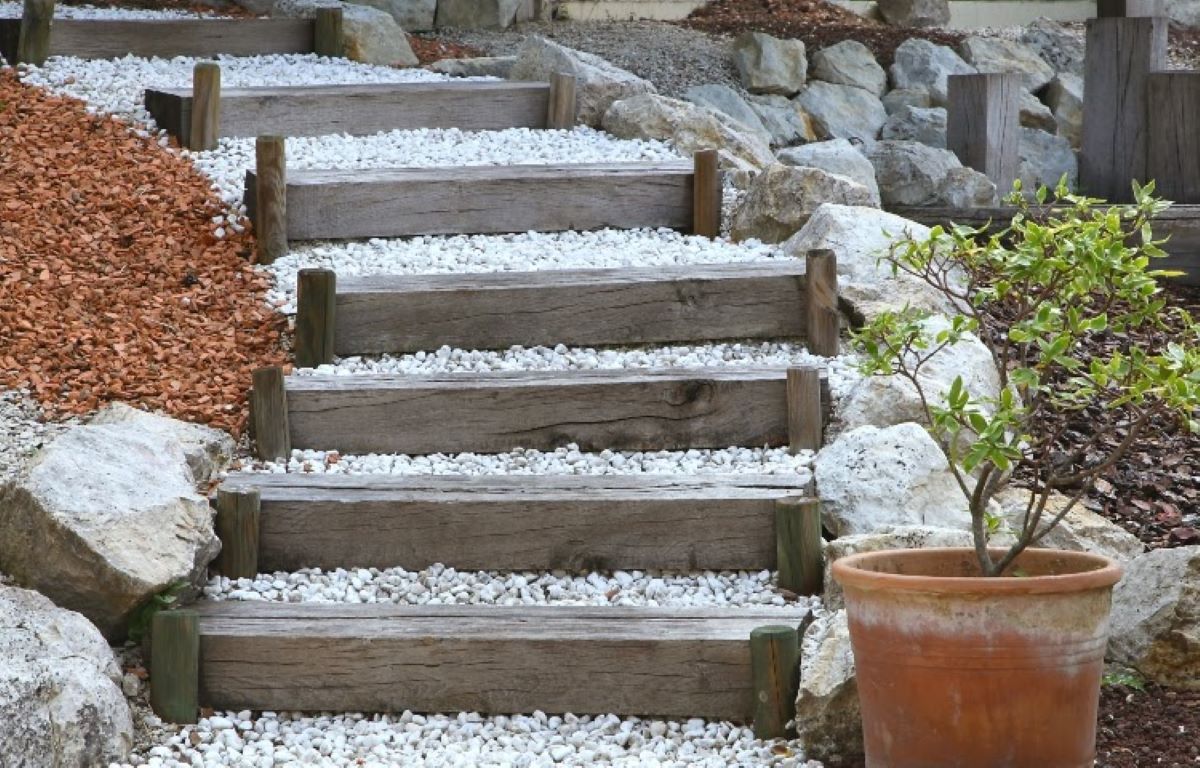
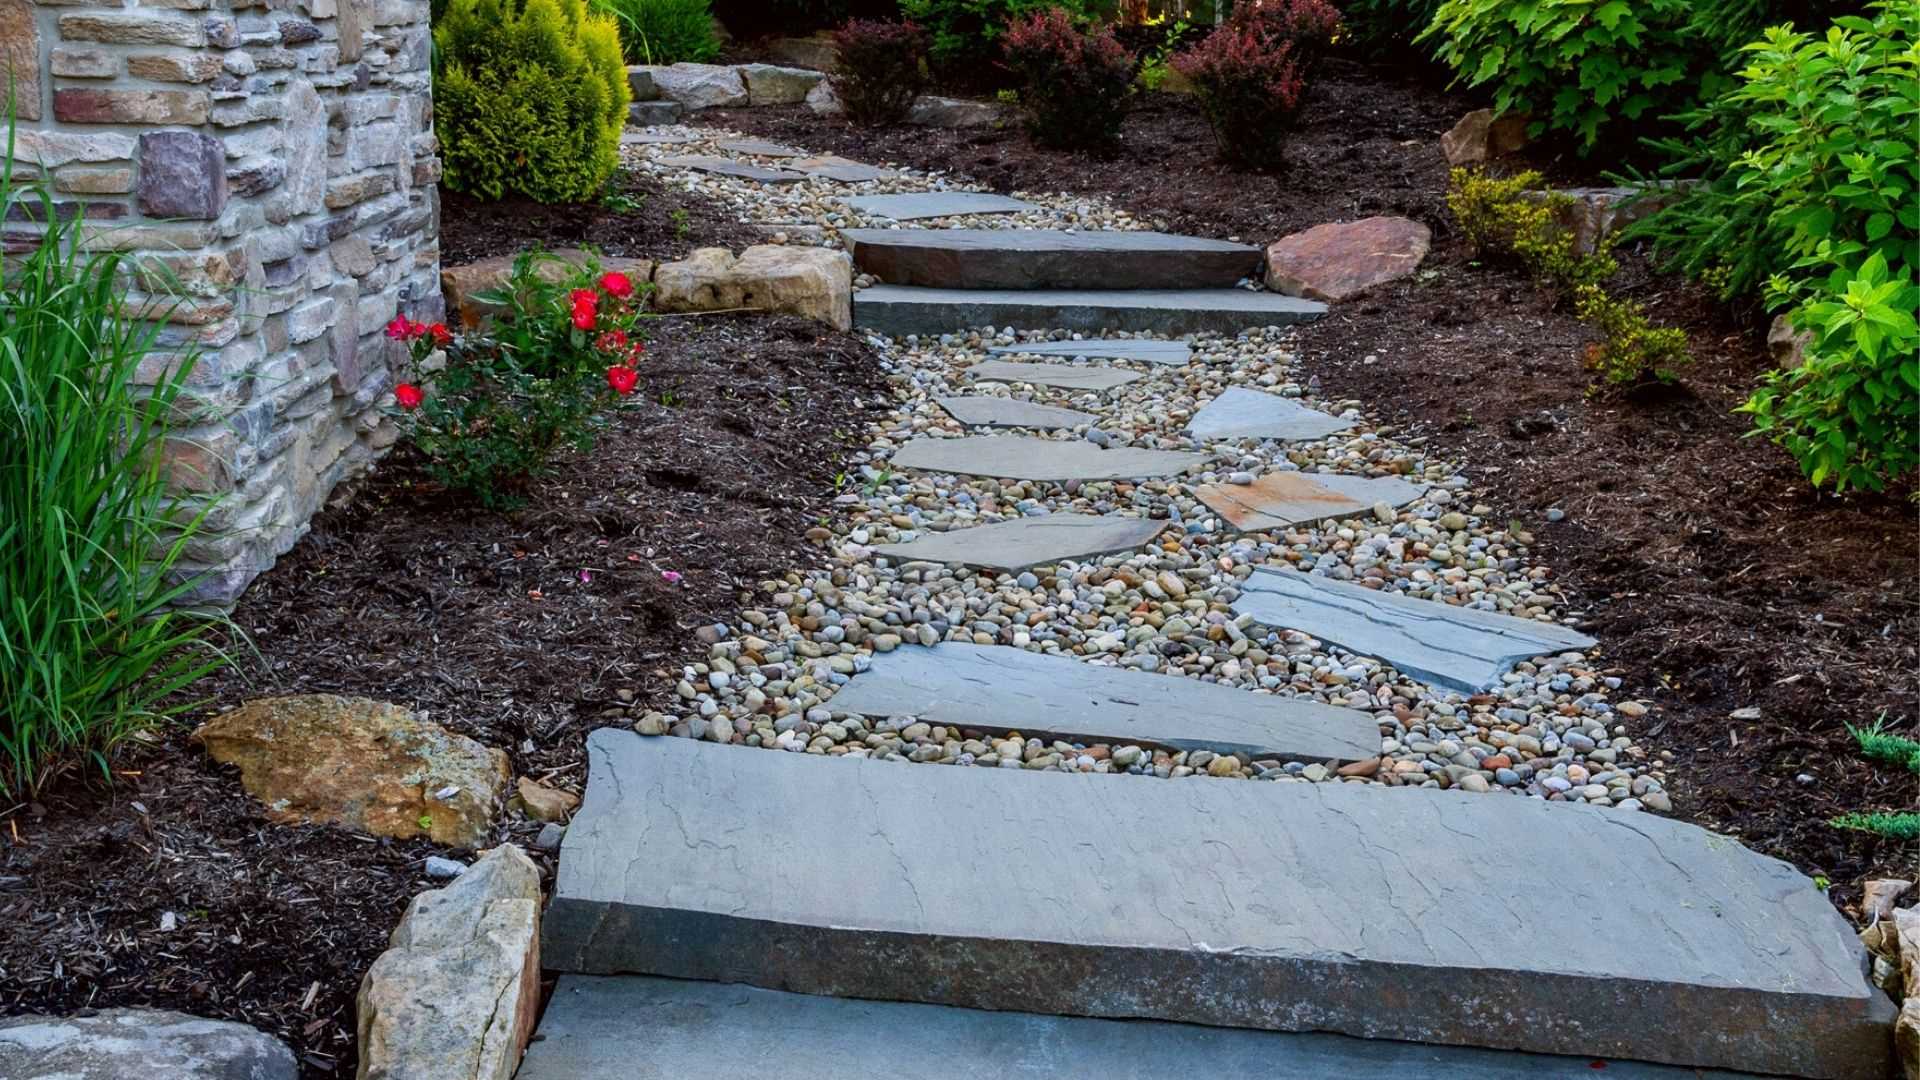
Begin by sketching out a design for the steps, taking into account the dimensions, rise, run, and overall layout. Consider the materials you intend to use, whether it’s natural stone, concrete, wood, or a combination of materials. Each option offers unique aesthetic and practical benefits, so choose the material that best complements the surrounding landscape and aligns with your design vision.
Next, create a detailed plan that outlines the sequence of construction steps, from excavation and foundation preparation to the installation of the steps themselves. Anticipate any challenges or complexities based on the slope’s incline and factor them into your plan to mitigate potential setbacks during the construction process.
Obtain any necessary permits or approvals required for the construction of outdoor steps in your area. Compliance with local building codes and regulations is essential to ensure the safety and structural integrity of the staircase. If you are unsure about specific requirements, consult with a professional or local authorities to gain clarity on the legal and safety aspects of your project.
Prepare the work area by clearing debris, vegetation, and any obstacles that may impede the construction process. Ensure that the site is well-drained and free from standing water to create a stable and secure foundation for the steps.
Lastly, gather all the required tools and materials, including shovels, a level, measuring tape, safety gear, and the chosen building materials. Having everything organized and readily accessible will streamline the construction process and minimize disruptions once work commences.
By meticulously planning and preparing for the construction of outdoor steps on a slope, you set the stage for a successful and gratifying building experience, culminating in a stunning addition to your outdoor living space.
Gathering Materials and Tools
With the planning phase complete, it’s time to gather the essential materials and tools required for constructing outdoor steps on a slope. The selection of high-quality materials and the use of appropriate tools are paramount to the structural integrity and visual appeal of the finished staircase.
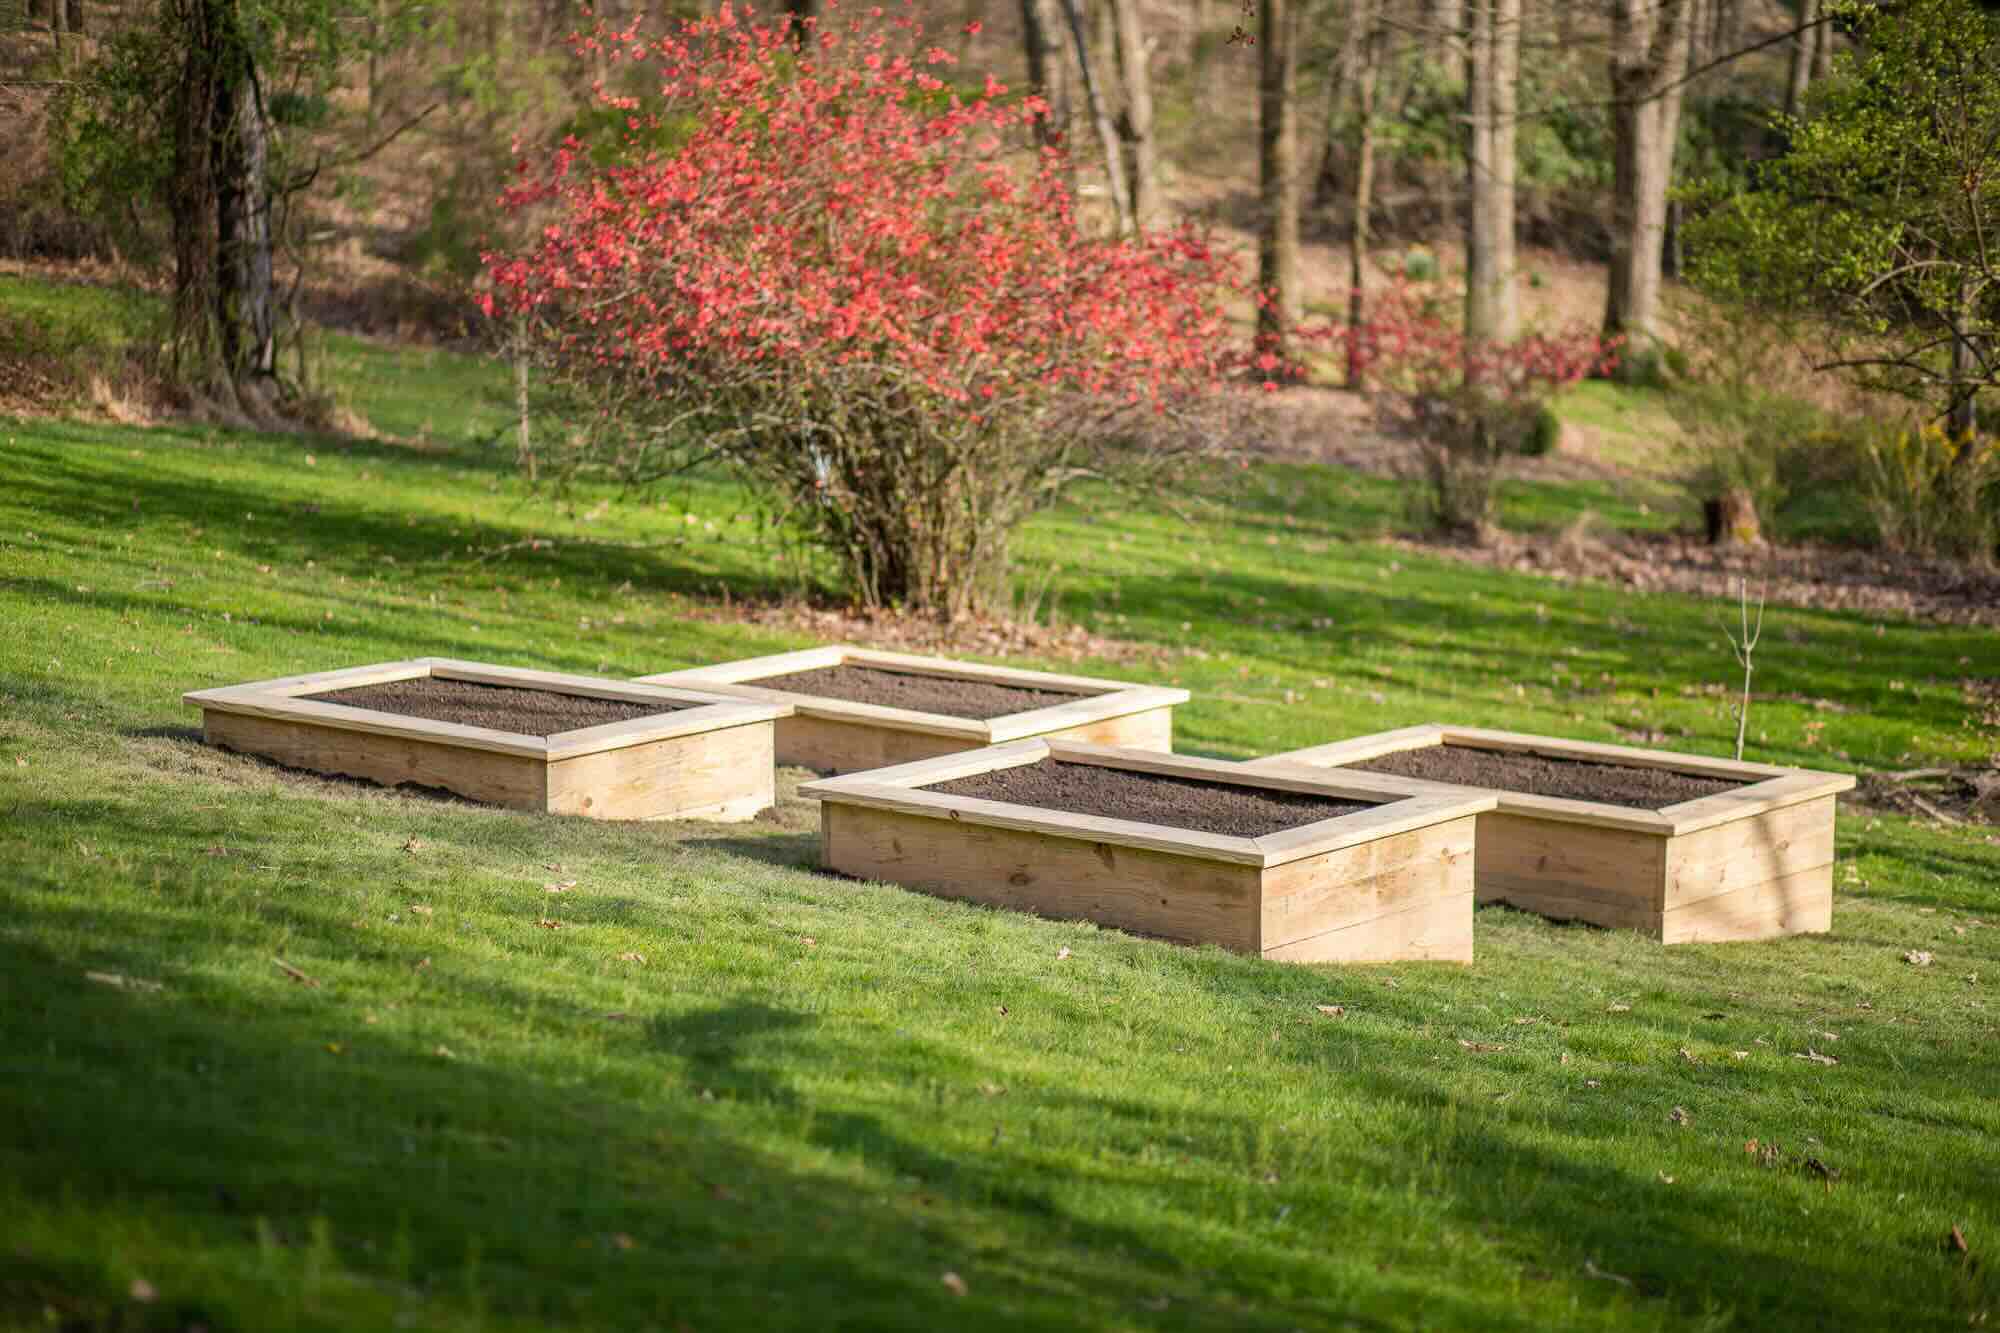
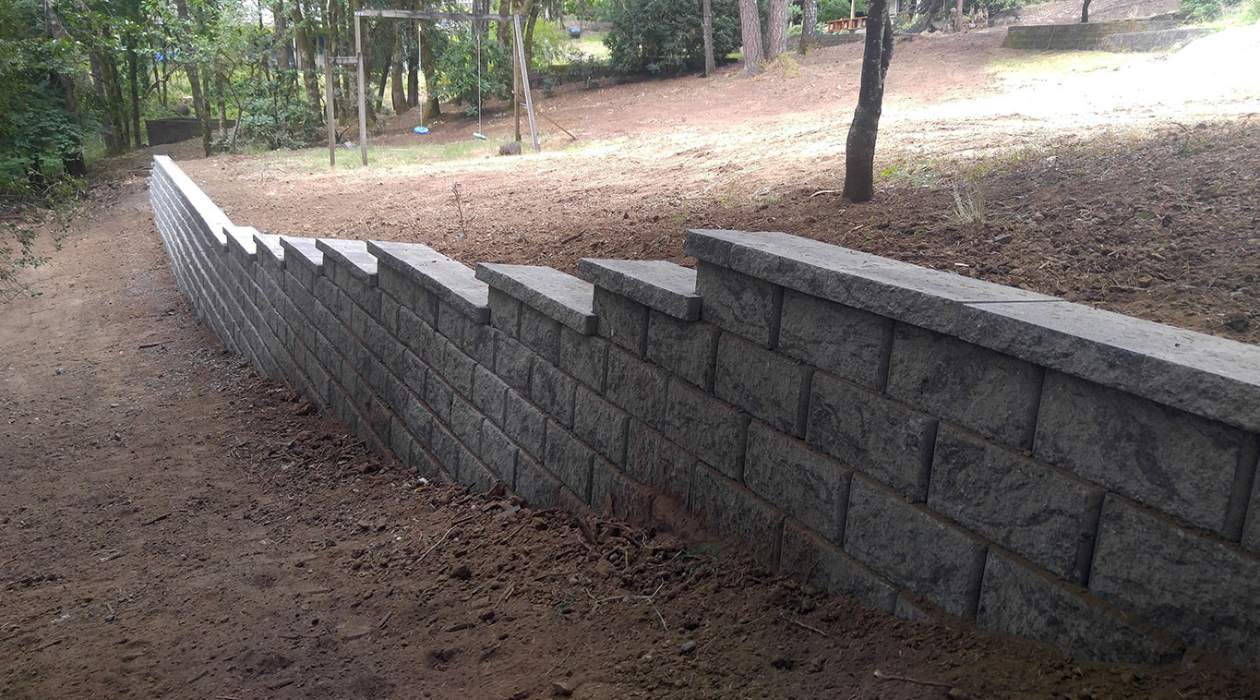
The choice of building materials will largely depend on the desired aesthetic, durability, and compatibility with the surrounding environment. Common options include natural stone, concrete pavers, pressure-treated wood, or composite materials. Each material offers distinct advantages in terms of appearance, longevity, and maintenance requirements, so consider these factors when making your selection.
In addition to the primary building materials, you will need a range of tools to facilitate the construction process. Shovels, a wheelbarrow, a level, measuring tape, a hammer, and safety gear are essential for excavation, leveling the ground, and installing the steps. Depending on the chosen materials, specialized tools such as a masonry saw, a concrete mixer, or a power drill may also be necessary to ensure precise and efficient construction.
Consider the importance of safety equipment, including gloves, safety glasses, and sturdy footwear, to protect yourself during the construction process. Adequate safety measures are crucial when working on outdoor projects, especially when handling heavy materials and using power tools.
If you opt for natural stone or pavers, ensure that you have the required quantity to complete the project, accounting for any potential waste or breakage during installation. For wood-based steps, select pressure-treated lumber or rot-resistant materials to withstand outdoor exposure and minimize maintenance needs over time.
By gathering the right materials and tools before commencing the construction, you set the stage for a smooth and efficient building process, ensuring that you have everything you need to bring your vision of outdoor steps on a slope to fruition.
When building outdoor steps on a slope, make sure to use pressure-treated wood for durability and consider using gravel or sand as a base for stability.
Building a Foundation
The foundation serves as the anchor for the outdoor steps, providing stability and support on the sloped terrain. Establishing a solid and level foundation is a critical step in the construction process, laying the groundwork for the secure installation of the steps and ensuring long-term durability.
Begin by marking the boundaries of the staircase with stakes and string, outlining the area where the foundation will be constructed. Excavate the soil within the marked boundaries to create a level base for the foundation. The depth of excavation will depend on the specific requirements of your chosen building materials and the slope’s incline.
Next, introduce a layer of compacted gravel or crushed stone to the excavated area, creating a stable and well-drained base for the foundation. Use a hand tamper or a mechanical compactor to ensure that the gravel is firmly packed and level, providing a solid footing for the subsequent construction stages.
If you are working with concrete as the foundation material, construct wooden forms to contain the concrete and shape it according to the planned dimensions of the steps. Ensure that the forms are securely braced and level to prevent the concrete from spreading or shifting during pouring and curing.
When pouring concrete, follow the recommended mixing ratios and techniques to achieve a uniform and structurally sound foundation. Use a screed or straight edge to level the surface of the concrete, removing any excess material and creating a smooth and even base for the installation of the steps.
For natural stone or paver-based foundations, carefully lay the stones or pavers in a compacted bed of sand or gravel, ensuring that they are level and properly aligned. Pay close attention to the placement and spacing of the individual stones or pavers, as this will influence the stability and aesthetics of the foundation.
By meticulously constructing a stable and level foundation, you establish a solid footing for the outdoor steps, setting the stage for the subsequent phases of construction and ensuring the longevity and structural integrity of the staircase.
Read more: How To Build Handrails For Outdoor Steps
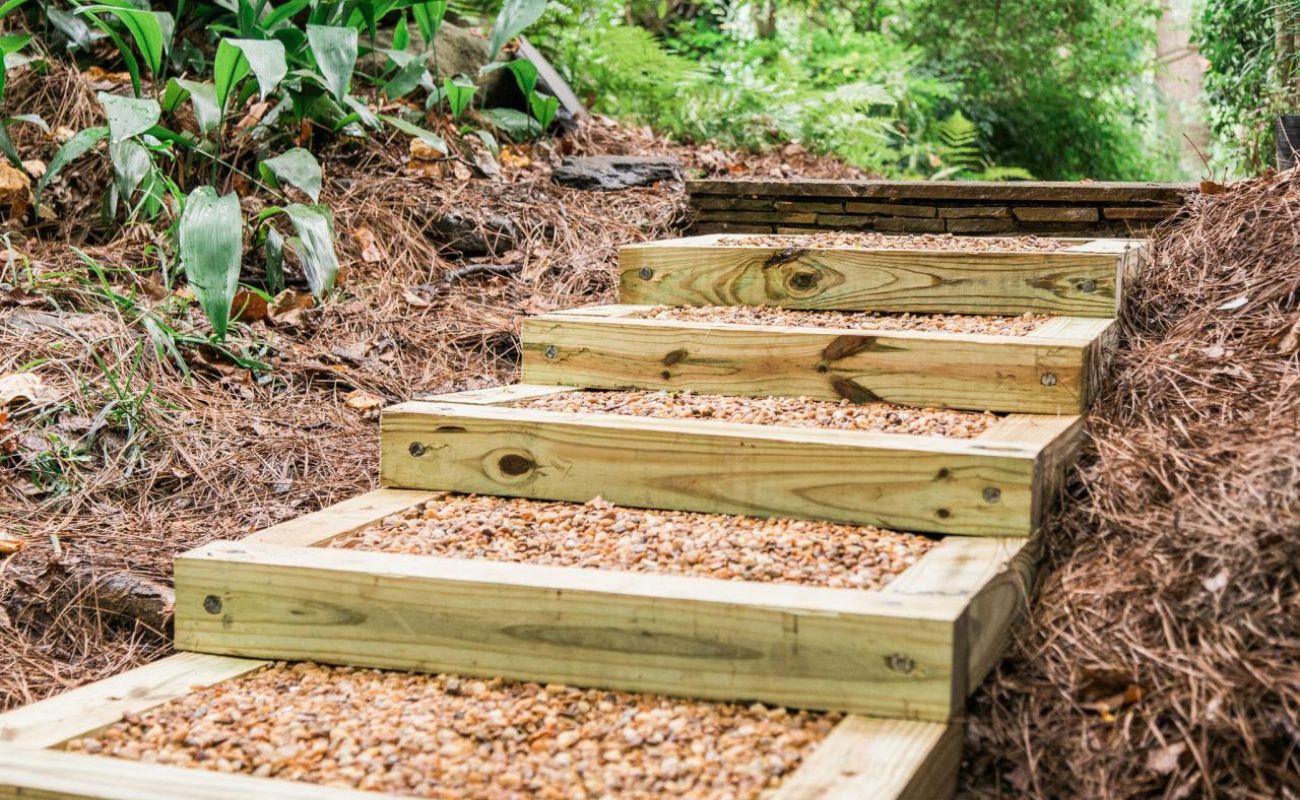
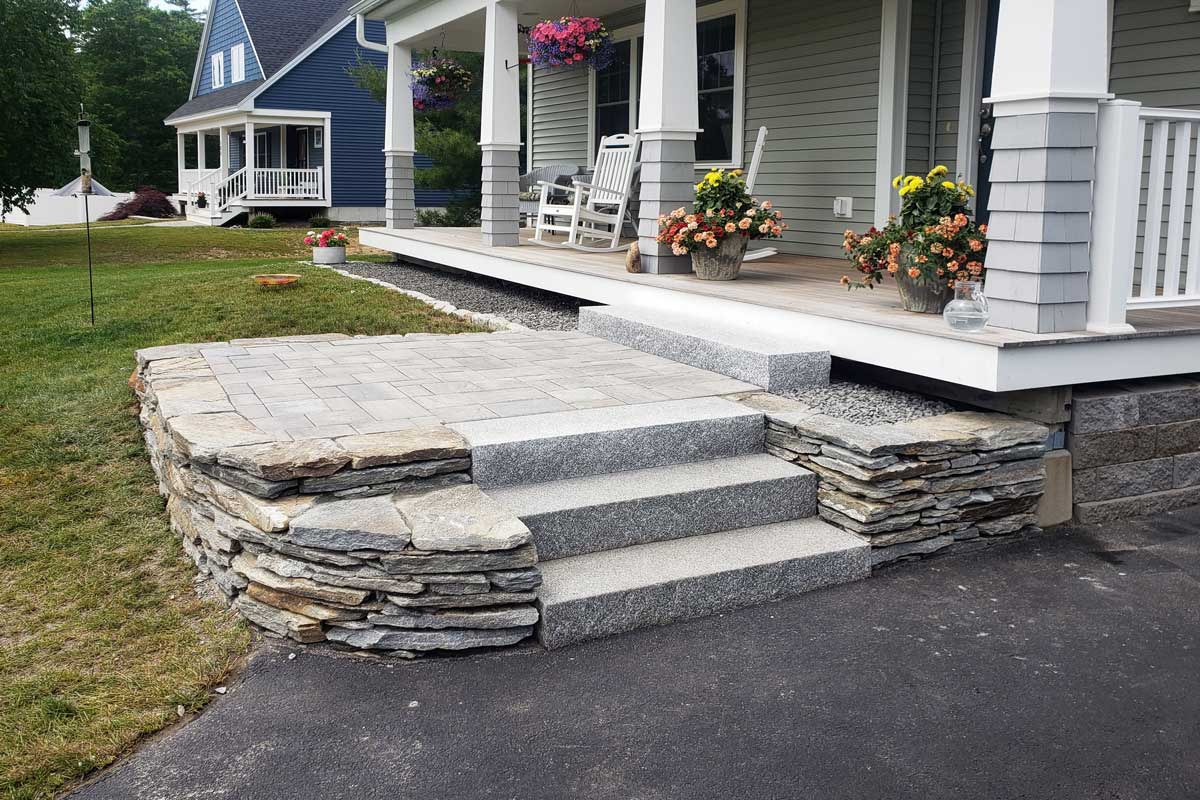
Constructing the Steps
With the foundation in place, it’s time to embark on the construction of the outdoor steps, transforming the carefully prepared terrain into a functional and visually captivating staircase. Whether you’ve opted for natural stone, concrete pavers, or wood, the construction process involves meticulous attention to detail and precision to ensure a seamless and durable result.
If you are working with natural stone or pavers, begin by laying out the individual steps according to the predetermined design, ensuring that they are evenly spaced and aligned. Use a level to verify the evenness of each step, making any necessary adjustments to achieve a uniform rise and run throughout the staircase.
For concrete steps, construct wooden forms to contain the concrete and shape it into the desired dimensions. Ensure that the forms are securely braced and level before pouring the concrete. Follow the recommended mixing and pouring techniques to create solid and well-formed steps, using a trowel to smooth the surface and remove any imperfections.
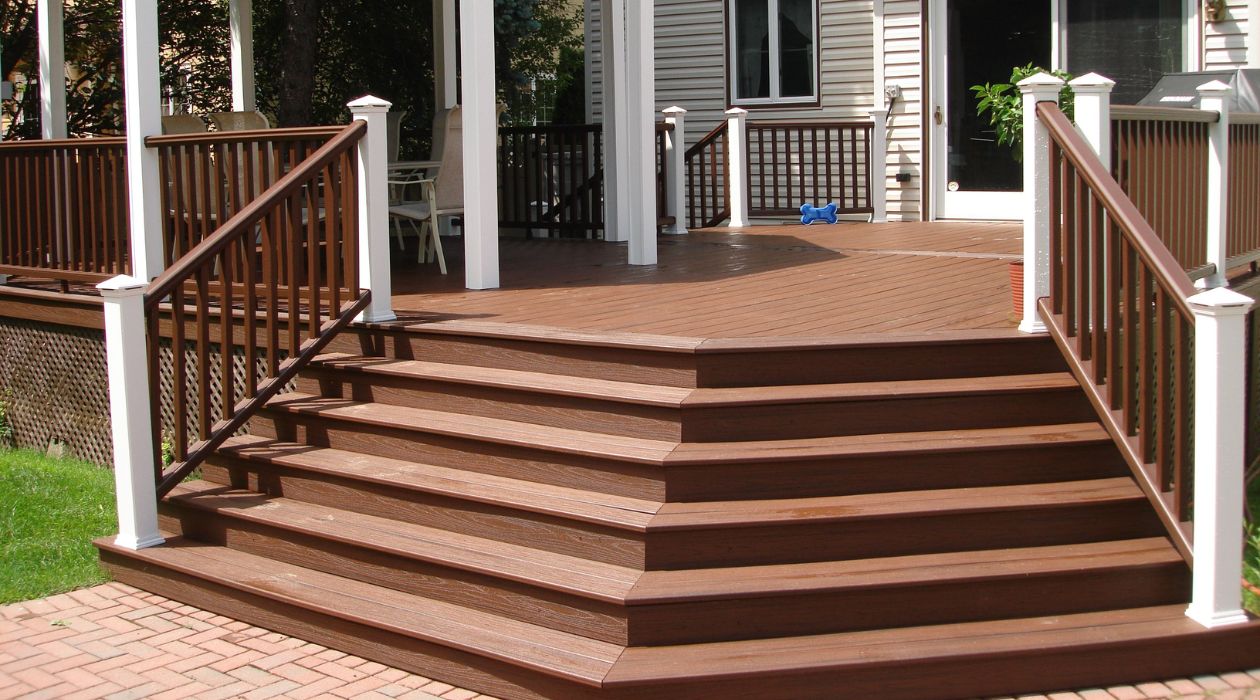
If wood is your material of choice, construct the individual steps using pressure-treated lumber or rot-resistant wood to withstand outdoor exposure. Secure the steps to the foundation using appropriate hardware, ensuring that they are level and securely anchored to provide a stable and safe staircase.
During the construction process, pay attention to the alignment, levelness, and structural integrity of each step, making adjustments as needed to achieve a cohesive and visually pleasing staircase. Take care to maintain consistent spacing and alignment between the steps, creating a smooth and natural flow as users ascend or descend the staircase.
Once the steps are in place, apply any finishing touches or sealants as necessary to enhance their durability and resistance to outdoor elements. Consider adding non-slip treads or coatings to improve safety, especially in areas prone to moisture or inclement weather.
By meticulously constructing each step with precision and attention to detail, you will create a visually stunning and structurally sound staircase that seamlessly integrates with the natural landscape, providing safe and convenient access to your outdoor space.
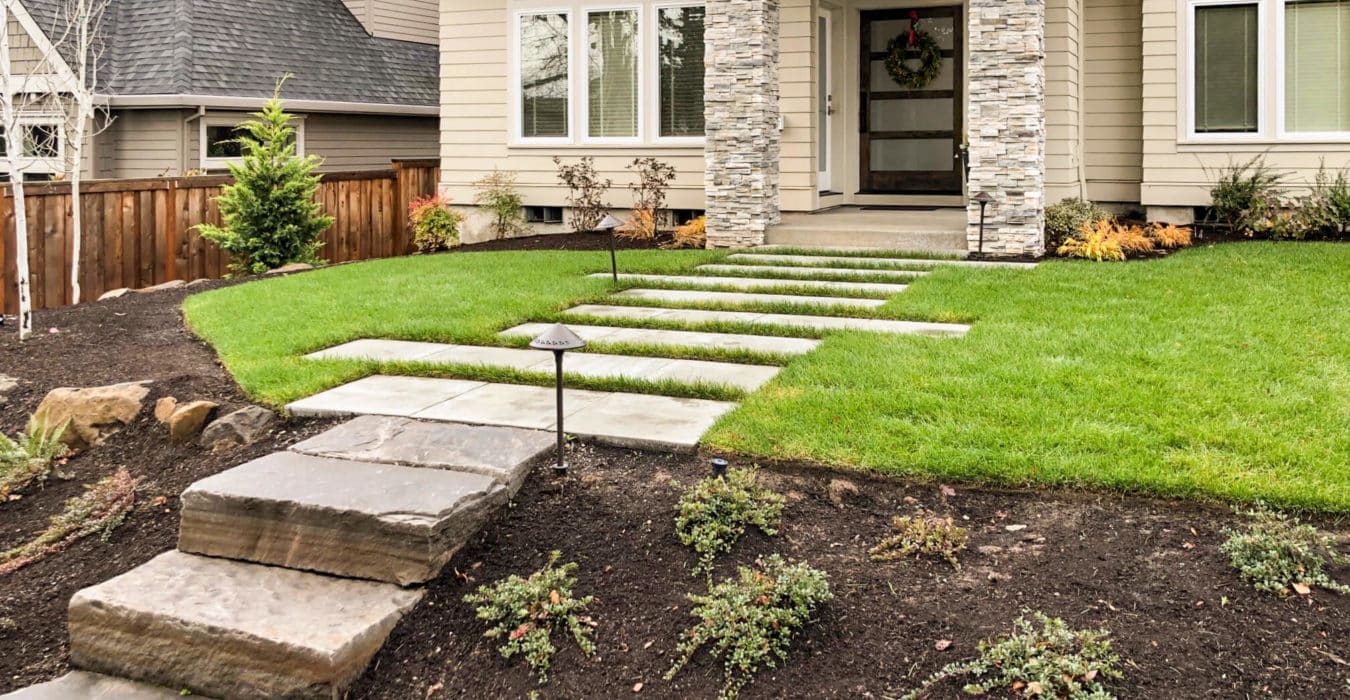
Finishing Touches
As the construction of the outdoor steps nears completion, it’s time to add the finishing touches that will elevate the visual appeal, functionality, and safety of the staircase. These final details contribute to the overall aesthetic and usability of the steps, ensuring that they seamlessly blend with the surrounding environment and provide a secure and inviting passage.
Consider incorporating landscaping elements around the steps to soften their appearance and integrate them harmoniously with the natural surroundings. Planting low-maintenance shrubs, flowers, or ground cover around the base of the staircase can enhance its visual appeal and create a welcoming transition between the steps and the adjacent landscape.
Install lighting fixtures along the steps to improve visibility and safety, especially during evening hours. Solar-powered or low-voltage LED lights can be strategically placed to illuminate the treads and risers, guiding users and accentuating the architectural features of the staircase.
If the steps are constructed in an area prone to moisture or inclement weather, consider applying a protective sealant or non-slip coating to enhance their durability and safety. This additional layer of protection can mitigate the effects of weathering and minimize the risk of slips or falls, especially during wet conditions.
Add handrails or balustrades to provide support and stability, particularly on steeper slopes or in areas where users may benefit from an added sense of security. The design of the handrails should complement the aesthetic of the steps while prioritizing user safety and ease of use.
Finally, take the time to inspect the completed staircase, addressing any minor imperfections or adjustments that may be necessary to ensure its functionality and visual coherence. Verify that the steps are securely anchored, level, and free from any hazards or obstructions that could compromise their usability.
By attending to these finishing touches, you will transform the outdoor steps into a seamless and inviting feature of your outdoor space, combining practicality, safety, and aesthetic appeal to create a striking and functional addition to your landscape.
Conclusion
Congratulations on completing the journey of constructing outdoor steps on a slope! This endeavor has allowed you to transform a challenging terrain feature into a functional and visually captivating element of your outdoor space. Through meticulous planning, precise execution, and attention to detail, you have created a staircase that seamlessly integrates with the natural landscape while providing safe and convenient access.
As you reflect on the construction process, take pride in the craftsmanship and dedication that have culminated in the realization of this project. The outdoor steps on a slope stand as a testament to your creativity, perseverance, and commitment to enhancing your outdoor environment.
Not only do the steps serve a practical purpose, but they also contribute to the overall aesthetic and ambiance of your outdoor space. The careful selection of materials, thoughtful design, and attention to finishing touches have resulted in a visually striking addition that harmonizes with the surrounding landscape.
Furthermore, the completion of this project signifies your ability to overcome challenges and engage in hands-on construction, expanding your skills and knowledge in the realm of outdoor design and construction. The experience gained from building outdoor steps on a slope will undoubtedly empower you to undertake future projects with confidence and ingenuity.
As you enjoy the fruits of your labor, take the time to appreciate the seamless integration of the steps into your outdoor environment. Whether they provide access to a garden, patio, or elevated deck, the steps stand as a testament to your vision and determination to enhance your outdoor living space.
With this project behind you, you are now equipped with the expertise and experience to tackle future outdoor construction endeavors, whether they involve additional landscaping features, hardscaping projects, or other enhancements to your outdoor oasis.
So, take a moment to savor the satisfaction of a job well done and the transformation of a challenging slope into a functional and visually captivating element of your outdoor sanctuary. Your outdoor steps on a slope are not just a construction achievement, but a testament to your creativity, resourcefulness, and dedication to creating a harmonious and inviting outdoor environment.
Ready to elevate your outdoor space even further? After mastering the art of building steps on a slope, consider enhancing your entryway next. Our detailed guide on constructing outdoor wooden steps not only adds charm but also boosts curb appeal. Dive into this project to make a welcoming and impressive entrance. You'll find practical step-by-step instructions that ensure success. Don't miss this chance to make your home stand out!
Frequently Asked Questions about How To Build Outdoor Steps On A Slope
Was this page helpful?
At Storables.com, we guarantee accurate and reliable information. Our content, validated by Expert Board Contributors, is crafted following stringent Editorial Policies. We're committed to providing you with well-researched, expert-backed insights for all your informational needs.


0 thoughts on “How To Build Outdoor Steps On A Slope”