Home>Articles>How Convert A Claw-Foot Tub Showerhead To A Standard
Articles
How Convert A Claw-Foot Tub Showerhead To A Standard
Modified: October 22, 2024
Looking for articles on how to convert a clawfoot tub showerhead to a standard one? Discover helpful tips and step-by-step instructions in this informative guide.
(Many of the links in this article redirect to a specific reviewed product. Your purchase of these products through affiliate links helps to generate commission for Storables.com, at no extra cost. Learn more)
Introduction
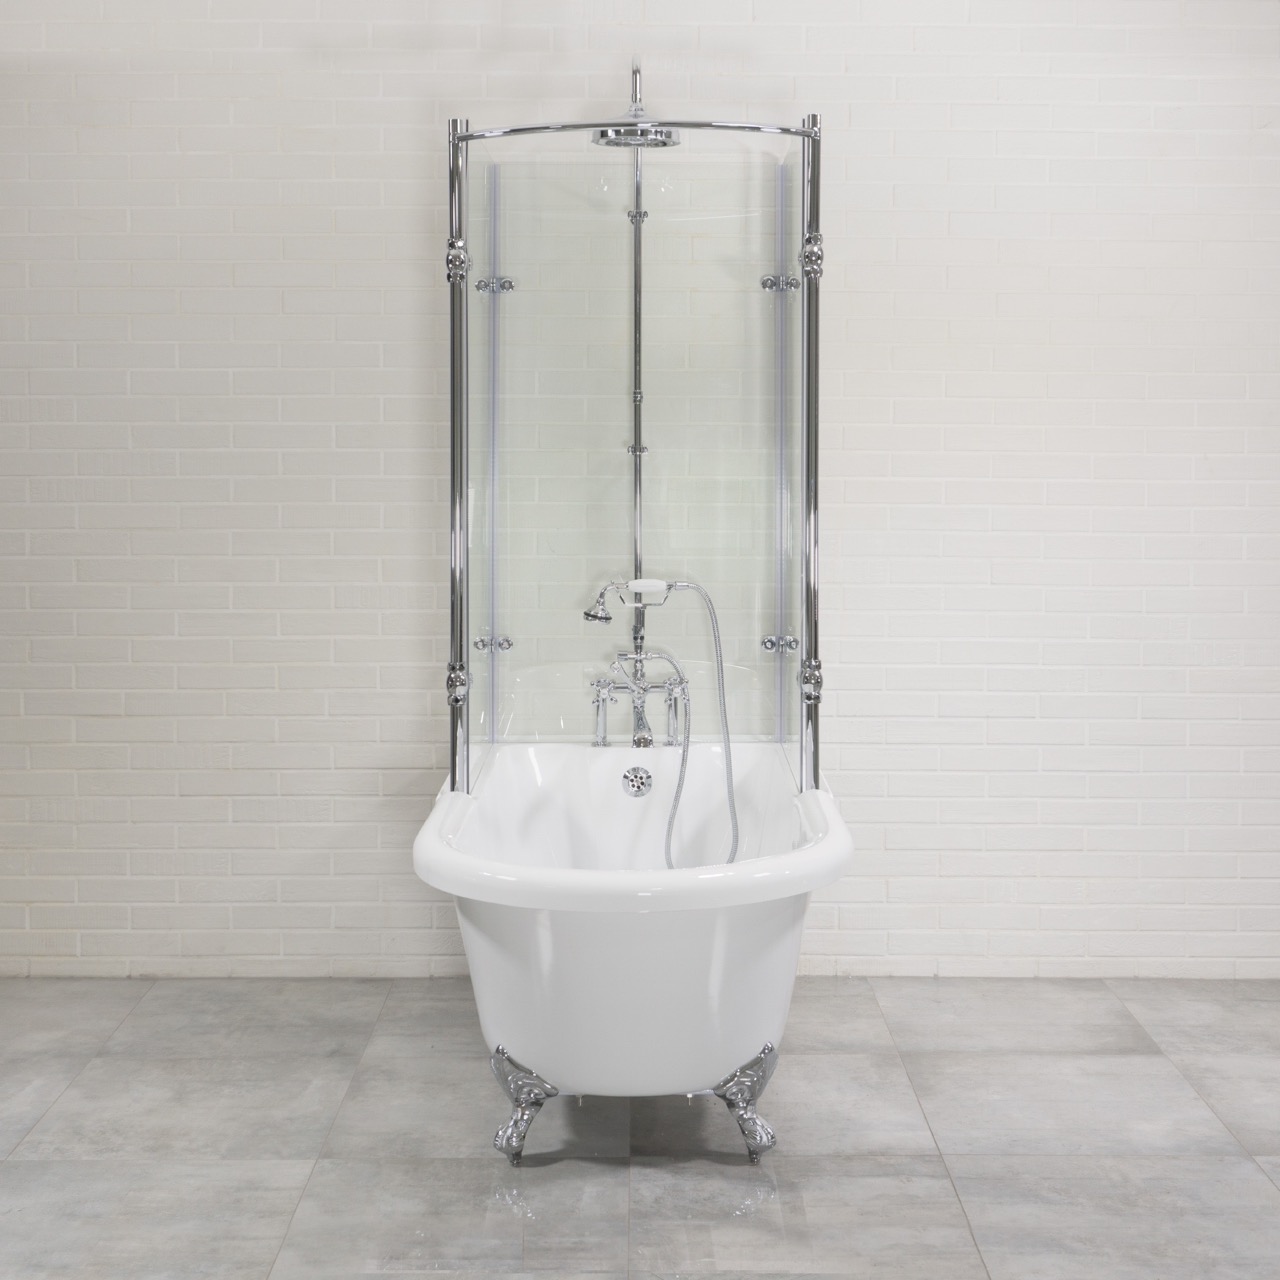
So, you have a beautiful clawfoot tub in your bathroom, but you’re not a fan of the showerhead that’s currently attached to it. You prefer the convenience and functionality of a standard showerhead, and you’re wondering if it’s possible to convert your clawfoot tub showerhead to a standard one. Well, the good news is that it is indeed possible!
Converting a clawfoot tub showerhead to a standard one can be a relatively straightforward process if you have the right tools and a basic understanding of plumbing. In this article, we’ll guide you through the step-by-step instructions to help you make the conversion seamlessly.
Before we dive into the details, it’s important to note that safety should always be a top priority when working with plumbing. If you’re not confident in your abilities or if you’re unsure about any of the steps involved, it’s always best to consult a professional plumber.
Now, let’s gather the necessary tools and materials, and get ready to transform your clawfoot tub showerhead into a standard one!
Key Takeaways:
- Transform your clawfoot tub showerhead to a standard one with the right tools and materials, following step-by-step instructions. Prioritize safety, inspect existing plumbing, and test the new showerhead for a seamless conversion.
- Consider additional tips such as weight support, water pressure regulation, regular cleaning, plumbing regulations, water conservation, and seeking professional help for a successful and satisfying clawfoot tub showerhead conversion.
Safety Precautions
Before you begin the process of converting your clawfoot tub showerhead to a standard one, it’s essential to take some safety precautions to ensure a smooth and accident-free project.
1. Turn off the water supply: Before you start any plumbing work, make sure to turn off the water supply to your bathroom. This will prevent any accidental water leakage or flooding while you’re working on the showerhead.
2. Use protective gear: Plumbing work can involve handling tools and materials that may cause injuries. It’s important to wear protective gear such as safety glasses and gloves to protect your eyes and hands. If you’re working with any chemicals or solvents, make sure to use them in a well-ventilated area and follow the safety instructions provided.
3. Check for leaks: Before removing the existing showerhead, inspect the surrounding plumbing connections for any signs of leaks. If you notice any leaks, it’s best to address them before proceeding with the conversion. Tighten any loose fittings or replace damaged pipes to avoid future issues.
4. Secure the tub: Clawfoot tubs can be heavy and unstable. Make sure that your tub is properly secured and stable before performing any work on it. This will minimize the risk of accidents or injuries during the conversion process.
5. Seek professional help if needed: If you’re unsure about any step or if you’re not comfortable with plumbing work, it’s always best to seek the help of a professional plumber. They have the expertise and knowledge to handle the job safely and efficiently.
By following these safety precautions, you can ensure a safe working environment and minimize the risk of accidents or damage to your bathroom. Now that we’ve covered the safety aspect, let’s move on to the tools and materials you’ll need for the conversion.
Tools and Materials Needed
Before you get started with the conversion process, it’s important to gather all the necessary tools and materials. Having everything prepared beforehand will help streamline the process and ensure that you have everything you need at your fingertips. Here’s a list of the tools and materials you’ll need:
Tools:
- Adjustable wrench
- Pipe wrench
- Plumber’s tape
- Screwdriver
- Drill (if necessary)
- Hacksaw (if necessary)
- Plumbing putty or silicone sealant
Materials:
- Standard showerhead kit
- Shower arm and flange
- Extension nipple (if necessary)
- Plumbing fittings (such as adapters or reducers)
- Plumber’s tape
Make sure to check the compatibility of the materials with your existing plumbing system and the specifications of your clawfoot tub. It’s always a good idea to measure and take note of the dimensions of your tub and the existing showerhead to ensure that the new standard showerhead and fittings will fit seamlessly.
If you’re unsure about any of the tools or materials on this list, consult with a professional or a knowledgeable staff member at your local hardware store. They can provide guidance and recommendations based on your specific needs.
Now that you have all the necessary tools and materials, let’s move on to the step-by-step instructions for converting your clawfoot tub showerhead to a standard one.
Step-by-Step Instructions
Now that you have gathered all the necessary tools and materials, let’s dive into the step-by-step instructions for converting your clawfoot tub showerhead to a standard one. Follow these instructions carefully and take your time to ensure a successful and seamless conversion:
1. Remove the Clawfoot Tub Showerhead:
Using an adjustable wrench, carefully loosen and remove the existing clawfoot tub showerhead. Turn it counterclockwise until it is fully detached from the shower arm. Set the old showerhead aside.
2. Inspect the Existing Plumbing:
Take a close look at the shower arm and the surrounding plumbing connections. Ensure that there are no signs of leaks or damage. If you notice any issues, address them before proceeding with the installation of the standard showerhead.
3. Prepare the Plumbing for Standard Showerhead:
If the existing shower arm is compatible with the standard showerhead kit, you can proceed to the next step. However, if the shower arm is not compatible or if you want to adjust the height or position of the showerhead, you may need to install an extension nipple or additional plumbing fittings. Use a pipe wrench and plumber’s tape to securely attach the extension nipple or fittings as needed.
Read more: How To Add Showerhead To An Existing Tub
4. Install the Standard Showerhead:
Take the standard showerhead kit and follow the manufacturer’s instructions for installation. Typically, this involves applying plumber’s tape to the threaded end of the shower arm to create a tight seal. Then, attach the shower arm and flange provided with the kit onto the shower arm. Finally, screw the standard showerhead onto the shower arm, making sure it is securely tightened.
5. Test the New Showerhead:
Once the standard showerhead is installed, turn on the water supply and test the new showerhead. Check for any leaks or drips and make any necessary adjustments to ensure a proper and consistent flow of water.
And voila! You have successfully converted your clawfoot tub showerhead to a standard one. Enjoy the convenience and functionality of your new showerhead!
Before we conclude, here are a few additional tips and considerations to keep in mind.
Remove the Clawfoot Tub Showerhead
The first step in converting your clawfoot tub showerhead to a standard one is to remove the existing showerhead. Follow these steps to safely and effectively remove the clawfoot tub showerhead:
Gather the Tools:
Before you begin, make sure you have an adjustable wrench or a pair of pliers handy. These tools will help you loosen and remove the showerhead.
Read more: What Is A Standard Size Hot Tub
Turn off the Water Supply:
Locate the water shut-off valve for your bathroom and turn it off. This step is crucial to prevent any water leakage while you’re working on the showerhead.
Remove the Showerhead:
Take the adjustable wrench or pliers and clamp it securely around the base of the showerhead. Make sure to grip it firmly to avoid slipping or damaging the showerhead. Turn the wrench or pliers counterclockwise to loosen the showerhead. Once it’s loose, you can continue unscrewing it by hand until it is fully detached from the shower arm.
Inspect the Shower Arm:
After removing the showerhead, inspect the shower arm for any signs of damage or leaks. Check the threads on the shower arm to ensure they are intact and in good condition. If you notice any issues, such as rust or cracks, you may need to replace the shower arm. However, if the shower arm is in good condition, you can proceed with the conversion.
By carefully following these steps, you will be able to remove the existing clawfoot tub showerhead and prepare the shower arm for the installation of the standard showerhead. Now, let’s move on to the next step and inspect the existing plumbing.
Inspect the Existing Plumbing
Once you have successfully removed the clawfoot tub showerhead, it’s time to inspect the existing plumbing connections. This step will ensure that there are no underlying issues that need to be addressed before proceeding with the conversion to a standard showerhead.
Read more: How To Store Hair Claws
Examine the Shower Arm:
Take a close look at the shower arm, which is the pipe that extends from the wall and where the showerhead is attached. Check for any signs of leaks, corrosion, or damage. If you notice any issues, it’s important to address them before continuing with the installation of the new showerhead. Tighten any loose fittings or replace damaged parts to ensure a secure and leak-free connection.
Check the Surrounding Pipes:
Inspect the pipes that connect to the shower arm. Look for any leaks, cracks, or signs of wear and tear. It’s essential to ensure that the plumbing system is in good condition to prevent any future problems or water damage. If you notice any issues, it’s advisable to consult a professional plumber to assess the situation and make any necessary repairs.
Evaluate the Water Pressure:
While inspecting the existing plumbing, take note of the water pressure in the shower. Low water pressure could indicate a potential problem, such as a clogged pipe or a faulty valve. If you notice a significant decrease in water pressure, it’s best to have it checked and resolved before installing the new showerhead.
By thoroughly inspecting the existing plumbing connections, you can ensure that your bathtub’s plumbing system is in good condition and ready for the installation of a standard showerhead. Now, let’s move on to the next step and prepare the plumbing for the new showerhead.
Prepare the Plumbing for Standard Showerhead
Before you can install the new standard showerhead, it’s essential to prepare the plumbing for a seamless and secure connection. This step involves assessing the compatibility of the existing shower arm and making any necessary adjustments or additions.
Read more: How To Store Claw Clips
Check the Shower Arm Compatibility:
Take a moment to ensure that the existing shower arm is compatible with the standard showerhead you plan to install. Check the size and threading of the shower arm to ensure it matches the specifications of the new showerhead. Most standard showerheads have a ½-inch connection, but it’s always a good idea to double-check.
Make Adjustments if Needed:
If the existing shower arm is not compatible with the standard showerhead, or if you want to adjust the height or position of the showerhead, you may need to make some adjustments. This can be done by installing an extension nipple or additional plumbing fittings.
Attach the Extension Nipple or Fittings:
If you need to extend the length of the shower arm or create a different angle for the new showerhead, you can do so by attaching an extension nipple or additional plumbing fittings. Use a pipe wrench and plumber’s tape to securely attach the extension nipple or fittings as needed. Ensure that they are tight and properly sealed to avoid any leaks.
Add Plumber’s Tape:
To create a watertight seal, wrap plumber’s tape around the threaded end of the shower arm. This will help prevent any leaks or drips once the new showerhead is attached. Wrap the tape around the threads in a clockwise direction, overlapping the tape as you go. Make sure to cover the entire threaded area.
By preparing the plumbing for the new standard showerhead, you are ensuring a smooth and secure installation. Once you have made the necessary adjustments and added plumber’s tape, you are ready to move on to the exciting step of installing the standard showerhead.
Read more: How To Store Stone Crab Claws
Install the Standard Showerhead
With the plumbing prepared and ready, it’s time to install the new standard showerhead. Follow these steps to ensure a proper and secure installation:
1. Apply Plumber’s Tape:
Before attaching the new showerhead, apply a layer of plumber’s tape to the threaded end of the shower arm. This tape will create a tight seal and prevent any leaks. Wrap the tape in a clockwise direction, overlapping the tape as you go. Make sure to completely cover the threaded area with the tape.
2. Attach the Shower Arm and Flange:
Take the shower arm and flange included in your standard showerhead kit. Slide the flange onto the shower arm and push it against the wall. Then, screw the shower arm onto the threaded end of the shower arm. Use a wrench or pliers to tighten it securely. Make sure not to overtighten, as it may damage the threads or create leaks.
3. Screw on the New Showerhead:
Take the new standard showerhead and screw it onto the threaded end of the shower arm. Again, use a wrench or pliers to tighten it firmly. Make sure not to overtighten, as it may cause damage to the showerhead or the threads.
Read more: How To Convert A Printer To Sublimation
4. Check for Leaks:
Once the new showerhead is securely attached, turn on the water supply and check for any leaks or drips. Pay close attention to the connections between the showerhead, shower arm, and flange. If you notice any leaks, try tightening the connections further. If the leaks persist, you may need to disassemble and reapply plumber’s tape or consult a professional plumber for assistance.
5. Adjust the Showerhead Position:
If necessary, adjust the position of the showerhead to your desired angle and height. Most standard showerheads have a swivel joint that allows for easy adjustment. Experiment with different positions until you find the one that suits your preferences.
By following these steps, you can successfully install the new standard showerhead in your clawfoot tub. Now, it’s time for the final step – testing the new showerhead.
Test the New Showerhead
After installing the new standard showerhead, it’s important to test it to ensure that it is functioning properly and meets your expectations. Follow these steps to test your new showerhead:
1. Turn on the Water Supply:
Turn on the water supply to your bathroom by opening the shut-off valve. This will allow water to flow through the plumbing system and to the new showerhead.
Read more: How To Convert An Attic Into A Room
2. Check for Proper Water Flow:
Once the water is flowing, check if the water flow from the new showerhead is consistent and at the desired pressure. Adjust the showerhead settings, if applicable, to switch between different spray patterns and test the water flow in each mode.
3. Look for Leaks:
Inspect the connections between the showerhead and the shower arm, as well as the shower arm and flange, for any signs of leakage. Run your hand along the connections to feel for any water drops or moisture. If you notice any leaks, try tightening the connections further or reapplying plumber’s tape.
4. Evaluate Showerhead Performance:
Step into the shower and assess how well the new showerhead performs. Pay attention to factors such as water coverage, pressure, and ease of use. Adjust the position of the showerhead, if needed, to optimize your showering experience.
5. Make Necessary Adjustments:
If you’re not satisfied with the performance of the new showerhead or if you encounter any issues, consider making adjustments. This can include repositioning the showerhead, checking for clogs in the showerhead nozzles, or consulting with a professional plumber for further assistance.
By testing the new showerhead, you can ensure that it is functioning properly and delivering a satisfying showering experience. Once you’re satisfied with the performance, congratulations – you’ve successfully converted your clawfoot tub showerhead to a standard one!
Now, let’s wrap up with a few additional tips and considerations to keep in mind during and after the conversion process.
Read more: How To Convert A Shed Into An Office
Conclusion
Converting your clawfoot tub showerhead to a standard one can greatly enhance the functionality and convenience of your bathing experience. With the right tools, materials, and knowledge, you can successfully complete this project and enjoy the benefits of a modern showerhead.
Throughout this article, we discussed the step-by-step instructions for converting your clawfoot tub showerhead to a standard one. From removing the existing showerhead to preparing the plumbing and installing the new showerhead, each step was designed to help you achieve a seamless and secure conversion.
It’s important to prioritize safety during the entire process, such as turning off the water supply and wearing protective gear. If at any point you are unsure or uncomfortable, it’s always best to consult a professional plumber for assistance.
Remember to inspect the existing plumbing connections for any signs of leaks or damage, as well as to adjust or replace them if necessary. Properly applying plumber’s tape and ensuring tight connections will help prevent any future leaks or drips.
By testing the new showerhead after installation, you can ensure that it is functioning properly and meeting your expectations in terms of water flow and pressure. Adjustments can be made as needed to optimize your showering experience.
Converting a clawfoot tub showerhead to a standard one requires some effort and attention to detail, but the results can be well worth it. Enjoy the convenience, versatility, and improved functionality of your new standard showerhead as you indulge in relaxing showers or refreshing baths.
As a final tip, remember to regularly check and maintain your new showerhead to ensure its longevity and optimal performance. Keep an eye out for any clogs, clean the showerhead as needed, and address any leaks or issues promptly to prevent further damage.
Now, armed with the knowledge and instructions provided, you can confidently embark on your clawfoot tub showerhead conversion project. Best of luck, and may your newfound showering experience bring you joy and satisfaction for years to come!
Additional Tips and Considerations
As you complete the conversion of your clawfoot tub showerhead to a standard one, here are some additional tips and considerations to keep in mind:
Consider the Weight:
Standard showerheads are generally heavier than clawfoot tub showerheads. Ensure that the shower arm and the plumbing system can support the weight of the new showerhead. If needed, reinforce the shower arm or consult a professional to ensure a safe and secure installation.
Water Pressure Regulation:
If you experience inconsistent water pressure or low flow after installing the new showerhead, you may need to install a pressure regulator or consult with a professional plumber. This will help ensure a consistent and enjoyable showering experience.
Read more: How To Convert A Shed Into A Salon
Clean the Showerhead Regularly:
To maintain optimal performance and prevent clogs, clean the showerhead regularly. Soak the showerhead in a mixture of vinegar and water to remove mineral deposits and debris. This will help ensure a steady flow of water and extend the lifespan of the showerhead.
Check for Any Plumbing Restrictions:
Before making any modifications to your plumbing system, check local building codes and regulations. Certain areas may have specific guidelines or restrictions regarding plumbing modifications. It’s crucial to comply with these regulations to avoid any legal or structural issues.
Consider Water Conservation:
If environmental sustainability is a priority, consider installing a water-saving showerhead. These showerheads reduce water consumption without compromising on water pressure or comfort. Look for showerheads with the WaterSense label, which indicate their compliance with water efficiency standards.
Consult a Professional Plumber if Needed:
If you encounter any challenges or are unsure about any step of the conversion process, consult a professional plumber. They have the expertise and knowledge to guide you through the process and ensure a successful installation.
By considering these additional tips and taking the necessary precautions, you can navigate the conversion process with confidence and maximize the benefits of your new standard showerhead.
Enjoy your transformed bathing experience and revel in the convenience and functionality that a standard showerhead brings to your clawfoot tub!
Frequently Asked Questions about How Convert A Claw-Foot Tub Showerhead To A Standard
Was this page helpful?
At Storables.com, we guarantee accurate and reliable information. Our content, validated by Expert Board Contributors, is crafted following stringent Editorial Policies. We're committed to providing you with well-researched, expert-backed insights for all your informational needs.
0 thoughts on “How Convert A Claw-Foot Tub Showerhead To A Standard”