Articles
How To Add Showerhead To An Existing Tub
Modified: September 2, 2024
Learn how to add a showerhead to your existing tub with these articles. Find step-by-step instructions and helpful tips for a successful installation.
(Many of the links in this article redirect to a specific reviewed product. Your purchase of these products through affiliate links helps to generate commission for Storables.com, at no extra cost. Learn more)
Introduction
Are you tired of taking baths and wish you could enjoy the convenience and comfort of a shower? Adding a showerhead to your existing tub can provide you with the best of both worlds. It allows you to easily switch between bathing and showering, giving you the flexibility to choose what suits your needs and preferences.
Whether you’re looking to upgrade your bathroom or improve its functionality, adding a showerhead to your tub can be a relatively simple and cost-effective solution. In this article, we will guide you through the process of adding a showerhead to your existing tub, providing you with step-by-step instructions and essential tips to ensure a successful installation.
Before diving into the installation process, it’s important to assess your tub to determine if it’s suitable for a showerhead addition. Some tubs are designed specifically for showers, while others may require additional modifications to accommodate a showerhead.
In the following sections, we will cover the essential steps involved in adding a showerhead to your existing tub. From choosing the right showerhead to preparing the tub and installing the necessary hardware, we will provide you with all the information you need to successfully complete this project.
However, before embarking on any DIY project, it’s important to note that plumbing tasks can be complex and may require professional assistance. If you’re unsure about your plumbing skills or encounter any difficulties during the installation process, don’t hesitate to reach out to a licensed plumber for assistance.
Now that you understand the basics, let’s get started on adding a showerhead to your existing tub and bring a new level of convenience and comfort to your bathing experience.
Key Takeaways:
- Adding a showerhead to your existing tub can provide the best of both worlds, allowing you to easily switch between bathing and showering for a versatile and convenient bathing experience.
- Thoroughly assessing your tub’s compatibility, choosing the right showerhead, and properly preparing the tub are crucial steps to ensure a successful and satisfying showerhead installation.
Read more: How To Add Onto An Existing Shed
Assessing your Tub
Before adding a showerhead to your existing tub, it’s crucial to assess its compatibility and suitability for the installation. There are several factors to consider during the assessment process to ensure a successful and safe showerhead addition.
The first thing to examine is the construction of your tub. Determine if your tub is made of materials that can withstand the water pressure and weight of a showerhead. Most standard tubs, such as acrylic, fiberglass, or porcelain-enameled steel, are suitable for installing a showerhead.
Next, assess the available space in your bathroom. Measure the distance between the tub walls to ensure there is enough space for a comfortable showering experience. Additionally, consider the proximity of any immovable fixtures, such as toilets or sinks, as they may hinder the installation process.
Another crucial aspect to consider is the plumbing system in your bathroom. Check if your tub already has a dedicated water supply and drain for a showerhead. If not, you may need to hire a professional plumber to modify the plumbing and install the necessary connections.
Additionally, evaluate the structural integrity of your bathroom walls. If your tub is located near a shared wall or a room with valuable belongings, consider the impact of potential water damage. Ensure that the showerhead installation will not compromise the integrity of the walls or cause any leaks.
Lastly, factor in your personal needs and preferences. Consider the purpose of the showerhead addition and how it will enhance your bathing experience. Take into account any specific features you desire, such as adjustable spray settings or handheld capabilities.
By thoroughly assessing your tub, space, plumbing, and personal preferences, you can determine if adding a showerhead to your existing tub is feasible and beneficial. It’s always a good idea to consult with a professional plumber if you have any doubts or concerns about the compatibility of your tub for this project.
Choosing the Right Showerhead
When it comes to adding a showerhead to your existing tub, selecting the right one is crucial to ensure a satisfying and enjoyable showering experience. With countless options available in the market, it’s important to consider your specific needs and preferences before making a final decision.
Here are some factors to keep in mind while choosing the right showerhead for your tub:
- Spray Pattern: Consider the spray patterns available. Some common options include rain, massage, mist, and a combination of different patterns. Think about the type of showering experience you prefer and choose a showerhead that offers the desired spray pattern.
- Water Pressure: Check the water pressure in your bathroom. If you have low water pressure, look for a showerhead specifically designed to increase the pressure. On the other hand, if your water pressure is high, choose a showerhead with adjustable settings to regulate the flow.
- Water Conservation: If you’re conscious about water consumption, consider a showerhead that is designed to conserve water while providing a satisfying showering experience. Look for models that are certified for their water-saving features.
- Handheld or Fixed: Decide whether you prefer a fixed showerhead or a handheld one. Fixed showerheads are mounted on the wall, while handheld showerheads have a detachable hose, allowing for more flexibility and convenience.
- Materials: Consider the materials used in the construction of the showerhead. Opt for high-quality materials that are resistant to rust and corrosion for enhanced durability and longevity.
- Budget: Determine your budget for the showerhead installation. Showerheads are available in a wide range of prices, so it’s important to find one that fits within your budget while still meeting your desired specifications.
- Reviews and Recommendations: Read customer reviews and seek recommendations from friends or family who have installed showerheads in their tubs. Their insights can provide valuable information about the performance, usability, and durability of different models.
By considering these factors, you can narrow down your options and choose a showerhead that aligns with your preferences and requirements. Remember, investing in a high-quality showerhead will ensure years of enjoyable and satisfying showers.
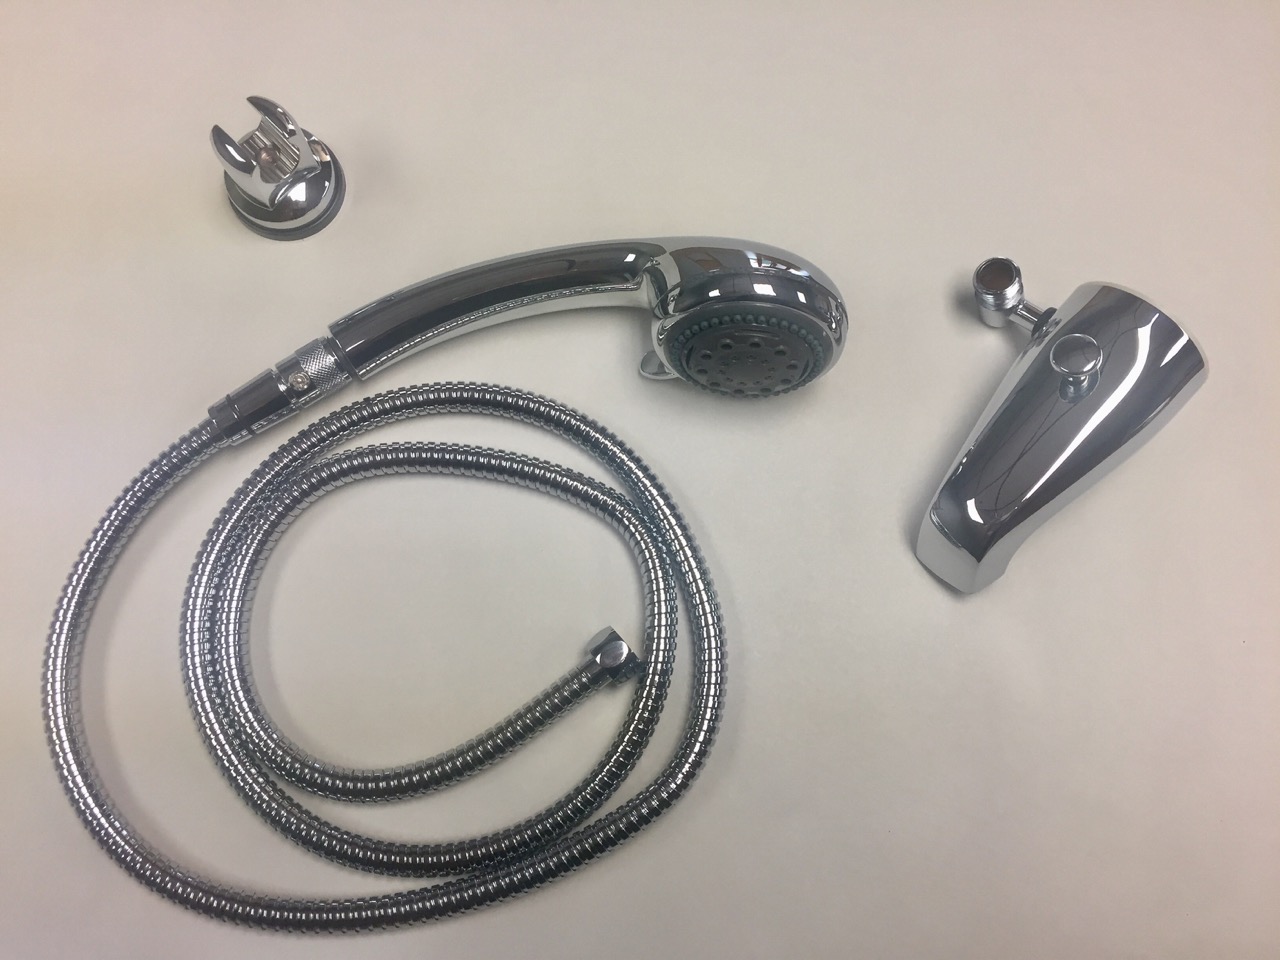
Gathering the Necessary Tools and Materials
Before you begin the installation process, it’s important to gather all the necessary tools and materials to ensure a smooth and efficient process. Having everything in place beforehand will save you time and prevent any unnecessary delays or interruptions during the installation.
Here’s a list of common tools and materials you’ll need:
- Adjustable Wrench: This tool will be used to tighten and secure various connections, such as the shower arm and the showerhead.
- Teflon Tape: Also known as plumber’s tape, this is used to create a watertight seal on threaded connections to prevent leaks.
- Screwdriver: Depending on your specific showerhead and tub configuration, you may need a screwdriver for certain parts of the installation process.
- Shower Arm: This is the pipe that extends from the wall and holds the showerhead in place. Make sure to choose a shower arm that is compatible with your tub and desired showerhead.
- Showerhead: Select the showerhead that best suits your preferences and needs, based on the factors discussed in the previous section. Ensure that the chosen showerhead is compatible with the shower arm and tub.
- Tub Spout Diverter (optional): If you want the flexibility to switch between the showerhead and the tub spout, you may need a tub spout diverter. This device allows you to redirect the water flow between the showerhead and the tub spout.
- Plumber’s Putty or Silicone Sealant (optional): Depending on your tub and showerhead configuration, you may need to use plumber’s putty or silicone sealant to create a waterproof seal around the shower arm or other connections.
Ensure that you have all these tools and materials readily available before starting the installation process. It’s always a good idea to double-check the compatibility and specifications of the showerhead, shower arm, and any other components to avoid any last-minute complications.
By being well-prepared and having all the necessary tools and materials at hand, you’ll be able to complete the showerhead installation smoothly, efficiently, and without any unnecessary delays.
Preparing the Tub
Before you can install the showerhead, it’s important to properly prepare your tub to ensure a secure and watertight installation. Taking the time to prepare the tub will help prevent leaks and ensure a long-lasting and functional showerhead addition.
Here are the steps to follow in preparing the tub:
- Clean the Tub: Thoroughly clean the area around the tub where the showerhead will be installed. Remove any dirt, grime, or residue using a mild cleanser or soap. Rinse the area and let it dry completely before proceeding.
- Remove any Existing Hardware: If there is any existing hardware, such as a tub spout or showerhead, that needs to be replaced or removed, do so before proceeding with the installation. Follow the manufacturer’s instructions for proper removal.
- Inspect the Tub: Carefully inspect the area where the showerhead will be installed. Check for any cracks, chips, or damages to the tub. If you notice any issues, it’s important to address them before proceeding with the installation.
- Apply Plumber’s Putty or Silicone Sealant (if necessary): Depending on the type of tub and showerhead configuration, you may need to apply a small amount of plumber’s putty or silicone sealant around the base of the shower arm or other connections. This will create a waterproof seal and prevent any potential leaks.
- Attach a Tub Spout Diverter (if necessary): If you plan to have both a showerhead and a tub spout, you may need to install a tub spout diverter. Follow the manufacturer’s instructions to properly attach it to the tub spout.
- Seal any Gaps: Double-check for any gaps or spaces around the tub where water could potentially leak. Use caulking or sealing material to fill in these gaps and create a watertight seal.
- Let it Cure: If you have applied plumber’s putty or silicone sealant, allow it to cure as per the manufacturer’s instructions. This ensures that the sealant fully sets and provides maximum effectiveness.
By following these preparation steps, you’ll create a solid foundation for installing the showerhead and minimize the risk of any leaks or damages to your tub. Taking the time to properly prepare the tub will ensure a successful installation and a hassle-free showering experience.
When adding a showerhead to an existing tub, make sure to choose a showerhead with a diverter that can be easily attached to the existing tub faucet. This will allow you to switch between the showerhead and the tub faucet as needed.
Read more: How To Add A Dormer To An Existing Roof
Installing the Shower Arm
Once your tub is properly prepared, you can proceed with installing the shower arm. The shower arm is the pipe that extends from the wall and holds the showerhead in place. Follow these steps to install the shower arm:
- Measure and Mark: Measure the desired height for your showerhead and mark the spot on the wall where the shower arm will be installed. Ensure that the height is comfortable for showering and allows for adequate clearance.
- Locate the Stud: To provide a strong and secure installation, it is recommended to secure the shower arm to a stud in the wall. Use a stud finder to locate the nearest stud behind the marked spot on the wall.
- Drill Pilot Hole: Use an appropriate-sized drill bit to create a pilot hole at the marked spot. Ensure that the hole is centered on the stud and at a level position.
- Insert Wall Anchor (if necessary): If there is no stud located directly behind the pilot hole, insert a wall anchor into the hole. This will provide stability for the shower arm by anchoring it securely to the wall.
- Insert Shower Arm: Apply a small amount of plumber’s putty or silicone sealant to the threaded end of the shower arm. Insert the arm into the pilot hole, making sure it is aligned properly and level with the wall. If using a wall anchor, ensure the shower arm is seated securely in place.
- Tighten the Shower Arm: Using an adjustable wrench or pliers, tighten the shower arm by turning it clockwise until it is snug against the wall. Be careful not to over-tighten, as this could damage the plumbing or cause leaks.
- Attach Flange (if necessary): Some shower arms may come with a flange that provides a decorative cover where the arm meets the wall. If your shower arm includes a flange, follow the manufacturer’s instructions to attach it securely.
- Apply Teflon Tape: To ensure a watertight seal and prevent leaks, wrap Teflon tape around the threaded end of the shower arm. This helps create a tight seal when attaching the showerhead.
By following these steps, you can successfully install the shower arm and create a sturdy base for your showerhead. Before proceeding to the next step, make sure the shower arm is securely attached to the wall and properly aligned with the marked spot.
Attaching the Showerhead
With the shower arm securely installed, you are now ready to attach the showerhead. Follow these steps to properly attach the showerhead to the shower arm:
- Remove any Protective Coverings: If your showerhead comes with any protective coverings, such as plastic caps or rubber gaskets, remove them before attaching it to the shower arm.
- Inspect the Showerhead: Take a moment to inspect the showerhead for any damage or defects. Ensure that all the components are present and in good condition.
- Apply Teflon Tape: Wrap Teflon tape around the threaded end of the shower arm to create a tight seal. This helps to prevent any potential leaks.
- Screw On the Showerhead: Carefully screw the showerhead onto the threaded end of the shower arm. Turn it clockwise until it is snug and securely attached.
- Tighten with an Adjustable Wrench: To ensure a tight and secure fit, use an adjustable wrench to further tighten the connection between the showerhead and the shower arm. Be cautious not to overtighten and damage the threads or the showerhead.
- Adjust the Position: Once the showerhead is attached, adjust its position to ensure optimal water flow and coverage. This may involve tilting or angling the showerhead to your preferred position.
- Check for Leaks: Turn on the water supply and carefully check for any leaks around the showerhead connection. If you notice any leaks, use the adjustable wrench to tighten the connection further or apply additional Teflon tape to create a tighter seal.
- Test the Showerhead: With the showerhead securely attached and no leaks present, turn on the water and test the showerhead. Ensure that the water flows smoothly and the desired spray pattern is achieved. Make any necessary adjustments to the showerhead’s settings or position as needed.
By following these steps, you can successfully attach the showerhead to the shower arm and ensure a secure and functional connection. Remember to check for leaks and make any necessary adjustments to guarantee the best showering experience.
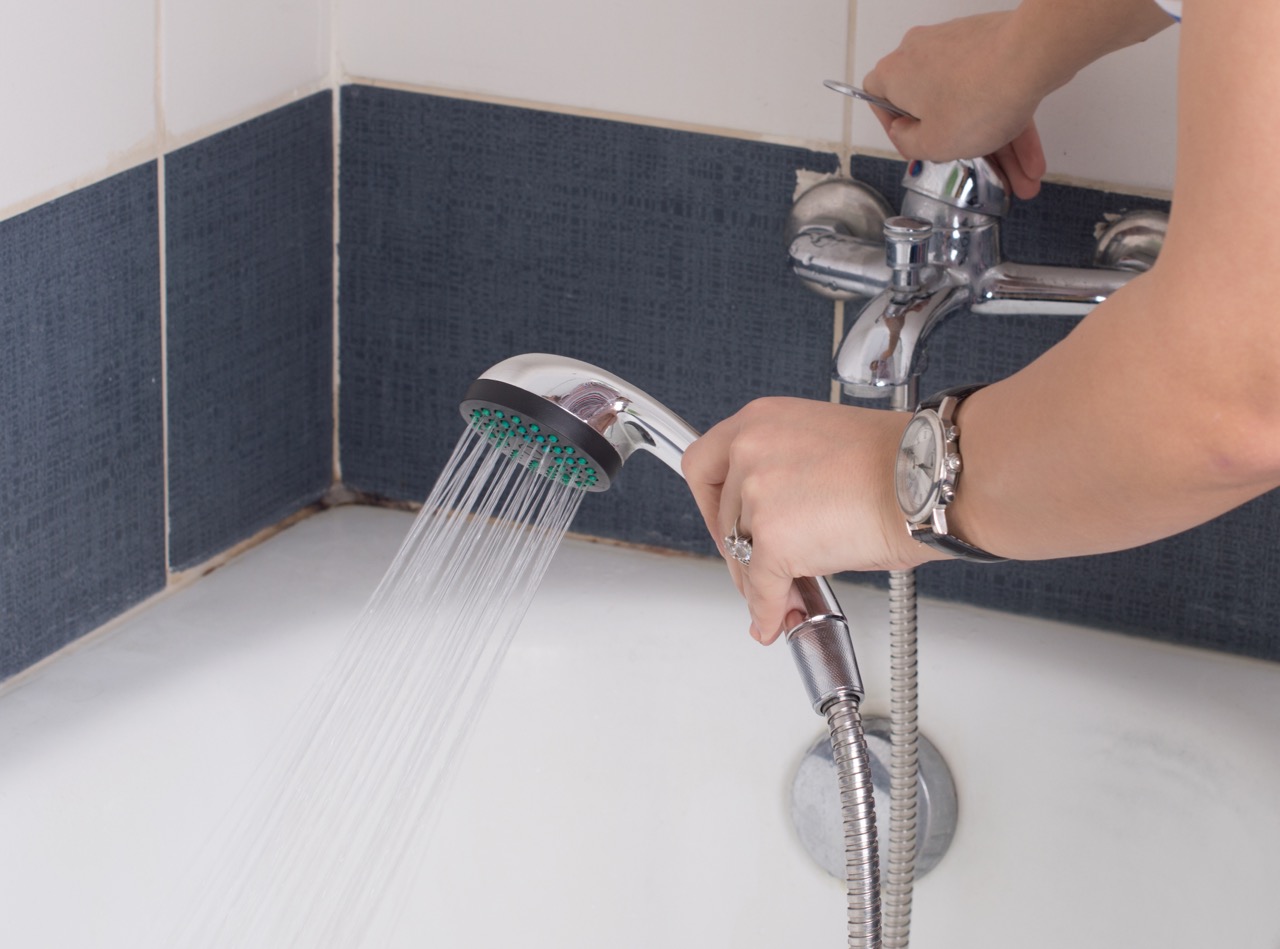
Testing the Showerhead
After attaching the showerhead to the shower arm, it’s crucial to test it to ensure that it is functioning properly and providing a satisfactory showering experience. Performing a thorough test will help you identify any issues or adjustments that need to be made. Follow these steps to test the showerhead:
- Turn on the Water: Turn on the water supply to the showerhead. Start with a moderate water flow to begin testing.
- Check for Leaks: Observe the connection between the showerhead and the shower arm for any signs of leaks. Ensure that water is not escaping from the connection point or any other areas of the showerhead. If leaks are present, use an adjustable wrench to tighten the connection or apply additional Teflon tape to create a better seal.
- Adjust the Spray Pattern: If your showerhead has adjustable settings, switch between different spray patterns to find the one that suits your preference. Test each setting to ensure that water flows evenly and that the spray covers the desired area effectively.
- Check Water Pressure: Pay attention to the water pressure coming from the showerhead. Ensure that it is sufficient for a comfortable showering experience. If the water pressure is too low, check for any obstructions or clogs in the showerhead or the shower arm. If necessary, clean them to improve water flow.
- Adjust the Position: Take note of the position of the showerhead during the test. If necessary, adjust the position to ensure optimal water flow and coverage. This may involve tilting or angling the showerhead to your desired position.
- Test Duration: Allow the water to flow for a few minutes during the test to assess whether there are any sudden fluctuations in water temperature or pressure. This will help identify any potential issues with the plumbing or the showerhead itself.
- Overall Satisfaction: Consider your overall satisfaction with the showerhead’s performance. Evaluate factors such as water flow, coverage, spray patterns, and ease of use. If you are satisfied with the results, you can proceed to enjoy your new showerhead. However, if you are not fully satisfied, consider making adjustments or considering alternate options.
By conducting a thorough test of the showerhead, you can ensure that it is functioning properly and providing a pleasant showering experience. Take note of any adjustments that need to be made or any issues that arise during the testing process. This will allow you to address any concerns and make the necessary changes for an optimal showering experience.
Additional Considerations
While the installation of a showerhead to your existing tub may seem straightforward, there are a few additional considerations to keep in mind to ensure a successful and hassle-free project:
- Water Flow and Pressure: If you notice low water flow or inconsistent water pressure after installing the showerhead, it could be an issue with the plumbing system. In such cases, it’s advisable to consult a professional plumber to assess and address the problem.
- Maintenance and Cleaning: Regularly clean and maintain your showerhead to ensure optimal performance. Remove any mineral deposits or debris that may accumulate over time. Refer to the manufacturer’s instructions for specific cleaning recommendations.
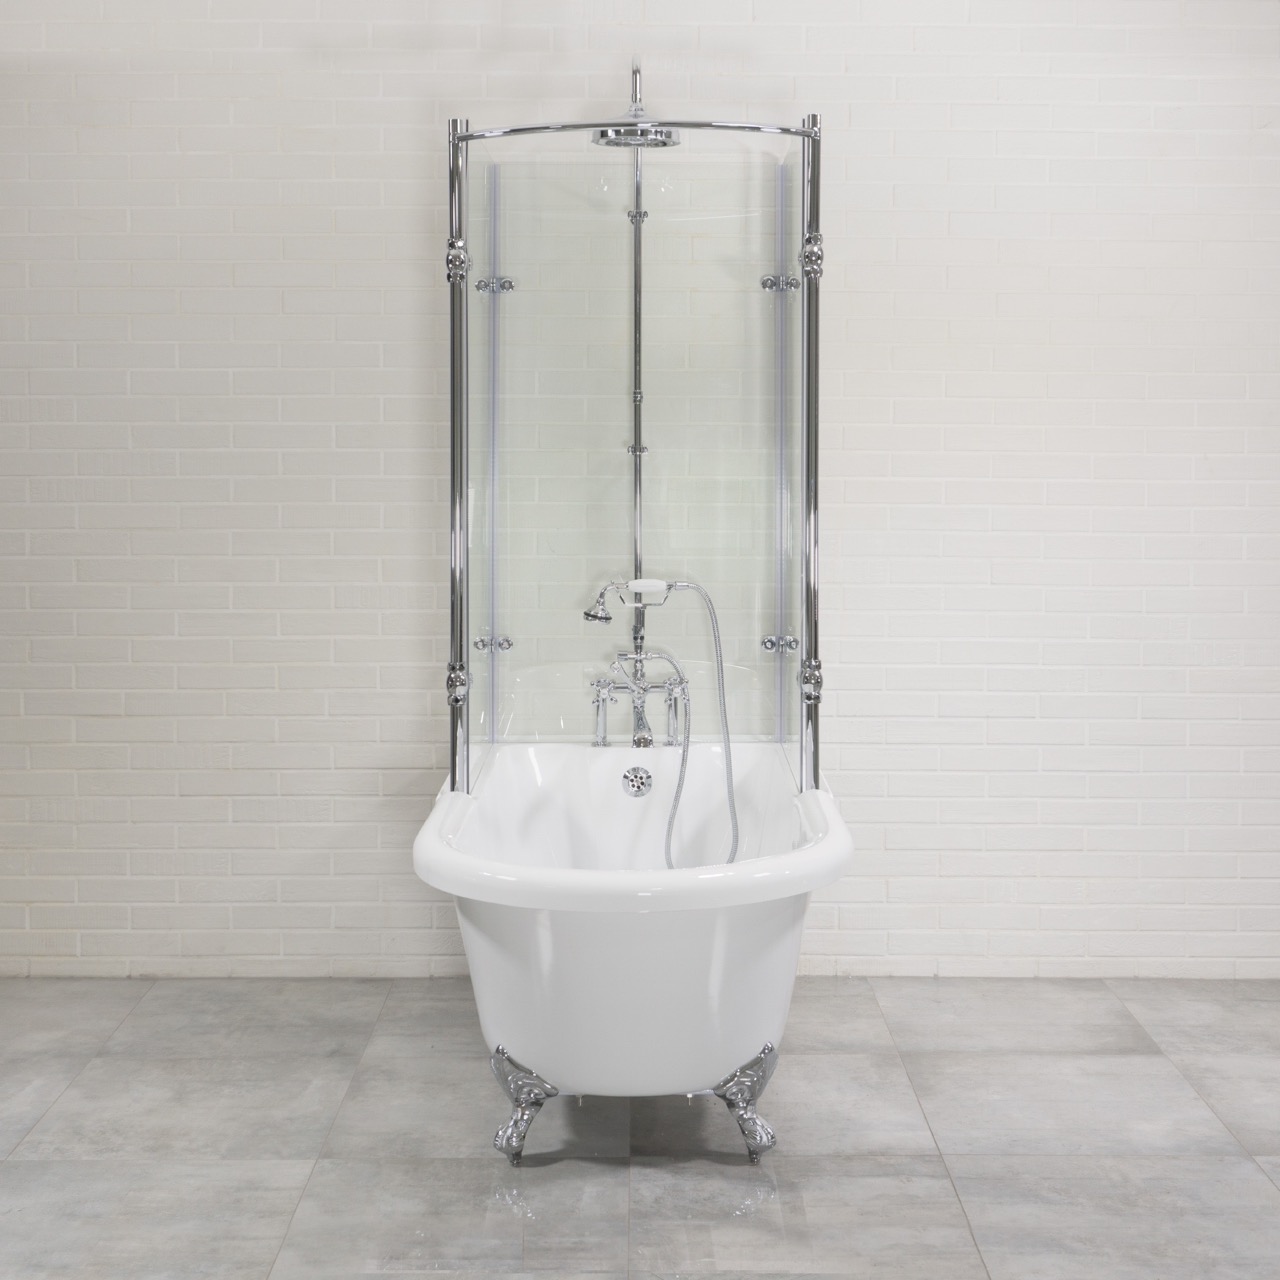
- Compatibility with Tub Type: While most tubs can accommodate a showerhead installation, certain tub types, such as clawfoot or freestanding tubs, may require additional modifications. Consider consulting a professional to determine the best approach for adding a showerhead to these types of tubs.
- Water Conservation: Be mindful of water conservation while using your new showerhead. Consider installing a low-flow showerhead or incorporating other water-saving devices to reduce water consumption.
- Proper Sealing: Ensure that all connections are properly sealed and free from leaks. Regularly check for any signs of water leakage around the showerhead, shower arm, or tub spout diverter. Address any leaks promptly to prevent water damage.
- Building Codes and Permits: Depending on your location, adding a showerhead to an existing tub may require compliance with specific building codes or obtaining necessary permits. Research the regulations in your area and ensure compliance to avoid any legal or safety issues.
- Professional Assistance: If you are unsure about your plumbing skills or encounter any difficulties during the installation process, it’s always wise to seek professional assistance. A licensed plumber can provide expert guidance and ensure that the installation is done correctly and safely.
By considering these additional factors, you can enhance the success and longevity of your showerhead installation. Paying attention to maintenance, addressing any issues promptly, and following proper procedures will help you make the most out of your new showerhead and enjoy a satisfying showering experience.
Read more: How To Add Wall Insulation To Existing Walls
Conclusion
Adding a showerhead to your existing tub can greatly enhance the versatility and convenience of your bathroom. It allows you to switch between a relaxing bath and an invigorating shower, giving you the flexibility to meet your bathing preferences.
Throughout this guide, we have discussed the essential steps involved in adding a showerhead to your tub. From assessing the tub’s compatibility to choosing the right showerhead, gathering the necessary tools and materials, and properly preparing the tub, we have provided you with the knowledge and guidance needed to successfully complete the installation.
By following the step-by-step instructions, you can confidently install the shower arm, attach the showerhead, and test the functionality for a satisfying showering experience. Remember to pay attention to any leaks, water pressure, and adjustable settings to ensure optimal performance.
It’s important to note that while DIY projects can be fulfilling and cost-effective, plumbing tasks can be complex. If you’re unsure about your plumbing skills or encounter any challenges during the installation process, don’t hesitate to seek professional assistance. A licensed plumber can provide you with expert guidance and ensure a safe and efficient installation.
Lastly, remember to consider additional factors such as water conservation, regular maintenance, and complying with local building codes and permits. These considerations will help you make the most out of your showerhead installation and maintain its functionality for years to come.
Now that you’re equipped with the knowledge and understanding of adding a showerhead to your existing tub, it’s time to get started. Enjoy the convenience and rejuvenation that comes with having a versatile bathing experience at your fingertips.
Frequently Asked Questions about How To Add Showerhead To An Existing Tub
Was this page helpful?
At Storables.com, we guarantee accurate and reliable information. Our content, validated by Expert Board Contributors, is crafted following stringent Editorial Policies. We're committed to providing you with well-researched, expert-backed insights for all your informational needs.


0 thoughts on “How To Add Showerhead To An Existing Tub”