
Articles
How To Add A Hue Dimmer Switch
Modified: September 2, 2024
Learn how to easily add a Hue Dimmer Switch using our step-by-step articles. Enhance your smart lighting experience with this simple guide.
(Many of the links in this article redirect to a specific reviewed product. Your purchase of these products through affiliate links helps to generate commission for Storables.com, at no extra cost. Learn more)
Introduction
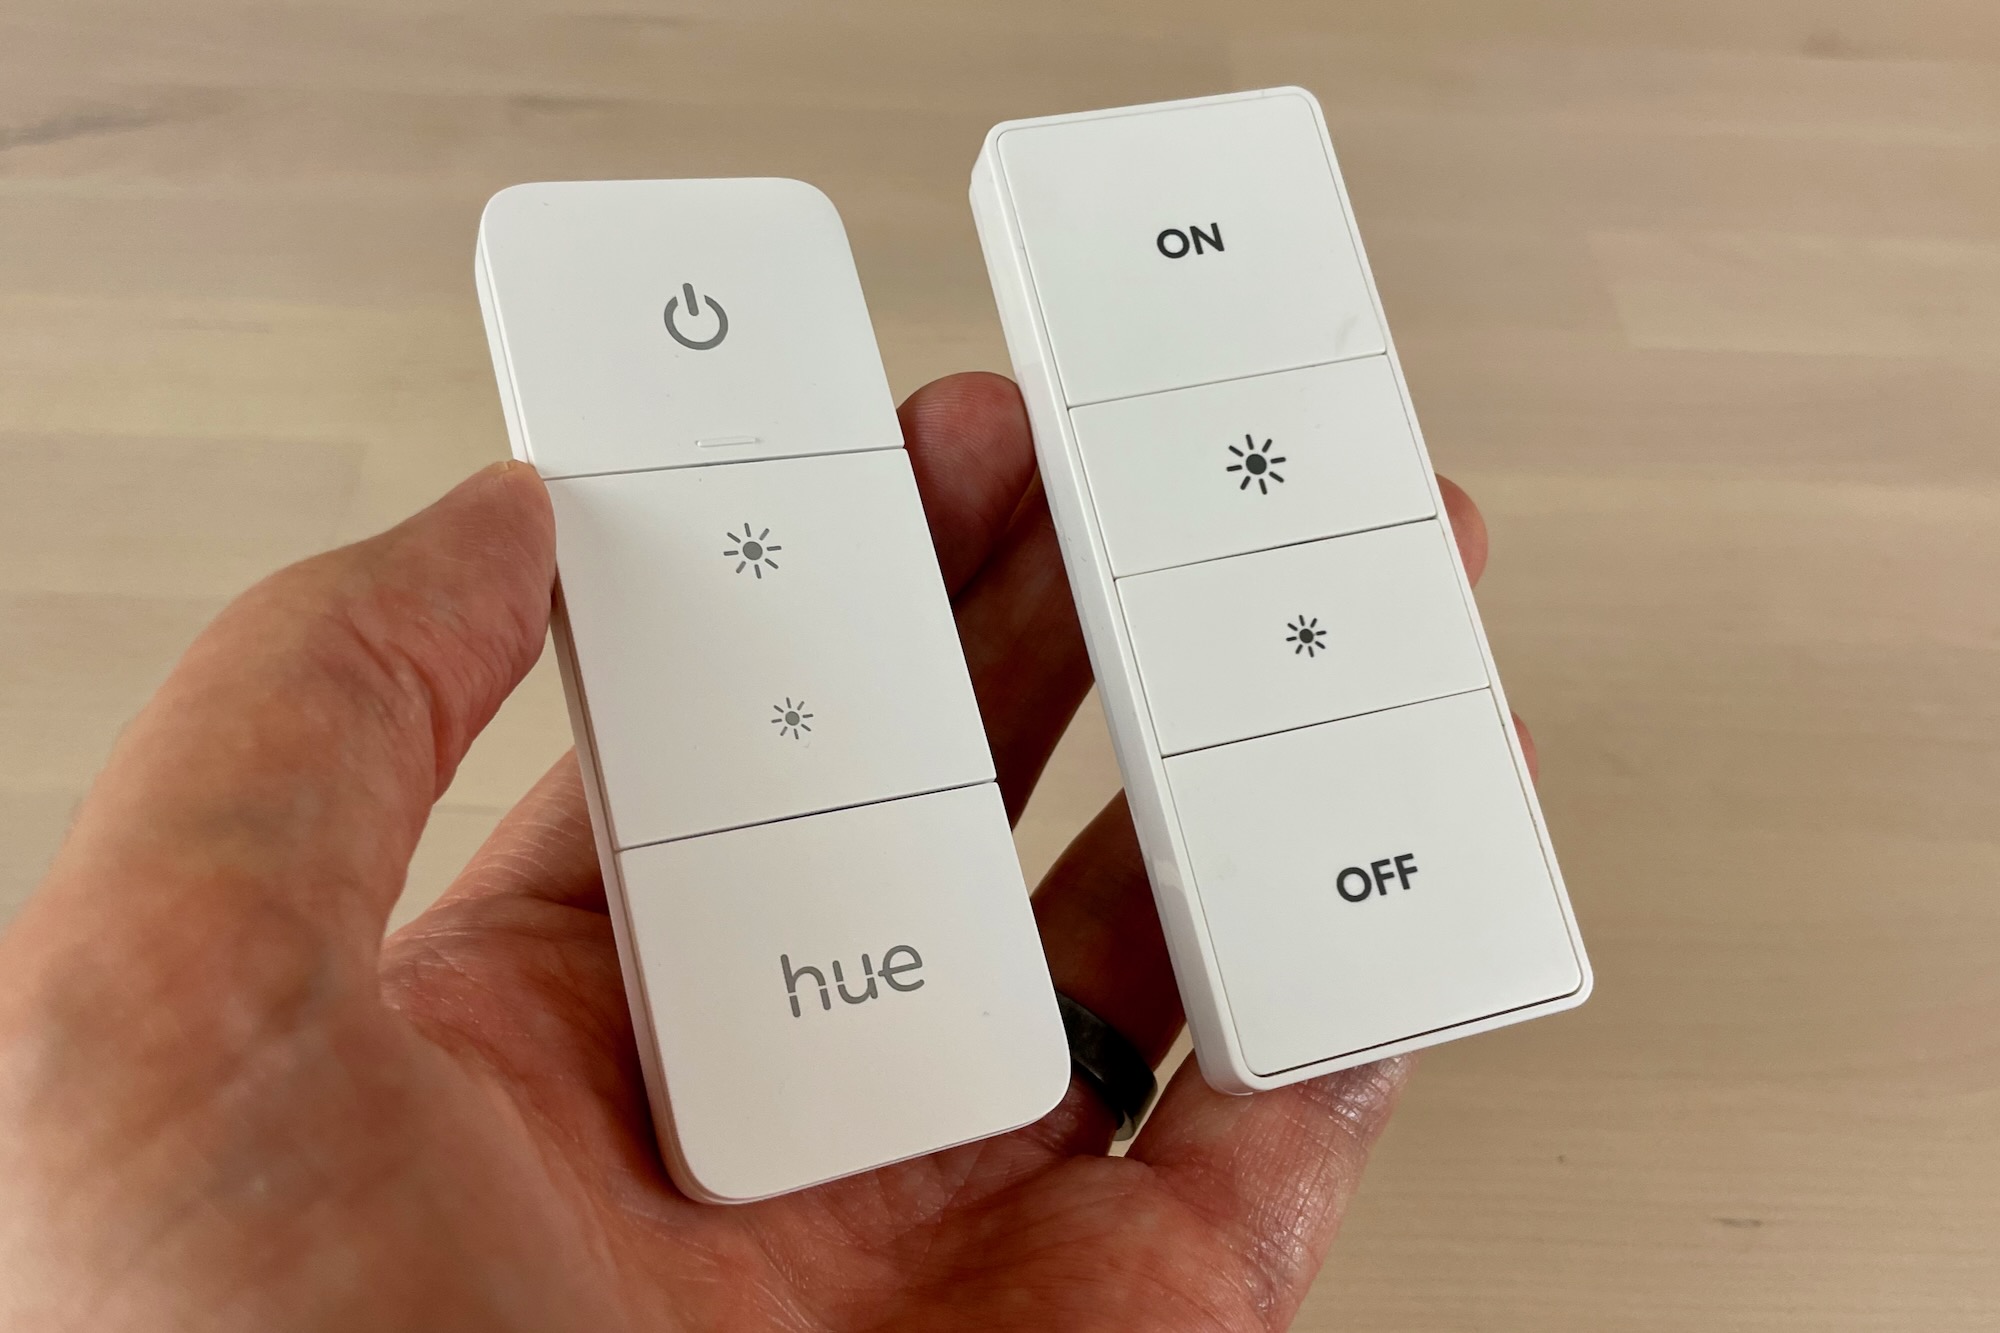
Welcome to this comprehensive guide on how to add a Hue Dimmer Switch to your smart home setup. The Philips Hue Dimmer Switch is a convenient device that allows you to control your smart lights with ease. Whether you are new to the Philips Hue ecosystem or simply looking to expand your existing smart lighting system, this step-by-step tutorial will provide you with all the information you need to successfully add and configure a Hue Dimmer Switch.
The Hue Dimmer Switch offers a simple and intuitive way to adjust the lighting in a room. With just a few taps or clicks, you can brighten or dim the lights, switch between different lighting scenes, or turn the lights on and off. It gives you the flexibility to control your lights without relying on a mobile app or voice commands.
In this guide, we will walk you through the entire process of adding a Hue Dimmer Switch to your home. We will start by discussing the equipment you will need for this setup. Then, we will guide you through the steps of preparing the Hue Dimmer Switch, mounting it on a wall or any convenient location, and pairing it with your Hue Bridge. Finally, we will explore the configuration options available for the Hue Dimmer Switch and provide tips on testing and finalizing the setup.
So, whether you want to have a dedicated light switch for your smart lights or simply add more convenience to your smart home, let’s get started on adding a Hue Dimmer Switch to your setup.
Key Takeaways:
- Adding a Hue Dimmer Switch is a breeze with its simple installation and customization options, providing effortless control and convenience in adjusting your smart lights to create the perfect ambiance in any room.
- The Hue Dimmer Switch offers a versatile and intuitive way to enhance your smart lighting experience, allowing you to say goodbye to fumbling for your smartphone or relying on voice commands as you effortlessly control your lights with a simple press of a button.
Read more: How To Reset A Philips Hue Dimmer Switch
Step 1: Gathering the Necessary Equipment
Before you begin the process of adding a Hue Dimmer Switch to your smart home, it is essential to gather all the required equipment. Here’s what you will need:
- Philips Hue Dimmer Switch: This is the main component of your setup. Ensure that you have a Hue Dimmer Switch readily available.
- Philips Hue Bridge: The Hue Dimmer Switch needs to be paired with a Hue Bridge, which acts as the central hub for all your Hue smart lights. If you already have a Hue Bridge installed, make sure it is powered on and connected to your home network. If you don’t have a Hue Bridge, you will need to purchase one separately.
- Smart Lights: The Hue Dimmer Switch is designed to control Philips Hue smart lights. Ensure that you have compatible Hue bulbs or light strips installed in the room where you plan to install the dimmer switch.
- Screwdriver: Depending on the method of mounting you choose, you may need a screwdriver to install the Hue Dimmer Switch onto a wall or other surface.
Once you have gathered all the necessary equipment, you are ready to move on to the next step.
Step 2: Preparing the Hue Dimmer Switch
With all the equipment gathered, it’s time to prepare the Hue Dimmer Switch for installation. Follow these steps:
- Remove the plastic strip: The Hue Dimmer Switch may come with a small plastic strip inserted to preserve battery life during shipping. Remove this strip to activate the dimmer switch.
- Install batteries: The Hue Dimmer Switch typically requires two AAA batteries for operation. Open the battery compartment on the back of the switch and insert the batteries, ensuring they are correctly aligned with the + and – symbols indicated.
- Test the switch: Press the buttons on the Hue Dimmer Switch to make sure the batteries have been installed correctly and the switch is functioning properly. If the lights on the switch don’t respond, double-check the battery placement.
Once you have prepared the Hue Dimmer Switch, you are ready to move on to the next step of mounting the switch onto a wall or other suitable surface.
Step 3: Mounting the Hue Dimmer Switch
Mounting the Hue Dimmer Switch is an important step to ensure convenient access and easy control of your smart lights. Here’s how you can mount the switch:
- Select a suitable location: Choose a wall or surface where you want to mount the Hue Dimmer Switch. Ensure that it is within reach and easily accessible.
- Align the mounting plate: Hold the mounting plate against the wall or surface and use a pencil to mark the positions of the screw holes. Make sure the mounting plate is level and aligned as desired.
- Secure the mounting plate: Using a screwdriver and the provided screws, attach the mounting plate to the wall or surface by screwing it into place. Ensure that it is firmly secured.
- Attach the Hue Dimmer Switch: Line up the back of the Hue Dimmer Switch with the mounting plate and gently slide it down until it clicks into place. The magnet in the switch will hold it securely to the mounting plate.
Once you have mounted the Hue Dimmer Switch, you can now proceed to the next step of pairing it with your Hue Bridge.
When adding a Hue Dimmer Switch, make sure to first connect it to the Hue Bridge using the Philips Hue app. This will allow you to fully customize and control the switch’s functions.
Step 4: Pairing the Hue Dimmer Switch with your Hue Bridge
Now that you have mounted the Hue Dimmer Switch, it’s time to pair it with your Hue Bridge. Follow these steps to establish the connection:
- Ensure that your Hue Bridge is powered on and connected to your home network. If it’s not, follow the manufacturer’s instructions to set it up.
- Open the Philips Hue mobile app or any other compatible app that you use to control your Hue lights. Make sure you are connected to the same Wi-Fi network as your Hue Bridge.
- In the app, navigate to the device pairing section or follow the specific instructions for adding a new device.
- Press and hold the “Setup” button on the back of the Hue Dimmer Switch for a few seconds until the LED indicator starts blinking.
- The app should detect the Hue Dimmer Switch. Follow the on-screen prompts to complete the pairing process. This may involve confirming the connection on the Hue Bridge, assigning a room or zone to the switch, or customizing the button functions.
- Once the pairing is successful, you can give the Hue Dimmer Switch a name for easy identification in your app.
After successfully pairing the Hue Dimmer Switch with your Hue Bridge, you are now ready to proceed with configuring the switch to suit your preferences.
Read more: What Is A Dimmer Switch
Step 5: Configuring the Hue Dimmer Switch
Configuring the Hue Dimmer Switch allows you to customize its functionality and define specific actions for each button press. Follow these steps to configure your switch:
- Open the Philips Hue mobile app or any other compatible app that you use to control your Hue lights.
- Navigate to the device settings section or the specific settings for the Hue Dimmer Switch.
- Choose the Hue Dimmer Switch you want to configure from the list of connected devices.
- Select the button you want to customize. Each button on the dimmer switch can be assigned a different function.
- Depending on your app, you may have several options for customizing button actions, such as turning lights on/off, dimming lights, activating specific lighting scenes, or controlling other smart home devices.
- Experiment with different button configurations to find what works best for your needs. You can always modify the settings later if desired.
- Save the changes or apply the configuration to the Hue Dimmer Switch.
By configuring the Hue Dimmer Switch, you can ensure that each button press provides the desired lighting experience in your smart home. Take some time to explore the customization options and discover the possibilities available to you.
Once you have configured the Hue Dimmer Switch, you are almost done. The final step is to test the setup and make any necessary adjustments.
Step 6: Testing and Finalizing Setup
After configuring the Hue Dimmer Switch, it’s important to test the setup and ensure that everything is working as expected. Follow these steps to test and finalize your setup:
- Stand near the Hue Dimmer Switch and press the buttons to control your smart lights. Check if the lights respond according to the button configurations you have set.
- Go to different areas of the room and test the switch’s range. Make sure the signal reaches your Hue lights consistently from various locations.
- If you encounter any issues with range or responsiveness, try repositioning the Hue Dimmer Switch closer to your Hue Bridge or rearranging the location of your Hue Bridge to optimize communication.
- Take note of any adjustments or improvements needed in the button configurations. Return to the app settings and modify the functions as desired.
- Ensure that the batteries in the Hue Dimmer Switch are functioning properly. Replace them if necessary to maintain optimal performance.
- Once you are satisfied with the testing and adjustments, finalize your setup by securing the Hue Dimmer Switch in its mounted position. Check for any loose connections or wobbling and tighten as needed.
With the testing and final adjustments complete, your Hue Dimmer Switch is now fully operational and ready to enhance your smart lighting experience. Enjoy the convenience and control provided by the switch as you effortlessly adjust your lights with a simple click of a button.
Congratulations! You have successfully added and configured a Hue Dimmer Switch to your smart home setup. Take advantage of the versatility and ease of use that this device offers as you continue to expand and enhance your smart lighting system.
Happy smart lighting!
Conclusion
Adding a Hue Dimmer Switch to your smart home setup is a simple and effective way to enhance the control and convenience of your smart lighting system. With its easy installation and customization options, the Hue Dimmer Switch allows you to effortlessly adjust your lights to create the perfect ambiance in any room.
In this comprehensive guide, we have walked you through the step-by-step process of adding and configuring a Hue Dimmer Switch. From gathering the necessary equipment to mounting the switch, pairing it with your Hue Bridge, and customizing its functionality, we have provided you with all the information you need to successfully integrate the Hue Dimmer Switch into your smart home ecosystem.
Remember to take the time to test your setup and make any necessary adjustments to ensure optimal performance. By experimenting with different button configurations and exploring the full range of features offered by the switch, you can tailor your smart lighting experience to suit your preferences and needs.
With the Hue Dimmer Switch in place, you now have a convenient and intuitive way to control the lighting in your home. Enjoy the benefits of easily adjusting brightness levels, switching between lighting scenes, and turning lights on and off with a simple press of a button. Say goodbye to fumbling for your smartphone or voice commands and embrace the effortless control that the Hue Dimmer Switch provides.
Thank you for following this guide, and we hope that it has been informative and helpful in assisting you with adding a Hue Dimmer Switch to your smart home setup. Enjoy the enhanced lighting experience and the convenience this device brings to your daily life!
Frequently Asked Questions about How To Add A Hue Dimmer Switch
Was this page helpful?
At Storables.com, we guarantee accurate and reliable information. Our content, validated by Expert Board Contributors, is crafted following stringent Editorial Policies. We're committed to providing you with well-researched, expert-backed insights for all your informational needs.

0 thoughts on “How To Add A Hue Dimmer Switch”