Articles
How To Install A Smart Dimmer Switch
Modified: October 19, 2024
Learn how to install a smart dimmer switch in your home with our comprehensive articles. Upgrade your lighting system for a more convenient and efficient experience.
(Many of the links in this article redirect to a specific reviewed product. Your purchase of these products through affiliate links helps to generate commission for Storables.com, at no extra cost. Learn more)
Introduction
Welcome to this comprehensive guide on how to install a smart dimmer switch! Modern technology has revolutionized our daily lives, and now it’s time to bring intelligence to our lighting systems. Installing a smart dimmer switch not only allows you to control the brightness of your lights but also opens up a whole new world of convenience and energy efficiency. Whether you’re a tech enthusiast or just looking to upgrade your home, this step-by-step guide will walk you through the installation process, ensuring a hassle-free experience.
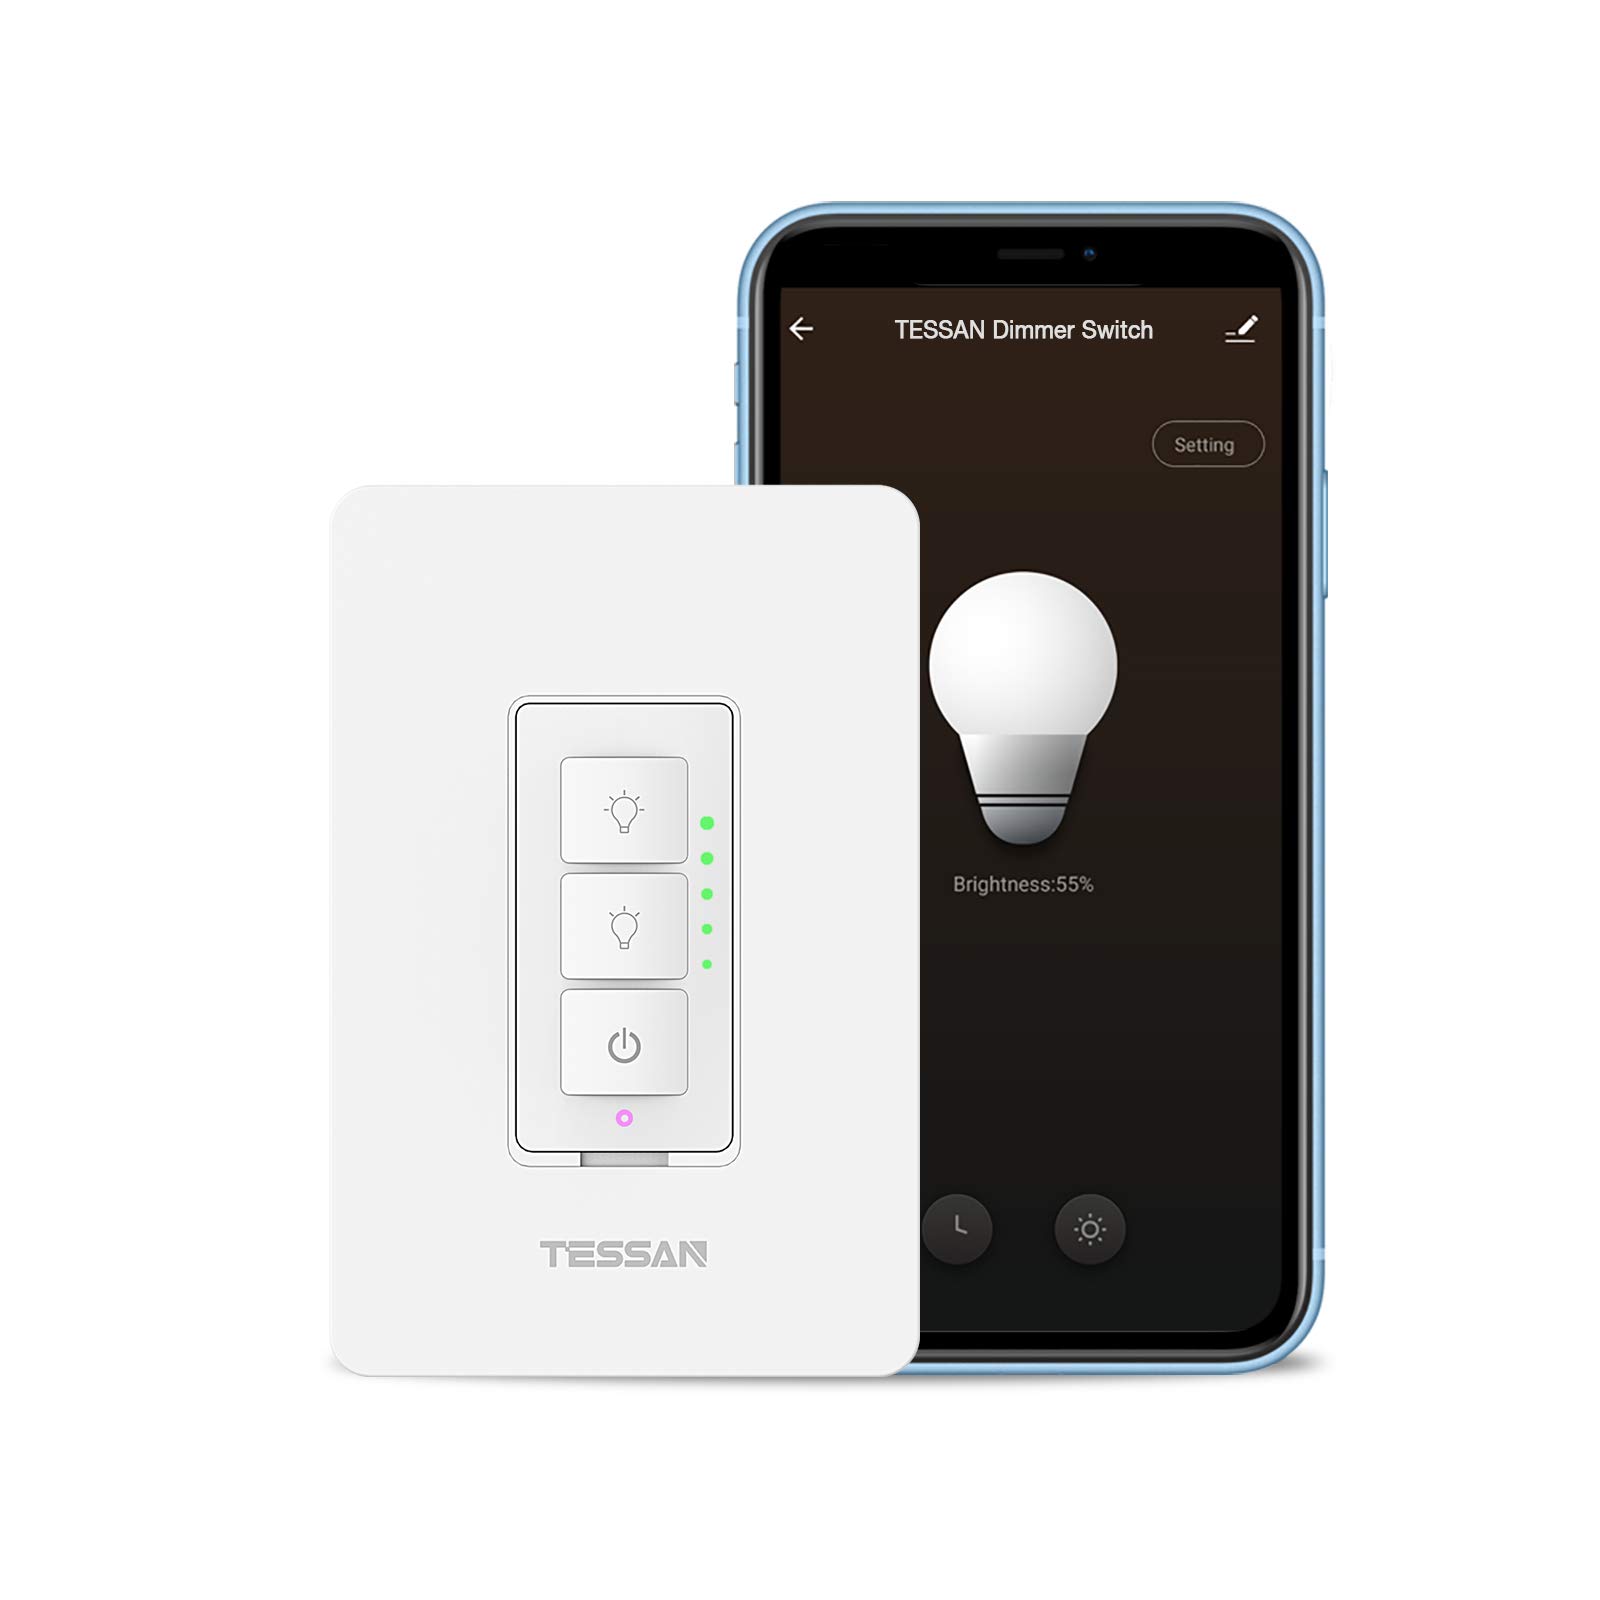
Before we dive into the installation steps, let’s take a moment to understand what a smart dimmer switch is and why it’s a great addition to your home. In simple terms, a smart dimmer switch is a device that allows you to adjust the intensity of your lights using a smartphone app, voice commands, or even motion sensors. This smart technology provides ultimate control over your lighting, giving you the flexibility to create the perfect ambiance for any occasion.
Installing a smart dimmer switch offers several benefits. Firstly, it allows you to set the mood by adjusting the brightness levels according to your preference. Whether you want a well-lit room for productivity or a cozy atmosphere for relaxation, a smart dimmer switch gives you the power to customize your lighting experience.
Secondly, a smart dimmer switch can help you save energy and reduce your electricity bills. By dimming the lights to an appropriate level, you can decrease energy usage while still maintaining sufficient illumination. Additionally, many smart dimmer switches come with built-in timers and scheduling capabilities, allowing you to automate your lighting and ensure lights are turned off when not needed.
Thirdly, installing a smart dimmer switch adds a layer of convenience to your life. With the ability to control your lights remotely, you can turn them on or off from anywhere in your home or even when you’re away. Imagine arriving home to a well-lit hallway or being able to turn off forgotten lights without having to get out of bed. A smart dimmer switch makes these scenarios a reality.
Now that you understand the benefits, let’s get started with the installation process. But before we do, remember that electrical work should always be done with caution. If you’re not comfortable working with electrical wires, it’s best to consult a professional electrician. With that said, if you’re ready to take on the challenge, gather your materials, and let’s proceed to the first step of installing a smart dimmer switch – gathering the necessary materials.
Key Takeaways:
- Upgrade your lighting experience with a smart dimmer switch, offering convenience, energy efficiency, and customizable ambiance for any occasion. Enjoy effortless control and reduced energy consumption in your home.
- Ensure a safe and successful installation by following step-by-step instructions, from gathering materials to calibrating dimming settings. Transform your lighting system into a smart and customizable solution with ease.
Read more: What Is A Smart Dimmer Switch
Step 1: Gather Materials
Before you begin the installation process, it’s essential to gather all the necessary materials. Ensuring you have everything you need beforehand will make the installation smoother and prevent any delays or interruptions. Here’s a list of the materials you’ll need:
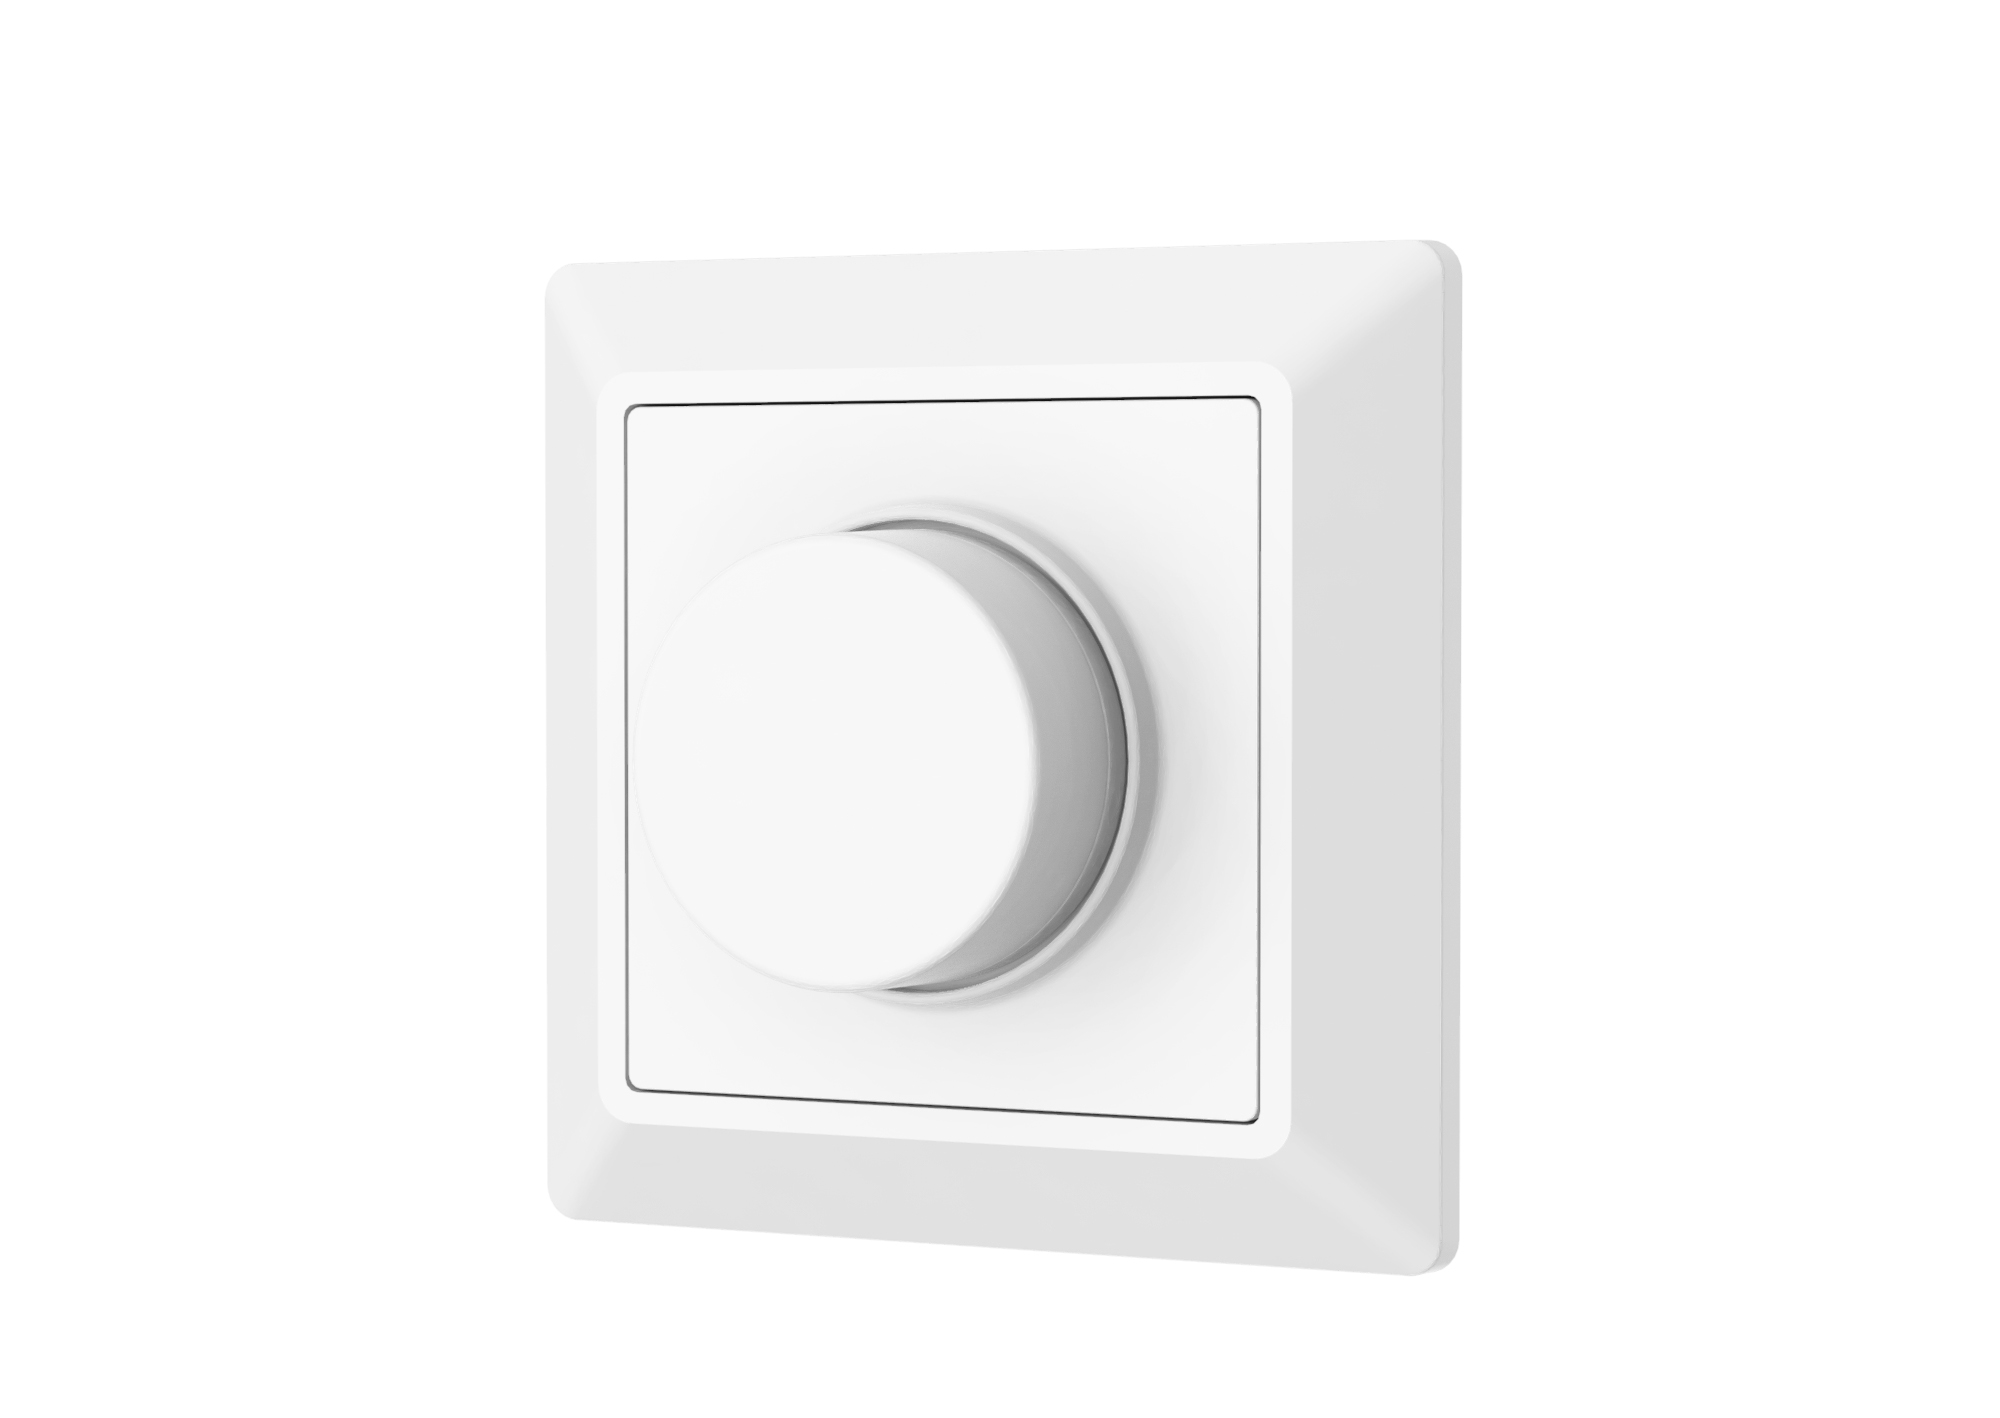
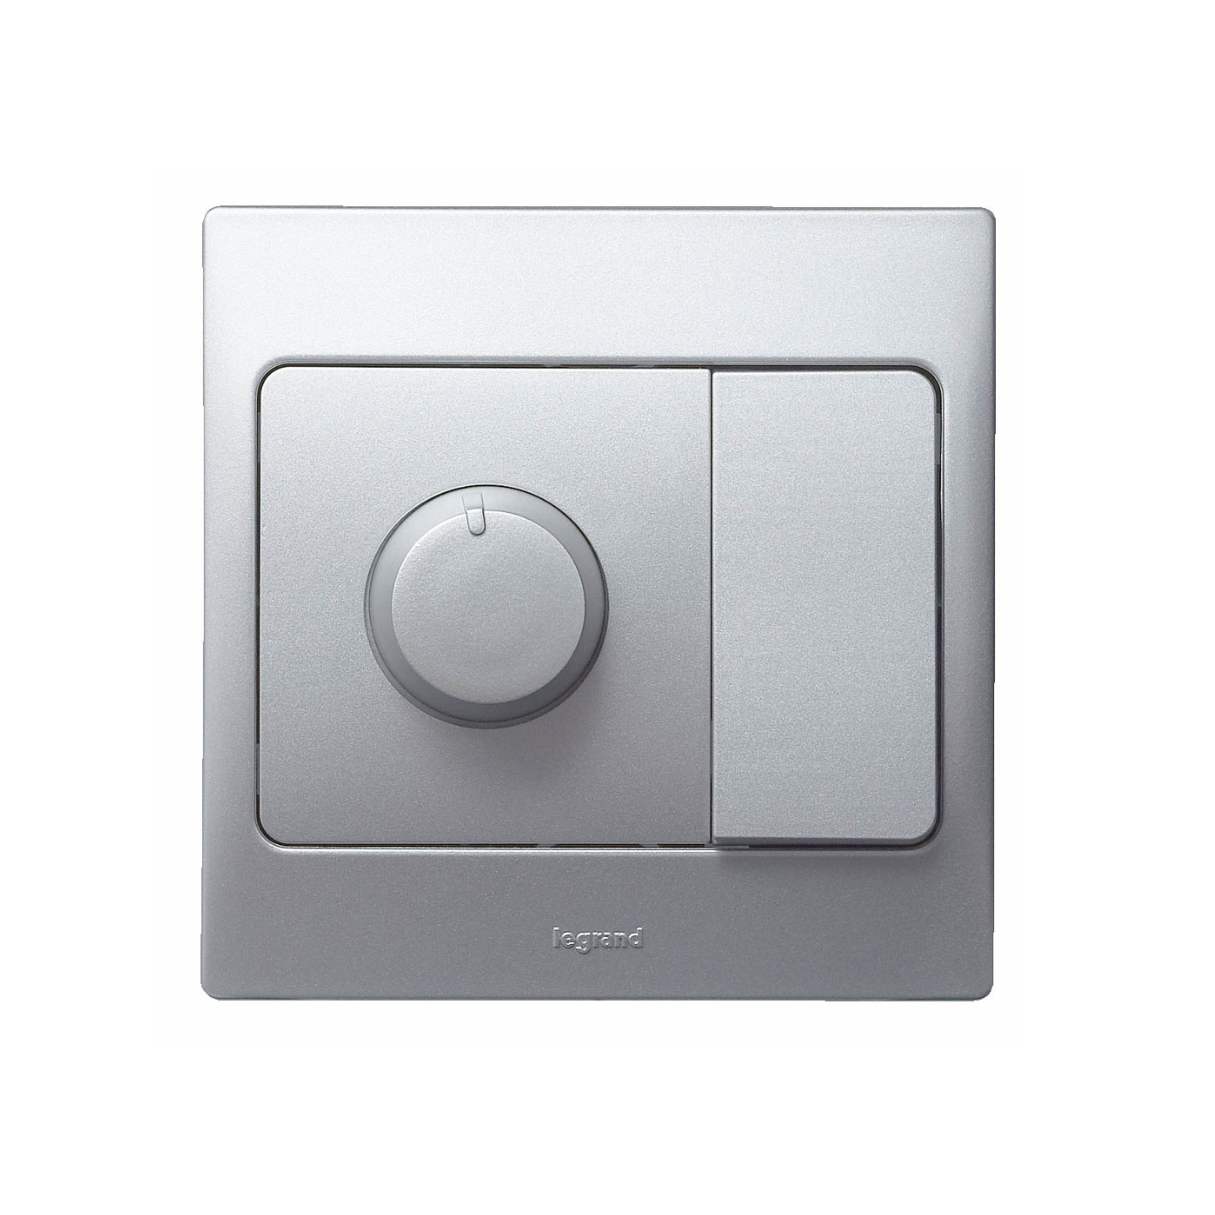
- A smart dimmer switch: Choose a dimmer switch that is compatible with your existing lighting system and smart home setup. There are various options available on the market, so make sure to do your research and select one that suits your needs.
- Screwdriver: A flathead or Phillips screwdriver will be necessary to remove the faceplate and screws from the existing switch.
- Wire stripper: This tool will be used to strip the insulation off the wires, allowing for proper connection.
- Wire connectors: These connectors are used to join wires securely. Depending on the type of switch you’re installing, you may need different sizes or types of wire connectors.
- Electrical tape: Electrical tape is used to insulate exposed wires and ensure safety.
- Voltage tester: A voltage tester is essential to verify that the power is turned off before beginning the installation.
- Optional: If you’re planning to control the dimmer switch via a smartphone app or voice commands, make sure you have a compatible smartphone or smart home hub.
Double-check that you have all the materials before proceeding to the next step. This will save you time and prevent frustration during the installation process. It’s always better to be prepared!
Now that you’re equipped with the necessary materials, you’re ready to move on to the next step: turning off the power to ensure a safe installation process.
Step 2: Turn off the Power
Before you begin working with any electrical components, it’s crucial to turn off the power to the circuit you’ll be working on. This step is essential for your safety and to prevent any damage to the electrical system or connected devices. Follow these steps to turn off the power:
- Locate the electrical panel: In most homes, the electrical panel is typically found in the basement, utility room, or garage. It houses the circuit breakers or fuses for the different areas of your home.
- Identify the correct circuit: Look for the circuit breaker that corresponds to the area or room where you’ll be installing the smart dimmer switch. Usually, circuit breakers are labeled to indicate which areas they control. If the breaker isn’t labeled, you might need to do some trial and error by turning off breakers one at a time to identify the correct one.
- Turn off the breaker: Once you’ve identified the correct circuit, switch the corresponding breaker to the “off” position. This will cut off the power supply to the area and ensure that you can work safely without any risk of electrical shock.
- Verify the power is off: To double-check that the power is indeed off, use a voltage tester. Bring the tester near the switch and ensure that it doesn’t detect any current. This step is crucial for your safety. If the tester indicates any voltage, do not proceed with the installation and consult a professional electrician.
After you’ve confirmed that the power is off, you can proceed to the next step: removing the old switch.
Note: If you’re unsure or uncomfortable working with electrical components, it’s best to seek the assistance of a professional electrician. They will ensure that the power is safely turned off and handle the installation for you.
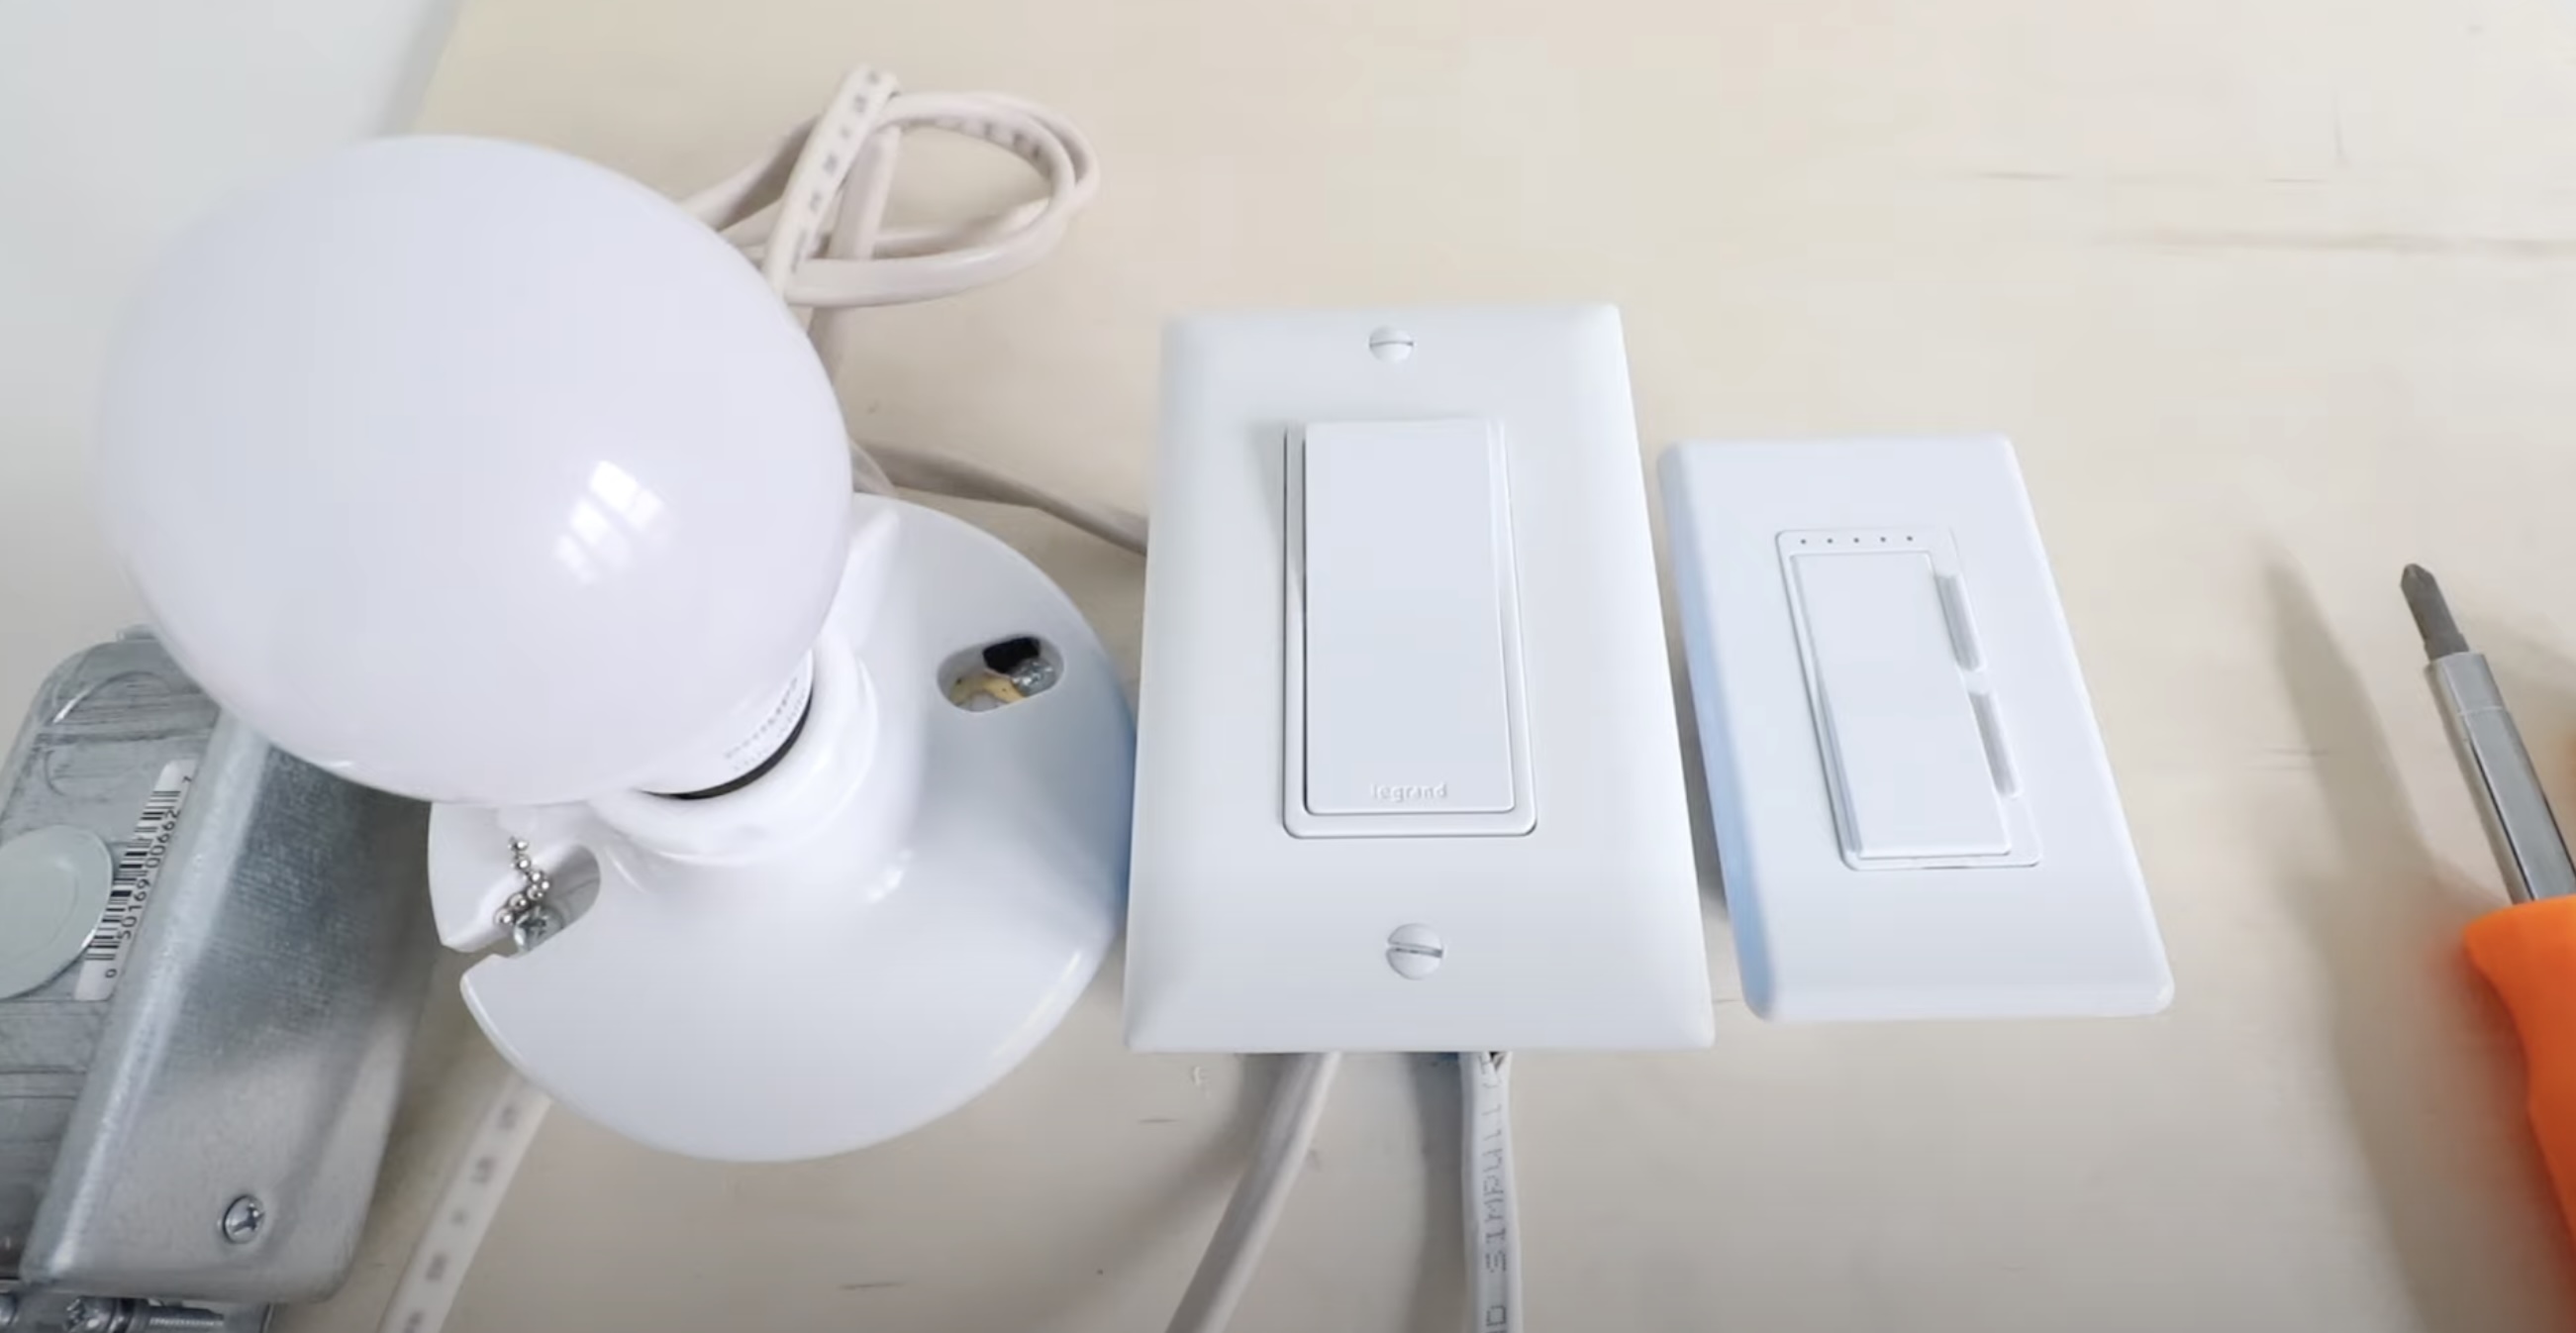
Step 3: Remove the Old Switch
Now that you have turned off the power and verified its absence using a voltage tester, you are ready to remove the old switch. Follow these steps to safely remove the old switch:
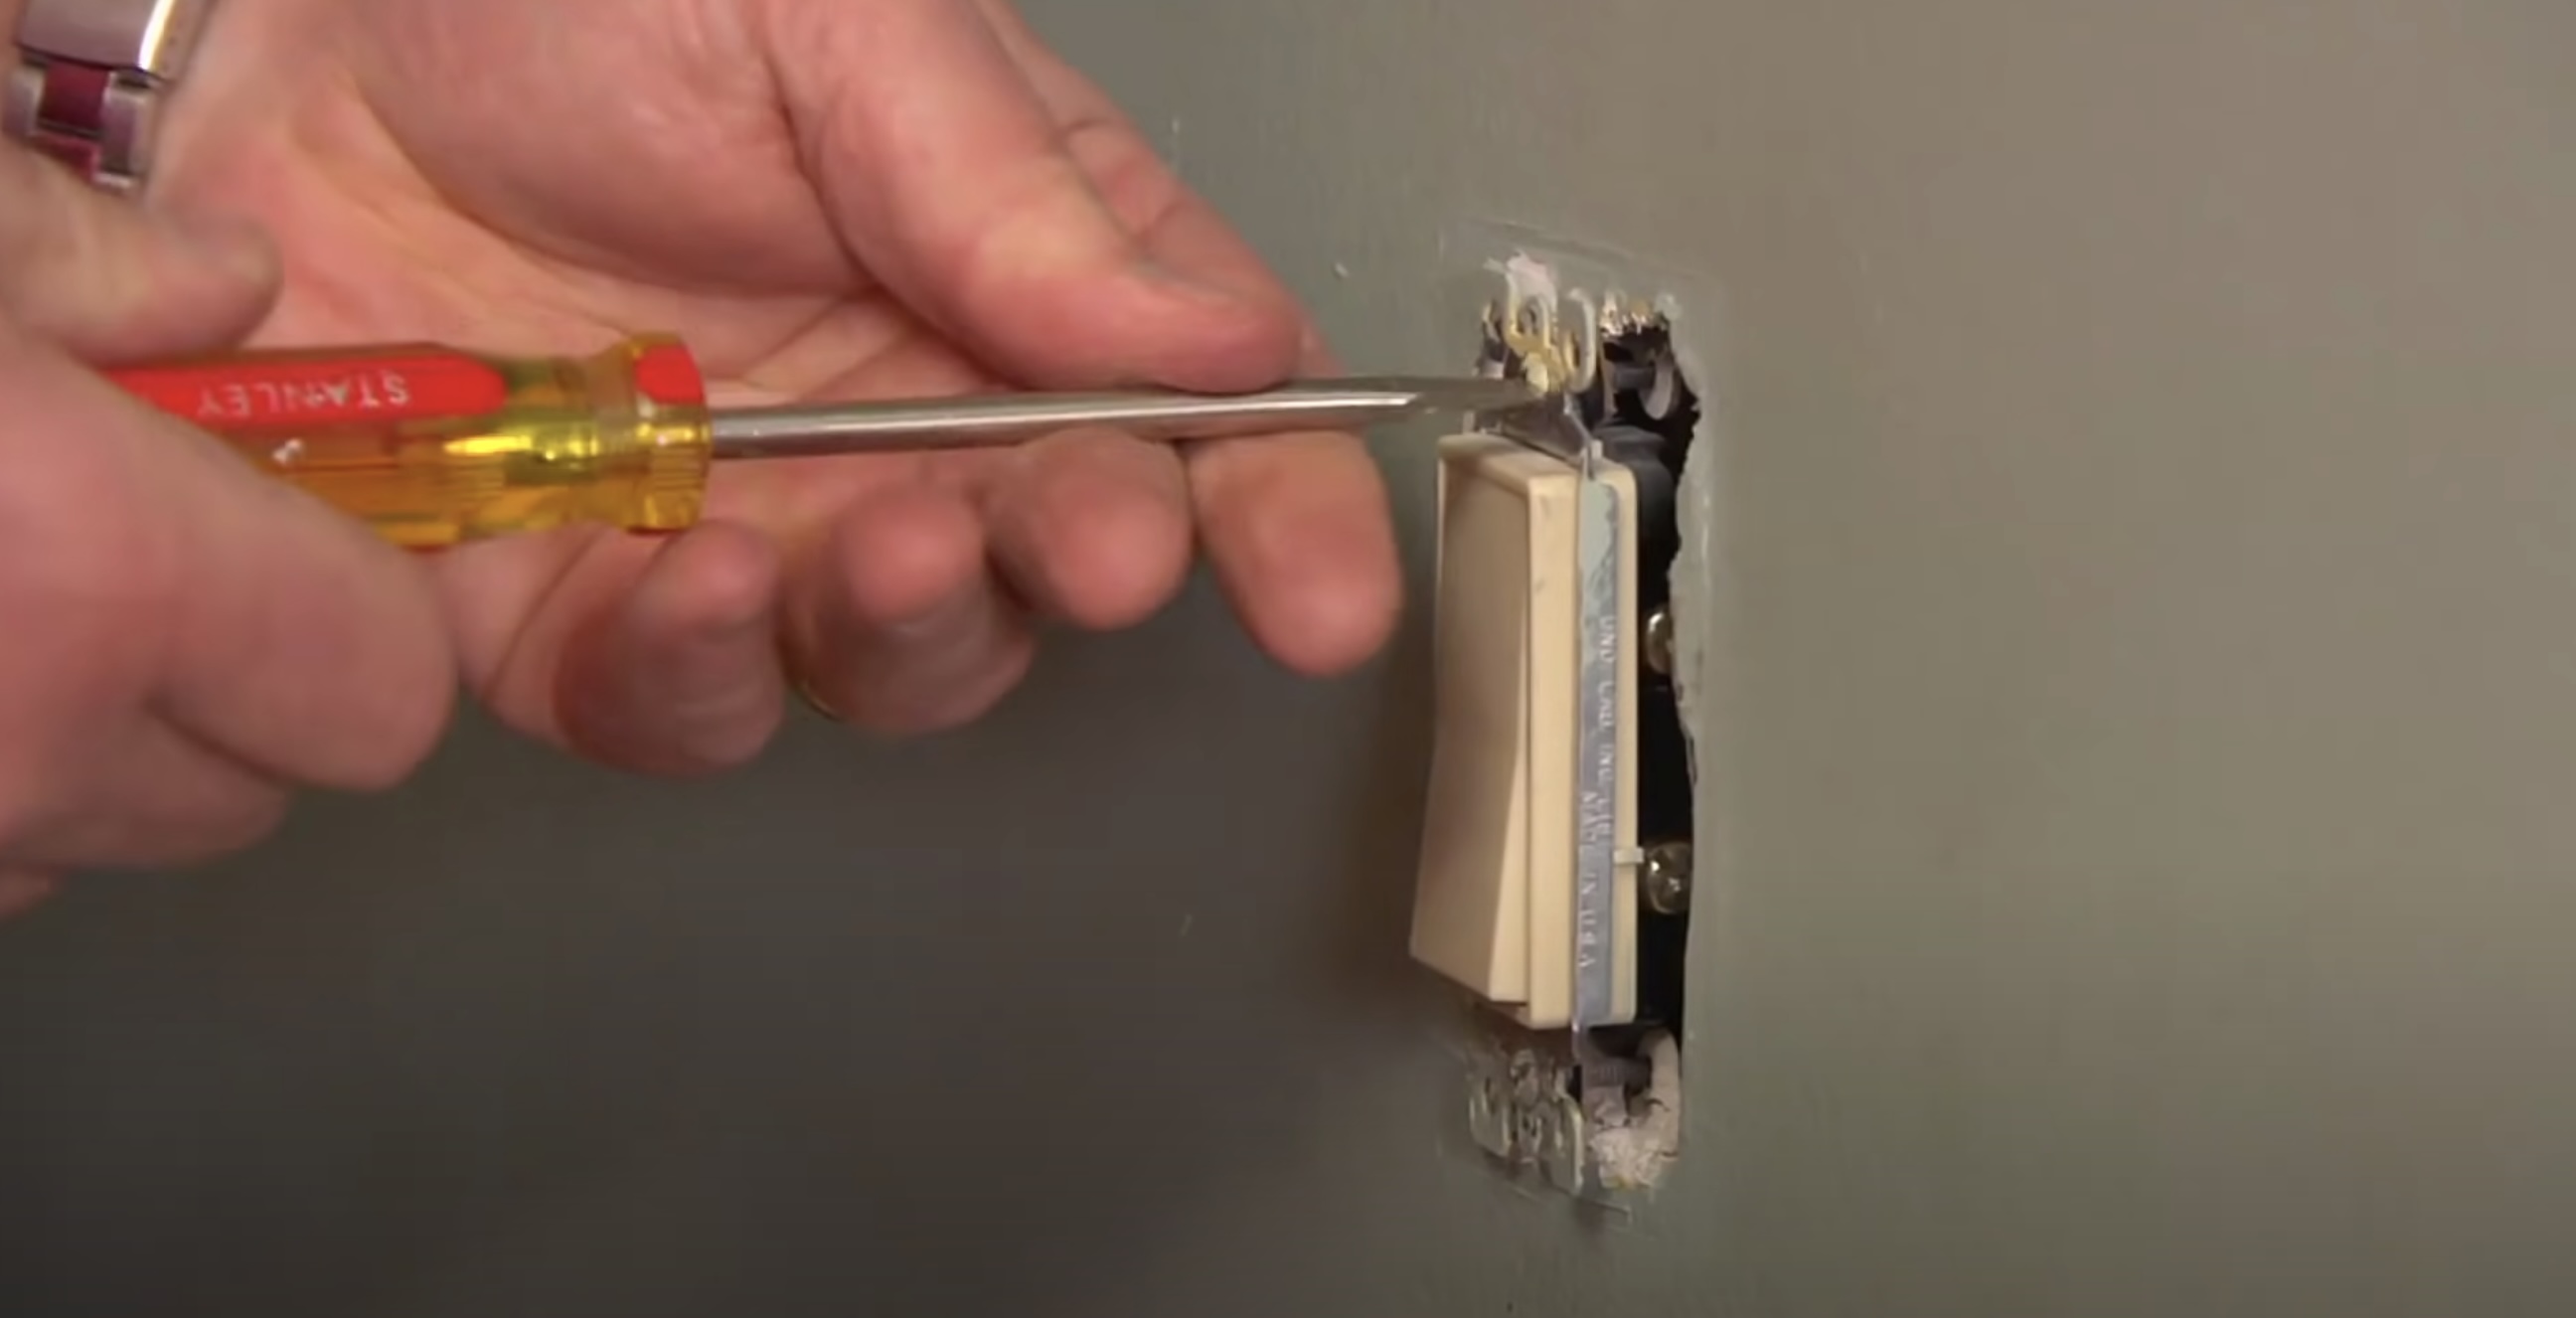
- Remove the faceplate: Start by unscrewing the screws that hold the faceplate in place. Set the faceplate aside.
- Remove the switch from the electrical box: Carefully unscrew the screws securing the switch to the electrical box. Gently pull the switch away from the wall, exposing the wiring behind it.
- Disconnect the wiring: Locate the wire connectors connecting the switch to the electrical wiring. Depending on the type of switch, there may be two or three wires attached to it. Typically, these wires are color-coded, with the black wire as the hot wire, the white wire as the neutral wire, and the green or copper wire as the ground wire.
- Loosen the wire connectors: Use a screwdriver or your fingers to loosen the wire connectors. Twist the connectors counterclockwise until they are loose enough to release the wires.
- Disconnect the wires: Once the wire connectors are loose, carefully disconnect the wires from the switch. Take note of which wire is connected to each terminal, as you will need this information for the installation of the new dimmer switch.
- Remove the old switch: After the wires are disconnected, you can completely remove the old switch from the electrical box. Set it aside, as you will no longer need it.
Removing the old switch is an important step in the installation process. Be sure to handle the wiring with care and avoid touching any exposed wires to prevent electrical shock. Once the old switch is removed, you’re ready to move on to the next step and start connecting the wires to your new smart dimmer switch.
Step 4: Connect the Wires
With the old switch removed, it’s time to connect the wires to your new smart dimmer switch. Follow these steps to ensure a secure and proper connection:
- Review the wiring diagram: Before you start connecting the wires, refer to the wiring diagram provided with your smart dimmer switch. This diagram will guide you on how to properly connect the wires based on the specific model and manufacturer’s instructions. It’s important to follow the diagram closely to ensure a correct and safe installation.
- Prepare the wires: Strip approximately ¾ inch of insulation from the ends of the wires using a wire stripper. This will expose the bare copper wire underneath, which is necessary for a proper connection.
- Connect the wires: Begin by connecting the ground wire. Attach the green or copper wire from the dimmer switch to the bare copper wire or ground wire in the electrical box. Use a wire connector to secure the connection, ensuring there are no loose or exposed wires.
- Connect the hot wire: The hot wire is typically black or red and is responsible for carrying the electrical current. Connect the hot wire from the dimmer switch to the corresponding hot wire in the electrical box. Again, use a wire connector to secure the connection.
- Connect the neutral wire: Some smart dimmer switches require a neutral wire connection, while others may not. If your switch requires a neutral wire, connect the white wire from the dimmer switch to the neutral wire in the electrical box. Secure the connection with a wire connector.
- Double-check the connections: Once all the wires are connected, carefully tug on each wire to ensure they are securely attached. Make sure there are no loose or frayed wires and that each connection is tight.
Properly connecting the wires is crucial for the safe and efficient functioning of your smart dimmer switch. Take your time and double-check each connection before proceeding to the next step. Once you’re confident that the wires are securely connected, you can move on to attaching the smart dimmer switch to the electrical box.
When installing a smart dimmer switch, always turn off the power at the circuit breaker before beginning the installation to ensure safety.
Read more: Installing A Chandelier And Dimmer Switch
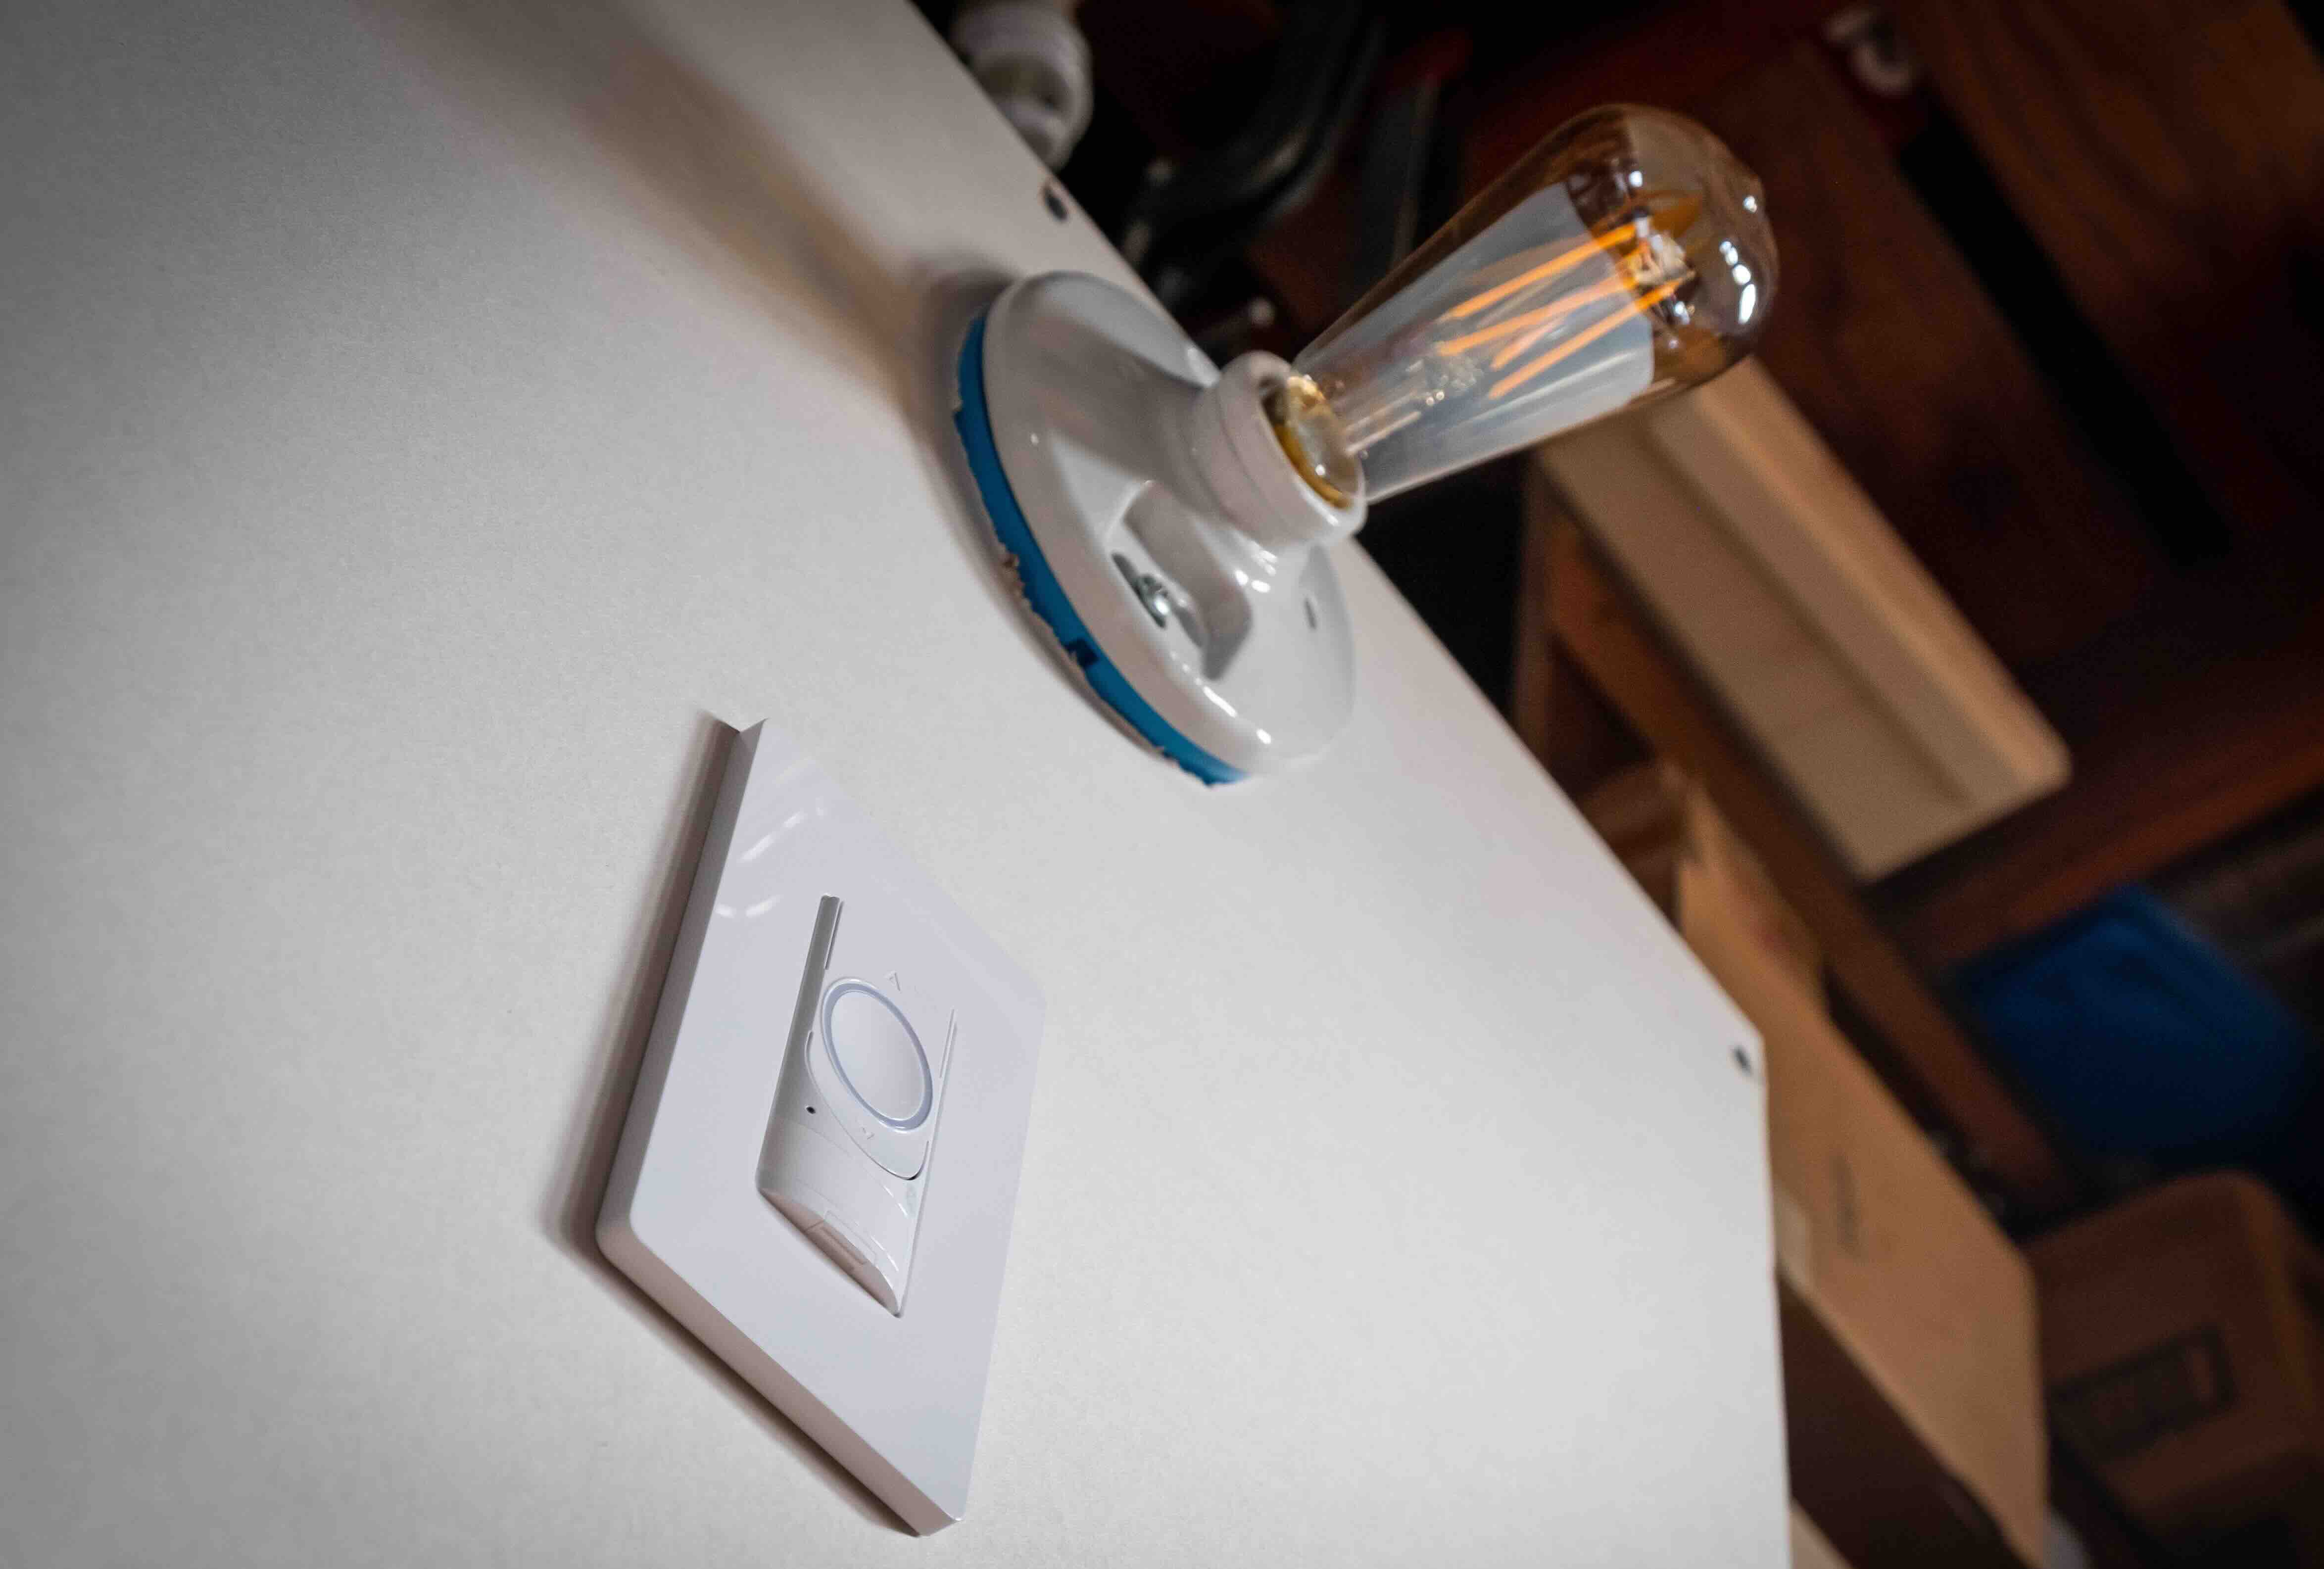
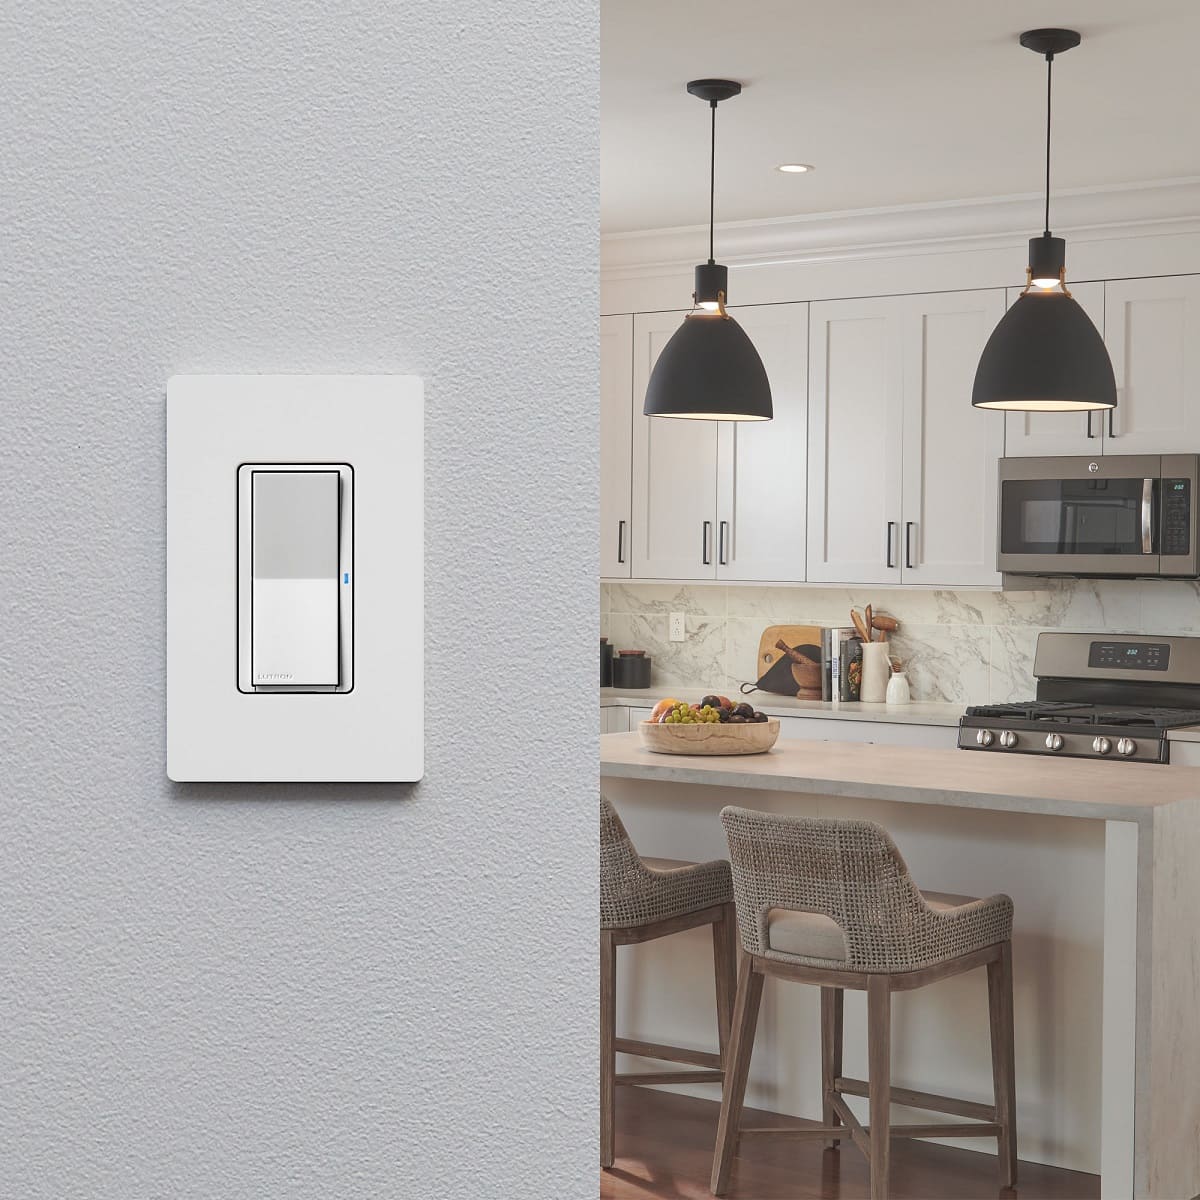
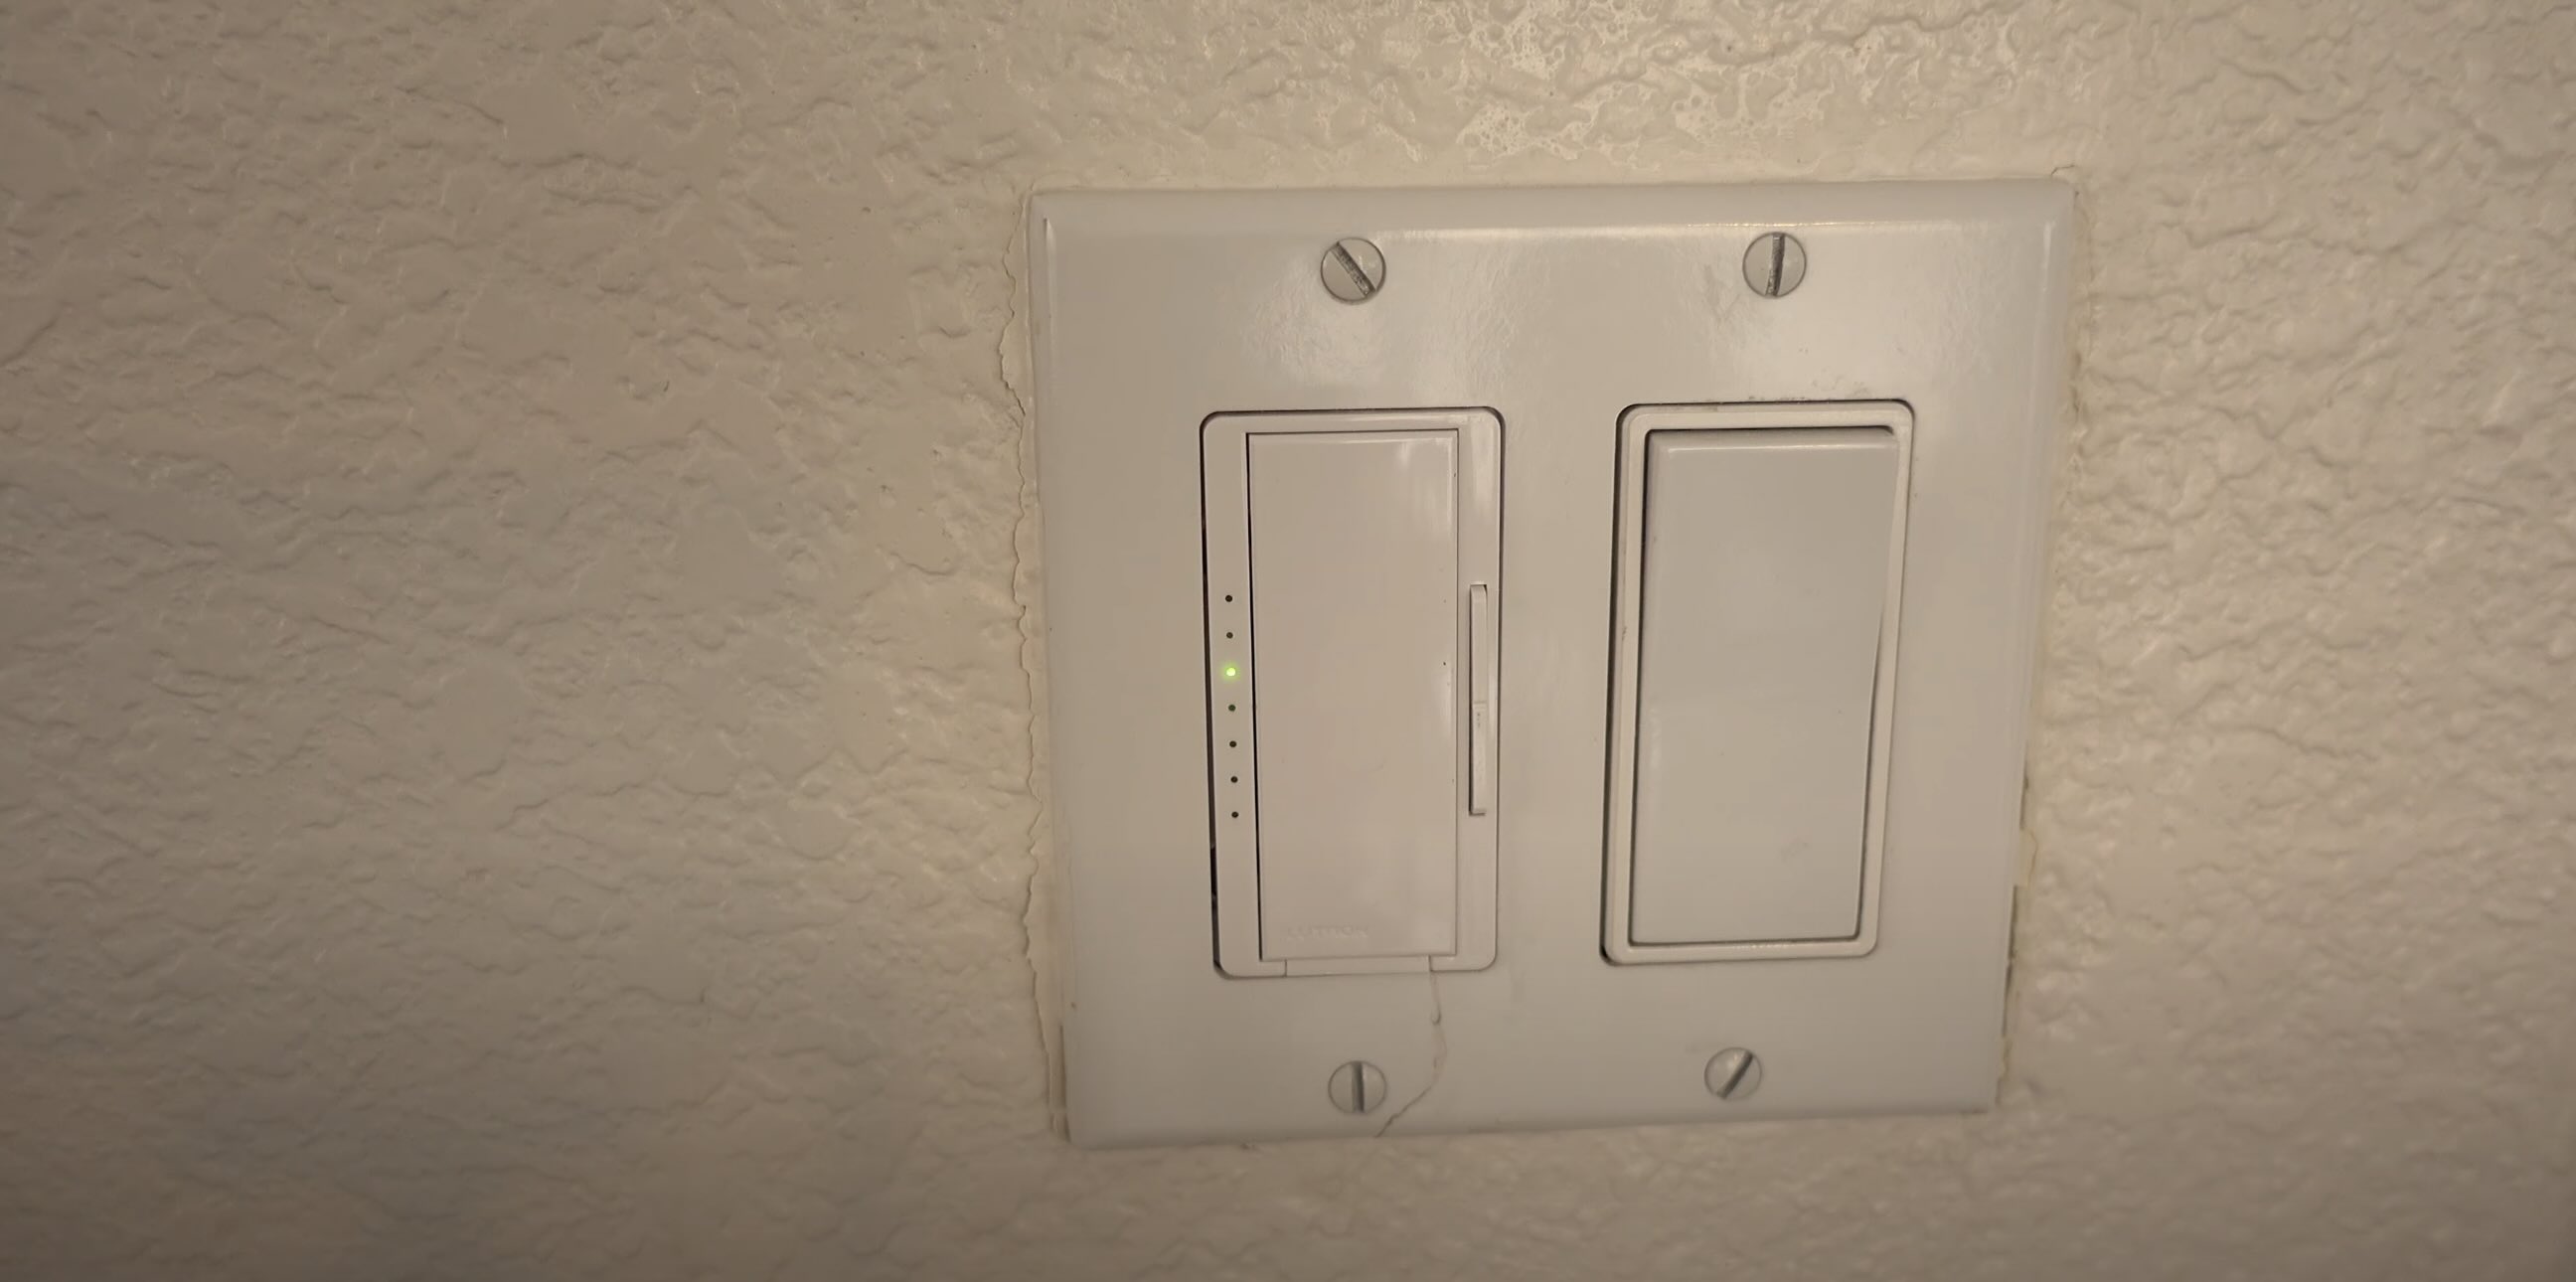
Step 5: Attach the Smart Dimmer Switch
With the wires properly connected, it’s time to attach the smart dimmer switch to the electrical box. Follow these steps to ensure a secure installation:
- Position the smart dimmer switch: Carefully position the switch in the electrical box, aligning it with the screw holes. Ensure that the wires are neatly tucked inside the box without any excess wire sticking out.
- Secure the switch: Using the provided screws, attach the smart dimmer switch to the electrical box. Use a screwdriver to tighten the screws, but be careful not to overtighten and damage the switch or the electrical box.
- Double-check the positioning: After securing the switch, give it a gentle tug to ensure it is properly attached to the electrical box. Make sure it is stable and does not move or wobble.
- Replace the faceplate: Take the faceplate that came with the smart dimmer switch and position it over the switch. Align the screw holes and use the screws provided to attach the faceplate to the switch. Tighten the screws with a screwdriver, but again, be cautious not to overtighten.
Attaching the smart dimmer switch to the electrical box is an important step in the installation process. Ensure that the switch is securely fastened and that the faceplate is properly aligned. A stable and secure attachment will ensure the longevity and functionality of the switch.
Once the smart dimmer switch is securely attached, it’s time to move on to the next step: testing the dimmer switch to ensure it’s functioning correctly.
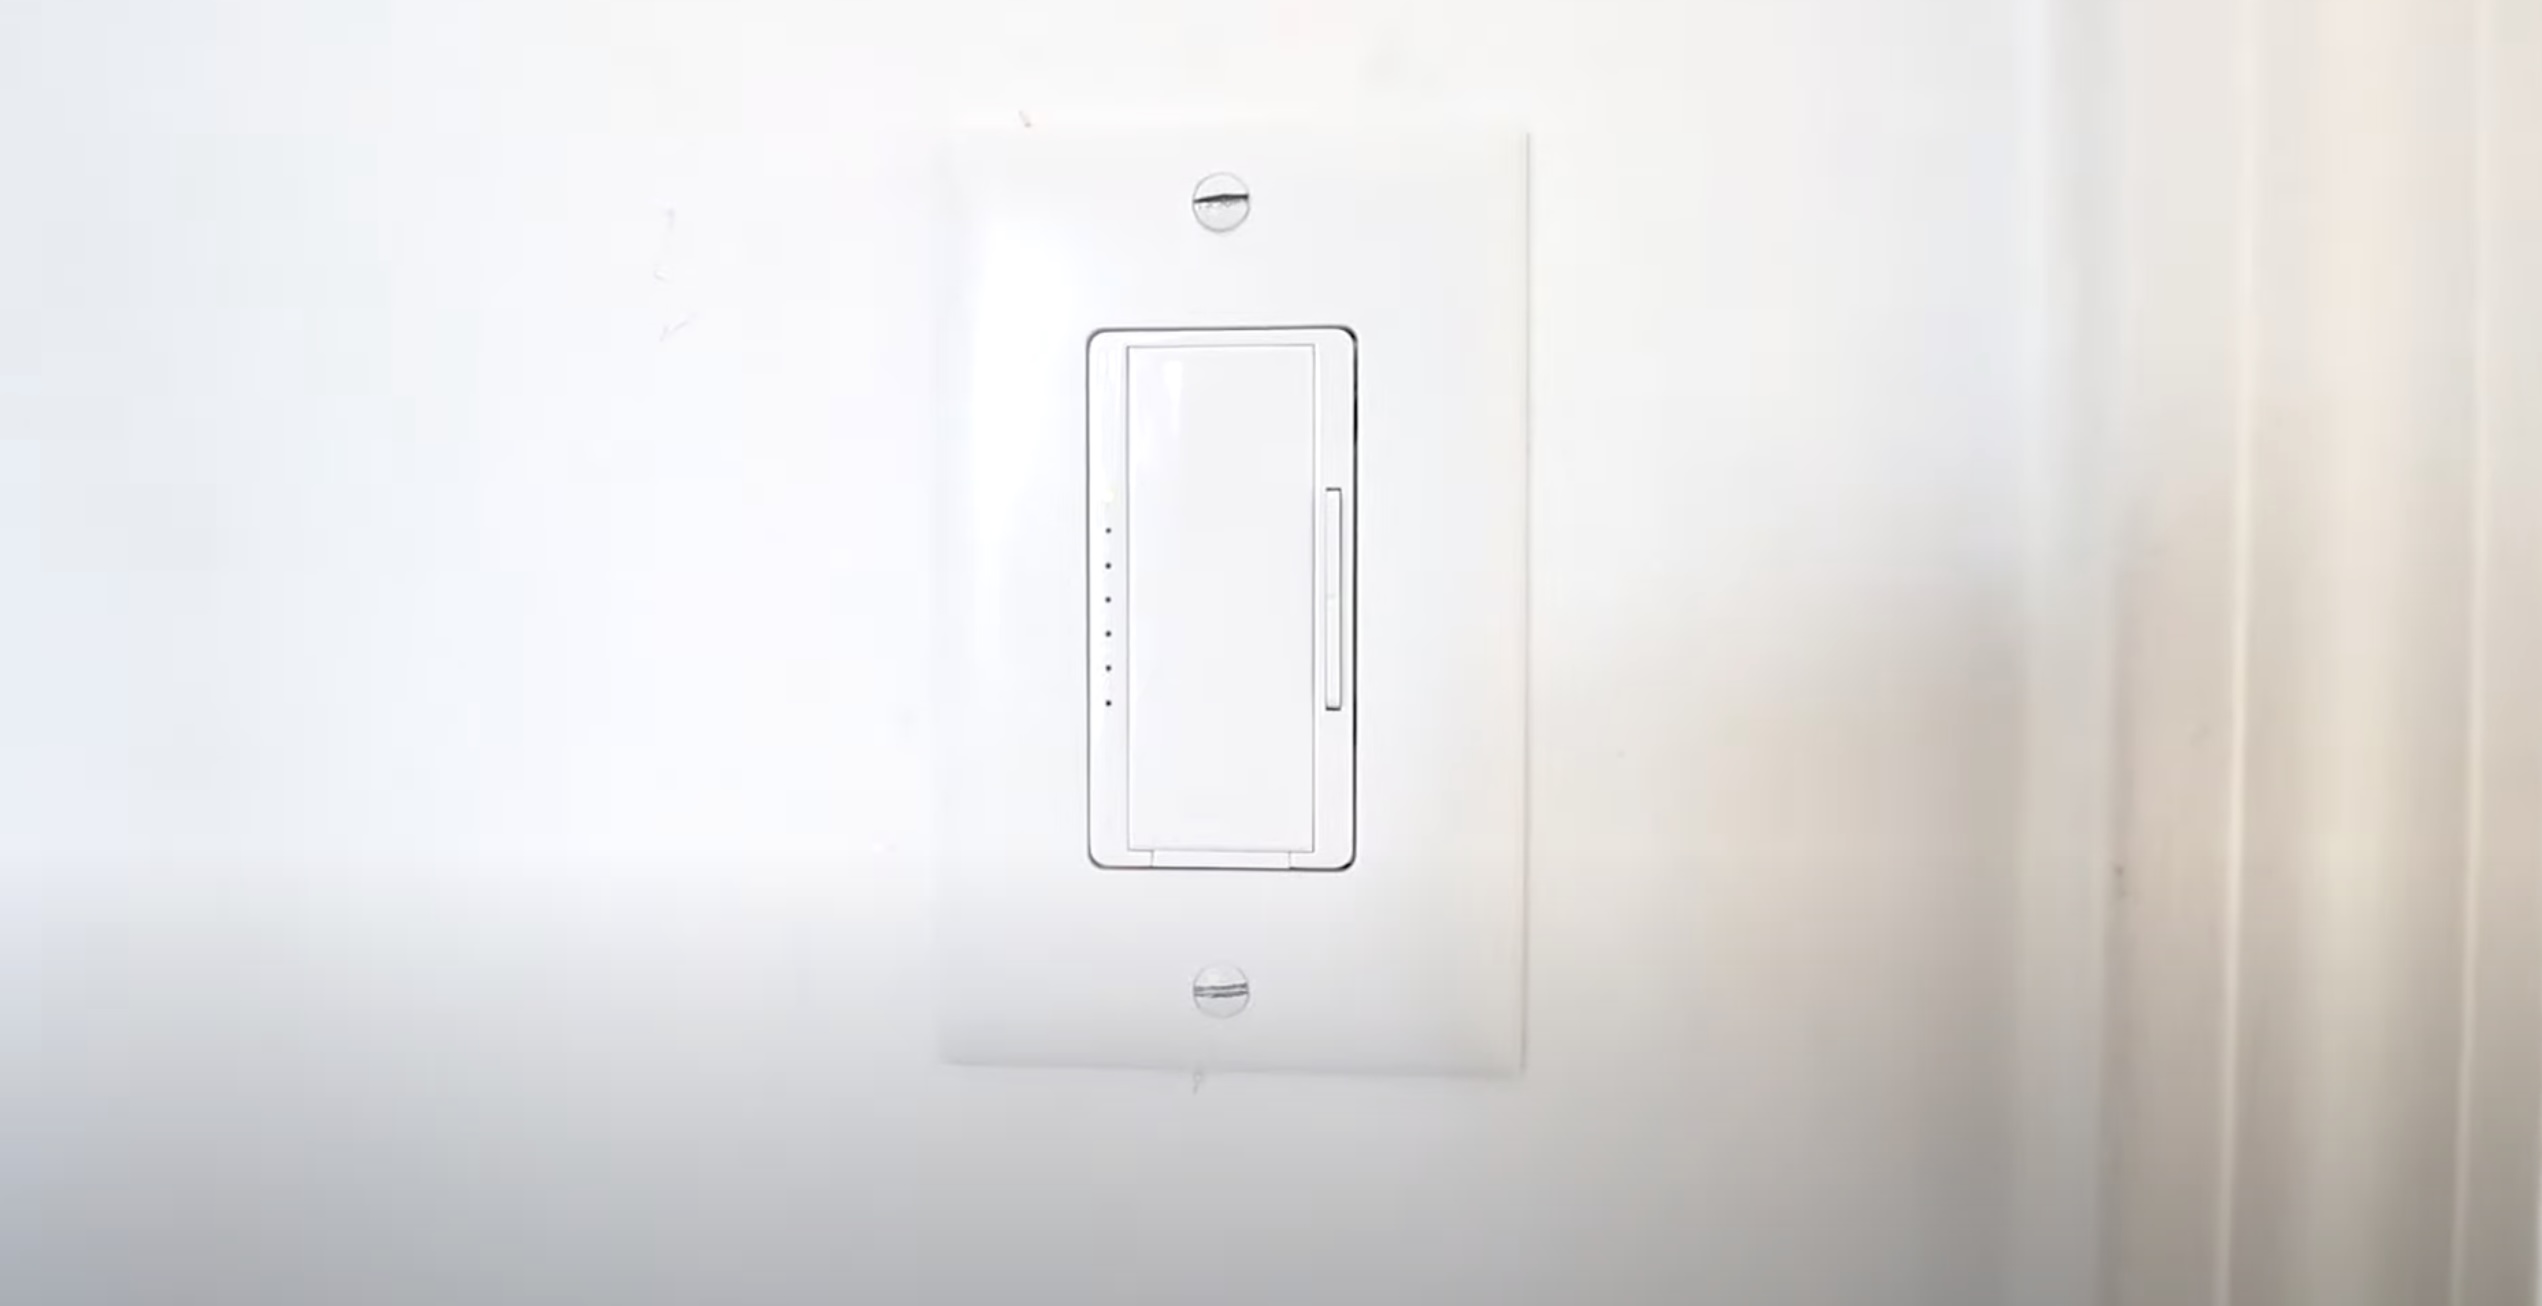
Step 6: Test the Dimmer Switch
After the smart dimmer switch is properly attached, it’s important to test its functionality before proceeding further. Follow these steps to test the dimmer switch:
- Turn on the power: Go back to the electrical panel and turn on the circuit breaker that controls the area where you installed the smart dimmer switch. This will restore power to the switch and allow you to test its functionality.
- Activate the switch: Press the switch or use the designated method provided by the smart dimmer switch to activate it. You should see the lights connected to the switch turn on.
- Adjust the brightness: Once the lights are on, use the dimmer function to adjust the brightness levels. The lights should respond accordingly, becoming brighter or dimmer as you adjust the switch.
- Observe any issues: Pay close attention to any flickering lights, buzzing sounds, or other signs of malfunction. If you notice any issues, turn off the power immediately and consult the manufacturer’s instructions or seek professional assistance.
- Test additional features (if applicable): If your smart dimmer switch comes with additional features such as smartphone app control or compatibility with a smart home hub, test these features as well. Follow the manufacturer’s instructions to connect the switch to your desired control method and ensure proper functionality.
Testing the dimmer switch is crucial to ensure that it’s working correctly and there are no issues with the installation. If you encounter any problems or the switch does not function as expected, it’s important to address them before continuing. This will help prevent any future inconvenience or potential safety hazards.
If the dimmer switch passes the testing phase, you can proceed to the next step: securing the switch in place.
Step 7: Secure the Switch in Place
Now that you have tested the functionality of the smart dimmer switch, it’s time to secure it in place to ensure long-term stability. Follow these steps to securely mount the switch:
- Check the positioning: Confirm that the switch is properly aligned and positioned within the electrical box. Make any necessary adjustments to ensure it is straight and level.
- Tighten the screws: Use a screwdriver to tighten the screws that secure the switch to the electrical box. Be careful not to overtighten, as it may damage the switch or the electrical box. Ensure that the switch is securely fastened and does not move or wobble.
- Inspect the faceplate: Take a moment to inspect the faceplate of the switch. Ensure that it is properly aligned and covers the switch completely. If needed, realign the faceplate and tighten the screws to secure it in place.
- Test the stability: Once the switch and faceplate are secured, gently tug on the switch and faceplate to ensure they are firmly attached. Confirm that there is no movement or looseness in the switch assembly. A stable and secure installation is important for the safe and reliable operation of the smart dimmer switch.
By securely mounting the smart dimmer switch, you ensure its longevity and minimize any potential safety hazards. Take your time during this step to ensure everything is properly secured in place.
Once the switch is securely mounted, you can proceed to the next step: powering on the switch and calibrating the dimmer.
Step 8: Power On and Calibrate the Dimmer
With the smart dimmer switch securely in place, it’s time to power it on and calibrate the dimming settings to suit your preferences. Follow these steps to complete the installation process:
- Turn on the power: Return to the electrical panel and switch on the circuit breaker that controls the area where the smart dimmer switch is installed. This will restore power to the switch and allow it to function.
- Ensure proper functionality: Once the power is back on, test the switch again to ensure that the lights respond correctly. Confirm that the on/off function and dimming capabilities are working as expected.
- Calibrate the dimming settings: Most smart dimmer switches have the ability to fine-tune the dimming range or set default brightness levels. Refer to the manufacturer’s instructions to understand how to calibrate the dimming settings based on your preferences.
- Experiment with different brightness levels: Adjust the dimmer switch to different brightness levels and observe how the lights respond. Take note of the desired intensity for various settings such as full brightness, dimmed for ambiance, or specific levels for different room activities.
- Make necessary adjustments: If the dimming range or default brightness doesn’t align with your preferences, use the dimmer’s calibration or programming features to make the necessary adjustments. Follow the instructions provided by the manufacturer to customize the dimming settings to your liking.
- Test the settings: After making adjustments, test the switch again to ensure that the dimming settings are now calibrated correctly. Confirm that the lights respond accordingly to your desired brightness levels.
Calibrating the dimming settings allows you to personalize the lighting experience and achieve the desired ambiance for any situation. Take the time to fine-tune the settings based on your preferences and needs.
With the smart dimmer switch installed, powered on, and calibrated, you’ve successfully completed the installation process! You can now enjoy the convenience, energy efficiency, and customization options that a smart dimmer switch brings to your home.
Remember, if you ever need to make any changes or troubleshooting, refer to the manufacturer’s instructions or consult a professional electrician for assistance.
Enjoy your new smart dimmer switch and the enhanced lighting experience it provides!
Conclusion
Congratulations on successfully installing your smart dimmer switch! By following this comprehensive guide, you have transformed your ordinary lighting system into a smart and customizable solution. Installing a smart dimmer switch not only provides you with the ability to adjust the brightness of your lights, but it also brings convenience, energy efficiency, and enhanced ambiance to your home.
Throughout the installation process, you have learned how to gather the necessary materials, turn off the power, remove the old switch, connect the wires, attach the smart dimmer switch, test its functionality, secure it in place, and power it on while calibrating the dimming settings. Each step plays a vital role in ensuring a safe and successful installation.
With your new smart dimmer switch in place, you have the power to create the perfect lighting atmosphere for any occasion. Whether you’re hosting a cozy dinner party, working from home, or simply relaxing with a book, you can now effortlessly control the brightness of your lights with just a touch of a button, a voice command, or through a smartphone app.
Not only does a smart dimmer switch enhance your lighting experience, but it also offers energy-saving benefits. By dimming the lights to an appropriate level, you can reduce energy consumption and lower your electricity bills. Additionally, smart dimmer switches often come with scheduling capabilities, allowing you to automate your lighting and ensure lights are turned off when not needed, further optimizing energy efficiency.
Remember, safety is paramount when working with electrical components. Always turn off the power before starting any installation process and exercise caution throughout the entire installation process. If you are uncertain or uncomfortable with electrical work, it’s best to consult a professional electrician for assistance.
Now that you have successfully installed your smart dimmer switch, it’s time to enjoy the benefits it brings to your home. Sit back, relax, and bask in the perfect ambiance that your smart dimmer switch provides, all with just a tap or command. Upgrade your lighting experience and embrace the convenience, energy efficiency, and customization options that a smart dimmer switch offers.
Thank you for following this guide, and may your new smart dimmer switch illuminate your home in a whole new way!
Frequently Asked Questions about How To Install A Smart Dimmer Switch
Was this page helpful?
At Storables.com, we guarantee accurate and reliable information. Our content, validated by Expert Board Contributors, is crafted following stringent Editorial Policies. We're committed to providing you with well-researched, expert-backed insights for all your informational needs.


0 thoughts on “How To Install A Smart Dimmer Switch”