
Articles
How To Build A Basement Foundation
Modified: October 21, 2024
Learn the step-by-step process of building a basement foundation with our informative articles. Get expert tips and guidance to help you tackle this project successfully.
(Many of the links in this article redirect to a specific reviewed product. Your purchase of these products through affiliate links helps to generate commission for Storables.com, at no extra cost. Learn more)
Introduction
Building a basement foundation is an important step in constructing a sturdy and reliable structure. Whether you are adding a basement to an existing home or constructing a new building from scratch, understanding the process of building a basement foundation is crucial to ensure its durability and longevity.
A basement foundation serves multiple purposes, ranging from providing extra living space to offering storage options. It also plays a crucial role in the structural integrity of the building by distributing the weight of the structure evenly and acting as a barrier against moisture and potential water damage.
In this article, we will guide you through the step-by-step process of building a basement foundation. From site preparation to finishing touches, we will cover each stage to help you understand the intricacies involved in the construction process. So, let’s dive in and explore the various steps involved in building a basement foundation.
Key Takeaways:
- Building a basement foundation is a complex process that requires careful planning, precise execution, and attention to detail. Each step, from site preparation to finishing touches, plays a crucial role in creating a solid and functional living space.
- Consult with professionals, adhere to local building codes, and prioritize proper site preparation, excavation, and reinforcement. Implement waterproofing measures, install a drainage system, and focus on insulation and finishing details to create a comfortable and inviting space.
Read more: What Is A Basement Foundation
Step 1: Site Preparation
Before starting the construction of your basement foundation, it is crucial to prepare the site properly. Site preparation involves clearing the area where the basement will be built and ensuring a level surface for construction.
The first step in site preparation is to obtain the necessary permits and approvals from local authorities. Check with your local building department to understand any specific requirements or regulations for building a basement foundation in your area.
Next, clear the site of any obstructions such as trees, bushes, rocks, or debris. Ensure that the area is free from any potential hazards that may interfere with construction. It is essential to hire professionals to handle tree removal or excavation if needed.
Once the site is cleared, the next step is to level the ground. Use a surveying tool or a laser level to ensure the site is perfectly level. This will ensure the stability of the foundation and prevent any future issues.
After leveling the ground, mark the perimeter of the basement foundation on the site. Use stakes and strings to outline the shape and size of the foundation. Double-check the measurements to ensure accuracy.
Lastly, prepare the access routes to the construction site, including clear pathways for construction workers and machinery. This will help ensure smooth progress during the construction process and make it easier to transport materials and equipment.
By effectively preparing the site, you are laying the foundation for a successful construction project. Proper site preparation will help streamline the subsequent stages of building your basement foundation, ensuring a solid and structurally sound structure.
Step 2: Excavation
Once the site is properly prepared, the next step in building a basement foundation is excavation. Excavation involves digging out the area where the foundation will be constructed. This process creates the space necessary for the foundation walls and basement floor.
Excavation is typically done using heavy machinery such as excavators or backhoes. It is essential to hire experienced and skilled operators to ensure accurate and precise digging. The depth of the excavation will depend on the planned height of the basement and any additional requirements specified in the building plans.
During the excavation process, it is vital to constantly check the depth and dimensions of the hole. Use a measuring tape or laser level to ensure the excavation matches the planned specifications. Any deviations should be addressed and corrected promptly to prevent future issues.
As the excavation progresses, remove the excavated soil from the site to create space for construction activities. Proper disposal or relocation of the soil should be coordinated with local authorities and in compliance with environmental regulations.
Additionally, during excavation, it is crucial to address any potential issues like existing utility lines or underground structures. Coordinate with utility companies to locate and mark any buried utilities before excavation to avoid damage or accidents during the process.
Once the excavation is complete, inspect the walls and floor of the hole for any signs of instability or water accumulation. If water is present, install drainage systems to redirect it away from the excavation area. This will help prevent water damage and ensure a dry construction site.
Excavation is a critical step in building a basement foundation. It sets the stage for the foundation walls and floor to be constructed. Proper planning, precise digging, and attention to detail during excavation will contribute to the overall stability and longevity of the basement foundation.
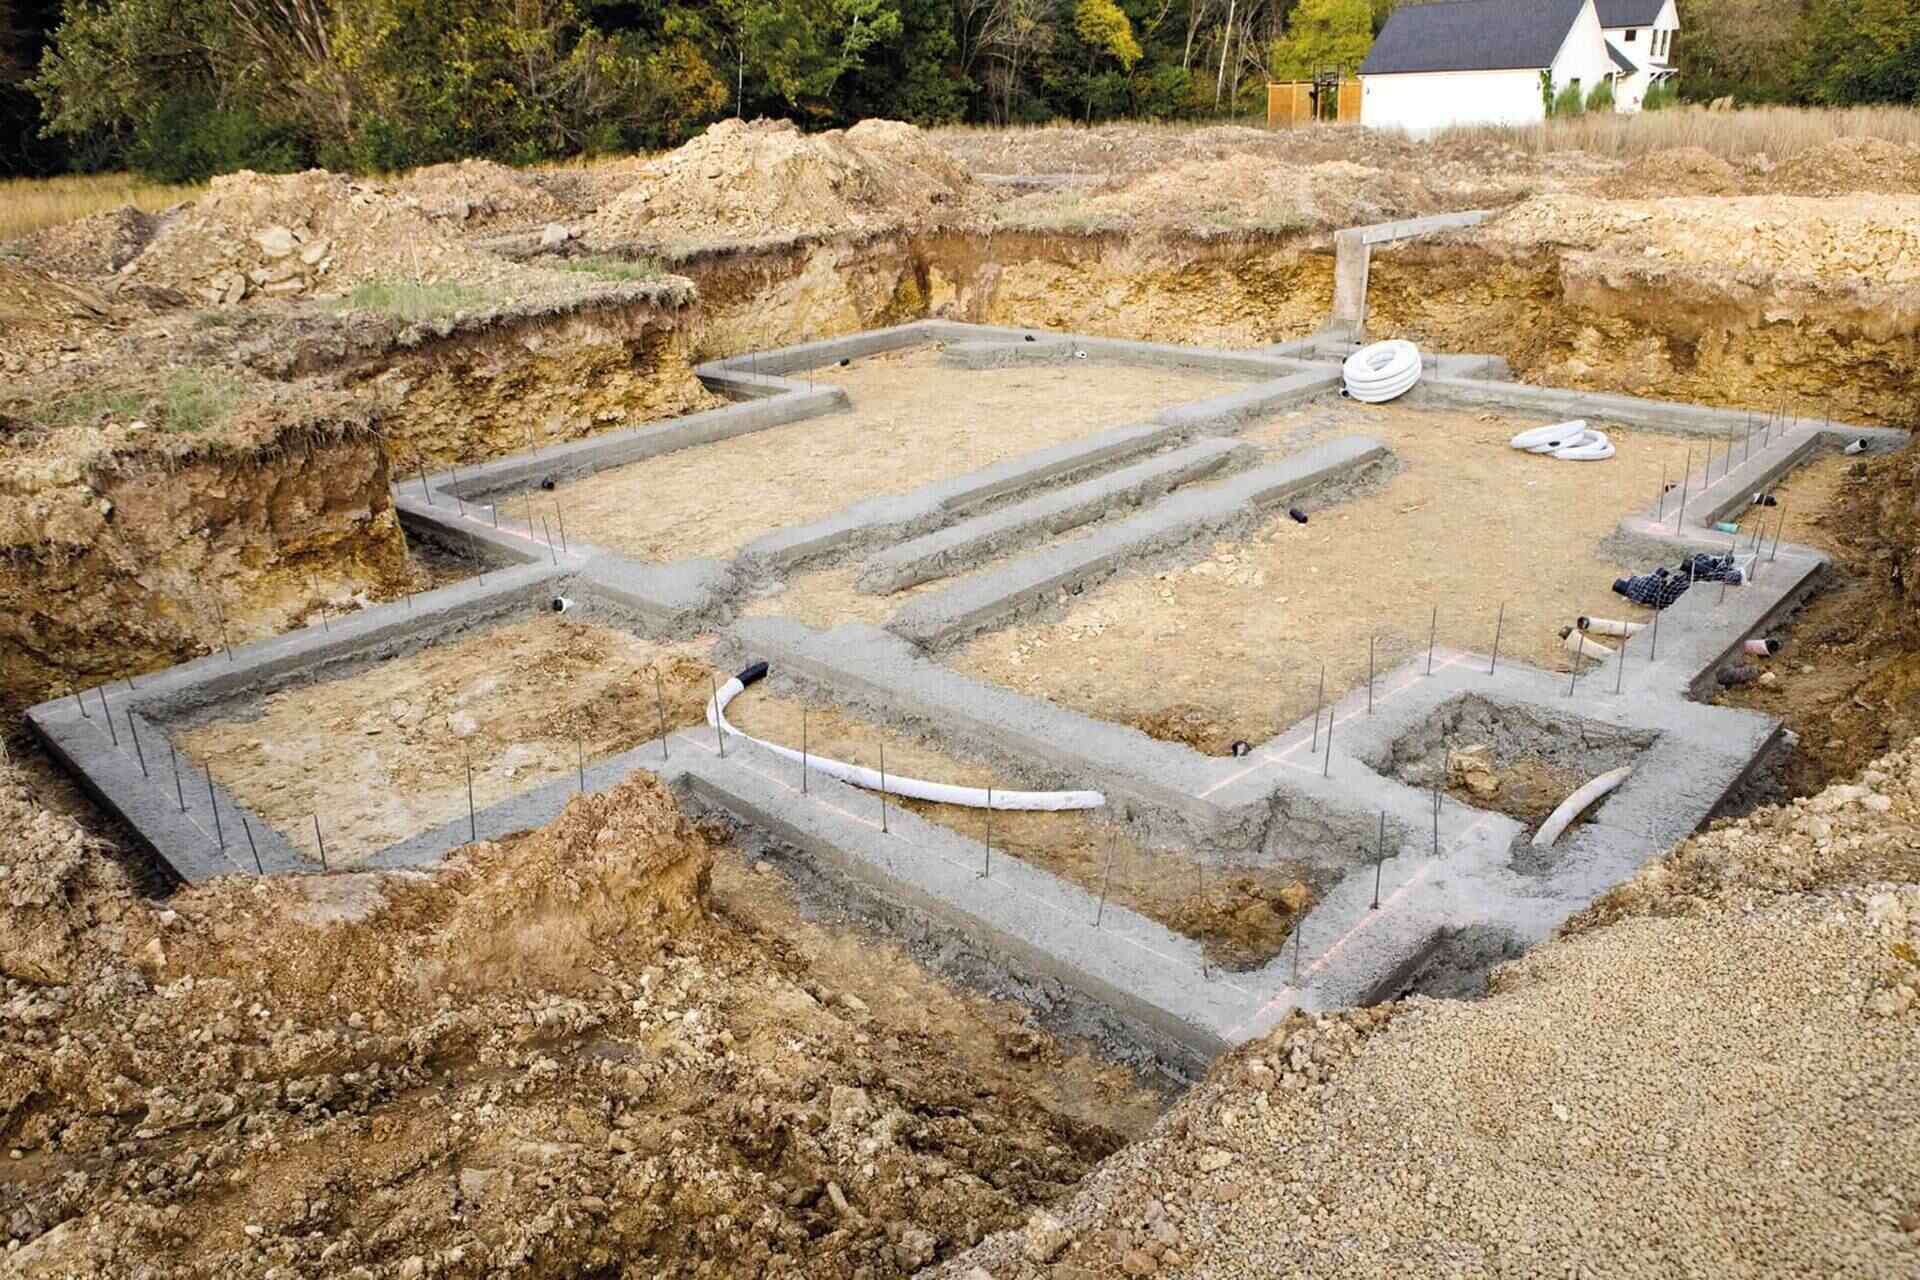
Step 3: Pouring Footings
After the excavation is complete, the next step in building a basement foundation is pouring the footings. Footings are a vital component of the foundation that provides support and stability for the structure above.
Footings are usually made of concrete and are poured along the perimeter of the excavation. They act as a solid base for the foundation walls and distribute the load of the building evenly to the soil below.
The first step in pouring footings is to set up the formwork. Formwork consists of wooden or metal molds that define the shape and size of the footings. The formwork should be set securely and leveled to ensure the footings are poured accurately.
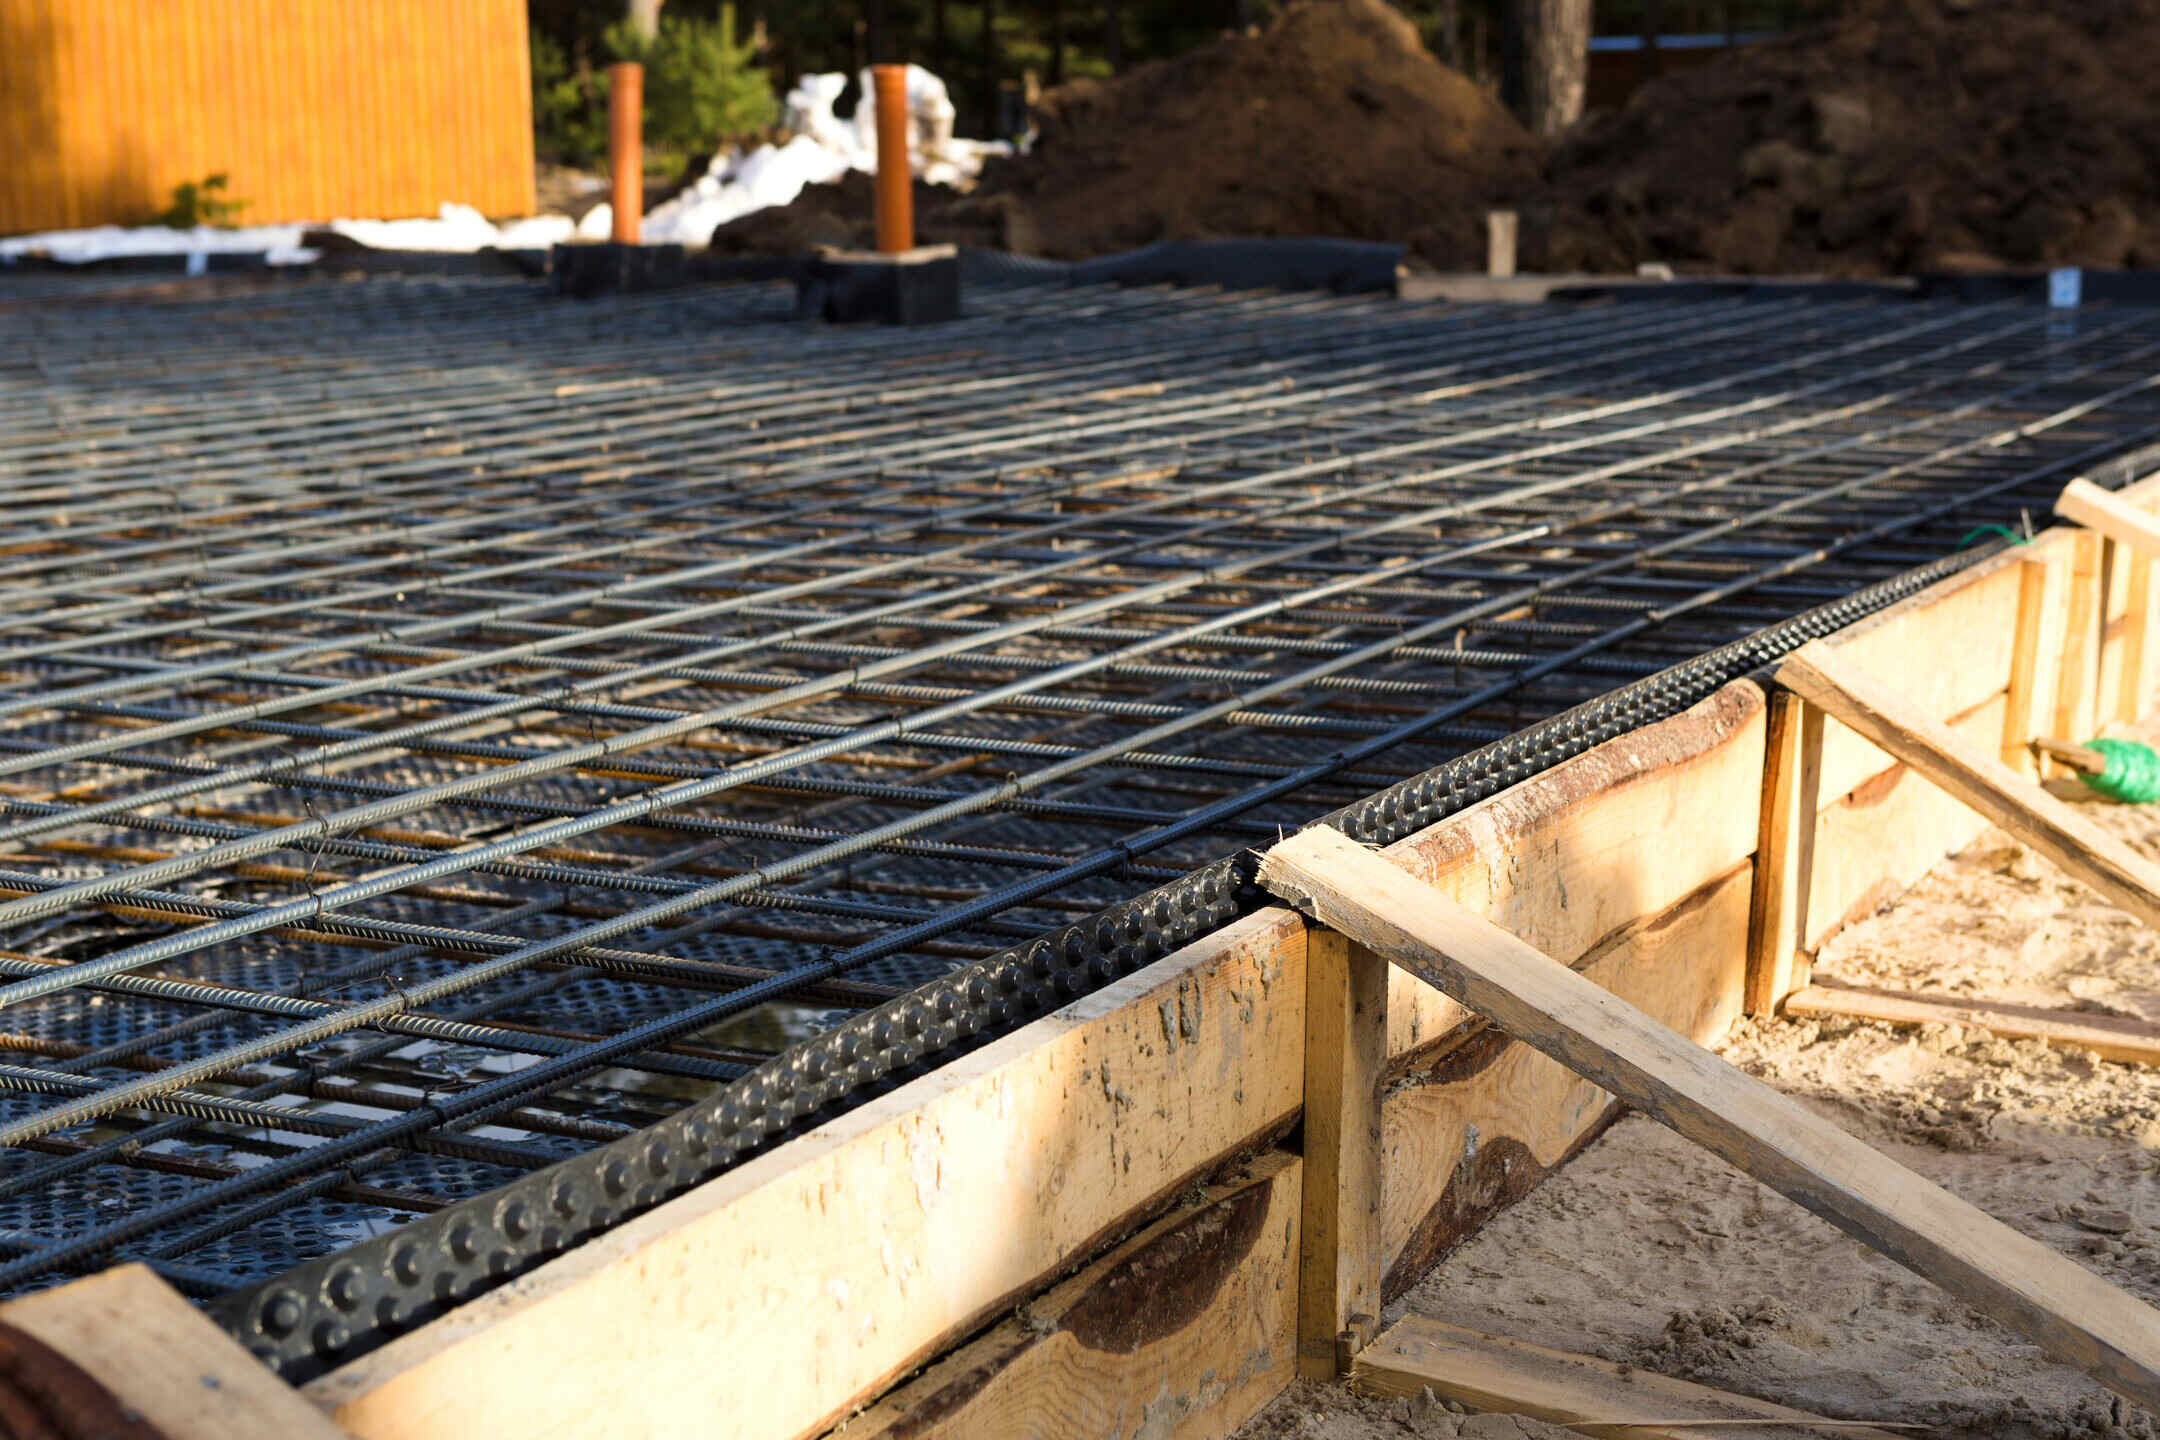
Before pouring the concrete, ensure that the formwork is adequately reinforced with rebar or wire mesh. This will provide added strength and prevent the footings from cracking or shifting over time.
Next, mix the concrete according to the specifications and pour it into the formwork. Use a shovel or concrete pump to distribute the concrete evenly and avoid air pockets. Ensure that the concrete completely fills the formwork, reaching the desired height for the footings.
After pouring the footings, use a screed or a straight edge to level the surface of the concrete. Smooth out any uneven areas or excess material, and check for proper alignment and dimensions.
Allow the footings to cure and set for the recommended period before proceeding to the next step of the foundation construction. Curing time can vary, but typically it takes about 24 to 48 hours for the concrete to gain sufficient strength.
It is important to note that footings should be designed by a structural engineer or in compliance with local building codes. The size and depth of the footings depend on the load-bearing requirements and the soil conditions of the construction site. Consulting with a professional will help ensure that the footings are designed properly to support the structure above.
Pouring footings is a critical step in building a basement foundation. It establishes a solid and stable base for the foundation walls and ensures the overall structural integrity of the building. Following proper procedures and guidelines will result in strong footings that can withstand the test of time.
Step 4: Installing Forms
After pouring the footings, the next step in building a basement foundation is installing the forms. Forms, also known as molds, are used to shape and contain the concrete walls of the foundation. They create a barrier that holds the wet concrete in place until it hardens and forms the desired shape.
Forms can be constructed using a variety of materials, including plywood, aluminum, or insulated formwork systems. The choice of form material depends on factors such as the size and complexity of the foundation walls, budget constraints, and construction requirements.
The first step in installing forms is to measure and cut the form panels to the desired height and length. Ensure that the panels are properly aligned and securely connected using nails, screws, or clamps. Use a level and plumb line to ensure that the forms are vertically straight and aligned correctly.
It is important to pay attention to the corners and joints of the formwork, as these areas need to be tightly sealed to prevent any leaks or seepage of the wet concrete. Use caulk or sealant to seal any gaps or openings between the form panels.
Once the forms are properly installed, it is important to verify their dimensions and alignment. Double-check the measurements and adjust the forms if necessary. Any errors or deviations should be corrected before pouring the concrete.
Prior to pouring the concrete, it is a good practice to apply form release agents on the interior surfaces of the forms. This will ensure that the forms can be easily removed once the concrete has cured, without sticking or damaging the walls.
Installing forms requires precision and attention to detail. It is crucial to follow the construction plans and guidelines to ensure that the forms are properly installed, aligned, and secured. Properly installed forms will result in straight, smooth, and solid foundation walls.
Keep in mind that form removal should only be done after the concrete has reached sufficient strength and can support its weight. Refer to the recommended curing time provided by the concrete manufacturer or consult with a professional to determine the appropriate time for form removal.
By following the correct methods for installing forms, you can ensure the successful construction of a basement foundation with accurately shaped and aligned walls.
Read more: How To Build A Deck Foundation
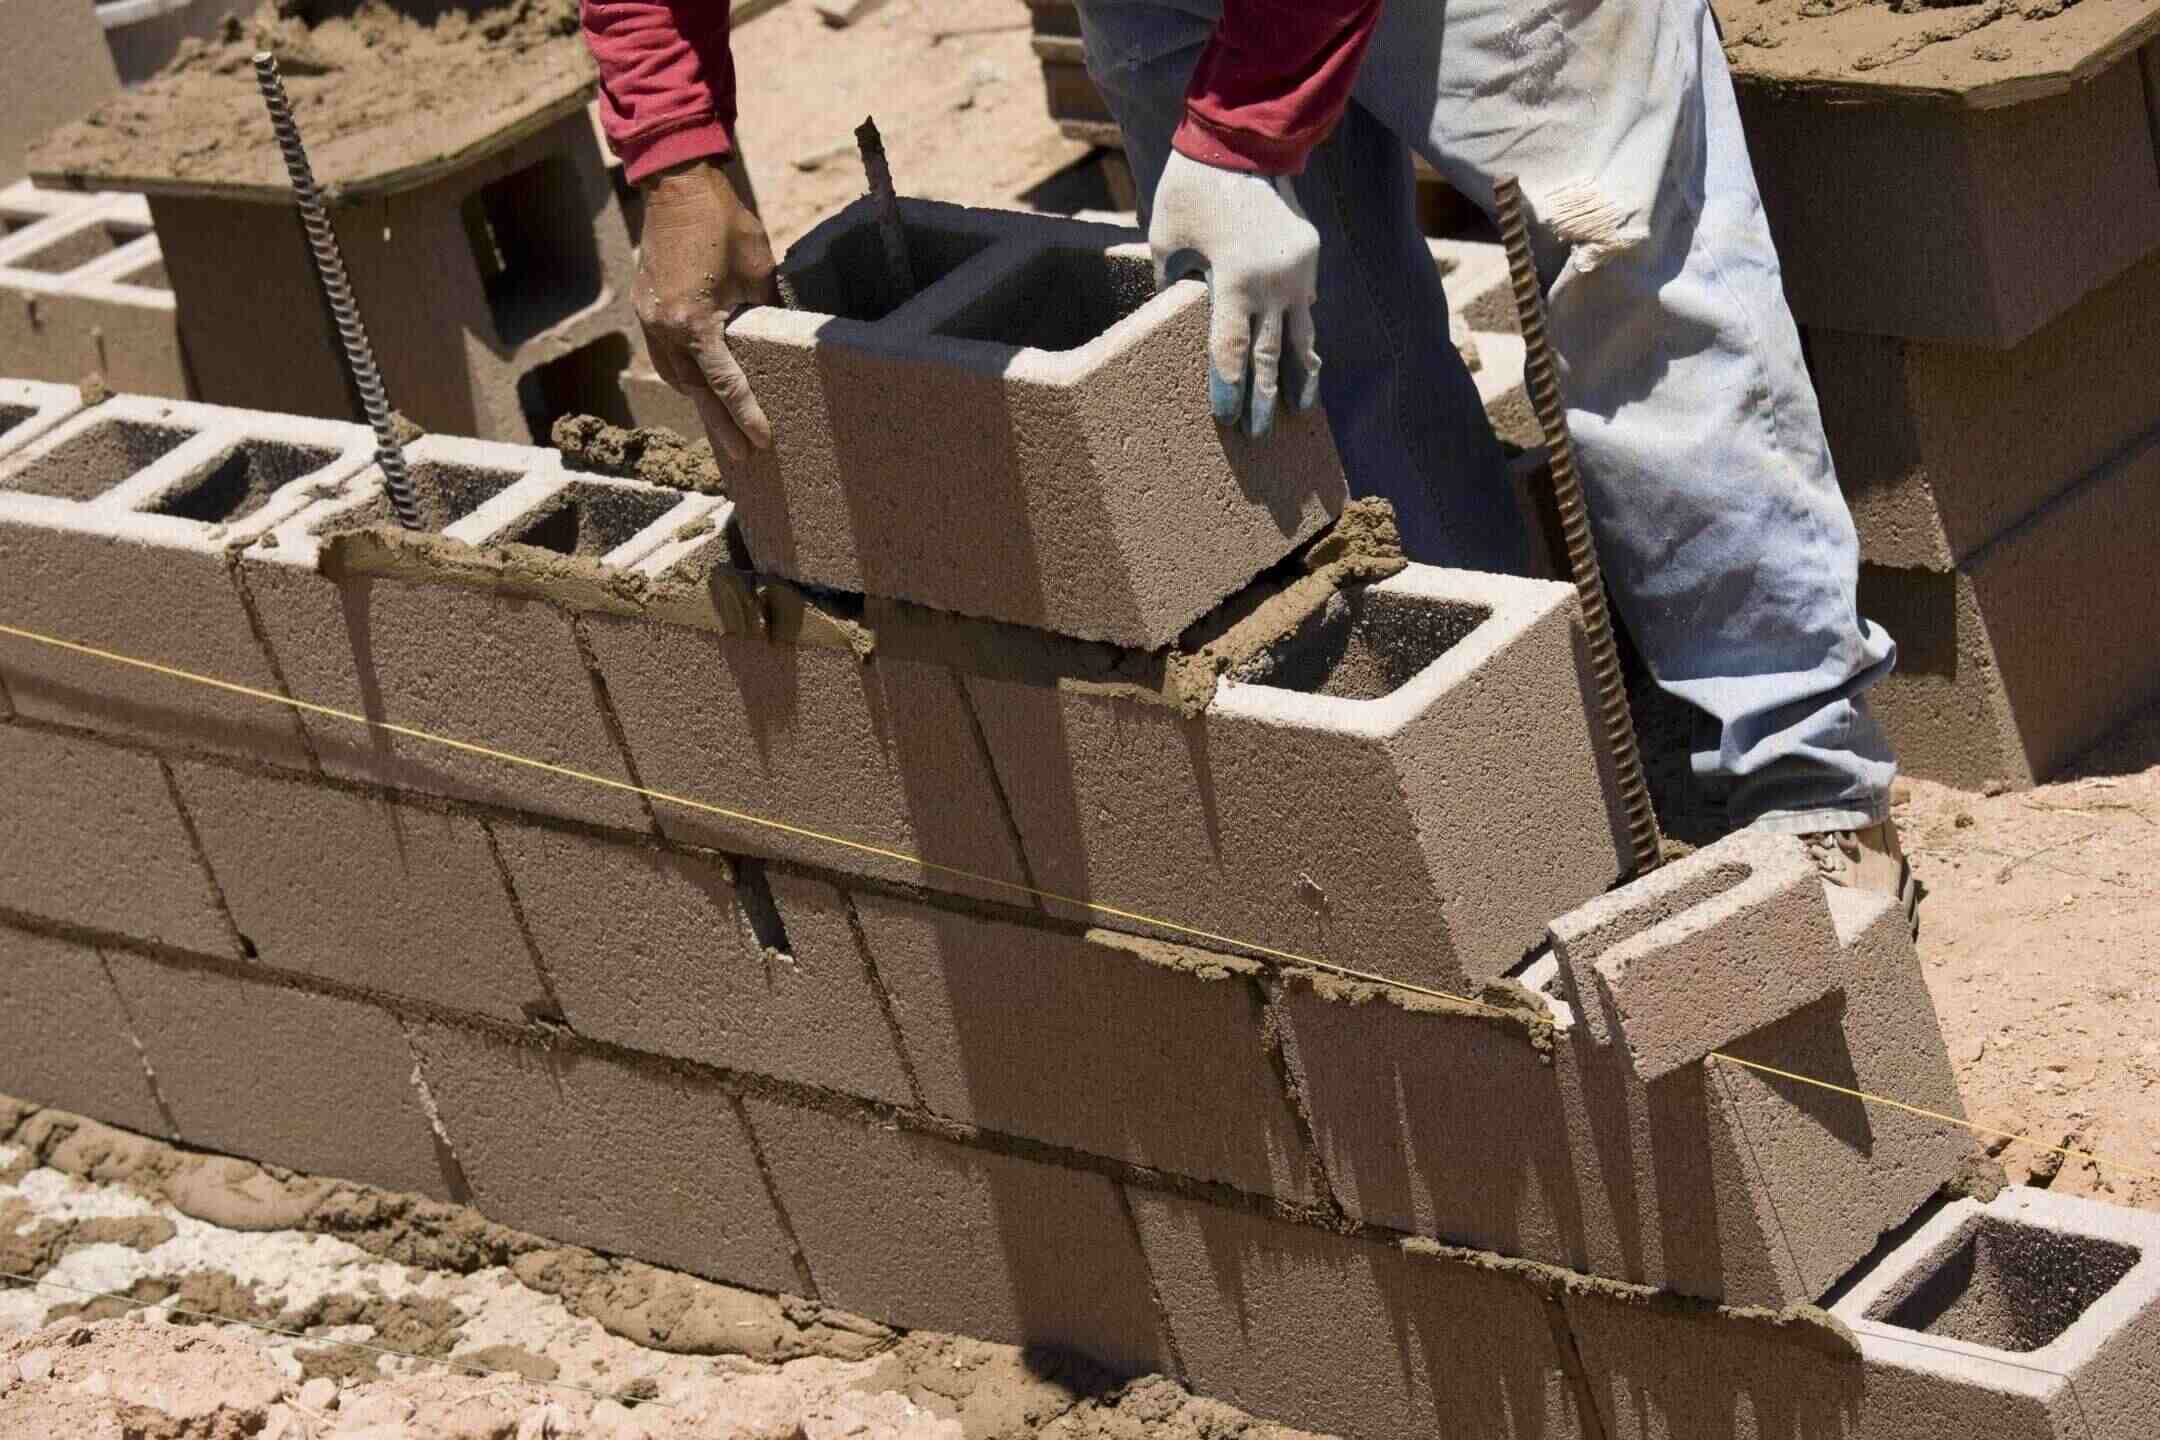
Step 5: Reinforcing Steel Placement
Reinforcing steel, also known as rebar, plays a crucial role in strengthening and reinforcing the concrete walls of a basement foundation. This step involves placing and securing the rebar within the formwork before pouring the concrete.
The purpose of reinforcing steel is to enhance the structural integrity and load-bearing capacity of the foundation walls. It helps to distribute the load evenly and minimize cracking or shifting of the concrete.
The first step in reinforcing steel placement is to determine the appropriate size and spacing of the rebar. This is typically specified in the structural design plans and takes into account the anticipated loads and soil conditions of the construction site.
Cut the rebar to the required lengths using a rebar cutter or grinder, taking care to ensure accurate measurements. You may need to bend the rebar to fit the shape of the foundation walls. Use a rebar bender or a hydraulic rebar tool for this purpose, following the bending specifications provided in the construction plans.
Next, position the rebar within the formwork, ensuring proper spacing and coverage. Use rebar chairs or supports to hold the rebar in place at the desired height and prevent it from sinking into the wet concrete.
It is essential to tie the rebar together using wire or rebar ties at the intersections to maintain the structural integrity and stability of the reinforcement. Make sure the ties are tight and secure, without any loose ends that can interfere with the concrete pouring process.
During the placement of the rebar, pay attention to its proximity to the form walls to prevent any interference during concrete pouring and to ensure proper concrete coverage. Maintain the specified concrete cover thickness over the rebar, as indicated in the construction plans, to protect it from corrosion and other potential damage.
Verify the placement and alignment of the rebar by visually inspecting the forms. Double-check the spacing and coverage to ensure it meets the required standards and specifications.
Reinforcing steel placement is a critical step in building a basement foundation. Properly placed and secured rebar ensures the strength and stability of the foundation walls, allowing them to withstand the intended loads and external forces.
Remember that the placement of reinforcing steel should be done under the supervision of a structural engineer or a professional familiar with the project’s requirements. Following the approved construction plans and specifications will help ensure that the reinforcing steel is correctly positioned to enhance the overall structural integrity of the basement foundation.
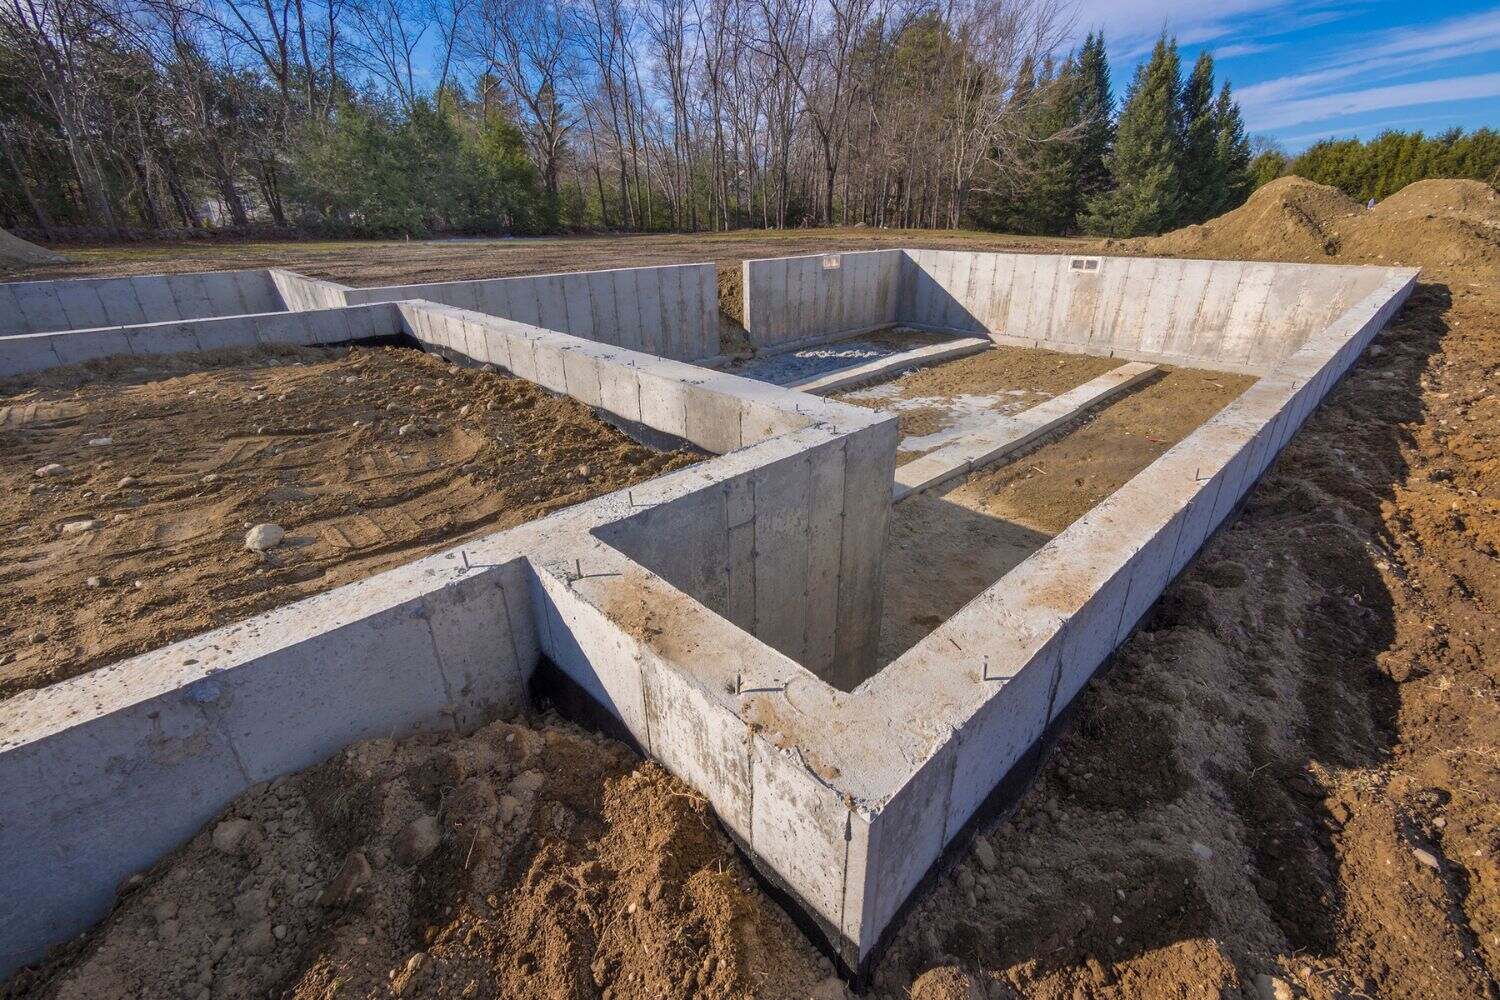
Step 6: Pouring Concrete Walls
Once the reinforcing steel is in place, the next step in building a basement foundation is pouring the concrete walls. This step involves carefully filling the formwork with wet concrete to create the solid structure of the foundation walls.
Prior to pouring the concrete, it is crucial to properly prepare the formwork. Ensure that the forms are clean, free of debris, and securely fastened to prevent any leakage. Apply form release agents to facilitate the removal of the forms once the concrete has cured.
Before starting the concrete pouring process, it is essential to have enough concrete mix prepared and ready for use. Consult with a concrete supplier to determine the right concrete mix design for your specific project requirements.
Begin pouring the concrete at one end of the formwork and work your way around to ensure even distribution. Use a concrete pump or a wheelbarrow to quickly and efficiently transfer the concrete into the formwork. It is important to pour the concrete continuously to prevent any cold joints or weak points in the walls.
While pouring the concrete, use a vibration tool or a rod to remove any air bubbles and ensure proper compaction. This will help to achieve a dense and solid concrete structure. Additionally, monitor the pour rate to prevent overflowing or underfilling of the forms.
As you pour the concrete, periodically check the level and alignment of the walls using a level and plumb line. Adjust the forms if necessary to maintain the desired shape and dimensions of the foundation walls. Smooth out the surface of the concrete using a trowel or a screed, ensuring an even and uniform appearance.
After the concrete walls are poured, use a brush or broom to apply a stipple finish to the surface, providing better adhesion for subsequent layers or finishes. This finish helps to enhance the durability and longevity of the walls.
Once the concrete is poured, allow it to cure and gain strength as per the manufacturer’s recommendations. This typically takes several days, during which the concrete will harden and develop its full strength.
Pouring the concrete walls is a critical step in building a basement foundation. By following proper procedures and techniques, you can create solid and reliable foundation walls that will provide the necessary strength and stability for your structure.
Ensure that the concrete pour is performed by experienced professionals or under the guidance of a knowledgeable contractor. Adhering to industry standards and best practices will result in high-quality concrete walls that meet the structural requirements of your basement foundation.
Step 7: Waterproofing
Waterproofing is a crucial step in building a basement foundation to protect it from water damage and moisture intrusion. This step involves applying a waterproofing barrier to the exterior surface of the foundation walls to prevent water infiltration.
Waterproofing is essential because basements are prone to water seepage due to the surrounding soil’s moisture content and the potential for groundwater accumulation. By implementing proper waterproofing measures, you can safeguard your basement against water-related issues such as leaks, mold growth, and structural damage.
The first step in waterproofing is to ensure the surface of the foundation walls is clean and free of any dirt, debris, or loose materials. Use a wire brush or a power washer to thoroughly clean the walls before applying any waterproofing products.
Next, select a suitable waterproofing material based on your specific needs and local building codes. There are various options available, such as liquid-applied membranes, sheet membranes, or waterproofing coatings. Consult with a professional or refer to the manufacturer’s guidelines to determine the most appropriate product for your project.
Apply the waterproofing material to the exterior surface of the foundation walls using a brush, roller, or spray equipment. Ensure that the material is applied evenly and covers the entire surface of the walls, paying close attention to joints, corners, and any penetrations.
It is important to follow the manufacturer’s instructions regarding the application thickness and drying time of the waterproofing product. Proper curing and drying of the material are essential for its effectiveness and long-term durability.
In addition to the exterior waterproofing, consider installing a drainage system around the foundation to further protect against water buildup. This can include a perimeter drain or French drain system that collects and redirects water away from the foundation.
Inspect the waterproofing system periodically to ensure its integrity and effectiveness. Check for any signs of water seepage, deterioration, or damage and address any issues promptly to prevent further damage.
Waterproofing is an important investment in maintaining a dry and safe basement. By implementing proper waterproofing measures, you can protect your basement from potential water damage and ensure its long-term durability.
Consider engaging a professional waterproofing contractor who specializes in basement waterproofing to ensure the highest quality workmanship and adherence to industry standards.
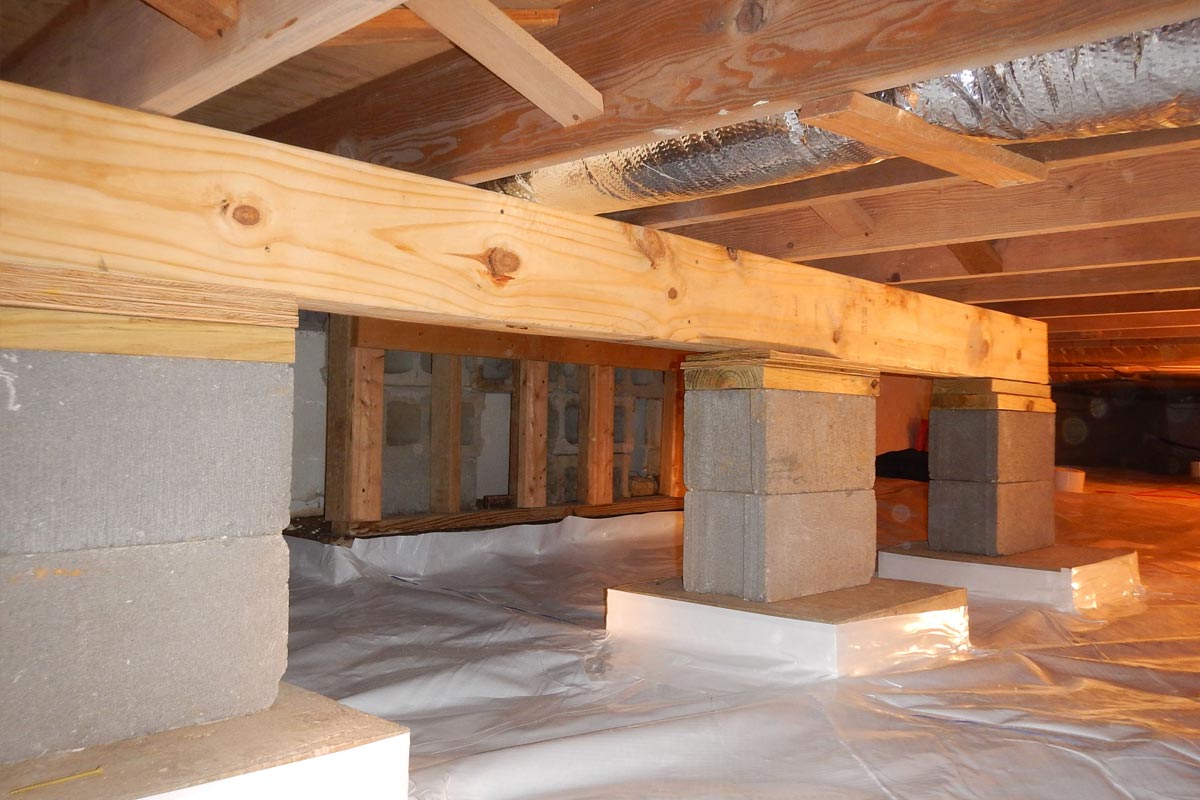
Step 8: Backfilling
After the foundation walls have been waterproofed and allowed to cure, the next step in building a basement foundation is backfilling. Backfilling refers to the process of filling the space between the exterior of the foundation walls and the surrounding soil.
The purpose of backfilling is to provide support and stability to the foundation walls. It helps to prevent the walls from shifting or settling due to the pressure exerted by the surrounding soil.
The first step in backfilling is to ensure that the backfill material is suitable and free from any debris or large rocks. Use clean fill material such as gravel or crushed stone to create a stable and firm layer around the foundation walls.
Begin backfilling by placing the backfill material in layers, compacting each layer as you go. Use a compactor or tamper to achieve proper compaction and density. This will help prevent settlement and ensure a solid backfill.
Pay attention to the backfilling process near the window wells or other openings in the foundation walls. Use caution and install proper drainage systems, such as window well drains, to prevent water accumulation and potential water damage.
While backfilling, it is important to slope the soil away from the foundation walls to ensure proper drainage. This helps to redirect rainwater and prevent it from pooling against the foundation, which can lead to moisture issues and potential damage.
Before completing the backfilling process, make sure to inspect the foundation walls and backfilled areas for any signs of settlement or structural issues. Address any concerns immediately to ensure the stability and integrity of the foundation.
Keep in mind that backfilling should be done gradually and in coordination with the rest of the construction process. It is crucial to follow local building codes and regulations when it comes to backfilling depths and techniques.
Proper backfilling is essential for the long-term stability and performance of a basement foundation. By following the correct procedures and using suitable materials, you can ensure that your foundation is properly supported and well-protected against soil pressure and potential settlement.
Consider consulting with a professional contractor or engineer experienced in foundation construction to ensure that the backfilling process is done in accordance with industry best practices and local regulations.
When building a basement foundation, ensure proper waterproofing and drainage to prevent water damage. Use quality materials and follow local building codes for safety and stability.
Read more: How To Build A Raised Foundation
Step 9: Installing Drainage System
Proper drainage is crucial for maintaining a dry and structurally sound basement. Step 9 in building a basement foundation involves installing a drainage system to control the flow of water around and beneath the foundation.
Excess water can pose a significant threat to the foundation, leading to issues like water seepage, moisture damage, and even foundation instability. Installing a drainage system helps to redirect water away from the foundation, preventing potential issues.
The first step in installing a drainage system is to plan the layout and design. Consider factors such as the existing soil conditions, local climate, and the topography of the site. The goal is to ensure that water is effectively directed away from the foundation and discharged at a safe distance.
One commonly used drainage system is a perimeter drain, commonly known as a French drain. This involves digging a trench around the perimeter of the foundation and installing a perforated pipe wrapped in a filter fabric. The perforated pipe collects excess water and redirects it away from the foundation.
Another crucial aspect of the drainage system is the inclusion of a sump pump. A sump pump is typically installed in the basement or lower level of the building to pump out any water that accumulates in the drain system or the sump pit.
After designing the drainage system, the next step is excavation. Dig a trench around the perimeter of the foundation at a depth below the level of the foundation footings. The trench should slope downward to facilitate water flow towards the sump pit or drainage outlet.
Install the perforated pipe in the trench, making sure it sits on a bed of gravel or crushed stone. Connect the pipe to the sump pump, ensuring proper alignment and airtight connections. Secure the pipe with fittings and cover it with additional gravel or stone for proper drainage.
It is essential to install a filter fabric or geotextile alongside the drainage system to prevent clogging and ensure the proper flow of water. The fabric allows water to pass through while preventing soil particles from entering and clogging the system.
Lastly, backfill the excavated trench with soil, taking care to not disturb the drainage system. Compact the backfill material to achieve proper compaction and avoid settling.
The installation of a proper drainage system is crucial for maintaining a dry and stable basement foundation. By effectively managing water flow, you can prevent potential damage and prolong the lifespan of your basement.
Consider consulting with a professional contractor experienced in drainage system installation to ensure the proper design and installation of the system. They can help evaluate the specific needs of your foundation and provide appropriate recommendations for an effective drainage solution.
Step 10: Pouring Basement Floor
Once the foundation walls are in place and the drainage system is installed, the next step in building a basement foundation is pouring the basement floor. This step involves the placement and leveling of concrete to create a solid and functional floor surface within the basement.
The basement floor serves as a crucial component of the foundation, providing a stable and level surface for various activities and adding structural integrity to the overall construction.
The first step in pouring the basement floor is to prepare the subgrade, the soil or aggregate base upon which the concrete will be poured. Ensure that the subgrade is properly compacted and leveled to create a solid and even base for the floor.
Next, construct forms around the perimeter of the basement floor to contain the concrete during the pouring process. The forms can be made of wood or metal, and they should be securely fastened and properly aligned.
Prior to pouring the concrete, it is crucial to determine the appropriate concrete mix design in consultation with a concrete supplier. The mix should be selected based on factors such as the intended use of the basement, the load requirements, and the local climate conditions.
With the concrete mix prepared, begin pouring the concrete into the forms. Utilize a concrete pump or wheelbarrows for efficient distribution, ensuring that the concrete is spread evenly throughout the space.
As you pour the concrete, use a screed or straight edge to level the surface and remove any excess material. Move the screed in a back-and-forth motion to smooth out the concrete and achieve a uniform thickness.
Use a bull float or power trowel to further smooth and finish the surface of the concrete for a professional and polished look. This process helps to eliminate any imperfections and create a durable and visually appealing basement floor.
Allow the concrete to cure and gain sufficient strength before removing the forms or subjecting the floor to any heavy loads. The curing time can vary depending on factors such as weather conditions and the specific concrete mix used. Consult with a professional or follow the manufacturer’s recommendations for the appropriate curing period.
Pouring the basement floor requires proper planning, precise execution, and adherence to industry standards. By following the correct procedures and using suitable materials, you can create a strong and functional floor that will withstand the demands of daily use in your basement.
Consider consulting with a professional concrete contractor to ensure the proper mix design, finishing techniques, and curing procedures are followed for a high-quality basement floor.
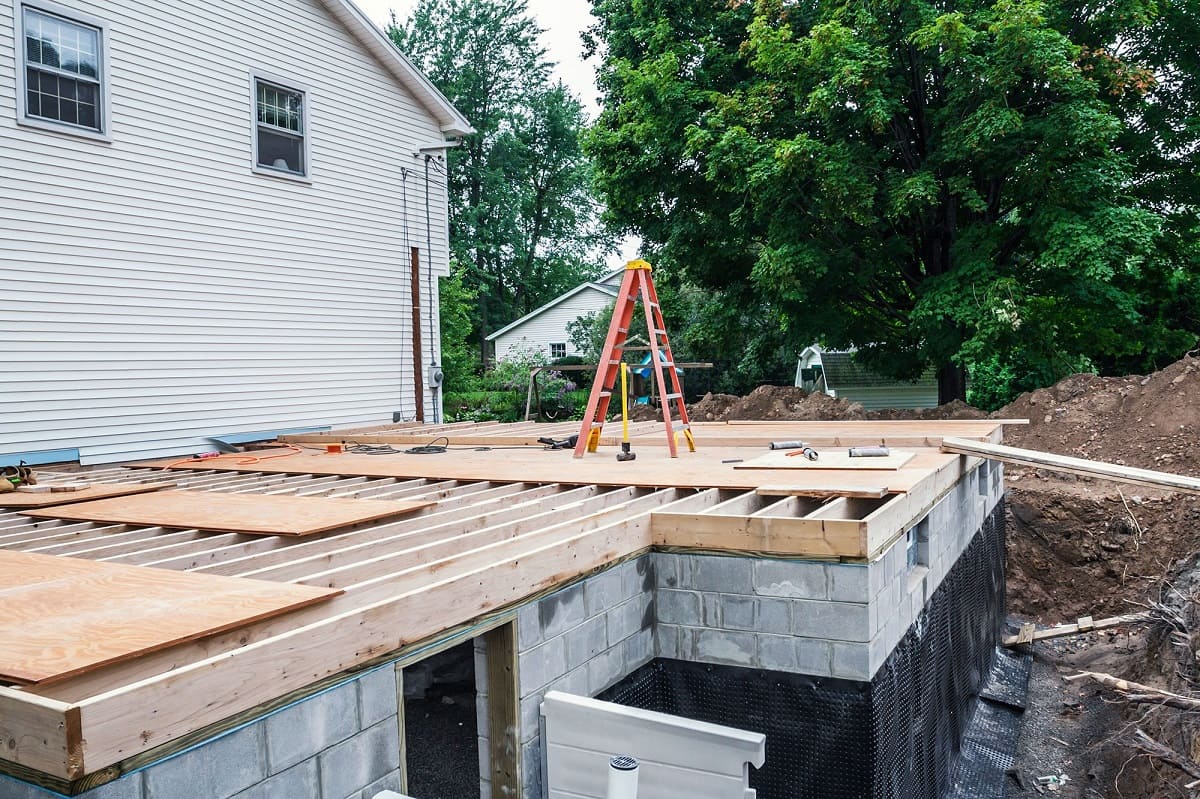
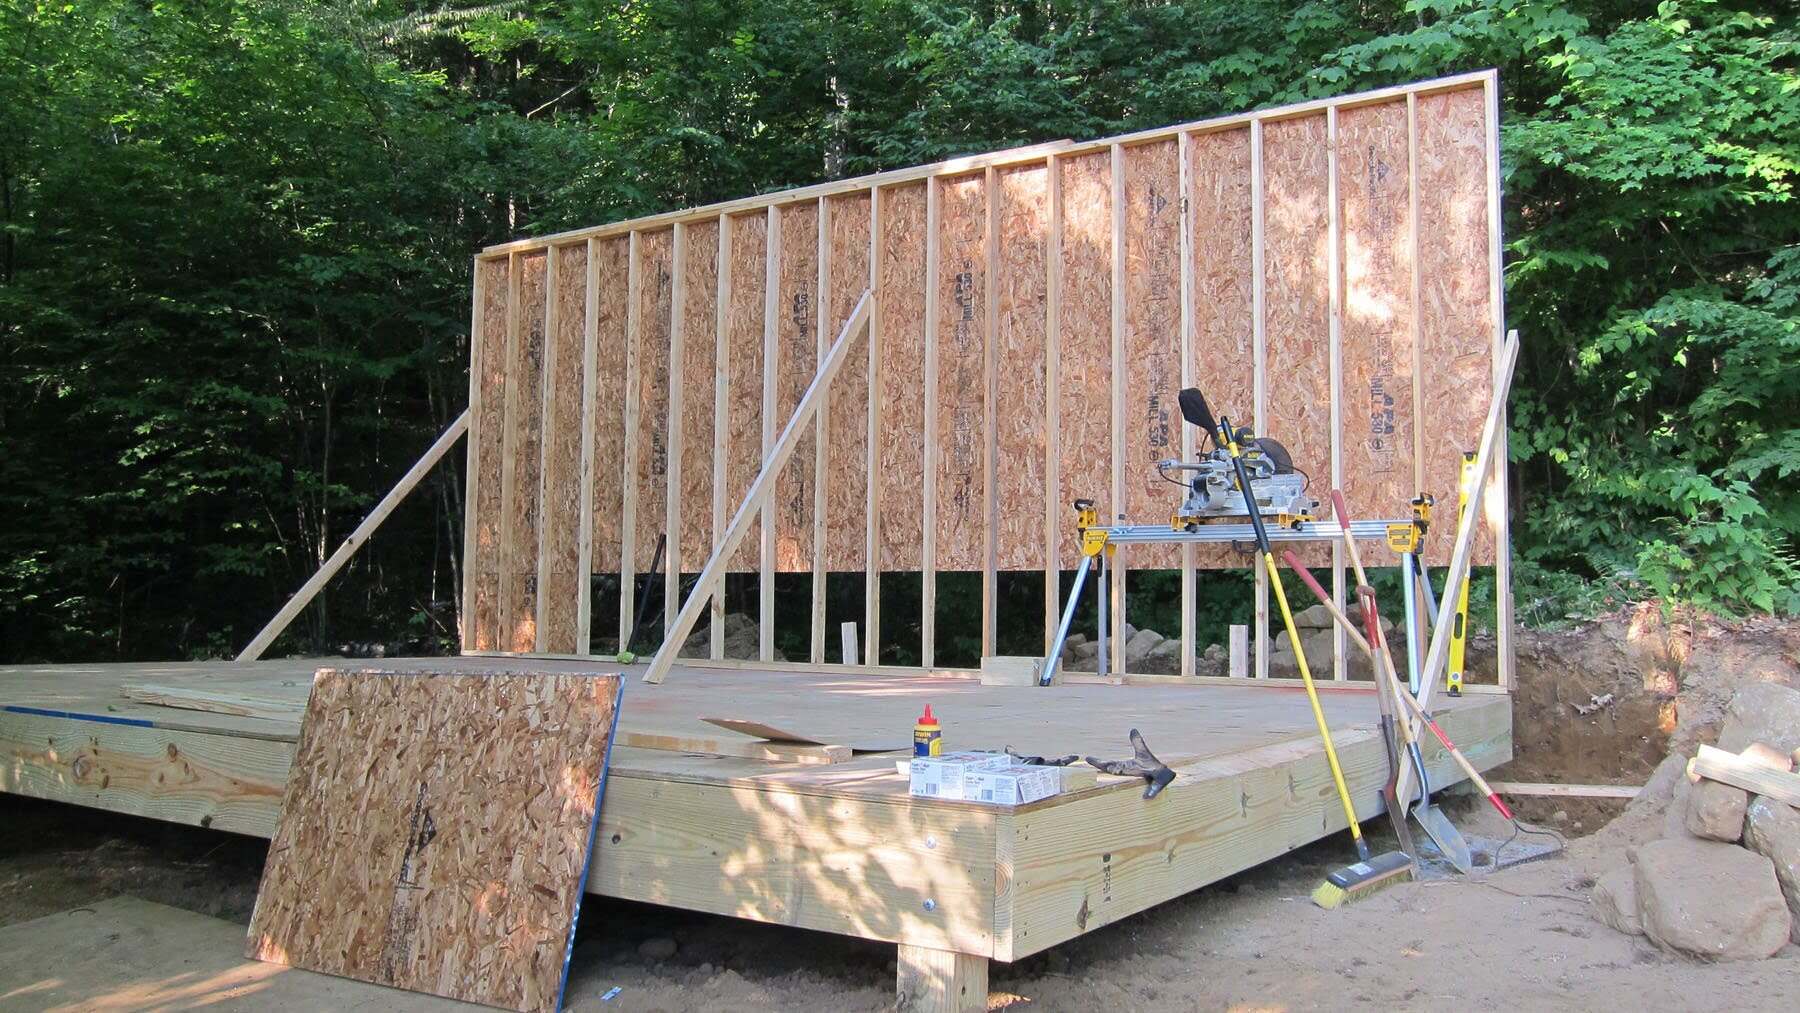
Step 11: Framing Basement Walls
After the basement floor has been poured and cured, the next step in building a basement foundation is framing the basement walls. Framing involves constructing the framework or skeleton of the walls that will define the various rooms and spaces within the basement.
The basement walls serve multiple purposes, including providing structural support, enclosing the space, and creating partitions for different rooms. They also allow for the installation of electrical wiring, plumbing, and insulation.
The first step in framing the basement walls is to carefully plan the layout and design. Consider factors such as the desired room layout, door and window locations, and any specific requirements for utility installations.
Start by measuring and marking the locations of the walls on the basement floor. Ensure the measurements are accurate and that the walls are properly aligned with the overall plan for the space.
Next, determine the type of framing material to be used, such as wood or metal studs. Wood framing is common for basement walls due to its versatility and ease of installation.
Begin framing by cutting the studs to the desired height and length, ensuring that they are straight and free from any defects. Install the bottom plate along the perimeter of the basement floor, attaching it securely using appropriate fasteners.
Construct the frames by placing the studs at regular intervals, typically 16 inches on center, and securing them to the bottom plate and top plate. Ensure the frames are plumb and level, using a level and plumb line for accurate alignment.
At this stage, consider adding additional framing elements such as headers above door and window openings or blocking between studs for added strength and stability.
During the framing process, leave openings for doorways, windows, and any necessary access points. Install appropriate headers and supports to accommodate these openings.
As you progress with the framing, periodically check the alignment and measurements to ensure accuracy and make any necessary adjustments. Pay attention to any plumbing or electrical requirements, allowing for the proper installation of pipes, conduits, and wiring.
It is important to follow local building codes and regulations when framing basement walls. These codes typically dictate requirements for wall spacing, fire protection, and overall structural integrity.
Framing basement walls is a critical step in the construction of a basement foundation. By following proper techniques and adhering to building codes, you can create solid and sturdy walls that form the backbone of your finished basement space.
Consider consulting with a professional contractor experienced in basement framing to ensure the proper planning and execution of this step. They can help guide you through the process and ensure your basement walls are constructed with precision and attention to detail.
Step 12: Installing Basement Windows
After framing the basement walls, the next step in building a basement foundation is installing the windows. Basement windows provide natural light, ventilation, and emergency egress points for safety. Proper installation is crucial to ensure energy efficiency, moisture resistance, and a secure fit.
The first step in installing basement windows is to select the appropriate windows based on your needs and local building codes. Consider factors such as the size, style, and material of the windows to align with the overall aesthetics and functionality of your basement.
Ensure that the window openings in the framed walls match the dimensions of the windows. Measure and mark the opening size on the framed wall, taking into account the necessary clearances as required by the window manufacturer.
Prepare the window opening by removing any obstructions, such as nails, debris, or excess framing material. Ensure that the opening is clean and free from any potential obstacles that may hinder the window installation process.
Install a waterproofing membrane or sealant around the window opening to provide a moisture barrier. This will help prevent water infiltration and protect the window and surrounding framing from damage.
Place the window into the opening, ensuring it is centered and level. Use shims to adjust the window position and ensure it fits snugly and securely within the rough opening.
Once the window is properly positioned, secure it in place by driving screws or nails through the window flange and into the framing material. Follow the manufacturer’s guidelines to ensure a secure and watertight installation.
After installing the window, check for proper operation by opening and closing it to confirm smooth functionality. Ensure that it provides a tight seal when closed to prevent air and water leaks.
If necessary, apply weatherstripping or caulk around the perimeter of the window to improve energy efficiency and further enhance the seal.
Consider installing window wells around basement windows for improved safety and aesthetics. Window wells help to provide necessary daylight, ventilation, and emergency egress in case of an emergency.
Proper insulation around the window frame is essential to prevent air and moisture infiltration. Apply insulation material, such as spray foam or fiberglass batts, around the window frame to achieve effective thermal insulation.
Installing basement windows requires precision and attention to detail. It is recommended to consult with a professional contractor or window installation specialist to ensure proper installation techniques and adherence to local building codes.
By properly installing basement windows, you can enhance the overall functionality, natural lighting, and ventilation in your basement, while ensuring energy efficiency and a secure seal against the elements.
Read more: How To Build A Cabin Foundation
Step 13: Installing Basement Insulation
After the basement windows are installed, the next step in building a basement foundation is installing insulation. Insulating the basement walls is crucial for creating a comfortable and energy-efficient living space, as it helps to regulate temperature, reduce energy consumption, and prevent moisture issues.
The first step in installing basement insulation is to choose the appropriate insulation material. Common options include rigid foam insulation boards, fiberglass batts, or spray foam insulation. Consider factors such as R-value, moisture resistance, and local building codes when selecting the insulation.
Before installing the insulation, it is essential to prepare the walls. Ensure that the walls are clean, dry, and free from any debris. Patch any cracks or gaps in the walls and address any moisture issues to prevent potential damage to the insulation.
If using rigid foam insulation, cut the panels to fit between the framed walls, leaving a gap around electrical outlets and other wall penetrations. Attach the insulation panels to the walls using appropriate adhesive or fasteners. Seal any gaps or joints with tape or sealant to ensure an airtight seal.
If using fiberglass batts, measure and cut the batts to fit snugly between the wall studs. Ensure that the insulation is tightly installed and does not leave any gaps or voids. Use a vapor barrier or faced insulation to provide additional moisture protection.
Spray foam insulation is an option for insulating irregular or hard-to-reach areas. It expands and fills cavities, providing an effective seal against air leakage and moisture infiltration. Consult with a professional contractor for the application of spray foam insulation.
Pay close attention to areas around windows, doors, and other openings. Install insulation around these areas, ensuring a proper seal to prevent drafts and heat loss.
Consider insulating basement ceilings, especially if the space above the basement will be used as living areas. Insulating the basement ceiling helps to reduce noise transmission and improve energy efficiency throughout the entire building.
It is crucial to follow local building codes and guidelines for insulation installation. Insulating the basement walls may require fire-rated materials or additional measures to meet safety requirements.
Proper insulation not only helps to maintain a comfortable temperature in the basement, but it also prevents condensation and moisture problems. This is important for minimizing the risk of mold growth and protecting the overall structural integrity of the basement.
Consider consulting with a professional insulation contractor or building specialist for expert advice and proper installation techniques based on your specific basement and climate conditions. They can guide you through the insulation options and ensure that the insulation is correctly installed to maximize energy efficiency and comfort in your basement.
Step 14: Electrical and Plumbing Installation
Once the insulation is in place, the next step in building a basement foundation is the installation of electrical and plumbing systems. This step involves bringing utility services into the basement space to ensure it is functional and ready for use.
Electrical Installation:
Begin by creating an electrical plan that outlines the location of outlets, switches, lighting fixtures, and any other electrical components required in your basement. Ensure that the plan complies with local electrical codes and regulations.
Work with a licensed electrician to bring power into the basement from the main electrical panel. This may involve extending existing circuits or installing new ones as needed. The electrician will also install circuit breaker panels and wiring throughout the basement.
Install electrical outlets, switches, and junction boxes according to the plan. Ensure that they are properly grounded and wired safely. Consider the placement of outlets for convenience and accessibility in each room of the basement.
Install lighting fixtures, such as recessed ceiling lights or wall sconces, and connect them to the electrical system. Consider incorporating energy-efficient lighting options to reduce energy consumption.
Plumbing Installation:
Determine the location of plumbing fixtures, including sinks, toilets, showers, and laundry appliances, based on the layout of your basement. Consult with a licensed plumber to ensure compliance with local plumbing codes.
If necessary, extend plumbing lines from the main water supply and sewage system to the basement. This may involve trenching and connecting pipes underground or using alternative methods such as pumps for sewage removal.
Install drainage lines to carry waste and wastewater away from the basement. Ensure proper slope and connections to prevent any leaks or drainage issues.
Install plumbing fixtures, such as sinks, toilets, showers, and laundry connections, according to the planned layout. Ensure that all connections are watertight and that fixtures are securely anchored to the walls or floor.
During the electrical and plumbing installation, it is crucial to work with licensed professionals who have expertise and experience in their respective fields. They will ensure installations meet safety codes, are properly grounded, and are capable of handling the anticipated loads and water flows.
Remember to obtain all necessary permits and inspections required by local authorities for electrical and plumbing work. This ensures compliance with building regulations and ensures the safety of your basement space.
By completing the electrical and plumbing installation, you are one step closer to having a fully functional and livable basement.
Step 15: Finishing Basement Floor
After completing the installation of electrical and plumbing systems, the next step in building a basement foundation is finishing the basement floor. This step involves adding the final layer or surface to the floor to create a functional and aesthetically pleasing living space.
There are various options available for finishing the basement floor, each with its own advantages and considerations:
1. Carpeting or Area Rugs: Installing wall-to-wall carpeting or area rugs can provide warmth, comfort, and sound insulation to the basement. Ensure that the carpet or rug is appropriately installed, taking into account moisture considerations and the need for proper padding or underlayment.
2. Laminate or Engineered Wood Flooring: Laminate or engineered wood flooring offers the appearance of hardwood flooring without the vulnerability to moisture and temperature changes. These flooring options are relatively easy to install and can provide a durable and attractive finish to the basement floor.
3. Vinyl or Luxury Vinyl Tile (LVT): Vinyl flooring is highly resistant to moisture, making it a suitable choice for basement settings. Luxury vinyl tile (LVT) mimics the look of stone or ceramic tiles while providing the benefits of vinyl, including ease of installation, affordability, and low maintenance.
4. Tile Flooring: Ceramic or porcelain tiles are durable and resistant to water damage, making them an excellent choice for basement floors. Tiles can be installed in various patterns and designs to add visual interest to the space.
Before installing the chosen flooring option, ensure that the basement floor is clean, smooth, and level. Address any moisture issues or cracks in the concrete floor to prevent future damage to the finished floor.
Follow the manufacturer’s instructions for the installation of the chosen flooring material. Take into account the necessary acclimation period, subfloor preparation, adhesive or underlayment requirements, and proper spacing and arrangement of the flooring materials.
After installing the flooring, add baseboards or trim around the edges of the room to provide a finished look. Seal any gaps between the flooring and walls to prevent the entry of moisture or pests.
Consider adding a protective layer, such as a waterproofing or moisture barrier, beneath the finished floor to provide an extra layer of protection against potential moisture issues.
By finishing the basement floor, you are transforming the space into a comfortable and inviting living area. Choose a flooring option that suits your design preferences, functional needs, and budget to create a basement floor that complements the overall aesthetic of your home.
Step 16: Painting and Finishing Touches
The final step in building a basement foundation is adding the finishing touches to create a polished and inviting living space. This step involves painting the walls, adding decorative elements, and completing any remaining tasks to enhance the overall look and feel of the basement.
1. Painting the Walls:
Choose a color scheme that complements your design aesthetic and desired ambiance for the basement. Consider lighter colors to make the space feel more open and bright, or darker colors for a cozy and intimate atmosphere.
Prepare the walls by cleaning them and filling any imperfections or cracks with the appropriate filler. Use painter’s tape to protect baseboards, trim, or any areas that should not be painted.
Apply a primer to the walls before painting to ensure a smooth and even finish. Then, apply the chosen paint color using a roller or brush, following recommended drying times between coats.
2. Adding Lighting Fixtures:
Consider installing additional lighting fixtures to enhance the functionality and ambiance of the basement. This can include recessed ceiling lights, pendant lights, or wall sconces. Ensure the lighting fixtures are properly installed and align with the desired lighting design.
Install light switches and dimmers in convenient locations, allowing for control and flexibility in lighting levels throughout the basement.
3. Installing Trim and Molding:
Add baseboards, crown molding, and other decorative trim to provide a finished look to the basement. This will help to conceal any gaps or imperfections between the walls and floors, and add a touch of elegance to the space.
4. Furnishing and Decorating:
Choose furniture, decor, and accessories that reflect your personal style and optimize the functionality of the space. Consider the purpose of each area in the basement and select appropriate furnishings and decor accordingly.
Hang artwork, photographs, or mirrors on the walls to add visual interest and personality to the space. Add curtains or blinds to windows for privacy and to control natural light.
Consider incorporating storage solutions such as shelving units, cabinets, or built-in storage to keep the space organized and clutter-free.
Throughout the finishing touches stage, pay attention to the details and ensure that any remaining tasks are completed properly. This may include touching up paint, adjusting or replacing hardware, or adding any final decorative elements.
By completing the painting and finishing touches, you are transforming the basement into a cohesive and fully functional living space. These final steps add the personalized touches that make the basement feel like a comfortable and inviting extension of your home.
Read more: How To Build A Slab Foundation
Conclusion
Building a basement foundation is a complex and multi-step process that requires careful planning, precise execution, and attention to detail. From site preparation to the finishing touches, each step plays a crucial role in creating a solid and functional living space.
By following the step-by-step guide outlined in this article, you can successfully navigate through the construction process and build a basement foundation that meets your needs and expectations.
Throughout the process, it is important to consult with professionals, such as contractors, engineers, and electricians, who can provide valuable expertise and ensure compliance with local building codes.
Remember to prioritize proper site preparation, excavation, and reinforcement before pouring the footings and walls. Implement waterproofing measures to protect against water damage, and install a drainage system to manage water flow around the foundation.
As you progress, focus on installing electrical and plumbing systems, followed by insulation and finishing details. Choose appropriate flooring, paint the walls, and incorporate lighting fixtures and decorative elements to create a comfortable and inviting space.
Throughout the entire process, maintain regular inspections and quality control measures to address any issues or deviations promptly. This will help guarantee the long-term stability and functionality of your basement foundation.
Building a basement foundation requires careful planning, patience, and skilled craftsmanship. However, the end result is a valuable addition to your home that expands your living space and enhances its overall value.
Remember to consult with professionals and refer to local building codes to ensure compliance and safety at every step of the process.
With the completion of your basement foundation, you are on your way to enjoying the benefits of additional living space, increased functionality, and a solid foundation for your home for years to come.
Frequently Asked Questions about How To Build A Basement Foundation
Was this page helpful?
At Storables.com, we guarantee accurate and reliable information. Our content, validated by Expert Board Contributors, is crafted following stringent Editorial Policies. We're committed to providing you with well-researched, expert-backed insights for all your informational needs.

0 thoughts on “How To Build A Basement Foundation”