Articles
How To Check Insulation In House
Modified: January 19, 2024
Learn how to check the insulation in your house with informative articles. Make sure your home stays energy efficient and comfortable.
(Many of the links in this article redirect to a specific reviewed product. Your purchase of these products through affiliate links helps to generate commission for Storables.com, at no extra cost. Learn more)
Introduction
Having proper insulation in your home is crucial for energy efficiency, comfort, and cost-saving. Insulation helps regulate indoor temperature, keeps your home warm in winter and cool in summer, reduces noise transmission, and prevents moisture buildup. However, over time, insulation can become less effective or even deteriorate, leading to energy loss and discomfort. That’s why it’s important to regularly check your house’s insulation and address any issues promptly.
In this article, we will guide you on how to check the insulation in your house, identify signs of inadequate insulation, and provide tips on improving insulation for optimal energy efficiency. By following these steps, you can ensure that your home is well-insulated, saving you money on energy bills and creating a more comfortable living environment.
Key Takeaways:
- Regularly checking and addressing insulation issues in your home is crucial for energy efficiency, comfort, and cost savings. Identifying signs of inadequate insulation and using the right tools for inspection are key steps in maintaining a well-insulated living space.
- Thoroughly inspecting both the exterior and interior of your house, testing insulation effectiveness, and taking proactive steps to fix any issues are essential for creating a comfortable and energy-efficient home. Proper insulation contributes to a more sustainable and enjoyable living environment.
Read more: How To Check Plumbing In A House
Importance of Insulation in a House
Insulation plays a vital role in maintaining a comfortable and energy-efficient home. Here are a few reasons why insulation is essential:
- Energy Efficiency: Insulation acts as a barrier against heat flow, preventing the escape of warm or cool air from your home. This means your heating and cooling systems work more efficiently, resulting in lower energy consumption and reduced utility bills.
- Temperature Regulation: Adequate insulation helps keep your home at a consistent temperature throughout the year. It keeps the heat out during summer and retains warmth during winter, creating a comfortable living environment.
- Noise Reduction: Insulation also acts as a sound barrier, reducing the transmission of noise between rooms and from the outside. It helps create a quieter and more peaceful living space, especially in urban areas or near busy roads.
- Moisture Control: Insulation helps prevent condensation and moisture buildup in your walls, ceilings, and floors. This is important to protect your home from mold, mildew, and other water-related issues that can compromise indoor air quality and structural integrity.
- Environmental Impact: Proper insulation reduces carbon emissions by minimizing the need for excess energy usage. By improving the energy efficiency of your home, you contribute to environmental sustainability and reduce your carbon footprint.
Overall, insulation is a key factor in creating a comfortable, energy-efficient, and environmentally friendly home. It provides numerous benefits, including lower energy bills, improved indoor comfort, noise reduction, and protection against moisture-related problems.
Signs of Inadequate Insulation
Identifying the signs of inadequate insulation is crucial to ensure your home remains energy-efficient and comfortable. Here are some common indicators that your house may have insulation issues:
- Uncomfortable Temperatures: If your home feels excessively hot in summer or cold in winter, even with the heating or cooling system running, it could be a sign of inadequate insulation. Insufficient insulation allows heat or cold air to transfer more easily into your living spaces.
- High Energy Bills: If you notice a sudden spike in your energy bills without any changes in usage patterns, it could be a sign that your home is not properly insulated. Inadequate insulation forces your heating and cooling systems to work harder, leading to increased energy consumption and higher utility bills.
- Drafts or Cold Spots: If you feel drafts or notice cold spots near windows, doors, or walls, it indicates that cold air is infiltrating your home. This could be due to insufficient insulation, gaps, or cracks that allow air to seep through.
- Uneven Room Temperatures: Inadequate insulation can lead to inconsistent temperatures throughout your home. If some rooms feel significantly colder or hotter than others, it suggests that insulation is lacking or poorly installed in those areas.
- Noise Transmission: If you can hear noises from outside, such as street traffic or neighbors, it may be a sign that your home lacks proper insulation. Insulation helps reduce sound transmission, creating a quieter and more peaceful living environment.
- Ice Dams: If you notice the formation of ice dams on your roof during winter, it indicates that heat is escaping from your home’s insulation. This can lead to significant energy loss and potential roof damage.
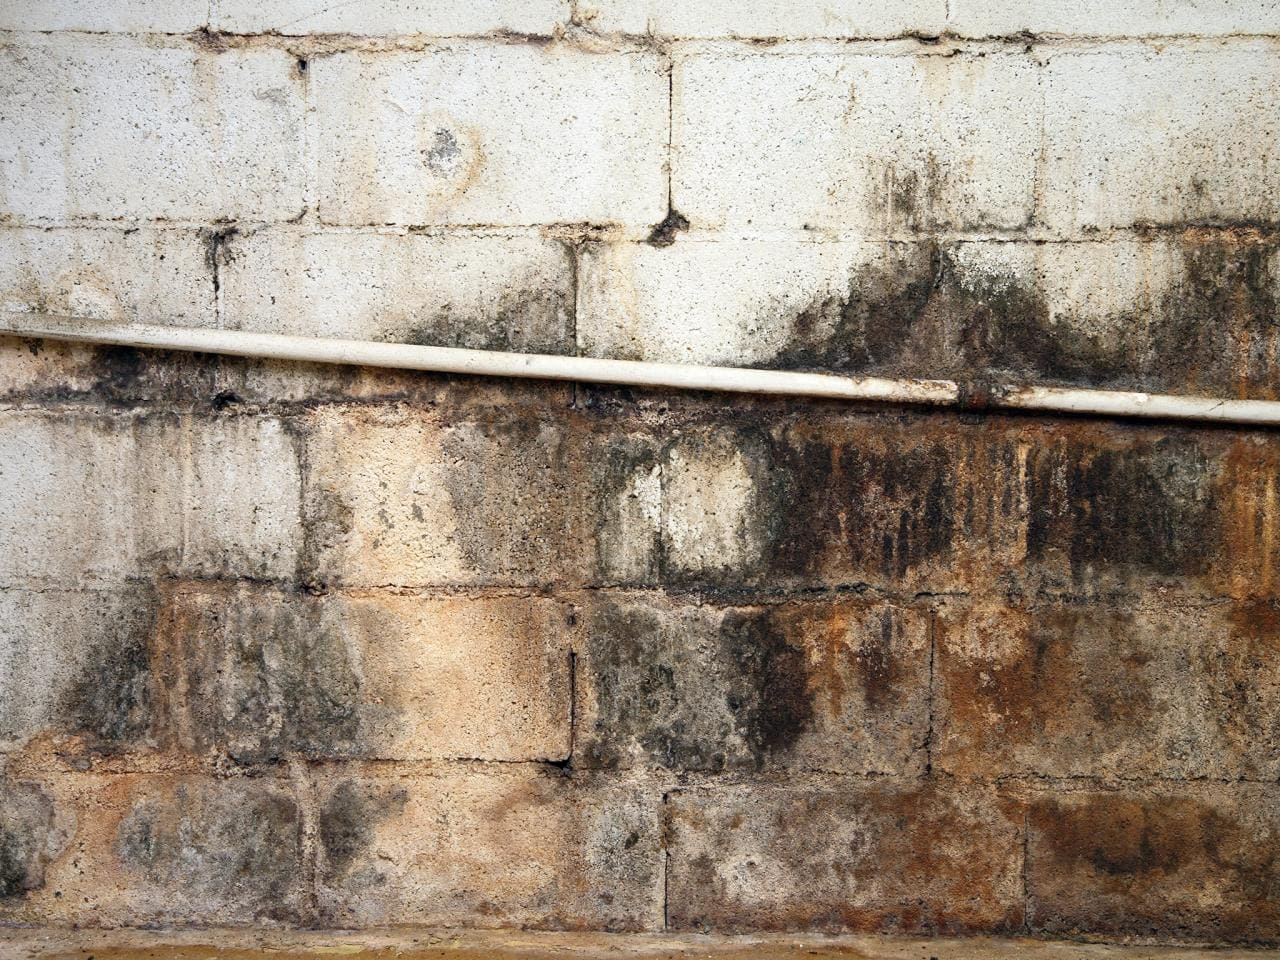
- Excessive Moisture: Insufficient insulation can cause condensation and moisture buildup on windows, walls, or ceilings. If you frequently encounter dampness, mold growth, or water stains, it’s likely that your insulation isn’t adequately protecting against moisture.
If you notice any of these signs in your home, it’s important to address the insulation issues promptly. Properly insulating your home will not only improve energy efficiency and comfort but also help prevent costly damage and health hazards associated with inadequate insulation.
Tools Required for Checking Insulation
Before you begin inspecting the insulation in your house, it’s helpful to gather the necessary tools to ensure an accurate assessment. Here are some commonly used tools for checking insulation:
- Flashlight: A flashlight is essential for examining dark or hard-to-reach areas, such as crawl spaces, attics, or basements. It helps illuminate the space and allows you to identify any insulation problems.
- Tape Measure: A tape measure is useful for measuring the thickness of existing insulation. It helps determine if the insulation meets the recommended thickness for your specific region.
- Thermometer: A thermometer is helpful for measuring temperatures in different areas of your home. It allows you to identify temperature variations that may indicate inadequate insulation.
- Infrared Thermometer: An infrared thermometer is a handy tool for detecting temperature differences on surfaces. By pointing the thermometer at walls, ceilings, or floors, you can identify areas where heat is escaping or cold air is infiltrating due to insulation issues.
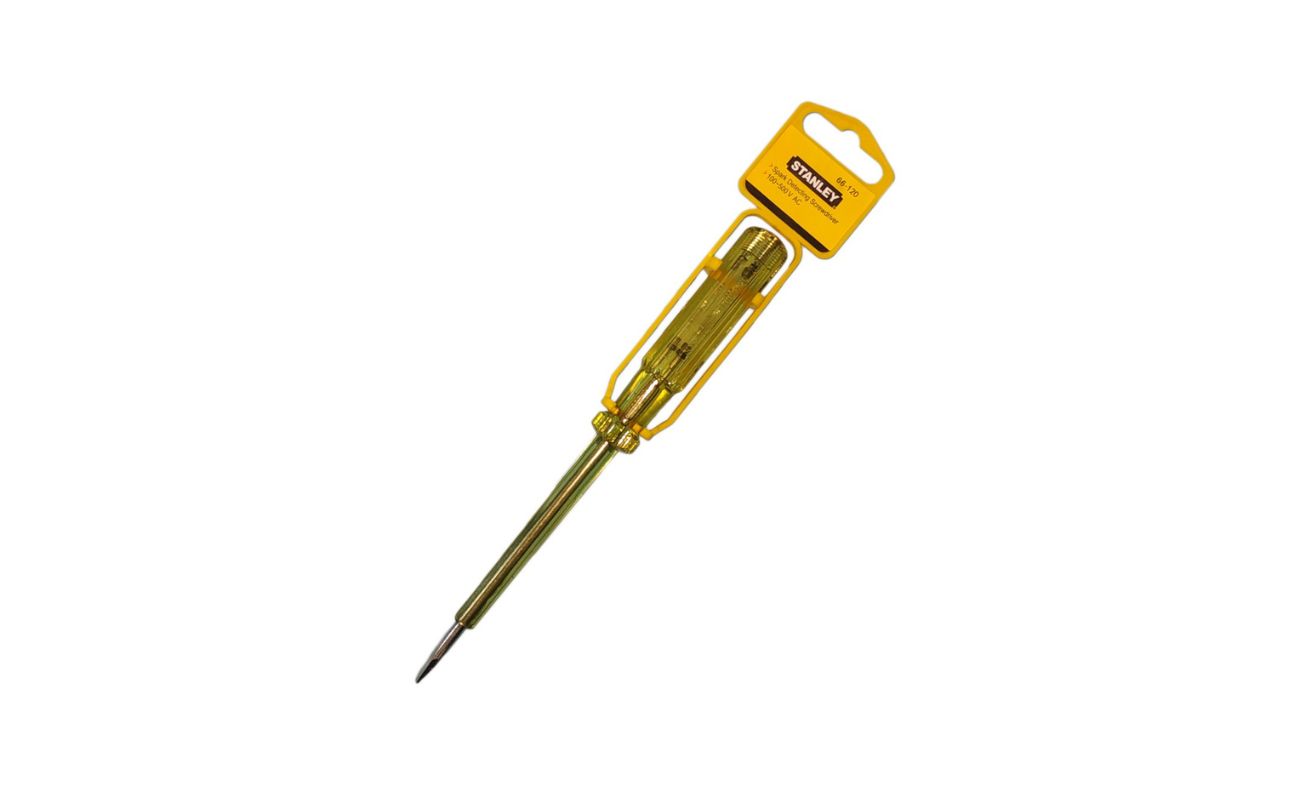
- Screwdriver or Probe: A screwdriver or probe can be useful for checking the integrity of insulation in walls or ceilings. Gently press the screwdriver or probe against the surface to see if it goes through easily, indicating a potential insulation problem.
- Moisture Meter: A moisture meter can be helpful for identifying moisture-related issues caused by inadequate insulation. It measures the moisture content in materials such as walls or ceilings, helping you pinpoint areas where insulation may not be protecting against moisture infiltration.
- Camera: A camera, either on your smartphone or separate device, can be useful for documenting any insulation problems you find. Taking pictures can help you remember the specific locations and conditions for future reference or when discussing insulation issues with professionals.
Having these tools on hand will enable you to effectively inspect the insulation in your house and identify any areas that may need attention. Remember to follow safety precautions when using tools, especially when accessing areas such as attics or crawl spaces. If you have any doubts or concerns about performing the inspection, it’s recommended to consult a professional insulation contractor for assistance.
Preparing for Inspection
Before you begin inspecting the insulation in your house, it’s important to properly prepare to ensure a thorough and accurate assessment. Here are some steps to follow when preparing for an insulation inspection:
- Check Safety Measures: Ensure that you have proper safety equipment, such as gloves, goggles, and a mask, to protect yourself during the inspection. If you are accessing areas like the attic or crawl spaces, make sure you have a sturdy ladder and are aware of any potential hazards.
- Clear Access Points: Clear the areas you plan to inspect of any obstacles, such as furniture, boxes, or stored items. This will allow you to access the insulation easily and ensure an accurate evaluation.
- Know the Different Types of Insulation: Familiarize yourself with the different types of insulation commonly found in homes, including fiberglass, cellulose, spray foam, and rigid foam. Understand their characteristics and how they should be installed to identify any potential issues.
- Research Building Codes and Guidelines: Research the building codes and insulation guidelines specific to your region. This will help you understand the recommended R-values (insulation levels) for different areas of your house, such as walls, floors, and attics.
- Plan for Different Areas: Make a checklist of the areas you want to inspect, such as the attic, walls, floors, and basement. Each area may require different inspection techniques or tools, so be prepared to adapt your approach accordingly.
- Document Existing Insulation: Take note of the existing insulation materials and their thickness, if possible. This will help you compare your findings with the recommended insulation levels for your region and determine if any areas need to be addressed.
- Consider Outside Weather Conditions: Take into account the outside weather conditions when conducting your inspection. Extreme temperatures, high humidity, or heavy rainfall can impact the performance and appearance of insulation.
- Allocate Ample Time: Set aside enough time for the inspection to ensure you can thoroughly check all areas of your house. Rushing through the process may result in overlooking potential issues or not being able to properly evaluate the insulation.
- Keep Safety a Priority: Throughout the inspection, prioritize safety. If you encounter any hazards, such as exposed wiring or structural damage, refrain from continuing the inspection and consult a professional for assistance.
By following these preparation steps, you can approach your insulation inspection with confidence and ensure a comprehensive evaluation of the insulation in your house. Remember, if you are unsure or uncomfortable performing the inspection yourself, it’s always recommended to seek the assistance of a professional insulation contractor.
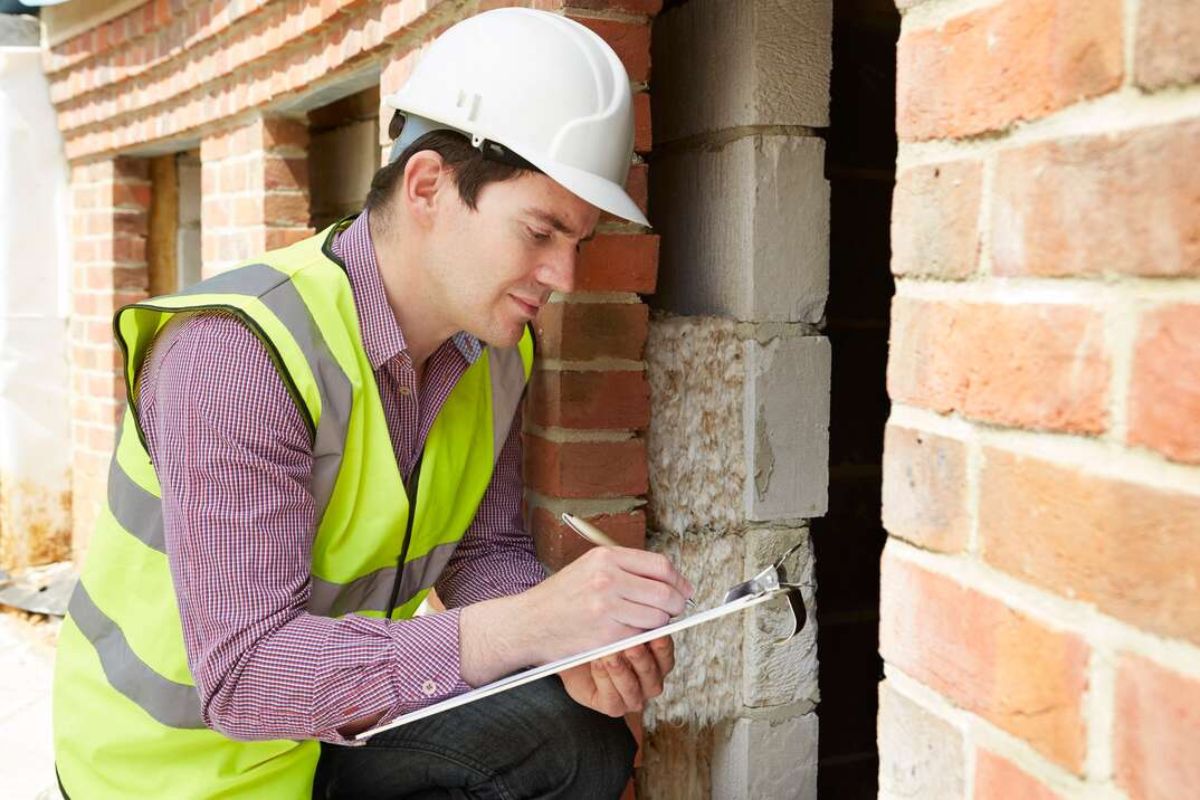
Exterior Inspection
When inspecting the insulation in your house, it’s essential to start with an exterior inspection. This will provide valuable insights into the condition of your insulation and any potential issues. Here are the steps to follow for an exterior inspection:
- Check for Visible Gaps: Start by examining the exterior walls of your house for any visible gaps or cracks. Inspect the area around windows, doors, and utility penetrations. These gaps can indicate poor insulation or improper installation.
- Look for Deterioration: Inspect the exterior walls for signs of deteriorating insulation material. This may include crumbling or damaged insulation, which can lead to reduced effectiveness and energy loss.
- Inspect Siding: Examine the siding of your house for any loose or damaged sections. Improperly installed or damaged siding can compromise the insulation underneath, allowing air to flow through.
- Check for Water Damage: Look for any signs of water damage on the exterior walls, such as stains or rot. Water infiltration can damage insulation and create a conducive environment for mold growth. Address any water-related issues promptly.
- Inspect Ventilation: Check the exterior vents, such as soffit vents and gable vents, to ensure they are not blocked or obstructed. Proper ventilation is important for maintaining healthy airflow and preventing moisture buildup.
- Examine Roofing: Assess the condition of your roof and roofing materials. Inspect for any missing or damaged shingles, as well as gaps or cracks around chimneys or vents. A well-maintained roof helps prevent heat loss and moisture infiltration.
- Consider Insulation Levels: Take into account the insulation levels in your exterior walls. Older homes may have inadequate insulation levels, so it’s worth considering adding more insulation to improve energy efficiency.
- Document Findings: Take photos or notes of any issues or areas that require attention during your exterior inspection. This documentation will be helpful when discussing the findings with insulation professionals or when addressing the issues yourself.
By conducting a thorough exterior inspection, you can identify any visible gaps, deterioration, or water damage that may affect the performance of your insulation. Taking note of these findings will guide you in addressing the insulation issues and improving the energy efficiency of your home.
Use a thermal imaging camera to check for insulation gaps and areas of heat loss. Look for cold spots in walls, ceilings, and floors, which indicate inadequate insulation.
Interior Inspection
After conducting an exterior inspection, it’s time to move on to the interior inspection to assess the insulation in your house. The interior inspection will help you identify any insulation issues that may be affecting the comfort and energy efficiency of your home. Follow these steps for an effective interior inspection:
- Check for Drafts: Start by inspecting windows and doors for any drafts. Hold a lit candle or a tissue near the edges of windows and doors and observe if there is any noticeable movement indicating air leakage. Seal any gaps or cracks with weatherstripping or caulk to improve insulation.
- Inspect Electrical Outlets: Remove outlet and switch plate covers to check if insulation is present around the outlets. Insufficient insulation around electrical outlets can lead to air leakage and energy loss. Consider installing foam gaskets or using insulating pads to improve insulation around outlets.
- Examine Walls and Ceilings: Inspect walls and ceilings for any visible signs of insulation problems, such as gaps, sagging, or damaged insulation. Pay special attention to areas around light fixtures, electrical wiring, and plumbing connections, as these are potential weak points for insulation.
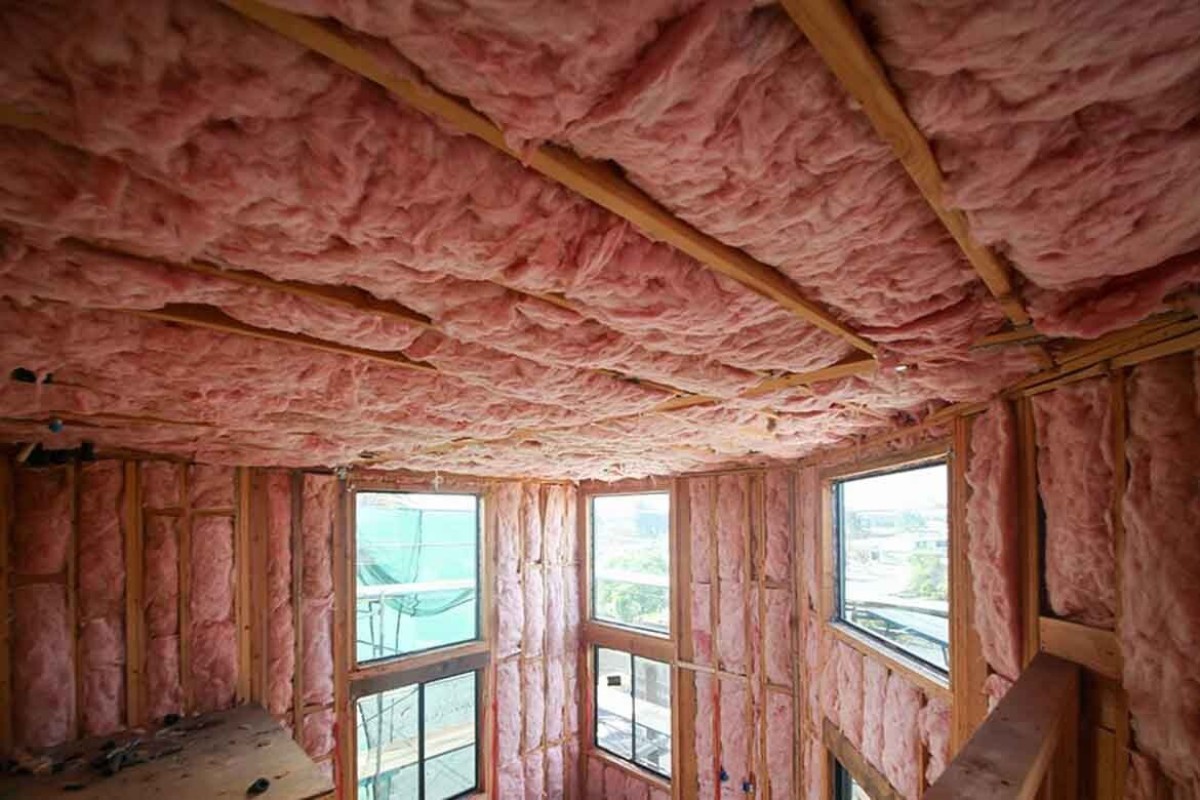
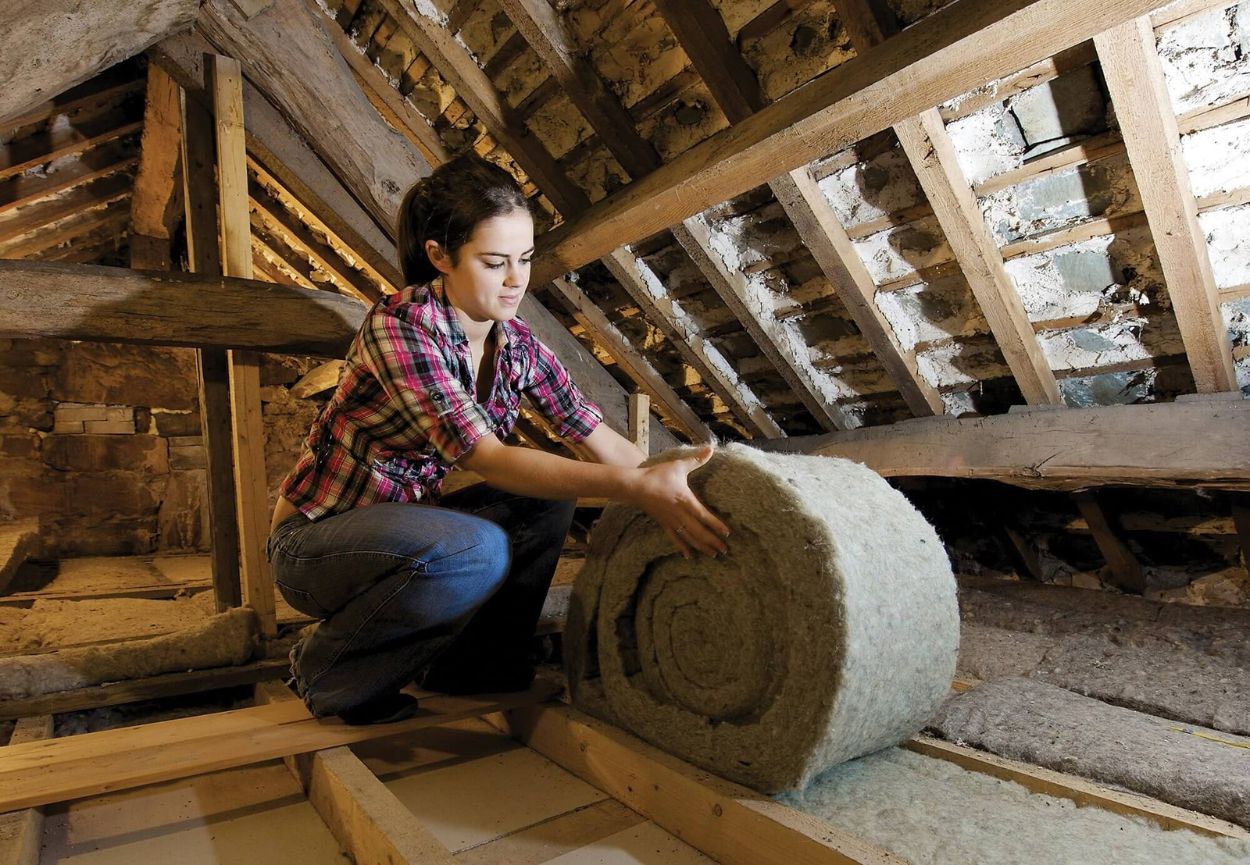
- Check Attic Access: If your house has an attic, check the access point to ensure it is properly insulated and sealed. Inspect the insulation in the attic for any signs of damage or inadequate coverage. Adding more insulation to the attic can significantly improve energy efficiency.
- Assess Floor Insulation: If you have accessible crawl spaces or basement areas, inspect the insulation under the floors. Look for any gaps or damaged insulation that may be affecting the thermal performance of the floors. Insulating the floors can help reduce heat loss and improve comfort.
- Observe Moisture and Mold: Look out for any signs of moisture or mold growth on walls, ceilings, or floors. Inadequate insulation can contribute to condensation and moisture buildup, leading to favorable conditions for mold growth. Address any water-related issues and consider improving insulation in areas prone to moisture.
- Consider Soundproofing: If noise transmission is a concern, assess the effectiveness of your insulation in reducing sound. Insulation with soundproofing properties can help create a quieter living environment.
- Document Findings: Take photos or notes of any insulation issues or areas that require attention during your interior inspection. This documentation will serve as a reference when addressing the insulation problems or discussing them with insulation professionals.
By conducting a thorough interior inspection, you can identify any insulation problems, drafts, or moisture-related issues that may be impacting the energy efficiency and comfort of your home. Taking the necessary steps to address these issues will result in improved insulation performance and a more efficient and enjoyable living space.
Common Problem Areas
When inspecting the insulation in your house, certain areas are more prone to insulation problems and may require special attention. Here are some common problem areas to look out for:
- Attic: The attic is a critical area to inspect as it often has the largest potential for heat loss. Look for gaps, damaged insulation, or inadequate coverage. Consider adding more insulation to improve energy efficiency.
- Walls: Inspect the walls for any visible signs of insulation issues, such as gaps, sagging, or damage. Pay close attention to areas around electrical outlets, windows, and doors, as they are common weak points for insulation.
- Floors: If your house has accessible crawl spaces or basement areas, check the insulation under the floors. Look for any gaps or damaged insulation that may be causing heat loss or discomfort. Improve floor insulation to enhance energy efficiency.
- Windows and Doors: Insufficiently sealed windows and doors can significantly impact insulation. Check for drafts around windows and doors and seal any gaps with weatherstripping or caulk to improve energy efficiency.
- Basement or Crawl Spaces: Insulate basement walls and floors, as well as accessible crawl spaces, to prevent heat loss and moisture intrusion. Look for signs of moisture or water damage and address any issues promptly.
- Electrical Outlets: Insufficient insulation around electrical outlets can result in air leakage and energy loss. Install foam gaskets or insulating pads to improve insulation around outlets.
- Slope Ceilings and Dormers: Slope ceilings and dormers can be challenging areas to insulate properly. Check for any gaps or insulation voids in these areas and ensure they are adequately insulated to prevent heat loss.
- Plumbing and HVAC Penetrations: Inspect areas around plumbing and HVAC penetrations, such as pipes and vents. Ensure they are properly sealed and insulated to prevent air leakage and maintain energy efficiency.
- Roof: Assess the condition of the roof and roofing materials. Look for missing or damaged shingles, gaps, or cracks around chimneys or vents. Proper insulation and maintenance of the roof are important for preventing heat loss and moisture infiltration.
These common problem areas require careful inspection and attention to detail. By focusing on these areas and addressing any insulation issues, you can improve the overall energy efficiency and comfort of your home.
Testing Insulation’s Effectiveness
While visual inspection can give you an idea of potential insulation issues, it’s essential to test the effectiveness of your insulation to get a more accurate assessment. Here are some methods for testing insulation’s effectiveness:
- Thermal Scanning: Thermal scanning, also known as thermal imaging, uses infrared technology to detect temperature differences in surfaces. By scanning the walls, floors, and ceilings, you can identify areas where insulation is lacking or not performing optimally.
- Blower Door Test: A blower door test is conducted by professionals to assess a house’s airtightness. The test involves placing a powerful fan in an exterior door frame and creating a pressure difference to measure air leakage. Through this test, you can identify areas where insulation and air sealing may require improvement.
- Smoke Pencil Test: The smoke pencil test involves using a handheld smoke source to detect air leaks. When the smoke is directed towards potential leakage points, such as gaps or cracks, it will indicate air movement. This test helps identify areas where insulation might be compromised.
- Measuring Temperature Differences: You can use a simple thermometer to measure temperature differences in various areas of your home. Compare the temperatures near exterior walls, windows, and doors to the temperatures in well-insulated areas. Significant temperature variations may indicate insulation issues.
- Sound Insulation Test: If noise transmission is a concern, you can conduct a sound insulation test. Play music or generate noise near walls, floors, and ceilings and listen for any sound transmission. Insufficient insulation may result in noticeable noise leakage between rooms or from the outside.
- Patching and Monitoring: In some cases, you may need to perform small patches or modifications to test the impact on insulation. For example, patching a small section of damaged insulation and monitoring the temperature or comfort level in that area can give you a sense of the insulation’s effectiveness.
Keep in mind that while these methods can help test insulation’s effectiveness, some tests, such as blower door tests, may require professional assistance. Consulting with insulation experts or energy auditors can provide more accurate and detailed testing results.
By testing the effectiveness of your insulation, you can identify areas that require improvement and take appropriate measures to enhance energy efficiency and comfort in your home.
Read more: How To Insulate A Brick House
Fixing Insulation Issues
Once you have identified insulation issues in your house, it’s important to take action to address those problems. Here are some steps to fix insulation issues:
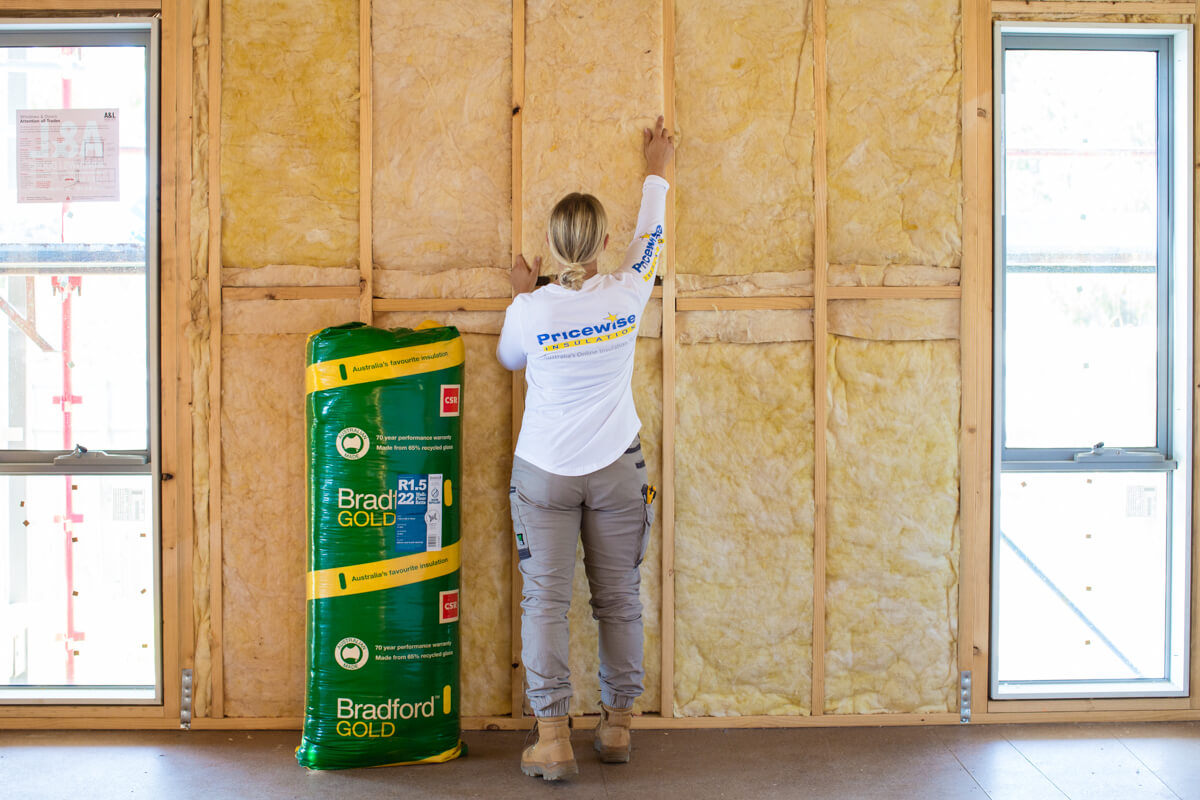
- Add More Insulation: If you find that your existing insulation is inadequate or has deteriorated, consider adding more insulation. Consult the recommended insulation levels for your region and choose the appropriate type of insulation for the area you are insulating. Common insulation materials include fiberglass, cellulose, spray foam, and rigid foam.
- Seal Gaps and Cracks: Inspect your house for gaps and cracks that may allow air to leak in or out. Seal these gaps and cracks with caulk, weatherstripping, or spray foam insulation to enhance energy efficiency.
- Insulate Electrical Outlets and Switches: Improve the insulation around electrical outlets and switches by installing foam gaskets or insulating pads. This helps prevent air leakage and improves energy efficiency.
- Upgrade Windows and Doors: Consider upgrading to more energy-efficient windows and doors. Look for windows and doors with high-quality insulation properties and proper sealing to minimize heat loss or gain. This can significantly improve the overall insulation of your home.
- Insulate Your Attic: Insulating your attic is crucial for preventing heat loss or gain. Ensure that the attic floor and access points are well-insulated and sealed. Consider adding insulation to meet the recommended R-values for your region.
- Improve Floor Insulation: If your floors are not adequately insulated, consider adding insulation in crawl spaces or basement areas. Install insulation batts or spray foam insulation to reduce heat loss and improve comfort.
- Enhance Air Sealing: Proper air sealing is essential for improving insulation. Seal gaps and cracks in walls, ceilings, and floors using caulk, weatherstripping, or spray foam insulation. Pay attention to areas around windows, doors, vents, and pipes where air leakage is common.
- Consult Insulation Professionals: If you are unsure about fixing insulation issues or require more extensive insulation upgrades, consult insulation professionals. They can provide expert advice, recommend the most suitable insulation solutions, and ensure proper installation.
It’s important to remember that fixing insulation issues is an investment in the long-term energy efficiency and comfort of your home. By taking the necessary steps to improve insulation, you can enjoy a more comfortable living environment while reducing energy consumption and lowering utility bills.
Conclusion
Proper insulation is vital for maintaining an energy-efficient, comfortable, and cost-effective home. Regularly checking your house’s insulation and addressing any issues promptly can help you optimize energy efficiency and create a more pleasant living environment. In this article, we have discussed the importance of insulation, signs of inadequate insulation, tools for insulation inspection, preparing for the inspection, and common problem areas to check.
By conducting a thorough inspection of both the exterior and interior of your house, you can identify areas where insulation may be lacking, damaged, or deteriorated. Testing the effectiveness of your insulation through methods such as thermal scanning or sound insulation tests provides a more accurate assessment of potential insulation issues.
If you discover insulation problems, take steps to fix them. Adding more insulation, sealing gaps and cracks, insulating outlets and switches, upgrading windows and doors, and improving attic or floor insulation are effective ways to enhance insulation performance. Consultation with insulation professionals may be necessary for more complex insulation issues or extensive upgrades.
In conclusion, ensuring proper insulation in your house is essential for energy efficiency, comfort, and cost savings. By checking insulation regularly, addressing problems promptly, and implementing appropriate improvements, you can create a well-insulated home that provides optimal thermal comfort while reducing energy consumption and utility costs.
Frequently Asked Questions about How To Check Insulation In House
Was this page helpful?
At Storables.com, we guarantee accurate and reliable information. Our content, validated by Expert Board Contributors, is crafted following stringent Editorial Policies. We're committed to providing you with well-researched, expert-backed insights for all your informational needs.


0 thoughts on “How To Check Insulation In House”