
Articles
How To Check Doorbell Voltage
Modified: October 21, 2024
Learn how to check the voltage of your doorbell with these informative articles. Discover step-by-step guides and helpful tips to ensure proper functioning.
(Many of the links in this article redirect to a specific reviewed product. Your purchase of these products through affiliate links helps to generate commission for Storables.com, at no extra cost. Learn more)
Introduction
Doorbells are an essential part of our homes, notifying us when someone is at the door. However, over time, doorbells can become unreliable or stop working altogether. One of the most common causes of doorbell issues is voltage problems. If your doorbell is not functioning properly, checking the voltage can help you identify the underlying issue.
Doorbell voltage refers to the electrical power that the doorbell receives from the transformer. The voltage can vary depending on the type of doorbell system you have, with most residential doorbells operating on either 8 or 16 volts. Checking the voltage is a straightforward process that can be done with a few simple tools.
In this article, we will guide you through the step-by-step process of checking doorbell voltage. We will also discuss why it is important to check the voltage, safety precautions to take, and how to troubleshoot any voltage issues you may encounter.
Key Takeaways:
- Ensure the safety and reliability of your doorbell by checking its voltage. Identify and troubleshoot low or high voltage issues to maintain optimal functionality and prevent potential damage.
- By following the step-by-step process, you can confidently test, troubleshoot, and reconnect your doorbell system, ensuring its proper operation and longevity. Regular maintenance and monitoring of voltage will keep your doorbell functioning reliably.
Read more: What Voltage Does A Ring Doorbell Need
Why Check Doorbell Voltage
Checking the voltage of your doorbell is crucial for several reasons. Firstly, it helps you determine if the voltage is within the operating range of your doorbell system. If the voltage is too low or too high, it can lead to problems such as a weak or non-functional doorbell chime.
Secondly, understanding the voltage of your doorbell system can help you troubleshoot any issues that arise. If you are experiencing problems with your doorbell, such as intermittent ringing or no sound at all, checking the voltage can provide valuable insights into the root cause of the problem.
Lastly, checking the voltage can help you ensure the safety of your doorbell system. Extremely high or low voltage levels can damage the doorbell transformer or even pose a risk of electrical shocks. By regularly monitoring the voltage, you can address any abnormalities before they cause further damage.
Safety Precautions
Before you begin checking the voltage of your doorbell, it is essential to prioritize safety. Here are some precautions to keep in mind:
- Turn off the power: Before starting any work on your doorbell system, make sure to turn off the power at the circuit breaker to prevent electrical accidents.
- Use insulated tools: When handling electrical components, always use insulated tools to avoid electric shocks.
- Wear protective gear: It is advisable to wear safety gloves and goggles to protect yourself from any potential hazards.
- Consult a professional: If you are uncomfortable working with electrical wiring or unsure about the process, it is best to seek assistance from a qualified electrician.
Tools Needed
Before you begin, gather the following tools:
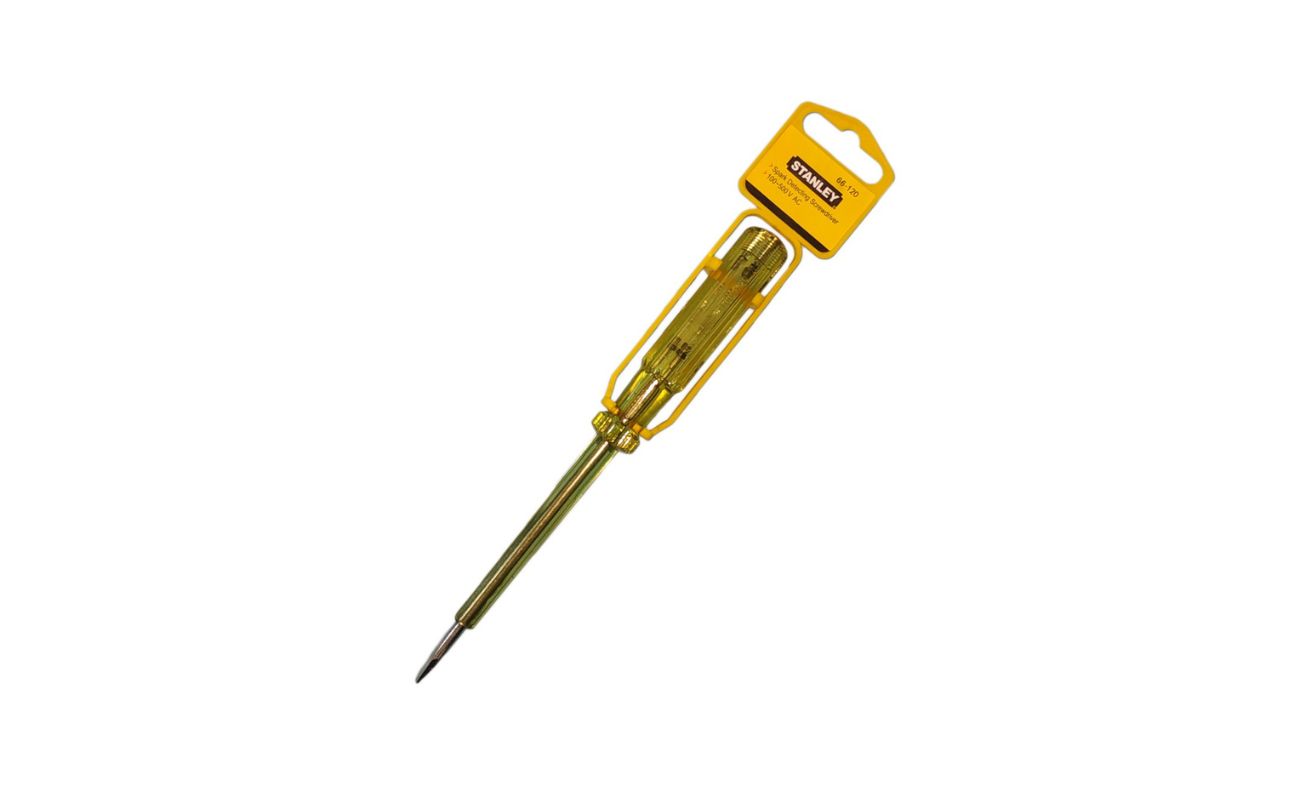
- Flathead screwdriver
- Voltage tester or multimeter
With these tools at hand and the necessary safety precautions, you are ready to start checking the voltage of your doorbell system.
Key Takeaways:
- Ensure the safety and reliability of your doorbell by checking its voltage. Identify and troubleshoot low or high voltage issues to maintain optimal functionality and prevent potential damage.
- By following the step-by-step process, you can confidently test, troubleshoot, and reconnect your doorbell system, ensuring its proper operation and longevity. Regular maintenance and monitoring of voltage will keep your doorbell functioning reliably.
Read more: What Voltage Does A Ring Doorbell Need
Why Check Doorbell Voltage
Checking the voltage of your doorbell is crucial for several reasons. Firstly, it helps you determine if the voltage is within the operating range of your doorbell system. If the voltage is too low or too high, it can lead to problems such as a weak or non-functional doorbell chime.
Doorbell systems typically operate on low voltage, usually between 8 and 16 volts. If the voltage is too low, the doorbell may not have enough power to ring properly, resulting in a faint or barely audible chime. On the other hand, if the voltage is too high, it can damage the doorbell components, causing them to malfunction or fail completely.
Secondly, understanding the voltage of your doorbell system can help you troubleshoot any issues that arise. If you are experiencing problems with your doorbell, such as intermittent ringing or no sound at all, checking the voltage can provide valuable insights into the root cause of the problem.
For example, if the voltage reading is below the recommended range, it may indicate a problem with the transformer or wiring. It could be that the transformer is not supplying enough power, or there may be a loose connection somewhere along the wiring. By identifying the voltage as the issue, you can focus your troubleshooting efforts on rectifying the power supply or wiring problem.
On the other hand, if the voltage reading is too high, it could indicate a faulty transformer or a problem with the doorbell itself. High voltage can overheat and damage electrical components, leading to failures and malfunctions. By knowing that the voltage is too high, you can take appropriate actions to replace the transformer or repair the doorbell unit.
Lastly, checking the voltage can help you ensure the safety of your doorbell system. Extremely high or low voltage levels can damage the doorbell transformer or even pose a risk of electrical shocks. By regularly monitoring the voltage, you can address any abnormalities before they cause further damage.
Monitoring the voltage of your doorbell system is especially important if you have recently installed a new doorbell or made any changes to the electrical setup in your home. In such cases, it is crucial to ensure that the voltage is compatible and within the recommended range for your specific doorbell system.
By regularly checking the voltage and addressing any issues promptly, you can ensure that your doorbell operates efficiently and reliably. So, whether you are troubleshooting an existing problem or simply performing routine maintenance, checking the voltage of your doorbell is a crucial step that should not be overlooked.
Safety Precautions
Before you begin checking the voltage of your doorbell, it is essential to prioritize safety. Working with electrical systems carries inherent risks, so taking the necessary precautions can help prevent accidents and ensure your well-being. Here are some safety guidelines to follow:
- Turn off the power: Before starting any work on your doorbell system, make sure to turn off the power at the circuit breaker. This step is crucial to prevent electrical accidents and ensure your safety while working on the wiring or components.
- Use insulated tools: When handling electrical components or working around live wires, always use insulated tools. Insulated tools have rubberized handles or coatings that provide an extra layer of protection against electric shocks. They help minimize the risk of current flowing through your body if you accidentally come into contact with a live wire.
- Wear protective gear: It is advisable to wear safety gloves and goggles when working on your doorbell system. Safety gloves protect your hands from potential electrical hazards and sharp edges, while goggles safeguard your eyes from any debris or sparks that may occur during the process.
- Work in a well-lit area: Ensure that you have proper lighting when working on your doorbell system. Good visibility allows you to see the wiring and components clearly, reducing the chances of making mistakes or coming into contact with live wires.
- Avoid working alone: It’s always safer to have someone else present when working with electrical systems. If an accident occurs, having someone nearby can provide assistance or call for help if needed.
- Disconnect the power source: Besides turning off the power at the circuit breaker, it is advisable to disconnect the power source from the doorbell itself. This additional step adds an extra layer of safety by ensuring that no power is flowing through the system while you work on it.
- Seek professional help if unsure: If you are uncomfortable working with electrical wiring or unsure about any part of the process, it is best to seek assistance from a qualified electrician. They have the expertise and knowledge to handle electrical systems safely and can ensure the job is done correctly.
Remember, safety should always be the top priority when working on electrical systems. By following these safety precautions, you can minimize the risk of accidents and complete the task of checking your doorbell voltage with confidence and peace of mind.
Tools Needed
Before you begin checking the voltage of your doorbell system, it’s important to gather the necessary tools. Having the right tools on hand will allow you to perform the task effectively and efficiently. Here are the tools you’ll need:
- Flathead screwdriver: A flathead screwdriver is an essential tool for accessing the components of your doorbell system. It will help you remove any covers or panels that may be blocking your access to the doorbell and wiring.
- Voltage tester or multimeter: A voltage tester or multimeter is used to measure the voltage of the doorbell system. These tools come in different types, but the most common ones for measuring AC voltage are non-contact voltage testers or digital multimeters. Make sure you have one of these tools available before you start.
A flathead screwdriver will aid in removing the cover of your doorbell and accessing the inner components. Depending on the type of doorbell system you have, there may be screws or clips holding the cover in place. Use the flathead screwdriver to remove these fasteners and expose the wiring and doorbell chime.
Once you have access to the wiring, a voltage tester or multimeter will enable you to measure the voltage levels accurately. Non-contact voltage testers are convenient because they can detect voltage without making physical contact with the wires. Simply bring the tester close to the wire, and if voltage is present, the tester will emit an audible or visual indication. This is particularly helpful for ensuring your safety when working around live wires.
On the other hand, digital multimeters are versatile tools that can measure various electrical properties, including voltage. They require direct contact with the wires, usually by connecting the multimeter probes to the terminals or exposed wire ends. Digital multimeters provide precise voltage readings and additional functionality, such as resistance and continuity testing.
Having these tools readily available will make the process of checking your doorbell voltage much easier and more accurate. They ensure that you can measure the voltage levels effectively and troubleshoot any issues that may arise.
Remember to use these tools safely and follow the manufacturer’s instructions for proper usage. If you are unsure about how to operate them, refer to the user manuals or consult with a professional for guidance.
Step 1: Turning Off the Power
Prior to working on your doorbell system, it is crucial to ensure that the power supply is turned off. This will help prevent any electrical accidents and ensure your safety throughout the process. Follow these steps to turn off the power:
- Locate the circuit breaker: The circuit breaker is typically found in the electrical panel or fuse box of your home. It is a control panel that manages the flow of electricity to various circuits in your house.
- Identify the correct circuit: Look for the circuit breaker that is responsible for supplying power to your doorbell system. If you are unsure which circuit controls the doorbell, you can either refer to the electrical plan of your home or use trial and error by turning off individual breakers until the doorbell stops functioning.
- Switch off the circuit breaker: Once you have identified the correct circuit breaker, switch it off by flipping the corresponding switch to the “Off” position. This will cut off the power supply to the doorbell system.
- Double-check the power supply: After switching off the circuit breaker, verify that the power to the doorbell is indeed off. You can do this by attempting to ring the doorbell itself or using a voltage tester to check for the absence of voltage. This additional step ensures that you are working with a de-energized system.
Remember, turning off the power is a critical step to avoid any potential electrical hazards. Take care to follow the proper procedure for switching off the circuit breaker and always confirm that the power is truly off before proceeding further.
Note that some doorbell systems may have a separate transformer that is connected directly to an electrical outlet rather than being controlled by a circuit breaker. In such cases, you will need to unplug the transformer from the outlet to cut off the power supply. Make sure to locate the transformer and unplug it before proceeding with the subsequent steps.
Once you have successfully turned off the power, you can proceed to the next step, which involves accessing the doorbell system to begin testing the voltage.
Use a digital multimeter to measure the voltage at the doorbell. Set the multimeter to AC voltage and touch the probes to the doorbell wires. A reading between 16-24 volts indicates standard doorbell voltage.
Step 2: Accessing the Doorbell
Now that the power to your doorbell system is turned off, you can proceed to access the doorbell itself. Accessing the doorbell will allow you to expose the wiring and components necessary for testing the voltage. Follow these steps to access the doorbell:
- Locate the doorbell cover: The doorbell cover is typically located near your front door, either on the exterior or interior wall. It may be attached with screws or clips, depending on the type of doorbell system you have.
- Use a flathead screwdriver: Depending on the fastening mechanism, use a flathead screwdriver to remove the screws or unclip the cover. Gently pry the cover away from the wall to expose the internal components of the doorbell.
- Disconnect the wires: Once the doorbell cover is removed, locate the two wires connected to the doorbell terminals. These wires are typically color-coded, with one wire being white and the other wire being black or red. Carefully disconnect the wires from the doorbell terminals by unscrewing them or releasing any clamps or connectors.
- Ensure wire safety: After disconnecting the wires, ensure that they are not making contact with each other or any other metal surfaces. This precaution is necessary to prevent any accidental short circuits or electrical shocks.
Once you have successfully accessed the doorbell and disconnected the wires, you are ready to move on to the next step: testing the voltage of the doorbell system.
It’s worth mentioning that the process of accessing the doorbell may vary depending on the specific model and installation of your doorbell system. Some doorbells may have additional components or wiring configurations that require extra steps to access. Refer to the manufacturer’s instructions or consult with a professional if you encounter any difficulties or uncertainties during this process.
By accessing the doorbell, you have set the stage for testing the voltage and identifying any potential voltage issues within the system. Proceed with caution and keep safety in mind as you move forward with the next steps.
Read more: What Is A Low Voltage Thermostat
Step 3: Testing the Voltage
Now that you have accessed the doorbell and disconnected the wires, it’s time to test the voltage of the doorbell system. Testing the voltage will help you determine if the power supply is within the recommended range for your specific doorbell. Follow these steps to test the voltage:
- Prepare your voltage tester: If you are using a non-contact voltage tester, ensure that the tester is in working condition and the batteries are properly installed. If you are using a digital multimeter, set it to the AC voltage mode and select an appropriate voltage range.
- Turn on the power: Before proceeding, ensure that the power supply to the doorbell system is turned back on. Go back to the circuit breaker panel and switch on the corresponding circuit breaker for the doorbell.
- Test the voltage: Hold the voltage tester close to the exposed wires of the doorbell. For a non-contact voltage tester, you do not need to make physical contact with the wires. Simply bring the tester near the wires, and if voltage is present, the tester will emit an audible or visual indication. If you are using a digital multimeter, carefully touch the multimeter probes to the exposed ends of the wires and note the voltage reading on the display.
- Record the voltage reading: Take note of the voltage reading provided by the tester or multimeter. The reading will indicate the voltage level of the doorbell system.
- Confirm the voltage range: Compare the recorded voltage reading with the recommended operating range for your specific doorbell system. Most residential doorbells operate at either 8 volts or 16 volts. If the recorded voltage falls within this range, your doorbell system is receiving the correct voltage. If the recorded voltage is significantly higher or lower than the expected range, you may need further investigation and troubleshooting.
- Take multiple readings: It’s a good practice to take multiple readings at different times to ensure consistency. Voltage levels can fluctuate, so capturing multiple readings will help you identify any consistent abnormalities or variations.
Testing the voltage of your doorbell is a crucial step to determine if the power supply is within the proper range. By taking accurate voltage readings, you will have a better understanding of the electrical health of your doorbell system and can proceed with identifying and resolving any voltage-related issues.
Keep in mind that specific doorbell models and installations may have unique wiring configurations or voltage testing procedures. Always refer to the manufacturer’s instructions or consult with a professional if you have any doubts or uncertainties during the voltage testing process.
With the voltage testing complete, you can now move on to the next step: identifying low or high voltage and troubleshooting any voltage issues that may be affecting your doorbell system.
Step 4: Identifying Low or High Voltage
After testing the voltage of your doorbell system, it’s time to analyze the readings to identify if the voltage is too low or too high. Identifying low or high voltage will help you understand the underlying issues affecting your doorbell’s functionality. Follow these steps to determine the voltage status:
- Compare the voltage reading: Refer to the recommended voltage range for your specific doorbell system. If the recorded voltage falls below the minimum recommended voltage, it indicates low voltage. Conversely, if the recorded voltage exceeds the maximum recommended voltage, it indicates high voltage.
- Understanding low voltage issues: If the voltage reading is lower than the recommended range, it can cause various problems with your doorbell. Low voltage can result in a weak or non-existent doorbell sound, intermittent operation, or even failure to function at all. Issues with the doorbell transformer or poor wiring connections are common causes of low voltage.
- Observing high voltage issues: If the voltage reading exceeds the recommended range, it can lead to doorbell malfunctions or damage to the doorbell components. High voltage can cause overheating, buzzing sounds, or even permanent damage to the doorbell unit. Faulty transformers or incorrect wiring configurations are typical causes of high voltage.
- Document the voltage status: Take note of the voltage status (low or high) and any specific voltage readings you recorded. This documentation will be helpful for troubleshooting and resolving the voltage issue.
Understanding whether your doorbell is experiencing low or high voltage is crucial for troubleshooting and fixing the problem. It gives you insight into the potential causes and helps guide the subsequent steps to rectify the voltage issue.
If you have identified low voltage, you may need to investigate and address problems such as a faulty transformer, loose wiring connections, or inadequate power supply. On the other hand, if high voltage is the issue, you should investigate the transformer or wiring to ensure they are properly configured and not providing excessive power to the doorbell.
In the next step, we will discuss how to troubleshoot and resolve voltage issues affecting your doorbell system based on the identified voltage status.
Step 5: Troubleshooting Voltage Issues
Now that you have identified whether your doorbell is experiencing low or high voltage, it’s time to troubleshoot and resolve the voltage issues. Troubleshooting the voltage will help you address the underlying causes and restore the proper voltage to your doorbell system. Follow these steps to troubleshoot and fix the voltage issues:
- For low voltage:
- Check the doorbell transformer: Start by inspecting the doorbell transformer. Ensure that it is functioning correctly and providing the proper voltage output. If the transformer is faulty, replace it with a new one compatible with your doorbell system.
- Examine the wiring connections: Loose or poorly connected wiring can cause low voltage issues. Check all the wiring connections, particularly at the transformer and doorbell. Ensure they are securely fastened and free from any damage or corrosion. If any wires are damaged, replace them with new ones.
- Verify power supply: Ensure that the power supply to the doorbell transformer is adequate. Check for any issues with the electrical circuit, such as a tripped circuit breaker or a blown fuse. If necessary, consult an electrician to inspect and resolve any problems with the power supply.
- Consider a higher-rated transformer: If you frequently experience low voltage issues, upgrading to a higher-rated transformer may be a solution. A higher-rated transformer will provide a stronger and more stable power supply, ensuring optimal voltage for your doorbell system.
- For high voltage:
- Inspect the transformer: Check the doorbell transformer to ensure it is the correct rating for your doorbell system. If it is oversized or incompatible, it can cause high voltage. Replace the transformer with the appropriate one if needed.
- Check the wiring configuration: Ensure that the wiring is correctly connected and not causing any voltage spikes. Verify that the wires are properly paired and connected to the corresponding terminals on the transformer and doorbell. Incorrect wiring configurations can lead to high voltage issues.
- Consider voltage regulation: Installing voltage regulation devices, such as voltage stabilizers or regulators, can help alleviate high voltage problems. These devices ensure a consistent and steady power supply, preventing voltage fluctuations that may damage your doorbell system.
- Consult a professional: If you are unsure about any of the troubleshooting steps or encounter difficulties in resolving the high voltage issue, it is best to seek assistance from a qualified electrician. They have the expertise to diagnose and rectify complex voltage problems.
By systematically troubleshooting the voltage issues and implementing the appropriate solutions, you can resolve the problems affecting your doorbell system and restore proper voltage operation. The specific steps and solutions may vary depending on the specifics of your doorbell system, so refer to the manufacturer’s instructions or consult with a professional for specific guidance.
Once you have addressed the voltage issues in your doorbell system, you can proceed to the next step: reconnecting the doorbell and completing the necessary connections.
Step 6: Reconnecting the Doorbell
With the voltage issues resolved and the necessary troubleshooting steps complete, it’s time to reconnect the doorbell. Reconnecting the doorbell will ensure that all the wiring connections are secure and properly reestablished. Follow these steps to reconnect the doorbell:
- Identify the doorbell terminals: Locate the doorbell terminals where the wires were previously connected. These terminals are typically labeled “Front” and “Transformer” or marked with (+) and (-) symbols.
- Strip the wire ends: Using a wire stripper or a sharp utility knife, carefully strip the insulation off the ends of the wires that were previously disconnected. Strip off approximately 1/4 inch (6 mm) of insulation to expose the bare copper wire.
- Connect the wires: Starting with the white wire, connect it to the appropriate terminal by wrapping the exposed wire clockwise around the screw and tightening it securely. Repeat the process with the other wire, typically black or red, making sure it is connected to the correct terminal.
- Tighten the terminal screws: Use a screwdriver to tighten the terminal screws snugly, ensuring a secure connection between the wires and the doorbell terminals. Avoid over-tightening, as this can damage the wires or the terminals.
- Inspect the connections: After reconnecting the wires, visually inspect the connections to ensure that they are secure and free from any loose strands or exposed wire. Correct any issues that you may find to ensure a safe and reliable connection.
- Replace the doorbell cover: Once the connections are secure and inspected, carefully place the doorbell cover back over the doorbell unit. Align it with the mounting holes or clips, and use a screwdriver to secure it in place or reattach any clips that were removed earlier.
By following these steps, you have successfully reconnected the doorbell and ensured that all the wiring connections are secure. This step is crucial for allowing the doorbell system to function properly and effectively transmit the voltage necessary for proper operation.
Before proceeding to the next step, take a moment to double-check all the connections and ensure that the doorbell cover is securely fastened. This will prevent any accidental disconnections and protect the wiring and components of the doorbell system.
In the next step, we will discuss restoring the power to the doorbell system, allowing you to test the functionality and performance of your newly reconnected doorbell.
Read more: How To Wire A Line Voltage Thermostat
Step 7: Restoring Power
After reconnecting the doorbell, the final step is to restore power to the doorbell system. By turning the power back on, you can test the functionality and performance of your doorbell to ensure that it is working properly. Follow these steps to restore power to your doorbell:
- Locate the circuit breaker panel: Go back to the circuit breaker panel or fuse box in your home where you previously turned off the power to the doorbell system.
- Identify the correct circuit breaker: Find and identify the circuit breaker that controls the power supply to your doorbell. Remember the specific breaker or note it down if necessary.
- Switch on the circuit breaker: Flip the corresponding switch or reset the circuit breaker associated with your doorbell system to the “On” position. This will restore the power supply to the doorbell.
- Verify the doorbell functionality: Once the power is restored, test your doorbell by pressing the doorbell button or using a tester tool. Listen for the chime or check the voltage reading to ensure that the doorbell is working as expected. If the doorbell does not function correctly, double-check the connections and troubleshoot further if needed.
- Observe proper functioning: After verifying that the doorbell is ringing or receiving the appropriate voltage, take a moment to observe its proper functioning. Pay attention to the sound, volume, and consistency of the chime. If you notice any irregularities or issues, you may need to revisit the previous steps to troubleshoot further.
By restoring power to your doorbell system, you have completed the reconnection process and verified the functionality of your doorbell. This final step ensures that the doorbell is receiving the necessary power and that it is ready to notify you when someone is at the door.
If you encounter any challenges during this step, such as the doorbell not functioning or the voltage still being incorrect, it may be necessary to seek professional assistance. Qualified electricians have the expertise and knowledge to troubleshoot and resolve complex electrical issues to ensure the proper operation of your doorbell system.
Congratulations! You have successfully followed all the steps to check the voltage, troubleshoot, and reconnect your doorbell system. Enjoy the convenience and peace of mind that comes with a properly functioning doorbell.
Now, sit back, relax, and enjoy the sound of your doorbell signaling the arrival of guests or package deliveries.
Conclusion
Checking the voltage of your doorbell system is an important maintenance task that ensures the proper functionality and longevity of your doorbell. By following the step-by-step process outlined in this article, you have learned how to check the voltage, troubleshoot voltage issues, and reconnect your doorbell system with confidence.
Understanding the voltage of your doorbell is crucial for several reasons. It helps you determine if the voltage is within the recommended operating range, allowing your doorbell to ring properly and consistently. By identifying low or high voltage, you can troubleshoot and resolve issues that may be affecting your doorbell’s functionality.
Throughout the process, safety precautions are vital. Always turn off the power at the circuit breaker and use insulated tools when working with electrical components. Wearing protective gear and seeking professional help if needed are also important for a safe and successful experience.
By having the necessary tools at hand and following each step carefully, you have successfully tested the voltage of your doorbell system. By troubleshooting voltage issues and reconnecting the doorbell with secure wiring connections, you have ensured the reliable operation of your doorbell.
Remember to restore the power to the doorbell system and observe its proper functioning. If you encounter any persistent issues or difficulties, it is advisable to consult a professional electrician who can provide expert guidance and assistance.
Checking the voltage of your doorbell and addressing any voltage problems will help prolong the lifespan of your doorbell and ensure that it functions optimally. Regular maintenance and monitoring of the voltage will prevent potential issues and allow you to enjoy the convenience of a fully operational doorbell system.
By following this comprehensive guide, you have taken an important step towards maintaining the functionality and reliability of your doorbell system. Now, you can confidently greet visitors and receive package deliveries, knowing that your doorbell will notify you with its familiar chime.
Now that you've mastered checking your doorbell's voltage, why not dive deeper into smart home management? Our latest guide on home automation covers essential gadgets for a smoother, more connected household in 2024. If you're looking to upgrade further, consider learning doorbell installation techniques for a seamless transformer setup. Both articles provide practical advice and easy-to-follow steps, perfect for enhancing your home's functionality and safety.
Frequently Asked Questions about How To Check Doorbell Voltage
Was this page helpful?
At Storables.com, we guarantee accurate and reliable information. Our content, validated by Expert Board Contributors, is crafted following stringent Editorial Policies. We're committed to providing you with well-researched, expert-backed insights for all your informational needs.


0 thoughts on “How To Check Doorbell Voltage”