
Articles
How To Paint Brick Chimney
Modified: October 28, 2024
Learn how to paint your brick chimney with our informative articles. Find step-by-step guides, tips, and tricks to achieve a professional finish.
(Many of the links in this article redirect to a specific reviewed product. Your purchase of these products through affiliate links helps to generate commission for Storables.com, at no extra cost. Learn more)
Introduction
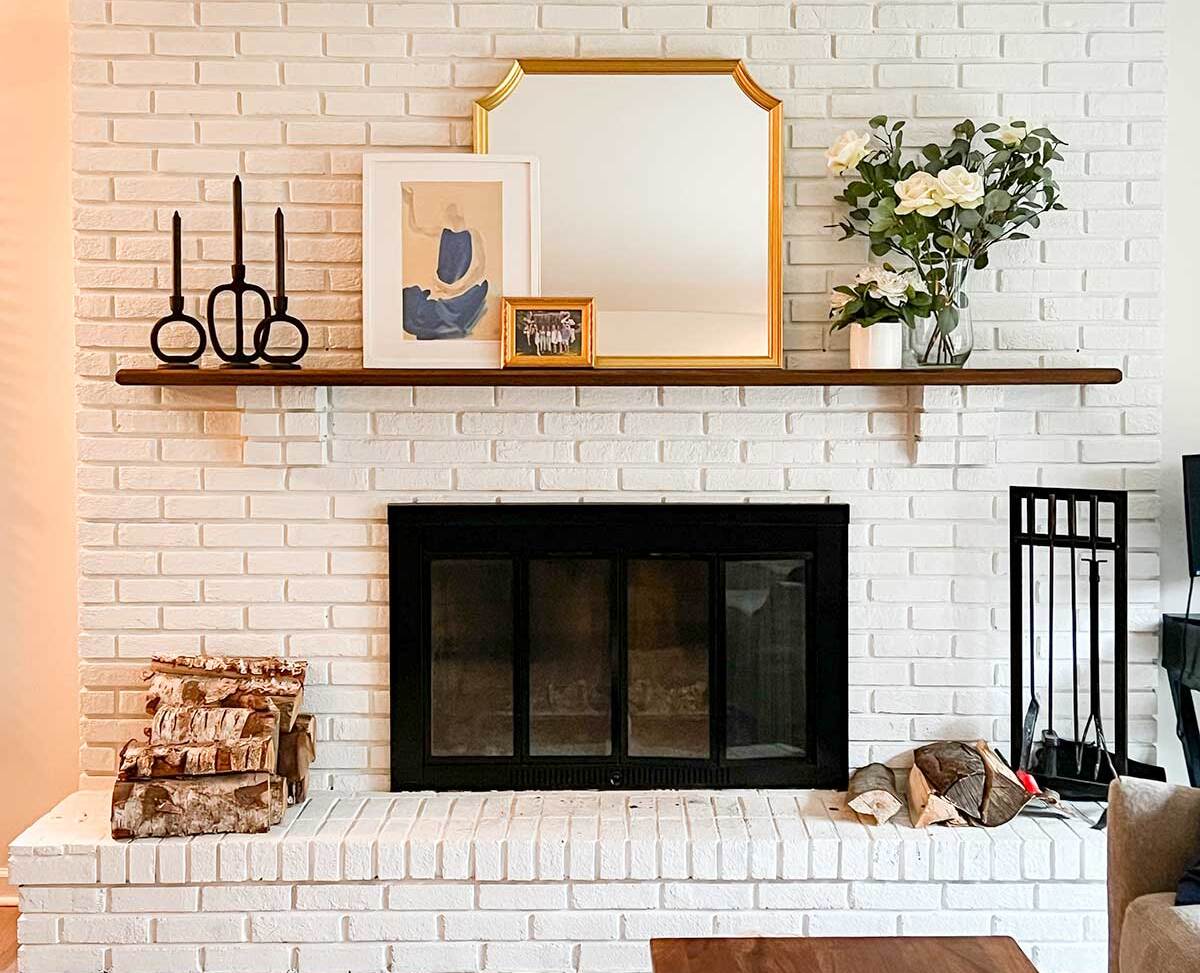
Painting a brick chimney can be a transformative project that adds a fresh new look to your home’s exterior. Whether you are tired of the outdated brick color or simply want to give your chimney a facelift, painting can be a cost-effective and visually appealing solution. However, it’s important to approach this task with the right knowledge and materials to ensure long-lasting results.
In this guide, we will walk you through the step-by-step process of painting a brick chimney. From the materials needed to the final clean-up, we’ve got you covered. So, let’s dive in and learn how to breathe new life into your chimney!
Key Takeaways:
- Transform your home’s exterior with a fresh coat of paint on your brick chimney. Proper preparation, cleaning, and repair are crucial for a successful and long-lasting finish.
- Choose the right materials, paint, and techniques to achieve a professional-looking result. Take your time, apply multiple thin coats, and ensure proper ventilation for a successful brick chimney painting project.
Read more: How To Build A Brick Chimney
Materials Needed
Before getting started, gather the following materials to ensure a smooth and successful painting process:
- Paint stripper or muriatic acid
- Protective gloves and goggles
- Scrub brush or wire brush
- Bucket and sponge
- Waterproof drop cloths or plastic sheeting
- Primer specifically designed for brick surfaces
- High-quality exterior paint (latex or acrylic-based)
- Paint roller with a medium nap
- Paintbrushes (1-2 inch and 4-inch sizes)
- Painter’s tape
- Extension pole
- Ladder or scaffolding
- Paint tray
- Paint stir stick
- Rags or paper towels
- Paint thinner or mineral spirits (for clean-up)
Having these materials on hand will ensure that you are well-equipped to complete the project efficiently and effectively.
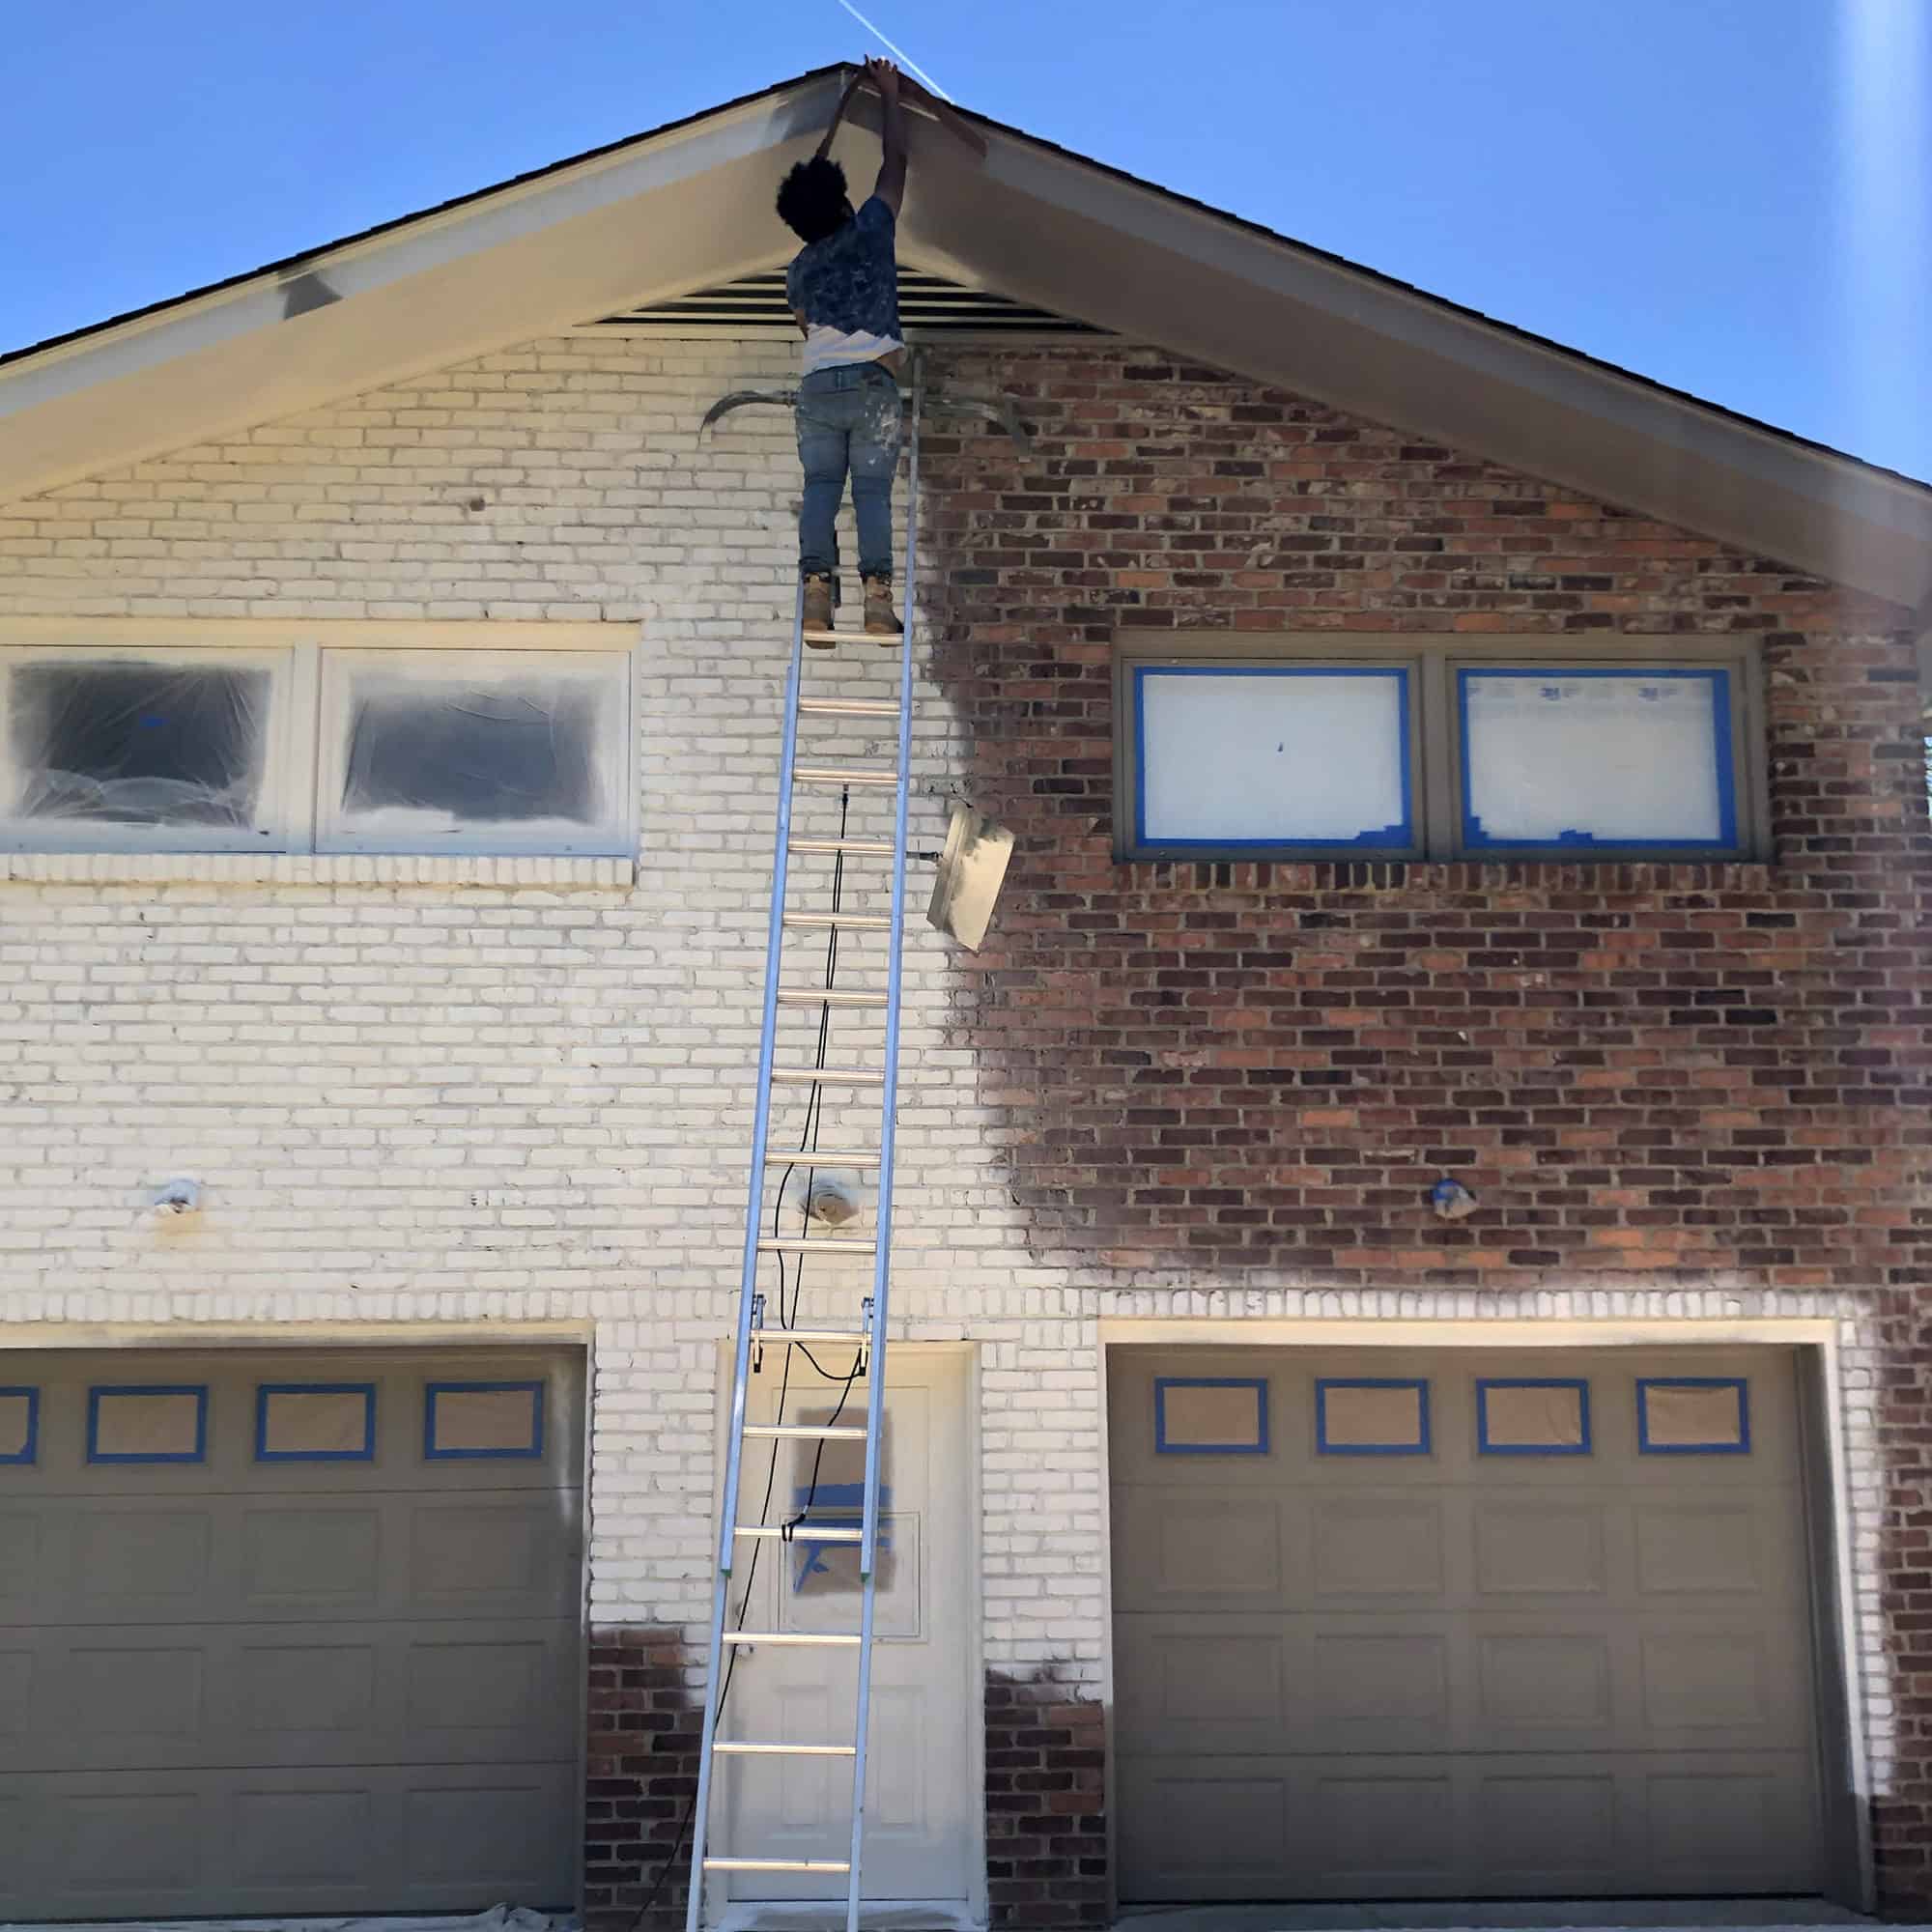
Preparation
Proper preparation is crucial for a successful brick chimney painting project. Follow these steps to ensure that the surface is ready to be painted:
- Remove any loose or peeling paint: If there is existing paint on the brick, use a paint scraper or wire brush to remove any loose or peeling paint. This will help create a smooth and even surface for the new paint.
- Protect the surrounding areas: Cover the ground and any nearby plants, windows, or other surfaces with waterproof drop cloths or plastic sheeting to protect them from paint splatters and spills.
- Tape off areas: Use painter’s tape to carefully cover any areas adjacent to the brick chimney that you want to keep paint-free, such as windows, trim, or gutters.
- Ensure proper ventilation: If you’re working on an indoor chimney, make sure the area is well-ventilated by opening windows or using fans. Paint fumes can be strong, so it’s important to have adequate airflow.
- Check the weather forecast: Painting a brick chimney is best done in dry weather with moderate temperatures. Avoid painting on extremely hot, cold, or windy days, as it may affect the paint’s application and drying time.
Once you have completed these preparations, you’re ready to move on to the next steps of cleaning and repairing the brick surface.
Cleaning the Surface
Before painting the brick chimney, it is essential to thoroughly clean the surface to remove any dirt, debris, or stains. This ensures that the paint adheres properly and provides a smooth finish. Here’s how to clean the surface:
- Remove loose dirt and debris: Start by using a brush or broom to sweep away any loose dirt or debris from the chimney bricks. Pay close attention to the mortar joints as well.
- Mix a cleaning solution: Prepare a cleaning solution by diluting a paint stripper or muriatic acid according to the manufacturer’s instructions. Wear protective gloves and goggles when handling these substances.
- Wet the brick surface: Use a sponge or sprayer to wet the brick surface with water before applying the cleaning solution. This helps prevent the brick from absorbing too much of the solution.
- Apply the cleaning solution: Dip a scrub brush in the cleaning solution and scrub the brick surface in a circular motion. Focus on areas with stains or discoloration.
- Rinse thoroughly: After scrubbing, rinse the brick surface thoroughly with clean water. This removes any residue from the cleaning solution.
- Allow the surface to dry: Give the brick chimney ample time to dry completely before proceeding. This ensures that the paint will adhere properly and prevent any moisture-related issues.
By cleaning the surface before painting, you ensure that the new paint adheres well and provides a long-lasting finish. This step also helps in removing any dirt or stains that might affect the appearance of the final result.
Repairing Any Damage
Before painting the brick chimney, it’s important to inspect the surface for any damage that needs to be repaired. Cracks, loose mortar, or missing bricks can compromise the structural integrity and affect the overall appearance of the chimney. Follow these steps to repair any damage:
- Inspect for cracks: Carefully examine the brick surface and mortar joints for any cracks or signs of damage. Use a pointed tool or screwdriver to gently probe the cracks and determine their depth.
- Repair minor cracks: For small cracks (less than 1/8 inch wide), use a high-quality caulk or exterior-grade masonry patching compound. Apply the compound to the crack, smoothing it with a putty knife or trowel. Allow it to dry according to the manufacturer’s instructions.
- Repoint mortar joints: If the mortar joints are deteriorated or crumbling, you’ll need to repoint them. Remove the loose or damaged mortar using a chisel and brush away any debris. Mix new mortar according to the manufacturer’s instructions and use a pointing trowel to fill the joints. Smooth the mortar and allow it to dry.
- Replace damaged bricks: If you have any severely damaged or missing bricks, you may need to replace them. Carefully remove the damaged bricks using a hammer and chisel, taking care not to damage the surrounding bricks. Clean out the area and apply mortar to the back of the new brick, placing it in the empty space. Allow the mortar to dry and blend it with the existing mortar.
By addressing and repairing any damage to the brick chimney before painting, you ensure its structural integrity and maintain a seamless appearance. Taking the time to perform these repairs will result in a longer-lasting and visually appealing final result.
Read more: How To Repair Brick Chimney
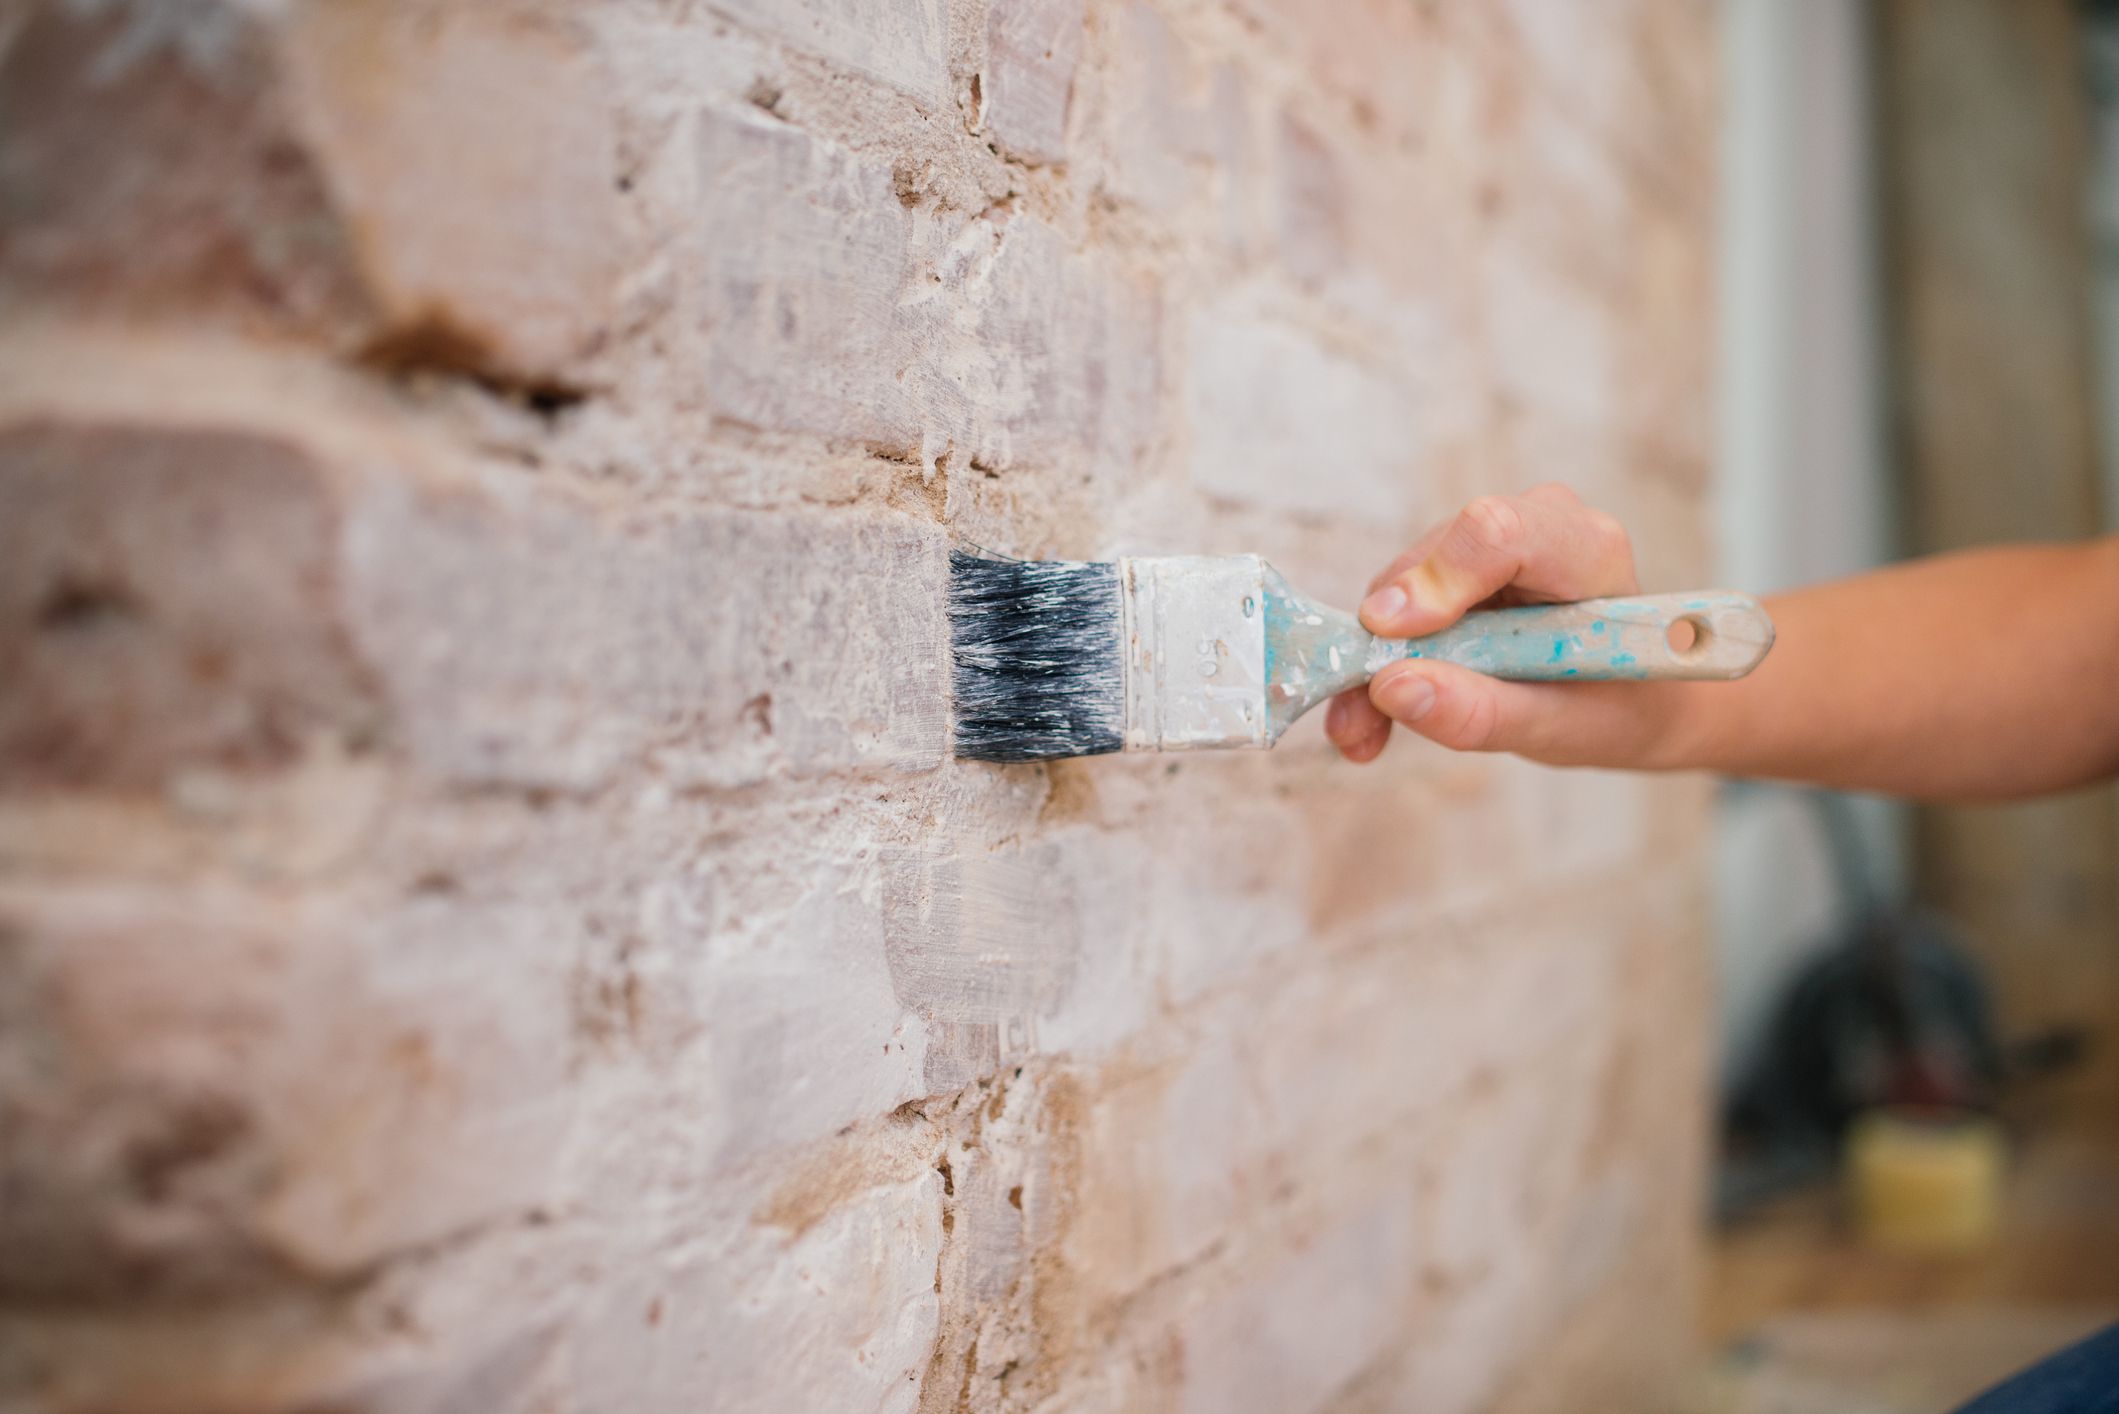
Priming the Brick
Priming the brick surface is an important step before applying the final coats of paint. Priming helps seal the pores of the brick and creates a smooth and uniform surface for better paint adhesion. Here’s how to prime the brick:
- Choose the right primer: Select a high-quality primer specifically designed for brick surfaces. Look for a product that is water-based and formulated to adhere well to porous materials.
- Prepare the primer: Follow the manufacturer’s instructions and stir the primer thoroughly before use. Pour the primer into a paint tray and use a paintbrush to cut in around the edges of the brick surface.
- Apply the primer: Use a paint roller with a medium nap to apply the primer to the larger areas of the brick. Work in sections, applying an even coat of primer to the brick surface. Roll the roller in different directions to ensure complete coverage.
- Allow the primer to dry: Check the drying time specified by the primer manufacturer and allow sufficient time for the primer to dry. This typically takes a few hours, but it may vary depending on the product and environmental conditions.
- Inspect the primed surface: Once the primer has dried, inspect the primed brick surface for any missed spots or uneven coverage. Touch up any areas as needed, making sure that the entire surface is evenly primed.
Priming the brick creates a solid foundation for the paint and improves the overall durability and longevity of the finish. It helps prevent the paint from peeling or bubbling and ensures a smooth and professional-looking result.
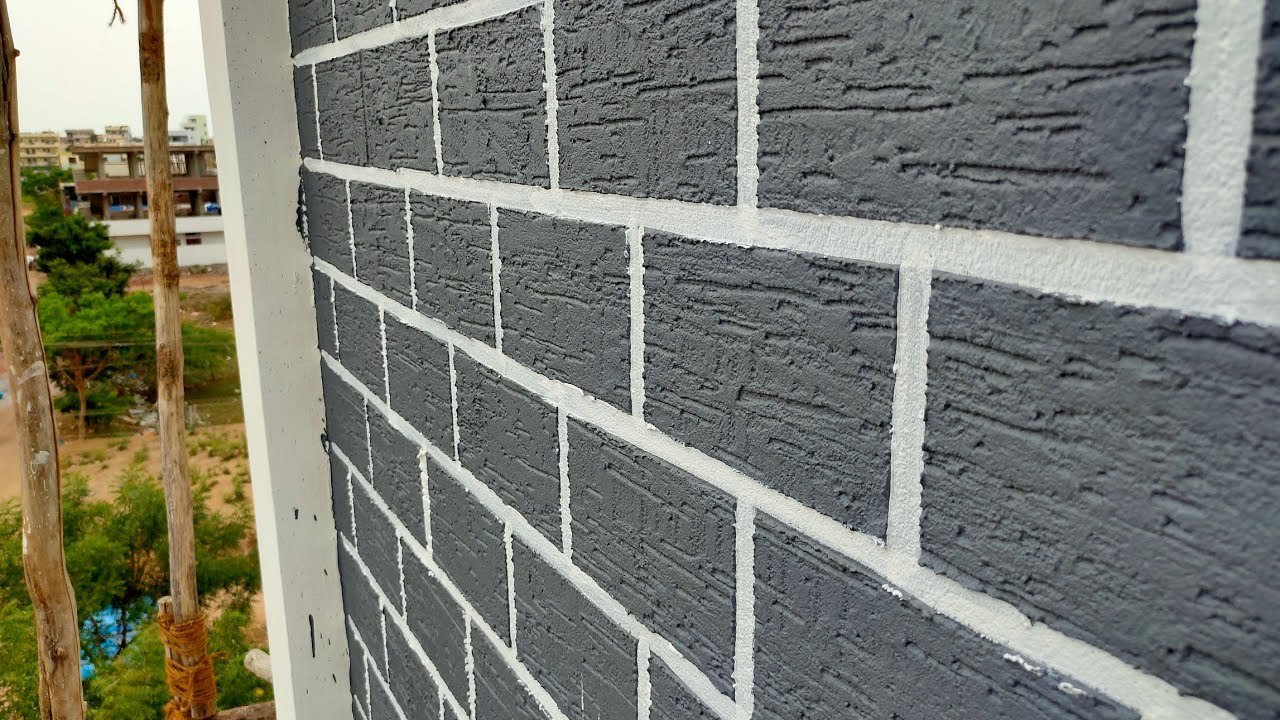
Before painting a brick chimney, make sure to clean the surface thoroughly to remove any dirt, soot, or debris. Use a wire brush and a mild detergent to scrub the bricks, then rinse and let it dry completely before applying the paint.
Choosing the Right Paint
When it comes to painting a brick chimney, selecting the right paint is key to achieving a beautiful and long-lasting finish. Here are some factors to consider when choosing the paint:
- Type of paint: Opt for a high-quality exterior paint that is specifically designed for masonry surfaces. Latex or acrylic-based paints are commonly used for painting brick as they provide excellent durability, flexibility, and resistance to cracking and peeling.
- Finish: Choose the appropriate finish based on your desired look and the location of the chimney. Satin or semi-gloss finishes are often recommended for exterior brick surfaces as they offer a good balance between durability and aesthetics.
- Color: Select a color that complements your home’s exterior and personal preferences. Keep in mind that lighter colors tend to reflect heat better, which can be beneficial for the chimney’s longevity and energy efficiency.
- Breathability: It’s important to choose a paint that allows the brick to breathe. Avoid using thick, oil-based paints that can trap moisture and lead to deterioration of the brick over time. Look for breathable masonry paints that allow moisture vapor to escape.
- UV resistance: Consider a paint that offers UV resistance to prevent fading and color change due to exposure to sunlight. This is especially important if your chimney is constantly exposed to direct sunlight.
Consult with a paint specialist or your local home improvement store for recommendations on the most suitable paint options for your specific project. They can guide you on selecting the right product based on the conditions and requirements of your brick chimney.
Painting the Chimney
Now that you have prepared the surface and chosen the right paint, it’s time to paint the brick chimney. Follow these steps for a successful painting process:
- Start at the top: Begin painting at the top of the chimney and work your way down. This helps prevent any drips or splatters from marring the already painted areas.
- Cut in around edges: Use a paintbrush to cut in around the edges of the brick, such as corners, edges, and crevices. This allows for precise application and helps create clean lines.
- Use a roller for larger areas: Use a paint roller with a medium nap to apply paint to the larger areas of the brick. Roll in different directions to ensure even coverage and to work the paint into the porous surface of the brick.
- Work in sections: Divide the chimney into manageable sections and paint one section at a time. This helps maintain a wet edge and ensures a more consistent finish.
- Apply multiple thin coats: Rather than applying one thick coat, it is best to apply multiple thin coats of paint. This allows for better adhesion and reduces the risk of paint drips or runs. Allow each coat to dry completely before applying the next.
- Check for missed spots: After each coat has dried, inspect the painted surface for any missed spots or uneven coverage. Touch up any areas as needed to ensure a uniform appearance.
- Follow the paint manufacturer’s instructions: Pay close attention to the drying time and curing process specified by the paint manufacturer. This will ensure that the paint fully cures and provides optimal durability and weather resistance.
Take your time and apply the paint with care to achieve a smooth and professional finish. Remember to maintain good ventilation in the area while painting and allow the recommended drying time between coats for the best results.
Applying Multiple Coats
When painting a brick chimney, applying multiple coats of paint is essential to achieve a long-lasting and beautiful finish. Here’s how to properly apply multiple coats:
- Allow the first coat to dry: After applying the first coat of paint, allow it to dry completely according to the paint manufacturer’s instructions. This usually takes a few hours, but it may vary depending on the type of paint and environmental conditions.
- Inspect the first coat: Once the first coat is dry, inspect the painted surface for any missed spots, uneven coverage, or imperfections. Use a light source or natural lighting to identify areas that may require touch-ups or additional coats.
- Prepare for the second coat: Before applying the second coat, lightly sand any rough patches or drips from the first coat. This helps create a smooth surface for the subsequent layers of paint.
- Apply the second coat: Use the same techniques as before to apply the second coat of paint. Start at the top and work your way down, cutting in around edges with a brush and using a roller for larger areas. The second coat should be applied in a similar manner as the first, ensuring even coverage.
- Allow for proper drying time: Once the second coat is applied, allow it to dry completely. Follow the paint manufacturer’s instructions for the recommended drying time between coats. This typically ranges from a few hours to overnight.
- Evaluate the need for additional coats: After the second coat has dried, assess the appearance of the brick chimney. Depending on the original color of the brick, the desired final color, and the coverage achieved with the first two coats, you may need to apply one or more additional coats.
- Repeat the process: If necessary, repeat the steps of sanding, applying, and drying for each additional coat until you achieve the desired level of coverage and color saturation.
By applying multiple thin coats of paint, you ensure a smooth and consistent finish while maximizing the durability and longevity of the painted surface. Allow each coat to dry properly before proceeding to the next, and be attentive to any areas that may require touch-ups or additional coats for complete coverage.
Read more: How To Paint Brick Pavers
Cleaning Up
Once you have finished painting the brick chimney, it’s time to clean up the area and properly store your painting materials. Here’s how to complete the clean-up process:
- Dispose of waste properly: Dispose of any leftover paint, paint cans, and other materials according to your local regulations. Some areas have specific guidelines for proper paint disposal, so be sure to follow them to protect the environment.
- Clean brushes and rollers: If you plan to reuse your brushes and rollers, clean them thoroughly immediately after use. Follow the instructions on the paint can or the paint thinner/mineral spirits container for the appropriate cleaning method.
- Remove painter’s tape: Carefully remove the painter’s tape from any areas that you protected during the painting process. Slowly peel it back at a 45-degree angle to avoid damaging the paint or any underlying surfaces.
- Store leftover paint: If you have any leftover paint, seal the can tightly to prevent air exposure. Store it in a cool, dry place where it won’t freeze or be exposed to extreme heat. The paint can remain usable for touch-ups or future projects.
- Clean the work area: Remove the drop cloths or plastic sheeting and clean up any splatters or drips on the surrounding surfaces. Use a damp cloth or sponge to wipe away any paint that may have accidentally gotten on windows, trim, or other areas.
- Inspect the finished chimney: Take a final look at the painted chimney to ensure that everything is clean and tidy. Check for any touch-ups or areas that may need additional attention.
By properly cleaning up after painting, you maintain a neat work area and prolong the lifespan of your painting tools. It’s also important to dispose of any waste materials responsibly, contributing to a cleaner and healthier environment.
Conclusion
Painting a brick chimney can be a rewarding project that breathes new life into your home’s exterior. With the right materials, preparation, and techniques, you can achieve a fresh and updated look while protecting the brick surface from the elements. Here’s a recap of the steps involved in painting a brick chimney:
- Prepare the surface: Remove loose paint, protect surrounding areas, and ensure proper ventilation.
- Clean the surface: Remove dirt and stains using a cleaning solution.
- Repair any damage: Fix cracks, repoint mortar joints, and replace damaged bricks.
- Prime the brick: Apply a suitable primer to seal the surface and promote paint adhesion.
- Choose the right paint: Select a high-quality paint designed for brick surfaces that offers durability, breathability, and UV resistance.
- Paint the chimney: Start at the top, cut in around edges, and use a roller for larger areas. Apply multiple thin coats, allowing sufficient drying time between each coat.
- Clean up: Properly dispose of waste, clean brushes and rollers, remove painter’s tape, and tidy up the work area.
Remember, the key to a successful paint job is in the preparation and attention to detail. Take your time, follow the steps carefully, and ensure that you have the necessary materials and tools to complete the project. By doing so, you’ll achieve a beautifully painted brick chimney that enhances the overall appearance of your home.
Now that you have the knowledge and guidance, it’s time to roll up your sleeves and transform your brick chimney with a fresh coat of paint. Enjoy the process and the satisfying results!
Frequently Asked Questions about How To Paint Brick Chimney
Was this page helpful?
At Storables.com, we guarantee accurate and reliable information. Our content, validated by Expert Board Contributors, is crafted following stringent Editorial Policies. We're committed to providing you with well-researched, expert-backed insights for all your informational needs.


0 thoughts on “How To Paint Brick Chimney”