Articles
How To Defrost Whirlpool Ice Maker
Modified: August 24, 2024
Discover helpful articles on how to defrost your Whirlpool ice maker and keep it running smoothly. Learn step-by-step methods and tips for optimal performance.
(Many of the links in this article redirect to a specific reviewed product. Your purchase of these products through affiliate links helps to generate commission for Storables.com, at no extra cost. Learn more)
Introduction
Welcome to the ultimate guide on how to defrost your Whirlpool ice maker. If you own a Whirlpool refrigerator with an ice maker, you may have encountered issues with ice production, such as small or misshapen ice cubes, or even a complete halt in ice production. One common cause of such problems is the accumulation of frost and ice in the ice maker unit.
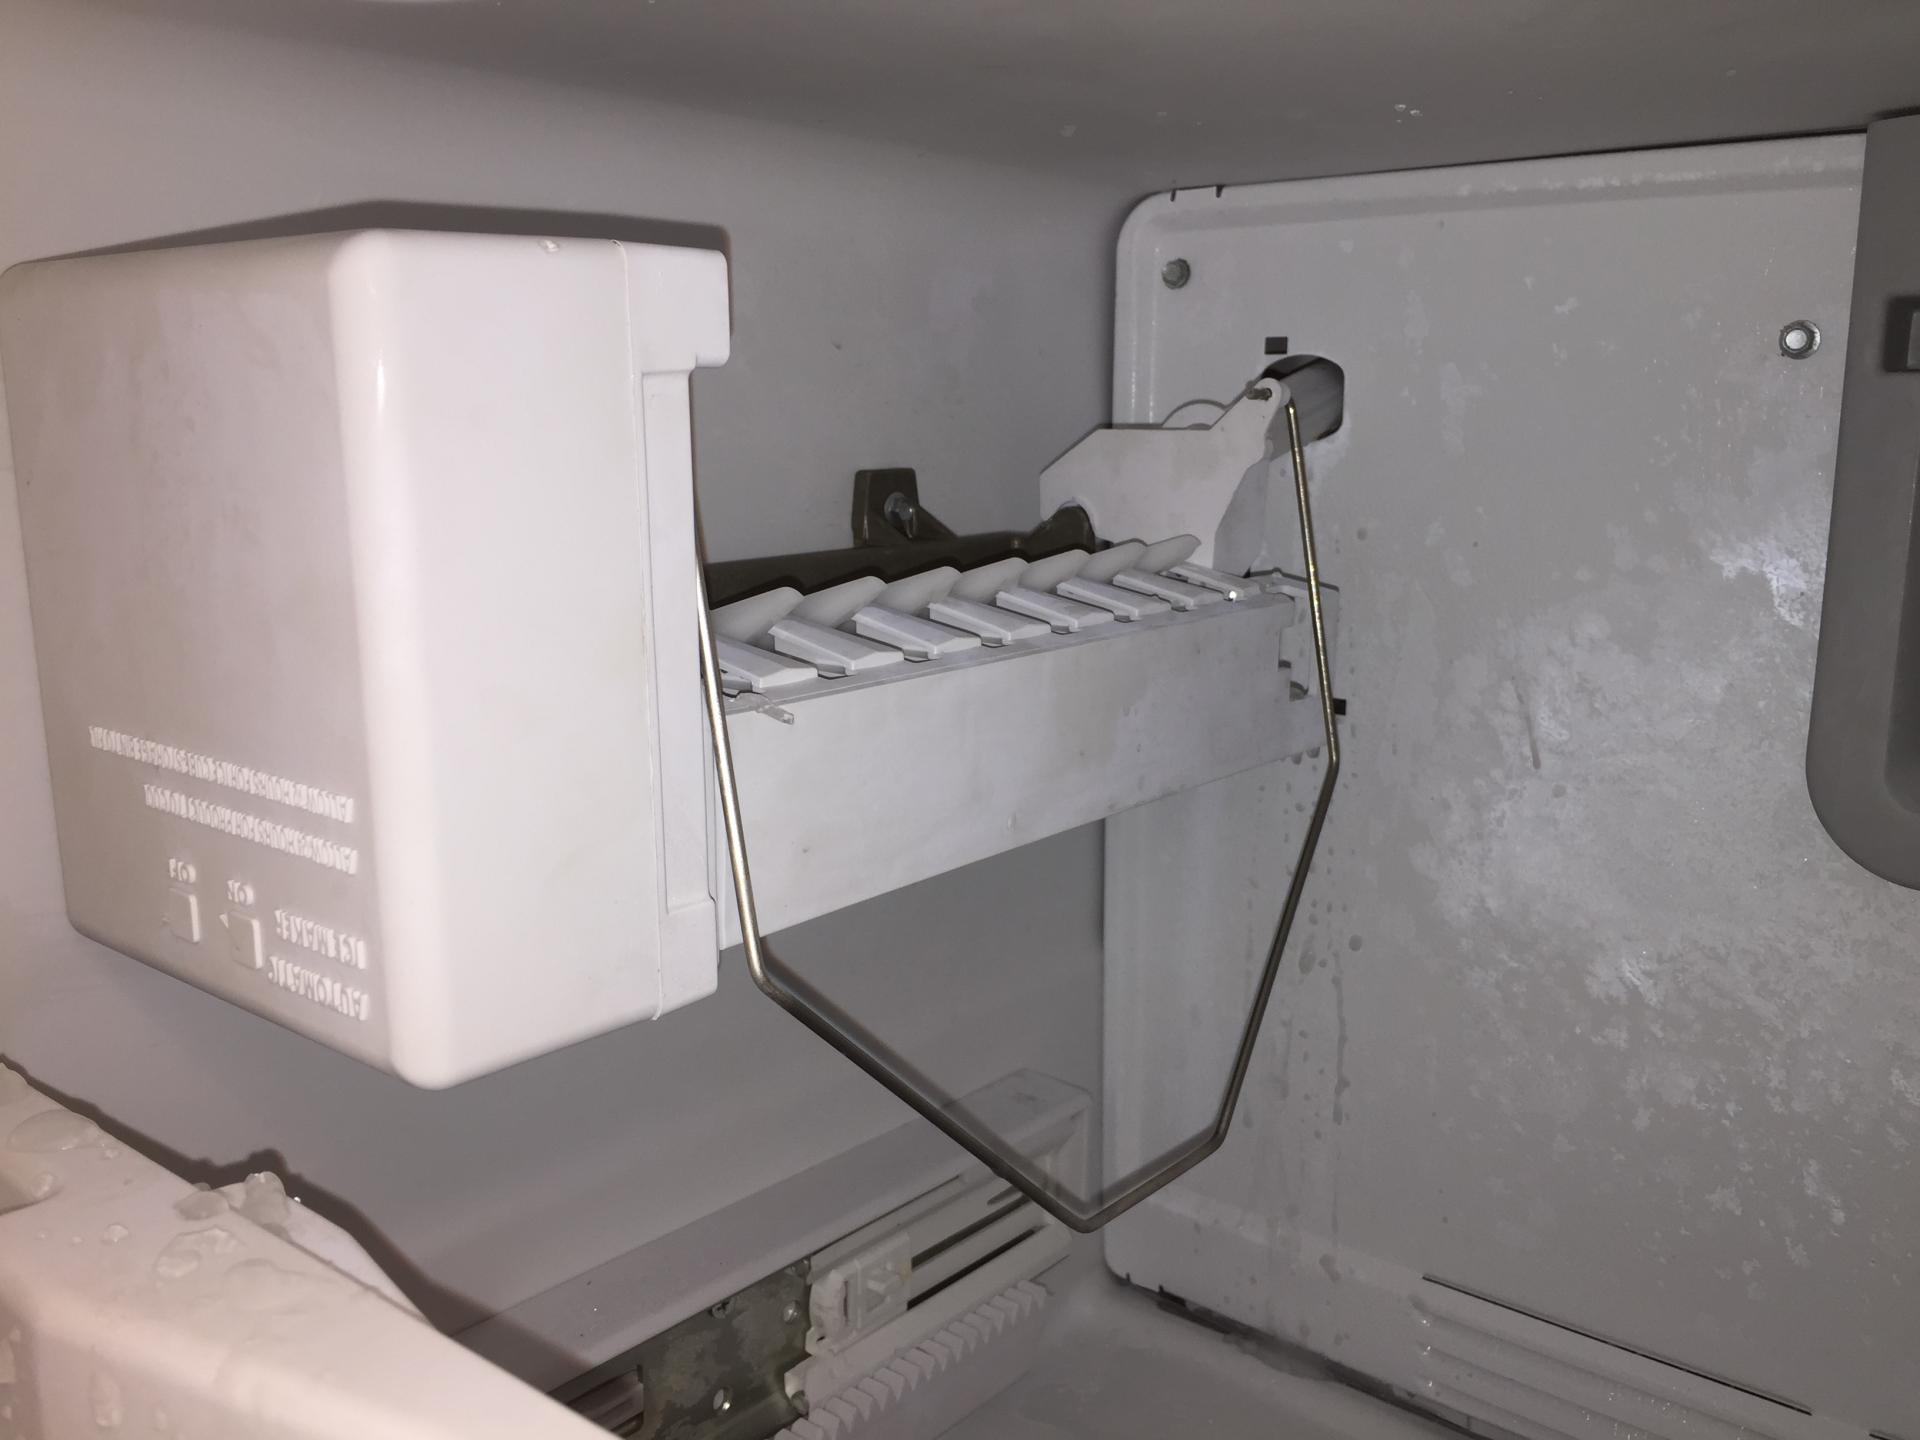
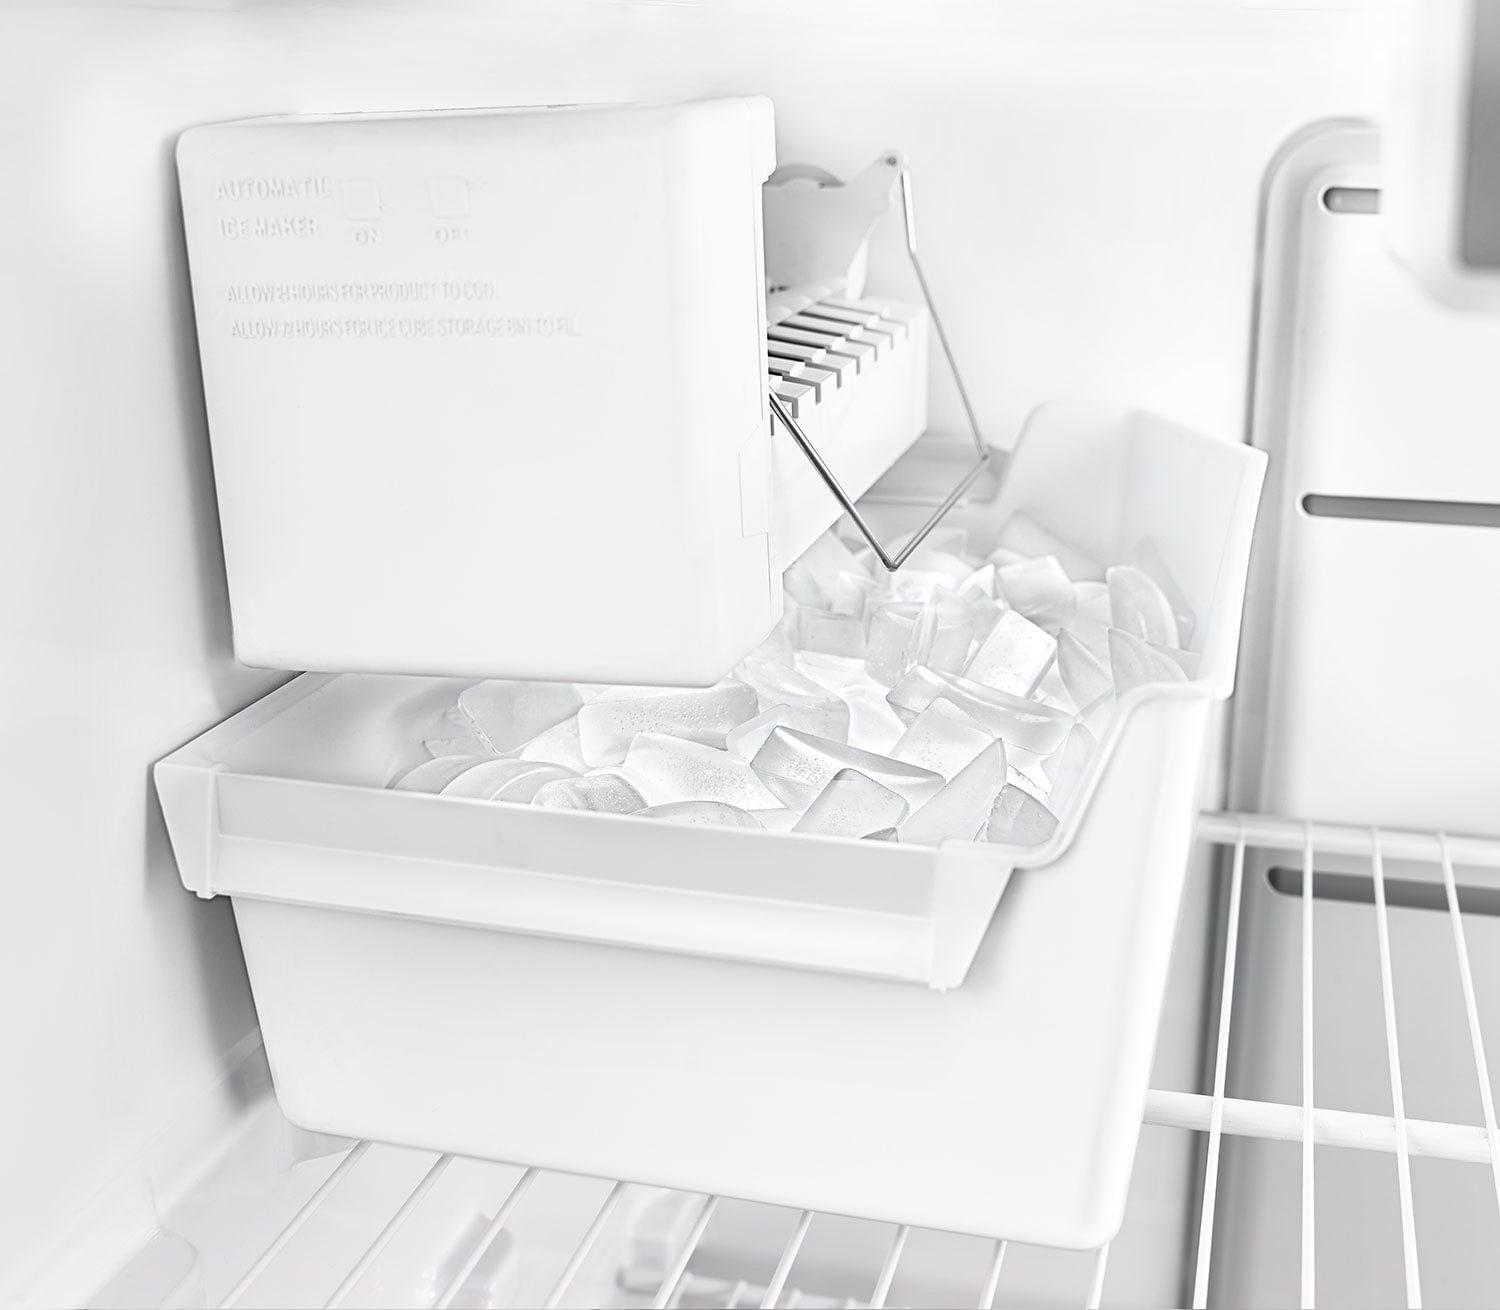
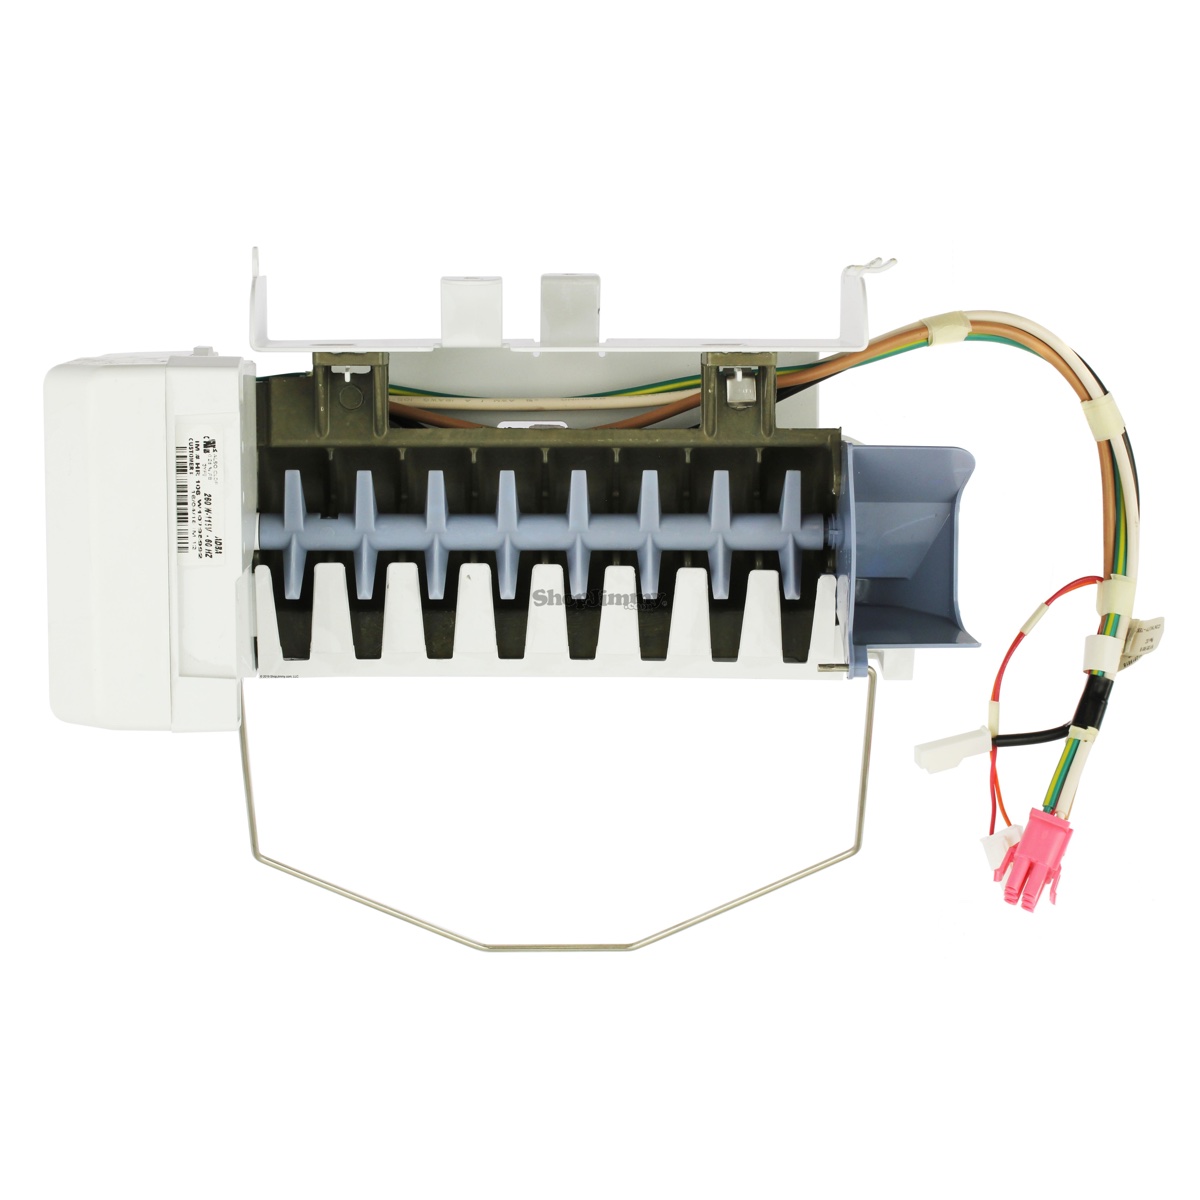
Understanding how your Whirlpool ice maker works is crucial before attempting to defrost it. The ice maker is a convenient feature that automatically produces ice cubes for you. It consists of a water supply line, a water valve, an ice mold, and a motorized ejector arm. When you select the ice dispenser on your refrigerator, the water valve opens, allowing water to flow into the ice mold. The water freezes, and once solid, the motorized ejector arm pushes the ice cubes into the storage bin, ready for your use.
Over time, due to fluctuations in temperature or infrequent use, frost can build up inside the ice maker. This frost buildup can obstruct the proper functioning of the unit, leading to decreased ice production or no ice at all. Defrosting the ice maker is a simple process that can help resolve these issues and restore the ice maker to its optimal functionality.
Before we dive into the steps for defrosting the Whirlpool ice maker, it is important to note some safety precautions to ensure both your own safety and the protection of your appliance. Let’s explore these precautions in the next section.
Key Takeaways:
- Defrosting your Whirlpool ice maker is essential to resolve issues like reduced ice production, clumping, and unpleasant odors. Follow safety precautions and a step-by-step guide for optimal results.
- Maintaining your ice maker’s efficiency involves regular cleaning, checking the water supply line, and monitoring freezer temperature. Troubleshoot common issues and seek professional assistance if needed for a hassle-free ice-making experience.
Read more: How To Defrost A Samsung Ice Maker
Understanding the Whirlpool Ice Maker
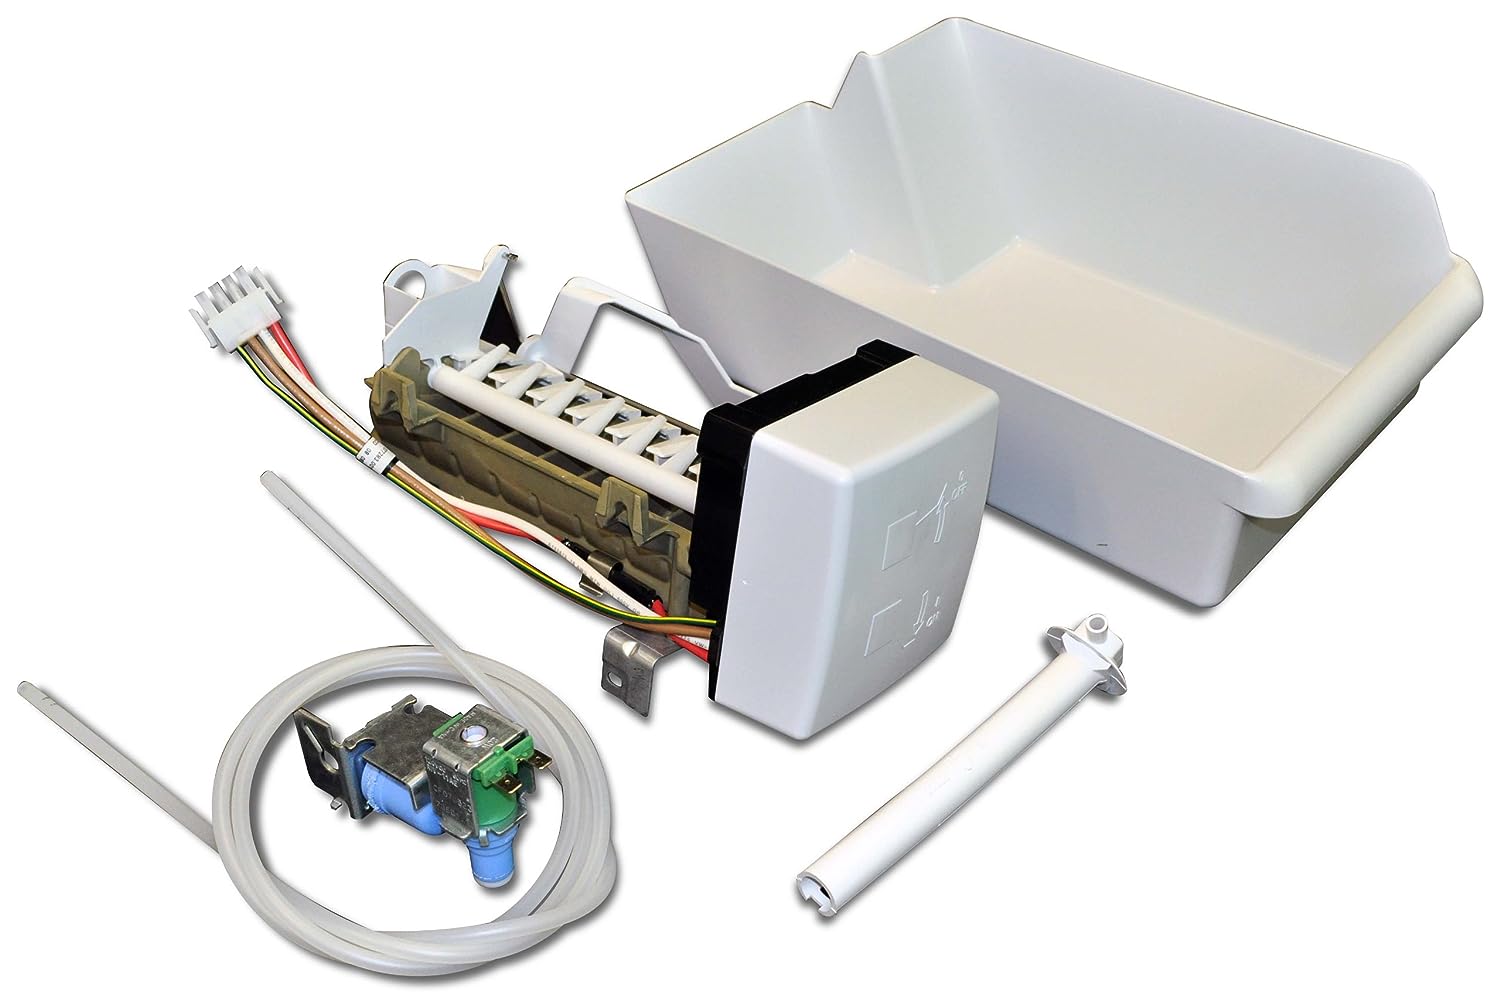
The Whirlpool ice maker is a vital component of your refrigerator that allows you to have a constant supply of ice cubes on hand. This innovative feature eliminates the need for manual ice tray filling and freezing, making it more convenient and efficient. To better understand how the Whirlpool ice maker operates, let’s take a closer look at its key components and functions.
Water Supply Line: The ice maker is connected to your home’s water supply through a water supply line. This line allows a steady flow of water to enter the ice maker when ice production is initiated.
Water Valve: The water valve controls the flow of water into the ice maker. When you activate the ice dispenser on your refrigerator, the water valve opens, allowing water to enter the ice maker’s reservoir and fill the ice molds.
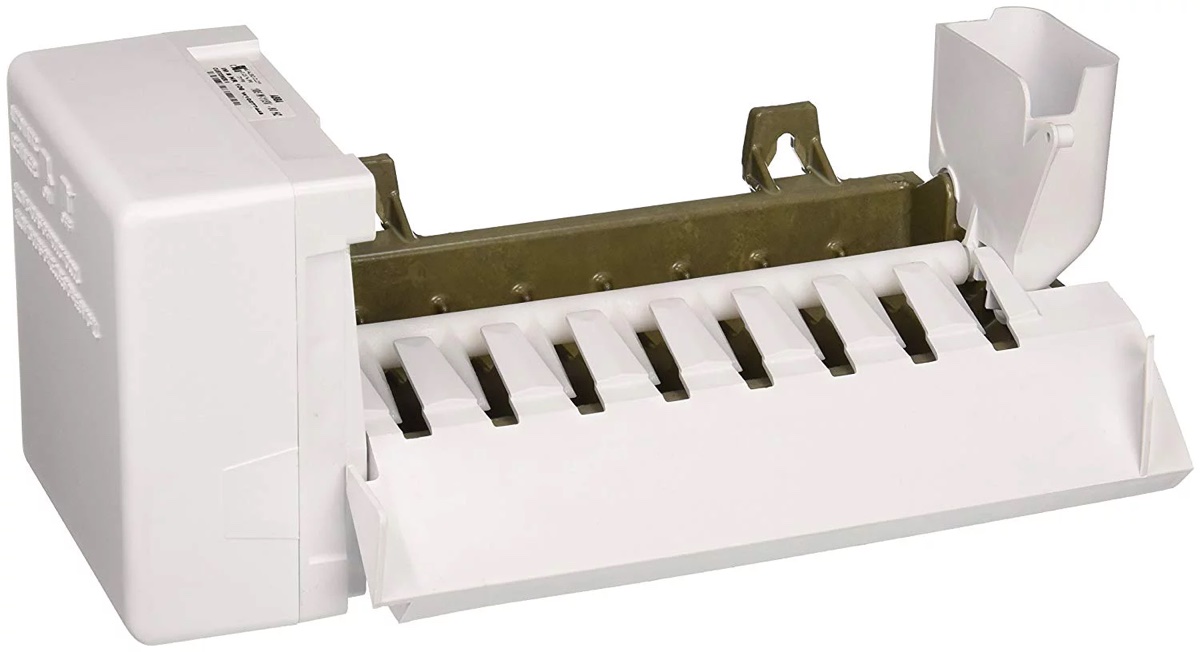
Ice Mold: The ice mold is where the water freezes to form ice cubes. It consists of small, individual compartments that shape the ice cubes. Once the water is poured into the ice mold, it is frozen, creating solid ice cubes.
Ejector Arm: The motorized ejector arm is responsible for pushing the frozen ice cubes out of the ice mold and into the storage bin. Once the ice cubes are ejected, the mold is ready to be refilled with water for the next batch of ice cubes.
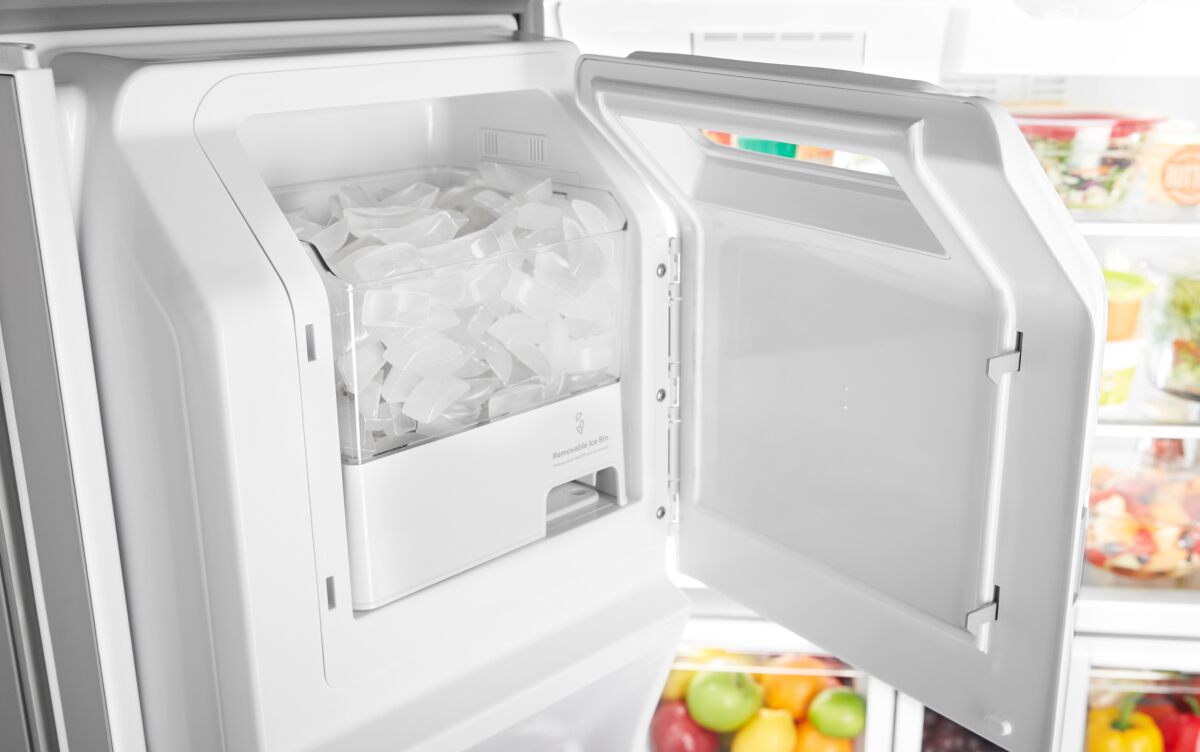
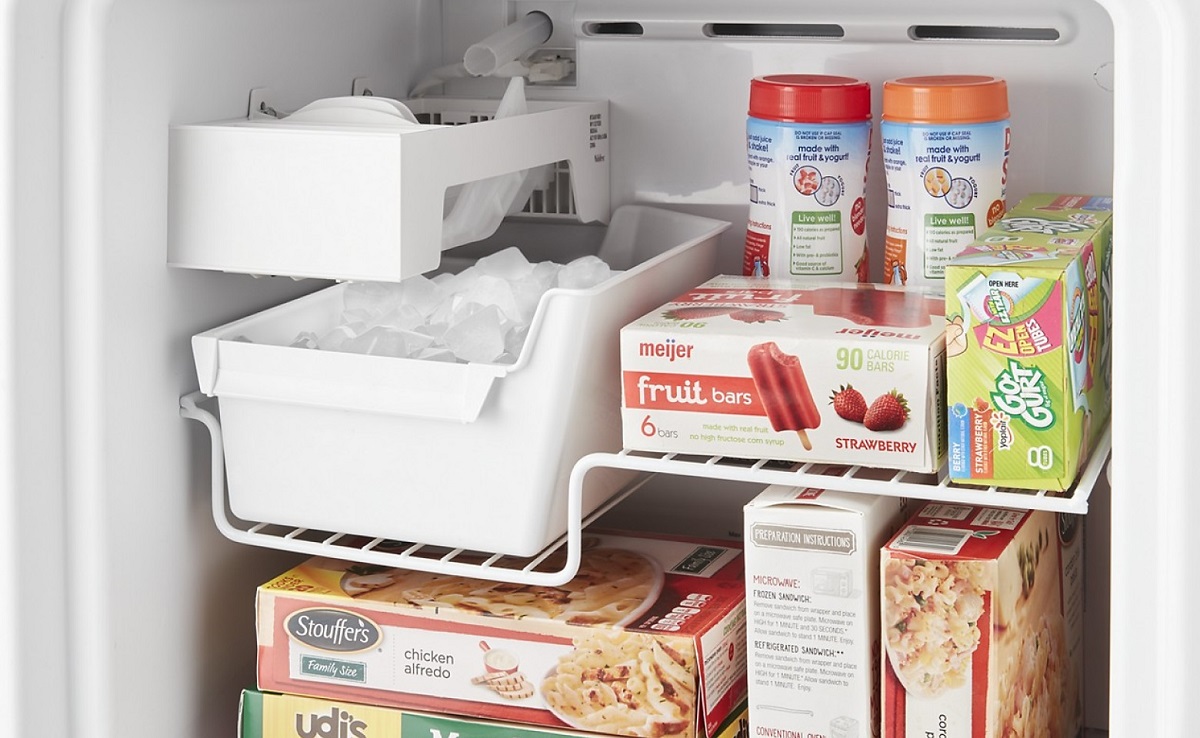
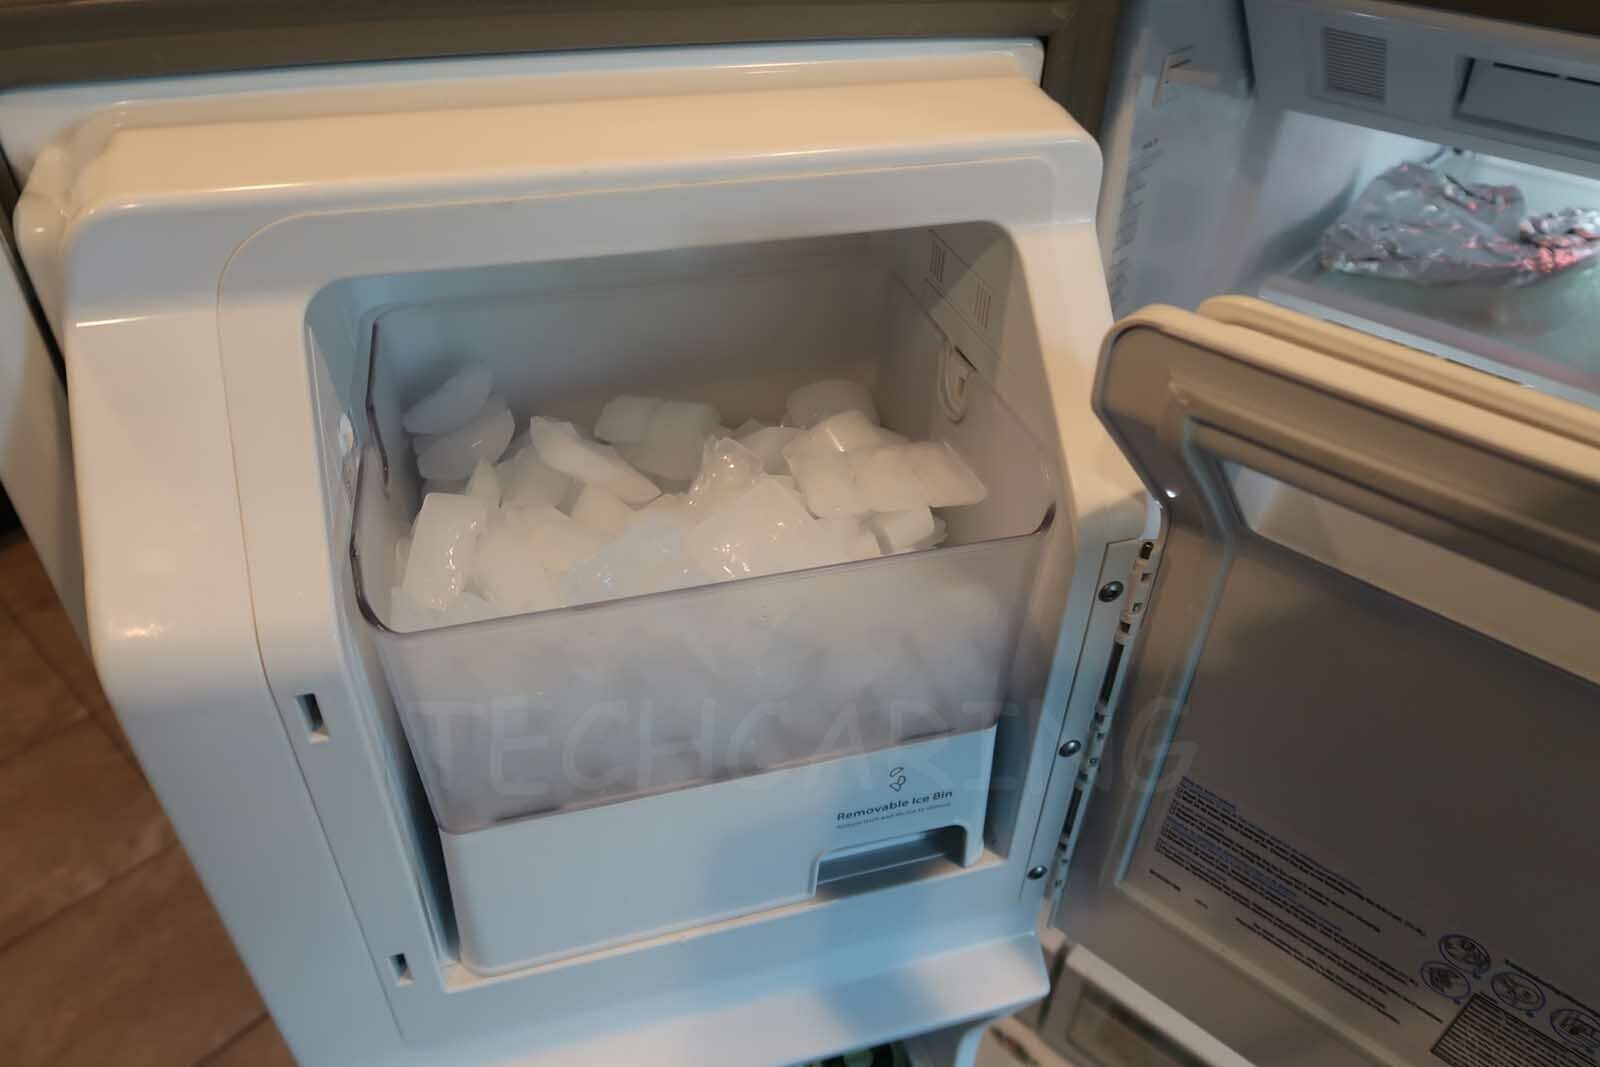
Storage Bin: The storage bin is where the ice cubes are collected and stored until you need to use them. It is usually located within the freezer compartment of the refrigerator and has a capacity to hold a significant amount of ice cubes.
Temperature Control: The ice maker operates within a specific temperature range to ensure the proper freezing and production of ice cubes. The temperature control mechanism maintains the ideal conditions for ice formation and ensures that the ice cubes remain solid and intact.
Now that you have a better understanding of the Whirlpool ice maker’s components and functions, let’s explore the reasons why you may need to defrost it in the next section.
Reasons for Defrosting the Ice Maker
There are several reasons why you may need to defrost your Whirlpool ice maker. Over time, frost and ice can accumulate inside the ice maker, leading to various performance issues. Let’s take a closer look at some of the common reasons for defrosting the ice maker:
1. Reduced Ice Production: If you notice a decrease in the amount of ice being produced by your Whirlpool ice maker, it could be due to frost buildup. Frost can obstruct the proper flow of water into the ice molds, resulting in smaller or misshapen ice cubes, or even a complete halt in ice production.
2. Slow Ice Harvesting: When frost accumulates inside the ice maker, it can also affect the motorized ejector arm. This arm is responsible for pushing the ice cubes out of the molds and into the storage bin. If it becomes obstructed by frost, it may not be able to function optimally, leading to slow or incomplete ice harvesting.
3. Ice Clumping: Another issue caused by frost buildup is the clumping of ice cubes in the storage bin. When frost accumulates, it can cause the ice cubes to stick together, forming large clumps that are difficult to dispense. This can be frustrating when you need individual ice cubes and can also prevent proper airflow within the storage bin.
4. Unpleasant Odor or Taste: Frost buildup can also lead to an unpleasant odor or taste in the ice cubes. This can occur when the frost absorbs odors from food items stored in the freezer or when it affects the quality of the water entering the ice maker. Defrosting can help eliminate these issues, ensuring fresh and clean-tasting ice cubes.
5. Extended Periods of Inactivity: If you have not been using the ice maker for an extended period, frost can accumulate due to temperature fluctuations. Defrosting the ice maker before resuming regular usage can help ensure its optimal performance.
These are just a few of the common reasons why you may need to defrost your Whirlpool ice maker. In the next section, we will discuss important safety precautions to consider before attempting to defrost the ice maker.
Safety Precautions Before Defrosting
Before you proceed with defrosting your Whirlpool ice maker, it is crucial to prioritize safety. Taking the following precautions will help ensure your well-being and protect your appliance from any potential damage. Here are some important safety measures to consider before defrosting:
1. Power Off the Appliance: Begin by disconnecting the power supply to your refrigerator. Locate the circuit breaker or unplug the refrigerator from the wall socket to ensure that there is no electricity running through the appliance during the defrosting process. This step is essential to prevent any electric shock or injury.
2. Empty the Ice Bin: Remove all the ice cubes from the storage bin and place them in a separate container. This will not only make it easier to access the ice maker components but also prevent any water or melted ice from leaking into the freezer or refrigerator compartments during the defrosting process.
3. Protect Your Hands and Eyes: It is advisable to wear protective gloves and safety goggles to shield your hands and eyes from any ice shards or debris that may be dislodged during the defrosting process. This precaution will minimize the risk of injury and ensure you can safely handle the ice maker components.
4. Use a Thawing Tray or Towels: Placing a thawing tray or a few towels on the floor beneath the ice maker will help catch any water or ice that may melt during the defrosting process. This will prevent any potential water damage to your kitchen floor and ensure a clean and controlled defrosting environment.
5. Follow Manufacturer’s Instructions: Refer to the Whirlpool refrigerator’s user manual or the manufacturer’s instructions specifically related to defrosting the ice maker. Different models may have varying defrosting procedures or additional safety precautions that need to be followed. Familiarize yourself with these instructions before engaging in the defrosting process.
6. Allow Ample Time for Defrosting: Defrosting can take several hours depending on the extent of frost buildup. Make sure to allocate enough time for complete defrosting, allowing the ice maker components to thaw and any ice to melt away. Rushing the process may result in incomplete defrosting and potential damage to the ice maker unit.
By following these safety precautions, you can ensure a safe and successful defrosting process for your Whirlpool ice maker. In the next section, we will provide a step-by-step guide on how to defrost the ice maker effectively.
To defrost a Whirlpool ice maker, unplug the unit and remove any ice buildup. Use a hairdryer on a low setting to gently melt any remaining ice. Be sure to dry the ice maker thoroughly before plugging it back in.
Step-by-step Guide to Defrosting the Whirlpool Ice Maker
Now that you have taken the necessary safety precautions, let’s dive into the step-by-step process of defrosting your Whirlpool ice maker. By following these instructions carefully, you can effectively remove the frost buildup and ensure optimal ice maker performance. Here’s how to defrost the Whirlpool ice maker:
Step 1: Power Off the Appliance: Disconnect the power supply to your refrigerator by either turning off the circuit breaker or unplugging the appliance from the wall socket. This precaution will ensure your safety during the defrosting process.
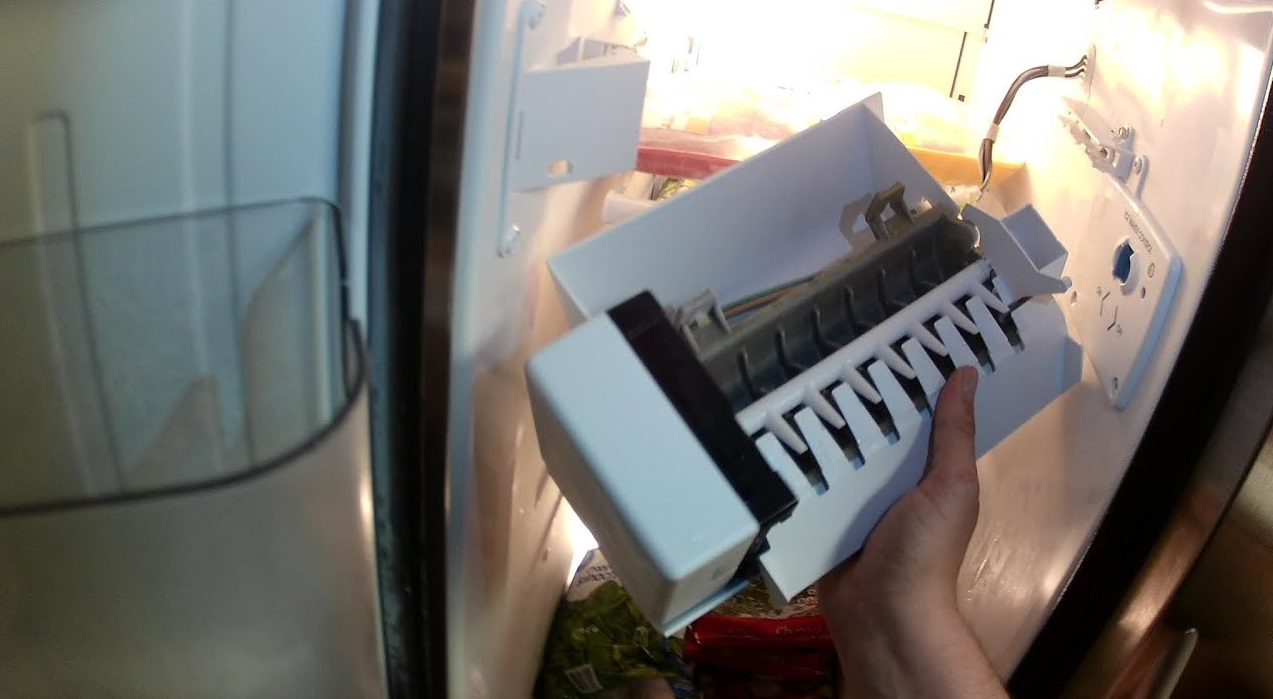
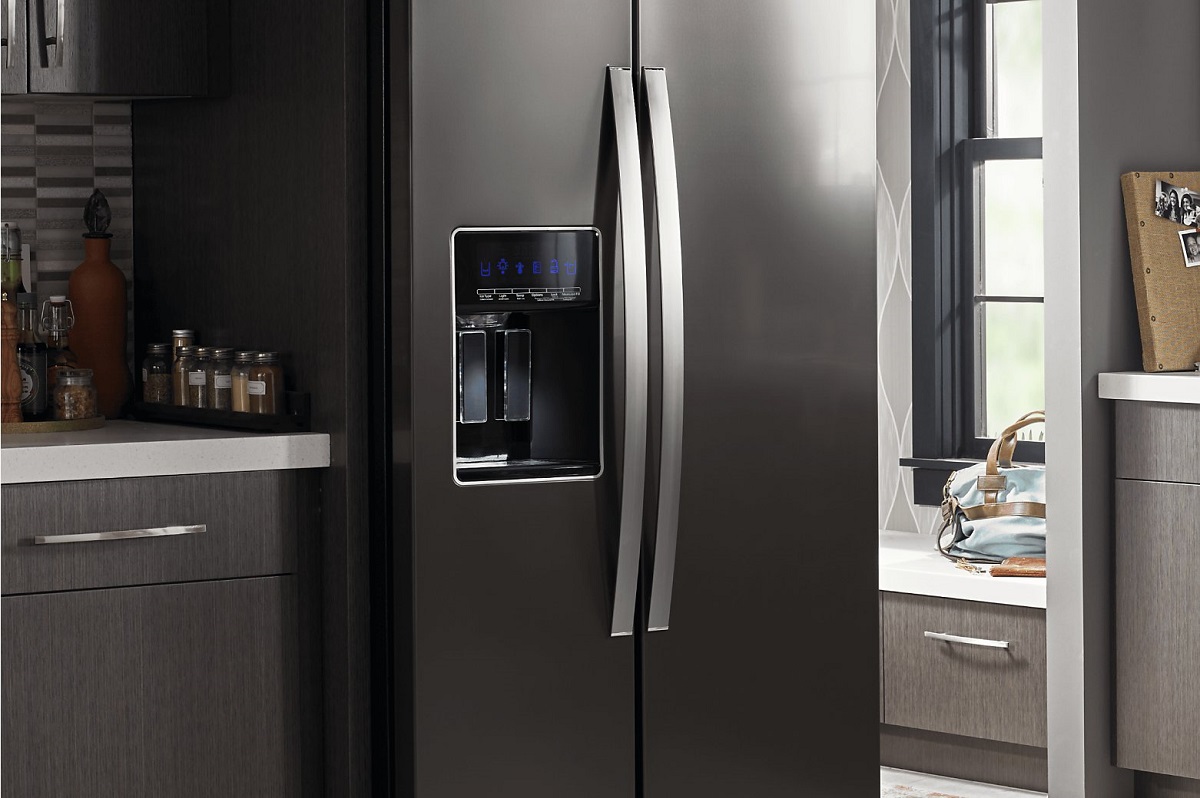
Step 2: Locate the Ice Maker: Identify the location of the ice maker inside your Whirlpool refrigerator. It is usually located in the freezer compartment, either on the side wall or attached to the ceiling. Familiarize yourself with its components, including the water supply line, ice molds, and ejector arm.
Step 3: Remove the Ice Bucket: Take out the ice bucket or storage bin from the freezer. Empty the ice cubes into a separate container and set them aside. This will provide you with clear access to the ice maker unit for defrosting.
Step 4: Allow Frost to Melt Naturally: Leave the freezer door open to allow the frost inside the ice maker to melt naturally. This process may take several hours, depending on the extent of the frost buildup. You can place a towel or a thawing tray on the floor beneath the ice maker to catch any water or ice that may melt.
Step 5: Use Gentle Heat (Optional): If you want to speed up the defrosting process, you can use a hairdryer set on low heat. Keep the hairdryer at a safe distance from the ice maker and use it to gently warm the components, encouraging the melting of the frost. Be cautious not to overheat or damage the ice maker unit.
Step 6: Clean and Dry the Components: Once the frost has melted, use a soft cloth or sponge to clean the ice maker components. Wipe away any remaining moisture or residue from the water supply line, ice molds, and ejector arm. Make sure all the components are completely dry before proceeding.
Step 7: Reassemble and Power On: Place the clean and dry ice bucket back into the freezer compartment. Plug the refrigerator back in or turn on the circuit breaker to restore power. Allow the refrigerator to cool down for a few hours before testing the ice maker’s functionality.
Step 8: Test the Ice Maker: Once the refrigerator has cooled down, activate the ice maker and observe its performance. Check if water fills the ice molds and if the motorized ejector arm pushes the ice cubes into the storage bin properly. Monitor the ice production over the next few hours to ensure the issue has been resolved.
Following these step-by-step instructions will help you defrost your Whirlpool ice maker effectively and restore its optimal functionality. In the next section, we will provide some helpful tips to maintain the efficiency of your ice maker.
Read more: How To Defrost Frigidaire Ice Maker
Tips for Maintaining the Ice Maker Efficiency
Once you have successfully defrosted your Whirlpool ice maker, it’s important to maintain its efficiency to prevent future issues. Here are some valuable tips to help you keep your ice maker running smoothly:
1. Regular Cleaning: Clean the ice maker and its components regularly to prevent the buildup of residue or mold. Use a mild cleaning solution and a soft cloth or sponge to wipe down the water supply line, ice molds, and storage bin. This will ensure clean and fresh-tasting ice cubes.
2. Check the Water Supply Line: Inspect the water supply line periodically to ensure there are no leaks or clogs. If you notice any issues, such as low water pressure or water leakage, address them promptly to avoid interruptions in ice production.
3. Maintain Freezer Temperature: The temperature inside the freezer compartment should be set between 0 and 5 degrees Fahrenheit (-18 to -15 degrees Celsius) for optimal ice production. Regularly monitor and adjust the freezer temperature to maintain the ideal conditions for ice cube formation.
4. Keep the Freezer Full: It may seem counterintuitive, but keeping your freezer relatively full can help maintain the efficiency of the ice maker. A well-stocked freezer helps to maintain consistent temperatures and provides better insulation, ensuring consistent ice production.
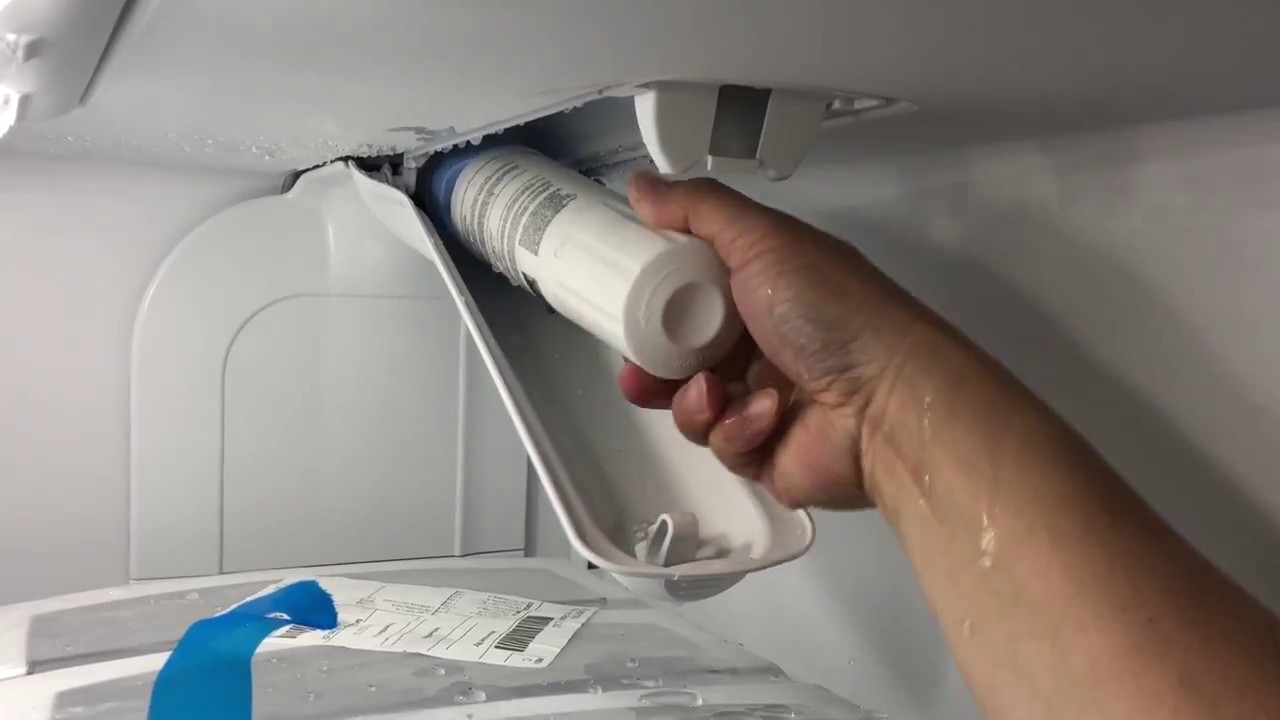
5. Use Filtered Water: If your refrigerator has a water filter, make sure to replace it regularly. Using filtered water helps improve the quality and taste of the ice cubes, as well as prevents any impurities from clogging the ice maker components.
6. Regularly Harvest Ice: To prevent ice cubes from clumping together, periodically remove the ice cubes from the storage bin. This will free up space and allow for better airflow, ensuring the ice cubes remain separate and easily dispensable.
7. Avoid Overfilling: Take care not to overfill the ice molds with water when manually filling them. Overfilling can lead to the formation of oversized ice cubes, which may cause issues with the ejector arm and result in ice production problems.
8. Schedule Professional Servicing: Consider scheduling regular maintenance or servicing with a professional to ensure the proper functioning of your ice maker. They can inspect and clean the internal components, check for any potential issues, and provide necessary repairs or adjustments.
By following these maintenance tips, you can maximize the efficiency and lifespan of your Whirlpool ice maker. However, if you encounter any persisting issues or need further assistance, it is advisable to consult the manufacturer’s guidelines or contact Whirlpool customer service for specific troubleshooting steps.
In the next section, we will address some common issues that may arise with the Whirlpool ice maker and provide troubleshooting tips to resolve them.
Common Issues and Troubleshooting
Even with proper maintenance, you may encounter some common issues with your Whirlpool ice maker. Here are a few common problems and troubleshooting tips to help you resolve them:
1. No Ice Production: If your ice maker is not producing any ice, check the water supply line to ensure it is properly connected and not kinked. Also, make sure the water valve is open, allowing water to flow into the ice maker. If the issue persists, there may be a problem with the water inlet valve, and it might require replacement.
2. Small or Misshapen Ice Cubes: If the ice cubes being produced are smaller or misshapen, it could be an indication of low water pressure. Check if the water supply line is properly connected and if the water filter is clean. Low water pressure can also be caused by a clogged water filter or a faulty water inlet valve. Cleaning or replacing these components can resolve the issue.
3. Ice Clumping in Bin: If the ice cubes are clumping together in the storage bin, it may be due to the freezer temperature being too low. Adjust the freezer temperature to the recommended range of 0 to 5 degrees Fahrenheit (-18 to -15 degrees Celsius). Additionally, make sure the ice cubes are regularly harvested from the storage bin to prevent clumping.
4. Noisy Operation: If you notice unusual noises coming from the ice maker, it could be due to a few factors. First, check if the ice cubes are properly aligned in the storage bin and not causing any obstruction. Additionally, ensure that the ice maker is level and securely installed in the freezer compartment. If the issue persists, there may be a problem with the motor or other internal components, requiring professional inspection and repair.
5. Leakage: If you notice water leakage around the ice maker, check the water supply line and connections for any loose fittings or leaks. Tighten any loose connections or replace damaged water supply lines. It is also essential to ensure the ice maker is level, as an unlevel ice maker can cause water to overflow and leak. If the leakage continues, professional assistance may be needed to identify and fix the underlying cause.
6. Ice Tastes or Smells Strange: If the ice cubes have an unpleasant taste or odor, it may be due to impurities in the water supply or a dirty water filter. Replace the water filter at regular intervals and ensure that the water supplied to the ice maker is clean and free of any contaminants. Regularly cleaning the ice maker components can also help eliminate any buildup that may affect the taste or smell of the ice cubes.
If you encounter any other issues with your Whirlpool ice maker that are not addressed here, refer to the user manual or contact Whirlpool customer service for specific troubleshooting steps related to your model.
With proper maintenance and timely troubleshooting, you can ensure that your Whirlpool ice maker operates smoothly, providing you with a consistent supply of ice cubes. In the next section, we will conclude our guide.
Conclusion
Congratulations! You have reached the end of our comprehensive guide on how to defrost your Whirlpool ice maker. By following the step-by-step defrosting process, taking safety precautions, and implementing maintenance tips, you can ensure optimal ice maker performance and enjoy a continuous supply of ice cubes for all your cooling needs.
We began by understanding the components and functioning of the Whirlpool ice maker, highlighting the reasons for defrosting, and discussing important safety measures. We then provided a detailed step-by-step guide on how to defrost the ice maker effectively, ensuring the removal of frost buildup and the restoration of proper ice production.
To maintain the efficiency of your ice maker, we provided valuable tips such as regular cleaning, checking the water supply line, maintaining the freezer temperature, and using filtered water. These maintenance practices will help prevent common issues and ensure a steady supply of clean and fresh-tasting ice cubes.
In addition, we addressed some common issues that may arise with the Whirlpool ice maker and provided troubleshooting tips to help you resolve them. However, if you encounter more complex or persisting issues, it is recommended to consult the user manual or reach out to Whirlpool customer service for further assistance.
Remember, safety should always be a priority when defrosting or performing any maintenance on your appliances. Always disconnect the power supply, wear protective gear, and take necessary precautions to avoid any potential hazards.
By following all the steps and tips outlined in this guide, you can ensure the proper functioning and longevity of your Whirlpool ice maker. Now, it’s time to enjoy the convenience and refreshing coolness of ice cubes whenever you need them.
Thank you for reading, and we hope this guide has been helpful in your journey to defrost and maintain your Whirlpool ice maker!
Frequently Asked Questions about How To Defrost Whirlpool Ice Maker
Was this page helpful?
At Storables.com, we guarantee accurate and reliable information. Our content, validated by Expert Board Contributors, is crafted following stringent Editorial Policies. We're committed to providing you with well-researched, expert-backed insights for all your informational needs.
0 thoughts on “How To Defrost Whirlpool Ice Maker”