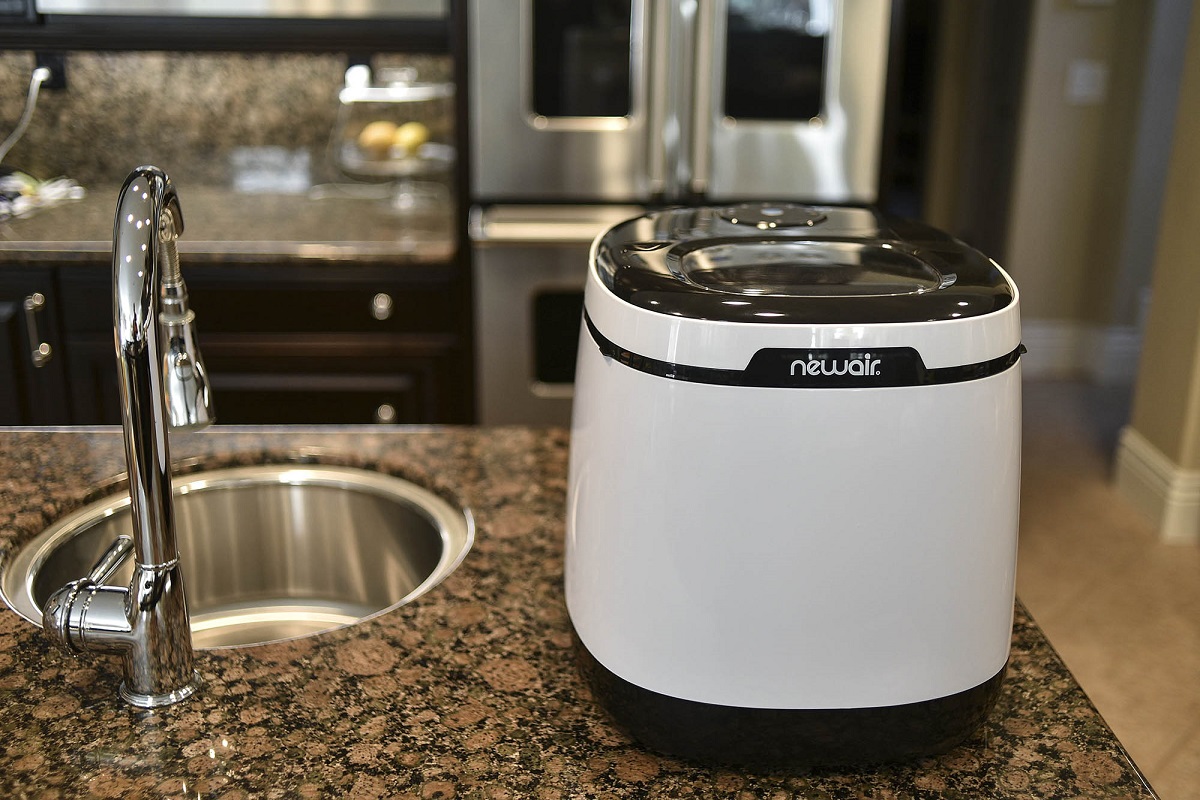

Articles
How To Clean A Newair Ice Maker
Modified: August 25, 2024
Learn how to clean your Newair ice maker with our informative articles. Keep your ice maker running smoothly and producing fresh ice.
(Many of the links in this article redirect to a specific reviewed product. Your purchase of these products through affiliate links helps to generate commission for Storables.com, at no extra cost. Learn more)
Introduction
Welcome to the guide on how to clean a Newair ice maker. An ice maker is a convenient appliance that allows you to have ice readily available whenever you need it. Whether you are hosting a party, enjoying a refreshing beverage, or simply want to keep your drinks chilled, a clean ice maker is essential.
Over time, ice makers can accumulate dirt, mineral deposits, and bacteria, which can affect the quality and taste of the ice it produces. Regular cleaning not only ensures hygienic ice but also helps in maintaining the performance and lifespan of your Newair ice maker.
In this article, we will take you through step-by-step instructions on how to clean your Newair ice maker effectively and safely. Before we dive into the cleaning process, let’s briefly discuss some safety precautions to keep in mind.
Key Takeaways:
- Regularly cleaning your Newair ice maker using mild solutions and proper techniques ensures hygienic ice, optimal performance, and a longer lifespan for the appliance.
- Following safety precautions, using recommended cleaning agents, and maintaining a regular cleaning schedule are essential for keeping your Newair ice maker clean, efficient, and producing high-quality ice.
Read also: 11 Best Newair Ice Maker for 2025
Safety Precautions
Before starting the cleaning process, it is important to prioritize your safety. Here are some essential safety precautions to follow:
- Unplug the Ice Maker: Ensure that the ice maker is completely disconnected from the power source before you begin the cleaning process. This will prevent any electrical accidents or injuries.
- Wear Protective Gear: It is advisable to wear protective gloves to protect your hands from any harsh chemicals or cleaning agents that you may use during the cleaning process.
- Read the Instruction Manual: Familiarize yourself with the manufacturer’s instructions and guidelines regarding cleaning and maintenance. These instructions may provide specific recommendations for your Newair ice maker.
- Use Approved Cleaning Agents: Use cleaning agents that are recommended by the manufacturer or are specifically designed for cleaning ice makers. Avoid using abrasive or harsh chemicals that can damage the ice maker or contaminate the ice.
- Ventilate the Area: Ensure that the area where you are cleaning the ice maker is well-ventilated. This will help in minimizing the exposure to any fumes or odors from cleaning agents.
- Keep Children and Pets Away: Ensure that children and pets are kept at a safe distance during the cleaning process to avoid any accidents or ingestion of cleaning agents.
By following these safety precautions, you can ensure a safe and effective cleaning process for your Newair ice maker. Let’s move on to the supplies you’ll need for the cleaning process.
Cleaning Supplies Needed
To clean your Newair ice maker, you will need the following supplies:
- Mild Cleaning Solution: A mild cleaning solution that is safe for food contact is essential for cleaning the interior and exterior surfaces of the ice maker. You can use a mixture of warm water and mild dish soap or a solution of equal parts water and vinegar.
- Clean Cloth or Sponge: Use a clean cloth or sponge to wipe down the exterior surfaces of the ice maker. Make sure it is non-abrasive to avoid scratching the finish.
- Toothbrush or Soft Brush: A toothbrush or a soft brush will come in handy for cleaning hard-to-reach areas or removing any debris or dirt from the ice maker’s components.
- Warm Water: You will need warm water for rinsing the cleaning solution and for general cleaning purposes.
- Drying Cloth or Towel: A soft cloth or towel should be used to dry the interior and exterior surfaces of the ice maker after cleaning.
Ensure that all the cleaning supplies are clean and free from any residues that could contaminate the ice maker or affect the cleaning process.
Now that you have the necessary supplies, let’s move on to the step-by-step instructions on how to clean your Newair ice maker.
Step 1: Unplug the Ice Maker
The first step in cleaning your Newair ice maker is to ensure that it is completely unplugged from the power source. This is an essential safety precaution to prevent any accidental electrical shock or damage to the ice maker during the cleaning process.
Locate the power cord of the ice maker and gently unplug it from the electrical outlet. Make sure that the cord is not tangled or obstructed in any way to ensure a safe and hassle-free cleaning process.
Once the ice maker is unplugged, you can move on to the next steps of the cleaning process. Please be cautious and avoid pulling or tugging on the power cord as it can cause damage.
Now that the ice maker is disconnected from the power source, you can proceed to the next step, which is emptying and discarding any existing ice. This step ensures a clean surface for the rest of the cleaning process.
Step 2: Empty and Discard Ice
Once you have unplugged the Newair ice maker, the next step is to empty and discard any ice that is currently in the ice maker. This is important to ensure that you are working with a clean and empty machine for the cleaning process.
Start by removing the ice basket from the ice maker. The ice basket is usually located at the front or top of the ice maker and can be easily accessed by sliding it out or lifting it up, depending on the model of your Newair ice maker.
Empty the contents of the ice basket into a sink or a container. If the ice has been sitting in the ice maker for some time, it is advisable to discard it as it may have absorbed odors or accumulated impurities.
Take a moment to inspect the ice for any signs of unusual color, odor, or abnormal texture. If you notice anything unusual, it may be an indication of a larger issue with the ice maker, and you should consider contacting the manufacturer or a professional for assistance.
Once the ice has been emptied and discarded, you can proceed to the next step, which involves removing the ice basket and scoop for cleaning.
With the ice basket and ice removed, you now have a clean slate to begin cleaning the exterior surfaces of the ice maker. Let’s move on to step three: removing the ice basket and scoop.
Read more: How To Clean A Igloo Ice Maker
Step 3: Remove Ice Basket and Scoop
To proceed with the cleaning process, the next step is to remove the ice basket and scoop from your Newair ice maker. This will allow for easier access to the interior components of the ice maker and ensure a thorough cleaning.
Begin by locating the ice basket, which is the container that holds the ice inside the ice maker. It is usually located at the front or top of the ice maker, depending on the model.
Once you have located the ice basket, gently lift it up or slide it out, depending on the design of your Newair ice maker. Be cautious not to spill any remaining ice or water when removing the basket.
Set the ice basket aside and proceed to remove the ice scoop, if your ice maker is equipped with one. The ice scoop is typically stored inside the ice maker, near the ice basket or in a designated compartment.
Take out the ice scoop and ensure it is clean and free from any ice remnants or debris. If needed, rinse the ice scoop with warm water to remove any residue. Set the ice scoop aside to be cleaned later in the process.
With the ice basket and scoop removed, you now have access to the interior components of the ice maker for thorough cleaning. In the next step, we will focus on cleaning the exterior surfaces of the ice maker.
Step 4: Clean Exterior Surfaces
Now that you have removed the ice basket and scoop, it’s time to clean the exterior surfaces of your Newair ice maker. Cleaning the exterior not only enhances the appearance of the appliance but also ensures that any dirt or grime does not contaminate the ice.
Start by preparing a mild cleaning solution using warm water and a gentle dish soap or a solution of equal parts water and vinegar. Dip a clean cloth or sponge into the cleaning solution and wring out any excess liquid.
Gently wipe down the exterior surfaces of the ice maker, paying attention to areas that may collect dust or splatters. Be sure to clean the front panel, sides, and top of the ice maker, as well as any control buttons or display screens.
If there are any stubborn stains or dried-on residue, you can use a soft-bristled toothbrush or a soft brush to gently scrub those areas. Be cautious not to exert too much pressure as it can damage the finish of the ice maker.
Once you have thoroughly cleaned the exterior surfaces, rinse the cloth or sponge with clean water and use it to wipe away any remaining cleaning solution. This will help to remove any traces of soap or vinegar from the ice maker.
Afterward, use a dry cloth or towel to wipe down the exterior surfaces and remove any moisture. It is important to ensure that the ice maker is completely dry before moving on to the next step, as excess moisture can affect the performance of the appliance.
With the exterior surfaces clean and dry, we can now move on to the interior components and give them a thorough cleaning. This is crucial for maintaining the quality and taste of the ice produced by your Newair ice maker.
To clean a Newair ice maker, mix equal parts water and vinegar and run the solution through the machine. Then, run a few cycles of plain water to rinse it out. Wipe down the exterior with a damp cloth.
Step 5: Clean Interior Components
Now that the exterior surfaces of your Newair ice maker are clean, it’s time to focus on cleaning the interior components. Cleaning the interior is essential for ensuring the hygiene and optimal performance of your ice maker.
Start by preparing a cleaning solution using warm water and a mild dish soap or a mixture of equal parts water and vinegar. This solution will effectively remove any build-up, mineral deposits, or bacteria that may have accumulated inside the ice maker.
Dip a clean cloth or sponge into the cleaning solution and wring out any excess liquid. Thoroughly wipe down the interior walls of the ice maker, including the ice chute, the area where the ice drops into the bin, and any other accessible components.
Pay close attention to any areas where you may notice build-up or residue. If needed, use a soft-bristled toothbrush or a soft brush to gently scrub those areas. Be careful not to be too rough to avoid damaging the interior surfaces.
For hard-to-reach areas or stubborn deposits, you can create a paste using baking soda and water and apply it to the affected areas. Allow the paste to sit for a few minutes to loosen the build-up, then gently scrub with a brush before rinsing with warm water.
Next, remove the water reservoir if applicable and clean it thoroughly using the same cleaning solution. Rinse it well to ensure that no soap or vinegar residue remains.
Remember to also clean the water inlet where the water enters the ice maker. Use a toothbrush or a soft brush to remove any debris or mineral deposits that may have accumulated in this area.
Once you have finished cleaning the interior components, rinse them thoroughly with warm water to remove any cleaning solution residue. It is crucial to ensure that all traces of cleaning agents are removed to prevent them from contaminating the ice produced by the ice maker.
With the interior components cleaned and rinsed, we can now move on to the next step: rinsing and drying the components before reassembling the ice maker.
Step 6: Rinse and Dry Components
After cleaning the interior components of your Newair ice maker, it is important to thoroughly rinse and dry them to ensure that no residue or moisture remains. This step is crucial for maintaining the cleanliness and functionality of your ice maker.
Start by rinsing the components under warm running water, ensuring that all the cleaning solution has been removed. Use your hands or a clean cloth to gently rub the components and remove any remaining residue.
Pay extra attention to crevices and hard-to-reach areas where residue may be trapped. You can use a soft brush or a toothbrush to gently scrub these areas while rinsing under running water.
Once the components have been rinsed, proceed to dry them thoroughly. Wipe each component with a clean, dry cloth to remove any excess moisture. Ensure that the components are completely dry before reassembling the ice maker.
It is essential to remove all moisture to prevent the growth of mold, mildew, or bacterial contamination inside the ice maker. Dampness can also affect the performance and lifespan of your appliance.
Take extra care to dry any areas that are prone to collecting water, such as the water reservoir, the ice chute, and the ice bin. Use a dry towel or cloth to reach these areas and ensure they are completely dry.
Now that the components are clean and dry, we can proceed to the next step: reassembling the ice maker and preparing it for use.
Read more: How To Clean Out An Ice Maker
Step 7: Reassemble the Ice Maker
Now that you have thoroughly cleaned and dried the components of your Newair ice maker, it’s time to reassemble the appliance. Proper reassembly ensures that all parts are securely in place and ready for use.
Start by taking the ice basket, which you set aside earlier, and slide it back into its designated position inside the ice maker. Make sure it sits securely and aligns properly with the ice chute.
If your ice maker came with an ice scoop, place it back into its designated storage compartment or attach it to the ice maker, ensuring that it is easily accessible for future use.
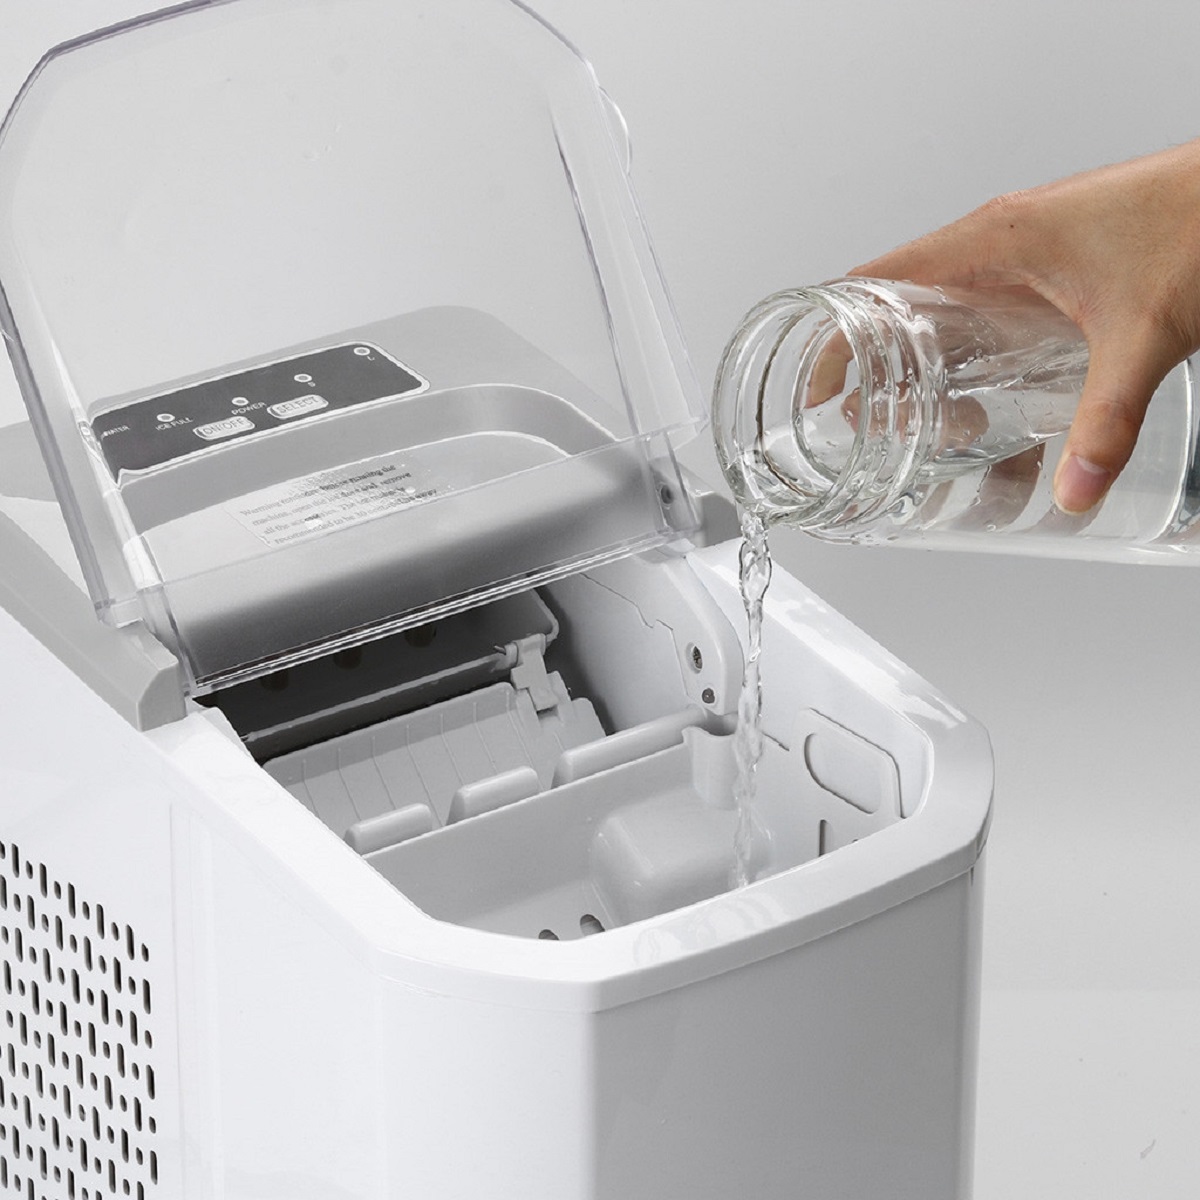
If you removed the water reservoir during the cleaning process, position it back into place, ensuring that it clicks or locks in securely. Double-check that the water inlet is properly aligned with the reservoir for smooth water flow.
Now is a good time to inspect the exterior surfaces of the ice maker once again. Wipe down any areas that may have collected dust, fingerprints, or water droplets during the reassembly process.
Ensure that all the components, including the ice basket, scoop, and water reservoir, are clean and positioned correctly in their designated places. This will prevent any potential issues when you start using the ice maker again.
With the ice maker fully reassembled, we can move on to the next step: plugging in the appliance and starting the ice-making process. But before doing so, let’s go over some essential tips for maintaining a clean ice maker.
Step 8: Plug In and Start Ice Maker
After reassembling your Newair ice maker, it’s time to plug it back in and start the ice-making process. This final step ensures that your ice maker is ready to produce fresh, clean ice for your enjoyment.
Locate the power cord of the ice maker and plug it securely into a grounded electrical outlet. Ensure that the cord is not tangled or obstructed in any way.
Once the ice maker is plugged in, locate the power switch or button, typically located on the front or side of the appliance. Turn on the power to activate the ice-making function.
Refer to the manufacturer’s instructions for your specific Newair ice maker to understand the operation and settings available. Allow the ice maker some time to cool down and start the ice-making cycle.
During the initial ice-making cycle, it is normal for the ice maker to produce smaller or thinner ice cubes. This is because it takes some time for the ice maker to reach optimal ice production capacity. Be patient as the ice maker adjusts to its normal ice-making routine.
It is also recommended to discard the first batch of ice produced after cleaning the ice maker. This helps ensure that any cleaning residue or odors are eliminated, resulting in fresh and clean ice.
Monitor the ice-making process to ensure that the ice is being produced correctly and that there are no leaks or unusual sounds coming from the appliance. If you encounter any issues, consult the troubleshooting section of the manufacturer’s manual or contact customer support for assistance.
Once the ice maker is fully operational and producing ice to your satisfaction, you can start enjoying a continuous supply of clean and refreshing ice for all your beverage and cooling needs.
Now that you have successfully completed the cleaning process and started your Newair ice maker, let’s go over some tips for maintaining a clean ice maker to ensure its longevity and optimal performance.
Tips for Maintaining a Clean Ice Maker
Maintaining a clean ice maker is essential for ensuring the production of fresh, high-quality ice and maximizing the lifespan of your Newair ice maker. Here are some tips to help you keep your ice maker clean and performing at its best:
- Regular Cleaning: Clean your ice maker at least every three months, or more frequently if you notice any build-up or impurities. Regular cleaning prevents the accumulation of bacteria, mineral deposits, and dirt.
- Follow Manufacturer’s Instructions: Refer to the manufacturer’s instructions and guidelines for cleaning and maintenance specific to your Newair ice maker. These instructions may provide important details and recommendations for maintaining your appliance.
- Use Recommended Cleaning Agents: Utilize cleaning agents recommended by the manufacturer or specifically designed for ice maker cleaning. Avoid using abrasive cleaners or chemicals that can damage the ice maker or contaminate the ice.
- Keep the Ice Maker Dry: After each use, ensure that the interior and exterior surfaces of the ice maker are fully dry to prevent the growth of mold or mildew. Wipe down any excess moisture with a clean, dry cloth or towel.
- Regularly Empty and Refill Water: Regularly empty the water reservoir of the ice maker and refill it with fresh water to prevent the formation of mold or stagnant water. This also ensures clean and fresh-tasting ice.
- Replace Water Filters: If your ice maker is equipped with a water filter, follow the manufacturer’s recommendations for replacing it. This helps maintain water quality and prevents mineral and sediment build-up in the ice maker.
- Inspect for Leaks: Regularly check for any water leaks or drips from the ice maker. If you detect any leaks, address them promptly to prevent further damage and maintain the efficiency of the appliance.
- Keep the Surrounding Area Clean: Maintain cleanliness in the area surrounding the ice maker, including countertops and cabinets. This prevents dust, dirt, and debris from entering the ice maker and affecting the quality of the ice.
- Regularly Remove and Clean the Ice Basket: Empty the ice basket regularly, especially if the ice is not being used frequently. Doing so prevents the ice from clumping together and ensures a continuous supply of fresh ice.
- Monitor Ice Quality: Pay attention to the quality, taste, and appearance of the ice produced by your ice maker. If you notice any changes, such as an unusual odor or taste, it may be an indication that the ice maker needs cleaning.
By following these tips and incorporating regular cleaning and maintenance into your routine, you can maintain a clean and efficient Newair ice maker, producing fresh and high-quality ice for all your needs.
By taking care of your ice maker, you can enjoy hassle-free ice production and ensure a hygienic and refreshing experience every time you use it.
Now that you have all the information you need to clean and maintain your Newair ice maker, you can enjoy the benefits of a clean and efficient appliance for years to come.
Conclusion
Cleaning your Newair ice maker is a necessary task to ensure the production of clean and refreshing ice. Regular maintenance not only improves the quality and taste of the ice but also extends the lifespan of the appliance.
In this guide, we have provided you with a comprehensive step-by-step process to clean your ice maker effectively and safely. We emphasized the importance of following safety precautions, using the right cleaning supplies, and maintaining a regular cleaning schedule.
From unplugging the ice maker to emptying and discarding the ice, removing the ice basket and scoop, cleaning the exterior and interior surfaces, rinsing and drying the components, and reassembling the ice maker, we covered each step in detail.
Additionally, we shared valuable tips for maintaining a clean ice maker, including following manufacturer’s instructions, using recommended cleaning agents, regularly emptying and refilling water, and monitoring ice quality.
By incorporating these tips and maintaining a clean ice maker, you can enjoy a continuous supply of fresh and hygienic ice for all your cooling needs.
Remember, a clean ice maker not only ensures the quality of ice but also contributes to the overall performance and longevity of the appliance.
Now that you have all the knowledge and guidance necessary to clean your Newair ice maker, you can go ahead and enjoy the benefits of a clean and efficient appliance.
So, start the cleaning process, follow the instructions, and maintain your ice maker regularly. Cheers to clean and refreshing ice!
Frequently Asked Questions about How To Clean A Newair Ice Maker
Was this page helpful?
At Storables.com, we guarantee accurate and reliable information. Our content, validated by Expert Board Contributors, is crafted following stringent Editorial Policies. We're committed to providing you with well-researched, expert-backed insights for all your informational needs.

0 thoughts on “How To Clean A Newair Ice Maker”