Articles
How To Clean Wall AC Unit
Modified: October 20, 2024
Learn effective techniques and tips to clean your wall AC unit using our informative articles. Keep your unit running efficiently and improve air quality.
(Many of the links in this article redirect to a specific reviewed product. Your purchase of these products through affiliate links helps to generate commission for Storables.com, at no extra cost. Learn more)
Introduction
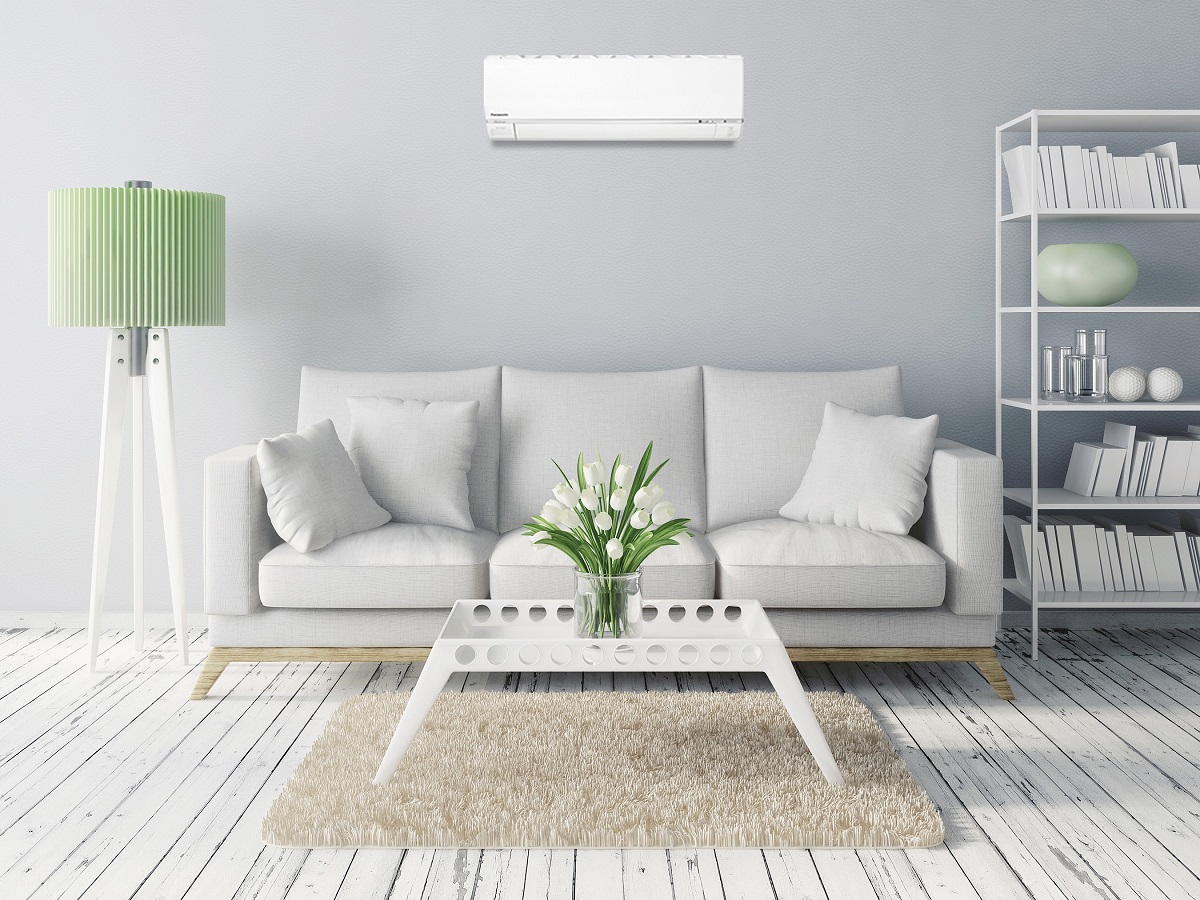
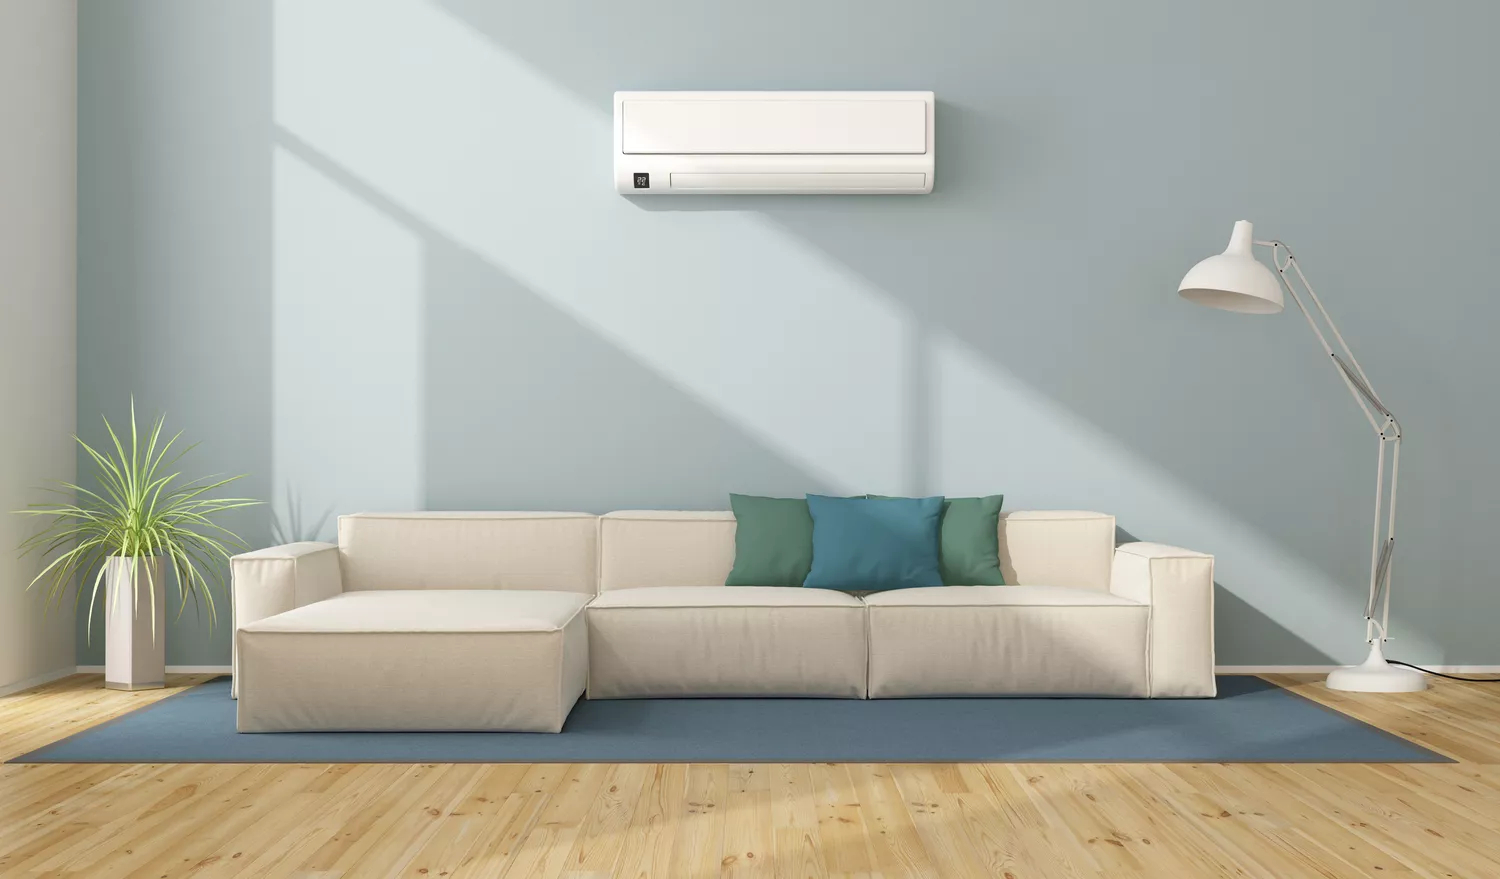
A wall AC unit, also known as a through-the-wall air conditioner, is a popular cooling solution for both residential and commercial spaces. These cooling units are designed to be installed directly into a wall, allowing for efficient and effective cooling of a specific area or room.
While wall AC units offer convenience and comfort, it is important to keep them clean and well-maintained to ensure optimal performance and longevity. Regular cleaning not only improves the air quality but also helps to prevent issues such as reduced cooling capacity, higher energy consumption, and potential system malfunctions.
In this article, we will provide you with a comprehensive guide on how to clean your wall AC unit effectively. We will cover the necessary tools and materials, safety precautions, and a step-by-step cleaning process. By following these instructions, you can ensure that your wall AC unit operates at its best and provides you with cool and clean air throughout the year.
Key Takeaways:
- Regular cleaning and maintenance of your wall AC unit is crucial for improved air quality, enhanced cooling performance, reduced energy consumption, and extended lifespan, ensuring optimal functionality and comfort.
- Incorporating regular maintenance suggestions, such as cleaning the air filter, vents, condenser coils, and drainage system, along with professional maintenance, will keep your wall AC unit clean, efficient, and in excellent working condition for years to come.
Read more: How To Clean AC Vent
What is a wall AC unit?
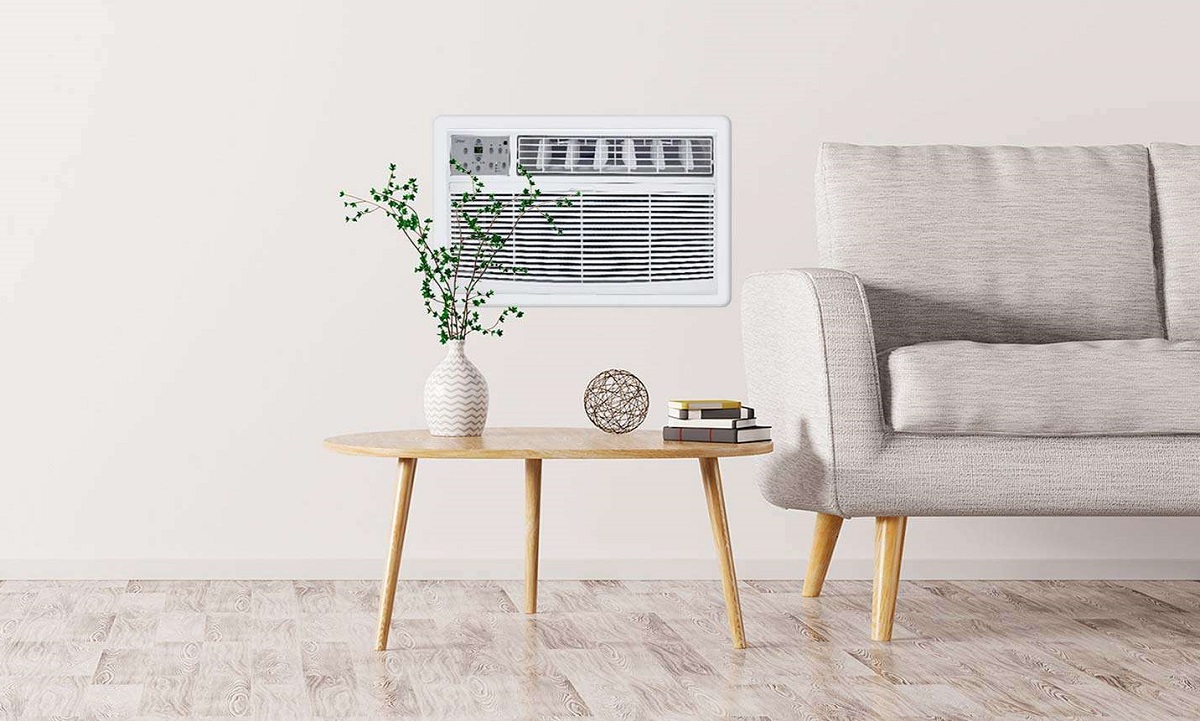
A wall AC unit, also known as a through-the-wall air conditioner, is a cooling appliance designed to be mounted directly into a wall. Unlike portable air conditioners that require a window for installation, wall AC units are permanently fixed in a designated space.
These units consist of an indoor evaporator unit and an outdoor condenser unit. The evaporator unit is responsible for cooling the air inside the room, while the condenser unit dissipates the heat generated by the cooling process to the outside environment.
Wall AC units come in various sizes and cooling capacities to accommodate different room sizes and requirements. They are commonly used in residential spaces, such as bedrooms, living rooms, and home offices, as well as in commercial settings, including offices, hotels, and retail stores.
One of the key advantages of wall AC units is their ability to provide efficient cooling while taking up minimal space. Unlike window units that protrude outward, wall AC units sit flush with the wall, offering a sleek and unobtrusive appearance. Additionally, these units are often quieter and more energy-efficient compared to their portable counterparts.
It is important to note that wall AC units require proper installation to ensure optimal performance and safety. The installation process typically involves cutting a hole in the wall, mounting the unit securely, and connecting it to the electrical circuit and ventilation system.
Now that you have a better understanding of what a wall AC unit is, let’s explore why it is important to clean and maintain these units regularly.
Why is it important to clean your wall AC unit?
Regular cleaning and maintenance of your wall AC unit are essential for several reasons:
- Improved Air Quality: Over time, dust, dirt, and allergens can accumulate on the filters, vents, and coils of your AC unit. This can lead to poor indoor air quality, triggering respiratory problems and allergies. Cleaning the unit removes these impurities and promotes cleaner, healthier air.
- Enhanced Cooling Performance: A clean AC unit operates more efficiently, providing better cooling performance. When filters and coils are clogged with dirt, airflow is restricted, resulting in decreased cooling capacity and longer run times. Cleaning the unit allows for improved airflow and better cooling efficiency.
- Reduced Energy Consumption: A dirty AC unit requires more energy to cool the same space due to reduced airflow and increased strain on the system. By keeping your unit clean, you can effectively reduce energy consumption, leading to lower utility bills and decreased environmental impact.
- Extended Lifespan: Regular maintenance, including cleaning, can significantly extend the lifespan of your wall AC unit. Removing dirt and debris prevents unnecessary wear and tear on the components, reducing the risk of system breakdowns and increasing its overall longevity.
Tools and Materials Needed
Before you begin cleaning your wall AC unit, gather the following tools and materials:
Tools:
- Screwdriver (if necessary for removing the unit’s cover)
- Soft-bristle brush or vacuum cleaner with a brush attachment
- Garden hose with a spray attachment
- Cleaning cloths or microfiber towels
Read more: How To Install A Wall AC Unit
Materials:
- Mild soap or AC coil cleaner
- Warm water
- Bleach (for cleaning condensate drain line, if necessary)
- Bucket (for collecting water during cleaning)
Having these tools and materials ready will ensure a smooth and effective cleaning process. Now that you are prepared, let’s move on to the safety precautions you need to follow before cleaning your wall AC unit.
List of tools required
Before you begin cleaning your wall AC unit, it’s important to gather the necessary tools. Having these tools on hand will make the cleaning process easier and more efficient. Here is a list of the tools you will need:
- Screwdriver: Depending on the model of your wall AC unit, you may need a screwdriver to remove the unit’s cover or access panels. Make sure you have the appropriate screwdriver size and type.
- Soft-bristle brush: A soft-bristle brush or a vacuum cleaner with a brush attachment is essential for gently removing dust and debris from the unit’s exterior, vents, and grilles.
- Garden hose with a spray attachment: A garden hose with a spray attachment is necessary for cleaning the condenser coils and flushing out any dirt or debris that may have accumulated.
- Cleaning cloths or microfiber towels: These will be used for wiping down the surfaces of the unit, including the exterior housing and the condenser coils.
By having these tools ready before you start cleaning, you can ensure a smoother and more effective process. It’s also a good idea to keep these tools in a designated cleaning kit so they are easily accessible for future maintenance tasks.
Now that you have assembled the necessary tools, let’s move on to the list of materials required for cleaning your wall AC unit.
List of materials required
When it comes to cleaning your wall AC unit, there are a few materials that you will need in addition to the tools. These materials will help you effectively clean and maintain your unit. Here is a list of the materials you should have on hand:
- Mild soap or AC coil cleaner: Use a mild soap or specifically designed AC coil cleaner to clean the air filter, vents, grilles, and condenser coils. These cleaning agents will help remove dirt, dust, and debris.
- Warm water: Warm water is essential for mixing with the cleaning solution and rinsing the parts of the AC unit. It aids in breaking down dirt and facilitates easier cleaning.
- Bleach (for cleaning condensate drain line, if necessary): In some cases, the condensate drain line of the AC unit may become clogged with algae or debris. Using bleach mixed with water can effectively clean the drain line and prevent blockages.
- Bucket (for collecting water during cleaning): Place a bucket or container underneath the AC unit to collect water that may drip during the cleaning process. This will help prevent damage to the surrounding area.
By having these materials ready, you can ensure that you have everything you need to thoroughly clean your wall AC unit. Now that you have your tools and materials, it’s important to take some safety precautions before proceeding with the cleaning process.
Safety Precautions
Before you begin cleaning your wall AC unit, it’s crucial to follow these safety precautions:
- Turn off the power: Before starting any maintenance or cleaning tasks, ensure that the power to the AC unit is turned off. This will prevent any accidents or electrical shocks.
- Wear protective gear: It is recommended to wear gloves and safety glasses to protect your hands and eyes during the cleaning process. This will help prevent any injuries or exposure to hazardous materials.
- Be mindful of sharp edges and moving parts: Take caution when handling the unit’s cover, grilles, and other components as they may have sharp edges. Additionally, be mindful of any moving parts when disassembling or cleaning the unit.
- Ensure proper ventilation: Make sure that the area where you are cleaning the unit is well-ventilated. This will help prevent the accumulation of fumes or dust particles, promoting a safe environment.
Following these safety precautions will help ensure that you can clean your wall AC unit safely and effectively. Now that you are aware of the necessary tools, materials, and safety measures, let’s proceed to the step-by-step cleaning process for your wall AC unit.
Read more: How To Clean Portable AC Filter
Important Safety Precautions to Follow Before Cleaning
Ensuring your safety is of utmost importance when cleaning your wall AC unit. Before you begin the cleaning process, make sure to follow these important safety precautions:
- Turn off the power: Start by turning off the power to the wall AC unit. Locate the electrical circuit that supplies power to the unit and switch it off at the breaker panel. This will prevent any electrical accidents while you are cleaning the unit.
- Wear protective gear: To protect yourself from potential hazards, wear gloves and safety glasses. Gloves will prevent injuries from sharp edges or moving parts, while safety glasses will safeguard your eyes from dust and debris.
- Ensure proper ventilation: It’s important to work in a well-ventilated area to avoid inhaling any fumes or dust particles. Open windows or doors, or use fans to improve air circulation during the cleaning process.
- Use stable footing: Ensure that you have a stable footing while working on or around the wall AC unit. This will help prevent accidents or falls. If needed, use a step ladder or platform to reach higher components of the unit.
- Handle refrigerant with caution: Refrigerant is a potentially harmful substance that should only be handled by trained professionals. Avoid coming into direct contact with refrigerant and follow proper disposal guidelines if a refrigerant leak occurs.
By following these safety precautions, you can minimize the risk of accidents and injuries while cleaning your wall AC unit.
Step-by-Step Cleaning Process
Now that you are aware of the safety precautions, let’s dive into the step-by-step cleaning process for your wall AC unit:
- Step 1: Turn off the power: As mentioned earlier, turn off the power to the wall AC unit by switching off the breaker that supplies electricity to the unit.
- Step 2: Remove the air filter: Locate the air filter in your wall AC unit. Depending on the model, the filter might be positioned behind a cover or in a separate compartment. Carefully remove the air filter from the unit.
- Step 3: Clean the air filter: Gently rinse the air filter with warm water to remove dust and debris. You can also use a mild soap or AC coil cleaner if the filter is heavily soiled. Allow the filter to dry completely before reinserting it into the unit.
- Step 4: Clean the vents and grilles: Use a soft-bristle brush or a vacuum cleaner with a brush attachment to clean the vents and grilles of the wall AC unit. Remove any dust or debris that may have accumulated.
- Step 5: Clean the exterior of the unit: Wipe down the exterior surfaces of the unit using a damp cloth or microfiber towel. This will remove any dust or dirt that has settled on the housing.
- Step 6: Clean the condenser coils: Use a soft-bristle brush or a vacuum cleaner to gently clean the condenser coils on the outdoor unit. If the coils are heavily soiled, you can use a coil cleaner according to the manufacturer’s instructions.
- Step 7: Clean the drainage system: Check the condensate drain line for any clogs or blockages. If needed, flush the drain line with a mixture of warm water and bleach to remove any algae or debris.
- Step 8: Reassemble and turn on the unit: Once you have cleaned all the components, reassemble the unit and ensure that everything is securely in place. Finally, turn on the power to the wall AC unit and test its operation.
Following these step-by-step instructions will help you effectively clean your wall AC unit and ensure its optimal performance.
Now that you have completed the cleaning process, it’s important to maintain your wall AC unit regularly to keep it running smoothly. In the next section, we will provide you with some maintenance tips to help you keep your unit in top condition.
Step 1: Turn off the power
Before you begin cleaning your wall AC unit, it is crucial to turn off the power to ensure your safety. By shutting off the power, you reduce the risk of electrical accidents or injury during the cleaning process. Follow these steps to properly turn off the power:
- Locate the electrical circuit: Identify the electrical circuit in your home that supplies power to the wall AC unit. This circuit is typically labeled in your electrical panel, so look for a label that corresponds to the AC unit.
- Switch off the breaker: Once you have identified the correct circuit, switch off the breaker that controls the AC unit. Flip the switch to the “off” position to cut off the power supply.
- Verify power shutdown: To ensure that the power is completely turned off, try turning on the unit’s controls or adjusting the temperature. If the unit remains inactive, you can be confident that the power has been successfully shut off.
It is important to note that some wall AC units may have an additional disconnect switch located near the outdoor condensing unit. If your unit has this switch, you should also turn it off to ensure complete power shutdown.
By turning off the power to your wall AC unit, you create a safe environment to clean and maintain the unit without any risk of electrical shock or damage.
With the power turned off, you can now proceed to the next step in the cleaning process: removing the air filter.
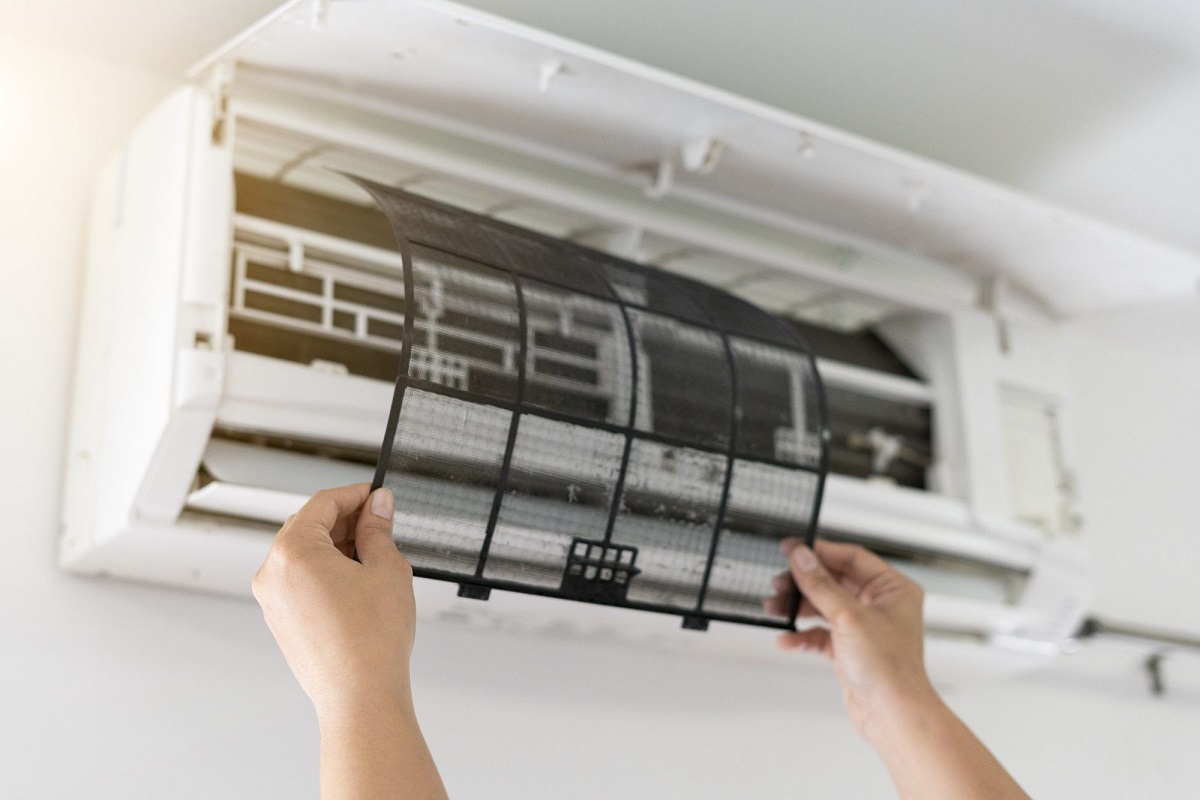
Step 2: Remove the air filter
Removing the air filter is an essential step in cleaning your wall AC unit. The air filter collects dust, dirt, pet dander, and other airborne particles, so it can become dirty and clogged over time. Here’s how you can remove the air filter:
- Locate the air filter: Depending on the model of your wall AC unit, the air filter is typically located behind a front cover or in a separate compartment. Consult your unit’s manual if you’re unsure about the location of the air filter.
- Remove the cover or access panel: If your unit has a front cover, carefully remove it by unscrewing any fasteners or pressing release tabs. In some cases, you may need to use a screwdriver. For units with a separate access panel, open it to reveal the air filter.
- Take out the air filter: Gently slide or lift out the air filter from its housing. Be cautious not to bend or damage the filter during removal.
Once you have successfully removed the air filter, you can proceed to clean it in the next step of the cleaning process.
Note that some wall AC units may have multiple air filters, especially if they have multiple cooling zones. In such cases, repeat the steps to remove each air filter for cleaning.
Tip: It is a good practice to check your unit’s air filter regularly and clean or replace it as necessary, even if you are not performing a full cleaning. This helps maintain optimal airflow and ensures efficient operation of your wall AC unit.
With the air filter removed, you can now move on to the next step: cleaning the air filter to remove dust and debris.
Regularly clean or replace the air filter in your wall AC unit to ensure efficient operation and improve air quality. Use a vacuum or gentle brush to remove dust and debris from the unit’s exterior and vents.
Read more: How To Clean AC Air Filter
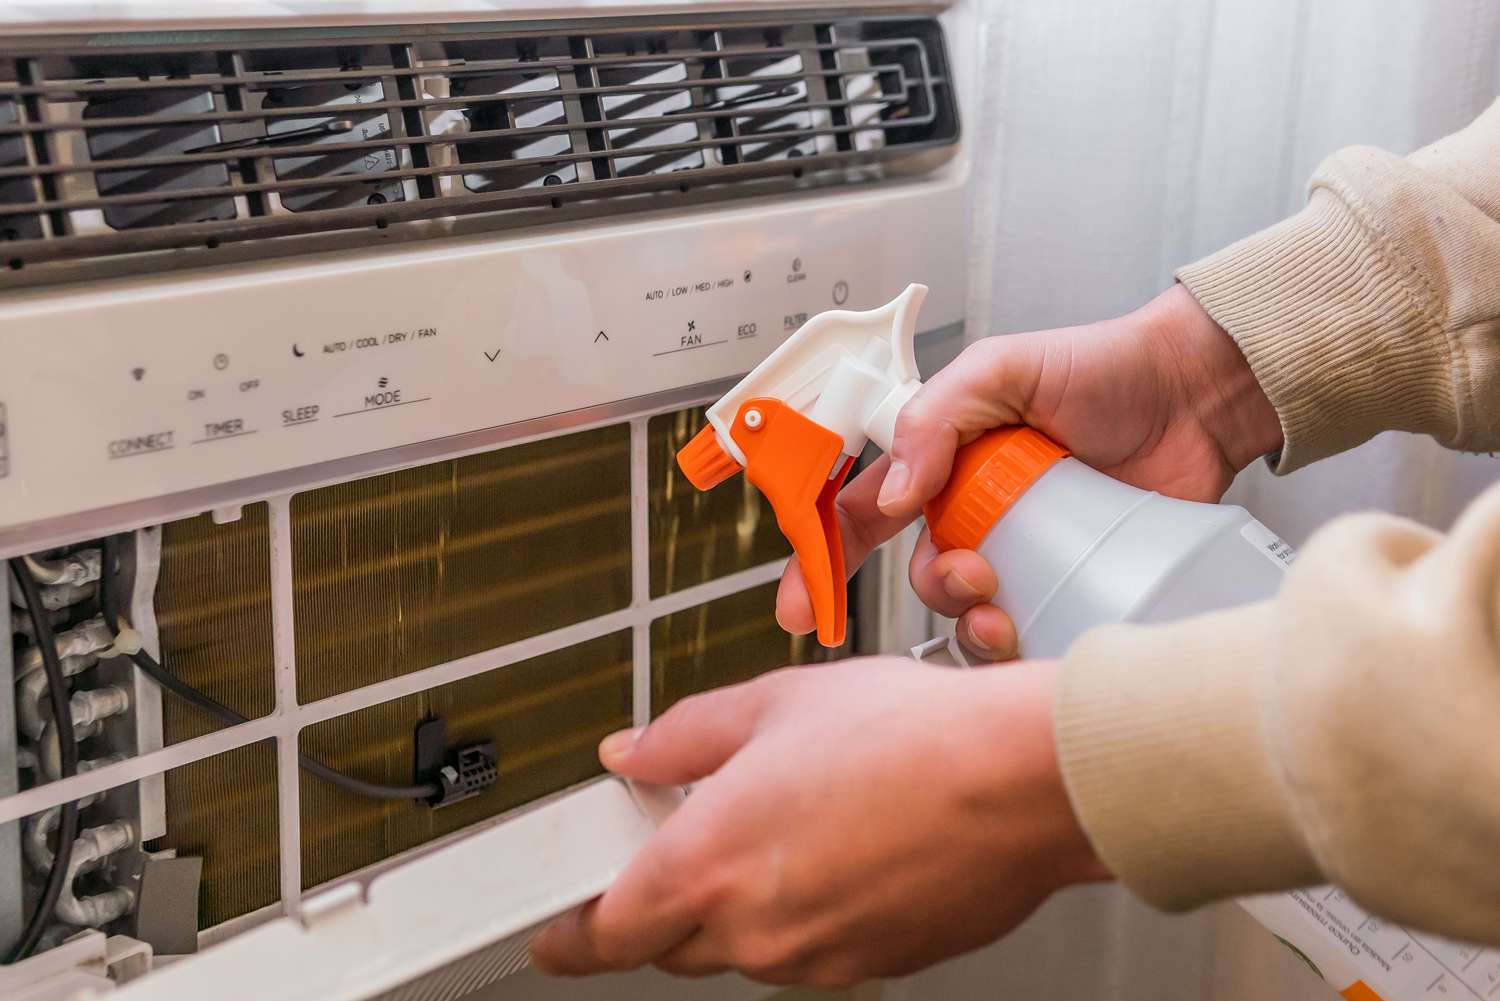
Step 3: Clean the air filter
Cleaning the air filter is an important step in maintaining the efficiency and performance of your wall AC unit. The air filter collects dust, pollen, and other airborne particles, so regular cleaning is necessary to ensure proper airflow and maintain good indoor air quality. Here’s how you can clean the air filter:
- Rinse the air filter: Begin by rinsing the air filter with warm water. Place the filter under gently running water or use a sink filled with warm water. Avoid using hot water, as it may damage the filter. Rinse both sides of the filter to remove any loose dirt and debris.
- Use mild soap or AC coil cleaner: For more stubborn dirt or grime, you can use a mild soap or an AC coil cleaner specifically designed for cleaning air filters. Apply a small amount of the cleaning solution to the filter and rub gently to remove any remaining dirt. Be sure to follow the instructions provided with the cleaner.
- Rinse thoroughly: After applying the cleaning solution, rinse the air filter thoroughly with warm water to remove any soap residue. Ensure that the water runs clear through the filter, indicating that it is clean and free of dirt.
- Allow the air filter to dry: Once the air filter is clean, shake off any excess water and place it in a well-ventilated area to dry completely. It is important to ensure that the air filter is fully dry before reinserting it into the wall AC unit to prevent the growth of mold or mildew.
It is worth noting that some wall AC units may have reusable filters that can be cleaned, while others have disposable filters that need to be replaced. Check your unit’s manual to determine whether your air filter is reusable or disposable.
Tip: It is recommended to clean or replace the air filter every 1-3 months, depending on usage and environmental conditions. Regular maintenance helps maintain optimal airflow and extends the lifespan of your wall AC unit.
With the air filter cleaned and dried, you are ready to move on to the next step: cleaning the vents and grilles of the wall AC unit.
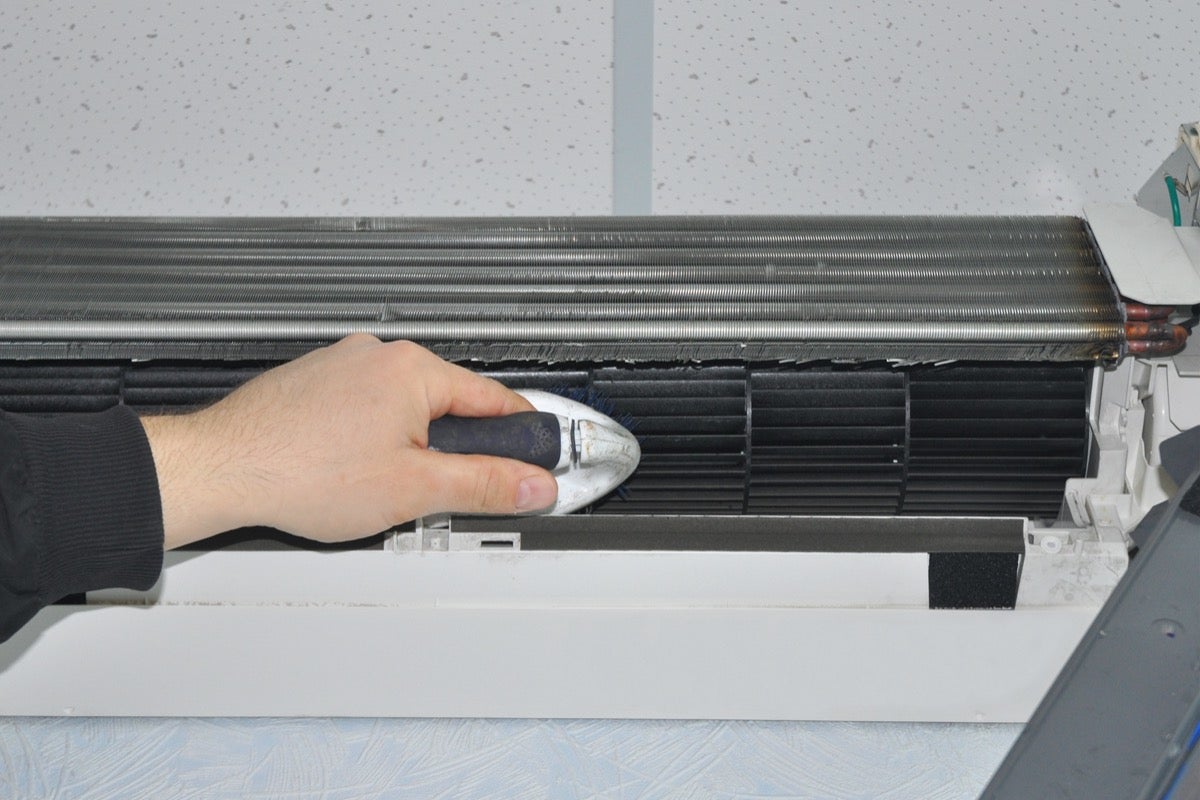
Step 4: Clean the vents and grillesCleaning the vents and grilles of your wall AC unit is vital for proper airflow and efficient cooling. Over time, dust and debris can accumulate on these surfaces, hindering the unit’s performance. Here’s how you can clean the vents and grilles:
- Inspect the vents and grilles: Take a close look at the vents and grilles of your wall AC unit. These are usually located on the front cover or along the sides of the unit. Look for any visible dirt, dust, or debris.
- Use a soft-bristle brush or vacuum cleaner: Depending on the level of dirt buildup, you can either use a soft-bristle brush or a vacuum cleaner with a brush attachment to clean the vents and grilles. Carefully brush or vacuum away the dust and debris, ensuring that they do not enter the unit.
- Pay attention to the fins: The fins, which are the thin metal slats behind the grilles, can be fragile. Take care when cleaning them to avoid bending or damaging the fins. If needed, use a soft-bristle brush or a fin comb to straighten any bent fins gently.
- Clean hard-to-reach areas: For hard-to-reach areas between the fins or inside the vents, you can use a can of compressed air or a brush with a long handle to remove any trapped dust or debris.
- Wipe down the surfaces: After removing the visible dirt, use a damp cloth or microfiber towel to wipe down the surfaces of the vents and grilles. This will help eliminate any remaining dust and ensure that they are clean and free of debris.
By cleaning the vents and grilles, you are allowing for proper airflow and minimizing any obstructions that may hinder the performance of your wall AC unit.
Tip: It is recommended to clean the vents and grilles every few months or as needed, depending on the accumulation of dirt and the frequency of use of your AC unit. Regular cleaning will help maintain efficiency and prevent potential issues.
With the vents and grilles cleaned, you can now proceed to the next step: cleaning the exterior of the wall AC unit.
Step 5: Clean the exterior of the unit
Cleaning the exterior of your wall AC unit is essential not only for aesthetic purposes but also for maintaining its overall functionality. Dust, dirt, and debris can accumulate on the unit’s housing, which can hinder proper airflow and potentially lead to performance issues. Here’s how you can clean the exterior of the unit:
- Prepare a cleaning solution: Mix a mild soap or detergent with warm water in a bucket or basin. Avoid using harsh chemicals or abrasive cleaners, as they can damage the unit’s surfaces.
- Dip a cloth or sponge in the cleaning solution: Immerse a soft cloth or sponge in the soapy water mixture. Wring out any excess liquid to avoid dripping onto the electrical components of the unit.
- Gently wipe down the exterior surfaces: Starting from the top, wipe down the exterior surfaces of the wall AC unit using the damp cloth or sponge. Pay attention to areas that may have accumulated more dirt, such as the bottom portion and around the vents.
- Remove stubborn stains or grime: For stubborn stains or grime that cannot be removed with the soapy water solution, consider using a non-abrasive cleaner specifically designed for cleaning AC units. Apply the cleaner to a cloth and gently scrub the affected areas.
- Rinse with clean water: After cleaning, rinse the exterior surfaces of the unit with clean water. This will ensure that all traces of soap or cleaning solution are removed.
- Dry the unit: Use a clean and dry cloth or towel to wipe down the unit’s surfaces and remove any remaining moisture. Allow the unit to air dry completely before turning it back on.
Regularly cleaning the exterior of your wall AC unit not only improves its appearance but also helps maintain good airflow and prevents the buildup of debris that can affect its performance.
Tip: If your wall AC unit is installed in an area prone to exposure to environmental factors such as pollution or salty air, more frequent cleaning may be necessary to prevent corrosion.
With the exterior of the unit cleaned, you can now move on to the next step: cleaning the condenser coils.
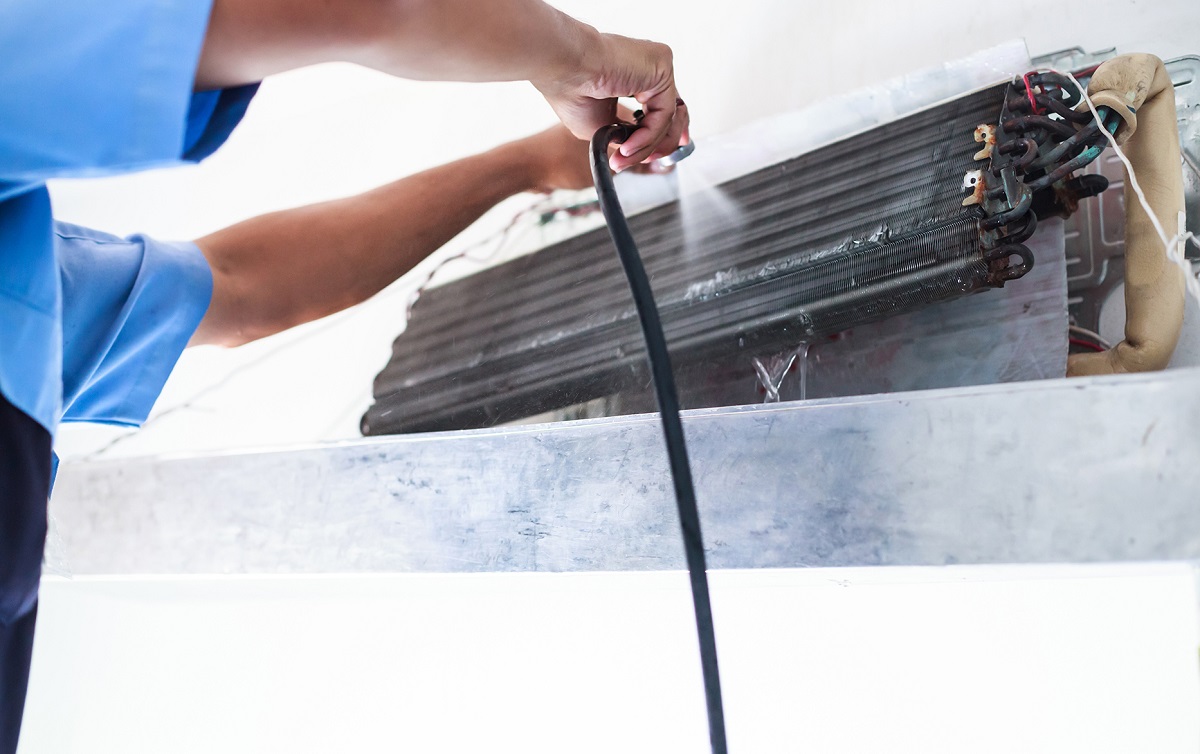
Step 6: Clean the condenser coils
Cleaning the condenser coils of your wall AC unit is crucial for maintaining its efficiency and cooling performance. Over time, the condenser coils can accumulate dirt, dust, and debris, which can hinder heat transfer and reduce the unit’s overall effectiveness. Here’s how you can clean the condenser coils:
- Locate the condenser coils: The condenser coils are located on the outdoor unit of your wall AC system. Typically, you can find them behind the aluminum or metal fins.
- Use a soft-bristle brush or vacuum cleaner: Before cleaning the coils, it’s important to remove any loose dirt or debris on the surface. You can use a soft-bristle brush or a vacuum cleaner with a brush attachment to gently brush or vacuum away the dirt.
- Spray water onto the coils: With the loose dirt removed, use a garden hose with a spray attachment to gently spray water onto the condenser coils. Make sure to direct the water in the opposite direction of the airflow to prevent the coils from bending.
- Apply a coil cleaner: If the coils are particularly dirty, you can apply a coil cleaner specifically designed for AC units. Follow the instructions provided with the cleaner and ensure that it is safe to use on your specific unit’s coils.
- Gently brush or rinse the coils: Use a soft-bristle brush or continue rinsing with water to clean the coils thoroughly. Pay close attention to the areas with heavy dirt buildup. Avoid using excessive force to prevent damage to the fragile fins.
- Rinse off any cleaning solution: If a coil cleaner was used, ensure that all traces of the cleaner are rinsed off completely. Use clean water to thoroughly rinse the coils, ensuring that no residue remains.
- Allow the coils to dry: After cleaning, let the coils air dry completely. This may take a few hours, depending on the weather conditions. Avoid turning on the unit until the coils are completely dry.
Cleaning the condenser coils of your wall AC unit ensures proper heat transfer, efficient cooling, and reduces the strain on the system. It can significantly improve the overall performance and energy efficiency of your AC unit.
Tip: It is recommended to clean the condenser coils at least once a year or as needed. However, if your outdoor unit is exposed to heavy dirt, debris, or vegetation, more frequent cleaning may be necessary.
With the condenser coils cleaned, you can proceed to the next step: cleaning the drainage system of your wall AC unit.
Read more: How To Clean Rv AC Coils
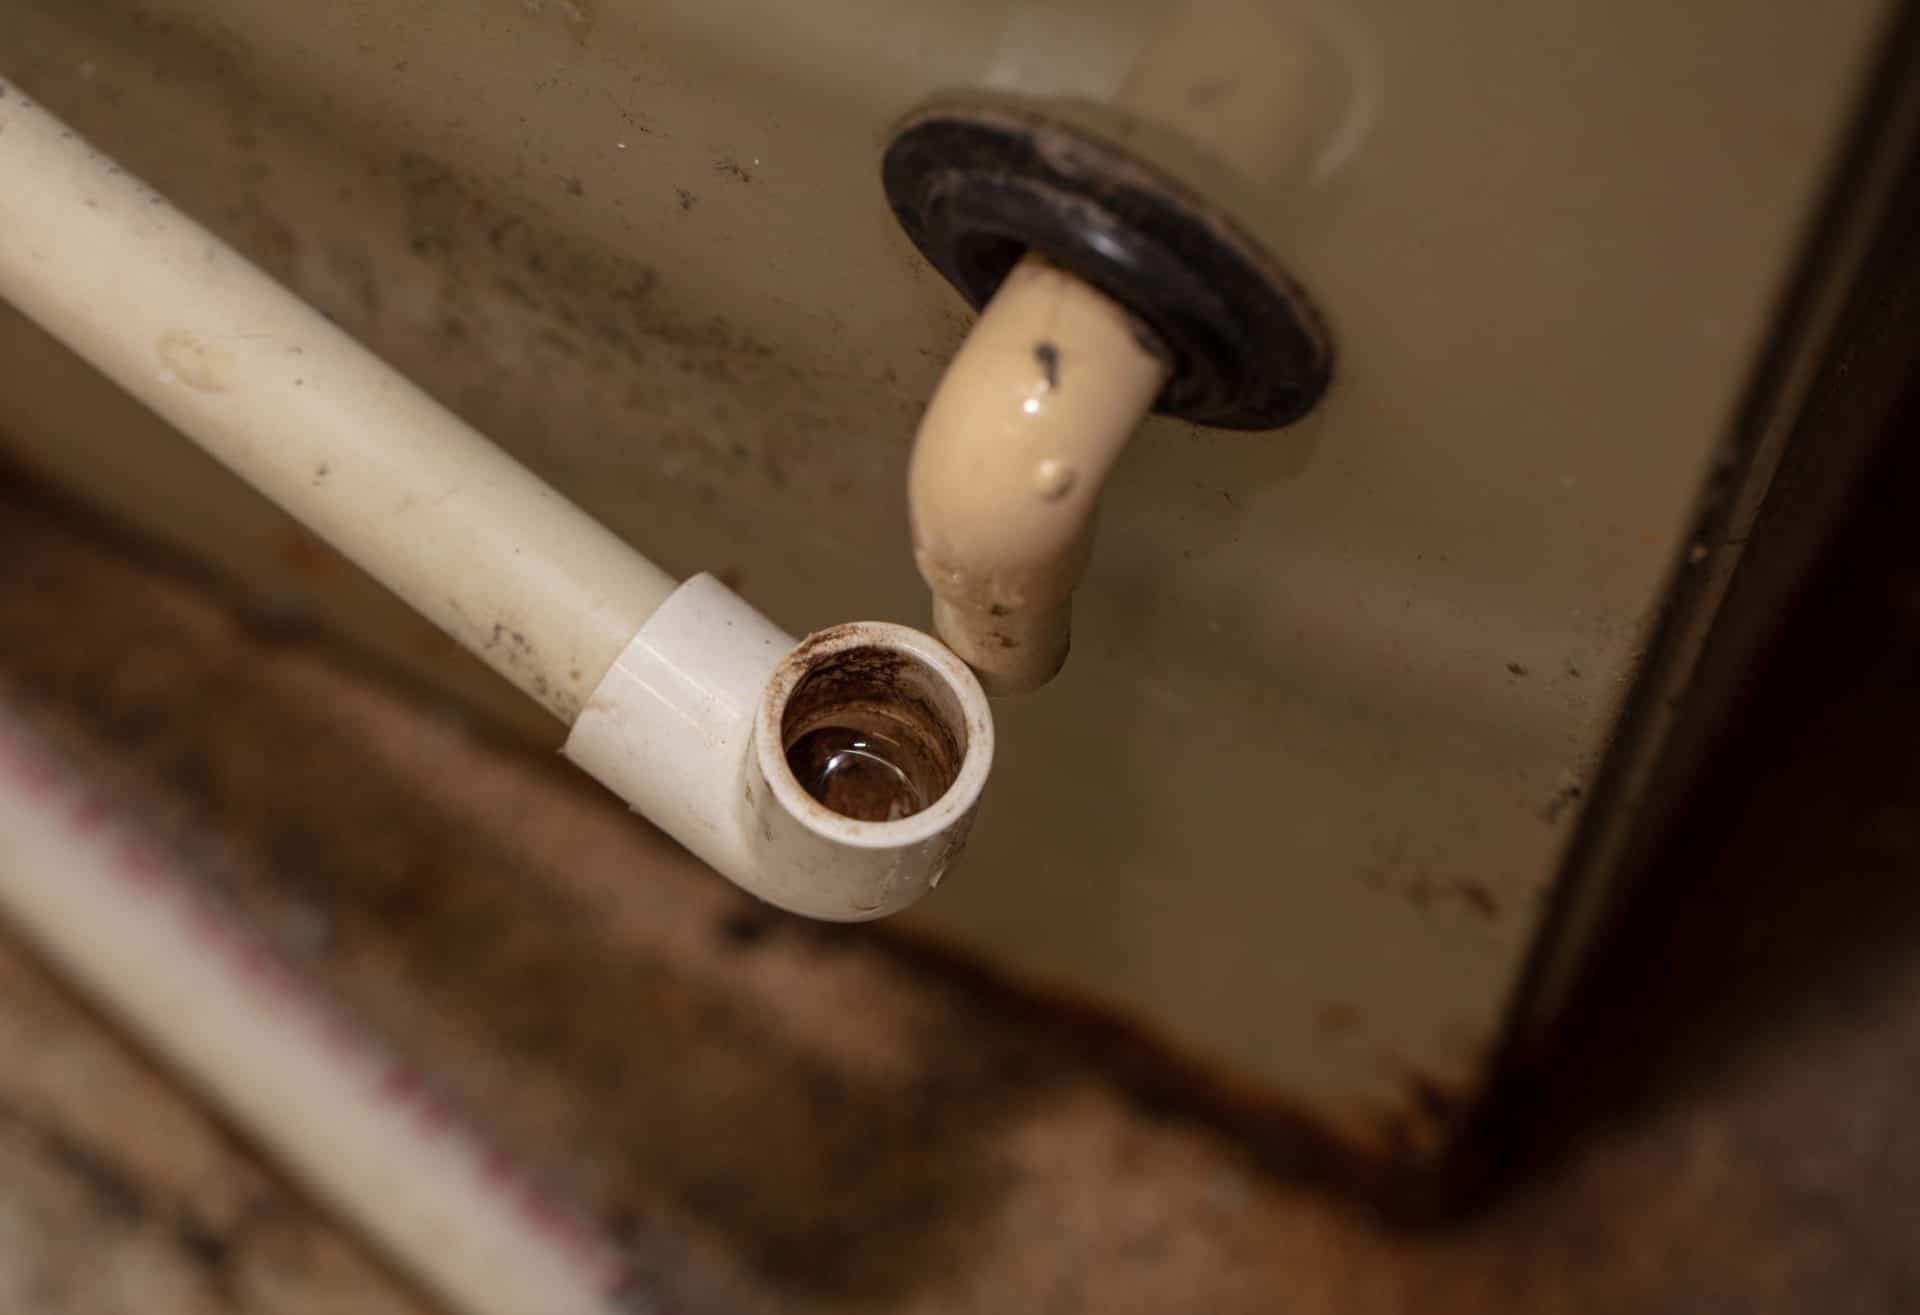
Step 7: Clean the drainage system
Keeping the drainage system of your wall AC unit clean is essential to prevent clogs and ensure efficient water drainage. Over time, algae, mold, dirt, and debris can accumulate in the condensate drain line, potentially leading to water leaks or blockages. Here’s how you can clean the drainage system:
- Locate the condensate drain line: The condensate drain line is typically a PVC pipe or tubing connected to the indoor unit of your wall AC system. It is responsible for carrying the water generated by the cooling process away from the unit.
- Inspect for clogs or blockages: Check the condensate drain line for any visible clogs or blockages. Look out for signs of stagnant water or debris buildup, which may indicate a blockage.
- Use a mixture of bleach and water: If you notice a blockage or suspect the presence of algae or mold, mix a solution of equal parts bleach and water. Pour this mixture into the condensate drain line to kill any microorganisms and clear the blockage. Alternatively, you can use a specially formulated condensate drain line cleaner available in the market.
- Allow the solution to sit and flush the drain line: After pouring the cleaning solution, allow it to sit in the drain line for a few minutes. Then, flush the drain line with clean water to remove the loosened debris and any residual bleach solution.
- Inspect the condensate drain pan: While cleaning the drainage system, check the condensate drain pan for any dirt, debris, or standing water. Clean the drain pan using a mild soap and warm water to remove any buildup.
- Ensure proper water flow: Check that the water is flowing freely through the condensate drain line by pouring a small amount of water into the drain pan. It should drain properly without any backup or overflow.
Cleaning the drainage system helps prevent water damage, potential leaks, and the growth of mold or algae. A well-maintained drainage system allows the wall AC unit to operate efficiently and effectively.
Tip: It is recommended to clean the drainage system at least once a year or as needed. However, if you notice water leakage or suspect a blockage, address it promptly to prevent any further issues.
With the drainage system cleaned, you are ready for the final step: reassembling the unit and turning it back on.
Step 8: Reassemble and turn on the unit
After completing the cleaning process, it’s time to reassemble your wall AC unit and get it ready for operation. Follow these steps to reassemble and turn on the unit:
- Ensure everything is dry: Before reassembling the unit, make sure that all components, including the air filter, vents, grilles, condenser coils, and the exterior housing, are completely dry.
- Replace the air filter: Insert the clean and dry air filter back into its designated slot or housing. Make sure it is properly aligned and securely in place.
- Reattach the covers or access panels: If you removed any covers or access panels during the cleaning process, carefully put them back in their original positions. Secure them with screws or fasteners as necessary.
- Turn on the power: Return to the electrical panel and switch on the breaker that controls the wall AC unit. This will restore power to the unit.
- Check the unit’s settings: Make sure the unit is set to your desired temperature and cooling mode before turning it on. Refer to the user manual if you need assistance with the unit’s controls.
- Monitor the unit’s performance: Once the unit is turned on, observe its operation to ensure everything is functioning correctly. Listen for any unusual noises, check for proper airflow from the vents, and monitor the temperature to ensure cool air is being produced.
By following these steps, you can reassemble your wall AC unit and have it ready for operation, providing you with efficient and comfortable cooling.
Maintenance Tips
In addition to the cleaning process, regular maintenance is essential to keep your wall AC unit running smoothly. Here are some maintenance tips to help you maintain the efficiency and longevity of your unit:
- Keep the area around the unit clear: Ensure there is adequate space around the wall AC unit. Remove any obstructions, such as furniture, plants, or debris, to allow for proper airflow.
- Inspect and clean the unit regularly: Perform visual inspections of the unit periodically to check for any signs of damage or dirt accumulation. Clean the air filter and vents regularly, as recommended by the manufacturer.
- Trim vegetation and shrubs: If there are plants or shrubs near the outdoor unit, make sure to keep them pruned and at a safe distance. This prevents leaves, branches, or pollen from obstructing the unit or causing damage.
- Monitor the thermostat settings: Adjust the thermostat settings based on your cooling needs and the ambient temperature. Avoid setting the temperature too low, as it can overwork the unit and lead to increased energy consumption.
- Schedule professional maintenance: Consider scheduling annual maintenance with a professional HVAC technician. They can perform a thorough inspection, cleaning, and any necessary repairs or adjustments to ensure optimal performance.
By following these maintenance tips and addressing any issues promptly, you can prolong the life of your wall AC unit and enjoy consistent cooling comfort throughout the years.
With the cleaning process complete and the maintenance tips in mind, you are well-equipped to keep your wall AC unit in excellent condition for years to come. Regular cleaning and maintenance will ensure optimal performance, energy efficiency, and clean air in your living or working space.
Suggestions for Regular Maintenance to Keep Your Wall AC Unit Clean
Maintaining the cleanliness of your wall AC unit is vital for optimal performance and longevity. By incorporating these regular maintenance suggestions into your routine, you can ensure that your unit remains clean and in excellent working condition:
- Keep the surrounding area clean: Regularly clean the area around the wall AC unit to prevent the buildup of dust, debris, and leaves. This will help maintain good airflow and prevent the unit from drawing in contaminants.
- Check and clean the air filter: Inspect the air filter every month and clean or replace it as needed. A clean air filter ensures proper airflow and helps improve indoor air quality.
- Clean the vents and grilles: Use a soft-bristle brush or vacuum cleaner to remove dust and debris from the vents and grilles regularly. This will prevent blockages and ensure optimal airflow.
- Regularly clean the condenser coils: Clean the condenser coils at least once a year to remove dirt and debris buildup. This will enhance the unit’s cooling efficiency and prevent strain on the system.
- Inspect and clean the condensate drain line: Check the condensate drain line regularly for any clogs or blockages. Clean it with a mixture of bleach and water if necessary, and ensure proper water flow to prevent leaks or water damage.
- Schedule professional maintenance: Consider scheduling annual maintenance with a qualified HVAC technician. They can conduct a thorough inspection, cleaning, and tune-up to identify and address any potential issues before they become major problems.
By following these maintenance suggestions, you can effectively keep your wall AC unit clean and in optimal condition for efficient cooling and improved indoor air quality.
Read more: How Much Vinegar To Clean AC Drain Line
Conclusion
Maintaining a clean wall AC unit is essential for its performance, energy efficiency, and the comfort of your living or working space. Regular cleaning and maintenance efforts can enhance airflow, prevent blockages, and ensure clean and healthy air quality.
In this article, we provided you with a comprehensive step-by-step guide to clean your wall AC unit. We discussed the importance of cleaning, the tools and materials you will need, important safety precautions to follow, and a detailed cleaning process from removing the air filter to cleaning the condenser coils and drainage system. We also provided maintenance tips to incorporate into your routine for long-term upkeep.
By dedicating time to clean and maintain your wall AC unit regularly, you can ensure that it operates at its best, providing reliable cooling, improved air quality, and energy efficiency. So, don’t overlook the importance of keeping your wall AC unit clean and enjoy a cool and refreshing environment all year round.
Frequently Asked Questions about How To Clean Wall AC Unit
Was this page helpful?
At Storables.com, we guarantee accurate and reliable information. Our content, validated by Expert Board Contributors, is crafted following stringent Editorial Policies. We're committed to providing you with well-researched, expert-backed insights for all your informational needs.
0 thoughts on “How To Clean Wall AC Unit”