Articles
How Much To Clean AC Coils
Modified: September 2, 2024
Looking for articles on how much it costs to clean AC coils? Find the information you need about AC coil cleaning expenses and pricing in this comprehensive guide.
(Many of the links in this article redirect to a specific reviewed product. Your purchase of these products through affiliate links helps to generate commission for Storables.com, at no extra cost. Learn more)
Introduction
Welcome to the world of air conditioning! Whether you’re a homeowner, a business owner, or just someone seeking relief from the scorching heat, an air conditioning system plays a vital role in keeping your surroundings comfortable.
One of the key components of an air conditioning system is the AC coils. These coils are responsible for transferring heat and humidity from the indoor air to the outside environment, allowing you to enjoy cool and refreshing indoor temperatures. But just like any other part of your AC system, the coils can accumulate dirt, dust, and debris over time.
In this article, we will delve into the importance of cleaning AC coils and the factors that can affect the cost of cleaning. We will also explore the average cost of AC coil cleaning and discuss the pros and cons of DIY cleaning versus hiring a professional.
So, if you’re ready to discover the ins and outs of AC coil cleaning, let’s dive in!
Key Takeaways:
- Regular AC coil cleaning improves energy efficiency, extends equipment lifespan, and enhances indoor air quality. Whether DIY or professional, prioritizing clean coils ensures optimal AC system performance and cost savings in the long run.
- Signs that your AC coils need cleaning include reduced cooling efficiency, increased energy consumption, frequent system cycling, unpleasant odors, uneven cooling, and visible dirt or dust on the coils. Prompt action and regular maintenance are crucial for preserving the efficiency and longevity of your air conditioning system.
Read more: How Much To Replace AC Coil
Understanding AC Coils
Before we discuss the significance of cleaning AC coils, it’s essential to understand what AC coils are and how they function.
In an air conditioning system, there are two types of coils: the evaporator coil and the condenser coil.
The evaporator coil, also known as the indoor coil, is located inside your AC unit and is responsible for absorbing heat from the air inside your home or building. It works by circulating refrigerant through a series of coils, which cools down the air as it passes over the coils. This cooled air is then distributed back into the living space, providing a comfortable environment.
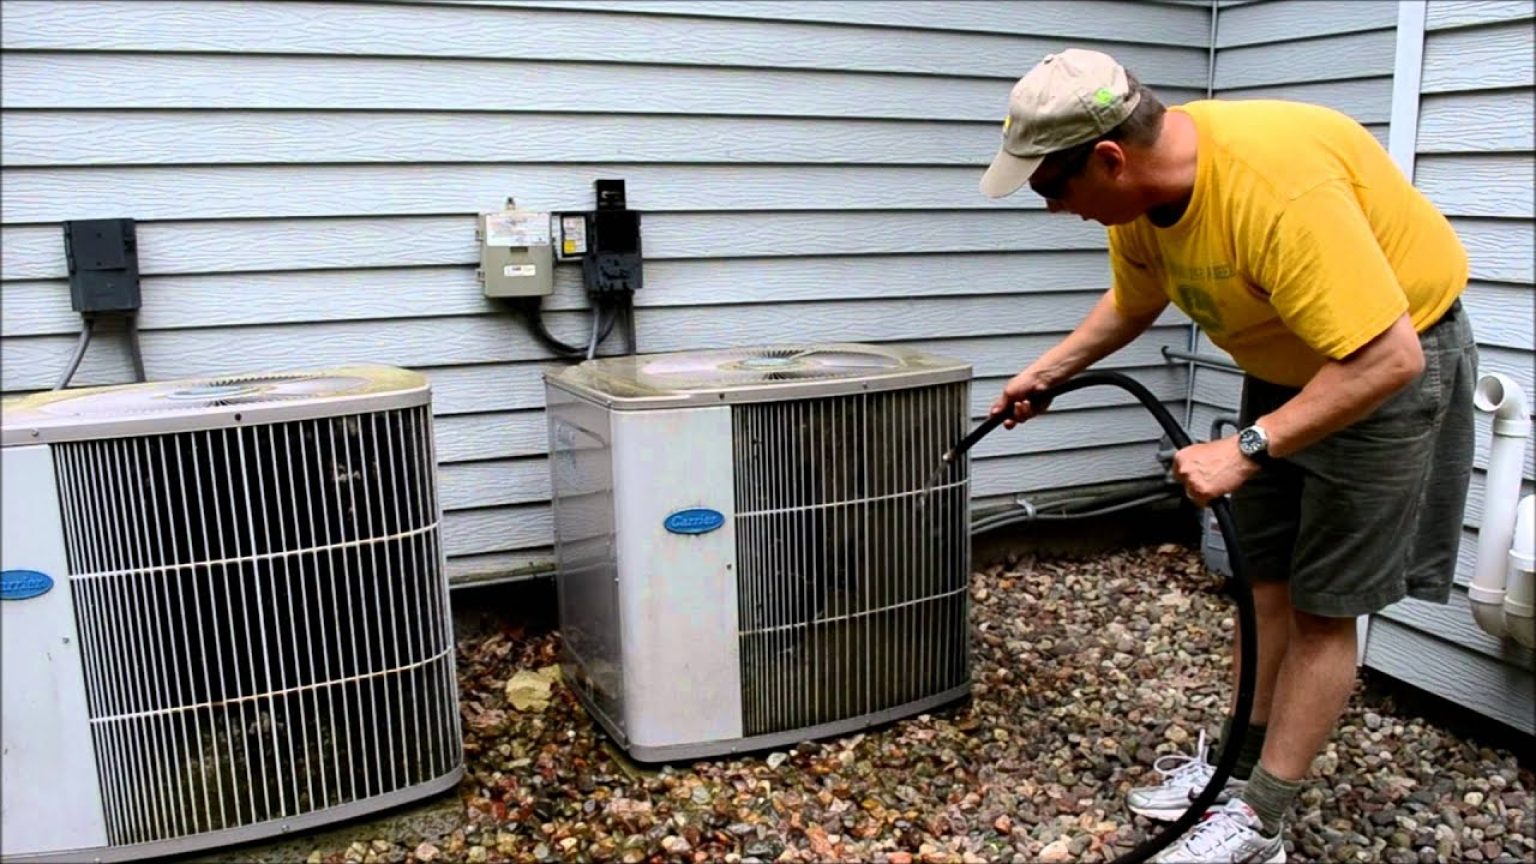
The condenser coil, on the other hand, is situated outside and is responsible for releasing the heat absorbed by the evaporator coil. It functions by transferring the heat from the refrigerant to the outside air, allowing the refrigerant to cool down before returning to the evaporator coil.
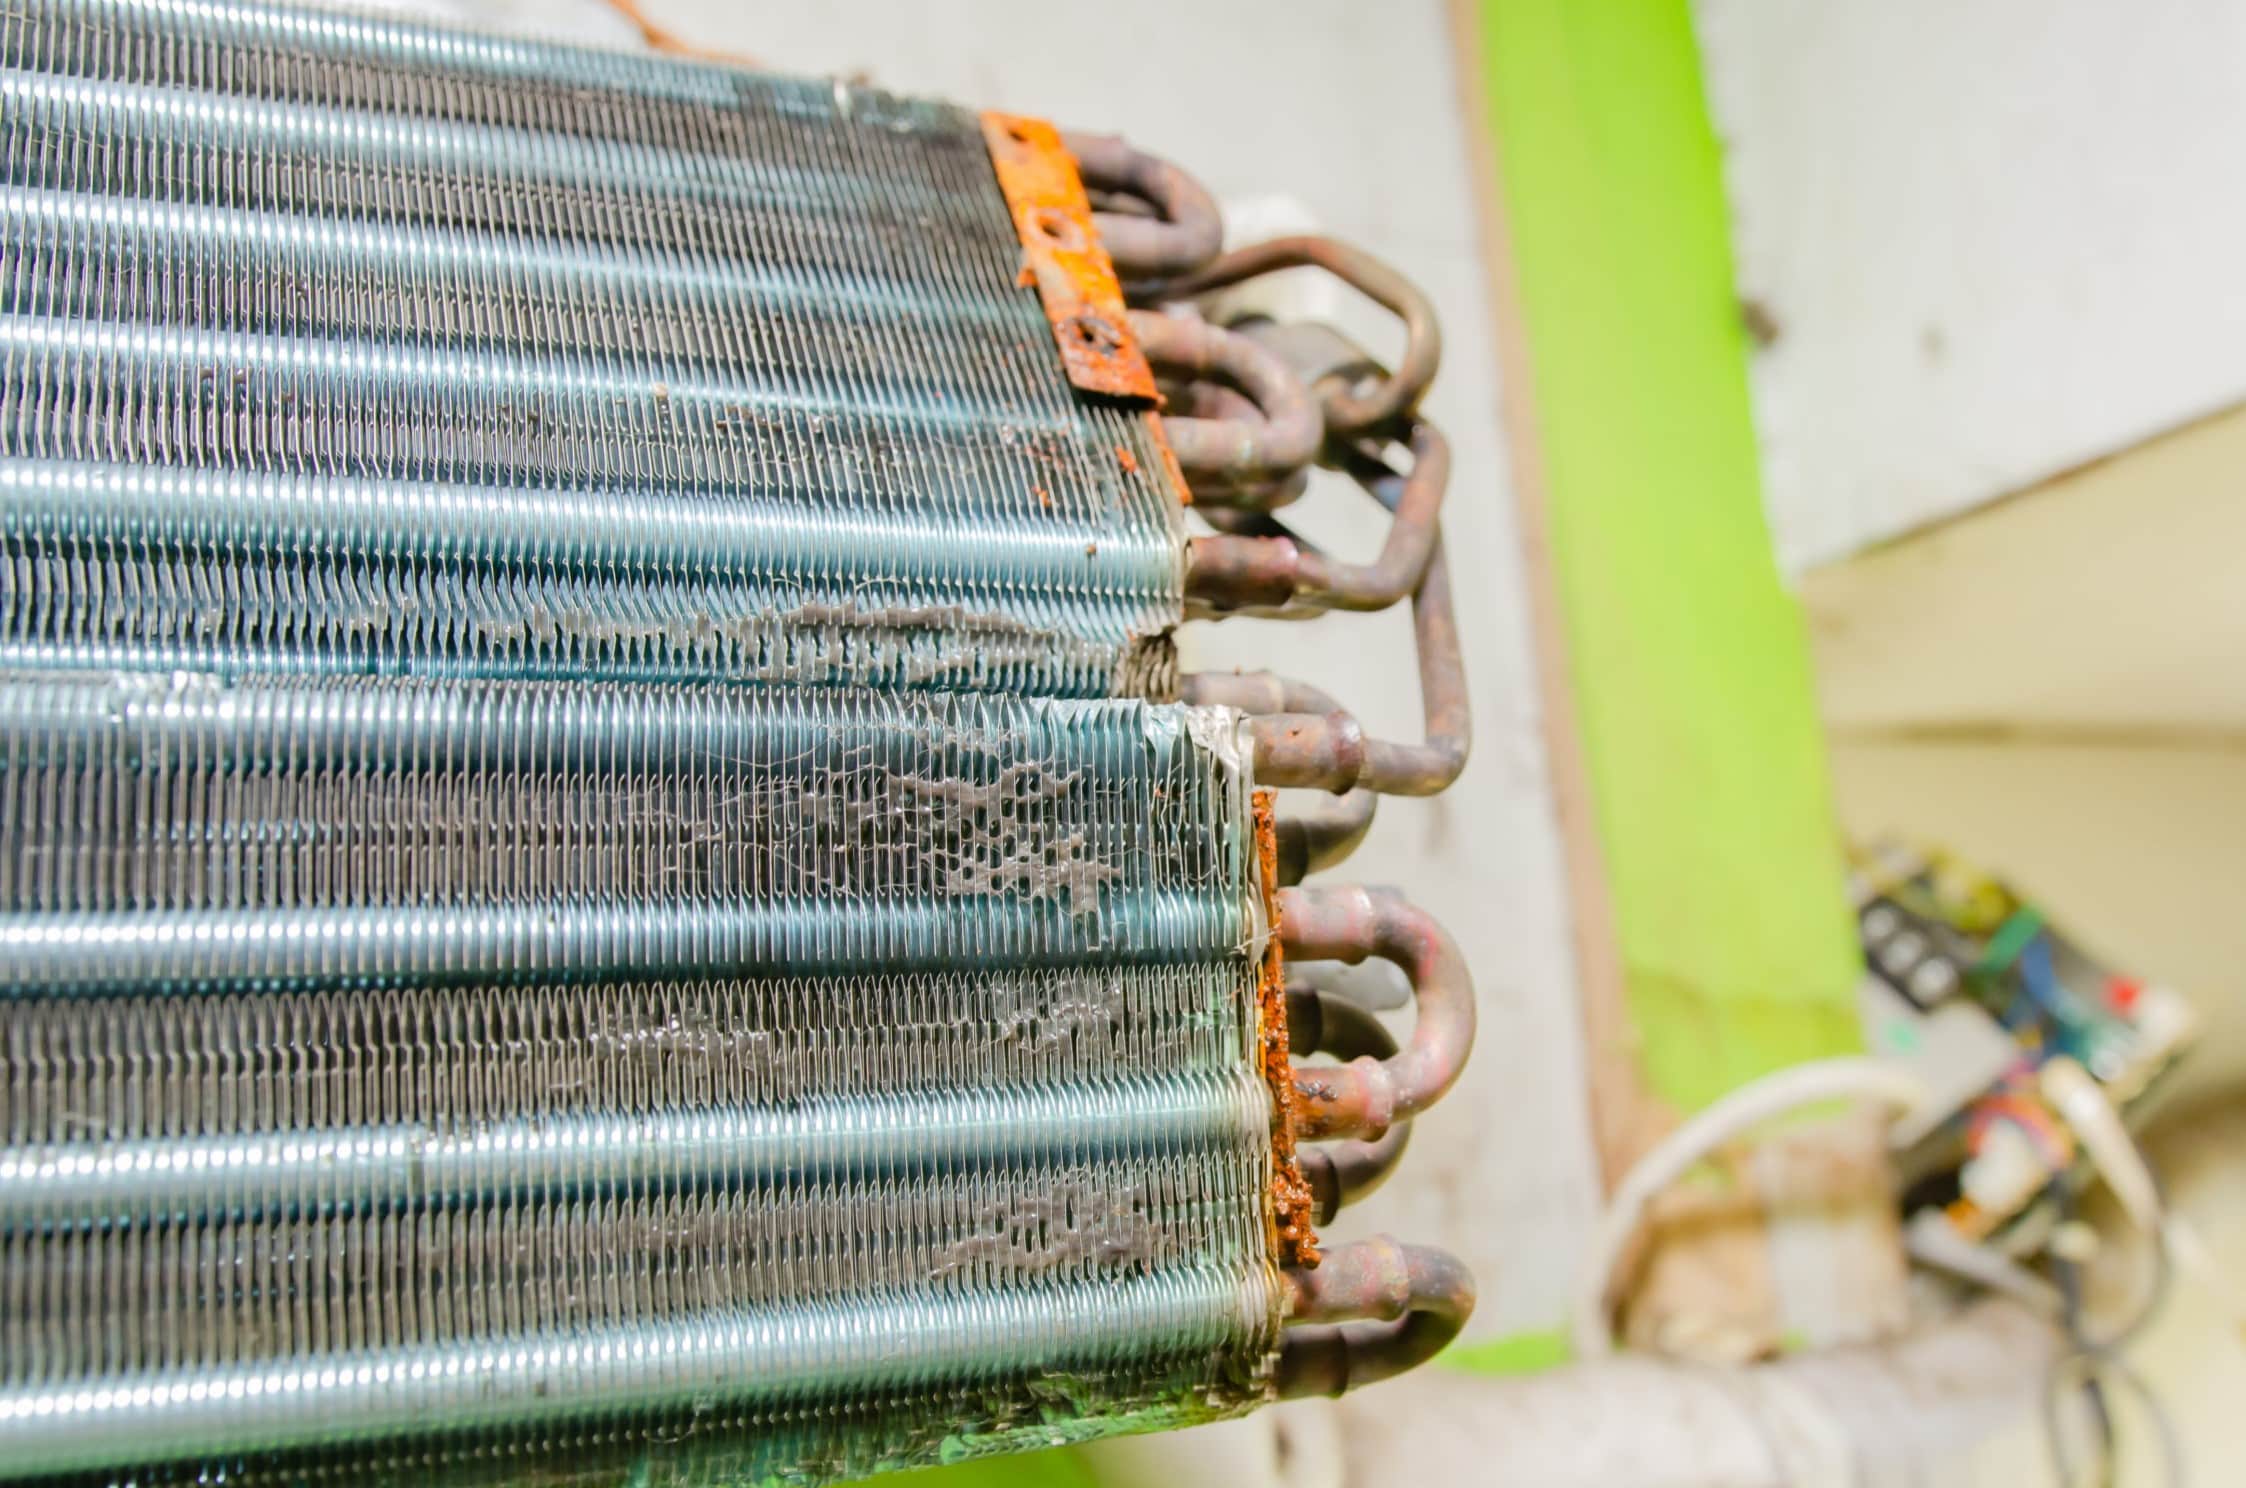
Both the evaporator coil and the condenser coil are made of metal and have a large surface area. This design allows for efficient heat transfer and ensures that your AC system operates optimally. However, over time, these coils can become clogged with dirt, dust, pollen, and other airborne particles.
When the coils become dirty, their ability to transfer heat and moisture is reduced. This can negatively impact the overall performance of your air conditioning system, leading to higher energy consumption and decreased cooling efficiency. In severe cases, dirty coils can even cause your AC unit to freeze up, resulting in costly repairs.
Now that we have a basic understanding of AC coils, let’s explore why cleaning them is crucial for the proper functioning of your air conditioning system.
Importance of Cleaning AC Coils
Cleaning the AC coils is a critical maintenance task that should not be overlooked. Here are four reasons why it’s important to keep your AC coils clean:
- Improved Energy Efficiency: Dirty AC coils restrict airflow and hinder heat transfer, leading to decreased energy efficiency. When the coils are clogged with dirt and debris, your air conditioning system has to work harder and consume more energy to cool your space. By keeping the coils clean, you can optimize the performance of your AC system and potentially reduce energy bills.
- Enhanced Cooling Performance: Clean coils allow for efficient heat transfer, which means your AC unit can effectively cool the air. When the coils are dirty, they cannot absorb heat as effectively, resulting in reduced cooling capacity. Cleaning the coils ensures that your AC system can cool your space adequately, providing the comfort you desire.
- Extended Lifespan of Equipment: Regularly cleaning your AC coils can help prolong the lifespan of your air conditioning system. When the coils are clean, your AC unit runs more efficiently and experiences less strain. This reduces the chances of premature wear and tear on the system’s components, ultimately extending its lifespan and saving you money in the long run.
- Improved Air Quality: Dirty AC coils can become a breeding ground for mold, bacteria, and other contaminants. When the coils are full of debris, these microorganisms can be circulated throughout your home or building, compromising indoor air quality. Cleaning the coils helps eliminate these pollutants, ensuring that you and your family breathe in clean and healthy air.
As you can see, cleaning AC coils is not just about maintaining the efficiency of your air conditioning system. It also has far-reaching benefits for your energy bills, comfort, equipment lifespan, and indoor air quality. Now that we understand the importance of cleaning AC coils, let’s explore the factors that can affect the cost of AC coil cleaning.
Factors Affecting Cleaning Costs
When it comes to determining the cost of cleaning AC coils, several factors come into play. These factors can vary depending on the size of your AC system, the level of dirt and debris buildup, and the location of the coils. Here are some key factors that can influence the cleaning costs:
- Size of the AC System: The size of your AC system affects the complexity and time required to clean the coils. Larger systems typically have more extensive coil assemblies, which may require additional labor and cleaning materials. As a result, cleaning costs tend to be higher for larger AC systems.
- Level of Dirt and Debris: The amount of dirt, dust, and debris accumulated on the coils can also impact the cleaning costs. If the coils are heavily soiled, it may require extra time and effort to thoroughly clean them. In some cases, additional cleaning agents or specialized cleaning equipment may be required, which can add to the overall cost.
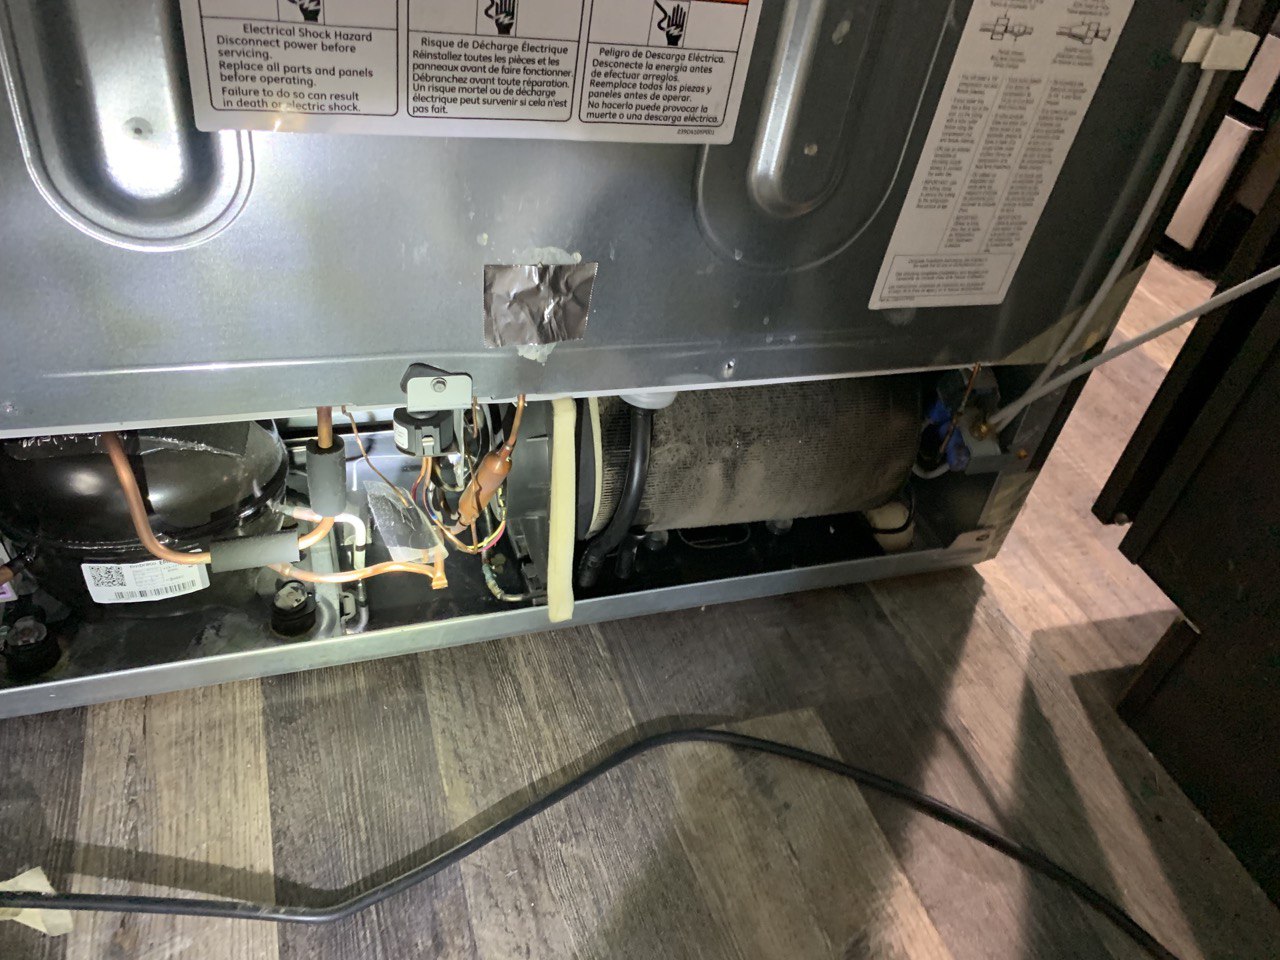
- Accessibility of Coils: The location and accessibility of the AC coils can affect the cleaning costs. If the coils are easily accessible and can be cleaned without the need for extensive disassembly, the cleaning process is generally quicker and more straightforward. However, if the coils are located in tight or hard-to-reach spaces, it may require more time and effort, resulting in higher cleaning costs.
- Additional Services Required: In some instances, the cleaning process may uncover other issues or maintenance needs within the AC system. For example, if the coils are heavily corroded or damaged, they may require repair or replacement. If mold or mildew growth is detected, it may necessitate additional treatments or remediation. These additional services can impact the overall cleaning costs.
- Geographical Location: The geographical location can also influence the cost of AC coil cleaning. The labor rates and market prices for cleaning services can vary from one region to another. Additionally, areas with higher humidity levels or more pronounced air pollution may require more frequent or intensive coil cleaning, leading to higher costs.
It’s essential to keep these factors in mind when estimating the cost of cleaning AC coils. While prices can vary depending on the specific circumstances, having a general understanding of these factors can help you prepare for the cost implications of maintaining your AC system. Now, let’s explore the average cost range for AC coil cleaning.
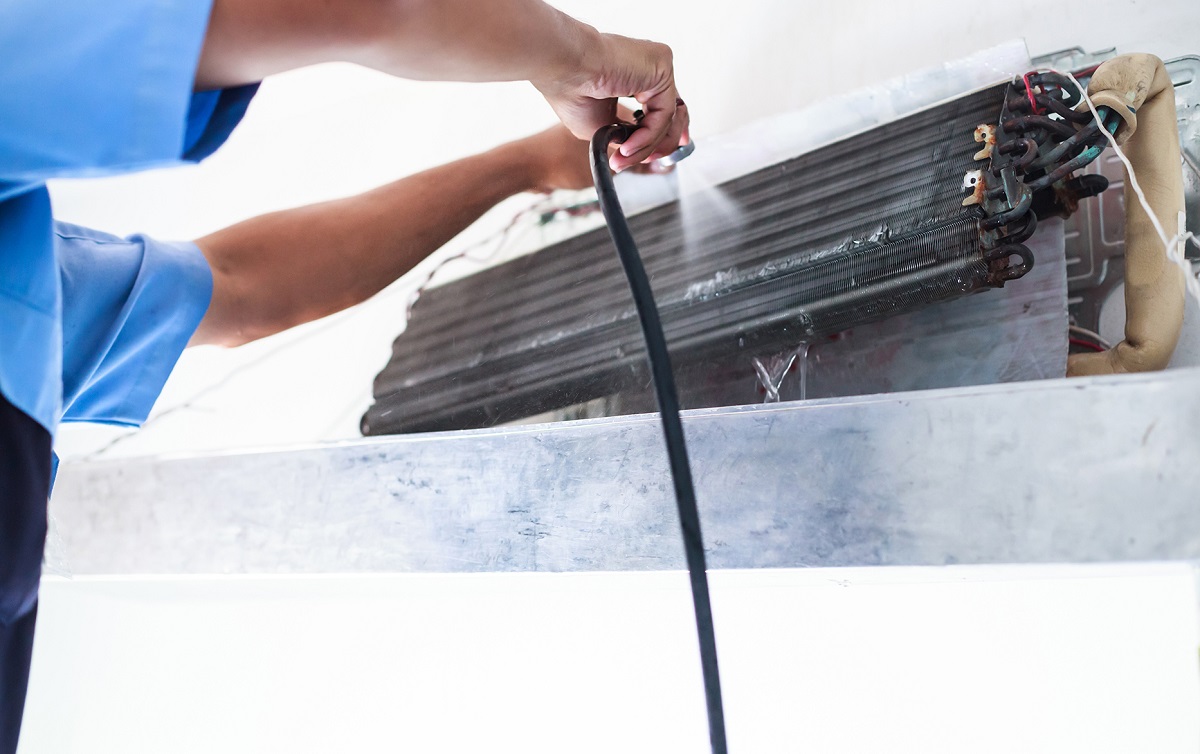
Average Cost for AC Coil Cleaning
When it comes to the cost of cleaning AC coils, it’s important to note that prices can vary depending on various factors such as the size of the system, the level of dirt buildup, and the location of the coils. However, on average, you can expect to pay between $100 and $300 for professional AC coil cleaning.
It’s worth mentioning that this price range is just an estimate, and actual costs may differ based on your specific circumstances and the service provider you choose. It’s always recommended to obtain multiple quotes from reputable HVAC contractors to ensure you’re getting a fair price.
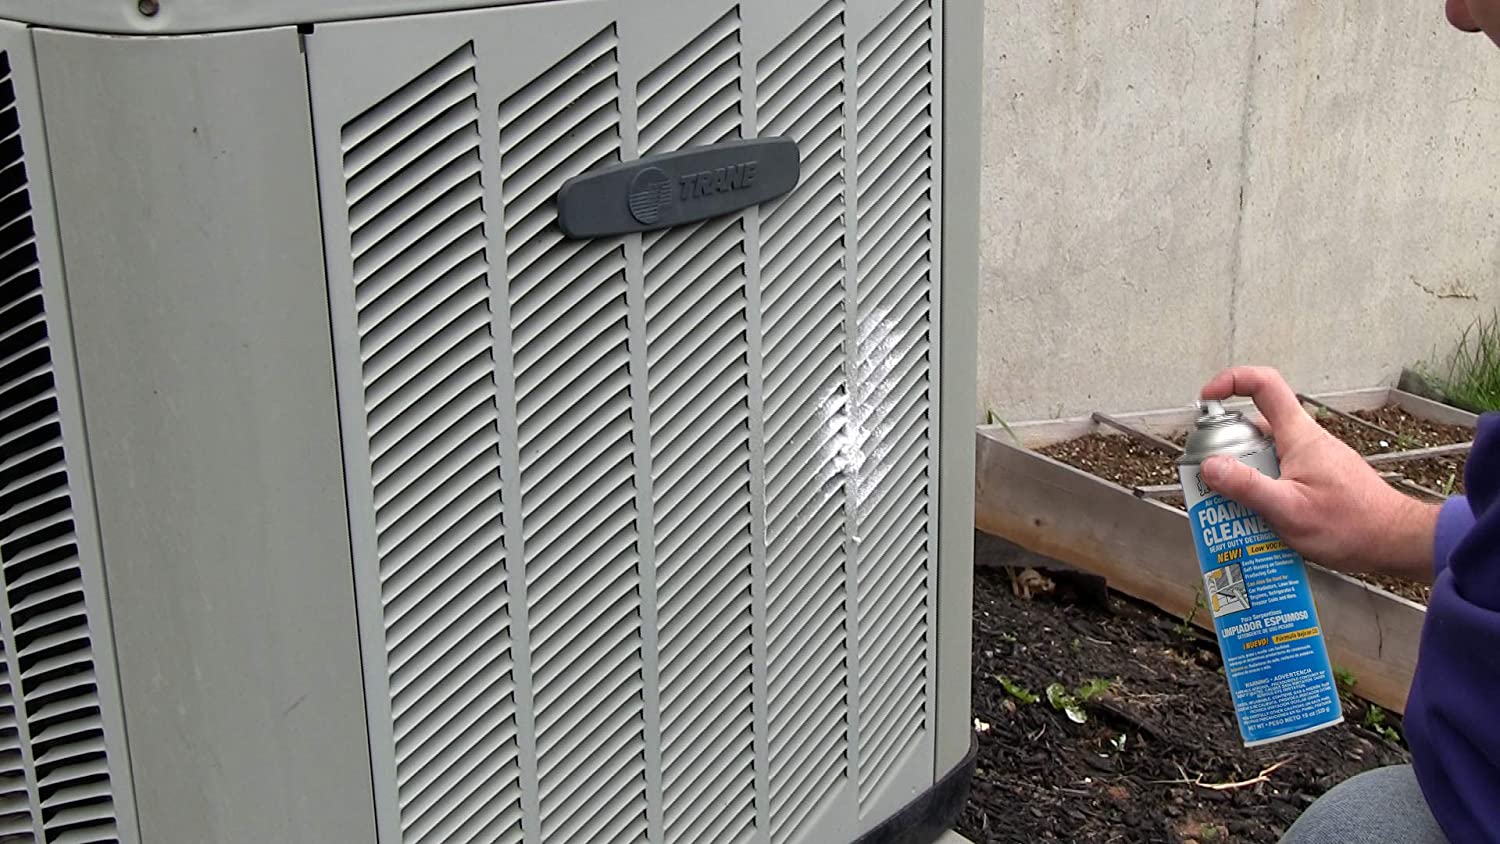
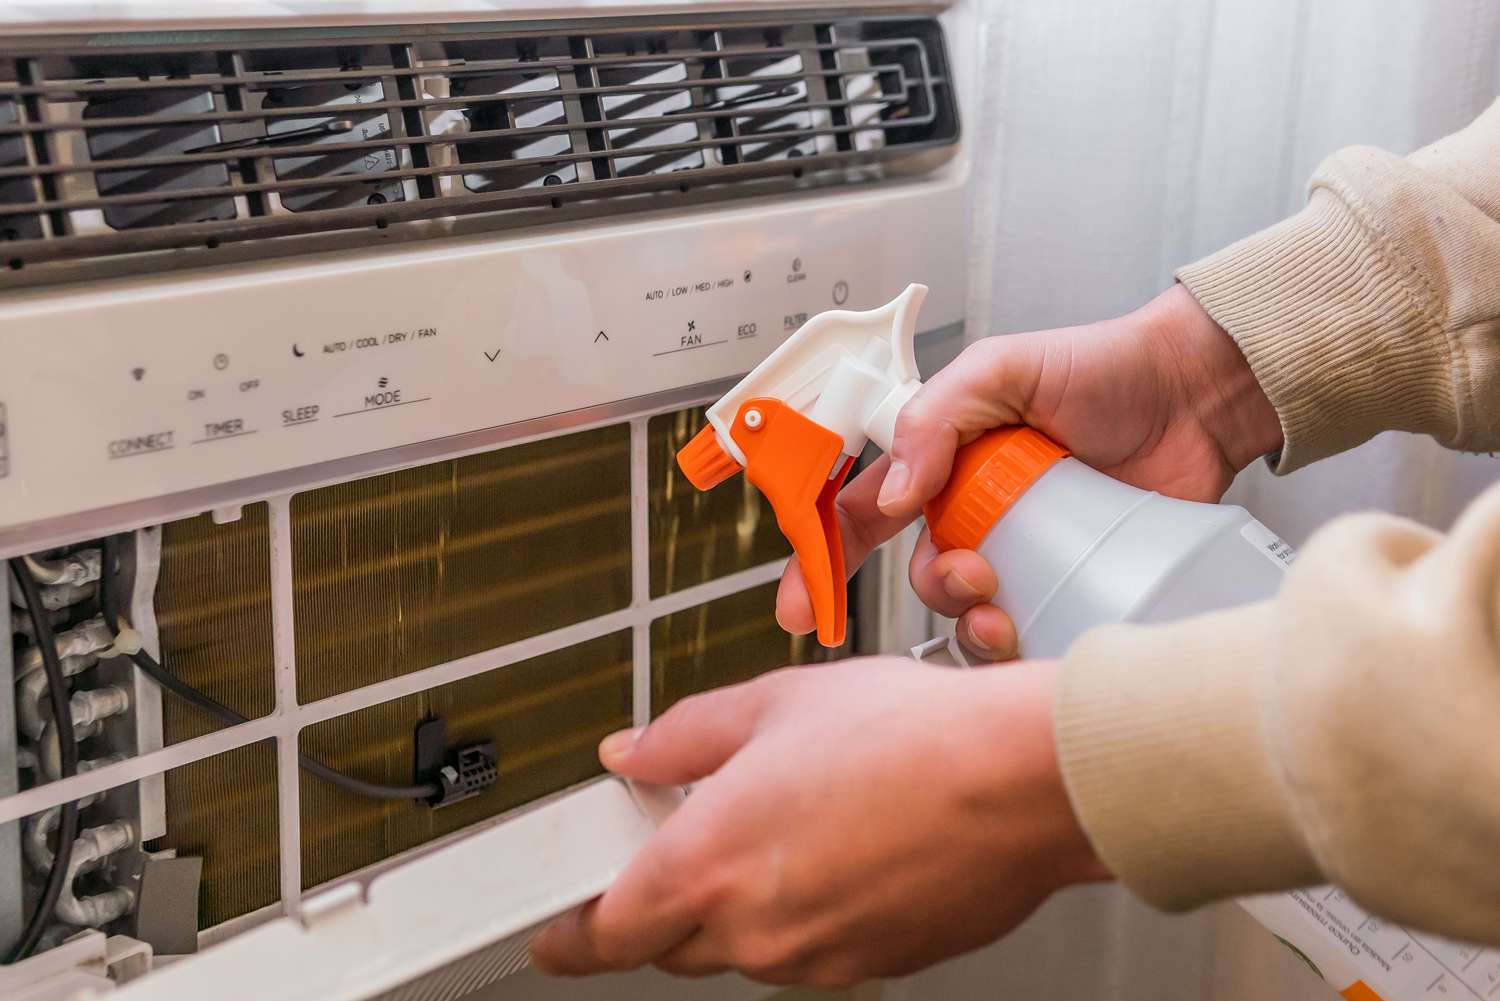
DIY AC coil cleaning is also an option, which can help reduce costs. If you decide to tackle the cleaning yourself, keep in mind that you’ll need to purchase the necessary cleaning supplies and dedicate sufficient time and effort to complete the task properly.
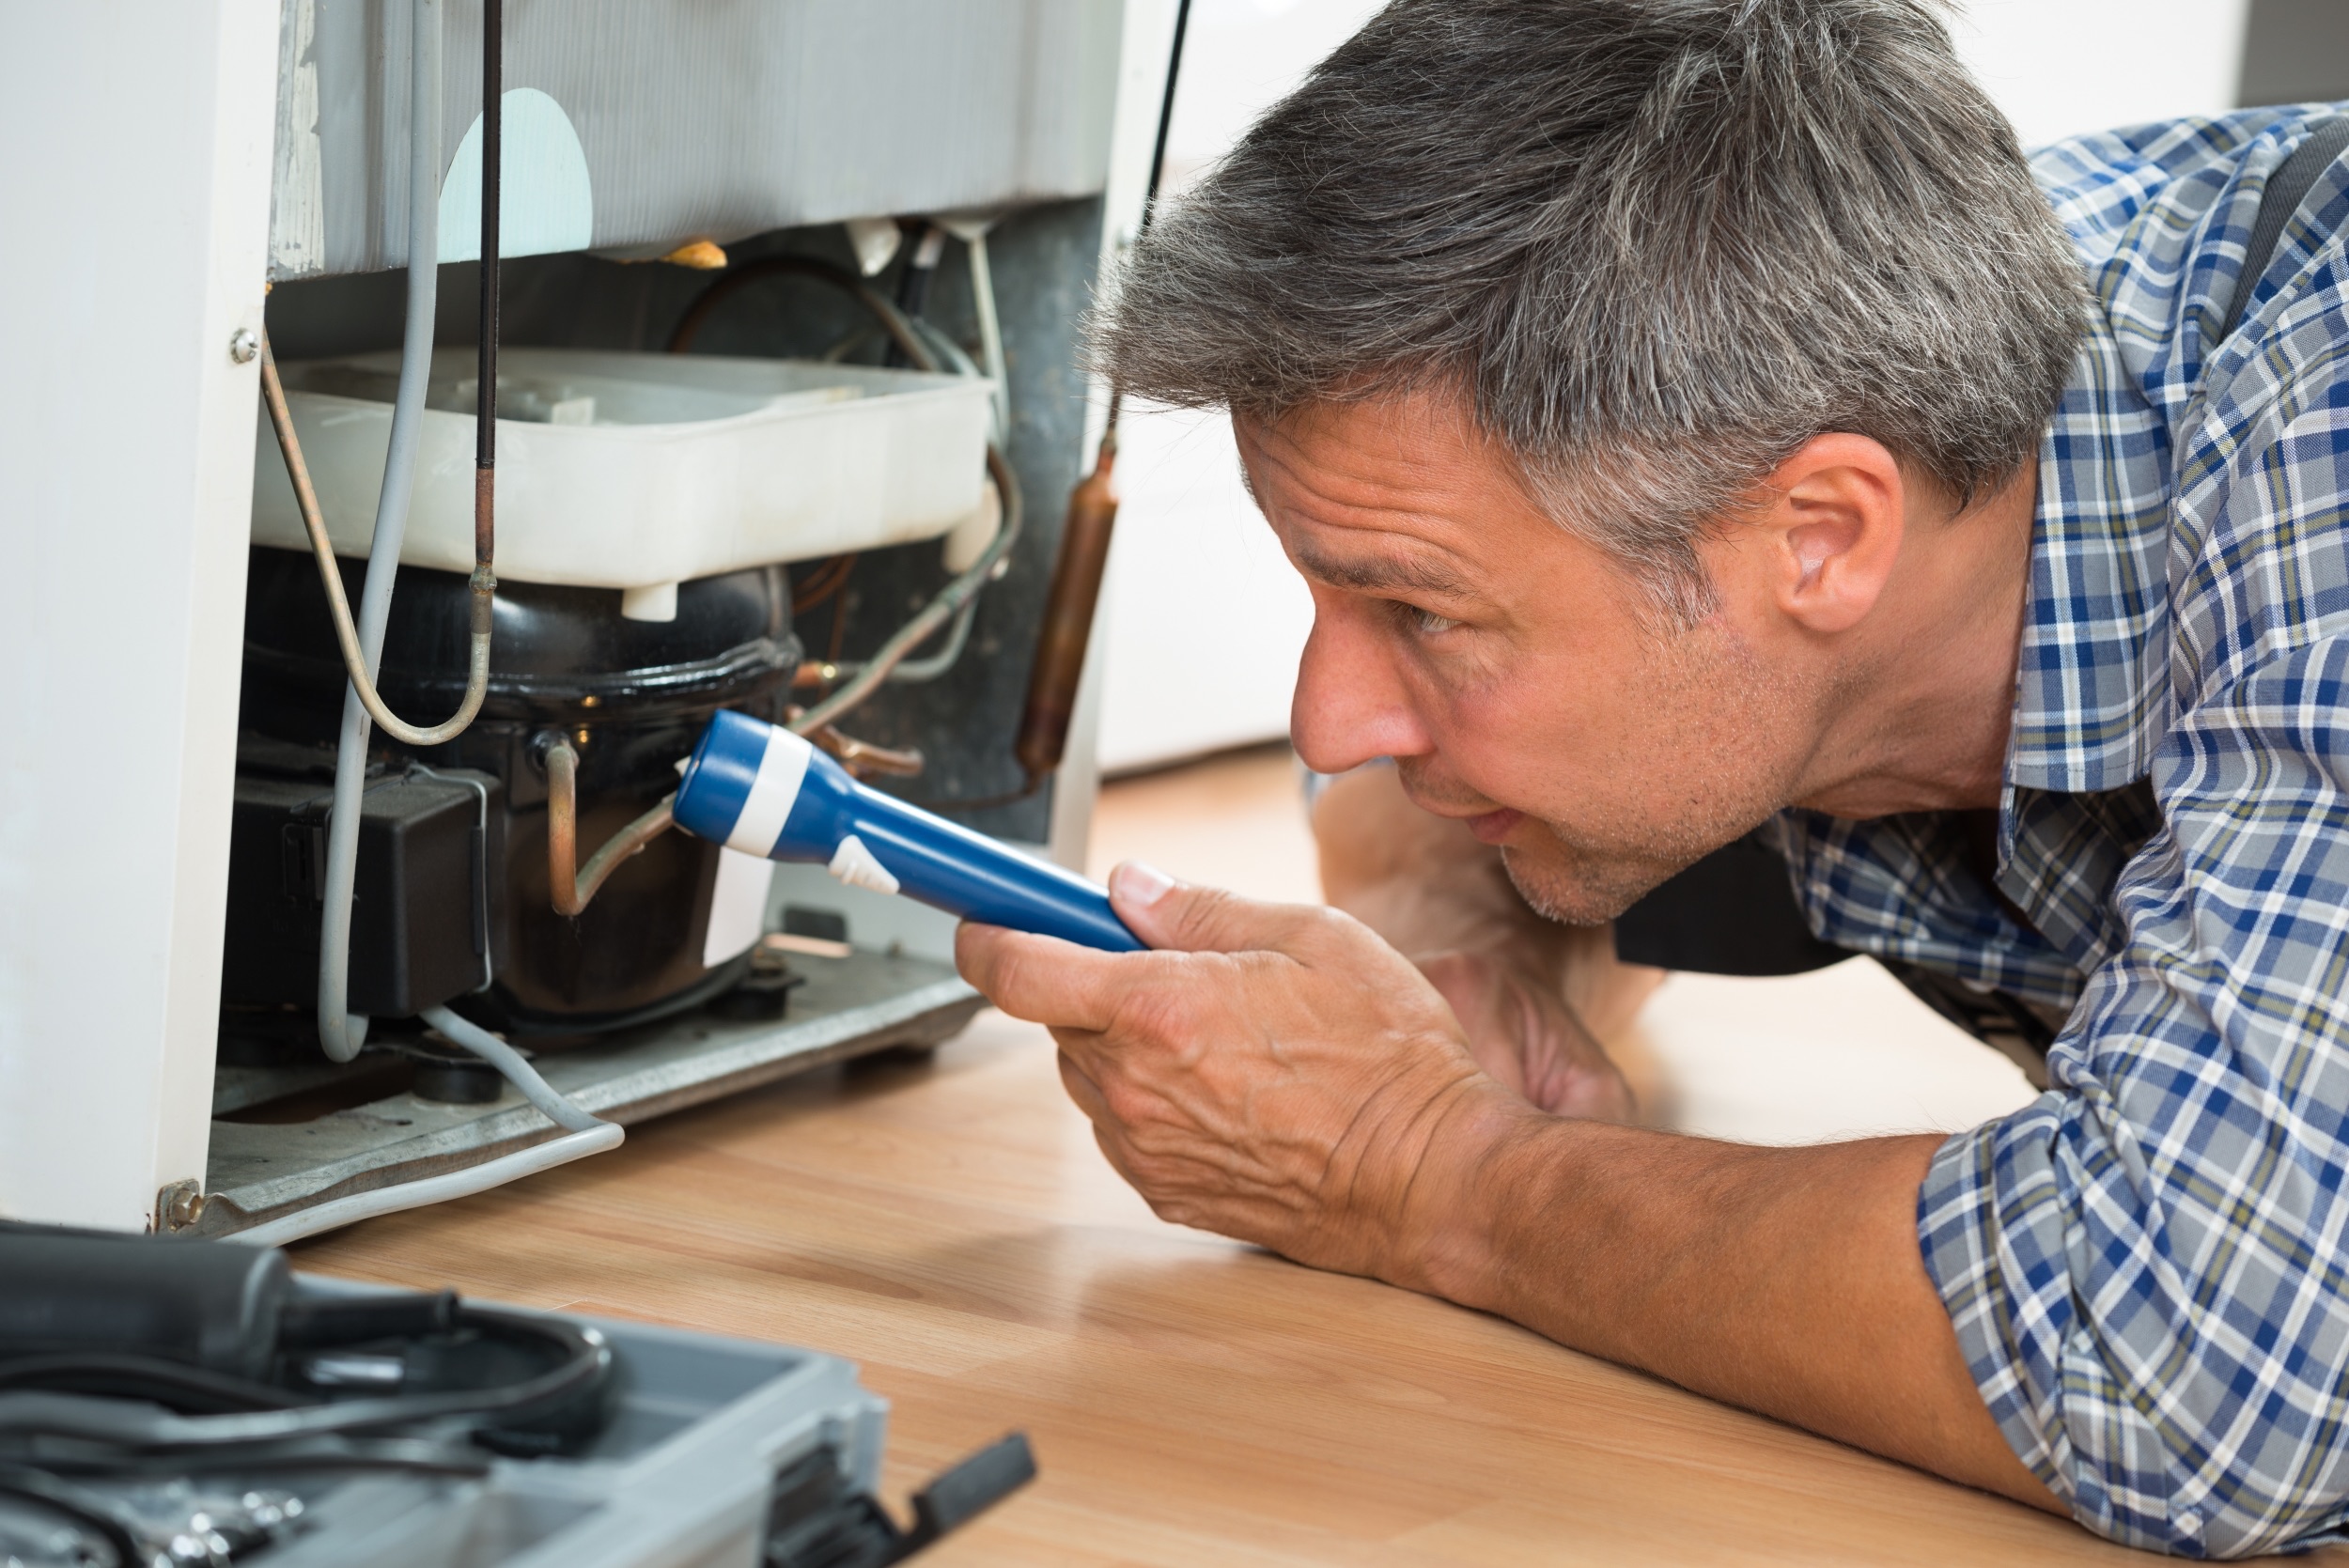
However, it’s essential to approach DIY cleaning with caution, as improper techniques or the use of incorrect detergents can damage the coils or other parts of your AC system. If you’re unsure about undertaking the task yourself or want to ensure a thorough and professional cleaning, it’s advisable to hire a licensed HVAC technician.
While professional AC coil cleaning may come at a higher cost, it offers the advantage of expertise and peace of mind. HVAC technicians have the knowledge, experience, and specialized equipment to clean the coils effectively and safely. They can also inspect the system for any underlying issues or potential maintenance needs, helping to extend the lifespan of your AC unit.
Now that we’ve explored the cost aspect of AC coil cleaning, let’s move on to discussing the pros and cons of DIY cleaning versus hiring a professional.
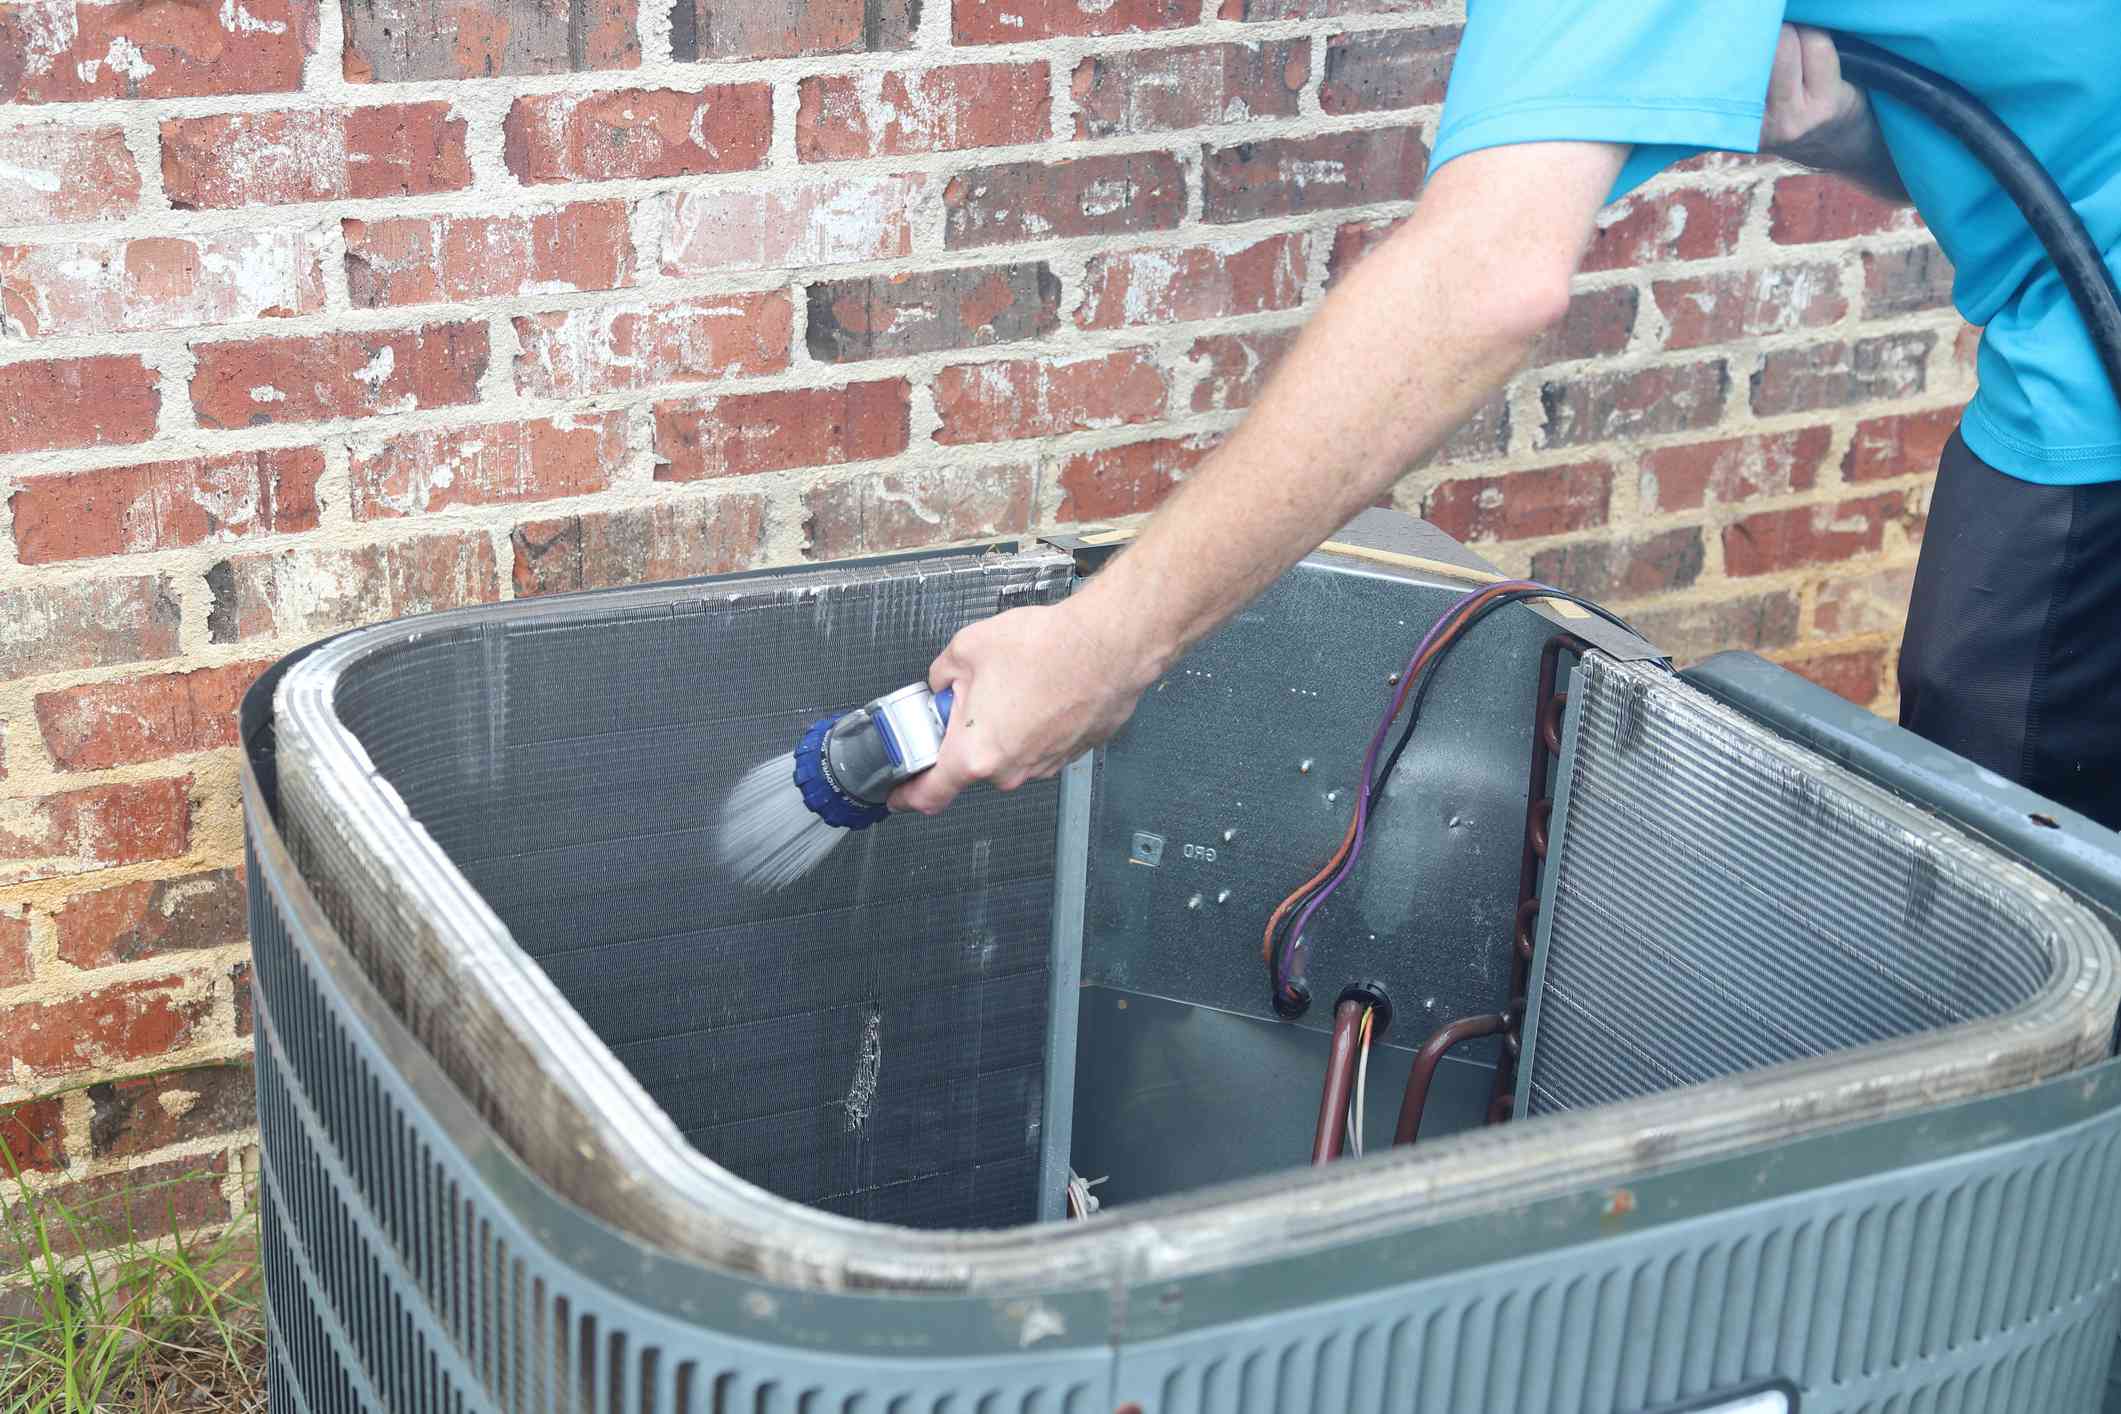
Regularly cleaning your AC coils can improve the efficiency of your system and prolong its lifespan. Use a soft brush or vacuum to remove dirt and debris, and consider professional maintenance for thorough cleaning.
Read more: How To Clean AC Unit Coils
DIY vs Professional AC Coil Cleaning
When it comes to cleaning AC coils, you have the option to tackle the task yourself or hire a professional HVAC technician. Let’s take a look at the pros and cons of each approach:
DIY AC Coil Cleaning:
- Cost Savings: One of the main advantages of DIY AC coil cleaning is the potential cost savings. By undertaking the task yourself, you can avoid the expense of hiring a professional.
- Flexibility and Convenience: DIY cleaning gives you the flexibility to clean the coils at your own convenience. You can schedule the task when it suits you best.
- Learning Opportunity: DIY cleaning allows you to learn more about the inner workings of your AC system. It can be a rewarding experience, providing you with valuable knowledge and skills.
However, there are also some downsides to consider:
- Risk of Damage: Cleaning AC coils requires proper techniques and the use of suitable cleaning agents. Without proper knowledge and experience, there’s a risk of damaging the coils or other components of your AC system.
- Time and Effort: AC coil cleaning can be a labor-intensive task, especially if the coils are heavily soiled. It requires time, effort, and attention to detail to ensure a thorough cleaning job.
- Limited Expertise: As a DIYer, you may lack the expertise and specialized equipment that professional HVAC technicians possess. They have the knowledge and experience to identify any underlying issues or potential maintenance needs while cleaning the coils.
Professional AC Coil Cleaning:
- Expertise and Experience: Hiring a professional HVAC technician ensures that the cleaning job is done properly and efficiently. They have the expertise and experience to perform a thorough cleaning and identify any potential issues.
- Time and Convenience: By outsourcing the task to a professional, you save time and effort. They will take care of the cleaning process, allowing you to focus on other priorities.
- Comprehensive Maintenance: HVAC technicians can provide additional maintenance services, such as inspecting the system for leaks, checking refrigerant levels, and ensuring optimal performance.
Of course, there are some considerations when opting for professional AC coil cleaning:
- Cost: Hiring a professional comes with a cost, which can range depending on the size of your system and the extent of cleaning needed. However, the expertise and peace of mind they provide may outweigh the expense.
- Scheduling: You’ll need to coordinate with the HVAC technician and schedule a time for the cleaning to take place.
Ultimately, the decision between DIY and professional AC coil cleaning depends on your comfort level, budget, and confidence in your abilities. If you’re unsure about the proper techniques or want comprehensive maintenance, it’s advisable to hire a professional HVAC technician.
Now that we’ve covered the DIY and professional options, let’s explore some signs that indicate your AC coils need cleaning.
Signs That Your AC Coils Need Cleaning
Regular maintenance and cleaning of your AC coils are essential to ensure optimal performance and efficiency. Here are some signs that indicate your AC coils may need cleaning:
- Reduced Cooling Efficiency: If you notice that your air conditioner is not cooling your space as effectively as before, dirty AC coils could be the culprit. When the coils are coated with dirt and debris, they struggle to transfer heat, resulting in reduced cooling efficiency.
- Increased Energy Consumption: If your energy bills have been on the rise without any significant changes in usage, it could be due to dirty AC coils. When the coils are dirty, your AC system has to work harder and longer to cool your space, leading to increased energy consumption.
- Frequent System Cycling: Dirty coils can cause your air conditioning system to cycle on and off more frequently. This constant cycling can wear out the components of your AC system and increase the risk of breakdowns.
- Unpleasant Odors: If there is a musty or foul smell coming from your air vents, it could be a sign of mold or mildew growth on the coils. These microorganisms thrive in the presence of moisture and dirt, resulting in unpleasant odors being circulated throughout your space.
- Uneven Cooling: When the coils are dirty, airflow can be restricted, leading to uneven cooling throughout your home. You may notice hot spots or areas that are not as cool as others, indicating the need for coil cleaning.
- Visible Dirt or Dust on Coils: If you inspect your AC unit and notice a visible buildup of dirt or dust on the coils, it’s a clear sign that they need cleaning. The accumulation of debris hinders heat transfer and can impede the overall performance of your air conditioning system.
If you notice any of these signs, it’s important to take prompt action and have your AC coils cleaned. Ignoring dirty coils can lead to reduced cooling capacity, increased energy costs, and potential damage to your AC system.
Now that we’ve discussed the signs indicating the need for AC coil cleaning, let’s explore some tips for maintaining clean AC coils.
Tips for Maintaining Clean AC Coils
Maintaining clean AC coils is crucial for the proper functioning and longevity of your air conditioning system. Here are some tips to help you keep your coils clean:
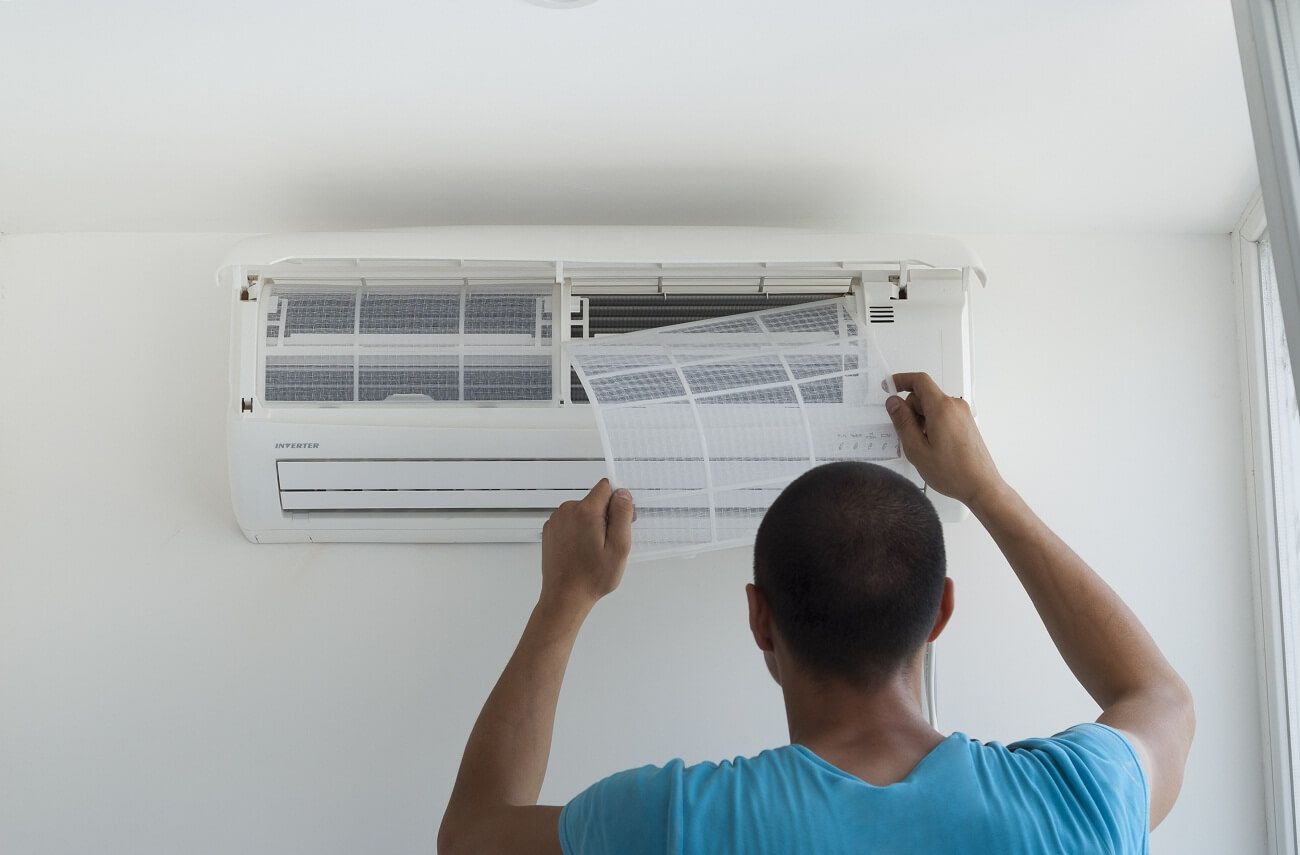
- Regular Filter Replacement: One of the easiest ways to prevent dirt and debris from accumulating on your AC coils is to regularly replace or clean your air filters. Dirty filters can allow particles to bypass the filter and settle on the coils, causing them to get dirty faster.
- Clear Surrounding Debris: Keep the area around your outdoor condenser unit clear of leaves, grass clippings, and other debris. This helps prevent debris from being drawn into the unit and accumulating on the condenser coils.
- Trim Vegetation: Trim any nearby bushes, plants, or trees that can obstruct airflow to the outdoor unit. Proper airflow is essential for maintaining optimal coil performance.
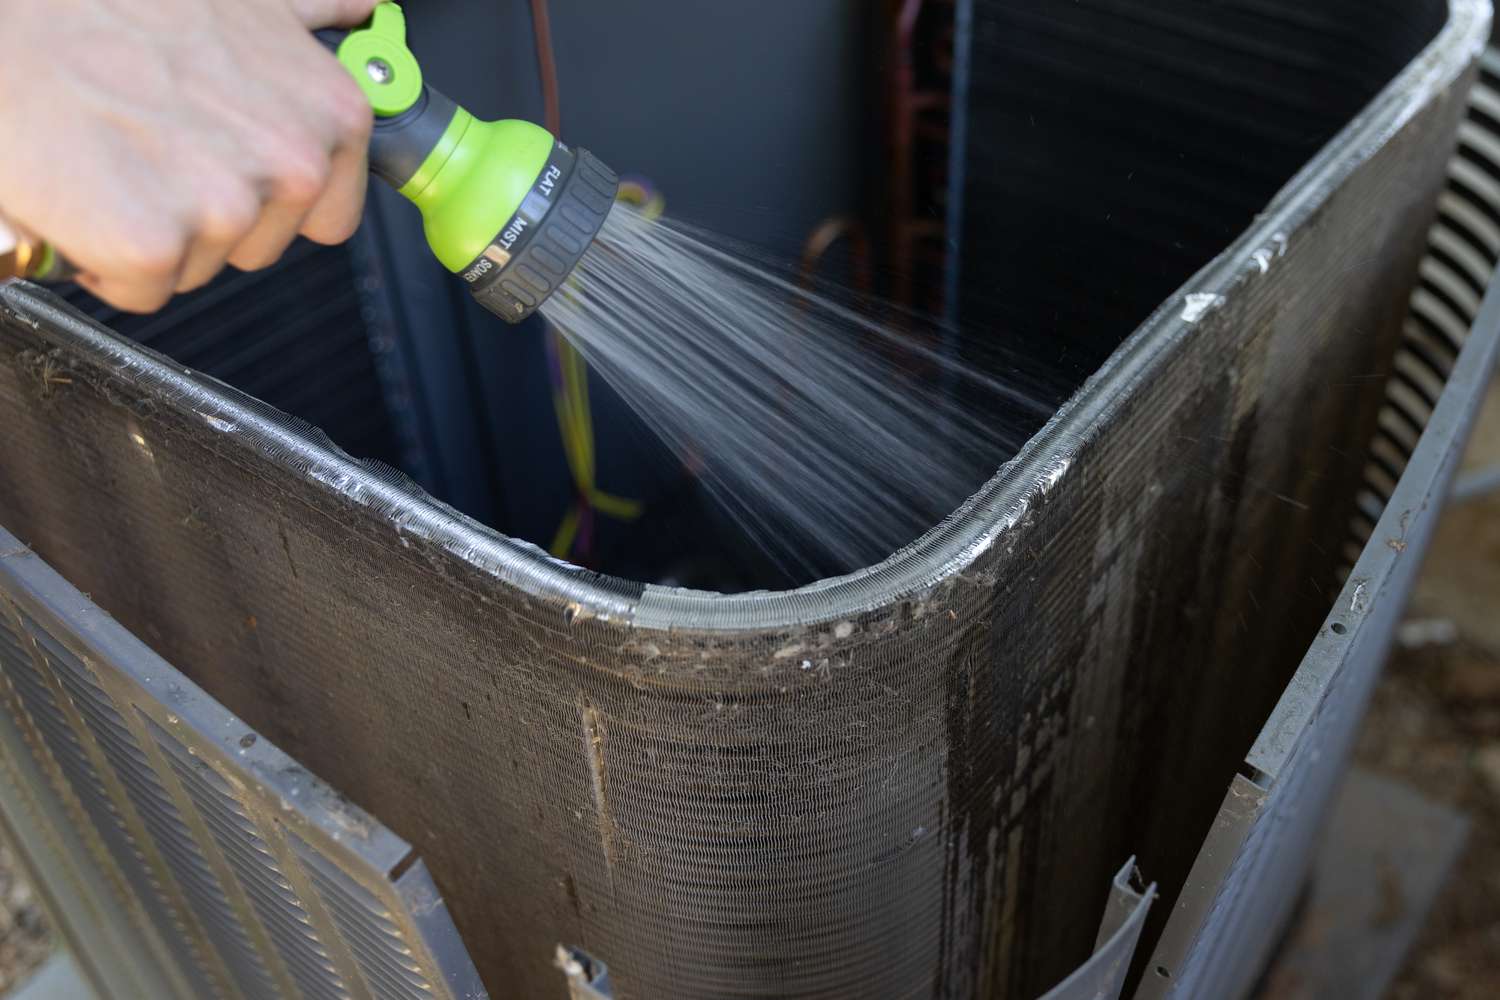
- Gentle Cleaning: If you decide to clean the coils yourself, use a soft brush or a vacuum cleaner with a soft brush attachment to gently remove dirt and debris. Avoid using excessive force or sharp objects that could damage the fins or coils.
- Use Mild Detergents: If you need to clean the coils more thoroughly, you can use a mild detergent mixed with water. Apply the solution to the coils and gently scrub with a soft brush. Rinse with water to remove any residue.
- Professional Maintenance: Consider scheduling professional maintenance for your AC system at least once a year. HVAC technicians can perform a comprehensive cleaning of the coils, as well as inspect other components of the system, ensuring optimal performance and efficiency.
- Protective Covers: During the off-season or when your AC unit is not in use, consider using a protective cover to prevent dirt, debris, and moisture from accumulating on the coils. Be sure to remove the cover before turning on your AC system.
By following these tips, you can help maintain clean AC coils and ensure the efficiency and longevity of your air conditioning system. Regular maintenance and proper coil cleaning practices will keep your AC system running smoothly and help you avoid costly repairs.
Now that we’ve covered the tips for maintaining clean AC coils, let’s summarize what we’ve learned.
Conclusion
Keeping your AC coils clean is essential for the optimal performance and efficiency of your air conditioning system. Dirty coils can lead to reduced cooling capacity, increased energy consumption, and potential damage to your AC unit. By understanding the importance of AC coil cleaning and the factors that can affect the cleaning costs, you can make informed decisions about the maintenance of your system.
While professional AC coil cleaning may come at a higher cost, it offers expertise, convenience, and comprehensive maintenance. Hiring a professional HVAC technician ensures that the cleaning is done properly and safely, while also allowing for the identification of potential issues or maintenance needs.
Alternatively, you have the option of DIY AC coil cleaning, which can help save costs. However, it requires proper techniques, suitable cleaning agents, and dedicated time and effort. It’s crucial to approach DIY cleaning with caution to avoid damaging the coils or other components of your AC system.
Signs that your AC coils need cleaning include reduced cooling efficiency, increased energy consumption, frequent system cycling, unpleasant odors, uneven cooling, and visible dirt or dust on the coils. If you notice any of these signs, it’s important to take action and have your AC coils cleaned promptly.
To maintain clean AC coils, remember to regularly replace or clean your air filters, clear surrounding debris, trim vegetation that obstructs airflow, perform gentle cleaning with soft brushes or vacuums, use mild detergents if needed, consider professional maintenance, and use protective covers when the AC unit is not in use.
In conclusion, by prioritizing the cleaning and maintenance of your AC coils, you can ensure optimal performance, energy efficiency, and a comfortable indoor environment for years to come. Whether you choose to hire a professional or undertake the task yourself, the effort invested in keeping your AC coils clean is well worth the benefits it brings.
Frequently Asked Questions about How Much To Clean AC Coils
Was this page helpful?
At Storables.com, we guarantee accurate and reliable information. Our content, validated by Expert Board Contributors, is crafted following stringent Editorial Policies. We're committed to providing you with well-researched, expert-backed insights for all your informational needs.

0 thoughts on “How Much To Clean AC Coils”