Articles
How To Crochet A Filet Blanket
Modified: February 25, 2024
Learn how to crochet a beautiful filet blanket with our comprehensive articles. Discover new techniques, tips, and patterns to create stunning pieces.
(Many of the links in this article redirect to a specific reviewed product. Your purchase of these products through affiliate links helps to generate commission for Storables.com, at no extra cost. Learn more)
Introduction
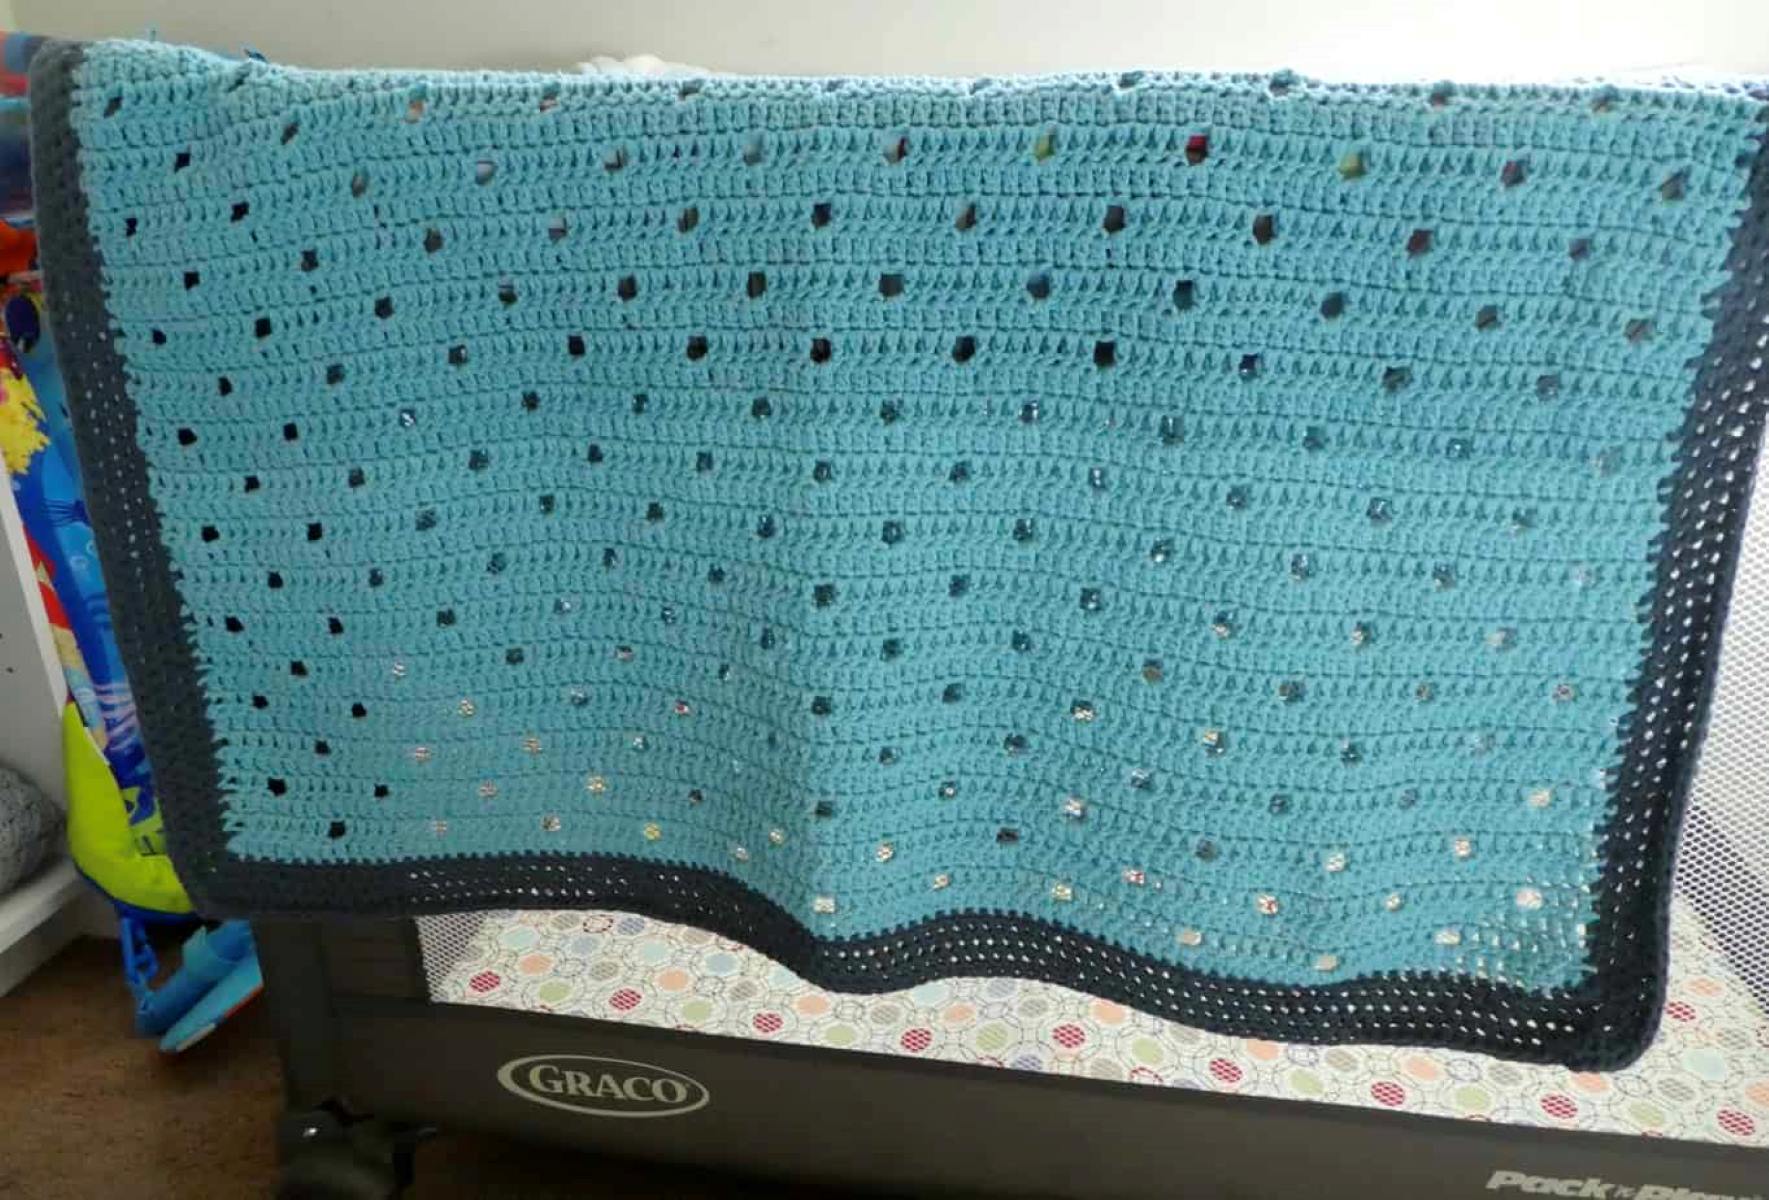
Welcome to the world of crochet! If you’re looking to create a beautiful and versatile blanket, filet crochet is a technique worth exploring. Filet crochet is a unique method that involves creating intricate and delicate patterns using a combination of solid blocks and open spaces. This technique allows you to make stunning designs that are perfect for blankets, shawls, and even home decor items.
In this article, we will guide you through the process of crocheting a filet blanket, from choosing the right yarn and hook size to understanding filet crochet charts and mastering increasing and decreasing techniques. Whether you’re a beginner or an experienced crocheter, this article will provide you with all the information you need to successfully create a filet crochet blanket.
Before we dive into the details, let’s talk about the importance of selecting the right materials for your project.
Key Takeaways:
- Dive into the world of filet crochet and create stunning, personalized blankets using the right yarn, hook size, and mastering techniques like solid blocks, open spaces, increasing, and decreasing.
- Embrace the art of filet crochet to craft unique and cherished blankets. From choosing the perfect materials to reading charts and finishing touches, enjoy the creative journey of crocheting a beautiful and versatile blanket.
Read more: How To Crochet A Blanket For Beginners
Choosing the Right Yarn and Hook Size
When it comes to crocheting a filet blanket, selecting the right yarn and hook size is crucial for achieving the desired look and feel of your project. Here are a few factors to consider when making your choices:
- Yarn Weight: The yarn weight determines the thickness and density of your blanket. For a delicate and lacy filet crochet blanket, choose a lighter weight yarn such as lace or fingering weight. If you prefer a more substantial and cozy blanket, opt for a thicker yarn like sport or worsted weight.
- Fiber Content: The fiber content of the yarn affects the drape, warmth, and care instructions of your finished blanket. Common yarn materials include acrylic, cotton, wool, and blends. Consider the preferences of the recipient and the desired characteristics of the blanket when selecting the fiber.
- Hook Size: The hook size determines the size of the stitches and the overall look of your filet crochet blanket. Different hook sizes can create varied effects, so choose a hook that matches the recommended hook size listed on the yarn label or one that achieves the desired tension and drape for your project.
It’s important to keep in mind that everyone’s tension and gauge may vary, so you may need to adjust your hook size to achieve the desired dimensions and appearance of your filet blanket. Don’t hesitate to experiment with different hook sizes and yarns until you find the perfect combination for your project.
Now that we’ve covered the basics of yarn and hook selection, let’s move on to understanding the fundamentals of filet crochet.
Understanding Filet Crochet
Filet crochet is a technique that involves creating a pattern using solid blocks and open spaces. The name “filet” comes from the French word for “net,” which perfectly describes the lacy and delicate look of the finished work.
In filet crochet, you typically work with two types of stitches: a solid stitch, usually a double crochet, to create the solid blocks, and a chain stitch to create the open spaces. By strategically placing these stitches, you can create intricate designs and patterns.
Filet crochet patterns are often represented using charts, which are grids that show the pattern in a visual format. Each square on the chart represents a stitch, and the symbols inside the squares indicate whether it’s a solid stitch or a chain stitch.
When reading a filet crochet chart, the solid blocks are usually represented by filled squares, and the open spaces are represented by empty squares. You follow the chart from right to left for each row, working the solid stitches and chains as indicated. The chart provides a clear visual guide for creating the pattern.
Keep in mind that filet crochet patterns can range from simple geometric designs to highly intricate images. As a beginner, it’s best to start with simpler patterns and gradually work your way up to more complex ones. This will allow you to build your skills and gain confidence in your filet crochet abilities.
Now that you have a basic understanding of filet crochet, let’s learn how to get started with your filet crochet blanket.
Getting Started with Filet Crochet
Before you begin crocheting your filet blanket, there are a few essential preparations and techniques to familiarize yourself with. Let’s go through the necessary steps to get started:
- Choose a Pattern: Start by selecting a filet crochet pattern for your blanket. There are numerous resources available online and in crochet pattern books. Choose a design that matches your skill level and personal preferences. Consider factors such as the complexity of the pattern, the number of solid blocks and open spaces, and the overall size of the finished blanket.
- Gather Your Materials: Once you’ve chosen a pattern, gather all the materials you’ll need. This includes the specific yarn and hook size recommended in the pattern, as well as any additional tools such as stitch markers or a yarn needle for weaving in ends.
- Practice the Stitches: If you’re new to filet crochet, it’s a good idea to practice the basic stitches before diving into your blanket. Start by practicing the double crochet stitch and chain stitch to ensure that you’re comfortable and confident with these fundamental techniques.
- Check Your Gauge: Filet crochet relies on achieving the correct gauge to ensure that your finished blanket has the desired dimensions. Before starting your blanket, crochet a swatch using the recommended yarn and hook size. Measure the swatch to see if it matches the gauge specified in the pattern. If necessary, adjust your hook size to achieve the correct gauge.
- Follow the Pattern: Now that you’re ready to begin, carefully read through the pattern and familiarize yourself with the chart symbols and instructions. Take it one row at a time, referring to the chart and following the pattern instructions for each solid block and open space. Mark your progress with stitch markers or highlighter tape to help you keep track of where you are in the pattern.
Remember to take your time and enjoy the process of creating your filet crochet blanket. Crocheting a filet blanket requires precision and attention to detail, but with practice and patience, you’ll soon be able to master this beautiful technique.
In the next section, we’ll delve into the process of creating the foundation chain for your filet crochet project.
Creating the Foundation Chain
The foundation chain is the starting point for any crochet project, including your filet blanket. It’s important to create a solid and even foundation chain to ensure the stability and structure of your blanket. Here’s how to create the foundation chain for your filet crochet project:
- Make a Slip Knot: Start by making a slip knot on your crochet hook. To make the slip knot, create a loop with the yarn and insert your hook through the loop. Pull the yarn end to tighten the knot around the hook.
- Hold the Hook Properly: Grip the crochet hook like a pencil or a knife, whichever is more comfortable for you. Find a grip that allows you to control the hook while maintaining a relaxed and comfortable posture.
- Yarn Over: With the slip knot on your hook, bring the yarn over the hook from back to front, crossing it over the top of the hook. This motion is known as “yarn over” and is used in various crochet stitches.
- Insert Hook Into the First Chain: Insert your hook into the first chain stitch of the foundation chain, which is the stitch closest to the slip knot. Ensure that you insert the hook under both loops of the chain stitch, not just one.
- Yarn Over and Pull Through: With the hook inserted into the chain stitch, yarn over once again and pull the yarn through the chain stitch. You should now have two loops on your hook.
- Complete the First Double Crochet: Yarn over once more and pull the yarn through both loops on your hook. This completes the first double crochet stitch of the foundation chain.
- Continue the Foundation Chain: Repeat steps 4 to 6 for the remaining stitches in the foundation chain. Insert the hook into the next chain stitch, yarn over, and pull through to create a double crochet. Continue until you reach the desired length for your foundation chain.
- Count Your Stitches: Once you’ve completed the foundation chain, count the stitches to ensure that you have the correct number specified in the pattern. This step is crucial to maintaining the pattern’s integrity and preventing any errors as you progress.
Remember to keep a relaxed tension on your yarn and stitches. It’s important not to make the foundation chain too tight, as this can make it difficult to insert your hook into the stitches for subsequent rows.
Now that you have your foundation chain, you’re ready to move on to the next step: working the first row of your filet crochet blanket.
Read more: How To Start Crocheting A Blanket
Working the First Row
After creating the foundation chain, it’s time to start working the first row of your filet crochet blanket. This row sets the foundation for the rest of your project and introduces the pattern elements. Here’s how to work the first row:
- Insert Your Hook: Insert your crochet hook into the designated stitch as indicated in the pattern. This stitch will depend on the specific pattern you’re following. Ensure that you insert the hook under both loops of the stitch to create a secure and even fabric.
- Yarn Over: With your hook in the stitch, yarn over by bringing the yarn from the back to the front, crossing it over the top of the hook.
- Pull Through: Once you’ve completed the yarn over, pull the yarn through the stitch. You should now have two loops on your hook.
- Yarn Over and Pull Through: Yarn over once again and pull the yarn through both loops on the hook. This completes the first double crochet stitch of the first row.
- Continue the Row: Repeat steps 1 to 4 for each stitch in the first row. Insert your hook into the next stitch, yarn over, pull through, yarn over, and pull through two loops on the hook. Continue until you’ve completed the first row.
Remember to maintain a consistent tension throughout your stitches, neither too tight nor too loose. This will help create an even and professional-looking fabric for your blanket.
As you work the first row, you may encounter instances where you need to create solid blocks or open spaces according to the pattern. Refer to the chart or written instructions to determine when to work a double crochet for a solid block or skip a stitch for an open space. These elements will form the basis of the filet crochet pattern in your blanket.
Take your time and enjoy the process of working the first row. Once completed, you can visualize the beginning of your filet crochet design taking shape.
In the next section, we’ll explore how to read a filet crochet chart, an integral part of working on your filet blanket.
When crocheting a filet blanket, use a larger hook size to create a more open and lacy design. This will also help the blanket work up faster.
Reading a Filet Crochet Chart
Reading a filet crochet chart is an essential skill when working on your filet crochet blanket. The chart provides a visual representation of the pattern and guides you in creating the desired design. Here’s how to read and understand a filet crochet chart:
- The Chart Grid: The filet crochet chart is displayed as a grid, with each square representing a stitch. The number of squares in each row and column corresponds to the total number of stitches in your pattern.
- Symbol Key: Typically, there will be a symbol key or legend included with the chart. This key explains which symbol represents each type of stitch, such as a solid block or an open space.
- Solid Blocks: Solid blocks are represented by filled-in squares on the chart. These squares indicate where you should work a double crochet stitch in your project. Each filled square represents one stitch.
- Open Spaces: Open spaces are represented by empty squares on the chart. These squares indicate where you should skip a stitch and create an open space in your project. Each empty square represents an unworked stitch.
- Following the Chart: Start at the bottom right corner of the chart and work from right to left for each row. Read the symbols in each square and follow the corresponding stitches indicated by the solid blocks and open spaces.
- Using a Highlighter: A helpful tip when working with a filet crochet chart is to use a highlighter or colored pencil to mark the row you’re currently working on. This can help you keep track of your progress and avoid confusion.
- Checking Your Work: As you work through the chart, periodically step back and take a look at your fabric to ensure that it matches the pattern on the chart. This will allow you to catch any mistakes early on and make any necessary adjustments.
Don’t be intimidated by the chart. With practice, reading a filet crochet chart will become easier and more intuitive. Remember to take it one row at a time and refer back to the chart as needed.
Now that you’re familiar with reading a filet crochet chart, you’re ready to continue creating solid blocks and open spaces to complete your filet crochet blanket.
Creating Solid Blocks and Open Spaces
Creating solid blocks and open spaces is the heart of filet crochet. These elements work together to form intricate patterns and designs in your blanket. Here’s how to create solid blocks and open spaces:
- Solid Blocks: Solid blocks are made by working a double crochet stitch into the designated stitch on the previous row. On the chart, solid blocks are represented by filled squares.
- Open Spaces: Open spaces are created by skipping a stitch on the previous row. This allows for a gap or opening in your fabric. On the chart, open spaces are represented by empty squares.
- Following the Chart: To create solid blocks and open spaces, refer to the filet crochet chart or written instructions. For each stitch indicated as a solid block, work a double crochet into the corresponding stitch on the previous row. For each stitch indicated as an open space, skip a stitch on the previous row.
- Maintaining Consistency: To ensure that your solid blocks and open spaces are consistent throughout the pattern, pay attention to your tension and stitch placement. Keeping a steady tension and working into the correct stitch will help maintain the pattern’s integrity.
- Counting Stitches: As you work through the pattern, count your stitches periodically to ensure that you’re staying on track. This will help you catch any mistakes early on and make any necessary corrections.
- Interpreting the Design: Over time, you’ll become more familiar with the symbols and patterns in filet crochet. You’ll be able to interpret how the solid blocks and open spaces come together to form the overall design of your blanket.
- Experimenting with Colors: Solid blocks and open spaces can be further enhanced by using different colors. Experiment with contrasting or complementary colors to add depth and visual interest to your filet crochet blanket.
Creating solid blocks and open spaces requires practice and attention to detail. As you become more confident and comfortable with filet crochet, you’ll be able to tackle more complex patterns and create stunning designs in your blanket.
In the next section, we’ll explore the techniques of increasing and decreasing in filet crochet.
Increasing and Decreasing in Filet Crochet
In filet crochet, increasing and decreasing techniques are used to shape and modify the size of the design. These techniques allow you to create curves, angles, and various other shapes in your filet crochet blanket. Here’s how to perform increasing and decreasing in filet crochet:
- Increasing: To increase in filet crochet, you need to add stitches to the previous row. This is done by working multiple double crochet stitches into the same stitch. Increase stitches are typically grouped together to create a fuller or wider section. The pattern will indicate when and where to place the increase stitches. This is usually represented in the chart by multiple solid blocks in the same square.
- Decreasing: To decrease in filet crochet, you need to eliminate stitches from the previous row. This is done by skipping stitches or working multiple stitches together into one stitch. Decrease stitches are typically used to create narrowing or tapering sections in your pattern. The pattern will indicate when and where to place the decrease stitches. This is usually represented in the chart by multiple open spaces in the same square.
- Following the Pattern: When working increases and decreases, always refer to the pattern instructions or chart. They will guide you on when and where to perform the necessary stitches. Pay attention to any specific instructions for working the increase or decrease stitches, such as the number of stitches to skip or the number of stitches to work together.
- Maintaining Consistency: As you work the increases and decreases, it’s important to maintain a consistent tension and stitch placement. This will ensure that your fabric remains even and the pattern continues to flow seamlessly. Counting your stitches regularly can help you stay on track and ensure that you’re following the pattern correctly.
- Practice and Experimentation: Increasing and decreasing in filet crochet may require some practice to perfect. Start with simpler patterns that incorporate these techniques and gradually work your way up to more complex designs. Don’t be afraid to experiment and try different variations to see how they change the overall shape and appearance of your blanket.
By mastering the art of increasing and decreasing in filet crochet, you’ll have the ability to create dynamic and visually interesting patterns in your blanket. These techniques add depth, shape, and intricacy to your filet crochet designs.
In the next section, we’ll discuss the importance of finishing and blocking your filet crochet blanket.
Read more: How To Finish A Crochet Blanket
Finishing and Blocking Your Filet Blanket
After completing the main body of your filet crochet blanket, there are a few important steps to take to ensure a polished and professional finish. Finishing touches and blocking can make a significant difference in the overall appearance and drape of your blanket. Here’s how to finish and block your filet crochet blanket:
- Weave in Ends: Start by weaving in all the loose ends of yarn that remain from changing colors or joining new yarn throughout your project. Use a yarn needle to neatly secure the ends into the stitches of your blanket to prevent them from unraveling over time.
- Block Your Blanket: Blocking is the process of gently shaping and stretching your completed crochet piece to even out the stitches and enhance the overall appearance. To block your filet crochet blanket, follow these steps:
- Fill a basin or sink with lukewarm water and add a mild detergent.
- Place your blanket in the water, gently pressing it down to fully submerge it.
- Allow the blanket to soak for 15-20 minutes.
- Remove the blanket from the water and gently squeeze out excess water. Avoid wringing or twisting the blanket, as it could damage the fibers.
- Lay the blanket flat on a clean, absorbent towel.
- Gently reshape the blanket by pulling and stretching it to the desired dimensions. Pay attention to any specific pattern details that should be emphasized.
- Use rust-proof T-shaped pins or blocking wires to secure the blanket’s edges and corners in place.
- Leave the blanket to dry completely in a well-ventilated area, away from direct sunlight or heat sources.
- Finishing Touches: Once your blanket is completely dry, inspect it for any loose stitches or uneven edges. Use a crochet hook or yarn needle to fix any issues and ensure that your blanket looks neat and tidy throughout. Give it a final trim if necessary.
- Store or Gift: Finally, decide how you wish to store or present your filet crochet blanket. Fold it neatly and store it in a cool, dry place to keep it safe and protected. If gifting, wrap it in tissue paper or a special crochet blanket storage bag to protect the delicate fibers.
Finishing and blocking your filet crochet blanket will not only enhance its overall appearance but also help maintain its shape and structure over time. It’s worth taking the extra time and care to complete these steps for a professional and polished final result.
Congratulations! You have successfully created a stunning filet crochet blanket that showcases your skills and creativity. Enjoy the warmth and beauty of your handmade creation or share it as a thoughtful and cherished gift.
If you find joy in crocheting, don’t hesitate to explore other crochet techniques and patterns to expand your skills and create more beautiful projects.
Conclusion
Crocheting a filet blanket is a wonderful way to showcase your creativity and craftsmanship. With the right yarn, hook size, and understanding of filet crochet techniques, you can create a stunning and personalized blanket that will be treasured for years to come.
In this article, we covered the essential steps to crochet a filet blanket. We discussed the importance of choosing the right yarn and hook size, understanding filet crochet, getting started with the foundation chain, working the first row, reading a filet crochet chart, creating solid blocks and open spaces, and mastering increasing and decreasing techniques. We also explored the importance of finishing and blocking your filet blanket for a polished final result.
Remember to take your time, practice, and enjoy the process of crocheting a filet blanket. Each stitch and pattern creates a unique and beautiful fabric that reflects your skill and creativity. Don’t hesitate to experiment with colors, designs, and variations to make your blanket truly one-of-a-kind.
Whether you keep your filet blanket as a cozy addition to your home or gift it to a loved one, it will undoubtedly be cherished and appreciated. Your dedication and love for the craft of crochet shine through in every stitch, making your filet blanket a work of art.
So grab your yarn, pick up your hook, and let your creativity flow as you embark on the journey of crocheting your very own filet blanket. Happy crocheting!
Frequently Asked Questions about How To Crochet A Filet Blanket
Was this page helpful?
At Storables.com, we guarantee accurate and reliable information. Our content, validated by Expert Board Contributors, is crafted following stringent Editorial Policies. We're committed to providing you with well-researched, expert-backed insights for all your informational needs.
0 thoughts on “How To Crochet A Filet Blanket”