Articles
How To Crochet A Blanket For Beginners
Modified: February 25, 2024
Learn the art of crocheting with our beginner-friendly articles. Discover how to create a cozy blanket using easy-to-follow steps and techniques.
(Many of the links in this article redirect to a specific reviewed product. Your purchase of these products through affiliate links helps to generate commission for Storables.com, at no extra cost. Learn more)
Introduction
Learning how to crochet can be a rewarding and relaxing hobby. One of the most popular projects for beginners is crocheting a blanket. Not only is it a practical item to have in your home, but it also allows you to practice and perfect the basic crochet stitches.
In this article, we will guide you through the process of crocheting a blanket for beginners. We will cover everything from the materials you will need to the step-by-step instructions for creating your first blanket. By the end of this article, you will have all the knowledge and skills required to start and complete your own cozy crochet blanket.
Key Takeaways:
- Crocheting a blanket for beginners involves choosing the right materials, mastering basic stitches, and adding personal touches like color changes and fringe. It’s a fulfilling and creative journey that results in a cozy masterpiece.
- The process of crocheting a blanket is not just about creating a practical item; it’s a therapeutic and mindful experience. Embrace imperfections, enjoy the journey, and let your unique style shine through.
Read more: How To Crochet Placemats For Beginners
Materials Needed
Before you begin crocheting your blanket, you will need to gather the necessary materials. Here is a list of items you will need:
- Yarn: Choose a soft and durable yarn in your desired color(s). The amount of yarn needed will depend on the size of the blanket you want to make. For a standard lap-sized blanket, approximately 1200-1500 yards of yarn should be sufficient.
- Crochet Hook: Select a crochet hook that corresponds to the size of your yarn. The size will be indicated on the yarn label. A size H (5mm) or I (5.5mm) hook is commonly used for worsted weight yarn, which is a good choice for beginners.
- Scissors: A pair of sharp scissors is essential for cutting the yarn.
- Tapestry Needle: You will use a tapestry needle to weave in the loose ends of yarn at the end of your project.
- Measuring Tape: A measuring tape is helpful for checking the size and progress of your blanket.
- Stitch Markers (optional): Stitch markers can be useful to mark the beginning of each row or the placement of special stitches.
By having these materials ready, you will be well-prepared to start crocheting your blanket. Now that you’re equipped with the necessary supplies, let’s move on to the basic crochet stitches.
Basic Crochet Stitches
To crochet a blanket, you will need to have a good understanding of the basic crochet stitches. Here are the essential stitches you will use:
- Chain Stitch (ch): The chain stitch is the foundation of crochet. It creates a series of interconnected loops. To make a chain stitch, yarn over (yo) and pull the yarn through the loop on your hook.
- Single Crochet (sc): The single crochet stitch is a simple and versatile stitch. Insert your hook into the designated stitch, yarn over, and pull the yarn through. Yarn over again and pull through both loops on your hook.
- Double Crochet (dc): The double crochet stitch is taller than the single crochet. Yarn over, insert your hook into the designated stitch, yarn over again, and pull the yarn through. Yarn over once more and pull through the first two loops on your hook. Yarn over again and pull through the remaining two loops.
- Half Double Crochet (hdc): The half double crochet stitch is slightly taller than the single crochet but shorter than the double crochet. Yarn over, insert your hook into the designated stitch, yarn over again, and pull the yarn through. Yarn over once more and pull through all three loops on your hook.
These are the fundamental stitches that will form the basis of your crochet blanket. With practice, you will become comfortable with these stitches and be able to create a variety of patterns and textures.
Now that you are familiar with the basic crochet stitches, it’s time to choose the right yarn and hook size for your blanket.
Choosing Yarn and Hook Size
When it comes to crocheting a blanket, choosing the right yarn and hook size is crucial. It will determine the final look and feel of your blanket. Here are some factors to consider:
Yarn Weight: Yarn is classified into different weights, ranging from lace weight to super bulky. For a beginner-friendly blanket, it’s recommended to choose a medium-weight yarn, also known as worsted weight or Aran weight. This yarn is easy to work with and provides a good balance between warmth and drape.
Hook Size: The recommended hook size for a specific yarn can usually be found on the label of the yarn. However, it’s always a good idea to make a gauge swatch before starting your blanket. A gauge swatch will help you determine if your tension is correct and if you need to adjust your hook size to achieve the desired dimensions.
Color and Texture: Consider the color and texture of the yarn you choose. Opt for colors that you find visually pleasing and that will complement your home decor. As for texture, you can choose a smooth yarn for a classic look or a yarn with a textured or variegated pattern for added visual interest.
Remember, the yarn and hook size you choose will ultimately depend on your personal preference and the desired outcome of your blanket. Once you have selected your materials, it’s time to get started on crocheting your blanket.
In the next section, we will guide you through the process of making the foundation chain, the first step in creating your blanket.
Starting the Blanket
Now that you have all your materials ready, it’s time to start crocheting your blanket. Follow these steps to begin:
- Making the Foundation Chain: To start your blanket, you will first create a foundation chain. This chain serves as the base for your stitches. To make the foundation chain, make a slip knot and slide it onto your crochet hook. Then, yarn over and pull the yarn through the slip knot. Continue this process, alternating between yarn over and pulling through the loop until you reach the desired length of your chain.
- Working the First Row: Once you have your foundation chain, it’s time to work the first row of stitches. Depending on the pattern you’re following, you may be instructed to work into the back loops, front loops, or both loops of the chain. Follow the instructions provided to complete the first row of stitches.
- Continuing with Rows: After completing the first row, it’s time to continue working rows of stitches. Each row will follow a similar pattern of making stitches into the designated loops or stitches of the previous row. Pay attention to any increases or decreases specified in the pattern to maintain the shape and size of your blanket.
As you work on your blanket, remember to maintain an even tension and check the dimensions periodically to ensure you’re on track. Crocheting a blanket is a time-consuming project, so be patient and enjoy the process.
In the next section, we will explore how to change colors in your blanket to add more visual interest and design possibilities.
Read more: How To Start Crocheting A Blanket
Making the Foundation Chain
The foundation chain is the starting point for your crochet blanket. It acts as the base on which you will work the following rows of stitches. Follow these steps to create the foundation chain:
- Create a Slip Knot: To begin, make a slip knot with your yarn. This will ensure that your chain is secure and easy to work with. Start by making a loop with the yarn, leaving a tail that is approximately 4-6 inches long. Insert your hook through the loop, yarn over, and pull the yarn through the loop. Gently tighten the slip knot around the hook.
- Begin the Chain: With the slip knot on your hook, yarn over and pull the yarn through the slip knot. This creates the first loop of your chain. Repeat this process for each subsequent loop.
- Count Your Stitches: As you create the chain, count the number of stitches to ensure you have the desired length for your blanket. You can use a measuring tape or simply estimate the length by comparing it to the size of your intended blanket.
It’s important to maintain an even tension as you form the stitches in your foundation chain. If your chain becomes too tight or too loose, it can affect the overall appearance and size of your blanket.
Once you have completed the foundation chain, you are ready to move on to the next step: working the first row of stitches. The specific stitches and pattern will depend on the design of your blanket, so be sure to follow the instructions provided in your chosen crochet pattern or the design you have in mind.
Now that you have mastered the foundation chain, you can confidently start crocheting your blanket. In the next section, we will guide you through working the first row of stitches.
When starting to crochet a blanket as a beginner, choose a simple stitch pattern and a large hook size to make the project easier and faster to complete.
Working the First Row
After creating the foundation chain, it is time to work the first row of stitches in your crochet blanket. The specific stitches and pattern for the first row will depend on the design you are following or the technique you are using. Here is a general guide to help you get started:
- Read the Pattern: If you are following a crochet pattern, carefully read through the instructions for the first row. Pay attention to any special stitches or techniques that may be required.
- Start the First Stitch: Begin by working into the second chain from your hook, unless otherwise instructed. Insert your hook into the designated stitch of the foundation chain.
- Make the Stitch: Depending on the desired stitch for your pattern, you will yarn over and pull the yarn through the stitch in various combinations. For example, if you are working single crochet stitches, yarn over and pull through both the stitch and the loop on your hook.
- Continue the Row: Repeat the stitch pattern across the row, working into each chain stitch until you reach the end.
It is important to keep an even tension with your stitches as you work the first row. This will ensure that the stitches are uniform in size and appearance. Take your time and practice if needed to achieve consistency.
Remember, the first row sets the foundation for the rest of your blanket, so double-check your stitch count and make any necessary adjustments to maintain the desired width of your project.
Once you have completed the first row, take a moment to admire your progress! You are now ready to continue with subsequent rows and see your crochet blanket take shape.
In the next section, we will discuss how to continue working rows to build upon the foundation you have created.
Continuing with Rows
Now that you have completed the first row of stitches in your crochet blanket, it’s time to continue working subsequent rows. Each row you work builds upon the previous ones, gradually increasing the size of your blanket. Here’s how to continue with your rows:
- Turn Your Work: After completing a row, turn your work clockwise to prepare for the next row. This will position your crochet hook to work from the opposite side.
- Create a Turning Chain: Before you begin the next row, create a turning chain. The turning chain serves as the height for the next row’s stitches. The number of chains needed will depend on the type of stitch you are working with. For example, to work a row of single crochets, chain one. For double crochets, chain two or three.
- Work into the Stitches: Insert your hook into the first stitch of the previous row, following the pattern or instructions you are working with. Complete the designated stitch for that row, such as single crochet, double crochet, or half double crochet. Continue working the specified stitches across the row.
- Repeat the Process: Continue turning your work, creating a turning chain, and working into the stitches for each subsequent row. Always follow the pattern instructions and repeat the stitch pattern until you reach the desired length or reach the end of your yarn.
As you work on each row, pay attention to your tension and make sure your loops are consistent in size. This will help ensure a uniform and professional-looking blanket.
Remember to periodically check the dimensions of your blanket and compare them to your desired size. Make adjustments as necessary to maintain the correct width and length.
Continue working rows until your blanket reaches your desired length or until you have used up all of your yarn. Once you have completed your final row, it’s time to finish off your blanket.
In the next section, we will discuss how to change colors in your blanket to add some visual interest and design possibilities.
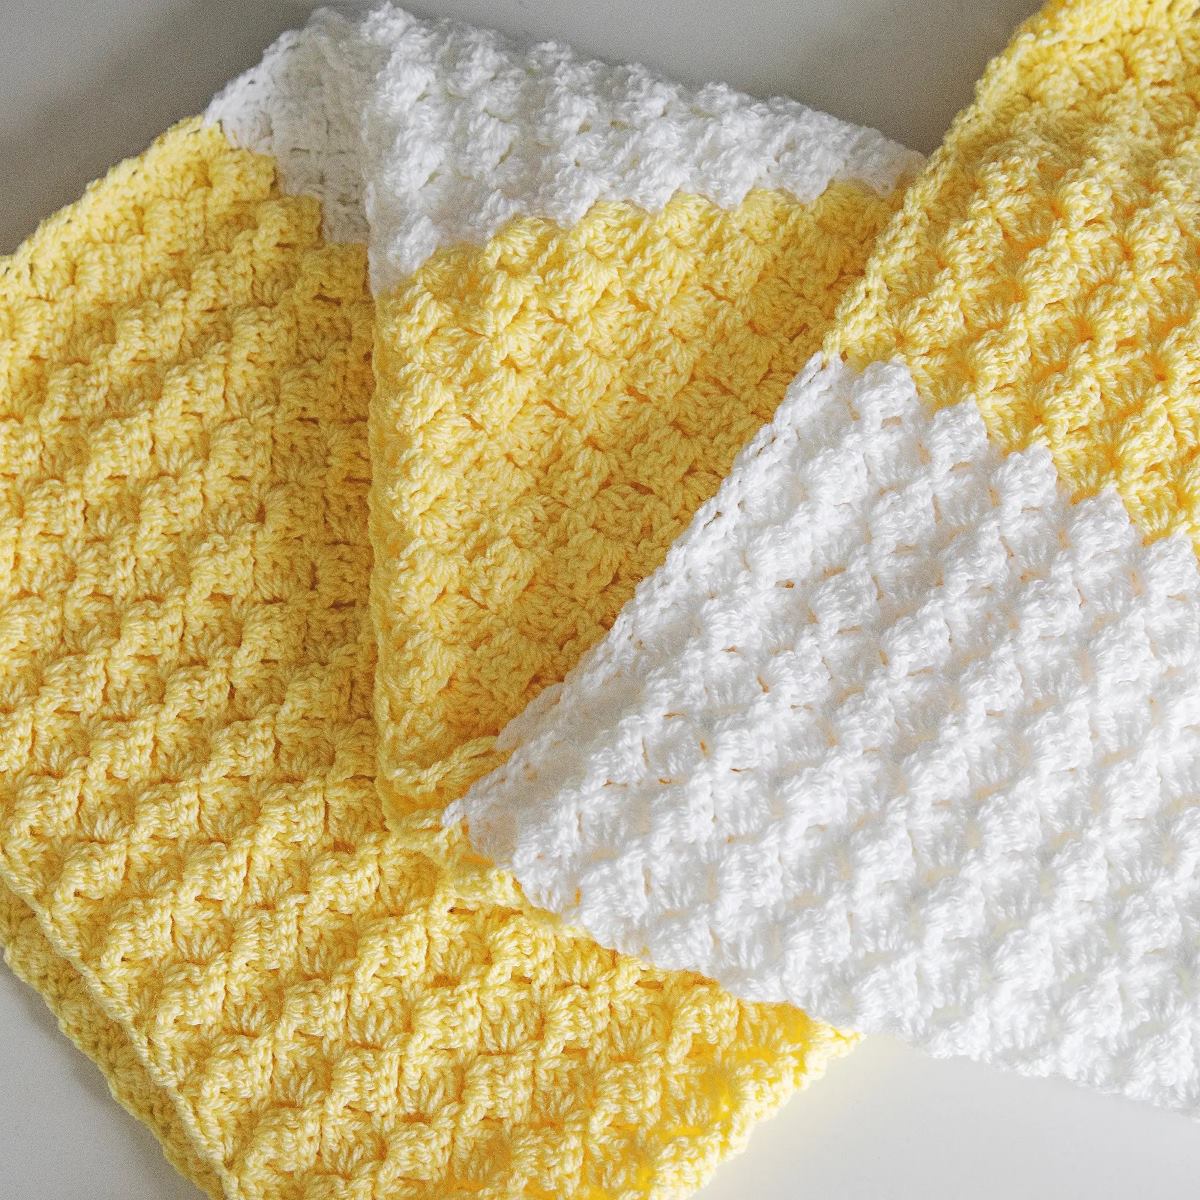
Changing Colors
Changing colors in your crochet blanket can add a beautiful and vibrant touch to your project. Whether you want to create stripes, a color gradient, or incorporate multiple colors into your design, here’s how you can change colors:
- Preparation: Before changing colors, make sure you are at the end of a row or stitch. To secure the yarn, finish the final stitch of the row as usual, but leave a long tail of the current color that you can weave in later.
- Planning: Determine where you want to change colors in your design. This could be at the beginning of a row, in the middle of a row, or at a specific stitch, depending on the pattern or desired effect. Mark the exact spot with a stitch marker if needed.
- Joining a New Color: To join a new color, start by completing the last stitch of the current color. Before making the final yarn over and pull through to complete the stitch, drop the old color and pick up the new color. Yarn over with the new color and pull it through the loops on your hook to complete the stitch with the new color.
- Weaving in Ends: After changing colors, you will have loose ends of yarn to weave in. To do this, thread the tail of the old color onto a tapestry needle and weave it through the stitches on the backside of your work for several inches. Repeat this process with the tail end of the new color to secure it as well.
When changing colors, it’s essential to carry the unused color along the edge of your work to avoid loose strands on the back. This technique is commonly used in colorwork projects where you alternate between colors in different rows or stitches.
Experiment with different color combinations and patterns to create a unique and visually appealing design. You can also refer to crochet patterns or color charts for inspiration.
Now that you know how to change colors, you can add stunning color variations to your crochet blanket. In the next section, we will discuss the finishing touches to complete your blanket.
Read more: How To Finish A Crochet Blanket
Finishing the Blanket
Once you have reached the desired length and completed the final row of your crochet blanket, it’s time to finish off your project. Here are a few steps to help you complete your blanket:
- Fasten Off: To secure your last stitch, cut the yarn, leaving a tail that is approximately 6 inches long. Yarn over and pull the tail all the way through the loop on your hook to fasten off. This will prevent your work from unraveling.
- Weave in Ends: Take the tail of yarn and thread it onto a tapestry needle. Weave the needle through the stitches on the backside of your work to hide the yarn end. Continue weaving back and forth, going in different directions, for several inches to ensure that the yarn is securely woven in.
- Block Your Blanket (optional): Blocking is the process of shaping and setting your crochet project by steam or wetting it and laying it flat to dry. This step helps to even out stitches and give your blanket a professional finish. Follow the blocking instructions for the specific yarn you used.
After completing these steps, take a moment to admire your finished crochet blanket. You have created a beautiful and cozy piece that you can be proud of. Whether you plan to keep it for yourself or gift it to someone special, it is sure to be cherished.
If you want to add a decorative touch to your blanket, you can also consider adding fringe. Although optional, fringe can add texture and a playful element to the edges of your blanket.
In the next section, we will discuss how to add fringe to your crochet blanket, if desired.
Adding Fringe (Optional)
If you want to add an extra decorative touch to your crochet blanket, you can consider adding fringe. Fringe can give your blanket a stylish and playful look. Here’s how you can add fringe to your blanket:
- Gather Your Materials: You will need the same yarn used in your blanket, scissors, and a ruler or cardboard cut to the desired fringe length.
- Cut the Fringe: Determine the length of your fringe. You can use a ruler or wrap yarn around a cardboard cutout to ensure consistency. Cut multiple strands of yarn twice the desired length of your fringe.
- Attach the Fringe: Fold a strand of yarn in half to form a loop. Insert your crochet hook from front to back through a stitch at the edge of your blanket. Place the loop on the hook and pull it halfway through the stitch. Then, pull the loose ends of the yarn through the loop and tighten it to create a secure knot. Repeat this process across the edge of your blanket, evenly spacing the fringe strands.
- Trim the Fringe: Once all the fringe strands are attached, use scissors to trim them to an even length. Be cautious not to cut the main body of the blanket while trimming.
Adding fringe allows you to personalize your crochet blanket and create a unique and stylish look. You can choose to have shorter or longer fringe, or even mix different colors of yarn for a more intricate design.
Once you have added the fringe, take a step back and admire your finished crochet blanket. It’s now ready to be enjoyed and cherished for years to come.
Crocheting a blanket for beginners is a fulfilling and rewarding project. With practice and time, you can create beautiful and cozy blankets for yourself, your loved ones, or even for charitable donations.
Remember to have fun and enjoy the process of crocheting. Each stitch is a step closer to completing your masterpiece. Happy crocheting!
Conclusion
Crocheting a blanket for beginners is an exciting journey that allows you to unleash your creativity and create a cozy and beautiful piece of art. Throughout this article, we have covered the essential steps and techniques to guide you through the process.
We started by discussing the materials you will need, such as yarn, crochet hook, scissors, and tapestry needle. Understanding the basics of crochet stitches, including the chain stitch, single crochet, double crochet, and half double crochet, is crucial for successfully crocheting a blanket.
We then delved into choosing the right yarn and hook size, as well as how to start your blanket with a foundation chain and work the first row of stitches. Continuing with subsequent rows, following patterns or instructions, is key to building upon your work and creating the desired size and shape of your blanket.
We explored the option of changing colors in your blanket to add visual interest and design possibilities. Additionally, we discussed the importance of finishing off your blanket by fastening off, weaving in ends, and optional blocking to achieve a polished look.
If you desire, adding fringe can give your crochet blanket a decorative and playful touch. It allows you to personalize your creation and add an extra flair to the edges of your blanket.
Crocheting a blanket is not only a creative process but also a journey of relaxation, mindfulness, and self-expression. The repetitive motions and the soft textures of the yarn can be incredibly therapeutic and soothing.
Remember, crocheting is an art form that takes time and practice. Don’t be discouraged if you make mistakes along the way. Embrace the imperfections, learn from them, and let your unique style shine through.
Now that you have gained knowledge and skills in crocheting a blanket for beginners, it’s time to pick up your crochet hook, select your favorite yarn colors, and embark on your crochet adventure. Enjoy the process, let your creativity guide you, and create a beautiful, cozy, and cherished blanket.
Happy crocheting!
Frequently Asked Questions about How To Crochet A Blanket For Beginners
Was this page helpful?
At Storables.com, we guarantee accurate and reliable information. Our content, validated by Expert Board Contributors, is crafted following stringent Editorial Policies. We're committed to providing you with well-researched, expert-backed insights for all your informational needs.