Articles
How To Make A Baby Blanket
Modified: February 17, 2024
Learn how to make a cozy baby blanket with our informative articles. Discover helpful tips, step-by-step instructions, and creative ideas for crafting the perfect blanket.
(Many of the links in this article redirect to a specific reviewed product. Your purchase of these products through affiliate links helps to generate commission for Storables.com, at no extra cost. Learn more)
Introduction
Creating a baby blanket is not only a practical project but also a wonderful way to express your love and care for the little ones in your life. Whether you’re a seasoned seamstress or a beginner looking to embark on a new creative journey, making a baby blanket can be a rewarding and enjoyable experience.
A baby blanket is more than just a piece of fabric; it becomes a cherished item that provides warmth, comfort, and security to a baby. It can also serve as a lasting memento, reminding both the parents and the child of the time and effort put into creating something unique and special. With a little guidance and a few simple steps, you can make a beautiful and personalized baby blanket that will be treasured for years to come.
Before you start making your baby blanket, it’s important to consider a few key factors. This article will guide you through the process of choosing the right fabric, selecting the perfect size, picking an ideal design and pattern, gathering the necessary supplies, preparing the fabric, adding personalized touches, sewing the blanket, adding finishing touches, and finally, cleaning and care instructions.
So, let’s dive in and discover how to make a baby blanket that is not only functional but also a true labor of love.
Key Takeaways:
- Choosing the right fabric, size, and design is crucial for creating a personalized and comfortable baby blanket. Consider the baby’s safety, the season, and your creativity to make a cherished keepsake.
- Adding personalized touches and finishing details elevates the baby blanket, making it truly one-of-a-kind. Follow proper cleaning and care instructions to ensure the blanket remains a treasured item for years to come.
Read more: How To Make A Taggie Blanket For A Baby
Choosing the Right Fabric
When it comes to choosing the fabric for your baby blanket, softness, comfort, and durability are key factors to consider. Babies have delicate skin, so opt for fabrics that are gentle and hypoallergenic. Here are a few popular fabric options that are suitable for baby blankets:
- Cotton: Cotton fabrics are a top choice for baby blankets due to their softness, breathability, and ease of care. Look for high-quality, organic cotton that is free from chemicals and pesticides.
- Flannel: Flannel is a warm and cozy fabric that is perfect for colder climates or cooler seasons. It has a brushed surface that creates a soft and fuzzy texture, providing additional comfort to the baby.
- Minky: Minky fabric is incredibly plush and luxurious, making it a popular choice for baby blankets. It has a silky smooth texture that babies love, and it comes in a wide range of colors and patterns to suit your preferences.
- Bamboo: Bamboo fabric is known for its natural antimicrobial properties and moisture-wicking abilities, making it an excellent choice for a baby blanket. It is also eco-friendly and sustainable.
- Fleece: Fleece is a soft and lightweight fabric that provides warmth without being too heavy. It is easy to care for and comes in various colors and prints.
When selecting the fabric, consider the season and climate. For warmer weather, lightweight and breathable fabrics like cotton would be ideal. For colder weather, opt for fleece or flannel fabrics to keep the baby cozy and snug.
It’s also essential to choose fabrics that are easy to clean. Babies can be messy, so look for fabrics that are machine washable and can withstand frequent washing without losing their softness or color.
Additionally, consider the aesthetic appeal of the fabric. Choose colors and patterns that reflect your personal style or coordinate with the nursery decor. Remember that the baby blanket will not only be functional but also serve as a decorative item.
By carefully selecting the right fabric for your baby blanket, you can ensure that it will provide both comfort and beauty to the baby for years to come.
Selecting the Perfect Size
When it comes to selecting the size of your baby blanket, there are a few factors to consider, including the intended use, the age of the baby, and personal preference. Here are some guidelines to help you choose the perfect size:
- Standard Sizes: There are standard sizes for baby blankets that you can follow. A popular size is around 30 inches by 40 inches, which provides enough coverage for a baby, is easy to carry, and can be used in various settings.
- Swaddling Blankets: If you plan to use the blanket primarily for swaddling, consider a smaller size, like 30 inches by 30 inches or even 28 inches by 28 inches. These sizes are perfect for wrapping the baby snugly while allowing freedom of movement for their tiny limbs.
- Stroller or Car Seat Blankets: If you want a blanket specifically for stroller or car seat use, opt for a smaller size, like 20 inches by 30 inches. This size is convenient and easily portable, providing comfort and warmth during outings.
- Toddler Blankets: For older babies or toddlers, you may want to consider a larger size, such as 40 inches by 60 inches. This size offers more coverage and can be used as a cozy blanket for nap time or as a play mat.
- Personal Preference: Ultimately, the size of the baby blanket comes down to personal preference. Consider your own comfort level and what feels right to you. Just ensure that the blanket is not too large or too small to be practical and usable.
It’s important to note that babies grow quickly, so you may want to choose a size that allows for some room to grow. A slightly larger blanket can be used for a longer period as the baby grows into it, ensuring longevity and usability.
Regardless of the size you choose, make sure that the blanket is lightweight and easy to handle. Babies are delicate, so you want a size that is manageable for you to carry and wrap around the baby comfortably.
By considering the intended use, age of the baby, personal preference, and room for growth, you can select the perfect size for your baby blanket, ensuring both practicality and comfort for your little one.
Picking the Ideal Design and Pattern
When it comes to picking the design and pattern for your baby blanket, the options are endless. This is your opportunity to get creative and add a personal touch to your project. Here are some tips to help you pick the ideal design and pattern:
- Theme or Nursery Décor: Consider the overall theme or nursery décor when choosing the design and pattern for the baby blanket. You can opt for a matching design that complements the nursery’s colors and theme, or go for a contrasting pattern to add visual interest.
- Gender: If you know the baby’s gender, you may want to select a design and pattern that reflects it. For instance, you can choose pastel colors and floral patterns for girls or bold colors and geometric shapes for boys. However, feel free to break free from traditional gender stereotypes and choose designs that resonate with your personal style.
- Personalized Touch: Consider adding a personalized touch to the baby blanket by incorporating the baby’s name or initials into the design. This can be done through embroidery, appliqué, or fabric painting. It adds a special and meaningful element to the blanket.
- Season and Occasion: Think about the season or occasion for which you are making the blanket. For example, if it’s for a winter baby, you can choose a design with snowflakes or holiday-themed patterns. If it’s for a summer baby, you can opt for cheerful, bright colors and beach-inspired motifs.
- Animal or Character Themes: Animal or character-themed designs are always a hit with babies and parents alike. Whether it’s cute animals like elephants or owls or beloved characters from books or cartoons, these patterns add a playful and whimsical touch to the baby blanket.
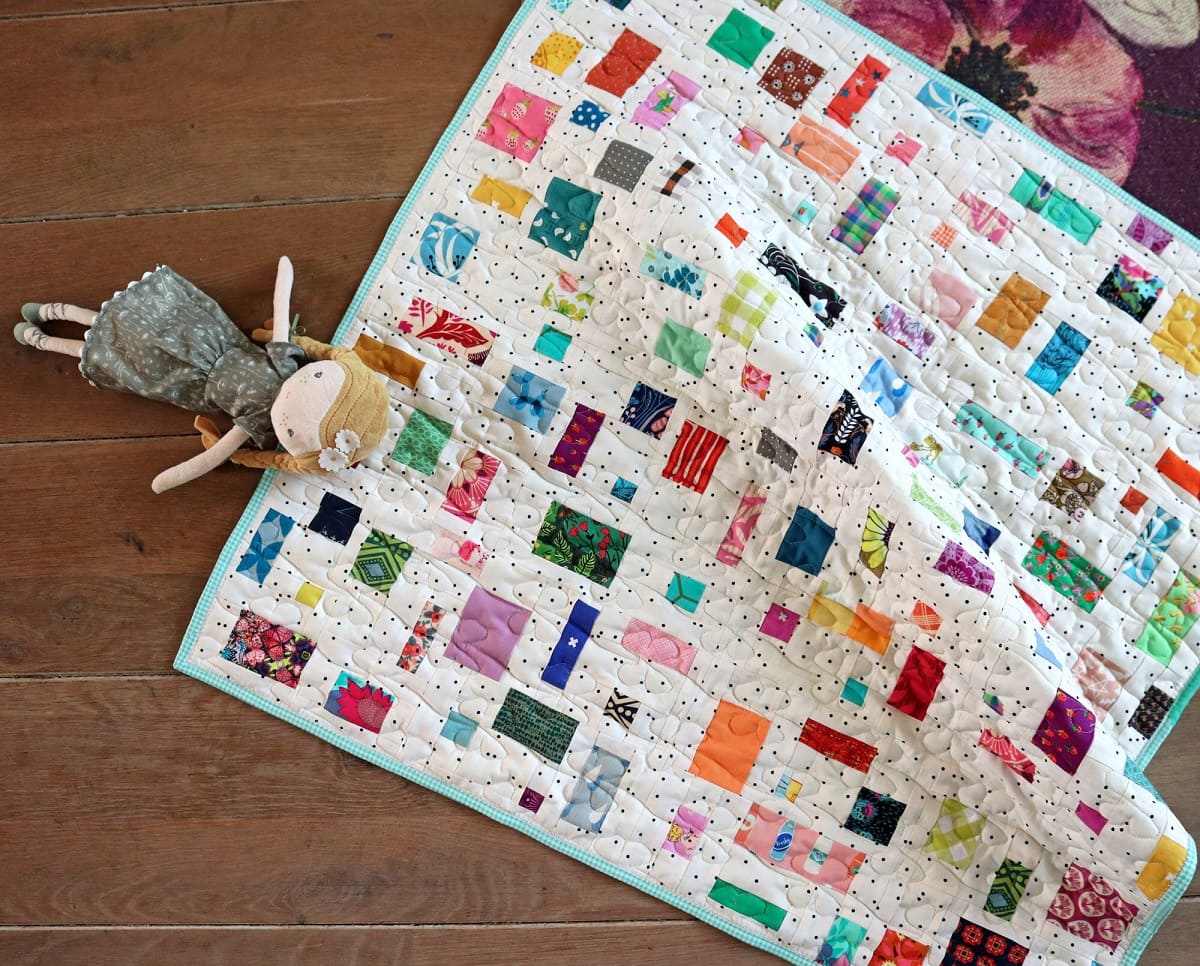
Another option is to create a patchwork quilt with a variety of fabrics and patterns. This allows you to showcase different designs and add visual interest to the blanket.
Ultimately, the design and pattern you choose should reflect your creativity, personal style, and the intended recipient’s personality. It’s an opportunity to create a unique and beautiful baby blanket that will be cherished for years to come.
Gathering the Necessary Supplies
Before you begin making your baby blanket, it’s essential to gather all the necessary supplies. Having everything on hand will make the process smoother and more enjoyable. Here are the essential supplies you’ll need:
- Fabric: Choose the fabric based on your preferences and the guidelines mentioned earlier. Make sure to have enough fabric to create the desired size of the blanket.
- Scissors: A sharp pair of fabric scissors will be essential for cutting the fabric to the desired dimensions and trimming any excess material.
- Pins: Sewing pins are crucial for holding the fabric in place while you sew. Opt for straight pins or quilting pins to secure the layers together.
- Thread: Select thread in a color that complements your fabric. It’s best to use a good-quality, all-purpose thread that is durable and won’t easily break during sewing.
- Sewing Machine: If you have access to a sewing machine, it will significantly speed up the process and provide more precise stitching. Make sure your machine is in good working condition and has the necessary supplies, such as bobbins and needles.
- Needles: If you decide to sew the blanket by hand, you’ll need a set of hand sewing needles. Choose needles appropriate for the fabric you’re using, such as sharp or ballpoint needles.
- Ruler or Measuring Tape: Accurate measurements are crucial when cutting the fabric and ensuring a properly sized blanket. A ruler or measuring tape will come in handy for this step.
- Marking Tool: A marking tool, such as fabric chalk or disappearing ink markers, can be used to make temporary marks on the fabric for cutting or sewing guidelines.
- Iron and Ironing Board: Having an iron and ironing board nearby is essential for pressing the fabric, removing any wrinkles, and achieving crisp, professional-looking seams.
- Embellishments (optional): If you plan to add any personalized touches to the blanket, gather the necessary embellishments, such as embroidery floss, appliqué patches, or fabric paint.
- Pattern Template (if needed): If you’re using a specific pattern or design, make sure you have the necessary template or pattern pieces ready. This will ensure accuracy when cutting the fabric.
Ensure that the supplies are of good quality to make the sewing process smooth and prevent any potential mishaps. Having everything organized and readily available will allow you to focus on the creative aspect of making the baby blanket.
Read more: How To Store Baby Blankets
Preparing the Fabric
Once you have gathered all the necessary supplies, it’s important to prepare the fabric before you begin sewing the baby blanket. This step ensures that the fabric is clean, properly sized, and ready for sewing. Here’s how you can prepare the fabric:
- Wash and Dry: Start by washing the fabric according to the manufacturer’s instructions. This is important to remove any dirt, chemicals, or finishes that may be present. Use a gentle detergent suitable for the fabric type and wash it in cold or warm water. After washing, tumble dry the fabric or hang it to dry.
- Iron: Once the fabric is dry, iron it to remove any wrinkles and creases. Set the iron to the appropriate temperature for the fabric, ensuring that it is not too hot to avoid damaging the material. Ironing the fabric will provide a smooth surface for cutting and sewing.
- Trim the Edges: Examine the fabric and trim any uneven or frayed edges. This will ensure that you have neat and straight edges to work with when cutting and sewing the blanket.
- Measure and Mark: Use a ruler or measuring tape to measure and mark the desired size of the blanket on the fabric. Make sure to leave additional space for seam allowances if necessary. Use fabric chalk or disappearing ink markers to make temporary marks on the fabric.
- Cut the Fabric: With the marked measurements as a guide, carefully cut the fabric to the desired size. Use sharp fabric scissors to ensure clean and precise cuts. Take your time and follow the marked lines to maintain accuracy.
By properly preparing the fabric before sewing, you ensure that the blanket will have a clean, even appearance and will be easier to work with. Taking the time to wash, iron, trim, measure, and cut the fabric will set a strong foundation for creating a beautiful and professionally finished baby blanket.
When choosing fabric for a baby blanket, opt for soft, breathable materials like cotton or flannel to ensure comfort and safety for the baby.
Adding Personalized Touches
One of the special aspects of making a baby blanket is the opportunity to add personalized touches. These personal touches make the blanket even more meaningful and unique. Here are a few ideas to consider when adding personalized details:
- Embroidery: Embroidery is a beautiful way to add a personal touch to the baby blanket. You can embroider the baby’s name, initials, or a special quote onto the fabric. Choose colors that complement the blanket and use different embroidery stitches to create intricate designs.
- Appliqué: Appliqué involves attaching fabric cutouts or patches onto the blanket surface. You can create shapes, animals, or letters using different fabric patterns and colors. Appliqué adds visual interest and a tactile element to the blanket.
- Fabric Painting: Using fabric paints or markers, you can create custom designs directly on the fabric. This allows for freehand drawing, writing, or stenciling. Make sure to use fabric-safe paints and follow the instructions for long-lasting results.
- Patchwork: If you have multiple fabric scraps or remnants, consider creating a patchwork design. Cut the fabric into squares or other shapes, and sew them together to form a visually captivating pattern. This method allows for creativity and personalization with a variety of fabric choices.
- Borders and Trims: Adding a decorative border or trim to the blanket can elevate its appearance. You can use lace, ribbon, or bias tape to create a finished edge. Choose colors and patterns that complement the fabric and overall design of the blanket.
When adding personalized touches, consider the safety and comfort of the baby. Make sure that any additional elements, such as buttons or beads, are securely attached and do not pose a choking hazard.
Remember, the goal is to add personalization that resonates with the parents and reflects the unique personality of the baby. These personalized touches will transform the baby blanket into a cherished keepsake that can be passed down through generations.
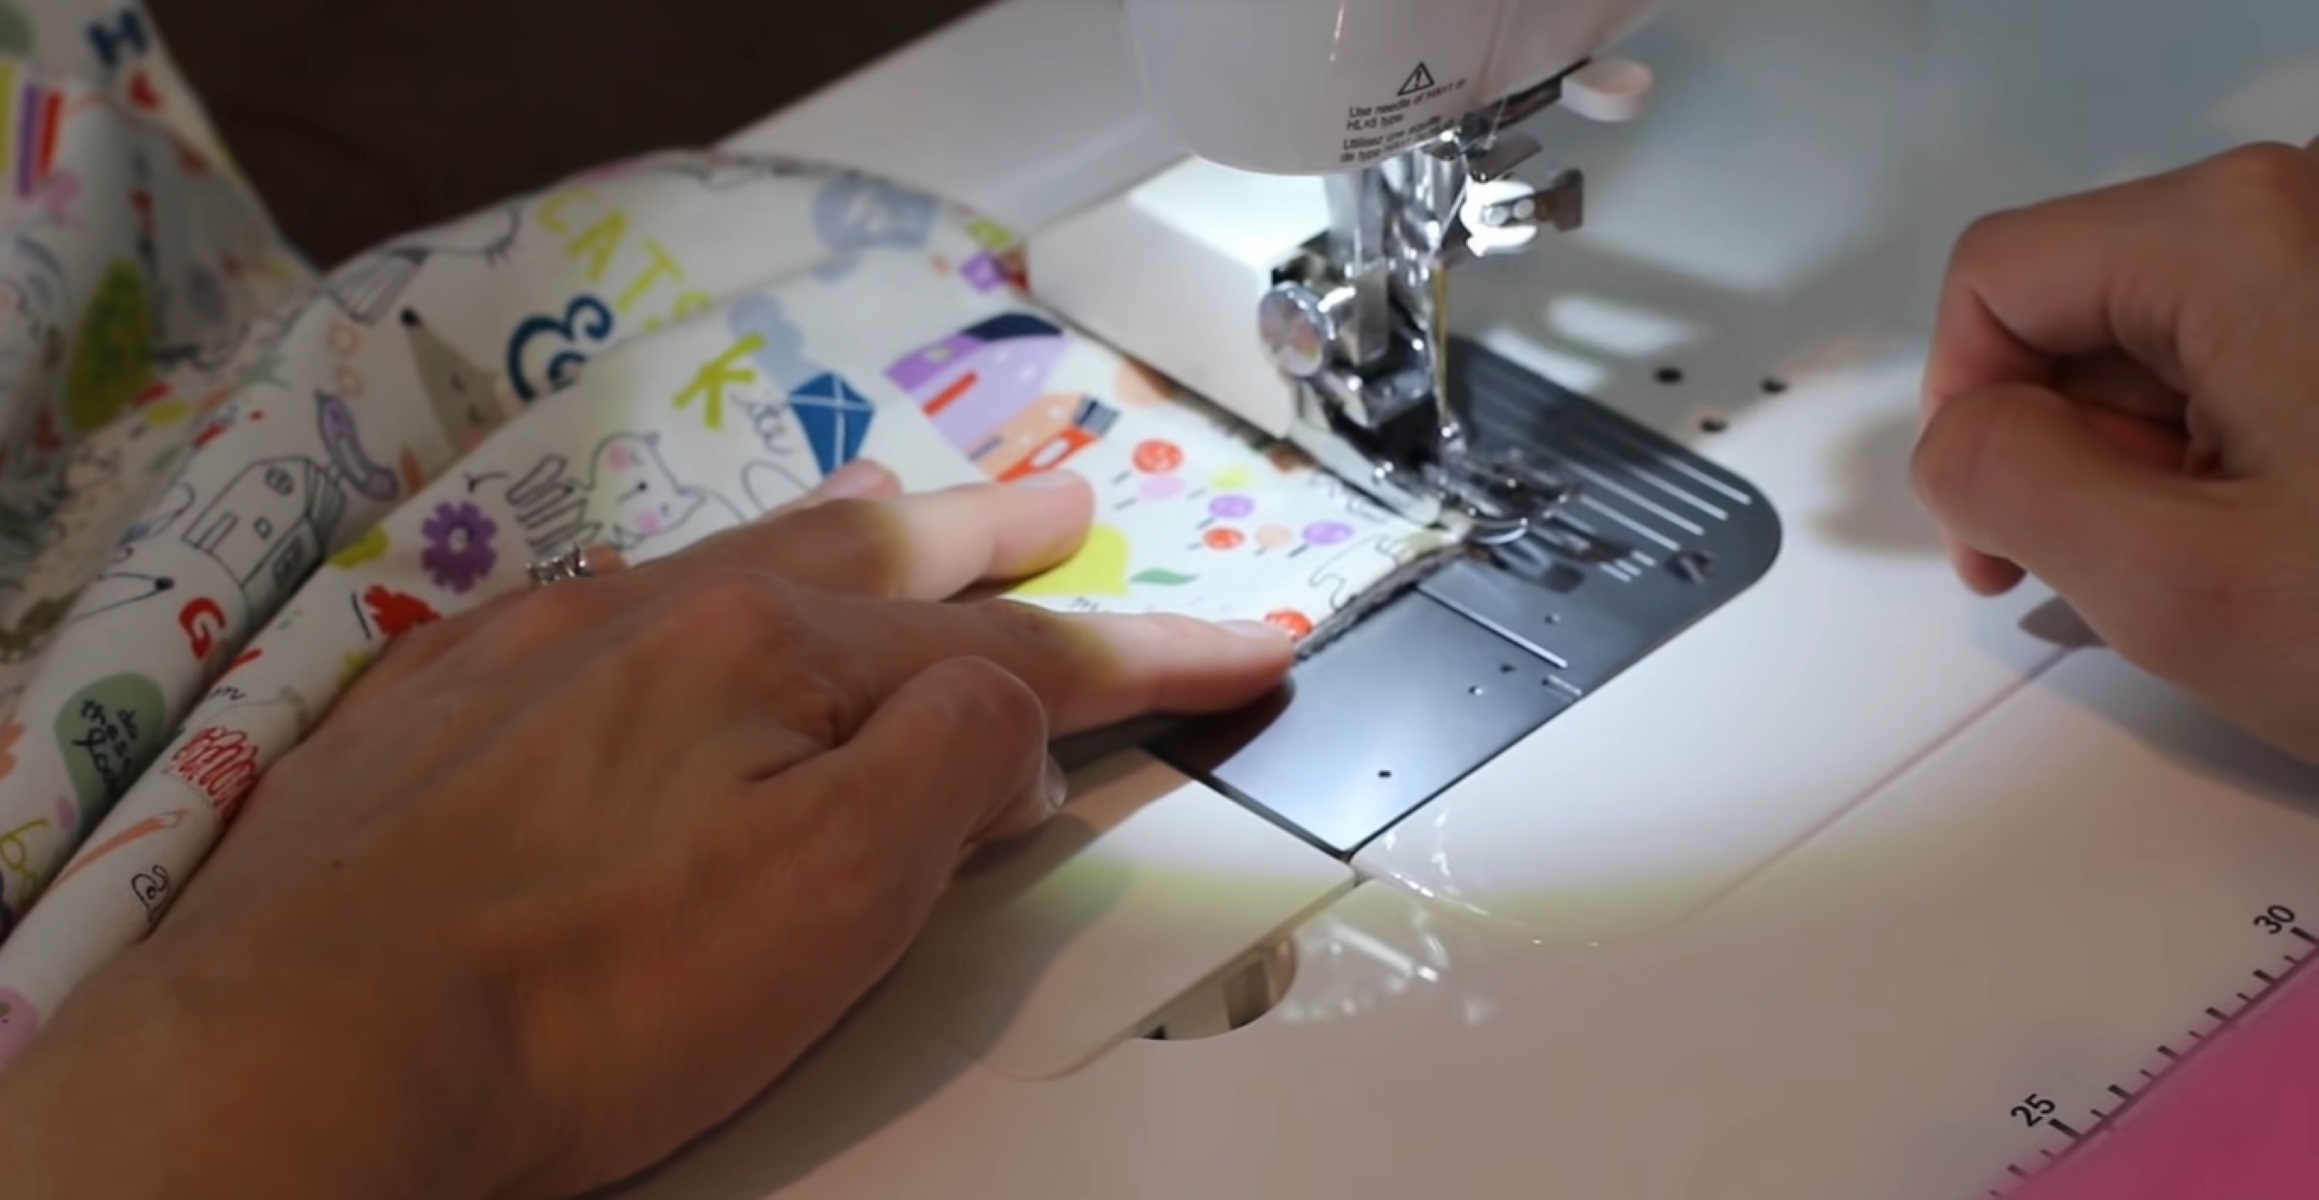
Sewing the Blanket
Now that you have prepared the fabric and added any personalized touches, it’s time to sew the baby blanket. Whether you’re using a sewing machine or sewing by hand, follow these steps to ensure a beautifully constructed blanket:
- Prepare your sewing machine: If you’re using a sewing machine, ensure that it is set up with the appropriate needle and thread for your fabric. Take a moment to familiarize yourself with the machine’s settings and adjust them as needed.
- Pin the layers: If you are working with multiple layers of fabric or adding batting for extra thickness and warmth, pin all the layers together to keep them aligned during sewing. Place the pins along the edges, ensuring that they are parallel to the sewing line.
- Start sewing: Begin sewing along one edge of the blanket, using the seam allowance specified in your pattern or allowing at least 1/4 inch for a standard seam. Backstitch at the beginning and end of the seam to secure the stitches.
- Continue sewing: Sew along the edges, removing the pins as you go and keeping a consistent seam allowance. Take your time to ensure straight and even stitches. If you’re sewing by hand, use a running stitch or a backstitch for added strength.
- Corners and curves: When you reach a corner, stop sewing with the needle down, lift the presser foot, and pivot the fabric to sew along the next edge. For curves, take your time and sew slowly, gently guiding the fabric to maintain a smooth curve.
- Finishing the edges: Once you have sewn all the way around the blanket, backstitch to secure the stitches. To prevent fraying, you can finish the edges by folding them over once or twice and sewing a straight stitch or using a serger if you have one.
Remember to trim any excess threads and give the blanket a final press with an iron. Admire your finished creation, and take pride in the love and care you put into making a special blanket for a precious little one.
If you’re uncertain about certain sewing techniques or need additional guidance, there are numerous online tutorials and resources available to help you along the way. Don’t be afraid to seek out assistance or ask for advice from experienced sewers.
Adding Finishing Touches
Once you have sewn the baby blanket, it’s time to add those final touches that will truly make it special. These finishing touches will give your blanket a polished and professional look. Here are some ideas to consider:
- Binding: Adding a binding around the edges of the blanket creates a clean and finished appearance. You can use bias tape or create your own binding from coordinating fabric. Follow a tutorial or pattern to attach the binding smoothly and evenly.
- Embellishments: Consider adding small embellishments to the blanket, such as buttons, ribbons, or bows. Use these sparingly and ensure they are securely attached, especially if the blanket will be used by a baby.
- Label or Tag: Adding a label or tag to the blanket not only adds a personalized element but also provides a convenient way to identify the blanket. You can sew in a fabric label with the baby’s name or initials or use a custom-made tag for a professional touch.
- Quilting: If you desire a quilted look or extra durability, you can quilt the layers of the baby blanket together. This involves stitching through all the layers, creating a beautiful texture and preventing shifting over time.
- Monogramming: Monogramming the baby’s initials or name onto the blanket can add a touch of elegance. You can use embroidery or appliqué for monogramming, depending on your preference and skill level.
- Ribbons or Ties: Consider adding small ribbons or fabric ties to the corners or sides of the blanket. These can serve both a decorative purpose and a practical function, allowing you to secure the blanket to a stroller or car seat.
Remember to keep in mind the safety and comfort of the baby when adding any finishing touches. Make sure that any additional elements, such as buttons or ribbons, are securely attached and do not pose a choking hazard.
Take your time and experiment with different finishing touches until you achieve the desired look. These details will elevate your baby blanket and make it truly one-of-a-kind.
Read more: How To Swaddle A Baby With A Blanket
Cleaning and Care Instructions
To ensure that the baby blanket remains in great condition and continues to provide comfort and warmth, it’s important to follow proper cleaning and care instructions. Here are some guidelines to keep in mind:
- Read the Care Labels: Before cleaning the blanket, always refer to the care labels attached to the fabric. They provide specific instructions from the manufacturer on how to properly clean and care for the material.
- Machine Washing: Most baby blankets can be safely machine washed. Use a gentle cycle with cold or warm water and a mild detergent suitable for the fabric. Avoid using harsh chemicals or bleach that could damage the fabric or cause skin irritation.
- Hand Washing: If the fabric or personalized elements require more delicate care, consider hand washing the baby blanket. Use lukewarm water and a mild detergent, gently agitating the fabric. Rinse thoroughly to remove all soap residue.
- Drying: It’s best to let the baby blanket air dry to maintain its shape and softness. Lay it flat on a clean towel or drying rack, away from direct sunlight. Avoid using a dryer, as high heat can shrink or damage the fabric.
- Stain Removal: Address stains on the blanket as soon as possible to prevent them from setting in. Gently blot the stain with a clean cloth or sponge and a mild stain remover or soap. Avoid scrubbing vigorously, as this can damage the fabric fibers. Rinse thoroughly after treating the stain.
- Ironing: If necessary, iron the baby blanket using a low heat setting. Always check the fabric care instructions before ironing and use a pressing cloth if needed to protect any delicate embellishments or appliqués.
- Store Properly: When not in use, store the baby blanket in a cool, dry place. Avoid exposing it to excessive sunlight, as this can cause fading or discoloration over time.
It’s important to note that different fabrics require different care methods, so always follow the specific instructions provided by the manufacturer or consult a professional if you have any concerns.
By following proper cleaning and care instructions, you can help the baby blanket maintain its quality and longevity, ensuring that it remains a cherished item for years to come.
Conclusion
Making a baby blanket is a fulfilling and enjoyable endeavor that allows you to create a special and personalized item for a little one. By following the steps outlined in this article, you can successfully navigate the process of making a baby blanket with ease.
From choosing the right fabric and selecting the perfect size to adding personalized touches and adding finishing touches, every stage of creating a baby blanket provides an opportunity to showcase your creativity and love.
Remember to consider the baby’s comfort and safety throughout the entire process. Choose fabrics that are soft, hypoallergenic, and easy to care for. Add personal touches that reflect the baby’s personality and create a unique keepsake.
Whether you sew by hand or with a sewing machine, take your time and enjoy the process. Sewing a baby blanket is not only a practical project but also a labor of love. Pour your heart into every stitch.
Once your baby blanket is complete, ensure you follow the appropriate cleaning and care instructions to maintain its quality and longevity. With proper care, the blanket will continue to provide warmth, comfort, and joy to the baby and serve as a cherished memento for years to come.
As you embark on this creative journey, remember that making a baby blanket is not just about the end result; it’s about the love, care, and dedication that goes into creating something special for a precious little one. So, gather your supplies, unleash your creativity, and enjoy the process of making a beautiful baby blanket that will bring joy and comfort to both baby and parents.
Frequently Asked Questions about How To Make A Baby Blanket
Was this page helpful?
At Storables.com, we guarantee accurate and reliable information. Our content, validated by Expert Board Contributors, is crafted following stringent Editorial Policies. We're committed to providing you with well-researched, expert-backed insights for all your informational needs.
0 thoughts on “How To Make A Baby Blanket”