Home>Articles>How To Free Motion Quilt On A Regular Sewing Machine
Articles
How To Free Motion Quilt On A Regular Sewing Machine
Modified: August 22, 2024
Learn how to free motion quilt on your regular sewing machine with these helpful articles. Master the art of quilting and create stunning designs.
(Many of the links in this article redirect to a specific reviewed product. Your purchase of these products through affiliate links helps to generate commission for Storables.com, at no extra cost. Learn more)
Introduction
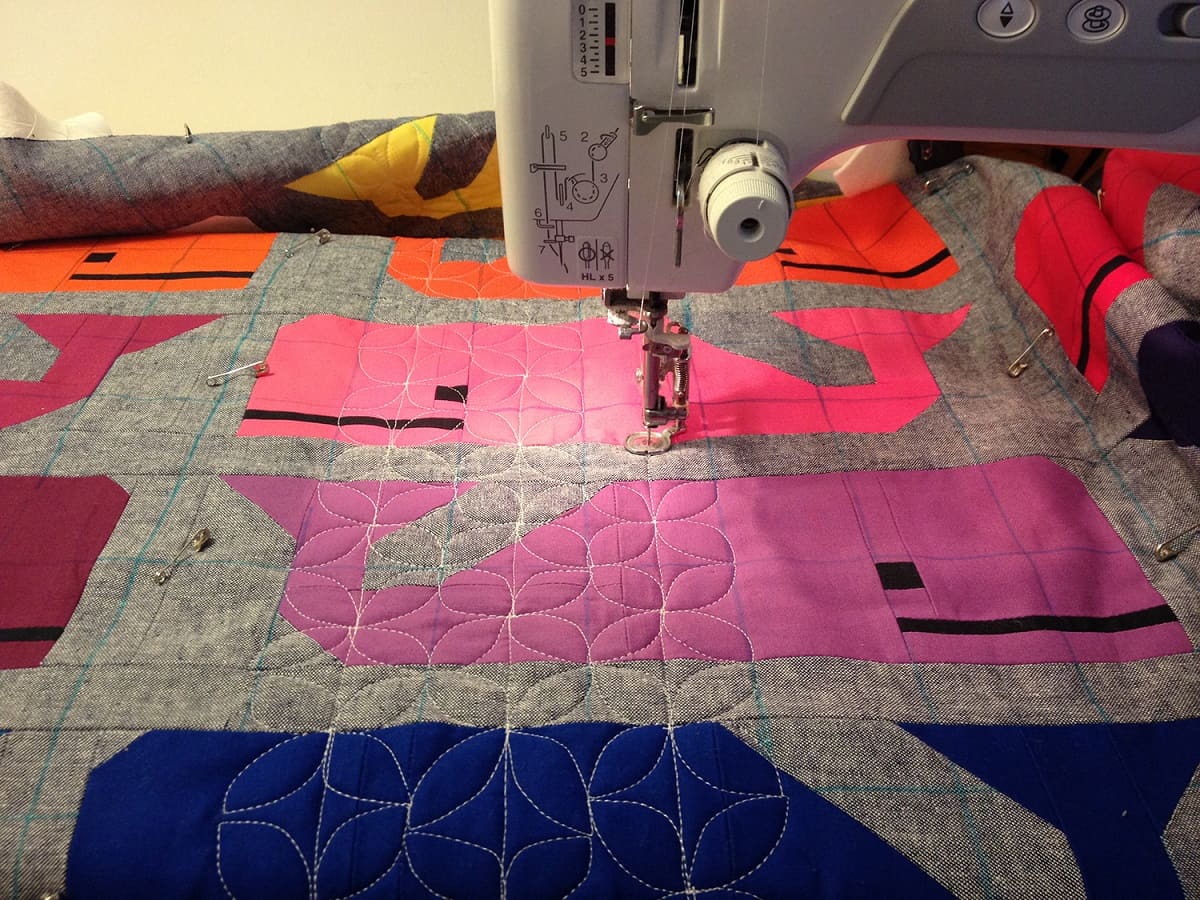
Welcome to the world of free motion quilting! Whether you’re a seasoned quilter looking to expand your skills or a beginner wondering how to achieve those beautiful, intricate designs, this article is here to guide you through the process. Free motion quilting allows you to create unique patterns and textures by moving the fabric freely under the needle of your regular sewing machine.
Unlike traditional quilting methods that involve stitching in straight lines or using a longarm quilting machine, free motion quilting offers more flexibility and creativity. With a few essential tools and some practice, you can achieve stunning results that will elevate your quilting projects to new heights.
In this article, we’ll cover everything you need to know to get started with free motion quilting on a regular sewing machine. We’ll explore the necessary tools, machine setup, and techniques to help you master this art form. Whether you’re planning to quilt small projects like table runners and placemats or tackle larger quilts, the information provided here will equip you with the skills needed to achieve professional-looking results.
Before we dive into the technical details, it’s important to note that free motion quilting is a skill that requires practice and patience. Don’t be discouraged if your first attempts don’t turn out perfect. Like any craft, it takes time to develop your own unique style and achieve the desired results.
Now, let’s gather our tools and get ready to embark on a quilting journey that will unleash your creativity and elevate your craft!
Key Takeaways:
- Embrace imperfections and enjoy the journey of free motion quilting. Practice, experiment, and let your creativity soar as you master basic and advanced techniques to create stunning, unique quilted masterpieces.
- Prepare your machine, quilt, and mindset for successful free motion quilting. From setting up your tools to troubleshooting common issues, patience, practice, and dedication are key to achieving beautiful, intricate designs.
Read more: How To Do Free Motion Quilt
Getting Started with Free Motion Quilting
Before you begin free motion quilting, it’s important to have a clear understanding of the basic techniques and principles involved. This section will cover the fundamental steps to get you started on your free motion quilting journey.
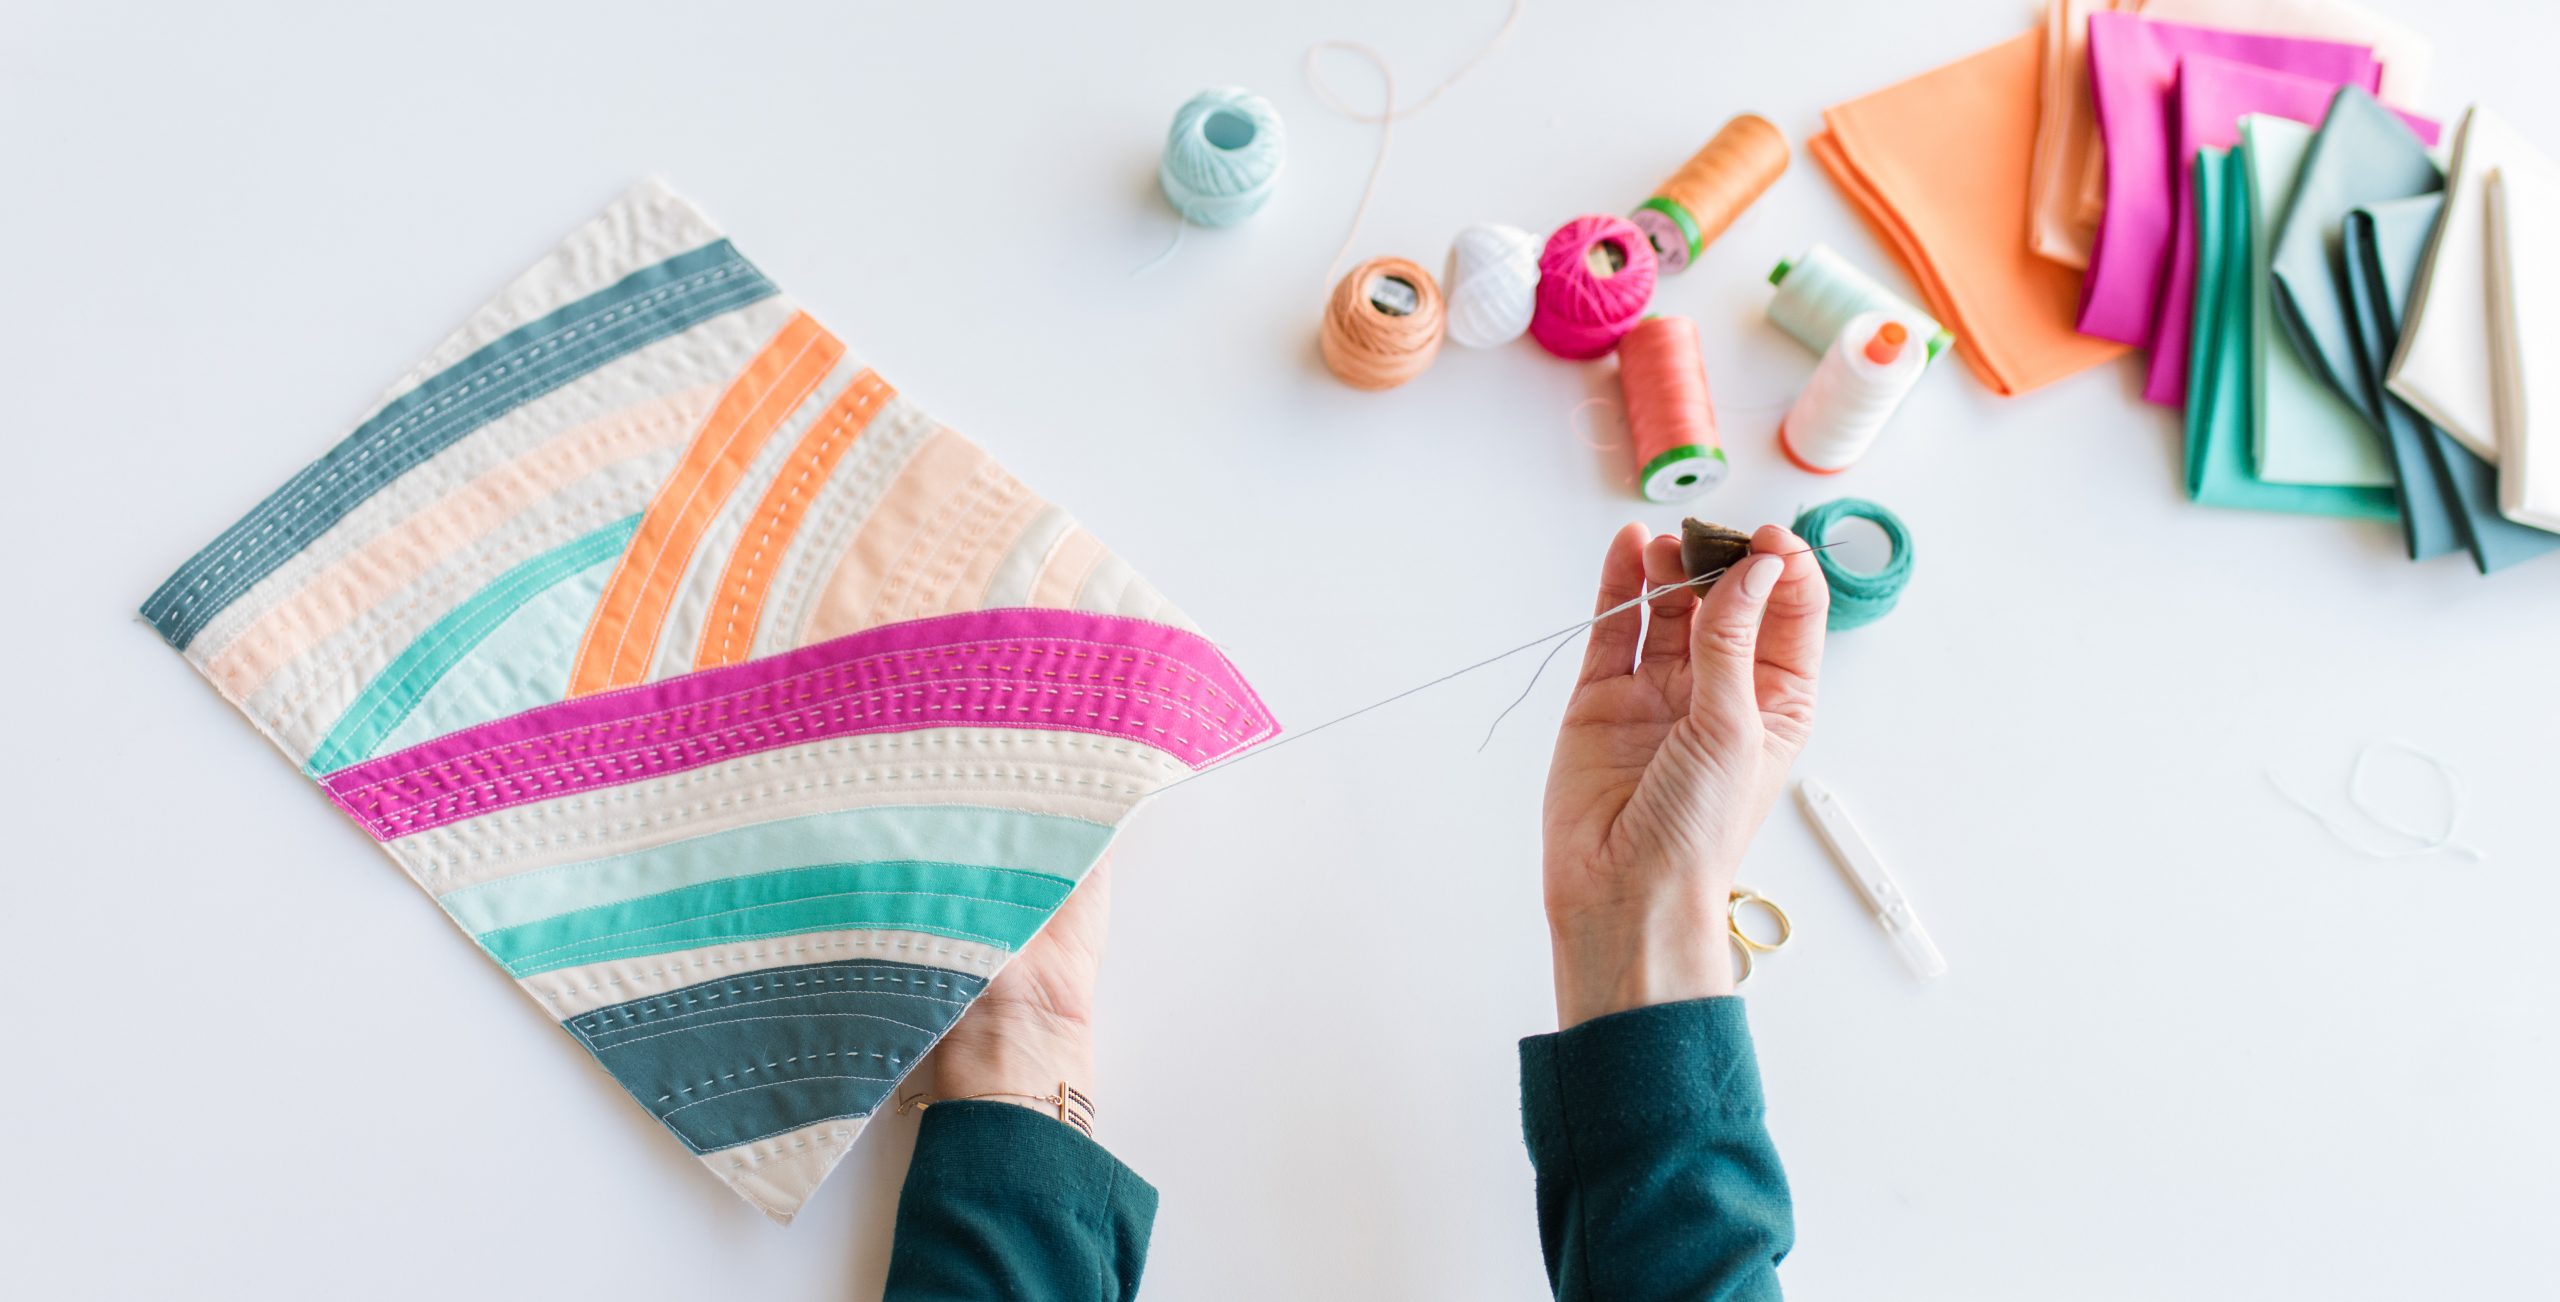
1. Gather Your Supplies: To begin, make sure you have all the necessary supplies. This includes a regular sewing machine, quilting foot, quilting needles, quilting thread, a quilting hooping or gloves, and your quilting project.
2. Choose a Design: Decide on the design you want to quilt on your project. You can opt for simple geometric shapes, swirls, flowers, or any other design that inspires you. Start with a basic design to get comfortable with the process, and gradually challenge yourself with more complex patterns.
3. Practice on Scrap Fabric: Before you start quilting your actual project, it’s wise to practice on scrap fabric. This will allow you to get comfortable with the movement and speed of your machine. Use a similar fabric and batting as your project to get an accurate experience.
4. Prepare the Machine: Install a quilting foot, usually an open-toe or free motion foot, on your sewing machine. Adjust the tension settings as per your machine’s instructions and choose a suitable quilting needle. It’s often recommended to use a 90/14 or 80/12 sized needle for quilting.
5. Lower the Feed Dogs: Most sewing machines have a lever or button to lower the feed dogs, the teeth that move the fabric while sewing. Lowering the feed dogs allows you to freely move the fabric in any direction during free motion quilting.
6. Prepare the Quilt Sandwich: Layer your quilt top, batting, and backing fabric to create the quilt sandwich. Baste the layers together using safety pins, spray baste, or any method that keeps the layers secure.
7. Start Quilting: With your prepared machine and quilt sandwich, it’s time to start quilting. Begin by securing the thread by taking a few small stitches or using a technique called “start/stop” stitching. This prevents the thread from unraveling as you quilt.
8. Practice Hand-Eye Coordination: As you quilt, focus on coordinating the movement of your hands with the speed and direction of the needle. This takes practice and will improve over time. Remember to breathe and relax to maintain a smooth quilting motion.
9. Explore Different Techniques: There are various free motion quilting techniques you can explore, such as stippling, meandering, feathers, and echoing. Experiment with different patterns and motifs to find your preferred style. Don’t hesitate to take inspiration from books, online tutorials, or attending quilting workshops to broaden your knowledge.
10. Practice, Practice, Practice: The key to becoming proficient in free motion quilting is practice. Set aside dedicated time regularly to practice quilting on different projects and designs. As you gain experience, you’ll notice an improvement in your skills and the quality of your quilting.
Remember, free motion quilting is an art form that allows for creativity and self-expression. Embrace the learning process and enjoy the journey as you explore the endless possibilities of this quilting technique.
Choosing the Right Machine and Tools
When it comes to free motion quilting, having the right machine and tools can greatly impact your quilting experience and the quality of your work. In this section, we’ll discuss the key considerations for choosing the right machine and tools for your free motion quilting endeavors.
1. Sewing Machine: While it is possible to free motion quilt on various sewing machine models, some machines offer features specifically designed for quilting. Look for machines with a drop feed dog feature, which allows you to lower or cover the feed dogs to enable free motion quilting. Additionally, choose a machine that offers a smooth and consistent stitching experience, adjustable speed control, and a wide throat space to accommodate larger quilts.
2. Quilting Foot: A quilting foot, also known as a free motion or darning foot, is an essential tool for free motion quilting. It provides an open-toe design that allows the needle to move freely in any direction. Look for a foot with good visibility, ensuring you can see the stitching area clearly while quilting.
3. Quilting Needles: Using the right needles is crucial for successful free motion quilting. Quilting needles have a sharp point and are designed to penetrate multiple layers of fabric and batting without causing damage. Choose a needle size that matches the weight of your fabric and batting. Generally, a size 90/14 or 80/12 needle is suitable for most quilting projects.
4. Quilting Thread: Opt for a high-quality quilting thread that is strong and lightweight. The thread should withstand the wear and tear of quilting without breaking or fraying. Cotton or polyester threads work well for most projects, but experiment with different threads to see which one suits your quilting style and fabric choices.
5. Quilting Hooping or Gloves: Quilting hooping or gloves provide grip and control while maneuvering the fabric under the needle. Hooping consists of a wooden frame that holds the layers of the quilt in place, while gloves are designed with grips on the fingertips and palms. Both options help reduce hand fatigue and improve accuracy during quilting.
6. Marking Tools: Marking tools come in handy for transferring your quilt design onto the fabric. Options include fabric markers, chalk pencils, or water-soluble pens. Choose a marking tool that is easy to use, leaves a visible mark, and can be easily removed once the quilting is complete.
7. Ruler or Template: For more precise and geometric designs, consider using a quilting ruler or template. These tools help you create straight lines, curves, or specific shapes with ease. There are various ruler and template options available, so explore different designs to find ones that align with your quilting style.
8. Additional Tools: Other useful tools include a seam ripper for fixing mistakes, scissors or rotary cutter for trimming excess fabric, and a quilting extension table to provide additional workspace and support for your quilting projects.
When selecting your machine and tools, consider your quilting goals, budget, and personal preferences. It’s always a good idea to visit a sewing machine or quilting store, where you can test machines, ask questions, and get recommendations from knowledgeable staff members.
By investing in the right machine and tools, you’ll be equipped to tackle various free motion quilting projects and achieve stunning results.
Setting Up Your Machine for Free Motion Quilting
Properly setting up your sewing machine is crucial for successful free motion quilting. In this section, we will walk you through the key steps to prepare your machine for this quilting technique.
1. Clean and Oil Your Machine: Before you start quilting, ensure your sewing machine is clean and properly oiled. Check your machine’s manual for specific cleaning instructions and oiling points. A clean and well-maintained machine will result in smoother stitching and prevent any potential issues during quilting.
2. Install a Quilting Foot: Swap out your regular sewing foot for a quilting foot, also known as a free motion or darning foot. These specialized feet provide the necessary clearance and visibility for free motion quilting. Follow your machine’s manual to install the appropriate foot for your specific model.
3. Adjust the Tension Settings: Adjusting the tension of your sewing machine is crucial for achieving even and balanced stitches. It’s recommended to set the tension slightly looser than usual, as this allows for the movement of the fabric and thread during free motion quilting. However, the ideal tension setting may vary depending on your machine, thread, and fabric. Test your tension on a practice fabric sandwich to achieve the desired results.
4. Choose the Right Needle: Selecting the correct needle is essential for successful free motion quilting. Quilting needles have a sharp point and are designed to penetrate multiple layers of fabric and batting. Choose a needle size appropriate for the weight of your fabric and batting. A size 90/14 or 80/12 needle is commonly recommended for quilting.
5. Thread the Machine: Thread your sewing machine with a suitable quilting thread. Ensure the thread passes through the quilting foot correctly and follows the pathway as outlined in your machine’s manual. Proper threading minimizes thread tension issues and ensures smooth stitching throughout your quilting process.
6. Lower or Cover the Feed Dogs: Most sewing machines have a lever, switch, or plate that allows you to lower or cover the feed dogs. The feed dogs are the teeth that move the fabric while sewing. For free motion quilting, it’s essential to lower or cover the feed dogs to allow for manual fabric movement. Refer to your machine’s manual for instructions on how to lower or cover the feed dogs.
7. Set the Stitch Length to Zero: When free motion quilting, you control the stitch length with the movement of the fabric, not the machine. Set your machine’s stitch length to zero or the smallest available setting, as this prevents the fabric from moving horizontally while you quilt. This setting ensures you have complete control over the stitch length as you freely move the fabric.
8. Test the Machine Settings: Before starting your actual quilting project, test the machine settings on a scrap fabric sandwich. Adjust the tension, stitch length, and speed until you achieve the desired results. This allows you to identify any issues or make necessary adjustments before working on your precious quilt.
9. Familiarize Yourself with the Machine Controls: Take some time to familiarize yourself with the controls and features of your sewing machine. Practice adjusting the speed control, needle position, and any other settings that may improve your quilting experience. The more comfortable you are with your machine, the more smoothly you’ll be able to navigate through your quilting projects.
By following these steps and taking the time to set up your sewing machine properly, you’ll be ready to embark on your free motion quilting journey with confidence. Remember, each machine may have specific requirements and adjustments, so refer to your manual for detailed instructions relevant to your machine model.
Preparing Your Quilt for Free Motion Quilting
Preparing your quilt properly is key to achieving successful free motion quilting results. This section will guide you through the crucial steps to ensure your quilt is ready for the quilting process.
1. Marking your Quilt: Before you start quilting, it’s essential to transfer your quilting design onto the fabric. You can use various methods to mark your quilt, such as fabric markers, chalk pencils, or water-soluble pens. Choose a marking tool that is easy to see and will not damage or alter the fabric permanently. Test the marking tool on a scrap piece of fabric to ensure it comes off easily.
2. Layering Your Quilt Sandwich: Prepare your quilt sandwich by layering the quilt top, batting, and backing fabric. Ensure the layers are smooth, with no wrinkles or puckers. Baste the layers together to keep them in place during the quilting process. You can use safety pins, basting spray, or hand basting to secure the layers together. The basting should be done at regular intervals to prevent shifting during quilting.
3. Secure the Edges: It’s important to secure the edges of your quilt before you begin quilting. This prevents the fabric layers from shifting or coming apart as you move the quilt under the machine. You can use binder clips or quilting clamps to secure the edges, ensuring a taut and stable quilt surface. Alternatively, you can machine stitch around the edges of your quilt to create a temporary border.
4. Divide Large Quilts into Sections: If you’re working on a large quilt that exceeds the throat space of your sewing machine, divide it into manageable sections. It’s easier to quilt smaller sections at a time rather than trying to maneuver the entire quilt. Once you complete one section, you can move on to the next, ensuring smooth and even quilting across the entire project.
5. Prepare Your Quilting Space: Set up your quilting space to ensure a comfortable and efficient working environment. Clear away any clutter, have adequate lighting, and arrange your tools within easy reach. Consider using a quilting extension table to expand your workspace and support the weight of your project as you quilt.
6. Take Breaks and Rest: Free motion quilting can be physically demanding. Remember to take regular breaks to rest your hands, arms, and back. Stretching and keeping your body relaxed will help maintain your quilting stamina and improve your overall quilting experience.
7. Test Quilt Designs: Before you start quilting on your main project, test your selected quilting designs on a smaller piece of fabric or practice sandwich. This allows you to experiment with different patterns, thread colors, and quilting techniques. It also provides a valuable opportunity to fine-tune your skills and build confidence before applying the designs to your quilt.
8. Plan the Quilting Path: Take a moment to plan the path you’ll follow while quilting. Generally, it’s recommended to start from the center of the quilt and work outward. This prevents excessive fabric bulk in the center and allows for easier control and movement. However, feel free to adapt this method based on your design and preferences.
9. Relax and Enjoy the Process: Free motion quilting is a creative and artistic endeavor. Don’t be too hard on yourself and enjoy the process. Embrace imperfections and remember that each quilt tells its own unique story. As you gain experience and confidence, your quilting skills will continue to evolve and improve.
By taking the time to properly prepare your quilt, you’ll set the foundation for a smooth and enjoyable free motion quilting experience. Remember to take breaks, be patient with yourself, and have fun as you bring your quilting designs to life!
Practice on scrap fabric first to get the feel for moving the fabric smoothly under the needle. Start with simple designs and gradually work up to more complex patterns. Keep your hands relaxed and maintain a steady speed.
Read more: How To Sew A Hexagon Quilt
Basic Free Motion Quilting Techniques
Once you have set up your machine and prepared your quilt, it’s time to dive into the world of basic free motion quilting techniques. This section will introduce you to the foundational techniques that will help you create beautiful designs on your quilt.
1. Stippling: Stippling is a popular and versatile quilting technique that involves creating random, curvy lines and shapes. Start by quilting small, continuous loops, circles, and swirls across your quilt, filling in the spaces with dense, overlapping lines. Stippling adds texture and creates an interesting background for focal points on your quilt.
2. Meandering: Meandering is similar to stippling but with slightly larger and more flowing designs. Instead of small loops and circles, create larger curves and waves in an organic, meandering pattern. As you quilt, try to maintain a consistent distance between the lines for a cohesive look.
3. Feathers: Feather quilting adds elegance and texture to your quilt. It involves creating curved, feather-like shapes with overlapping and intertwining plumes. Start by stitching a central spine and then add feathers on each side, mirroring each other. Feather quilting requires practice to achieve a balanced and graceful look, so don’t hesitate to experiment and try different variations.
4. Echoing: Echo quilting involves stitching multiple parallel lines around a shape or motif to create a visual echo effect. Start by quilting close to the shape and then gradually increase the distance between the lines as you move outward. Echo quilting adds depth, dimension, and emphasis to specific areas of your quilt.
5. Straight Line Grid: Creating a straight line grid involves quilting evenly spaced horizontal and vertical lines across your quilt. This technique adds structure and a modern touch to your quilt. Use a quilting ruler or masking tape as a guide to ensure your lines are straight and evenly spaced.
6. Pebbling: Pebbling consists of quilting repeated tiny circles or pebble-like shapes. This technique is labor-intensive but creates a stunning texture and visual interest on your quilt. Start with a central circle and gradually build outward, filling the space with densely packed circles. Take your time and focus on creating consistent and rounded shapes.
7. Swirls: Swirls are fluid and flowing designs that add movement and grace to your quilt. Begin with a central swirl and then expand outward, adding more swirls and curves as you go. The key is to maintain a consistent flow and ensure smooth transitions between the swirls.
8. Cross-Hatching: Cross-hatching involves quilting evenly spaced diagonal lines in one direction, and then quilting additional lines in the opposite direction to create a grid-like pattern. This technique offers a classic and geometric look, adding structure and a touch of sophistication to your quilt.
Remember, mastering these basic free motion quilting techniques takes practice, so start with smaller projects or practice sandwiches. Experiment with different patterns, thread colors, and quilt designs to find your unique style. As your confidence and skills grow, you’ll be able to incorporate more intricate designs and develop your own signature quilting motifs.
Stay tuned for the next section, where we will explore advanced free motion quilting techniques to take your quilting to the next level!
Advanced Free Motion Quilting Techniques
Now that you’ve mastered the basic free motion quilting techniques, it’s time to advance your skills and explore more intricate designs. In this section, we will introduce you to advanced free motion quilting techniques that will allow you to elevate the artistry of your quilts.
1. Fillers and Background Designs: Fillers and background designs add depth and interest to your quilting projects. Experiment with various filler designs such as swirls, pebbles, feathers, or geometric shapes to fill in negative spaces or enhance specific areas of your quilt. Use contrasting thread colors and densities to create texture and visual impact.
2. Thread Painting: Thread painting involves using your sewing machine to create detailed and realistic images on your quilt. It mimics the effect of painting with thread, allowing you to add intricate details, shading, and texture to your quilt top. Practice on smaller projects before attempting thread painting on larger quilts.
3. Trapunto: Trapunto is a technique that creates a raised or puffed appearance on your quilt by adding extra batting to certain areas. It involves stitching around a specific shape, filling it with additional batting, and then stitching again to secure it. Trapunto adds dimension and visual interest to your quilt, making certain areas stand out.
4. In-the-Hoop Quilting: In-the-hoop quilting combines machine embroidery and quilting techniques. Utilizing an embroidery machine, you can create intricate designs that incorporate quilting elements. This technique allows you to incorporate appliqué, custom motifs, and detailed quilting patterns in one step.
5. Custom Quilting: Custom quilting involves creating unique and personalized designs specific to each quilt block or element. This technique requires planning and attention to detail, as you’ll be incorporating different motifs, borders, and designs to enhance each section of the quilt. Custom quilting adds complexity and individuality to your projects.
6. Continuous Line Quilting: Continuous line quilting is a technique where the quilting lines flow continuously from one design element to another without breaking the thread. This creates a seamless and unified look throughout the quilt. Plan your design to ensure that each element connects smoothly, creating an intricate and interconnected quilted pattern.
7. 3D Embellishments: Take your quilting to the next level by incorporating three-dimensional embellishments into your projects. This includes techniques such as fabric folding, fabric manipulation, and adding appliqué elements to the quilt top. These embellishments add texture and visual interest to your quilts.
8. Background Fill Techniques: Advanced background fill techniques involve using multiple quilting motifs and patterns to fill larger areas of the quilt. Explore techniques such as stippling variations, cross-hatching with different orientations, or combining various filler designs to create intricate and captivating backgrounds.
As you venture into advanced free motion quilting, remember to continue practicing and experimenting with different designs and techniques. Each quilting project provides an opportunity for growth and expression. Take inspiration from other quilters, books, and online resources, but also allow your creativity to guide you in developing your own unique style.
With dedication and perseverance, your advanced free motion quilting skills will continue to evolve, allowing you to create stunning and awe-inspiring quilts. Enjoy the journey and let your creativity soar!
Troubleshooting Common Issues
While free motion quilting is an exciting and creative technique, it can come with its fair share of challenges. In this section, we will discuss common issues that quilters may encounter during the free motion quilting process and provide troubleshooting tips to help you overcome them.
1. Thread Breakage: One common issue is thread breakage during quilting. This can be caused by various factors, including improper tension, a dull needle, or using low-quality thread. To troubleshoot, check your machine’s tension settings, ensure you are using the correct needle size and type for your fabric, and choose high-quality quilting thread that is suitable for your machine.
2. Uneven Stitches: Uneven stitches can mar the overall appearance of your quilting. This issue may be due to inconsistent machine speed, incorrect tension settings, or not maintaining a consistent quilting motion. Adjust your machine’s speed to a comfortable level, check and adjust the tension as needed, and practice maintaining a smooth and steady quilting motion.
3. Puckering or Wrinkling: Puckering or wrinkling of the fabric can occur if the layers of your quilt sandwich are not properly aligned or if they are too tight. Ensure that you have basted the layers securely, allowing them to lay flat without tension. Take your time to smooth out any wrinkles or puckers before you begin quilting.
4. Fabric Slippage: Fabric slippage happens when the layers of your quilt sandwich shift or move during quilting, leading to distorted or misaligned stitches. To prevent this issue, use quilting gloves or a quilting hoop to provide better grip and control over the fabric. Additionally, make sure the layers are well-basted and try quilting smaller sections at a time, securing the sections before moving on to the next.
5. Fatigue and Tension: Quilting for long periods can lead to fatigue and tension in your hands and body. Take regular breaks to rest and stretch your hands and arms. Relax your shoulders and maintain good posture to prevent strain. Quilting should be an enjoyable and comfortable experience, so listen to your body and take breaks as needed.
6. Inconsistent Stitch Length: Inconsistent stitch length can occur if you are moving the fabric too quickly or too slowly under the needle. It can also be caused by inconsistent pressure on the foot pedal. Practice maintaining a steady and even quilting speed, and pay attention to the pressure applied to the foot pedal for consistent stitch length.
7. Quilt Tension Issues: Uneven tension on the quilt may cause areas of tightness or looseness in your stitching. Make sure the quilt layers are evenly distributed and adequately basted. Adjust the quilt as you go, ensuring there is no excess tension or slack that could affect the overall quality of your quilting.
8. Needle Breakage: Needle breakage can occur if the needle is dull, bent, or if it encounters resistance when quilting through thick seams or multiple layers of fabric. Ensure you are using a fresh, sharp needle suitable for quilting. If working on thicker areas, slow down and take your time to allow the needle to move smoothly through the layers.
Remember, troubleshooting issues in free motion quilting is all part of the learning process. Take your time, practice patience, and approach the challenges as opportunities for growth and improvement. Each issue you overcome will bring you one step closer to achieving your desired results and mastering the art of free motion quilting.
Tips and Tricks for Successful Free Motion Quilting
Embarking on your free motion quilting journey can be both exciting and challenging. To help you along the way, we have compiled a list of tips and tricks that will contribute to your success and enhance your quilting experience.
1. Practice on Scrap Fabrics: Before diving into your main quilting project, practice on scrap fabrics to familiarize yourself with the machine movement needed for free motion quilting. This will help you gain control and confidence before working on your precious quilt.
2. Start with Simple Designs: Begin with simple and basic designs, such as stippling or meandering, to build your skills. As you gain confidence, gradually progress to more complex and intricate designs.
3. Take Breaks: Free motion quilting can be physically demanding. Remember to take breaks to rest your hands, arms, and back. Stretching and relaxing will help maintain your quilting stamina and improve your overall comfort.
4. Relax and Breathe: Quilting requires focus, but it’s important to stay relaxed. Breathe deeply and maintain a comfortable posture to minimize tension in your body. Quilting should be pleasurable, so take a deep breath and enjoy the process.
5. Speed Control: Experiment with different speed settings on your machine to find the right pace for you. Start at a slower speed and gradually increase it as you become more comfortable. Practice controlling the speed to maintain even stitches.
6. Marking Techniques: Use various marking techniques to transfer your quilting designs onto the fabric. Experiment with different tools, such as fabric markers, stencils, or quilting rulers, to achieve accurate and precise markings.
7. Use Quality Thread: Invest in high-quality thread specifically designed for quilting. Strong and durable thread will minimize thread breakage and enhance the overall appearance of your stitches.
8. Experiment with Thread Colors: Have fun with thread colors and experiment with contrasting or complementing thread shades. Thread color can add depth, dimension, and visual interest to your quilted designs.
9. Practice Freehand Movements: As you quilt, practice freehand movements to create smooth curves and lines. The more comfortable you become with the movement and control of your hands, the more natural and fluid your quilting lines will appear.
10. Embrace Imperfections: Remember that quilting is a handmade art form, and imperfections are part of its charm. Don’t hesitate to embrace any quirks or mistakes that may arise. They add character and make each quilt unique.
11. Attend Workshops or Join Quilting Groups: Consider attending quilting workshops or joining local quilting groups. Learning from experienced quilters and exchanging ideas with fellow enthusiasts can broaden your knowledge and inspire your creativity.
12. Learn from Online Resources: Take advantage of the wealth of online resources available, such as tutorials, forums, and blogs. They offer tips, techniques, and step-by-step guidance to improve your quilting skills.
13. Take Note of Successful Designs: Keep a record of your successful quilting designs and techniques. Take photos or create a quilt journal to document your progress and refer back to these successful designs for future projects.
14. Practice, Practice, Practice: Above all, practice is the key to success in free motion quilting. Dedicate regular time to practice and experiment with different designs, techniques, and fabrics. The more you practice, the more refined and confident you will become in your quilting skills.
With these tips and tricks in mind, you’re well-equipped to embark on a successful free motion quilting journey. Be patient with yourself, enjoy the process, and let your creativity flow. Happy quilting!
Read more: How To Quilt On A Brother Sewing Machine
Conclusion
Congratulations on completing this comprehensive guide to free motion quilting! Throughout this article, we have explored the essential steps, techniques, and tips to help you master the art of free motion quilting on a regular sewing machine.
From setting up your machine and choosing the right tools to preparing your quilt and troubleshooting common issues, you have gained valuable insights into the world of free motion quilting. By practicing the basic and advanced techniques we’ve discussed, you’ll have the foundation to create stunning and intricate designs on your quilts.
Remember that free motion quilting is a skill that evolves over time. It requires practice, patience, and a willingness to embrace imperfections as part of your artistic journey. Each quilt you create will be unique, telling a story of dedication and creativity.
Don’t hesitate to seek inspiration from other quilters, attend workshops, or join quilting groups to continue expanding your knowledge and refining your skills. Take advantage of online resources and explore new techniques that push the boundaries of your quilting abilities.
Whether you’re quilting small projects or tackling larger quilts, the art of free motion quilting allows you to express your creativity and add a personal touch to your handmade creations. Embrace the process, enjoy the journey, and take pride in your beautiful quilted masterpieces.
Keep in mind that everyone’s quilting journey is unique, and it’s the joy of learning and improving that makes quilting so fulfilling. So gather your tools, embrace your creativity, and let your sewing machine be your artistic canvas as you explore the endless possibilities of free motion quilting.
Happy quilting!
Frequently Asked Questions about How To Free Motion Quilt On A Regular Sewing Machine
Was this page helpful?
At Storables.com, we guarantee accurate and reliable information. Our content, validated by Expert Board Contributors, is crafted following stringent Editorial Policies. We're committed to providing you with well-researched, expert-backed insights for all your informational needs.


0 thoughts on “How To Free Motion Quilt On A Regular Sewing Machine”