Articles
How To Piece A Quilt
Modified: August 22, 2024
Learn how to piece a quilt with our informative articles. Discover essential tips and techniques for creating beautiful quilts from start to finish.
(Many of the links in this article redirect to a specific reviewed product. Your purchase of these products through affiliate links helps to generate commission for Storables.com, at no extra cost. Learn more)
Introduction
Quilting is a timeless craft that allows you to create beautiful and functional pieces of art. One of the most rewarding aspects of quilting is piecing together the fabric to create unique and intricate designs. Whether you are a beginner or an experienced quilter, learning how to piece a quilt is an essential skill to master.
In this article, we will guide you through the step-by-step process of piecing a quilt. We will cover everything from choosing the fabric to binding the edges, ensuring that you have all the knowledge and tools you need to create a stunning quilt.
So, gather your supplies, unleash your creativity, and let’s dive into the wonderful world of quilting!
Key Takeaways:
- Master the art of quilting by carefully selecting fabric, precise cutting, and meticulous piecing to create stunning and functional quilts. Embrace the journey and let your creativity shine through each step.
- Quilting is a timeless craft that requires patience, attention to detail, and a love for the process. Enjoy the journey of creating beautiful quilts that tell a story and connect generations.
Read more: How To Paper Piece A Quilt Block
Supplies Needed
Before you begin piecing your quilt, it is important to gather all the necessary supplies. Here is a list of the essential items you will need:
- Fabric: Choose a variety of fabrics in different colors, patterns, and textures. Consider the size of your quilt and the desired design when selecting the amount of fabric.
- Rotary cutter and cutting mat: These tools will help you accurately cut your fabric pieces.
- Ruler: A clear, straight ruler is essential for measuring and aligning the fabric for cutting.
- Quilting pins: Use these to hold your fabric pieces in place before sewing.
- Sewing machine: A reliable sewing machine makes piecing your quilt faster and more efficient.
- Thread: Choose a thread color that complements your fabric and is suitable for quilting.
- Iron and ironing board: Pressing your fabric at each step is crucial for achieving accurate and neat piecing.
- Quilting needles: These needles have a larger eye to accommodate thicker quilting threads.
- Quilting ruler: This special ruler helps you create straight lines and accurate measurements for quilting.
- Batting: This is the middle layer of your quilt that provides warmth and thickness. Choose a batting that suits your preferences and climate.
- Fabric for backing: Select a fabric large enough to cover the back of your quilt.
- Binding fabric: This fabric is used to finish the edges of your quilt and give it a polished look.
- Scissors: A good pair of fabric scissors is essential for trimming threads and cutting fabric.
- Safety pins or quilt basting spray: These tools are used to hold the quilt layers together before quilting.
Gather these supplies before you begin your quilting journey to ensure a smooth and enjoyable piecing process.
Choosing the Fabric
When it comes to quilting, choosing the right fabric can make a world of difference in the overall aesthetic and feel of your quilt. Here are a few tips to help you select the perfect fabric for your project:
- Consider your quilt’s purpose: Think about who the quilt is for and the intended use. If it’s a baby quilt, you might want to choose soft and durable fabrics. For a decorative quilt, you can opt for more intricate and vibrant designs.
- Color coordination: Select a color scheme that appeals to you and complements the room where the quilt will be displayed. Consider using a color wheel to help you choose colors that harmonize well together.
- Contrasting and coordinating fabrics: Mixing different patterns, scales, and textures can add visual interest to your quilt. Look for contrasting fabrics to create focal points, and coordinating fabrics to tie the overall design together.
- Fabric quality: Choose high-quality fabrics that will withstand frequent use and washing. Avoid flimsy or sheer fabrics that may tear easily.
- Fabric care: Consider the care instructions for the fabrics you choose. Some fabrics may require special handling or washing methods.
- Personal taste: Ultimately, trust your instincts and choose fabrics that you love. Quilting is a creative outlet, and your personal style and preferences should shine through in your fabric choices.
Before making a final decision, it’s a good idea to gather fabric samples and lay them out next to each other to see how they look together. This will give you a better idea of how the fabrics will interact and help you visualize the final result of your quilt.
Remember, quilting is all about self-expression and creativity, so don’t be afraid to take risks and experiment with different fabric combinations. Have fun with the process and let your imagination soar!
Cutting the Fabric Pieces
Once you have chosen your fabric, it’s time to start cutting the pieces that will eventually be sewn together to create your quilt blocks. Here are the steps to effectively cut your fabric:
- Prepare your fabric: Start by washing and drying your fabric to prevent any shrinkage or color bleeding. Iron the fabric to remove any wrinkles and ensure a smooth surface for cutting.
- Measure and mark: Use a ruler and a fabric marker or chalk to measure and mark the desired dimensions of each fabric piece. Be precise and accurate to ensure your quilt blocks fit together correctly.
- Cut with a rotary cutter: Place your fabric on a cutting mat and use a rotary cutter to cut along the marked lines. Hold the ruler firmly in place to guide the rotary cutter for straight cuts. Be cautious and always cut away from your body to avoid accidents.
- Repeat for each fabric piece: Cut all the fabric pieces needed for your quilt blocks following the same process. Take your time to ensure clean and accurate cuts.
- Organize and label: Once you have cut all your fabric pieces, organize them by size and label them accordingly. This will help you keep track of the pieces and ensure you sew them together in the correct order.
It’s important to note that cutting fabric accurately is essential for successful piecing. Take your time, measure twice, and cut once to avoid any mistakes. Using sharp rotary blades and replacing them as needed will also ensure clean cuts.
Remember, accuracy at this stage will make the piecing process much easier and result in a more polished and professional-looking quilt. So, pay attention to details and take pride in your cutting skills!
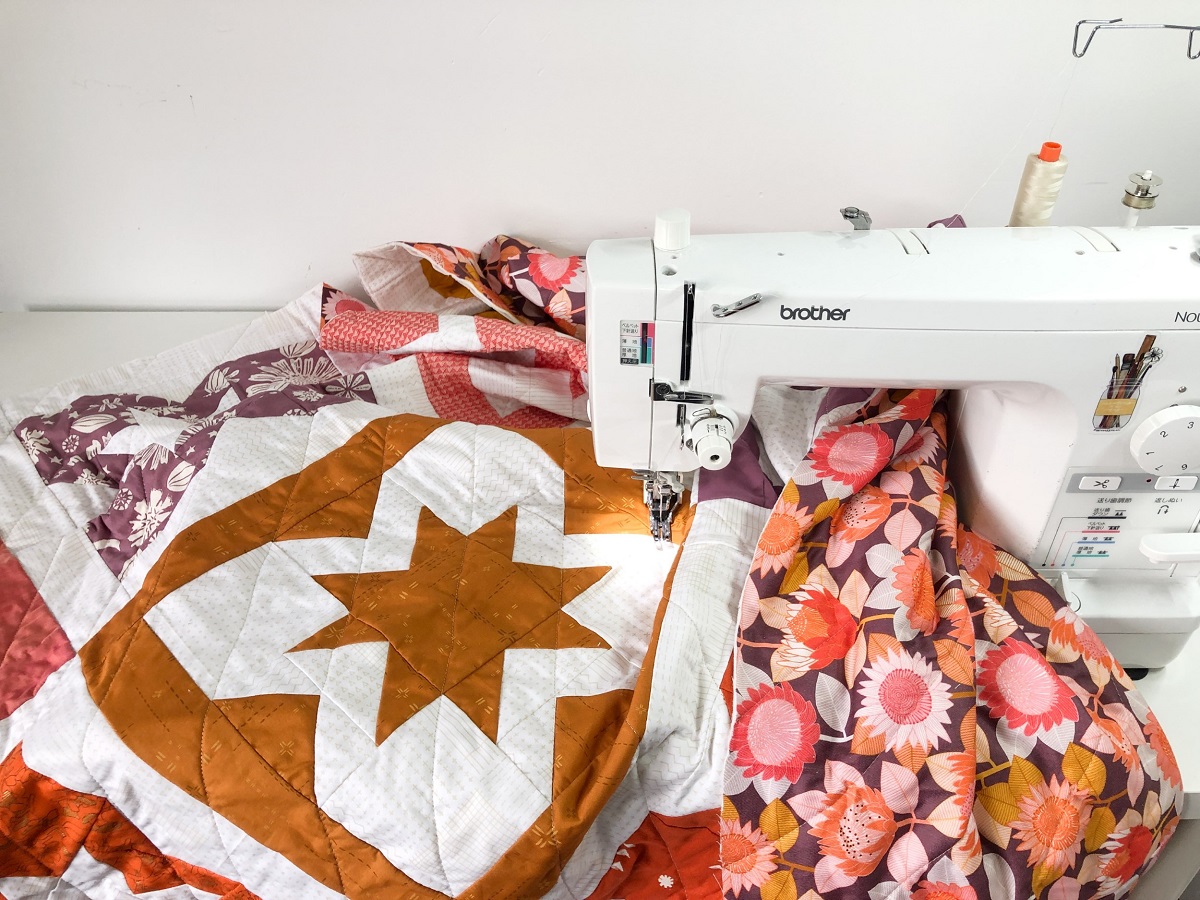
Piecing the Blocks
With your fabric pieces cut and ready, it’s time to start piecing together the blocks of your quilt. This is where your creativity and precision come together to create beautiful patterns and designs. Follow these steps to effectively piece your blocks:
- Refer to your quilt pattern: If you are using a quilt pattern, carefully read the instructions to understand how the blocks are constructed and how the fabric pieces should be sewn together.
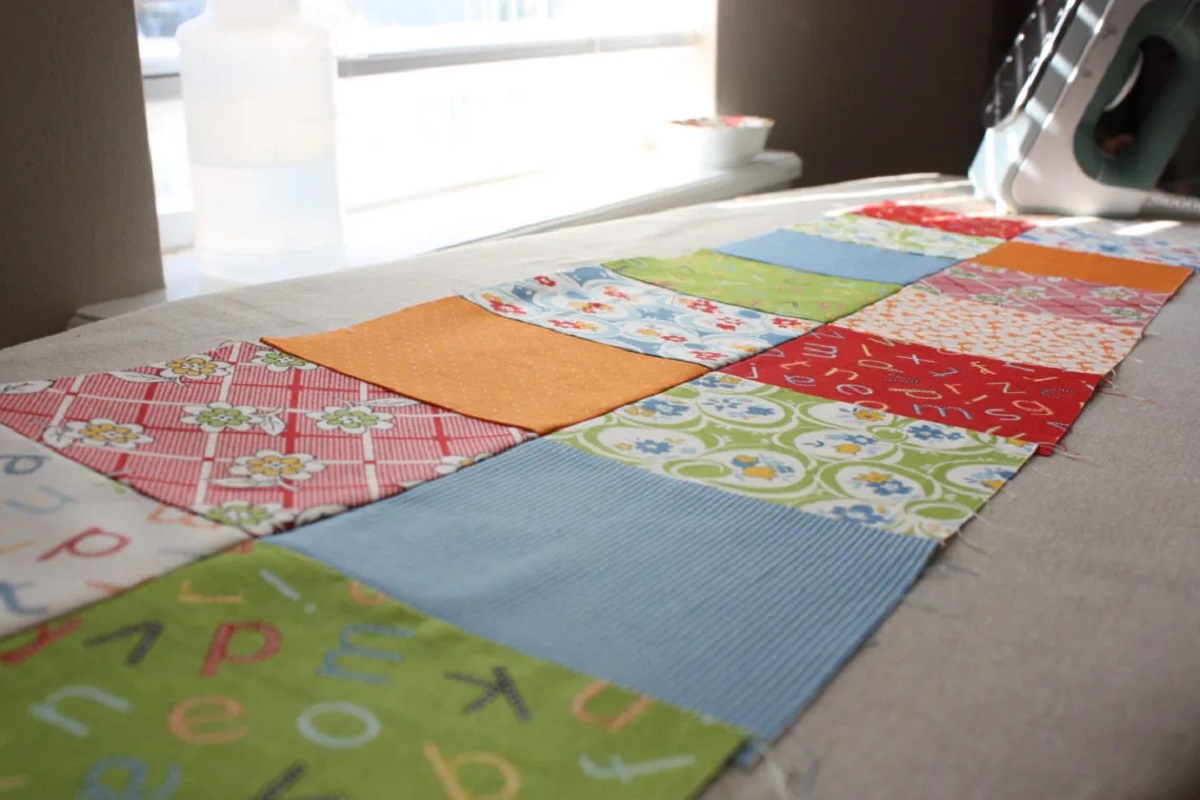
- Lay out the fabric pieces: Before you start sewing, lay out your fabric pieces in the desired pattern. This will help you visualize how the blocks will look once they are sewn together.
- Align and match fabric edges: Take two fabric pieces that need to be sewn together and place them right sides together, aligning the edges that need to be joined. Pin the pieces together to keep them in place.
- Sew a straight seam: Using a quarter-inch seam allowance, sew the fabric pieces together along the pinned edge. Use a sewing machine or stitch by hand, ensuring your stitches are straight and secure.
- Press the seam: Open up the fabric pieces and press the seam flat with an iron. This will create a neat and crisp seam and help the fabric lie flat.
- Continue piecing the blocks: Repeat the process for each set of fabric pieces to create the remaining blocks. Take your time to ensure accurate alignment and precise stitching.
As you piece your blocks, it’s important to maintain consistent seam allowances, ensuring that all your fabric pieces fit together seamlessly. Checking your blocks periodically for accuracy and adjusting as needed will help you achieve the desired outcome.
Remember, practice makes perfect, so don’t be discouraged if your first few blocks don’t turn out exactly as planned. With time and experience, your piecing skills will improve, and you’ll be creating stunning quilt blocks!
Read more: What Needle Size To Use For Quilt Piecing
Arranging the Blocks
Once you have pieced all the blocks for your quilt, it’s time to have some fun and experiment with different fabric block arrangements. The arrangement of your blocks can dramatically impact the overall look and feel of your quilt. Here are some steps to help you in arranging the blocks:
- Lay out the blocks: Start by laying out your quilt blocks on a large design wall or on the floor. Place them in a grid formation or explore other creative layouts such as diagonal patterns or on-point arrangements.
- Experiment with different combinations: Move the blocks around to see how different combinations and placements create different visual effects. Try to create balance and harmony by distributing colors, patterns, and textures throughout the quilt.
- Take a step back: Step away from your arrangement and view it from a distance. This will give you a better perspective on how the blocks come together and allow you to assess the overall balance and appeal of the design.
- Capture your favorite arrangement: Once you’re happy with an arrangement, take a photo or make a sketch to document it. This will help you recreate the layout later during the sewing process.
Remember, arranging the blocks is an opportunity to showcase your artistic vision. Trust your instincts and have fun with the process. Don’t be afraid to try different arrangements and push your creativity boundaries!
If you have trouble deciding on an arrangement or want a second opinion, consider seeking feedback from fellow quilters or joining online quilting communities. These platforms can provide valuable insights and inspiration.
After finalizing your block arrangement, you’re now ready to move on to the next step: sewing the blocks together to create the quilt top.
When piecing a quilt, use a consistent seam allowance to ensure all your blocks and pieces fit together accurately. This will help create a more polished and professional-looking finished quilt.
Sewing the Blocks Together
Now that you have arranged the blocks in your preferred design, it’s time to sew them together to create the quilt top. The way you sew the blocks together will determine the overall structure and appearance of your quilt. Here’s how to sew the blocks together:
- Prepare the blocks: Double-check the order and orientation of the blocks based on your chosen arrangement. Take a photo or refer to your sketch to ensure accuracy.
- Pin the blocks: Starting with the first two blocks that need to be attached, place them right sides together and align the edges to be joined. Use quilting pins or clips to keep the fabric in place.
- Stitch the blocks: Using a quarter-inch seam allowance, sew along the pinned edge to join the blocks. Backstitch at the beginning and end of each seam to secure the stitches.
- Press the seams: Open up the fabric and press the seam flat with an iron. Pressing will help create crisp and flat seams, allowing the quilt to lay smoothly and reducing bulkiness.
- Continue sewing the blocks: Repeat the process of pinning, stitching, and pressing for each pair of blocks until the entire quilt top is completed.
While sewing the blocks together, it’s important to maintain consistent seam allowances and ensure accurate alignment. Take your time and sew slowly to achieve neat and precise seams.
As you sew the blocks together, periodically check the overall design to ensure you’re happy with the progression. Making adjustments or re-arranging blocks as needed will help you achieve the desired visual impact of the quilt top.
Once all the blocks are sewn together, give the quilt top one final pressing to ensure everything is flat and smooth. Congratulations! You now have a completed quilt top ready for the next steps in the quilting process.
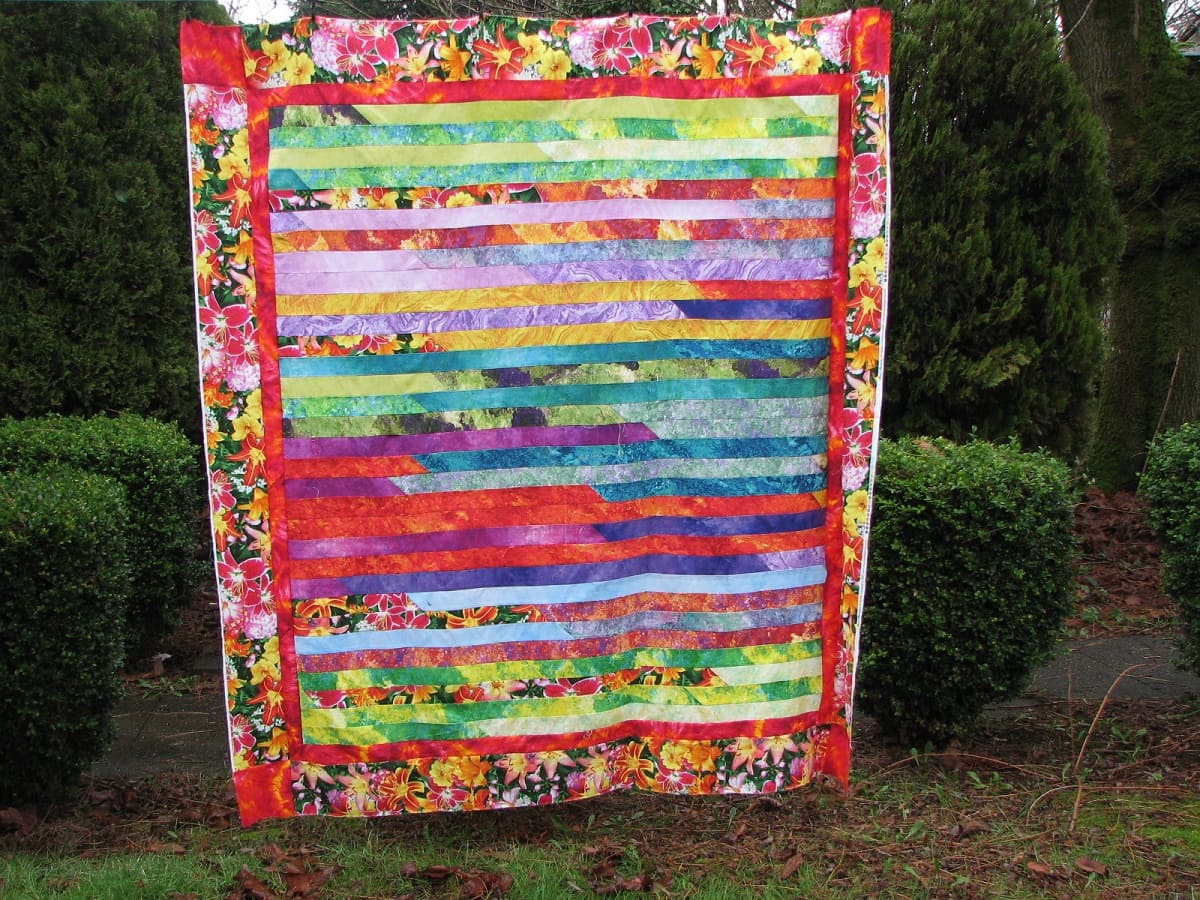
Adding Borders
Adding borders to your quilt not only enhances its design but also provides a finished look. Borders can frame the quilt, add visual interest, and even help with the sizing and proportions. Here’s how to add borders to your quilt:
- Measure your quilt top: Start by measuring the length and width of your quilt top. This will help you determine the size and dimensions of the borders.
- Select border fabric: Choose a fabric that complements the colors and patterns used in your quilt top. Consider the overall design and desired visual impact when selecting the border fabric.
- Calculate border length: To determine the length of your border strips, subtract the combined width of the quilt top from the desired finished width of the border. Divide this number by two to get the length of each border strip.
- Cut border strips: Using a ruler and rotary cutter, cut the fabric into strips according to the calculated length and the width of your borders. Make sure the strips are straight and align with the grain of the fabric.
- Pin and sew borders: Place the first border strip right sides together with one side of the quilt top. Pin the strip in place, aligning the edges. Sew a quarter-inch seam allowance along the pinned edge. Repeat this step for the remaining sides.
- Press the seams: Open up the borders and press the seams flat. Pressing will ensure that the borders lay flat against the quilt top and give a professional finish.
- Measure and trim excess fabric: Once all the borders are attached, measure the quilt top again to ensure it is square. Trim any excess fabric and align the edges if necessary.
When selecting border widths, consider the overall design and size of your quilt. Narrow borders can create a more subtle frame, while wider borders can make a bold statement. Experiment with different border widths to achieve the desired aesthetic.
Adding borders is an exciting step in the quilting process, as it brings your quilt top to completion and prepares it for the next stage: quilting the layers together.
Quilting the Layers
Quilting the layers is the process of stitching the quilt top, batting, and backing together to create a cohesive and durable quilt. The quilting not only adds decorative elements but also secures the layers and provides warmth and texture. Here’s how to quilt the layers:
- Prepare the layers: Lay the quilt backing fabric wrong side up on a flat surface. Smooth out any wrinkles or creases. Place the batting on top of the backing fabric, ensuring it covers the entire area. Finally, carefully place the quilt top right side up on top of the batting.
- Baste the layers: There are different methods to baste the layers together, such as using safety pins, thread basting, or quilt basting spray. Choose the basting method that works best for you and secure the layers together at regular intervals to prevent shifting during quilting.
- Select quilting design: Decide on the quilting design that you want to stitch on your quilt. You can choose from options like straight lines, free-motion quilting, or using quilting stencils or templates. Consider the complexity of the design and your quilting skill level when making your decision.
- Set up your sewing machine or quilting setup: If you’re using a sewing machine, attach the walking foot or quilting foot to ensure smooth feeding of fabric layers. If you’re hand quilting, choose a quilting needle and thread that complement your quilting design.
- Start quilting: Begin quilting by stitching along the chosen quilting lines or patterns. Take your time and follow a steady pace to maintain consistent stitch lengths and tension. If machine quilting, be sure to pivot or stop with the needle down to make turns or change directions smoothly.
- Continue quilting the entire quilt: Work systematically, quilting one section at a time, until the entire quilt is quilted. Take breaks if needed, but try to maintain a consistent quilting rhythm for even results.
- Secure and tie off threads: As you quilt, periodically secure and tie off threads on both the top and back of the quilt to prevent loose ends and potential unraveling.
Quilting the layers is a labor of love and requires patience and attention to detail. Take your time and enjoy the process, as it’s an opportunity to add personal touches and unique design elements to your quilt.
Once the quilting is complete, trim any excess batting and backing fabric, and prepare for the final step: binding the edges of your quilt.
Binding the Edges
Binding is the finishing touch that adds durability and a polished appearance to your quilt. It involves sewing a fabric strip around the raw edges of the quilt to enclose them. Here’s how to bind the edges of your quilt:
- Prepare the binding fabric: Cut strips of fabric for the binding, ensuring they are wide enough to wrap around the quilt edges. The length of the strips should be equal to the total perimeter of the quilt, plus a few extra inches for the corners and joining.
- Join the binding strips: If necessary, sew the binding strips together at a 45-degree angle to form one continuous strip. Trim the excess fabric and press the seams open for a neater finish.
- Attach the binding: Start by leaving a tail of binding fabric, and align the raw edge of the binding strip with the raw edge of the quilt, right sides together. Sew the binding to the quilt using a ¼ inch seam allowance, starting a few inches away from one corner.
- Miter the corners: As you approach a corner, stop stitching a ¼ inch away from the edge and backstitch. Fold the binding strip up, forming a 45-degree angle, and then fold it back down, aligning the raw edges with the next side of the quilt. Continue sewing along the next side, repeating this process for each corner.
- Join the ends: When you reach the starting point, trim the binding strip to overlap the beginning tail. Open both ends of the binding and fold back the excess fabric. Placing the ends right sides together, sew across the diagonal line where they meet. Trim the excess fabric and press the seam open.
- Finish sewing: Fold the binding strip over the raw edges of the quilt, enclosing them. Secure the binding in place by hand or machine stitching along the folded edge. Take care to miter the corners neatly for a professional look.
- Press and finish: Once the binding is securely attached, give the entire quilt a final press to ensure a crisp and finished look. Trim any loose threads.
Binding the edges may seem challenging at first, but with practice, it becomes easier. Take your time to ensure a clean and even binding. Remember, the binding not only adds functionality but also serves as a decorative element to your quilt. Choose a binding fabric that complements your quilt’s design and enjoy the final transformation of your quilt into a completed work of art.
Congratulations! Your quilt is now ready to be admired, cherished, and enjoyed for years to come.
Conclusion
Congratulations on completing the journey of piecing a quilt! Throughout this article, we have covered the essential steps and techniques required to create a beautiful and functional quilt. From choosing the fabric to adding the finishing touches, every step is a testament to your creativity and skill as a quilter.
Remember, quilting is not just about the end product; it’s about the process and the joy that comes with it. Take the time to enjoy each step, from selecting the fabric to arranging the blocks and quilting the layers. Embrace the imperfections and allow your unique style and personality to shine through in your quilt.
As you continue on your quilting journey, don’t be afraid to experiment with different techniques and designs. Attend workshops, join quilting communities, and learn from other experienced quilters. The more you explore and challenge yourself, the more you will grow as an artist.
Finally, remember that the most important part of quilting is the love and dedication you pour into each stitch. Your quilt will not only keep you warm but also become an heirloom that tells a story and connects generations. Cherish your quilts and share the joy of quilting with others.
So, gather your supplies, unleash your creativity, and start piecing your next quilt. Whether you’re quilting for yourself, gifting to a loved one, or even for charitable causes, embrace the journey and let your quilts be a reflection of your passion and artistry.
Happy quilting!
Frequently Asked Questions about How To Piece A Quilt
Was this page helpful?
At Storables.com, we guarantee accurate and reliable information. Our content, validated by Expert Board Contributors, is crafted following stringent Editorial Policies. We're committed to providing you with well-researched, expert-backed insights for all your informational needs.


0 thoughts on “How To Piece A Quilt”