Articles
How To Filter Rainwater From Roof
Modified: October 18, 2024
Learn how to filter rainwater from your roof with our informative articles. Start collecting and using sustainable water today!
(Many of the links in this article redirect to a specific reviewed product. Your purchase of these products through affiliate links helps to generate commission for Storables.com, at no extra cost. Learn more)
Introduction
Welcome to our comprehensive guide on how to filter rainwater from your roof. Filtering rainwater allows you to harness a valuable resource, reduce your water consumption, and minimize the strain on local water supplies. In this article, we will explore the benefits of filtering rainwater, the materials needed for a filtration system, and step-by-step instructions to set it up.
Rainwater is a free and abundant resource that can be collected and used for a variety of purposes, such as watering plants, washing cars, and even flushing toilets. However, before using rainwater for these activities, it is important to filter out any impurities, debris, and contaminants that may be present on your roof or in the gutters.
Filtering rainwater not only improves its quality but also helps to protect your plumbing system and extend the lifespan of your appliances. Additionally, by filtering rainwater, you are reducing the demand on municipal water supplies, conserving an essential resource, and promoting sustainability.
Now, let’s dive into the materials needed for a rainwater filtration system.
Key Takeaways:
- Filtering rainwater from your roof offers cost savings, environmental benefits, and improved water quality. By setting up a rainwater filtration system, you can contribute to water conservation and sustainable living.
- Installing gutters, downspouts, and a multi-stage filtration system is crucial for effectively filtering rainwater. With the right materials and steps, you can enjoy the benefits of clean, filtered rainwater for various household and outdoor uses.
Read more: How To Store Rainwater For Drinking
Benefits of Filtering Rainwater from the Roof
Filtering rainwater from your roof brings numerous benefits, both for you personally and for the environment. Let’s explore some of the key advantages of implementing a rainwater filtration system:
- Cost Savings: Using filtered rainwater for tasks like watering your garden or washing your car can lead to significant cost savings on your water bill. Instead of relying solely on treated municipal water, you can utilize a free and sustainable water source.
- Environmental Impact: By filtering rainwater and using it for various purposes, you are reducing the demand for water from natural sources like rivers and lakes. This helps to conserve water resources and protect delicate ecosystems that may be affected by excessive water extraction.
- Improved Water Quality: Rainwater collected from your roof can contain various contaminants, such as dust, debris, bird droppings, and pollutants accumulated on the roof surface. Filtering rainwater removes these impurities, ensuring you have access to clean and safe water for your needs.
- Prevention of Plumbing Issues: Rainwater that hasn’t been properly filtered can contain sediments and debris that can clog your plumbing system. By filtering the water, you can prevent blockages and ensure the smooth flow of water through your pipes, reducing the risk of costly plumbing repairs.
- Reduced Water Footprint: Using rainwater instead of treated municipal water for non-potable purposes like gardening and outdoor cleaning helps to reduce your overall water footprint. This contributes to water conservation efforts and promotes sustainable living.
- Emergency Water Supply: In the event of a water shortage or natural disaster, having a rainwater filtration system in place can provide you with an emergency supply of water. This can be crucial during times when access to clean water may be limited or compromised.
As you can see, filtering rainwater from your roof offers a range of benefits that encompass cost savings, environmental conservation, improved water quality, and preparedness for emergencies. Now, let’s move on to the materials you will need to set up a rainwater filtration system.
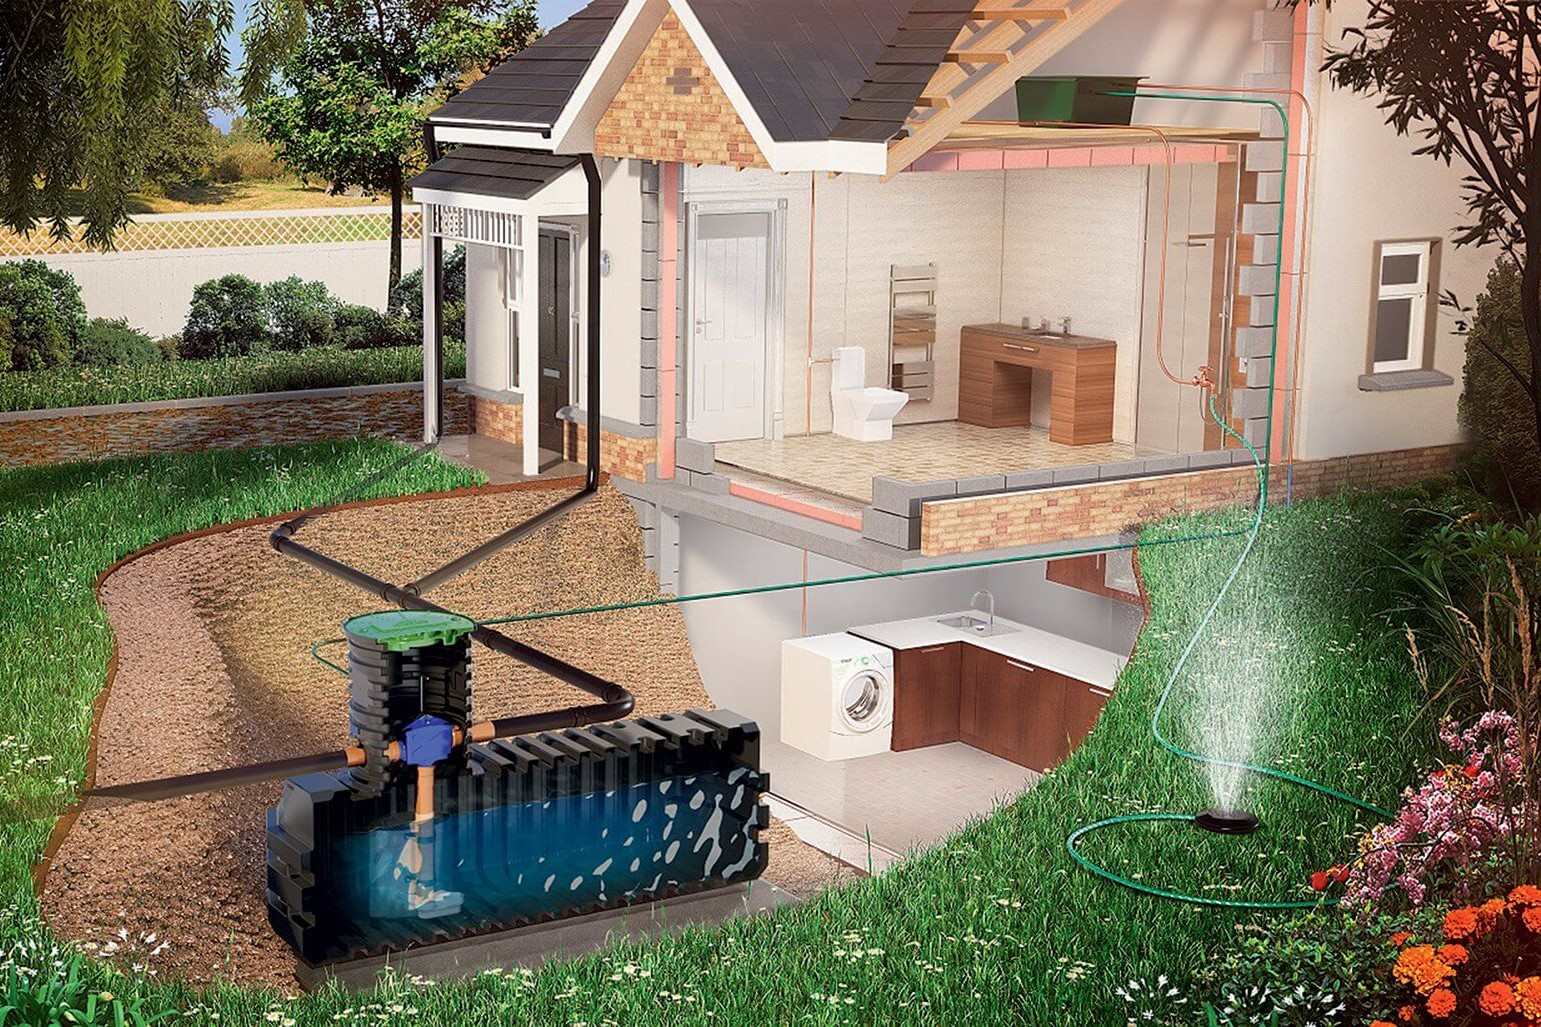
Materials Needed for Filtration System
Before you can start filtering rainwater from your roof, you will need a few essential materials to set up an effective filtration system. Here is a list of the items you will need:
- Gutters and Downspouts: Install a gutter system on your roof to collect rainwater and direct it into downspouts.
- Leaf Guard or Gutter Mesh: Attach a leaf guard or gutter mesh to the gutters to prevent leaves, debris, and other large particles from entering the filtration system.
- First Flush Diverter: Install a first flush diverter at the beginning of the downspout to divert and flush out the initial portion of the rainwater, which may contain the highest concentration of contaminants.
- Sand and Gravel Filter: Set up a sand and gravel filter to remove smaller particles, sediments, and debris from the rainwater. This filter consists of layers of gravel, sand, and sometimes activated charcoal.
- Charcoal Filter: Add a charcoal filter to further improve the quality of the filtered water. The activated charcoal helps to remove impurities, odors, and harmful chemicals.
- Ultraviolet (UV) Sterilizer: Install an ultraviolet sterilizer to kill any remaining bacteria, viruses, or pathogens in the filtered water. UV sterilizers use ultraviolet light to disinfect the water without the use of chemicals.
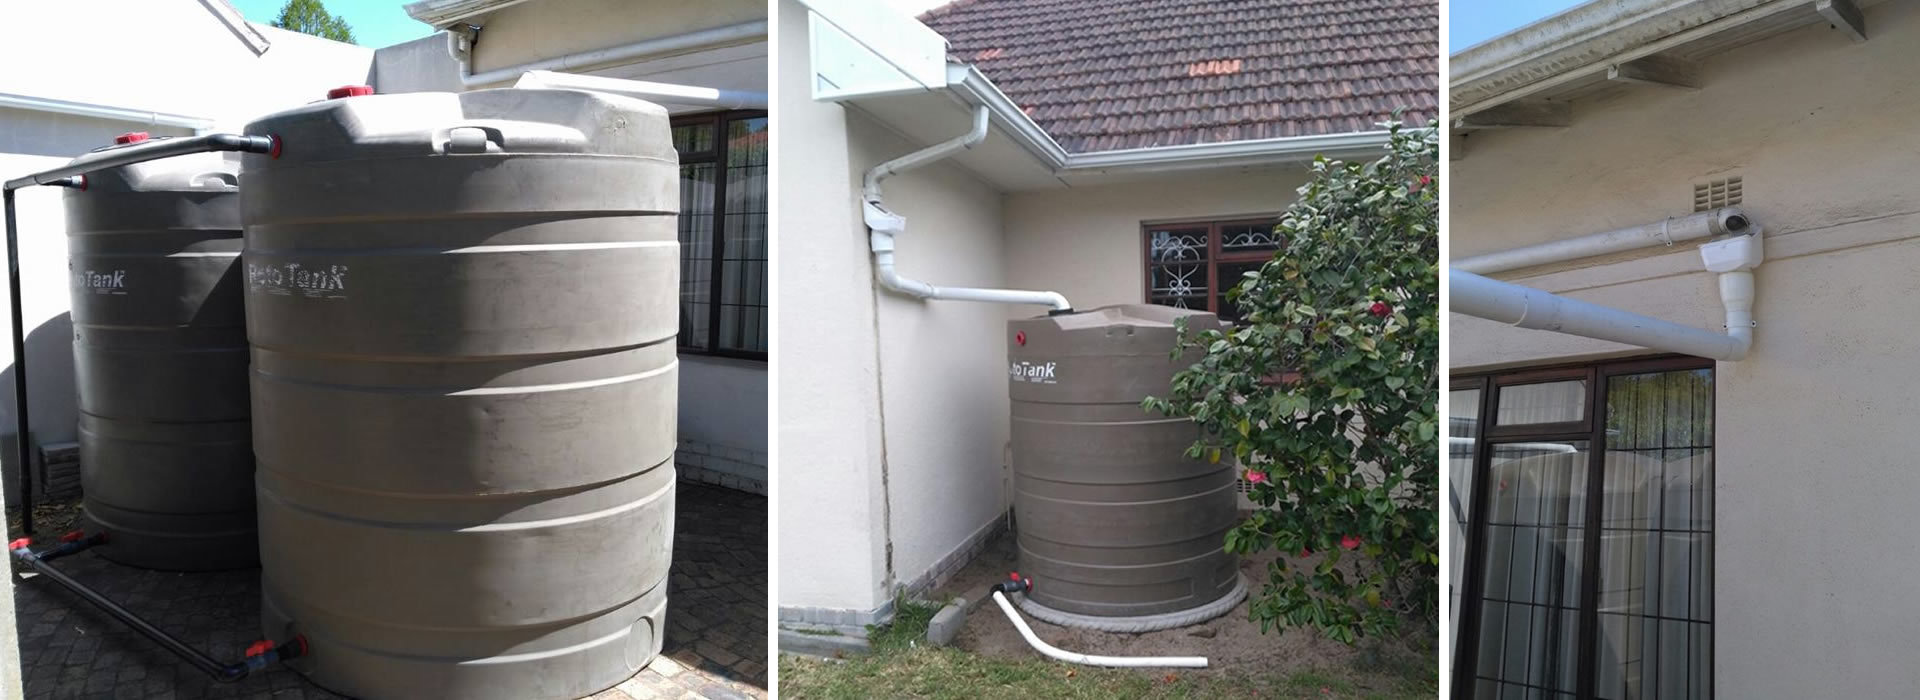
- Storage Containers: Have suitable storage containers or tanks to store the filtered rainwater for later use. These can be large water barrels, cisterns, or tanks designed specifically for rainwater storage.
These are the essential materials you will need to effectively filter rainwater from your roof. It is important to select high-quality materials that are suitable for your specific roofing system and filtration needs. Now that you have gathered all the necessary materials, let’s move on to the step-by-step process of setting up your rainwater filtration system.
Step 1: Installing Gutters and Downspouts
The first step in setting up your rainwater filtration system is to install gutters and downspouts on your roof. This will allow rainwater to be collected and directed towards the filtration system. Here’s a step-by-step guide on installing gutters and downspouts:
- Measure and Plan: Begin by measuring the length of your roof and determining the optimal placement for the gutters. Take into consideration the slope of the roof, any obstacles such as chimneys or dormers, and the location of downspouts.
- Mark the Gutter Position: Use a chalk or marker to mark the position of the gutters along the roofline. Ensure that the markings are level and aligned properly.
- Install the Gutter Hangers: Attach gutter hangers to the fascia boards or roof rafters at regular intervals. These hangers will support the weight of the gutters and secure them in place.
- Secure the Gutters: Fix the gutters onto the hangers, ensuring they are level and properly positioned. Use screws or nails to secure them in place. Trim the gutters to fit the length of the roof, if necessary.
- Connect the Downspouts: Install downspout outlets at appropriate locations along the gutters. Attach the downspouts to the outlets, directing them downwards towards the ground.
- Direct the Downspouts: Ensure the downspouts are extended away from the foundation of your house to prevent water damage. It is recommended to use downspout extensions or splash blocks to channel the water away from the house.
- Seal the Joints: Inspect the joints and connections of the gutters and downspouts. Apply sealant or caulking to any gaps or joints to prevent leaks and ensure proper water flow.
- Test the System: Once the gutters and downspouts are installed, test the system by pouring water into the gutters and observing the flow. Make any necessary adjustments or repairs to ensure proper drainage.
By following these steps, you will successfully install gutters and downspouts to collect rainwater from your roof. Now, let’s move on to the next step of adding a leaf guard or gutter mesh to prevent debris from entering the filtration system.
Step 2: Adding a Leaf Guard or Gutter Mesh
After installing gutters and downspouts, the next step in setting up your rainwater filtration system is to add a leaf guard or gutter mesh. This component helps to prevent leaves, debris, and other large particles from entering the filtration system. Here’s a step-by-step guide on adding a leaf guard or gutter mesh:
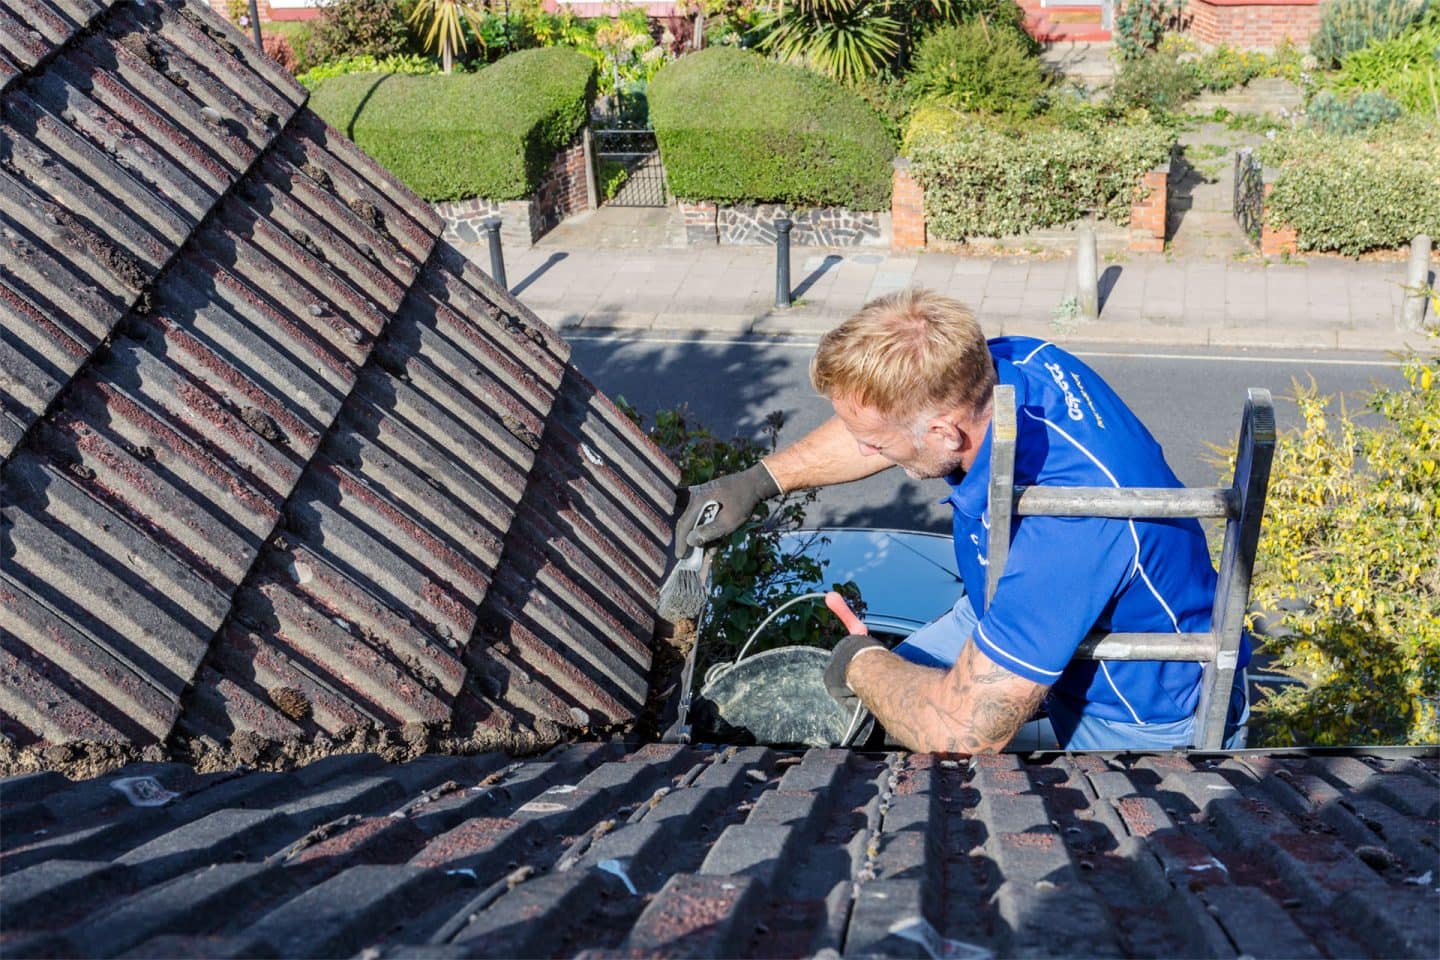
- Clean the Gutters: Before adding a leaf guard or gutter mesh, it’s important to clean any existing debris from the gutters. This ensures that the filtration system operates efficiently.
- Measure and Cut: Determine the length of the leaf guard or gutter mesh needed to cover the entire length of your gutters. Use a measuring tape and a pair of scissors or a utility knife to cut the material to the appropriate size.
- Secure the Leaf Guard or Gutter Mesh: Place the leaf guard or gutter mesh over the gutters, ensuring it fits snugly and covers the entire area. Secure it in place using clips, screws, or adhesive, depending on the type of leaf guard or gutter mesh being used.
- Ensure Proper Drainage: As you attach the leaf guard or gutter mesh, ensure that it does not obstruct the flow of water into the gutters. Check that water can easily enter the gutters and flow towards the downspouts.
- Inspect and Maintain: Regularly inspect the leaf guard or gutter mesh to ensure it is functioning effectively. Remove any accumulated debris or leaves to maintain proper water flow and prevent clogging.
By following these steps, you will successfully add a leaf guard or gutter mesh to your gutters, preventing large particles and debris from entering the filtration system. Now, let’s move on to the next step of installing a first flush diverter to flush out the initial portion of rainwater.
Read more: How To Remove Shingles From Roof
Step 3: Installing a First Flush Diverter
Installing a first flush diverter is an important step in setting up your rainwater filtration system. The purpose of a first flush diverter is to divert and flush out the initial portion of rainwater, which may contain the highest concentration of contaminants. Here’s a step-by-step guide on installing a first flush diverter:
- Select the Right Size: Choose a first flush diverter that is appropriate for the size of your roof and the volume of rainwater you expect to collect. It is recommended to consult with a professional or refer to the manufacturer’s guidelines.
- Determine the Installation Location: Decide where you want to install the first flush diverter along the downspout. This can be near the top, middle, or bottom section of the downspout, depending on your preference and the specific requirements of the diverter.
- Cut the Downspout: Measure the height of the first flush diverter and mark the downspout accordingly. Use a hacksaw or a pipe cutter to cut the downspout at the marked location.
- Install the Diverter: Follow the manufacturer’s instructions to properly install the first flush diverter. This typically involves inserting the diverter into the cut section of the downspout and securing it with screws or clamps.
- Connect the Overflow Pipe: Some first flush diverters have an overflow pipe to redirect excess water once the diverter is full. Connect the overflow pipe to the diverter, ensuring it is properly aligned and securely attached.
- Test the Diverter: Pour water into the gutters and observe the flow through the first flush diverter. Check that the diverter is diverting the initial portion of water and flushing it out through the overflow pipe.
By following these steps, you will successfully install a first flush diverter as part of your rainwater filtration system. The diverter plays a crucial role in removing contaminants from the initial rainwater, ensuring that only clean water enters the filtration system. Now that the first flush diverter is in place, let’s move on to setting up a sand and gravel filter.
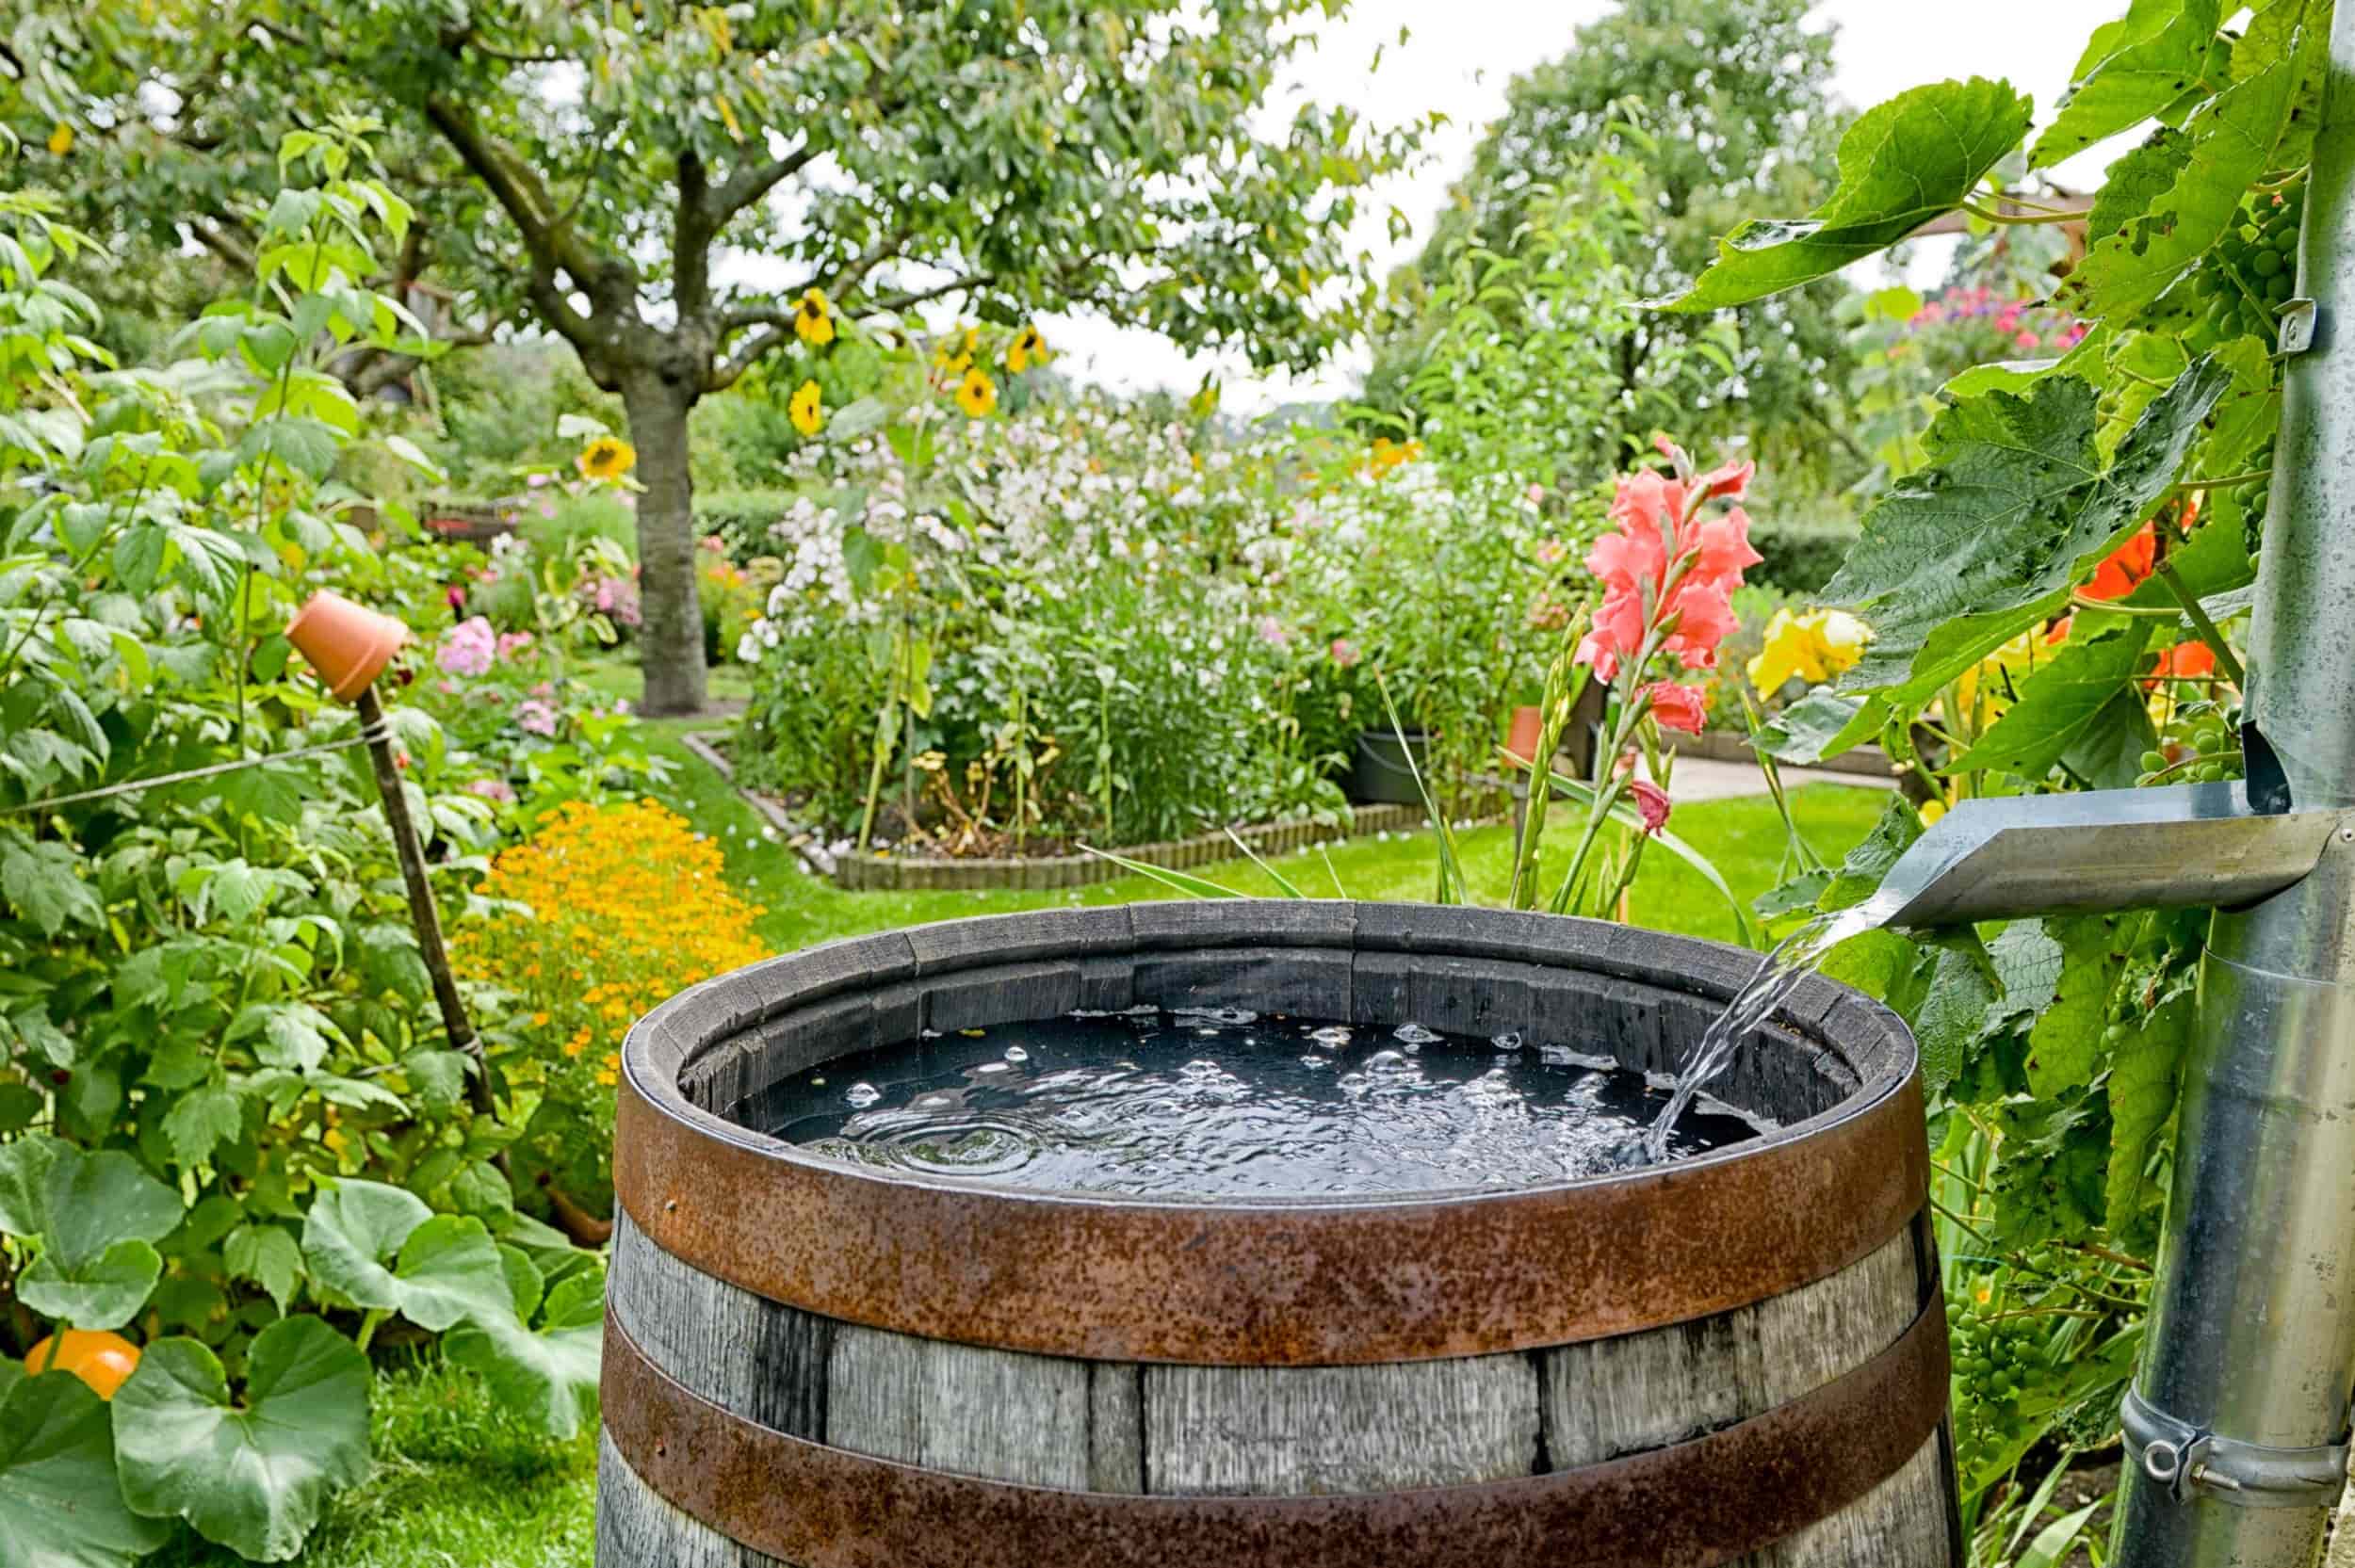
Install a gutter system with a leaf guard to prevent debris from entering the rainwater collection system. This will help filter out any large particles and keep the water clean.
Step 4: Setting up a Sand and Gravel Filter
A sand and gravel filter is an important component of a rainwater filtration system as it helps remove smaller particles, sediments, and debris from the collected rainwater. Here’s a step-by-step guide on how to set up a sand and gravel filter:
- Select a Container: Choose a container or tank that will serve as the filter for the rainwater. This can be a large drum, barrel, or a specifically designed filter system. Ensure the container is clean and able to hold the desired amount of water.
- Prepare the Container: Drill a series of small holes near the bottom of the container to allow water to flow through. These holes will prevent water from pooling at the bottom of the filter and ensure proper drainage.
- Layer the Gravel: Add a layer of coarse gravel to the bottom of the container. This acts as a first line of defense against larger particles and helps promote proper water flow throughout the filter.
- Add a Layer of Sand: On top of the gravel, add a layer of sand. The sand further filters out smaller particles and sediments from the rainwater, improving the overall quality of the filtered water.
- Repeat the Layers: Repeat the layering process with alternating layers of gravel and sand until the container is almost full. The number of layers will depend on the size and height of the container, but at least three to four layers are recommended.
- Install Inlet and Outlet Pipes: Install an inlet pipe (connected to the downspout) near the top of the container, allowing rainwater to flow in. Connect an outlet pipe near the bottom of the container to drain the filtered water into the next stage of the filtration system.
- Secure and Seal: Ensure that all pipes and connections are secure and watertight. Use sealant or plumbing tape if necessary to prevent any leaks or water loss.
- Periodic Maintenance: Regularly inspect and clean the sand and gravel layers to remove accumulated debris and sediments. This ensures optimal filtration efficiency and prolongs the lifespan of the filter.
By following these steps, you will successfully set up a sand and gravel filter in your rainwater filtration system. This filter will effectively remove smaller particles and sediments, improving the quality of the filtered rainwater. Now, let’s move on to the next step – adding a charcoal filter.
Step 5: Adding a Charcoal Filter
Adding a charcoal filter to your rainwater filtration system is an excellent way to further enhance the quality of the filtered water. Charcoal helps remove impurities, odors, and harmful chemicals, providing you with cleaner and safer water. Here’s a step-by-step guide on how to add a charcoal filter:
- Select the Charcoal Filter: Choose a charcoal filter that is suitable for your rainwater filtration system. You can find activated charcoal filters specifically designed for water purification purposes. Ensure that the filter is the appropriate size for your setup.
- Prepare the Filter Housing: If the charcoal filter requires a housing unit, prepare it by following the manufacturer’s instructions. This may involve attaching fittings and connectors to the housing unit.
- Position the Charcoal Filter: Place the charcoal filter inside the housing unit or at a designated spot in the filtration system. Ensure that it is securely positioned and that the water can flow through it effectively.
- Connect Inlet and Outlet Pipes: Connect the inlet pipe coming from the sand and gravel filter to the charcoal filter. This allows the water to flow through the charcoal for additional purification. Connect an outlet pipe from the charcoal filter to carry the filtered water to the next stage of the filtration system.
- Test the Filter: Once the charcoal filter is in place, pour some water into the filtration system and observe the flow through the charcoal filter. Ensure that the water passes through the filter and that there are no leaks or blockages.
- Monitor and Replace the Charcoal: Activated charcoal in filters has a limited lifespan. Check the manufacturer’s recommendations for how often the charcoal should be replaced. Monitor the effectiveness of the charcoal filter and replace it accordingly to maintain optimal filtration.
By following these steps, you will successfully add a charcoal filter to your rainwater filtration system, improving the quality of the filtered water by removing impurities and odors. Now, let’s move on to the next step – installing an ultraviolet (UV) sterilizer.
Step 6: Installing an Ultraviolet (UV) Sterilizer
Installing an ultraviolet (UV) sterilizer is an important step in ensuring that the filtered rainwater is free from harmful bacteria, viruses, and pathogens. UV sterilizers use ultraviolet light to disinfect the water without the use of chemicals. Here’s a step-by-step guide on how to install an ultraviolet sterilizer:
- Select the UV Sterilizer: Choose a UV sterilizer that is suitable for your rainwater filtration system. Consider factors such as flow rate, capacity, and compatibility with your plumbing setup. Refer to the manufacturer’s guidelines for the appropriate size and specifications.
- Identify the Installation Location: Determine where you want to install the UV sterilizer in your filtration system. It is typically installed after the charcoal filter and before the water storage tanks or distribution points.
- Prepare the Plumbing: Depending on the design of your UV sterilizer, you may need to make some adjustments to the plumbing. This can involve attaching fittings and connectors to ensure a proper and secure connection to the main water line.
- Mount the UV Sterilizer: Follow the manufacturer’s instructions to mount the UV sterilizer securely in the chosen location. Ensure that it is positioned properly and that it allows for easy access for maintenance and bulb replacement.
- Connect the Inlet and Outlet Pipes: Connect the inlet pipe from the charcoal filter or the previous stage of the filtration system to the UV sterilizer. Connect the outlet pipe from the UV sterilizer to carry the filtered water to the storage tanks or distribution points.
- Properly Seal the Connections: Ensure that all connections, fittings, and joints are properly sealed to prevent any leaks and maintain the flow of water through the sterilizer.
- Install and Replace UV Bulbs: UV sterilizers require regular maintenance, including bulb replacement. Install the UV bulb according to the manufacturer’s instructions and consider setting reminders for the replacement schedule.
- Power Up and Test: Once the UV sterilizer is properly installed, connect it to a power source. Switch on the UV sterilizer and test its functionality by ensuring that the UV light is emitting properly. Refer to the manufacturer’s guidelines for any specific testing procedures.
By following these steps, you will successfully install an ultraviolet (UV) sterilizer in your rainwater filtration system. This final stage ensures the water is effectively disinfected and free from harmful contaminants. Now, let’s move on to the last step – storing the filtered rainwater.
Read more: How To Clean Gutters From The Roof
Step 7: Storing Filtered Rainwater
Storing filtered rainwater is the final step in completing your rainwater filtration system. Proper storage ensures that you have a readily available supply of clean water for various household and outdoor uses. Here’s a step-by-step guide on how to store filtered rainwater:
- Select Suitable Storage Containers: Choose storage containers that are specifically designed for storing rainwater. These can include water barrels, cisterns, or tanks made from food-grade materials. Consider the size and capacity of the containers based on your water needs.
- Clean and Prepare the Containers: Thoroughly clean the storage containers before use. Remove any dirt, debris, or residue that may contaminate the filtered water. Follow the manufacturer’s guidelines for proper cleaning procedures.
- Position the Containers: Place the storage containers in a convenient location near the downspouts or the outlet pipe of the filtration system. Ensure that the containers are stable, secure, and protected from potential damage.
- Connect the Outlet Pipe: Connect the outlet pipe from the filtration system to the inlet of the storage container. Ensure a secure connection to prevent any leaks or water loss during the storage process.
- Use Mosquito Screens: Install mosquito screens or covers on the openings of the storage containers. This helps prevent insects, debris, and other contaminants from entering the stored water. Regularly inspect and clean the screens to ensure their effectiveness.
- Maintain Water Quality: Regularly monitor the quality of the stored rainwater. Inspect for any signs of contamination, such as odor, discoloration, or the presence of algae or sediment. If necessary, treat the water with appropriate disinfectants or filters to maintain its quality.
- Implement a Rotation System: Establish a rotation system for using the stored rainwater. Regularly use and refresh the stored water to prevent stagnation and maintain its freshness. This can involve using the water for tasks such as watering plants, cleaning, or flushing toilets.
- Follow Local Regulations: Familiarize yourself with any local regulations or guidelines regarding rainwater storage. Ensure that your storage system complies with any restrictions or requirements set by your local authorities.
By following these steps, you will successfully store the filtered rainwater and have a reliable supply of clean water for various household and outdoor purposes. Remember to regularly maintain and monitor the stored water to ensure its quality and freshness. With your rainwater filtration system complete, you can now enjoy the benefits of using this sustainable and eco-friendly water source.
Finally, we have reached the end of our comprehensive guide on how to filter rainwater from your roof. We hope you found this information helpful and that you’re now empowered to set up your own rainwater filtration system. Remember, by filtering rainwater, you not only save money but also contribute to water conservation efforts and promote a more sustainable lifestyle. Cheers to clean, filtered rainwater!
Conclusion
Filtering rainwater from your roof is a practical and eco-friendly way to harness a valuable resource and reduce your reliance on treated municipal water. By following the steps outlined in this comprehensive guide, you can successfully set up a rainwater filtration system that provides you with clean and safe water for various household and outdoor uses.
Throughout this guide, we explored the benefits of filtering rainwater, the materials needed for a filtration system, and the step-by-step process of installation. We learned about the cost savings, environmental impact, improved water quality, and reduced water footprint that come with using filtered rainwater. We also discussed the importance of installing gutters and downspouts, adding a leaf guard or gutter mesh, installing a first flush diverter, setting up a sand and gravel filter, adding a charcoal filter, installing a UV sterilizer, and storing the filtered rainwater.
By properly filtering rainwater, you not only ensure that the water you use is clean and safe, but you also contribute to water conservation efforts, reduce strain on municipal water supplies, and promote a more sustainable lifestyle. Additionally, having a rainwater filtration system in place can provide you with an emergency and eco-friendly water supply during times of water shortage or natural disasters.
Remember to regularly monitor and maintain your rainwater filtration system, inspecting and cleaning filters, replacing bulbs, and ensuring proper water flow. Adhering to local regulations and guidelines for rainwater storage is also essential to ensure compliance and safety.
Now that you have a comprehensive understanding of how to filter rainwater from your roof, it’s time to put this knowledge into action. Start collecting rainwater, filtering it using the steps outlined in this guide, and enjoy the benefits of this valuable water resource.
Thank you for reading this guide, and we hope it has empowered you to take a step towards a more sustainable lifestyle. Filtered rainwater is not only better for your wallet, but it’s also better for the environment. Make the most of this abundant and free resource and contribute to a greener, more sustainable future.
Frequently Asked Questions about How To Filter Rainwater From Roof
Was this page helpful?
At Storables.com, we guarantee accurate and reliable information. Our content, validated by Expert Board Contributors, is crafted following stringent Editorial Policies. We're committed to providing you with well-researched, expert-backed insights for all your informational needs.


0 thoughts on “How To Filter Rainwater From Roof”