Articles
How To Remove Shingles From Roof
Modified: February 24, 2024
Learn effective techniques to remove shingles from your roof with our informative articles. Get step-by-step instructions and expert tips for a successful project.
(Many of the links in this article redirect to a specific reviewed product. Your purchase of these products through affiliate links helps to generate commission for Storables.com, at no extra cost. Learn more)
Introduction
When it comes to maintaining the integrity and appearance of your home’s roof, removing damaged shingles is an essential task. Whether it’s due to wear and tear, storm damage, or the need for a roof replacement, knowing how to remove shingles correctly is crucial.
In this guide, we will walk you through the step-by-step process of removing shingles from your roof. With the right tools and a little bit of know-how, you can safely and effectively remove damaged shingles, ensuring the longevity and structural integrity of your roof.
Before we dive into the steps, it’s important to note that removing shingles from your roof can be a physically demanding task. If you’re not comfortable or confident in your abilities, it’s always best to hire a professional roofing contractor to handle the job.
Now, without further ado, let’s get started on how to remove shingles from your roof!
Key Takeaways:
- Properly removing damaged shingles from your roof involves gathering the right tools, preparing the work area, inspecting for damage, and safely lifting and replacing shingles. It’s essential to prioritize safety and consider professional assistance if needed.
- After removing damaged shingles, inspecting and repairing any underlying roof damage is crucial for maintaining stability and longevity. Installing new shingles, if necessary, and thoroughly cleaning up the work area ensures a well-maintained and protective roof for years to come.
Read more: What Is A Roof Shingle
Step 1: Gather necessary tools and materials
Before you begin removing shingles from your roof, it’s essential to gather all the necessary tools and materials. Having the right equipment on hand will make the process much smoother and more efficient. Here are the tools and materials you’ll need:
- Work gloves: Protect your hands from sharp edges and debris.
- Safety goggles: Shield your eyes from flying debris or dust.
- Flat pry bar: Use it to lift and remove the shingles.
- Roofing scraper or utility knife: Use it to cut through any adhesive and loosen shingles.
- Roofing nails: Needed for securing new shingles or repairing the roof.
- Roofing cement: Required for reattaching shingles or repairing damaged areas.
- Ladder: Get a sturdy ladder that can safely reach the roof.
- Broom or brush: Use it to clean debris from the work area.
- Trash bags: Dispose of old shingles and debris.
- Replacement shingles: If you’re removing damaged shingles, you’ll need new ones for replacement.
Make sure to double-check that you have all the necessary tools and materials before proceeding. It’s always better to be prepared and avoid interruptions during the process.
Once you’ve gathered everything you need, ensure that you’re wearing appropriate clothing, including sturdy shoes or boots and a long-sleeved shirt to protect yourself from any sharp objects or the sun’s rays.
Now that you’re equipped with the necessary tools and materials, it’s time to move on to the next step: preparing the work area.
Step 2: Prepare the work area
Before you start removing shingles from your roof, it’s crucial to prepare the work area properly. Taking the time to do so will ensure a safe and efficient process. Here’s what you should do:
- Safety first: Before climbing up to the roof, make sure to take proper safety precautions. Wear a sturdy pair of shoes with good grip, and consider using a safety harness if you’re not comfortable with heights. It’s also essential to have someone nearby to assist you if needed.
- Clear the area: Remove any objects or debris from the immediate vicinity of the work area. This includes items such as patio furniture, potted plants, or any other obstructions that may hinder your movement or pose a safety hazard.
- Protect delicate areas: If there are any delicate landscaping features nearby, such as flower beds or shrubs, consider placing a tarp or drop cloth over them to prevent damage from falling debris or accidental contact.
- Notify others: If there are other people in the vicinity, such as family members or neighbors, inform them about the work you’ll be doing on the roof. It’s essential to ensure everyone’s safety and avoid any potential accidents.
- Check the weather conditions: Make sure to choose a day with stable weather conditions for removing shingles. Avoid working during heavy rainfall, high winds, or extreme temperatures. Keeping an eye on the forecast will help prevent any unexpected weather-related issues.
By taking the time to prepare the work area properly, you’ll create a safer and more accessible environment for removing the shingles from your roof. Once you’ve completed these steps, it’s time to move on to the next step: inspecting the shingles and identifying the damaged ones.
Step 3: Inspect the shingles and identify damaged ones
Before proceeding with removing shingles from your roof, it’s essential to inspect them and identify the damaged ones. By doing so, you’ll have a clear view of the areas that require attention and ensure an efficient removal process. Here’s how you can inspect and identify damaged shingles:
- Start at one end: Begin at one end of the roof and work your way across, systematically inspecting each shingle as you go. This will help you maintain a organized approach and avoid missing any damaged areas.
- Look for signs of wear: Examine the shingles for any signs of wear and tear, such as cracks, curling edges, or missing granules. These are indications that the shingles are no longer providing adequate protection and need to be replaced.
- Check for leaks: If you’ve experienced any leaks or water damage inside your home, make note of the corresponding areas on the roof. Inspect those specific shingles thoroughly to determine the extent of the damage.
- Pay attention to flashing: In addition to the shingles, inspect the flashing around chimneys, vents, and other penetrations. Damaged or deteriorated flashing can contribute to leaks and should be addressed during the removal process.
- Take photographs: To keep a record of the damaged areas or for reference when purchasing replacement shingles, consider taking photographs of the affected shingles. This will help you accurately identify and source the necessary materials.
By carefully inspecting the shingles and identifying the damaged ones, you can plan the removal process effectively and ensure that you’re addressing all areas in need of attention. Once you’ve completed this step, it’s time to move on to the next: removing any obstructions or debris from the roof.
Step 4: Remove any obstructions or debris
Before proceeding with the actual removal of shingles, it’s important to ensure that the roof is clear of any obstructions or debris. This will create a safer and more accessible work environment. Here’s what you need to do:
- Clear away loose debris: Use a broom or brush to sweep away any loose leaves, twigs, or other debris that may have accumulated on the roof. This will prevent them from getting in the way while removing the shingles.
- Remove obstructions: Take a look around the roof and identify any obstructions or obstacles that may hinder your movement or pose a safety risk. These can include branches, satellite dishes, or vent pipes. Carefully remove or secure these items before proceeding.
- Inspect for hidden debris: Pay attention to areas where debris may be hidden, such as valleys, gutters, or around chimney flashings. Clear out any accumulated debris using a gloved hand or a small tool like a roof scraper.
- Exercise caution: While clearing debris, always exercise caution and maintain your balance on the roof. Watch your step to avoid slipping or tripping on loose materials.
By removing any obstructions or debris from the roof, you will create a safer and more manageable work area for the shingle removal process. This will allow you to work more efficiently and minimize any potential hazards. Once the roof is clear, it’s time to move on to the next step: loosening the adhesive strips of the shingles.
Read more: How To Shingle A Gable Roof
Step 5: Loosen the adhesive strips of the shingles
Before you can remove the damaged shingles, it is important to loosen the adhesive strips that hold them in place. This will make it easier to lift and remove the shingles without causing further damage. Follow these steps to properly loosen the adhesive strips:
- Identify the adhesive strips: Most shingles have adhesive strips applied to their underside. These strips are designed to bond the shingles together and provide stability to the roof.
- Warm the adhesive: If the weather is cold, the adhesive may be less pliable. Use a heat gun or a hairdryer set to a low heat setting to warm the adhesive strips. Be careful not to overheat the shingle, as it can lead to melting or distortion.
- Slide a putty knife under the shingle: Gently slide a putty knife or a thin flat pry bar under the edge of the shingle, near the adhesive strip. Use caution to avoid lifting the shingle too forcefully, as it can cause further damage.
- Apply pressure to loosen the strip: Once the putty knife is in place, carefully apply upward pressure to loosen the adhesive strip. Wiggle the knife back and forth to separate the adhesive bond without damaging the shingle.
- Repeat the process: Move along the length of the shingle, repeating the steps to loosen the adhesive strip. Be patient and methodical to ensure that each strip is properly loosened before attempting to lift the shingle.
By properly loosening the adhesive strips, you will make the subsequent removal of the shingles much easier and minimize the risk of causing damage to the shingles or the underlying roof structure. Once the adhesive strips are loosened, you are ready to proceed to the next step: sliding a flat pry bar under the damaged shingle.
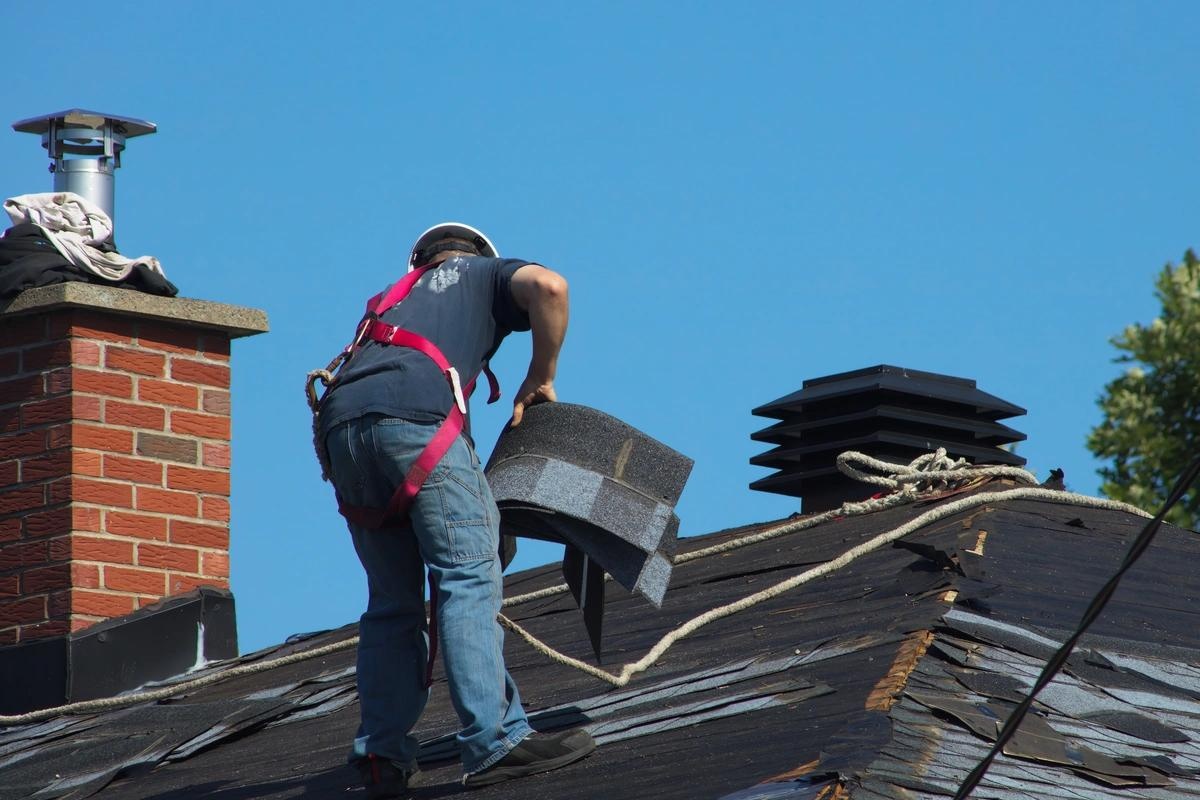
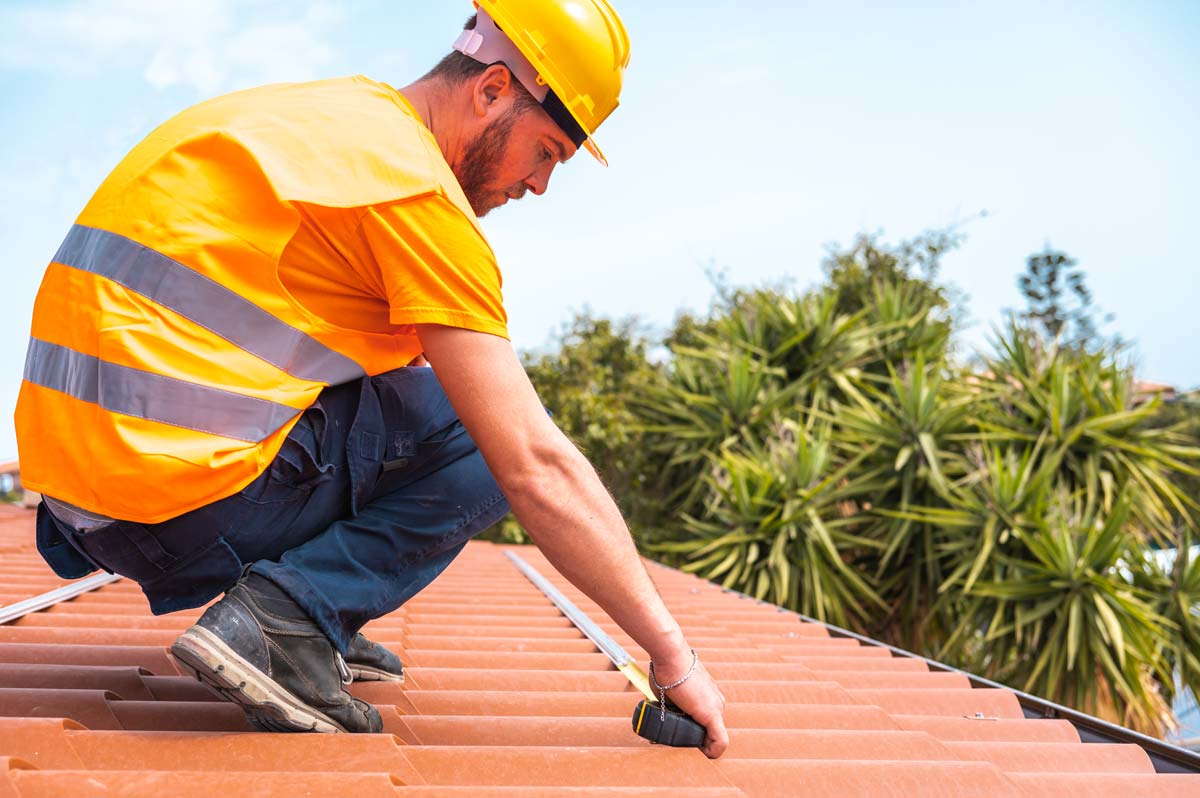
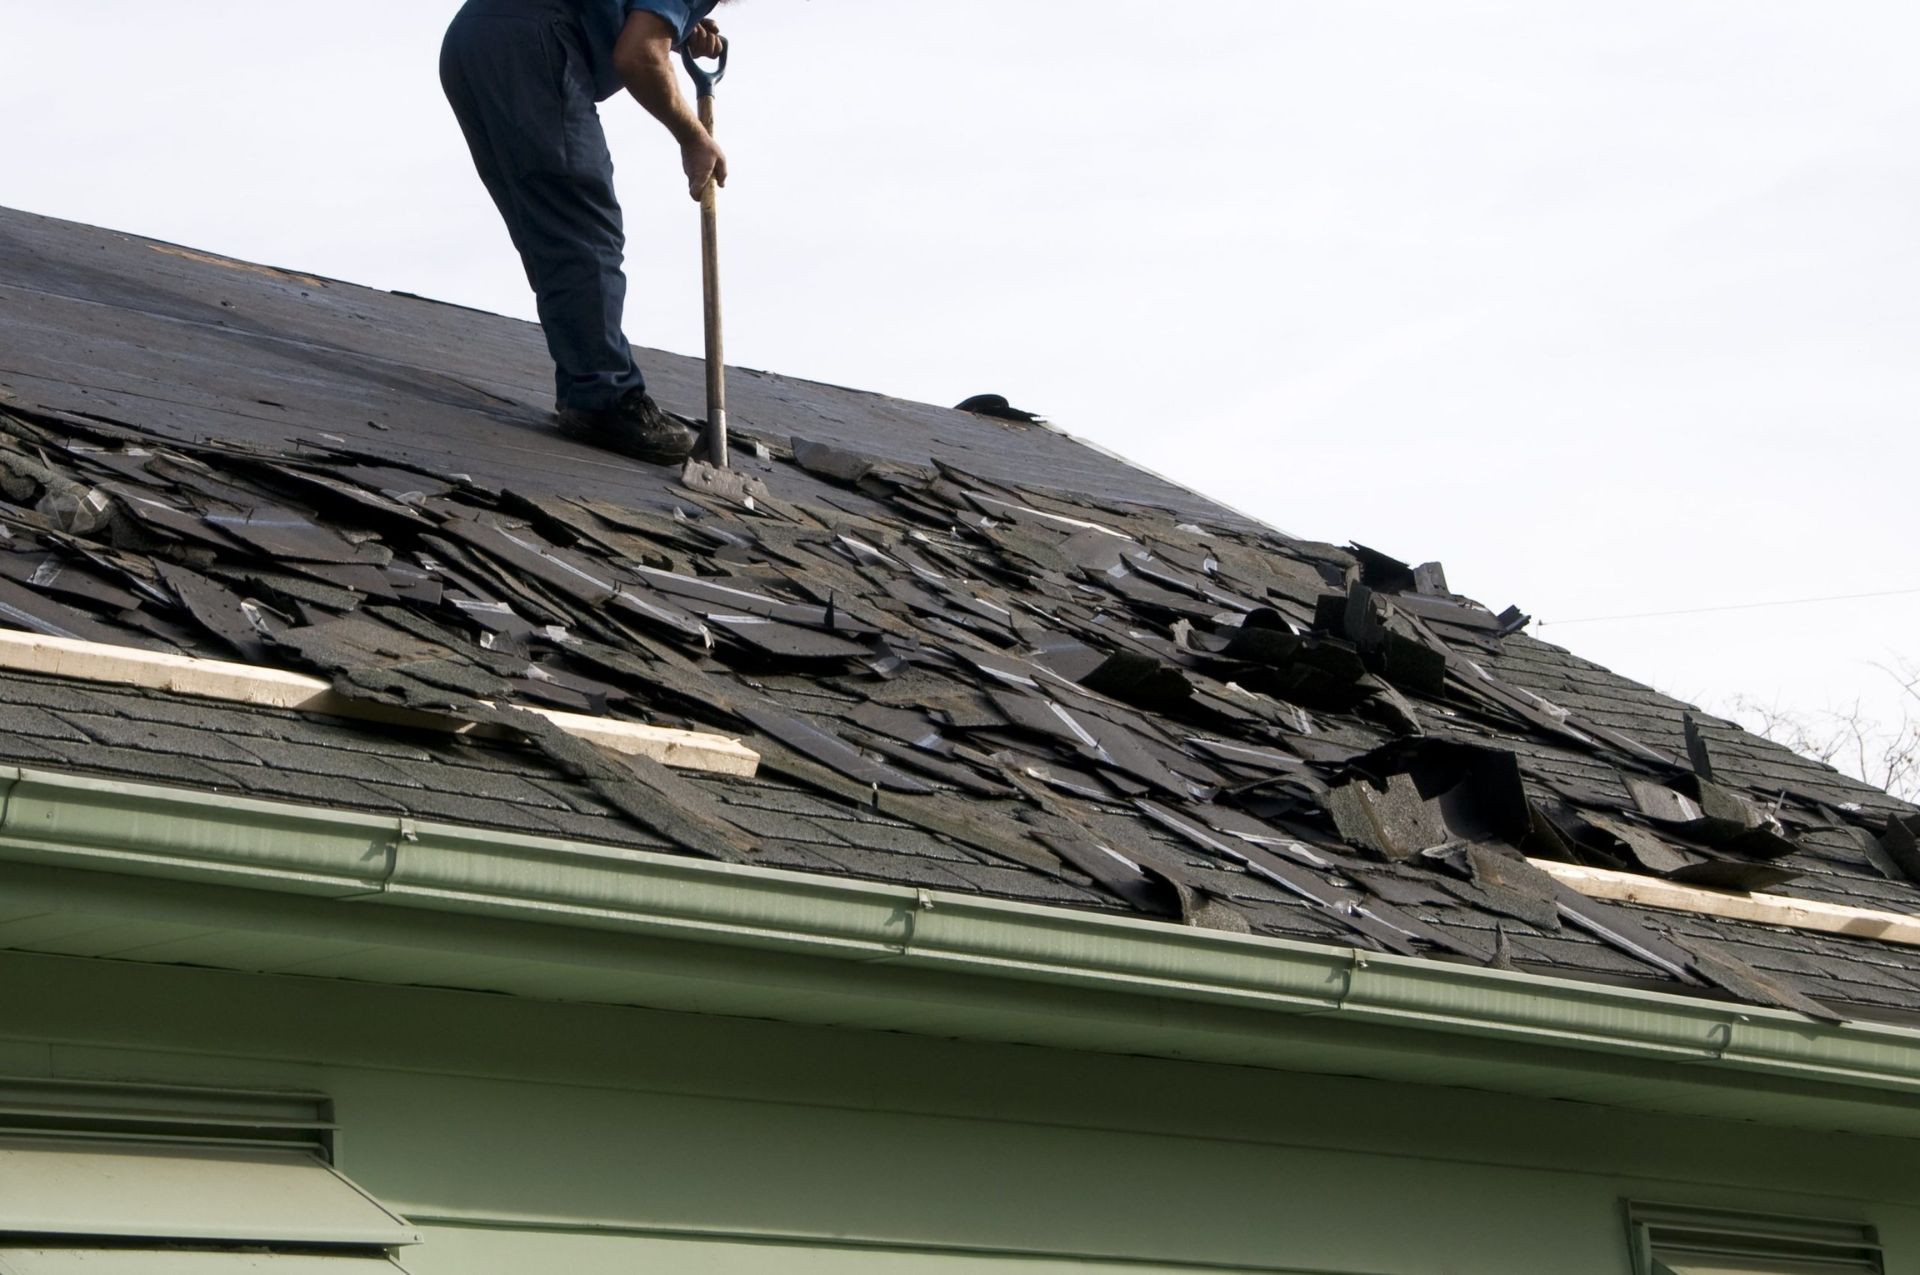
Use a flat bar to carefully lift the shingles and a roofing shovel to remove the nails. Work from the top down and be cautious of any underlying flashing or vents.
Step 6: Slide a flat pry bar under the damaged shingle
Now that you have loosened the adhesive strips, it’s time to slide a flat pry bar under the damaged shingle to prepare for its removal. This step requires accuracy and precision to ensure a smooth removal process. Here’s how you can do it:
- Position the pry bar: Place the flat pry bar under the edge of the damaged shingle, using caution not to damage the neighboring shingles. Position it near the adhesive strips on the underside of the shingle.
- Apply gentle pressure: Once the pry bar is in position, apply gentle and consistent pressure to lift the damaged shingle upward. Slowly work the pry bar along the length of the shingle, applying pressure at regular intervals.
- Work from bottom to top: Start at the bottom of the shingle and gradually lift it upwards. Be careful not to force the shingle up abruptly, as it can cause further damage or breakage.
- Support the adjacent shingles: As you lift the damaged shingle, be mindful of the adjacent shingles. Use your free hand to support and stabilize them, preventing any unintended damage or displacement.
- Continue along the shingle row: Once you have successfully lifted and removed the damaged shingle, move on to the next one in the row. Repeat the same process until all the damaged shingles have been removed.
By sliding a flat pry bar under the damaged shingle with care and precision, you can effectively remove it without causing any unnecessary damage. Remember to work methodically and take your time to ensure a smooth removal process. With the damaged shingle removed, you can move on to the next step: lifting and removing it carefully.
Step 7: Lift and remove the shingle carefully
Now that you have successfully slid the pry bar under the damaged shingle, it’s time to lift and remove it from the roof. This step requires caution and precision to avoid any further damage to the shingle or the underlying roof structure. Follow these steps to lift and remove the shingle carefully:
- Secure adjacent shingles: Before lifting the damaged shingle, use your hand to support and secure the adjacent shingles on either side. This will prevent them from getting dislodged or damaged during the removal process.
- Lift the shingle gradually: With one hand stabilizing the surrounding shingles, use the pry bar to gradually lift the damaged shingle upwards. Apply gentle and even pressure to lift it from the adhesive strips beneath.
- Inspect for additional nails: As you lift the shingle, check for any additional nails or fasteners that may be securing it to the roof. If you come across any, carefully remove them using a pry bar or a hammer.
- Slide the shingle out: Once the shingle is lifted, carefully slide it out from under the surrounding shingles. Take care not to damage the neighboring shingles or disturb any other components of the roof.
- Place the shingle in a safe area: Set aside the removed shingle in a safe area away from the work area. You may want to keep it for reference when purchasing replacement shingles or for inspection purposes.
- Repeat the process: Repeat the lifting and removal process for each damaged shingle that needs to be replaced or repaired. Take your time and work systematically to ensure a smooth and efficient removal process.
By lifting and removing each damaged shingle carefully, you can avoid additional damage and maintain the integrity of the surrounding shingles and the roof structure. With the damaged shingle removed, you can proceed to evaluate and repair any underlying damage in the next step.
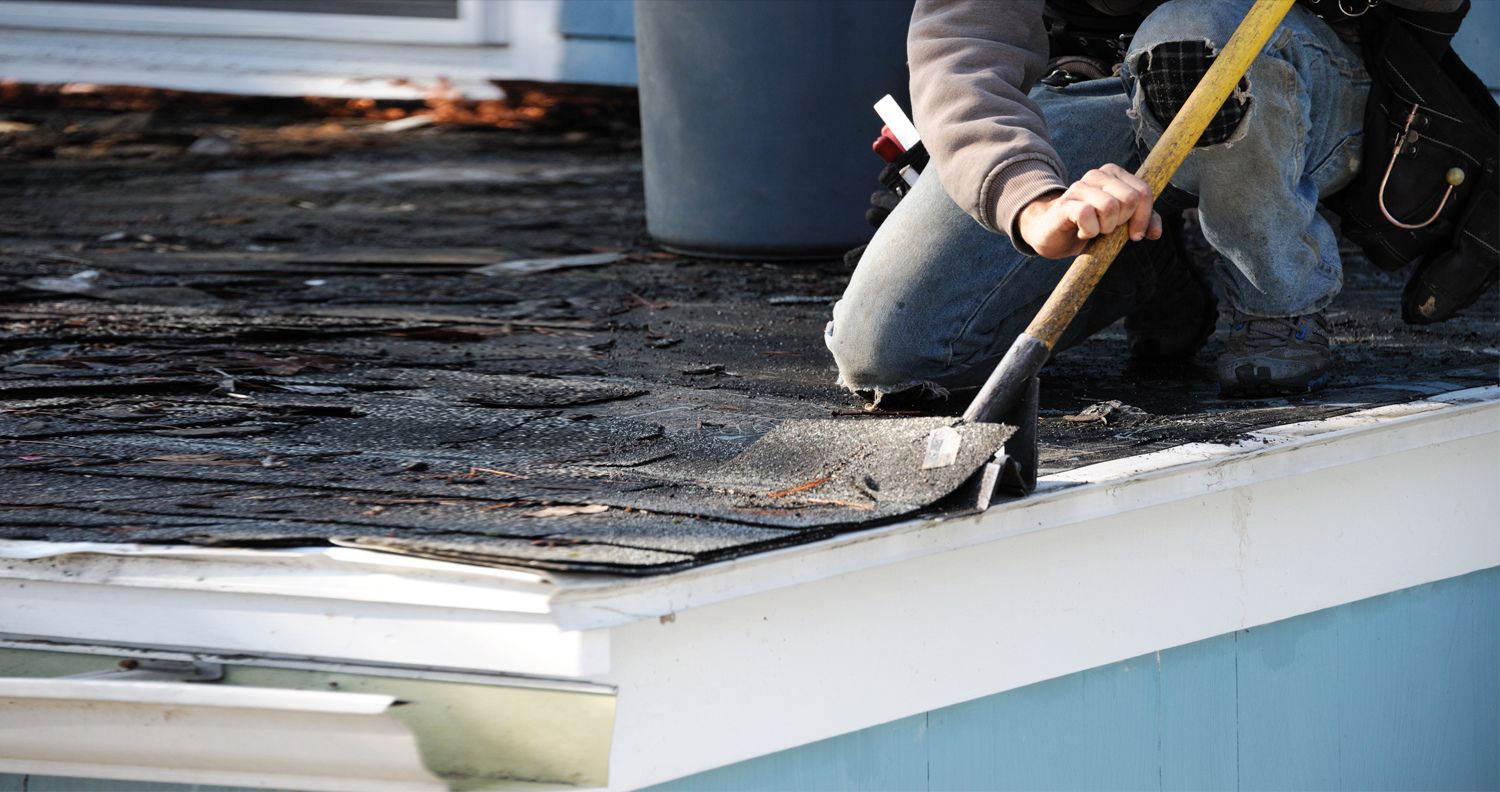
Step 8: Inspect the underlying roof and repair any damage
After removing the damaged shingles, it’s important to inspect the underlying roof and address any damage that may be present. This step is crucial for maintaining the longevity and structural integrity of your roof. Here’s how you can inspect and repair any underlying damage:
- Inspect for water damage: Look for signs of water damage, such as discoloration or rot, on the exposed roof surface. Pay close attention to areas near the removed shingles and around any flashing or roof penetrations. Water damage can indicate underlying issues that need to be addressed.
- Check for leaks: If you’ve noticed leaks or water intrusion inside your home, inspect the corresponding areas on the roof for any signs of leakage. Look for cracks, gaps, or deteriorated materials that may be causing the issue.
- Repair damaged areas: If you encounter any areas of damage, such as rotted or decayed wood, it’s essential to repair them promptly. Remove any compromised materials and replace them with new, sound roofing materials. This may involve replacing plywood, underlayment, or other roofing components.
- Secure loose nails or fasteners: During the inspection, check for any loose or protruding nails or fasteners. Use a hammer or roofing nails to secure them back in place, ensuring a tight and secure fit.
- Seal any gaps or cracks: If you come across any gaps or cracks in the roof, use roofing cement or a suitable sealant to fill them. This will prevent water infiltration and provide added protection against future damage.
- Replace damaged flashing: Inspect the flashing around chimneys, vents, and other roof penetrations. If you find any signs of damage or deterioration, replace the flashing to ensure a watertight seal.
By thoroughly inspecting the underlying roof and addressing any damage, you can mitigate the risk of further issues and prolong the lifespan of your roof. Taking proactive steps to repair and reinforce the roof will help ensure its durability and protection against the elements.
Once you have inspected and repaired any underlying damage, you can proceed to the next step: installing new shingles if necessary.
Read more: What Are The Best Roof Shingles
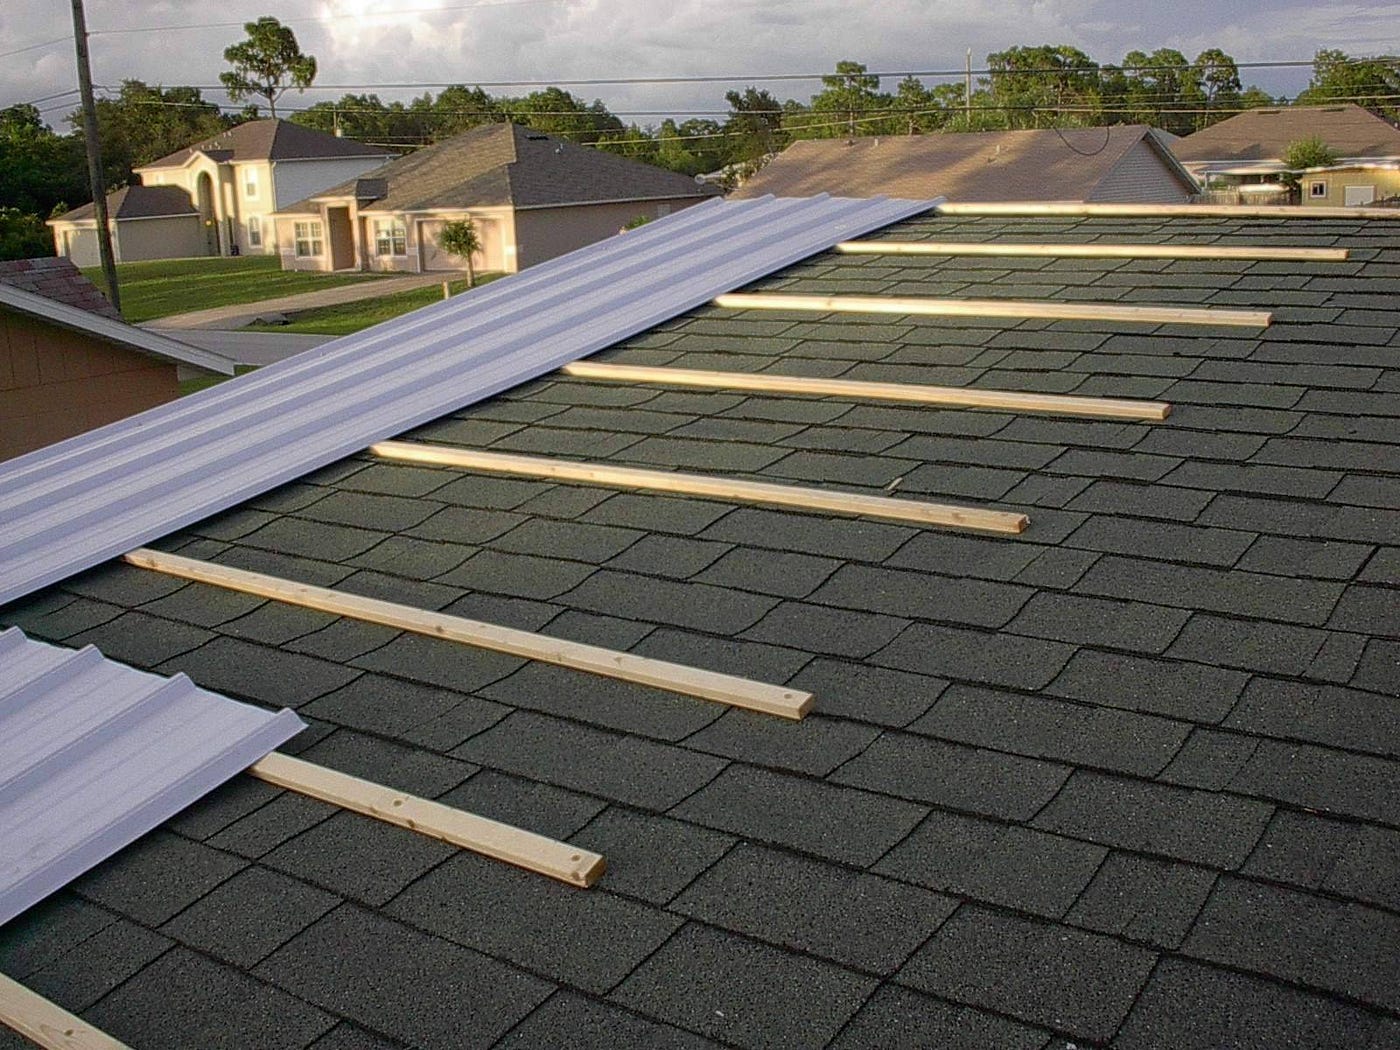
Step 9: Install new shingles if necessary
After completing the inspection and repairs of the underlying roof, it’s time to install new shingles if needed. Installing new shingles will restore the aesthetic appeal and functionality of your roof. Here’s how you can install new shingles:
- Select the right shingles: Choose shingles that match the style, color, and material of the existing roof. This will ensure a seamless and cohesive look.
- Cut the replacement shingles: Measure and cut the replacement shingles to the appropriate size using a utility knife or a roofing cutter. Make sure they fit accurately before proceeding.
- Apply roofing cement: Apply a thin layer of roofing cement to the backside of each replacement shingle. This will help adhere it to the roof and provide added protection against weather elements.
- Slide the replacement shingle into place: Carefully slide each replacement shingle into position, aligning it with the existing shingles. Ensure that it fits snugly and lays flat against the roof surface.
- Nail the shingles in place: Secure the replacement shingles by driving roofing nails into the designated nailing zone. Aim for the thicker parts of the shingles, known as the “sweet spots,” to avoid damaging the shingle underneath.
- Follow the proper nailing pattern: Maintain the correct nailing pattern recommended by the manufacturer or roofing guidelines. This typically involves placing nails in a specific pattern along the shingle edges and center.
- Repeat the process: Continue installing and nailing the replacement shingles in the damaged area until all the necessary repairs have been made.
It’s important to note that installing new shingles requires proper technique and precision. If you’re not confident in your abilities, it’s best to hire a professional roofing contractor to handle the installation for you.
Once you have installed the new shingles, you can proceed to the final step: cleaning up the work area.
Step 10: Clean up the work area
After completing the shingle installation and ensuring the new shingles are properly secured, it’s time to clean up the work area. Cleaning up not only enhances the visual appeal of your property but also removes any potential hazards. Here’s how you can clean up the work area:
- Collect debris: Gather all the debris, such as old shingles, nails, and any other materials, and place them in a sturdy trash bag. Properly dispose of the bag following the waste disposal guidelines in your area.
- Sweep the roof: Use a broom or brush to sweep away any loose dirt, dust, or remaining debris from the roof surface. Pay close attention to the areas where the shingles were replaced to ensure a clean finish.
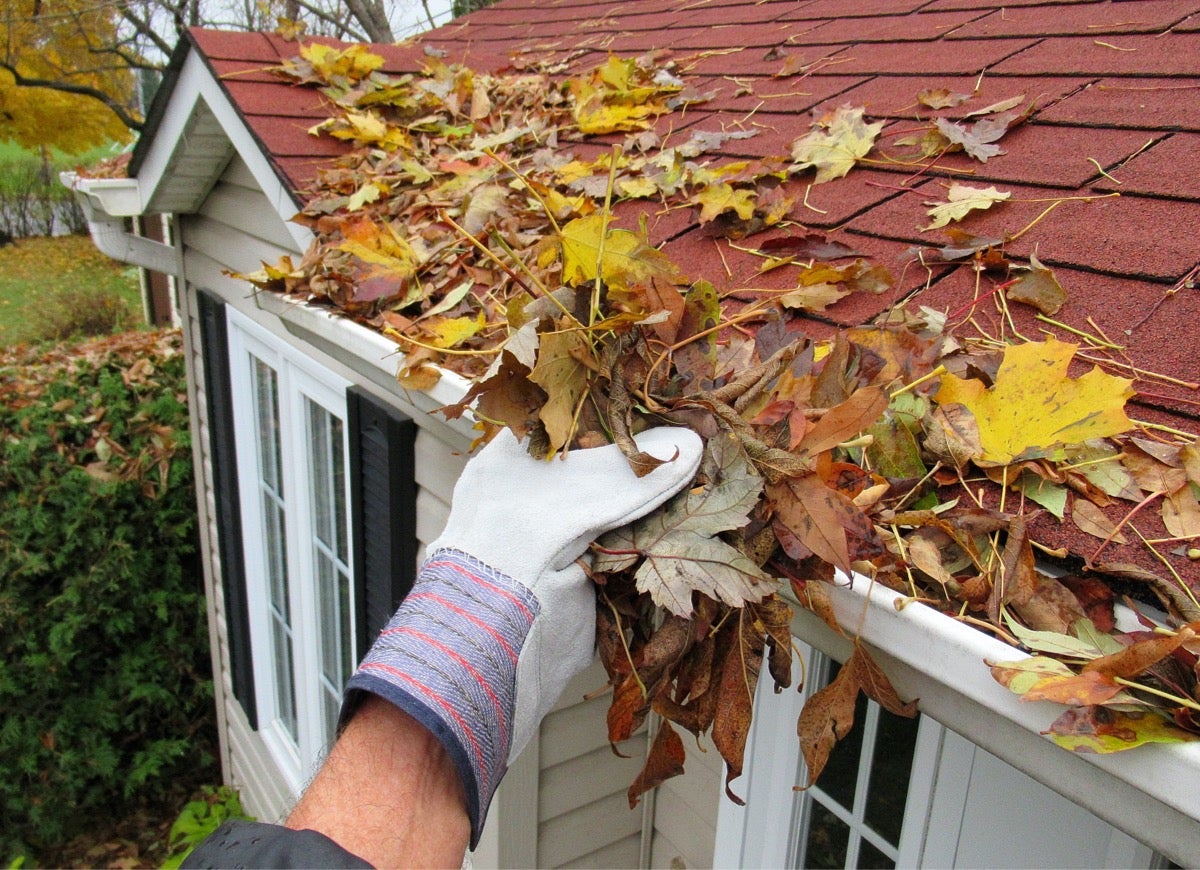
- Clean gutters and downspouts: Inspect and clean out any debris that may have fallen into the gutters and downspouts during the shingle removal and installation process. This will help maintain proper drainage and prevent clogs.
- Inspect the surrounding area: Check the ground around your home for any nails or sharp objects that may have fallen during the work. Use a magnetic sweeper or a thorough visual inspection to ensure the area is clear of potential hazards.
- Inspect for any leftover materials: Double-check for any leftover materials such as spare shingles or tools. Collect and store them properly for future use or dispose of them as needed.
By taking the time to clean up the work area, you’ll not only have a tidy and aesthetically pleasing property but also ensure the safety of you and your family. A clean work area also minimizes the risk of potential damage to other parts of your home or surrounding areas.
With the work area cleaned up, you have successfully completed the process of removing damaged shingles from your roof and installing new ones if necessary. Your roof is now refreshed, secure, and ready to provide protection for years to come.
Remember, if you are unsure or uncomfortable with any of the steps involved, it’s always best to consult with a professional roofing contractor who can handle the job with expertise and caution.
Conclusion
Removing damaged shingles from your roof is a vital task that ensures the longevity and functionality of your home’s roofing system. By following the step-by-step process outlined in this guide, you can confidently remove and replace damaged shingles, restoring the beauty and structural integrity of your roof.
Throughout the process, it’s important to prioritize your safety and take necessary precautions. If you are uncomfortable or unsure about any step, it’s always best to seek the assistance of a professional roofing contractor. They have the knowledge, experience, and tools to handle the job efficiently and safely.
Remember, gathering the necessary tools and materials, preparing the work area, inspecting the shingles, and identifying damage are all essential preliminary steps. Loosening the adhesive strips, sliding a flat pry bar under the damaged shingle, and lifting it carefully ensure a smooth removal process. Inspecting the underlying roof and repairing any damage is crucial for maintaining its stability.
If necessary, installing new shingles will further enhance the protection and appearance of your roof. Lastly, cleaning up the work area ensures a safe and tidy environment, leaving you with a well-maintained roof that can withstand the elements for years to come.
By maintaining your roof and promptly addressing any damaged shingles, you are safeguarding your home and protecting it from potential water damage, leaks, and other expensive problems. Regular inspections and necessary repairs will extend the life of your roof, providing you with peace of mind and a strong defense against the elements.
Always remember that roofing work can be physically demanding and potentially dangerous. If you have any doubts about your ability to perform the tasks involved, it’s best to consult with a roofing professional who can ensure the job is done correctly and safely.
With proper maintenance and proactive care, your roof will continue to provide excellent protection, keeping your home and loved ones safe and secure.
Frequently Asked Questions about How To Remove Shingles From Roof
Was this page helpful?
At Storables.com, we guarantee accurate and reliable information. Our content, validated by Expert Board Contributors, is crafted following stringent Editorial Policies. We're committed to providing you with well-researched, expert-backed insights for all your informational needs.
0 thoughts on “How To Remove Shingles From Roof”