
Articles
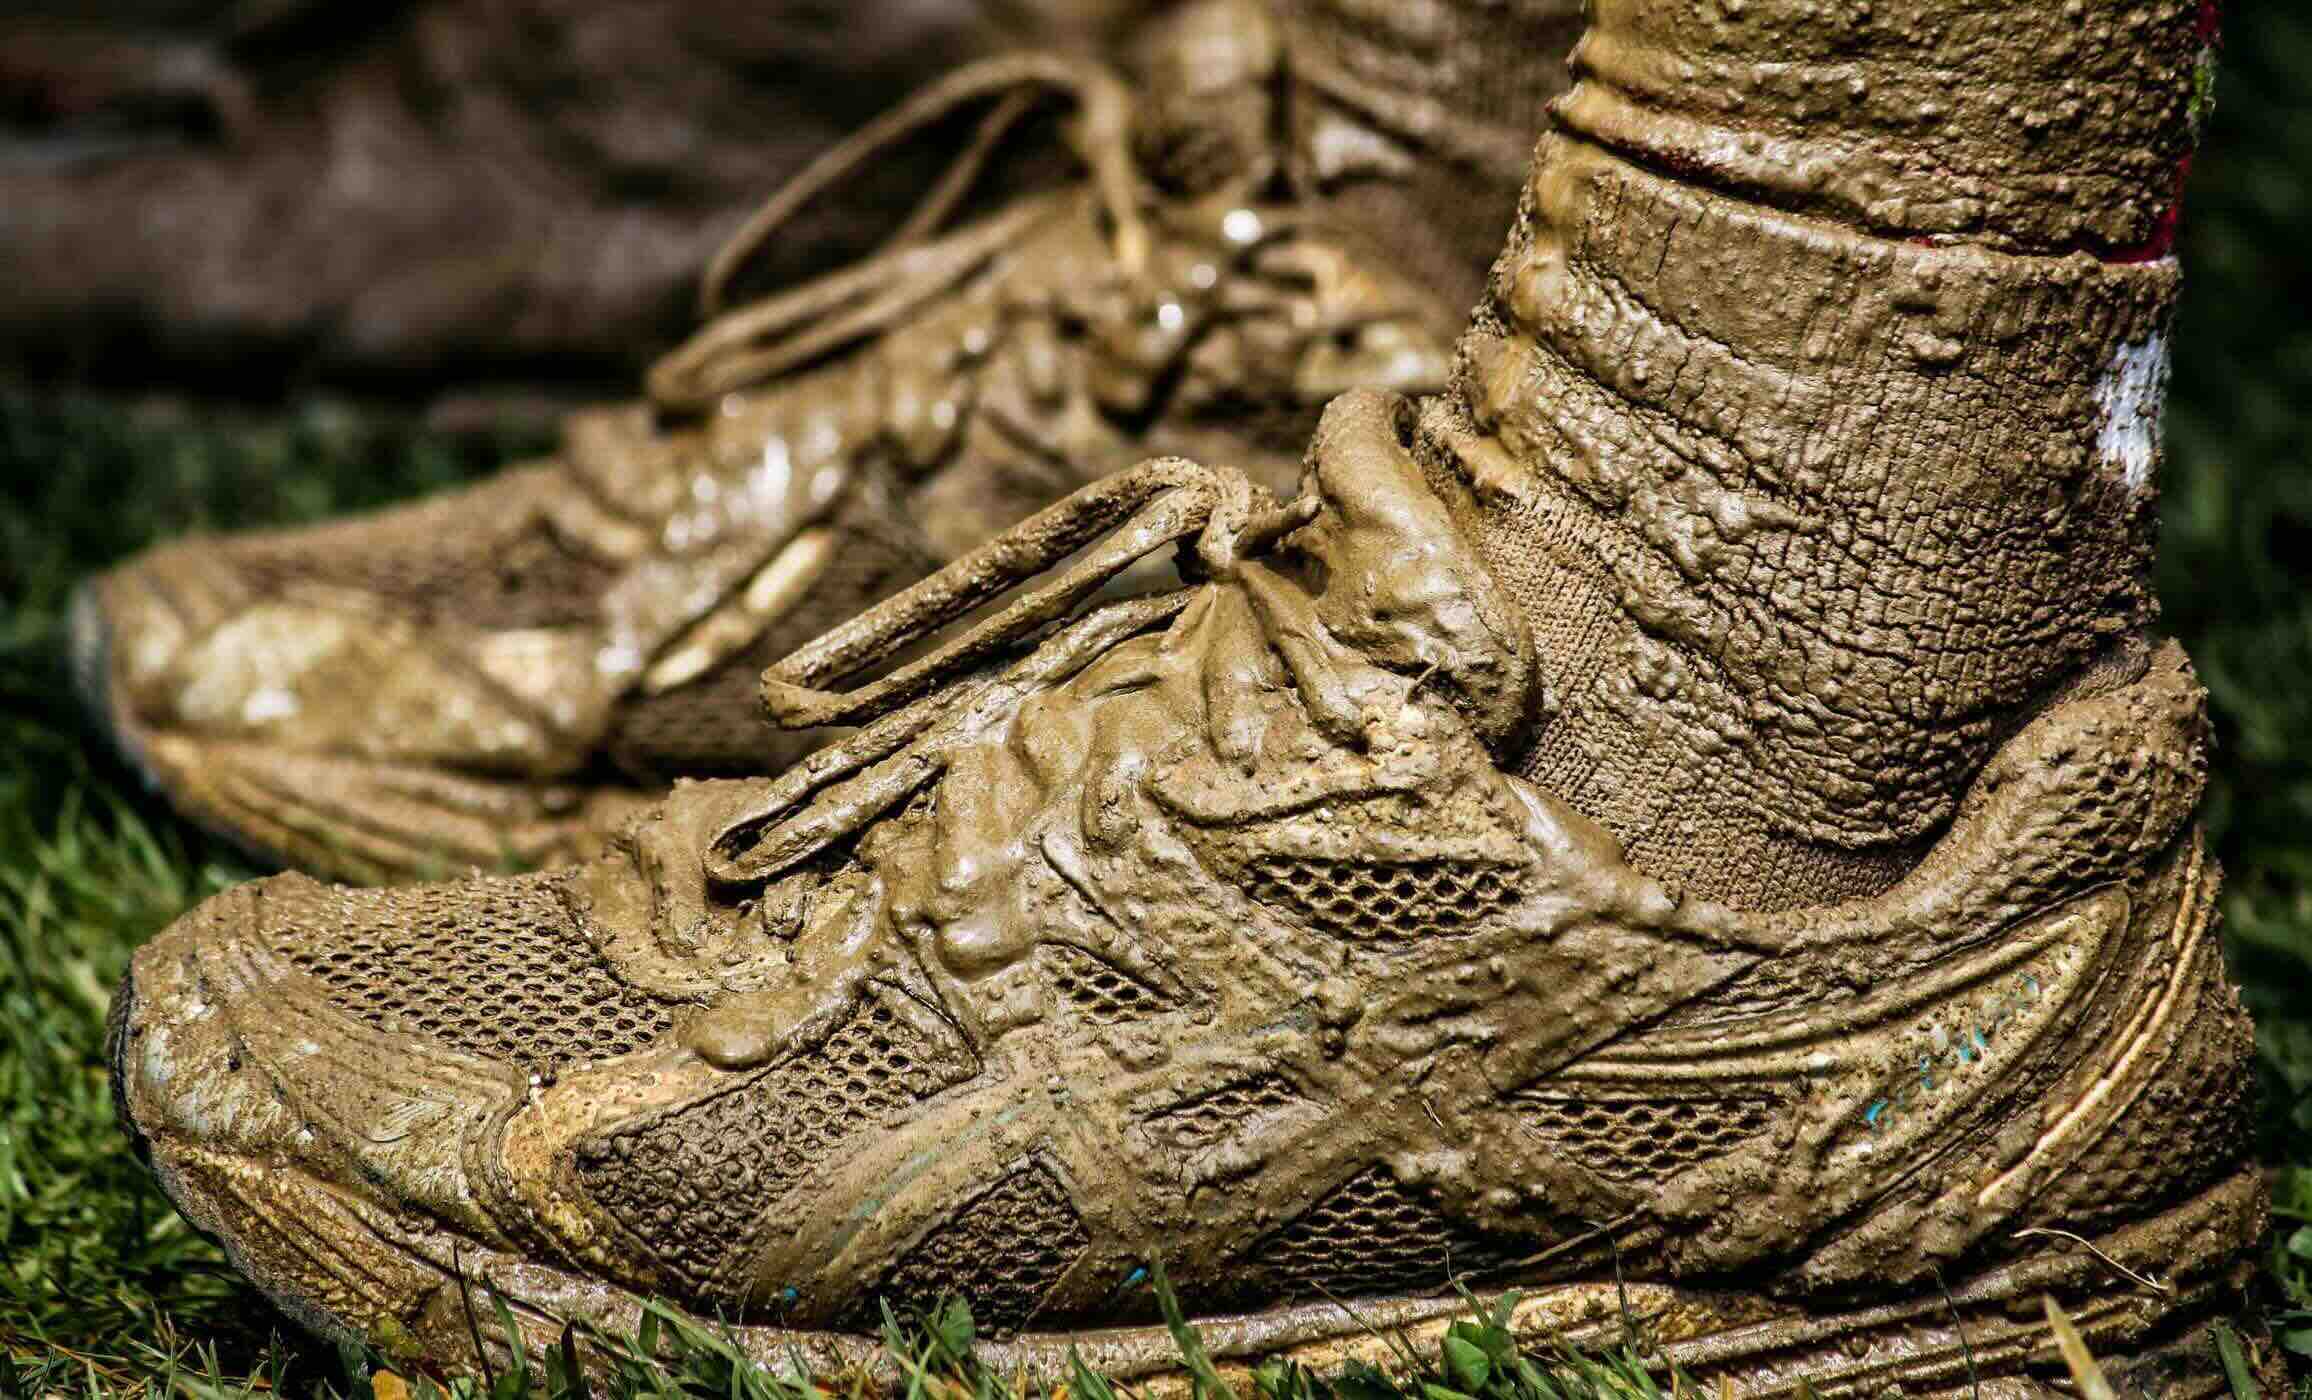
How To Fix A Muddy Driveway
Modified: October 22, 2024
Learn effective techniques and solutions for fixing a muddy driveway with our insightful articles. Get expert tips and advice to restore the functionality and aesthetics of your driveway.
(Many of the links in this article redirect to a specific reviewed product. Your purchase of these products through affiliate links helps to generate commission for Storables.com, at no extra cost. Learn more)
Introduction
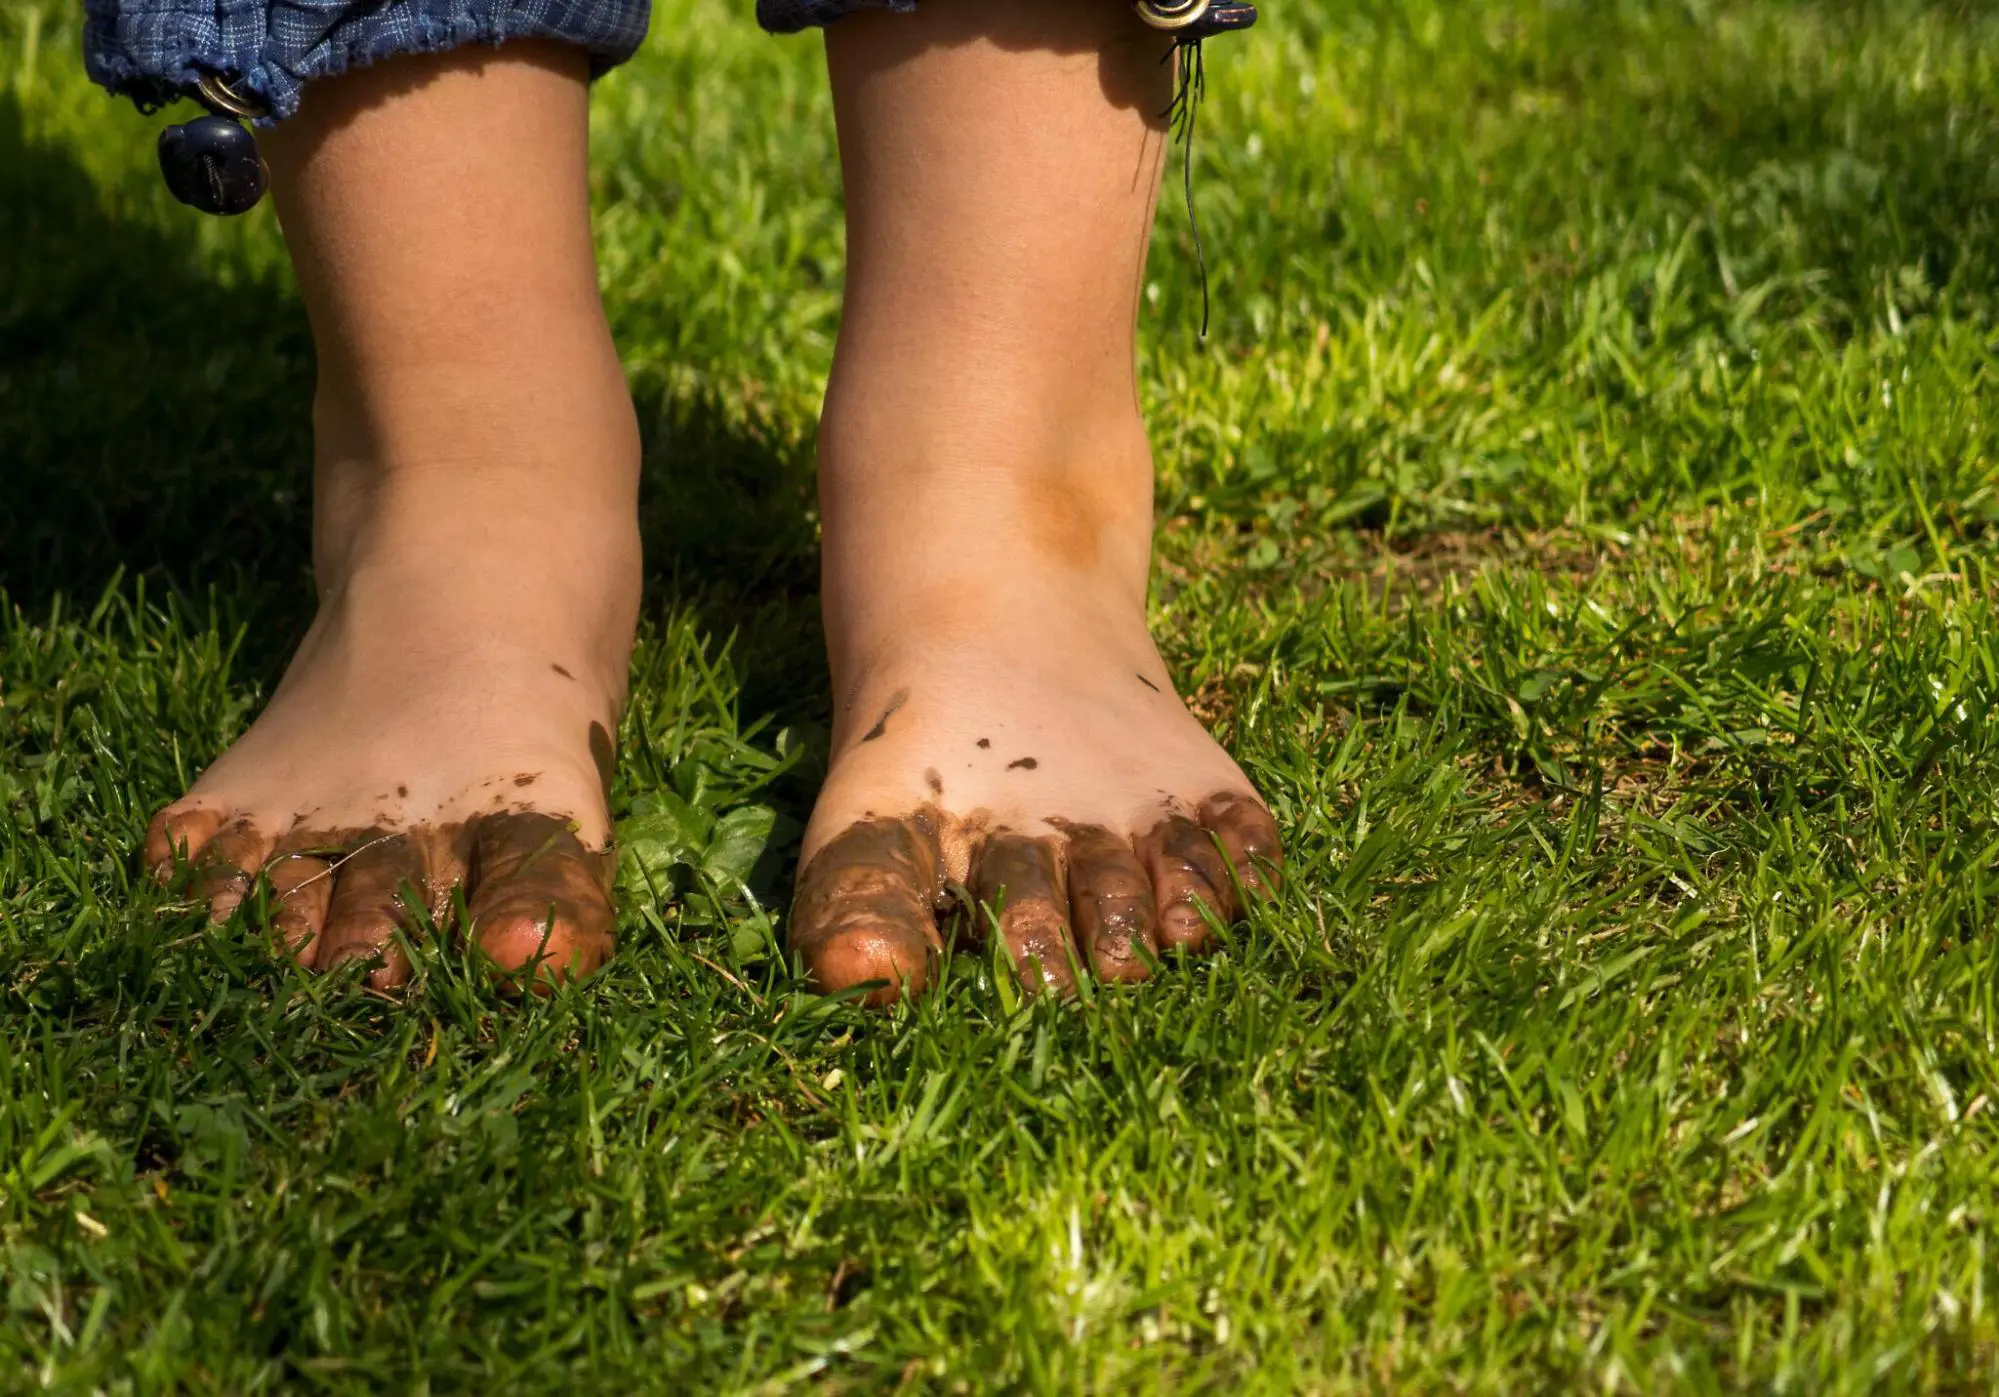
A muddy driveway can be a real headache for homeowners. Not only is it unsightly, but it can also create a mess whenever it rains or snows. Constantly tracking mud into your home or having your car get stuck in the muck can be frustrating and time-consuming. Fortunately, there are solutions available to fix a muddy driveway and prevent it from becoming a recurring problem.
In this comprehensive guide, we will explore the common causes of a muddy driveway and provide you with a range of effective solutions to alleviate the issue. Whether you have a gravel driveway, a paved driveway, or even a dirt driveway, there are steps you can take to improve its stability and prevent mud from forming.
Fixing a muddy driveway not only improves its appearance but also ensures safety and functionality. Eliminating the mud will provide a stable and durable surface for vehicles, pedestrians, and other activities that happen on your driveway. By implementing the right solutions, you can transform your muddy driveway into a clean and functional space that enhances the curb appeal of your property.
So, if you’re tired of dealing with a muddy mess every time it rains, read on to discover the causes behind a muddy driveway and the steps you can take to fix it. Whether you prefer a DIY approach or seek professional assistance, this guide will equip you with the knowledge and tools necessary to tackle the problem head-on.
Key Takeaways:
- Transform your muddy driveway into a clean, stable space by choosing the right solution, whether it’s gravel application, drainage systems, or landscaping options. Enjoy a mud-free driveway that enhances your property’s curb appeal.
- Regular maintenance, such as cleaning, addressing drainage issues, and repairing cracks, is essential for keeping your driveway mud-free and in optimal condition. By taking proactive measures, you can ensure the longevity and functionality of your driveway.
Read more: How To Fix Driveway Erosion
Common Causes of a Muddy Driveway
A muddy driveway can be the result of various factors. Understanding the underlying causes can help you determine the most effective solution for your specific situation. Here are some common causes of a muddy driveway:
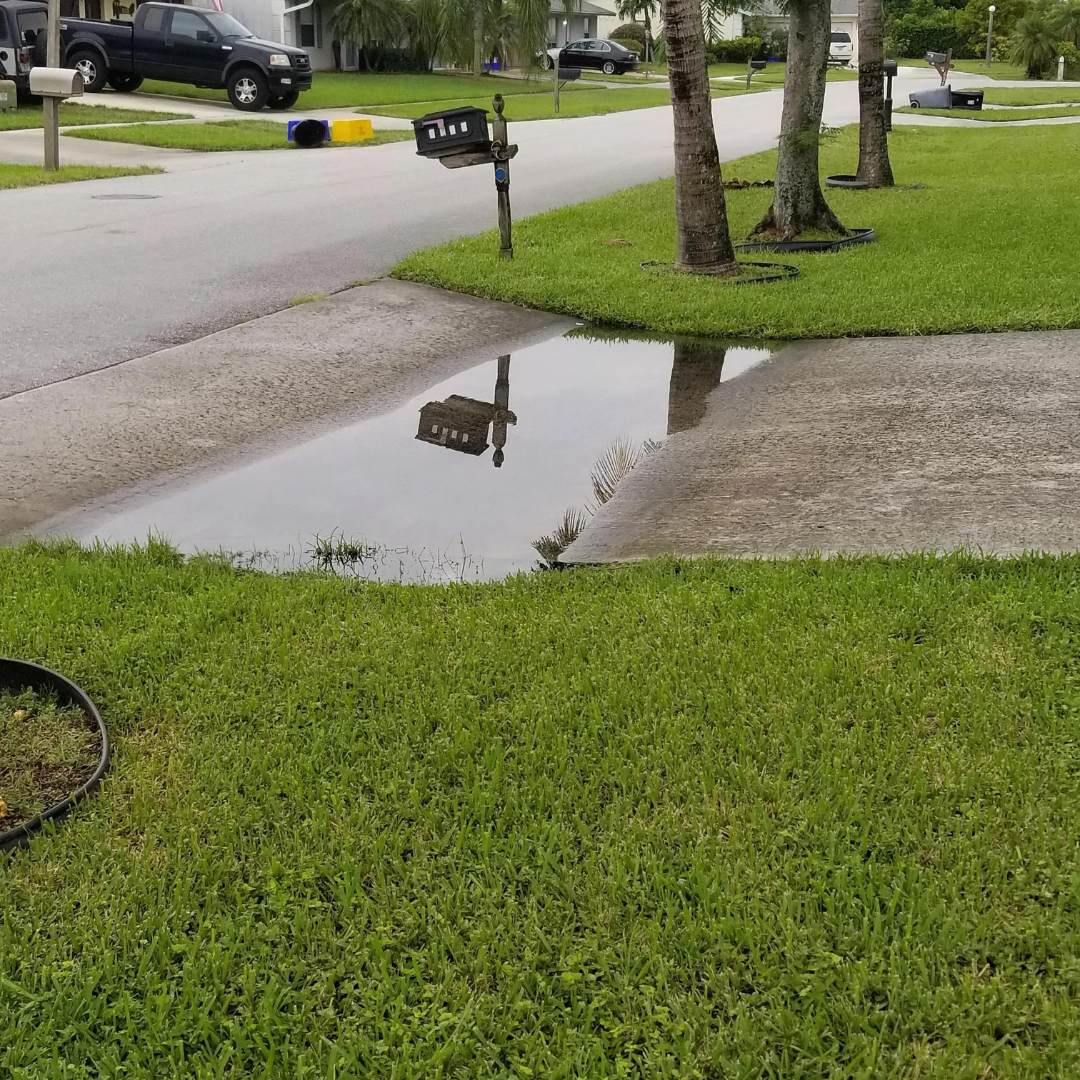
- Poor drainage: One of the leading causes of a muddy driveway is poor drainage. When water does not have a proper pathway to drain away from your driveway, it can accumulate and create muddy conditions. This can be due to improper grading, lack of appropriate channels, or clogged drainage systems.
- Insufficient base material: If your driveway is made of gravel or other loose materials, it is essential to have a solid base underneath. Insufficient base material can cause the surface to shift and become uneven, leading to water pooling and mud formation.
- Lack of vegetation: Healthy vegetation, such as grass or plants, plays an important role in preventing a muddy driveway. The roots of plants help to stabilize the soil and absorb excess water, reducing the likelihood of mud formation.
- Heavy traffic: If your driveway experiences heavy traffic, such as multiple vehicles or equipment, it can lead to soil compaction. Compacted soil does not allow water to penetrate properly, resulting in surface runoff and the formation of mud.
- Weather conditions: Heavy rainfall or snowfall can quickly turn a driveway into a muddy mess. If your area experiences frequent or intense precipitation, it is important to take preventative measures to minimize the impact on your driveway.
Identifying the specific cause or combination of causes for your muddy driveway is crucial in order to select the most appropriate solution. By addressing the root causes, you can effectively mitigate the problem and enjoy a mud-free driveway.
Assessing the Severity of the Problem
Before diving into the solutions to fix a muddy driveway, it’s important to assess the severity of the problem. Understanding the extent of the issue will help you determine the best course of action and allocate the necessary resources.
Here are some steps you can take to assess the severity of a muddy driveway:
- Observe the drainage patterns: Pay attention to how water flows across your driveway during and after a rainfall. Does it pool in certain areas or does it move freely towards a designated drainage point? Identifying areas with poor drainage can indicate potential problem spots where mud is likely to form.
- Inspect the condition of the driveway: Take a close look at the surface of your driveway. Are there areas with significant mud buildup? Is the driveway uneven or eroded? Assessing the overall condition will help you understand the extent of the problem.
- Consider the frequency of the issue: How often does your driveway become muddy? Is it a seasonal problem, occurring mainly during rainy seasons, or is it a consistent issue throughout the year? Determining the frequency of the problem can assist in prioritizing the solutions.
- Examine the impact on usability: Evaluate how the muddy driveway affects the usability of your property. Are you unable to park vehicles or walk safely on the surface? Assessing the impact on your daily activities can help you determine the urgency of finding a solution.
- Consult with professionals: If you’re uncertain about the severity of the problem or need expert advice, consider consulting with professionals who specialize in driveway repairs or landscaping. They can provide an accurate assessment based on their experience and expertise.
By evaluating these factors, you can gain a better understanding of the severity of your muddy driveway problem. This knowledge will guide you in selecting the most appropriate solution and taking the necessary steps to fix the issue effectively.
Choosing the Right Solution
Once you have assessed the severity of the muddy driveway problem, it’s time to choose the right solution. There are various options available, each suited for different circumstances. Consider the following factors when selecting the best solution for your situation:
- Driveway type: The type of driveway you have will influence the suitable solutions. Gravel driveways may require different remedies compared to paved or concrete driveways.
- Budget: Determine your budget for fixing the muddy driveway. Some solutions may require more investment upfront, while others may be more cost-effective in the long run.
- Extent of the problem: Consider the severity and size of the muddy areas on your driveway. This will help you determine if the issue needs a localized or comprehensive solution.
- Long-term goals: Think about your long-term goals for your driveway. Do you want a low-maintenance option or are you willing to invest time and effort into regular maintenance? Keep in mind the level of upkeep required for each solution.
- Environmental considerations: If you have a concern for the environment, opt for solutions that are eco-friendly and sustainable.
- Installation and maintenance requirements: Evaluate the installation process and ongoing maintenance requirements for each solution. Some solutions may require professional assistance, while others can be done as a DIY project.
By taking these factors into account, you can narrow down your options and choose the solution that aligns with your needs and preferences. It may also be beneficial to consult a professional to discuss your specific situation and get personalized recommendations.
Remember, the chosen solution should not only fix the muddy driveway but also provide long-term functionality and prevent future mud formation. With the right solution in place, you can enjoy a clean and stable driveway that enhances the overall aesthetics of your property.
Solutions for Fixing a Muddy Driveway
When it comes to fixing a muddy driveway, there are several solutions available. The choice of solution depends on the underlying causes of the problem and the specific characteristics of your driveway. Here are some effective solutions to consider:
- Gravel Application: Adding or replenishing a layer of gravel on your driveway can provide better drainage and stability. Choose gravel with angular edges and a size appropriate for your driveway. This helps the gravel interlock, creating a solid surface that resists erosion and minimizes mud formation.
- Adding Drainage Systems: Installing a drainage system, such as a trench drain or French drain, can efficiently redirect water away from your driveway. These systems capture and channel water, preventing it from pooling on the surface and causing mud formation.
- Installing Geotextile Fabric: Geotextile fabric acts as a barrier between the soil and the gravel on your driveway. It helps stabilize the base and prevents mixing of the materials, reducing the risk of mud formation. This solution is particularly effective for gravel driveways.
- Implementing French Drains: French drains are underground drainage systems that collect water and direct it away from the driveway. These drains are composed of a perforated pipe wrapped in geotextile fabric and surrounded by gravel. They efficiently remove excess water, preventing muddy conditions on the surface.
- Re-grading the Driveway: If poor grading is causing water to accumulate on your driveway, re-grading the surface can improve the drainage. This involves reshaping the driveway to ensure proper slope and flow of water away from the area, minimizing mud formation.
- Constructing Paving Stones: Building a paved driveway using interlocking paving stones provides a stable and visually appealing solution. Paving stones allow for better water drainage and resist the formation of mud. Additionally, they can be arranged in various patterns and designs to enhance the overall aesthetic of your driveway.
- Vegetation and Landscaping Options: Planting grass or other vegetation along the edges of your driveway can help stabilize the soil and absorb excess water, minimizing mud formation. You can also incorporate landscaping elements, such as gravel beds or decorative rocks, to redirect water and enhance the overall appearance of your driveway.
Remember, the choice of solution depends on the specific circumstances of your driveway. Some solutions may require professional assistance, while others can be done as a DIY project. Consider consulting with experts or contractors to determine the most suitable solution for your muddy driveway and ensure its successful implementation.
Read more: How To Fix A Sinkhole In The Driveway
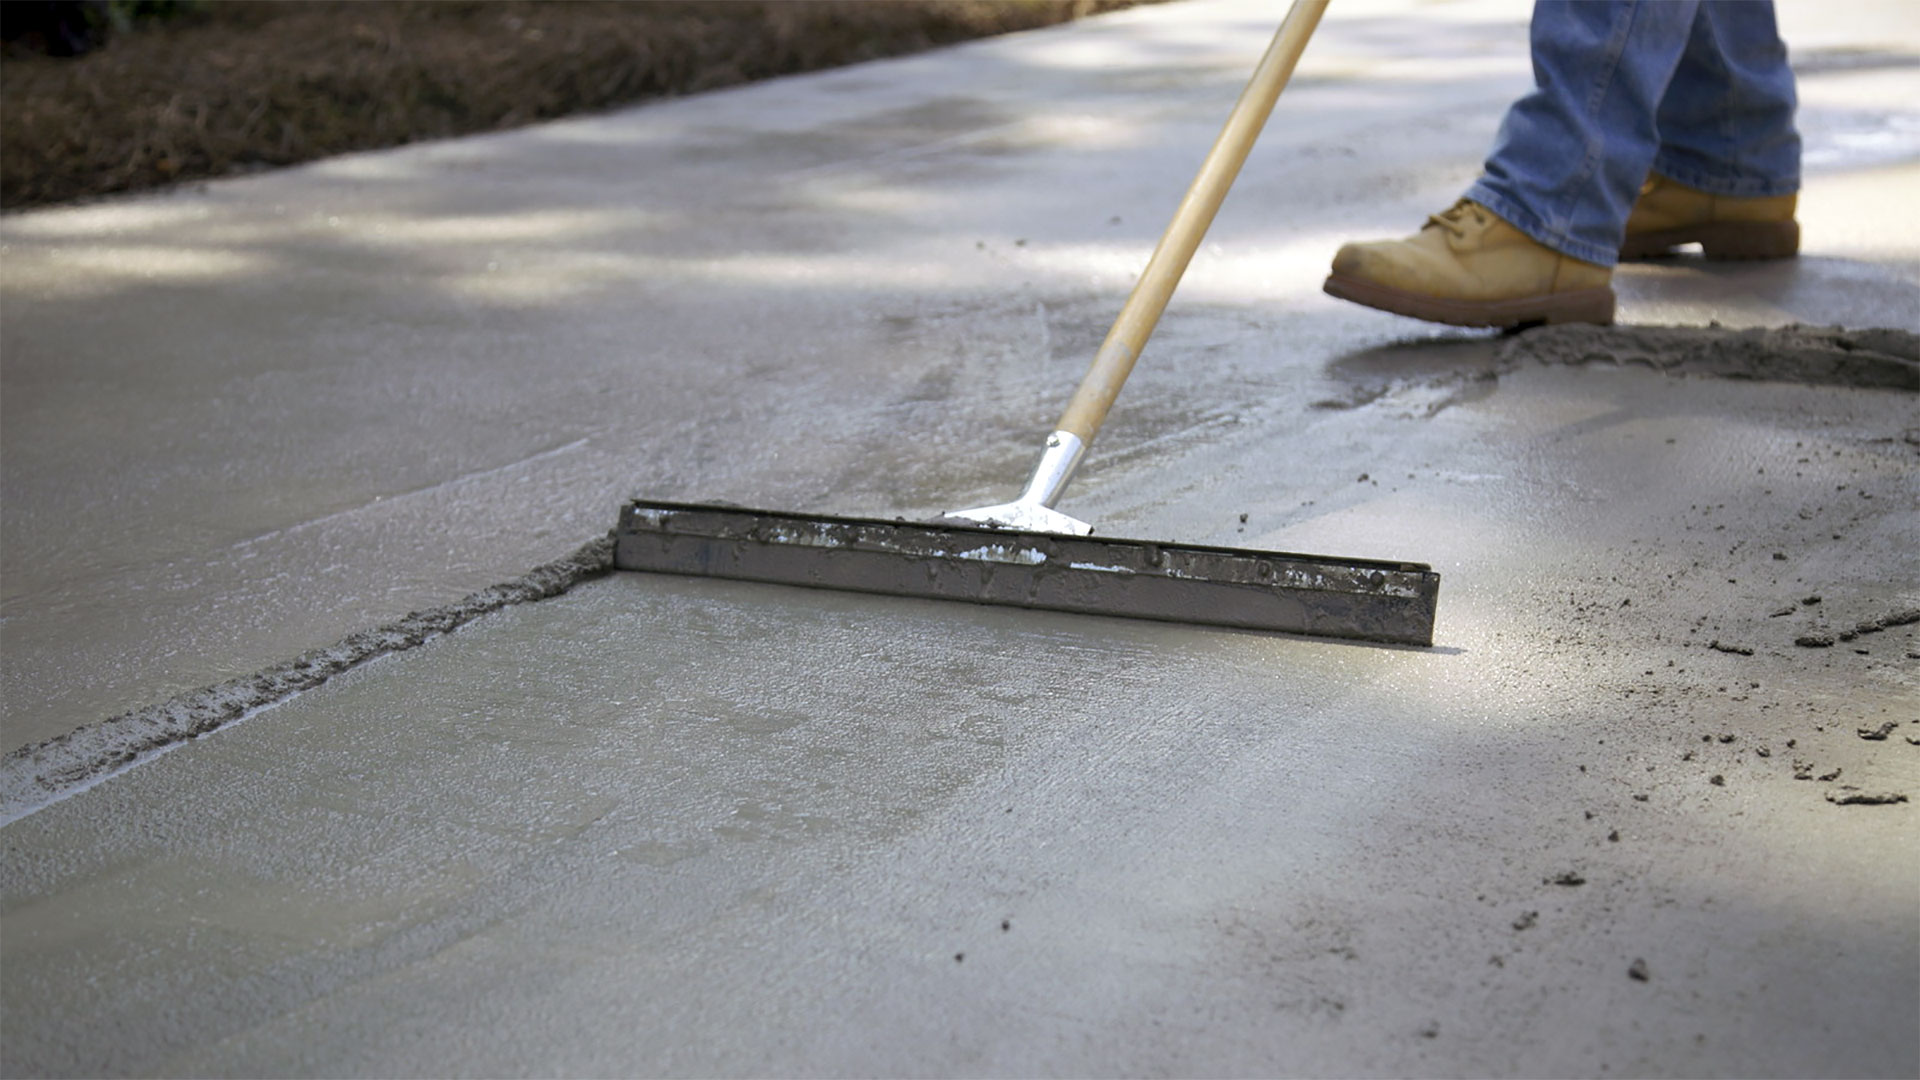
Gravel Application
One effective solution for fixing a muddy driveway is the application of gravel. Adding or replenishing a layer of gravel on your driveway not only improves its appearance but also provides better drainage and stability. Here’s how to go about it:
- Choose the right gravel: Select gravel with angular edges, as this type interlocks better, creating a solid surface that resists erosion and minimizes mud formation. The size of the gravel should be appropriate for your driveway, typically ranging from ¾ to 1 ¼ inches in diameter.
- Prepare the driveway: Start by cleaning the existing driveway surface, removing any debris, mud, or loose gravel. It’s important to have a clean and even base for the new gravel layer.
- Apply a layer of geotextile fabric (optional): To further enhance stability and prevent mixing of the soil and gravel, you can choose to lay a layer of geotextile fabric on the prepared driveway surface. This fabric acts as a barrier, helping to stabilize the base and reduce the risk of mud formation.
- Distribute the gravel: Spread the gravel evenly across the driveway, ensuring a consistent depth of approximately 2-3 inches. Use a rake or shovel to distribute the gravel and create a smooth and level surface. Take care not to make the layer too thick, as it may result in poor drainage and lead to mud formation.
- Compact the gravel: Use a vibrating plate compactor or a hand tamper to compact the gravel layer, ensuring a stable and solid surface. This step is crucial in promoting interlocking of the gravel particles and preventing the formation of ruts or uneven areas.
- Maintain and replenish: Regular maintenance is essential to keep your gravel driveway in good condition. Periodically rake and replenish the gravel layer, as loose particles may be displaced over time due to traffic or weather conditions. This helps to maintain the stability and effectiveness of the gravel surface.
A properly applied layer of gravel can significantly improve the drainage of your driveway, preventing mud formation and providing a durable, low-maintenance surface. Consider consulting with professionals or gravel suppliers to ensure you choose the right type and quantity of gravel for your specific needs and requirements.
Remember, maintaining the gravel layer is essential to avoid future mud problems. Regularly inspect your driveway, and if you notice any areas with excessive wear or unevenness, consider adding an additional layer of gravel to maintain the integrity of the surface.
Adding Drainage Systems
Adding drainage systems to your driveway is an effective solution for preventing mud formation and improving overall drainage. By redirecting water away from your driveway, these systems help maintain a clean, dry, and stable surface. Here’s how you can implement drainage systems:
- Trench drains: Trench drains, also known as channel drains, are a popular choice for managing water runoff on driveways. They consist of a long, narrow channel made of plastic or metal that is installed across the width of the driveway. The channel is typically covered with a grate or grateless cover to prevent debris from clogging the drain.
- French drains: French drains are underground drainage systems that collect water and channel it away from your driveway. To install a French drain, you will need to dig a trench along the problematic area of your driveway. The trench is then lined with geotextile fabric, which helps to prevent debris from entering the drain. A perforated pipe is placed in the trench, covered with additional geotextile fabric, and then filled with gravel to allow water to seep in and be directed away from the surface.
- Catch basins: Catch basins, or storm drains, are commonly used in areas with heavy rainfall or excessive runoff. These basins are connected to a network of underground pipes that collect and divert water away from your driveway. Catch basins are usually installed at low points in the driveway where water tends to accumulate. They are equipped with grates or covers to prevent debris from entering the system.
- Gravel-filled trenches: Creating gravel-filled trenches along the edges of your driveway can also help with water drainage. Dig a trench parallel to the driveway and fill it with gravel. The gravel allows water to percolate through and move away from the driveway surface, minimizing mud formation.
When adding drainage systems to your driveway, it is important to consider the specific requirements of your property and the amount of water runoff you typically experience. Consulting with a professional can help you determine the most appropriate drainage system for your situation.
Remember to regularly inspect and maintain your drainage systems. Clear any debris or obstructions that may accumulate in the drains or catch basins to ensure proper functionality. Additionally, periodically check for any signs of damage or deterioration and make repairs as needed.
By implementing effective drainage systems, you can effectively manage water runoff and eliminate muddy conditions on your driveway, creating a clean and functional space for vehicles and pedestrians.
To fix a muddy driveway, consider adding a layer of gravel or crushed rock to improve drainage and provide a stable surface. Additionally, compact the new material to ensure it stays in place.
Installing Geotextile Fabric
Installing geotextile fabric is an effective solution for stabilizing the base of your driveway and reducing the risk of mud formation. This durable and permeable fabric acts as a barrier, separating the soil from the gravel or other surface materials. Here’s how you can install geotextile fabric on your driveway:
- Prepare the driveway: Start by cleaning the driveway surface, removing any debris, mud, or vegetation. Ensure that the surface is smooth and even, as this will provide a solid base for installing the geotextile fabric.
- Choose the right fabric: Select a geotextile fabric that is appropriate for your driveway application. There are different types of geotextile fabrics available, each designed for specific purposes. For driveways, a woven fabric is commonly used as it provides excellent separation and stabilization characteristics.
- Measure and cut the fabric: Measure the dimensions of your driveway and cut the geotextile fabric to fit the area. It’s advisable to leave a few extra inches on each side to allow for proper overlapping and securing of the fabric.
- Lay the fabric: Carefully place the geotextile fabric on the prepared driveway surface, ensuring complete coverage. Smooth out any wrinkles or folds in the fabric to ensure it lies flat. Overlapping adjacent pieces of fabric by a few inches will provide a seamless barrier across the entire area.
- Secure the fabric: Use landscape staples or anchor pins to secure the geotextile fabric to the ground. Place the staples or pins at regular intervals along the edges and seams of the fabric. This will prevent the fabric from shifting or moving during installation or subsequent use.
- Add the top layer: After securing the geotextile fabric, you can proceed to add the top layer of material, such as gravel, over it. The geotextile fabric will act as a stabilizing layer, preventing the mixing of the soil and the top layer, and promoting better drainage. Ensure an even distribution of the top layer material for a smooth and uniform surface.
Installing geotextile fabric not only stabilizes your driveway’s base but also provides long-term benefits. It enhances the structural integrity of the driveway, improves drainage, and reduces the risk of mud formation. Additionally, it helps to prevent the migration of fines from the soil into the top layer, thereby maintaining the integrity and appearance of the surface materials.
Remember to periodically inspect the geotextile fabric, especially after heavy rain or significant soil movement, to ensure that it remains intact and in proper position. If any damage or displacement is observed, repair or replace the affected sections as soon as possible.
By incorporating geotextile fabric into your driveway construction, you can enjoy a stable, mud-free surface that enhances both the functionality and aesthetics of your property.
Implementing French Drains
Implementing French drains is an effective solution for managing water runoff and preventing a muddy driveway. French drains are underground drainage systems that collect water and redirect it away from your driveway, keeping the surface dry and stable. Here’s how you can install a French drain:
- Plan the drainage route: Determine the most appropriate route for your French drain. Identify the areas where water tends to accumulate on your driveway and plan the path that will lead the water away from the surface.
- Mark the trench: Once you have planned the drainage route, mark the path of the trench using spray paint or flags. Ensure that the trench runs at a slight slope to facilitate proper water flow towards the desired drainage area.
- Excavate the trench: Use a shovel or a mini-excavator to dig the trench along the marked route. The trench should be approximately 8-12 inches deep and wide enough to accommodate the drainage pipe and the surrounding gravel or stone.
- Line the trench with geotextile fabric: Place a layer of geotextile fabric in the trench before adding the drainage pipe. This fabric will act as a filter, preventing soil and debris from clogging the pipe over time.
- Install the drainage pipe: Lay a perforated drainage pipe in the trench on top of the geotextile fabric. The perforations in the pipe will allow water to enter and be directed away from your driveway. Connect the pipe sections as needed, ensuring a secure and watertight fit.
- Fill the trench with gravel: Once the drainage pipe is in place, fill the remaining space in the trench with coarse gravel or stone. This provides additional stability and ensures proper water flow through the drain. Avoid using fine particles or soil in the trench, as they can impede the drainage process.
- Cover the trench: Finally, cover the filled trench with a layer of geotextile fabric or filter fabric, followed by a layer of soil or landscape material. This will help maintain the integrity of the drainage system while preventing debris from entering the drain.
Implementing French drains can significantly improve the drainage of your driveway, minimizing mud formation and maintaining a stable surface. Keep in mind that the effectiveness of the drain depends on proper installation, including the slope of the trench, correct pipe placement, and sufficient backfill with gravel.
Regular maintenance is key to ensuring the longevity and efficiency of the French drain. Inspect the drain periodically and clear any debris or sediment that may have accumulated inside. Additionally, ensure that the drainage outlet remains unobstructed, allowing the water to flow freely away from your driveway.
By implementing a French drain, you can effectively manage water runoff and preserve the stability and cleanliness of your driveway, even during heavy rainfall or periods of excessive moisture. Consult with professionals or drainage experts for guidance specific to your situation.
Read more: How To Fix A Sinking Driveway
Re-grading the Driveway
Re-grading your driveway is a solution to fix a muddy driveway caused by poor drainage or improper slope. By reshaping the driveway surface, you can ensure that water flows away from the driveway, minimizing the formation of mud. Here’s how you can re-grade your driveway:
- Assess the current slope: Evaluate the existing slope of your driveway to determine if it is contributing to the drainage issues. Ideally, the driveway should have a slight slope away from your house or other structures to allow water to flow naturally.
- Plan the new grade: Identify the areas that need adjustment and plan the new grade for your driveway. You may need to add fill material to raise the low spots or remove excess soil to create a smoother slope.
- Prepare the driveway: Before re-grading, it’s essential to clear the driveway of any vegetation, debris, or loose material. This will provide a clean base for the re-grading process.
- Use a chalk line or stakes: Establish a reference line to guide the re-grading process. You can achieve this by using a chalk line or placing stakes at specific intervals along the desired slope.
- Adjust the grade: Use a shovel, garden rake, or a grading blade attachment on a tractor or Bobcat to adjust the grade. Add fill material to low spots and spread it evenly using a shovel or rake. Alternatively, remove excess soil from higher areas to create a more gradual slope.
- Compact the soil: Once you have achieved the desired grade, use a tamper or compactor to firm up the soil. This will ensure stability and prevent future settling or erosion.
- Monitor water flow: After re-grading, observe how water flows on your driveway during rainfall or with the use of a hose. Make adjustments as needed to ensure proper drainage away from your driveway and prevent the accumulation of water in low spots.
Re-grading your driveway can significantly improve its drainage and prevent mud formation. It is important to note that re-grading may require considerable time, effort, and expertise. If the re-grading process seems daunting or you are unsure about achieving the desired results, consider consulting with professionals who specialize in driveway construction and grading.
Regular maintenance is key to preserving the effectiveness of the re-grading. Periodically inspect your driveway and make any necessary adjustments, such as adding fill material or re-compacting the soil, to maintain the proper grade and ensure optimal drainage.
By re-grading your driveway, you can create a more functional and aesthetically appealing space, free from mud and water accumulation.
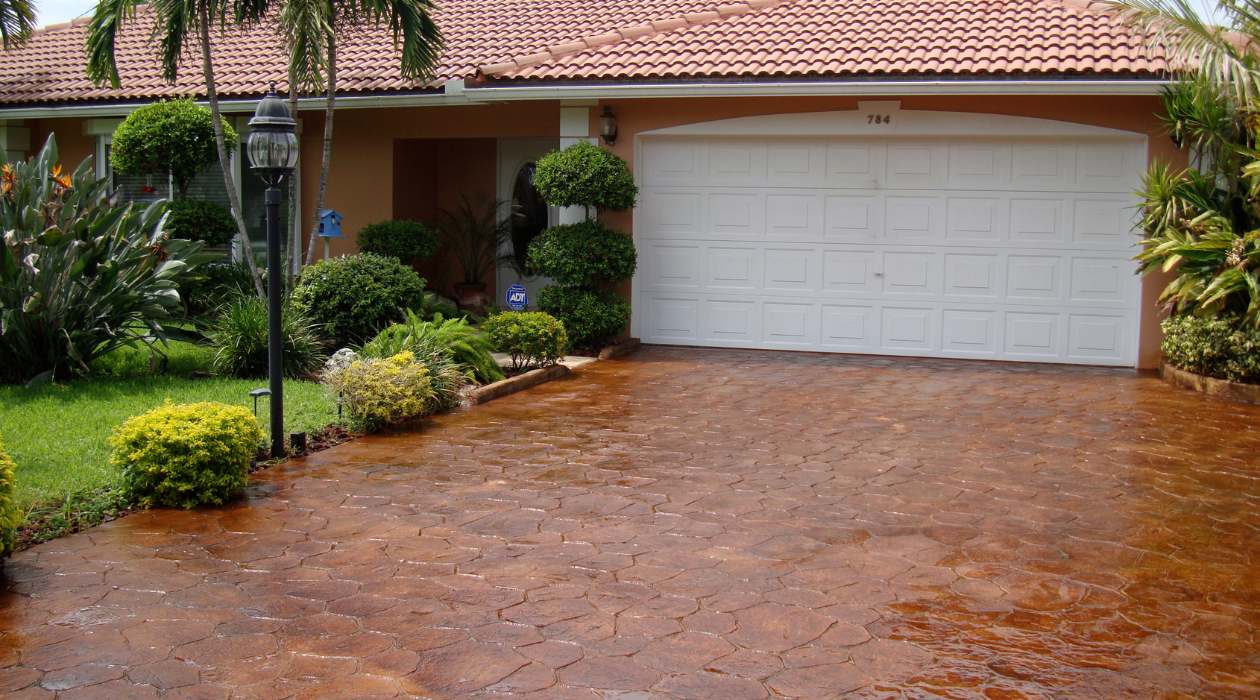
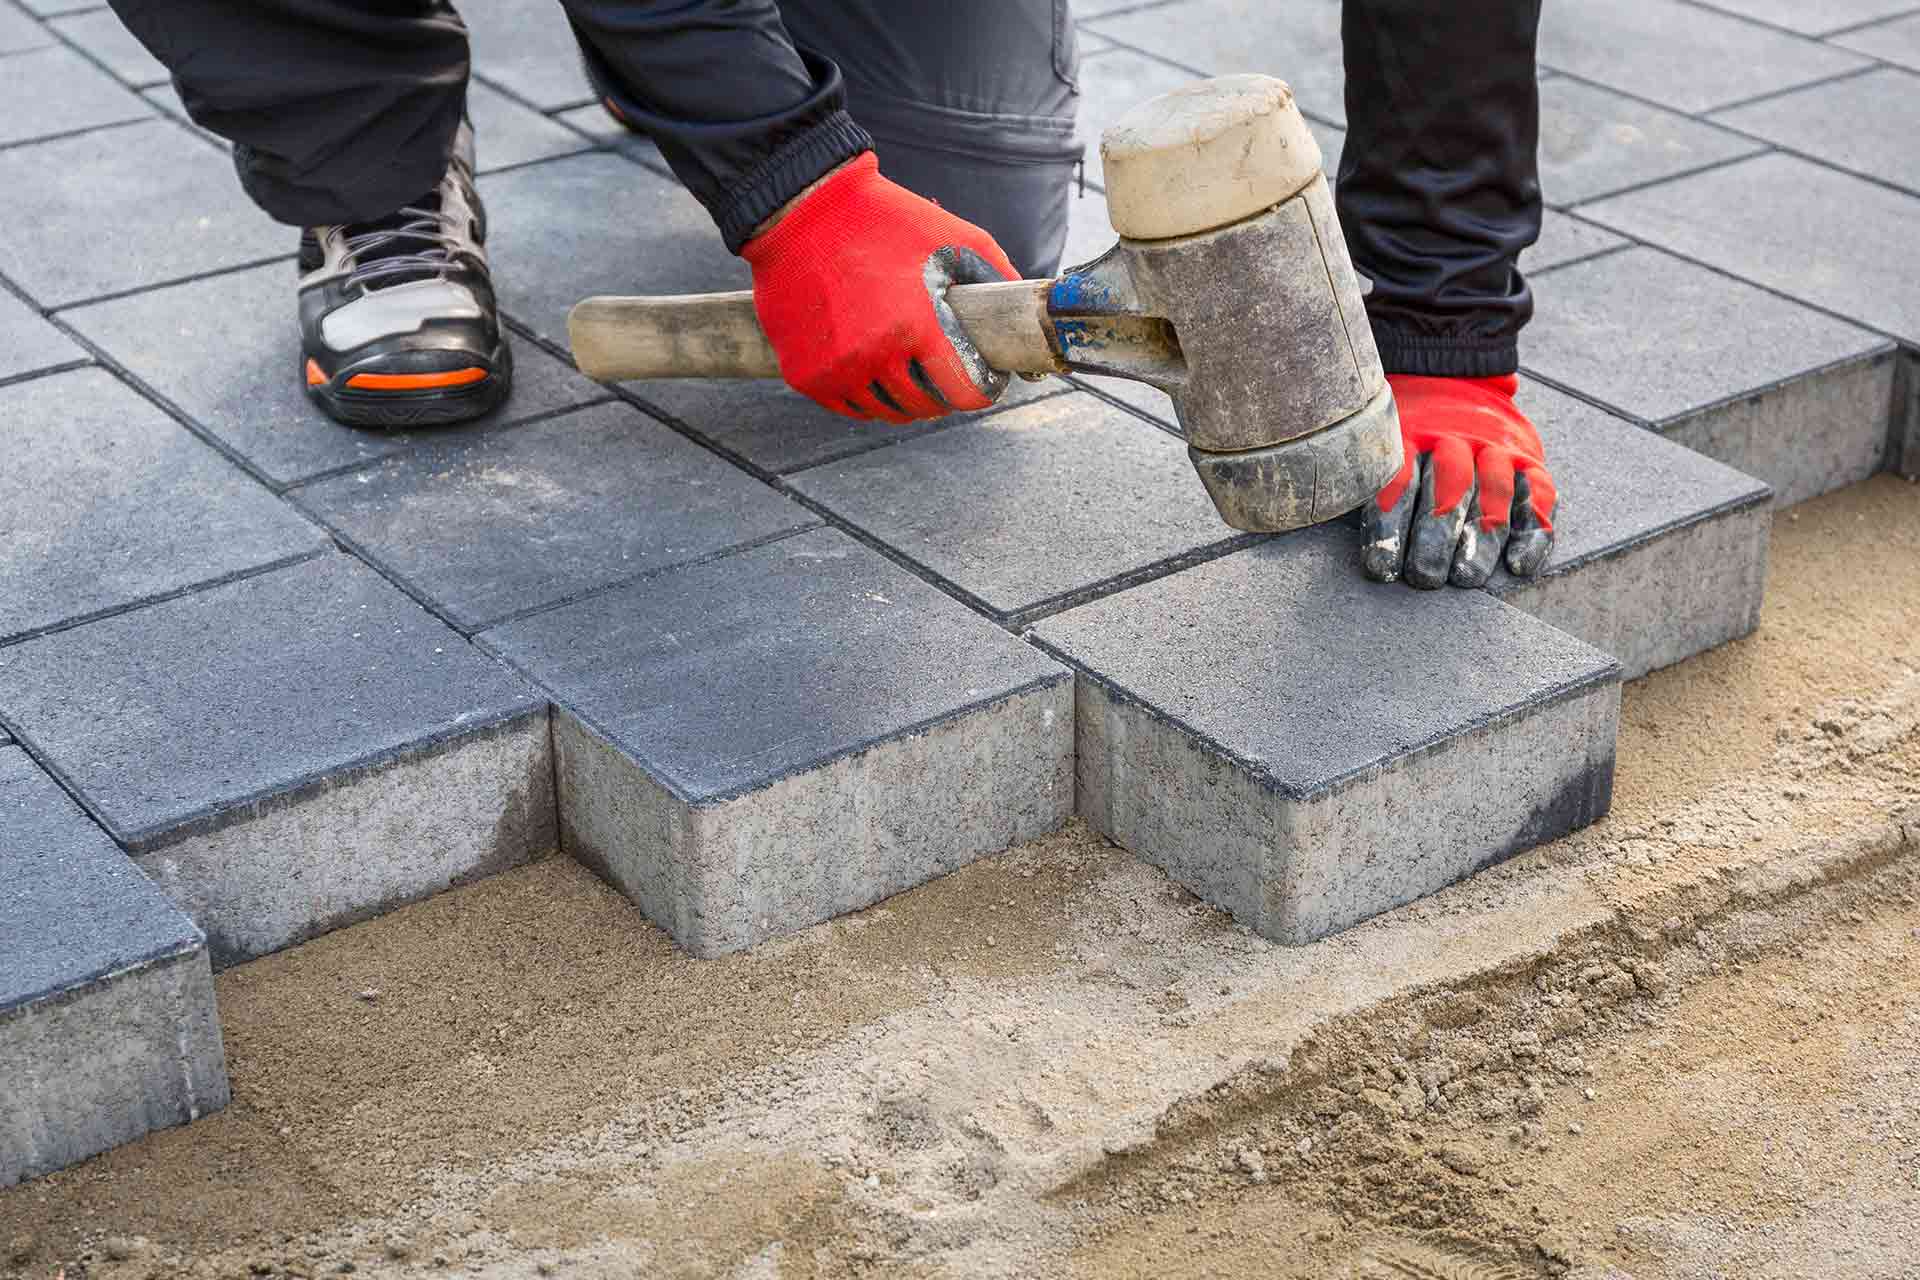
Constructing Paving Stones
Constructing a paved driveway using paving stones is an excellent solution for fixing a muddy driveway. Paving stones not only provide a stable and durable surface but also add aesthetic appeal to your property. Here’s how you can construct a paved driveway using paving stones:
- Plan and design: Determine the layout and design for your paved driveway. Consider factors such as the size and shape of the paving stones, the pattern or arrangement you want to create, and any border or edging details.
- Prepare the area: Clear the area where you plan to install the paving stones. Remove any vegetation, debris, or existing driveway material. Ensure that the area is compacted and leveled to provide a solid base for the stones.
- Excavate and level: If necessary, excavate the area to the desired depth for the paved driveway. This will depend on the type of paving stones and the base material used. Then, ensure the area is properly leveled and compacted to establish a stable foundation.
- Add a base material: Apply a layer of crushed stone or gravel as the base material for your driveway. This will provide stability and assist with drainage. Ensure the base material is evenly spread and compact it properly to create a solid foundation.
- Lay the paving stones: Start laying the paving stones according to your planned design. Place each stone carefully, ensuring they fit snugly together and are level with one another. Use a rubber mallet to tap the stones into place if needed.
- Fill the joints: Once all the paving stones are in place, fill the joints between them with sand or polymeric sand. This will help lock the stones in position and prevent weed growth. Sweep the sand into the joints and compact it to ensure a secure fit.
- Edge and finish: Install edge restraints or border stones along the driveway’s perimeter to keep the paving stones in place and create a clean, finished look. Secure these with landscaping adhesive or spikes. Finally, use a compactor or plate tamper to firmly compact the entire surface of the driveway.
Constructing a paved driveway using paving stones offers numerous benefits. These include improved drainage, reduced mud formation, increased durability, and enhanced curb appeal. Additionally, paving stones offer flexibility in terms of design, allowing you to create a unique driveway that complements your property’s aesthetic.
Maintaining a paved driveway involves regularly sweeping and cleaning the surface, removing any debris or sediment that may accumulate over time. Re-applying joint sand as needed and inspecting for any damaged or loose stones is also important for long-term durability and functionality.
Constructing a paved driveway with paving stones may require professional assistance, especially for larger projects or complex designs. Consulting with experts in driveway construction or hardscaping can provide valuable guidance and ensure a successful and visually appealing result.
Vegetation and Landscaping Options
Using vegetation and landscaping techniques can be an effective solution for fixing a muddy driveway. By strategically incorporating grass, plants, and landscaping features, you can stabilize the soil, enhance drainage, and improve the overall aesthetics of your driveway. Here are some options to consider:
- Planting grass: One of the simplest and most effective solutions is to plant grass alongside your driveway. Grass helps absorb water, prevents soil erosion, and provides a natural barrier against mud formation. Choose grass varieties that tolerate the specific conditions of your driveway, such as sun exposure and soil type.
- Creating gravel beds: Adding gravel beds along the edges of your driveway can enhance drainage and minimize mud formation. These beds act as a buffer zone, allowing excess water to percolate through and reducing the amount of moisture reaching the driveway’s surface. Use a sufficient amount of gravel and incorporate landscaping fabric to prevent weed growth.
- Installing decorative rocks: Decorative rocks can not only add visual appeal to your driveway but also help with drainage. Place them strategically in low-lying or problem areas to redirect water flow and prevent mud accumulation. Choose rocks that are large enough to stay in place and provide effective water diversion.
- Constructing rain gardens: Rain gardens are planted areas designed to collect and absorb excess water runoff. By creating a rain garden near your driveway, you can redirect water flow, reduce erosion, and minimize mud formation. Select native plants that can thrive in moist conditions and create a visually appealing garden space.
- Building retention walls: Retention walls can be constructed along the edges of your driveway to retain soil and prevent erosion. These walls provide stability and help redirect water away from the driveway. Consider using durable materials such as stone or concrete blocks, and ensure they are properly installed to withstand water pressure.
- Implementing permeable pavers: Permeable pavers are a type of paving material that allows water to flow through the surface, minimizing runoff and preventing mud formation. These pavers are designed with gaps or openings that allow water to infiltrate the ground below. This option combines the durability of paved surfaces with the benefits of natural drainage.
- Maintaining plants and landscaping features: Regular maintenance is crucial to ensure the effectiveness of vegetation and landscaping in preventing a muddy driveway. Trim grass and plants regularly, remove any weeds, and check the condition of retention walls or decorative elements. Proper upkeep will help maintain the integrity and functionality of these features.
When incorporating vegetation or landscaping options, consider the specific conditions of your driveway, such as sunlight exposure and soil type. Additionally, assess the amount of maintenance you are willing to commit to ensuring the long-term effectiveness of these solutions.
Consulting with a landscaping professional can provide valuable insights and guidance on the most suitable vegetation, materials, and landscaping strategies for your particular driveway. By integrating natural elements, you can create a visually appealing and mud-free driveway that complements your overall landscape design.
Maintenance Tips for a Mud-free Driveway
Maintaining your driveway is essential for keeping it mud-free and in optimal condition. By following these maintenance tips, you can ensure the longevity and functionality of your driveway:
- Regular cleaning: Sweep your driveway regularly to remove debris, leaves, and other particles that can accumulate and contribute to mud formation. Use a leaf blower or a broom to keep the surface clean and free from any obstructions.
- Address drainage issues promptly: Keep an eye out for any drainage issues, such as standing water or improper runoff. Address these issues promptly by fixing any clogged or malfunctioning drain systems and ensuring that the water flow is directed away from your driveway.
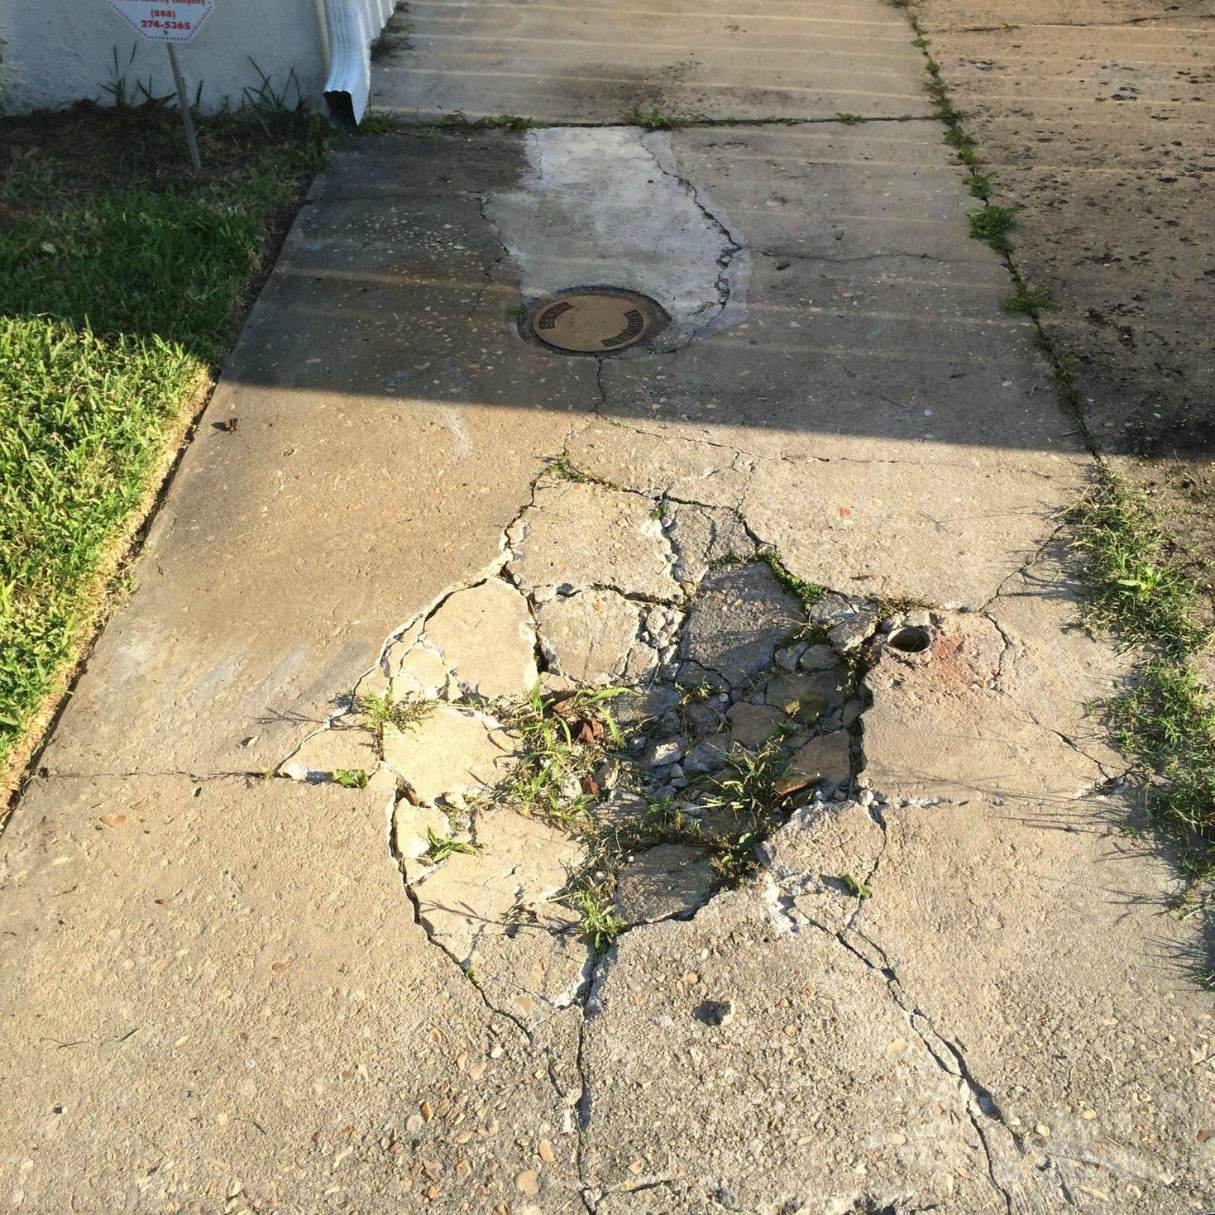
- Repair cracks or potholes: Inspect your driveway regularly for any cracks or potholes that can worsen over time and lead to mud formation. Fill and seal these areas promptly to prevent further damage and maintain a smooth, mud-free surface.
- Replenish gravel or topping material: If you have a gravel driveway or topping material, periodically assess its condition and replenish as necessary. Over time, gravel can become displaced or worn out, affecting the stability and drainage of the driveway. Add a fresh layer of gravel to maintain a consistent surface level and prevent mud build-up.
- Control weed growth: Keep weeds and vegetation from infiltrating your driveway as they can contribute to soil erosion and mud formation. Use weed killer or manually remove weeds that appear along the edges or in cracks to preserve the integrity and cleanliness of your driveway.
- Maintain vegetation and landscaping features: If you have vegetation or landscaping elements near your driveway, such as grass, plants, or decorative rocks, ensure they are well-maintained. Trim grass regularly, remove any dead vegetation, and check that rocks or edging materials are secure and preventing soil erosion.
- Regularly inspect and clean drainage systems: Check the condition of your drainage systems, such as trench drains or French drains, periodically. Remove any debris, sediment, or clogs that may hinder proper water flow. Clear out leaves, dirt, or other obstructions to ensure efficient drainage and prevent mud formation.
- Prevent snow and ice buildup: During winter months, take proactive measures to prevent snow and ice buildup on your driveway. Shovel snow promptly, apply de-icing products as needed, and use snow brushes or plows to remove any remaining snow. By preventing snow and ice accumulation, you can avoid water runoff and subsequent mud formation once the snow melts.
By implementing these maintenance tips, you can keep your driveway mud-free and in excellent condition throughout the year. Regular upkeep and proactive measures will help extend the lifespan of your driveway, enhance its functionality, and maintain its visual appeal.
If you encounter significant or persistent mud issues despite proper maintenance, it may be wise to consult with professionals specializing in driveway repairs or construction. They can assess your specific situation and provide tailored recommendations to resolve any ongoing muddy driveway problems.
Read more: How To Fix A Gravel Driveway
Conclusion
A muddy driveway can be a frustrating and unsightly problem for homeowners. However, with the right solutions and proper maintenance, you can conquer the mud and enjoy a clean and functional driveway. Throughout this guide, we explored various solutions for fixing a muddy driveway, including gravel application, adding drainage systems, installing geotextile fabric, implementing French drains, re-grading the driveway, constructing paving stones, and utilizing vegetation and landscaping options.
Each solution addresses different causes of mud formation, such as poor drainage, insufficient base material, or soil erosion. By evaluating the specific conditions of your driveway and assessing the severity of the problem, you can choose the most suitable solution or combination of solutions to achieve a mud-free driveway.
Maintaining a mud-free driveway requires regular cleaning, addressing drainage issues promptly, repairing cracks or potholes, and reapplying gravel or topping material as necessary. By taking good care of your driveway, you can prevent mud formation, prolong its lifespan, and ensure its functionality and aesthetics for years to come.
Don’t hesitate to consult with professionals for expert advice and assistance. Whether it’s seeking guidance on the right solution for your driveway or enlisting help for more complex installations or repairs, professionals can provide valuable insights specific to your situation.
Remember, a mud-free driveway not only improves the appearance of your property but also enhances safety and functionality. It provides a stable surface for vehicles and pedestrians, reduces the risk of accidents caused by slipping or getting stuck, and enhances the overall curb appeal of your home.
Fixing a muddy driveway may require some investment of time, effort, and resources, but the long-term benefits are worth it. So, roll up your sleeves, choose the appropriate solution, and take the necessary steps to transform your muddy driveway into a clean and functional space that you can be proud of!
Frequently Asked Questions about How To Fix A Muddy Driveway
Was this page helpful?
At Storables.com, we guarantee accurate and reliable information. Our content, validated by Expert Board Contributors, is crafted following stringent Editorial Policies. We're committed to providing you with well-researched, expert-backed insights for all your informational needs.


0 thoughts on “How To Fix A Muddy Driveway”