Articles
How To Fix A Sinking Driveway
Modified: February 23, 2024
Learn how to fix a sinking driveway with these helpful articles. Find step-by-step guides and expert tips to ensure a long-lasting solution.
(Many of the links in this article redirect to a specific reviewed product. Your purchase of these products through affiliate links helps to generate commission for Storables.com, at no extra cost. Learn more)
Introduction
A sinking driveway can be a frustrating problem for homeowners. Not only does it affect the appearance of your property, but it can also create safety hazards and cause damage to your vehicle. Whether it’s due to soil erosion, improper installation, or age-related wear and tear, addressing the issue is crucial to ensure the longevity and functionality of your driveway.
In this guide, we will explore the common causes of a sinking driveway and provide you with a step-by-step solution to fix it. By following these instructions and using the right tools and materials, you can restore your driveway to its former glory and prevent further problems down the line.
Key Takeaways:
- Addressing the underlying causes of a sinking driveway, such as poor soil compaction and water accumulation, is crucial to prevent further damage and ensure the longevity of your driveway.
- Properly assessing the damage, gathering the necessary tools and materials, and following a step-by-step repair guide can help you effectively fix your sinking driveway and restore its stability and functionality.
Read more: How To Fix A Sink
Causes of a Sinking Driveway
Understanding the underlying causes of a sinking driveway is essential to effectively address the problem. Here are some common reasons why driveways may sink:
- Poor soil compaction: When a driveway is initially installed, the soil beneath it must be properly compacted to provide a stable foundation. If this compaction is not done correctly or is compromised over time, the soil can settle and cause the driveway to sink.
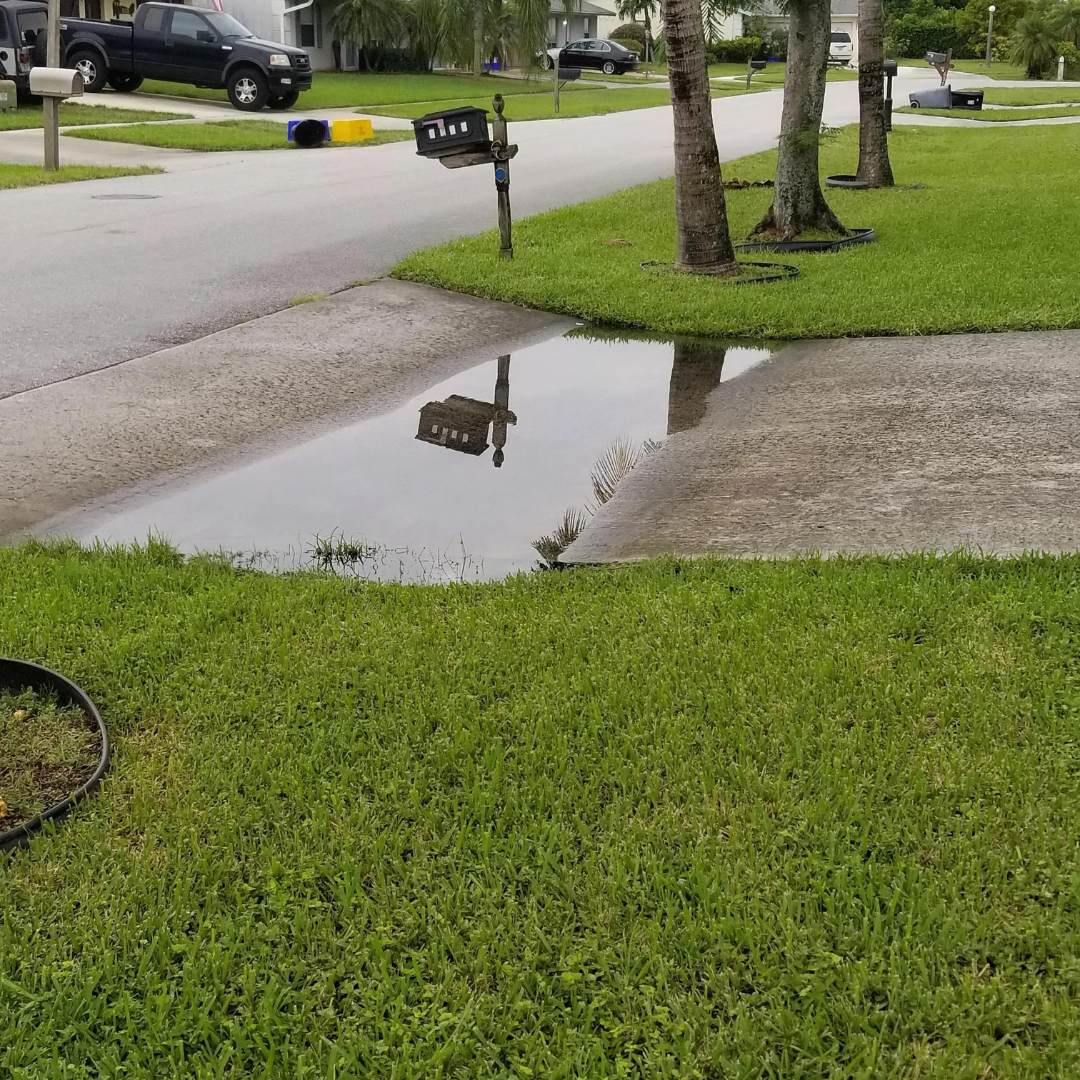
- Water accumulation: Excessive water can penetrate the soil underneath the driveway, causing it to become saturated. When this happens, the soil loses its stability and can no longer support the weight of the driveway, leading to sinking.
- Soil erosion: Natural erosion processes, such as heavy rainfall or poor drainage, can wash away the soil beneath the driveway. As the soil erodes, the driveway loses support and begins to sink.
- Poor installation: If the driveway was not properly installed in the first place, it is more likely to experience issues such as sinking. This can include inadequate foundation construction, incorrect slope, or the use of subpar materials.
- Aging and deterioration: Over time, driveways can experience wear and tear, causing the materials to degrade. Cracks, gaps, and sunken areas can develop, leading to a sinking driveway.
Identifying the specific cause of your sinking driveway is crucial in determining the most effective solution. By addressing the underlying issue, you can prevent further damage and ensure the longevity of your driveway. Now that you understand the causes, let us move on to assessing the extent of the damage.
Assessing the Damage
Before you start fixing your sinking driveway, it’s important to assess the extent of the damage. This will help you determine the appropriate measures needed to repair and stabilize the surface. Here are a few steps to follow when assessing the damage:
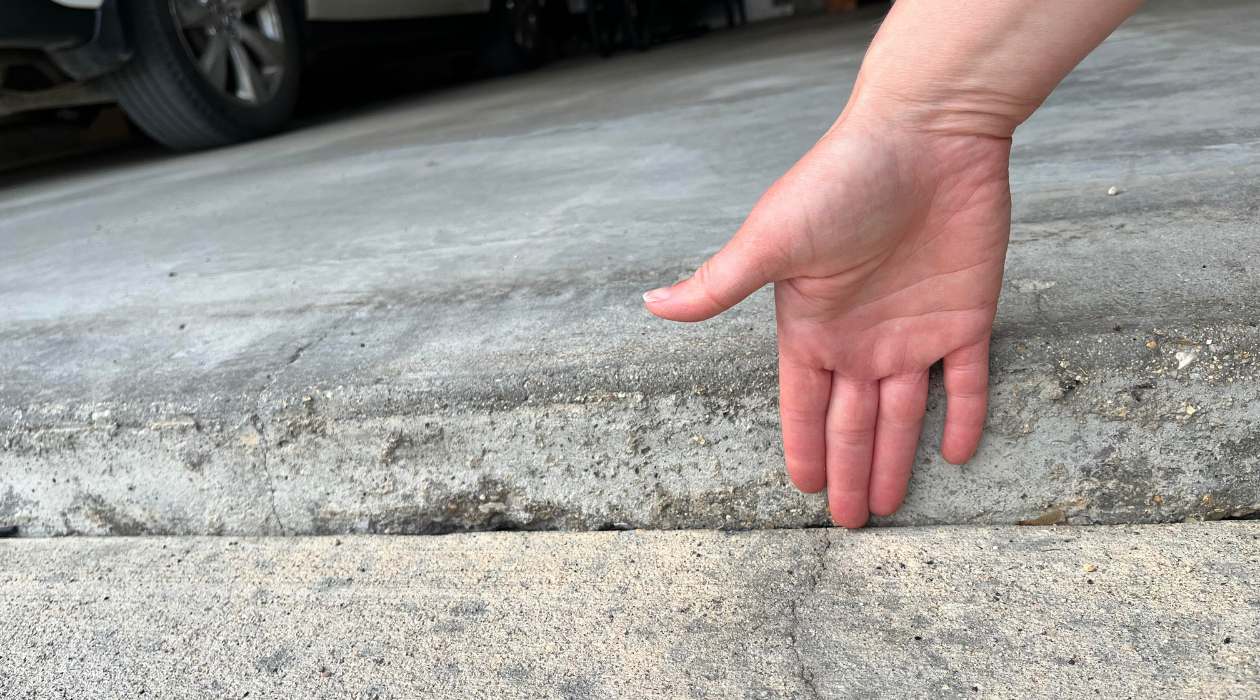
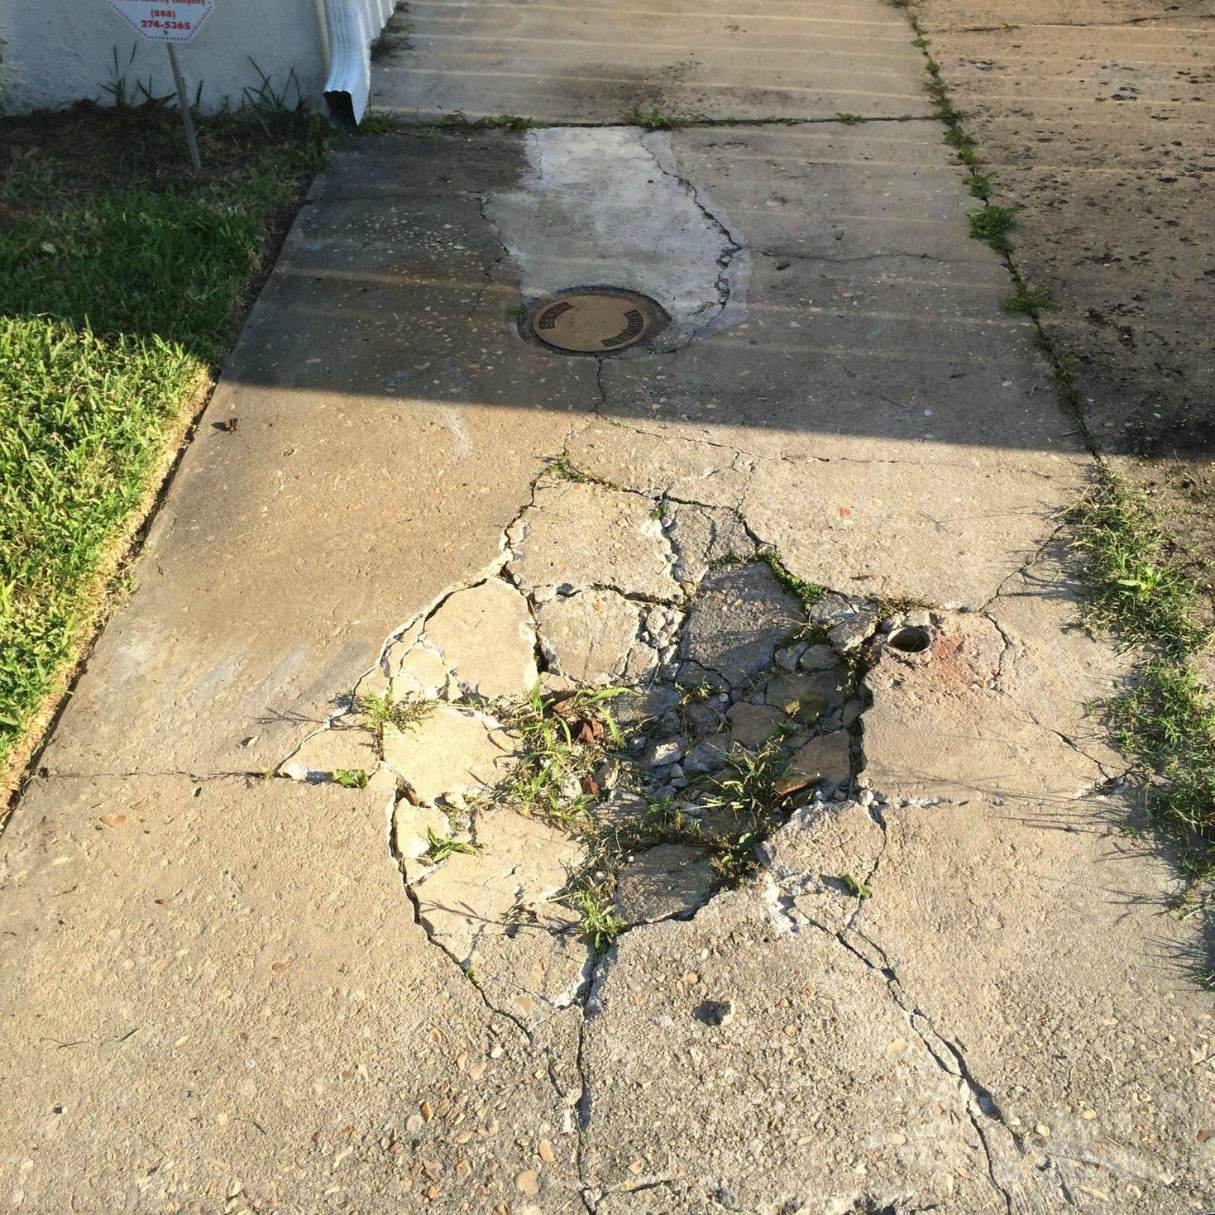
- Visual inspection: Begin by visually examining your driveway for any signs of sinking or uneven surfaces. Look for areas where the pavement has sunken or cracked, as well as any noticeable gaps or depressions.
- Measurements: Use a tape measure to measure the depth of the sunken areas. This will give you an idea of how much material you’ll need to add to level the driveway.
- Probing the soil: Taking a screwdriver or other probing tool, gently probe the soil beneath the sunken area. If the soil feels soft, wet, or unstable, it may indicate poor compaction or water accumulation.
- Check for drainage issues: Evaluate the drainage around your driveway. Look for signs of standing water or poor drainage patterns that may contribute to the sinking. Ensure that downspouts and gutters are diverting water away from the driveway.
- Consideration of cracks: Pay attention to any cracks in the driveway, as they may require additional repair work. Cracks can worsen over time and contribute to the sinking of the pavement.
By thoroughly assessing the damage, you will have a clearer understanding of the underlying issues that caused your driveway to sink. This will enable you to plan and execute the necessary steps to restore its stability and functionality. In the next section, we will discuss the tools and materials you’ll need for the repair process.
Tools and Materials Needed
Before you begin fixing your sinking driveway, it’s important to gather the necessary tools and materials. Having everything on hand will make the repair process smoother and more efficient. Here is a list of tools and materials you’ll need:
Tools:
- Shovel: A sturdy shovel will be needed for excavating the sunken areas and removing debris.
- Tamping tool: This tool is used to compact the soil and create a solid foundation.
- Rake: A rake will help level the excavated areas and distribute new material.
- Tape measure: Use a tape measure to measure the depth of the sunken areas and ensure accurate leveling.
- Concrete saw: If there are any cracks in the driveway, a concrete saw will be needed to cut along the edges of the crack for proper repair.
- Wheelbarrow: You’ll need a wheelbarrow to mix and transport the materials like gravel and concrete patch.
- Trowel: A trowel will be used for applying concrete patch and smoothing the surface.
- Broom: A broom is essential for cleaning the driveway and brushing away excess material.
- Safety gear: Don’t forget to wear safety glasses, gloves, and a dust mask to protect yourself during the repair process.
Read more: How To Fix Driveway Erosion
Materials:
- Gravel: You’ll need gravel to create a stable base for the repaired driveway.
- Concrete patch: This material will be used to fill in the sunken areas and cracks in the driveway.
- Water: Water is necessary for wetting and curing the concrete patch.
Make sure to gather all the required tools and materials before you start the repair process. This will save you time and ensure that the job is completed correctly. In the next section, we will provide a step-by-step guide to fixing your sinking driveway.
Step-by-Step Guide to Fixing a Sinking Driveway
Now that you have assessed the damage and gathered the necessary tools and materials, it’s time to start fixing your sinking driveway. Follow these step-by-step instructions to effectively repair and stabilize the surface:
1. Clearing the Driveway:
Begin by removing any debris, dirt, or vegetation from the sunken areas of the driveway. Use a shovel or rake to clear the surface and create a clean working area.
2. Compacting the Soil:
Use a tamping tool or the back of a shovel to firmly compact the soil in the sunken areas. This will provide a stable foundation for the repair materials.
Read more: How To Fix A Sinkhole In The Driveway
3. Adding Gravel:
Pour a layer of gravel into the excavated areas to create a solid base. Use a shovel or rake to spread and level the gravel, ensuring it is evenly distributed and compacted.
4. Applying Concrete Patch:
Mix the concrete patch according to the manufacturer’s instructions. Then, carefully fill the sunken areas and cracks in the driveway with the prepared concrete patch. Smooth the surface with a trowel and ensure it is level with the rest of the driveway.
5. Curing and Finishing:
Follow the curing instructions provided with the concrete patch. This may involve moistening the repaired areas and covering them to retain moisture. Allow the concrete patch to fully cure before using the driveway. Once cured, give it a final inspection and make any necessary adjustments to ensure a smooth and level surface.
By following these steps, you can effectively fix your sinking driveway and restore its stability. Remember to take precautions and follow all safety guidelines while working with tools and materials. In the next section, we will provide some additional tips and precautions to consider during the repair process.
Clearing the Driveway
The first step in fixing a sinking driveway is to clear the affected area of any debris, dirt, or vegetation. This will create a clean and clear working surface for the repair process. Here’s how to effectively clear your driveway:
- Remove loose debris: Begin by using a broom or leaf blower to sweep away any loose leaves, dirt, or small debris from the surface of the driveway. Clearing the surface will make it easier to identify the sunken areas that need repair.
- Clear vegetation: If there are any plants, grass, or weeds growing in the sunken areas, use a shovel or gardening tool to carefully remove them. Be sure to dig deep enough to remove the roots to prevent regrowth.
- Eliminate larger debris: Look for any larger debris, such as stones, branches, or construction materials, and remove them from the driveway. These objects can interfere with the repair process and prevent proper leveling of the surface.
- Inspect for oil stains: While clearing the driveway, take note of any oil stains or spills. These can weaken the pavement and may need to be addressed separately. Use an appropriate cleaner or degreaser to remove the stains before proceeding with the repair.
Clearing the driveway is an important first step to prepare for the repair process. By removing debris and vegetation, you ensure a clean working surface and better access to the sunken areas for necessary repairs. Once the driveway is cleared, you can proceed to the next step of compacting the soil.
Read more: How To Fix A Muddy Driveway
Compacting the Soil
After clearing the driveway of debris and vegetation, the next step in fixing a sinking driveway is to compact the soil in the sunken areas. Properly compacting the soil will provide a stable foundation for the repair materials. Here’s how to effectively compact the soil:
- Use a shovel or garden rake to loosen the soil in the sunken areas. Break up any compacted soil or clumps to create a more even surface.
- With the backside of the shovel or a tamping tool, firmly compact the loosened soil. Apply downward pressure with your body weight while making multiple passes over the area. This will help to eliminate any air gaps and create a solid foundation.
- Continue compacting the soil until it feels firm and does not sink under pressure. It should be compacted enough to provide support for the repair materials and prevent future sinking.
- Check for proper compaction by walking over the compacted area. If it feels stable and does not give way, the soil has been sufficiently compacted.
Properly compacting the soil is crucial to ensure a stable and even surface for your repaired driveway. It helps prevent future sinking and provides a solid base for the repair materials. Once the soil is compacted, you can proceed to the next step of adding gravel to the sunken areas.
Adding Gravel
Once the soil in the sunken areas of your driveway is properly compacted, the next step is to add gravel. Adding gravel helps create a stable base and provides additional support for the repaired areas. Here’s how to effectively add gravel to your driveway:
- Start by sourcing the appropriate type of gravel for your project. Look for compactable gravel, such as crushed stone or crushed rock, that is compatible with your local climate and conditions.
- Measure the depth of the sunken areas using a tape measure. This will guide you in determining the amount of gravel needed to fill the gaps and level the surface properly.
- Pour a layer of gravel into the sunken areas, ensuring it is evenly distributed and fills the space adequately. Use a shovel or rake to spread and level the gravel, ensuring it is compacted and forms a solid base.
- Compact the gravel using a tamping tool or the backside of a shovel. Apply firm pressure to ensure the gravel is properly compacted and forms a stable base for the repair materials.
- Continue adding gravel and compacting it until the sunken areas are level with the surrounding driveway. Take the time to periodically check the level using a straight edge or level to ensure an even surface.
The addition of gravel provides stability and support to the repaired areas of your driveway. By properly leveling and compacting the gravel, you create a solid foundation for the upcoming step of applying the concrete patch. Once the gravel is added and leveled, you’re now ready to move on to the next stage of the repair process.
Applying Concrete Patch
Once the gravel base is properly leveled, it’s time to apply the concrete patch to the sunken areas of your driveway. Concrete patching material is specifically designed to repair cracks, gaps, and uneven surfaces. Here’s how to effectively apply concrete patch to your sinking driveway:
- Begin by preparing the concrete patch according to the manufacturer’s instructions. This typically involves mixing the patching material with water in a wheelbarrow or bucket until it reaches the desired consistency.
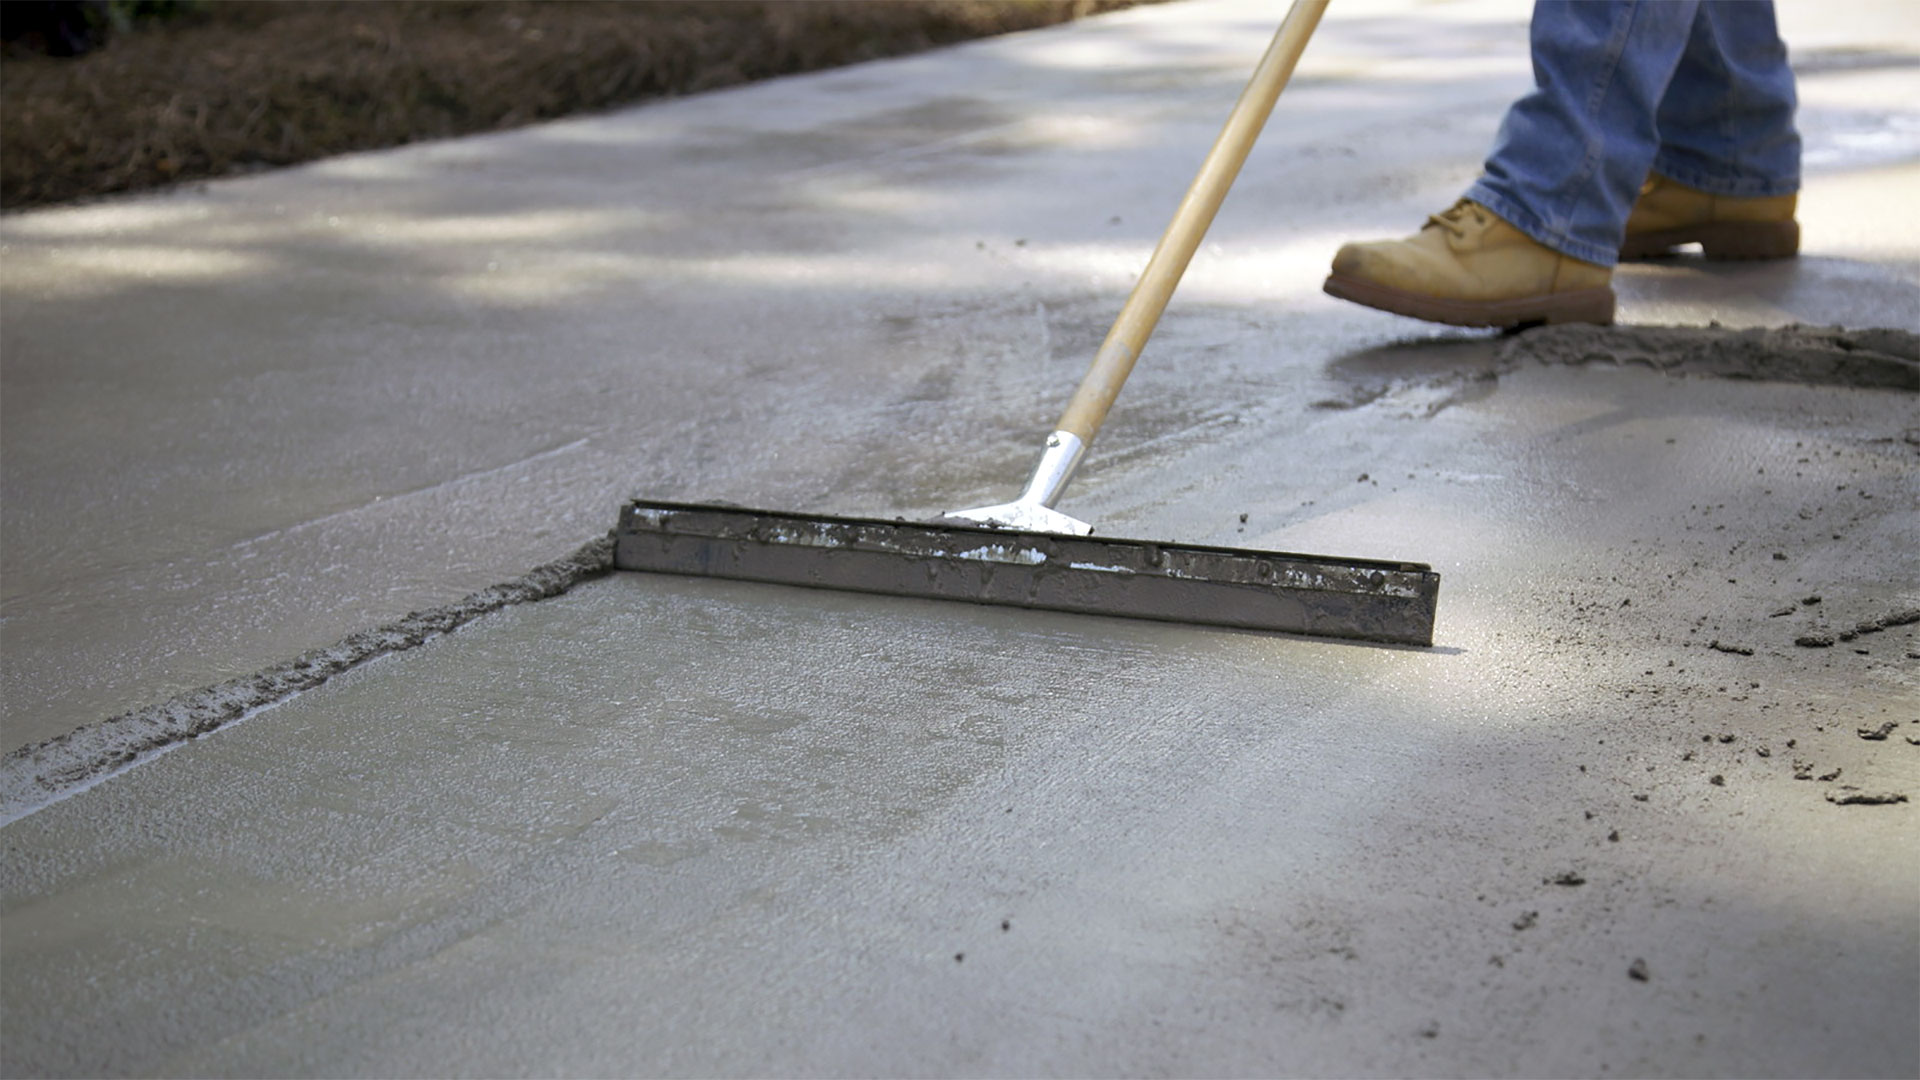
- Using a trowel, carefully apply the concrete patch to the sunken areas of your driveway. Fill the gaps and depressions, ensuring that the patching material is slightly higher than the surrounding pavement.
- Smooth the surface of the patch with the trowel, ensuring it is level and even with the rest of the driveway. Feather the edges of the patch to blend it seamlessly with the existing pavement.
- Continue filling and smoothing the concrete patch until all sunken areas have been addressed. Take your time to ensure a proper application and a smooth finish.
- Allow the concrete patch to cure according to the manufacturer’s instructions. This typically involves keeping the repaired areas moist and covered for a certain period of time to promote proper curing.
Applying concrete patch is a crucial step in repairing your sinking driveway. It helps fill the gaps and level the surface, creating a seamless and stable pavement. Remember to follow the instructions provided by the manufacturer to ensure proper mixing, application, and curing of the concrete patch. Once the patch has fully cured, you can proceed to the final step of curing and finishing.
Curing and Finishing
After applying the concrete patch to your sinking driveway, the final step is to allow it to properly cure and finish the surface. Curing ensures that the patch hardens and achieves its maximum strength, while finishing gives it a polished appearance. Here’s how to effectively cure and finish your repaired driveway:
- After applying the concrete patch, follow the manufacturer’s instructions for curing. This may involve moistening the repaired areas with water and covering them with plastic sheeting or a curing compound. The curing process helps prevent the patch from drying too quickly, allowing it to fully harden and achieve its maximum strength.
- Monitor the curing process regularly and ensure the repaired areas remain moist. This may involve lightly spraying water on the surface or covering it with damp cloths. The length of the curing process can vary depending on the type of concrete patch used.
- Once the concrete patch has fully cured, inspect the repaired areas for any imperfections or rough spots. Use a trowel or a sanding block to smooth out any uneven or rough edges. Pay attention to achieving a seamless transition between the patch and the existing pavement.
- Give the repaired areas a final cleaning by sweeping away any loose debris or excess particles. Using a broom or brush, gently sweep the surface to achieve a clean and polished appearance.
Curing and finishing your repaired driveway is crucial to ensure that the concrete patch achieves its maximum durability and aesthetic appeal. Proper curing allows the patch to fully harden and strengthens its bond with the surrounding pavement. Finishing touches help create a seamless integration between the repaired areas and the existing driveway surface.
By following these steps to cure and finish your sinking driveway, you can ensure a long-lasting repair that blends seamlessly with the rest of your pavement. Once the curing and finishing process is complete, you can enjoy a restored and stable driveway.
Regularly inspect your driveway for any signs of sinking or settling. If you notice any areas that are sinking, consult a professional to assess and fix the issue before it becomes a bigger problem.
Read more: How To Fix A Gravel Driveway
Additional Tips and Precautions
As you work on fixing your sinking driveway, there are some additional tips and precautions that can help ensure a successful repair and prevent further issues. Here are some important things to keep in mind:
- Before starting any repair work, check the weather forecast. Avoid working on your driveway during rainy or extremely hot conditions, as it can affect the effectiveness of the materials and compromise the quality of the repair.
- Wear appropriate safety gear, including safety glasses, gloves, and a dust mask, to protect yourself from injury and dust particles during the repair process.
- Consider hiring a professional if you’re unsure about your ability to perform the repairs properly. A professional contractor will have the expertise, experience, and specialized equipment to ensure a high-quality and long-lasting repair.
- Regularly inspect and maintain your driveway to prevent future sinking or damage. Keep an eye out for any signs of cracks, depressions, or water accumulation and address them promptly to avoid significant repairs in the future.
- Improve drainage around your driveway by ensuring that downspouts and gutters are directing water away from the pavement. Proper drainage helps prevent water from seeping into the soil beneath the driveway and causing sinking.
- Consider applying a sealant or protective coating to your repaired driveway to enhance its durability and resistance to damage. Consult with a professional or follow the manufacturer’s instructions for proper application.
Following these additional tips and precautions will help you achieve a successful and long-lasting repair for your sinking driveway. Take the time to assess the damage, gather the necessary tools and materials, and follow the step-by-step guide to ensure a smooth and seamless restoration. With proper maintenance, your driveway will remain stable, functional, and visually appealing for years to come.
Conclusion
Fixing a sinking driveway is an important task to ensure the safety, functionality, and visual appeal of your property. By understanding the causes of a sinking driveway and following the appropriate steps, you can restore its stability and prevent further damage. Remember to assess the extent of the damage, gather the necessary tools and materials, and carefully follow the step-by-step guide provided in this article.
Clearing the driveway, compacting the soil, adding gravel, applying concrete patch, and properly curing and finishing the repair are essential steps in the process. By taking these actions, you’ll be able to repair sunken areas, level the surface, and eliminate safety hazards. Additionally, maintaining good drainage, regular inspections, and proper maintenance will help prevent future sinking and preserve the integrity of your driveway.
If you’re unsure about the repair process or lack the necessary expertise, consider consulting a professional contractor. They can offer guidance, ensure proper repairs, and provide long-lasting solutions. With proper care and attention, your repaired driveway will not only enhance the value of your property but also serve as a durable and reliable surface for years to come.
Remember to follow safety guidelines, wear protective gear, and take necessary precautions throughout the repair process. Regular maintenance and prompt attention to any issues will help prolong the life of your driveway and minimize the need for extensive repairs in the future.
By addressing your sinking driveway and investing time and effort into its repair, you’ll create a safer and more visually appealing environment for your home. Enjoy the rewards of a stable and functional driveway that provides a warm welcome to guests and ensures a smooth driving experience for you and your family.
Frequently Asked Questions about How To Fix A Sinking Driveway
Was this page helpful?
At Storables.com, we guarantee accurate and reliable information. Our content, validated by Expert Board Contributors, is crafted following stringent Editorial Policies. We're committed to providing you with well-researched, expert-backed insights for all your informational needs.


0 thoughts on “How To Fix A Sinking Driveway”