Articles
How To Fix A Sinkhole In The Driveway
Modified: December 7, 2023
Looking for articles on how to fix a sinkhole in your driveway? Check out our comprehensive guide for step-by-step instructions and expert tips.
(Many of the links in this article redirect to a specific reviewed product. Your purchase of these products through affiliate links helps to generate commission for Storables.com, at no extra cost. Learn more)
Introduction
A sinkhole in a driveway can be a frustrating and potentially dangerous problem for homeowners. Sinkholes, also known as dolines, are depressions or holes that form in the ground. They can occur naturally due to geological factors or can be triggered by human activities. When a sinkhole appears in your driveway, it can not only affect the aesthetic appeal of your property but also pose a risk to vehicles and pedestrians.
In this article, we will explore the signs and causes of sinkholes in driveways, guide you on assessing the severity of the sinkhole, provide precautions and safety measures, and walk you through the step-by-step process of fixing a sinkhole in your driveway. We will also discuss preventative measures to help you avoid future sinkholes.
It is important to note that while this article provides a comprehensive guide, fixing a sinkhole in a driveway can be a complex task that may require professional assistance. It is always wise to consult with experts or contact local authorities for guidance and support.
Now, let’s dive into the details and learn how to effectively fix a sinkhole in your driveway.
Key Takeaways:
- Identifying early signs of sinkholes in driveways, assessing severity, and taking safety precautions are crucial steps in effectively addressing and repairing sinkhole issues. Prioritizing safety and seeking professional guidance when needed are essential for successful repairs.
- Implementing preventative measures such as improving drainage, monitoring soil moisture levels, and obtaining insurance coverage can help minimize the risk of future sinkhole formation in driveways. Regular inspections, proper maintenance, and proactive steps contribute to long-term driveway stability.
Read more: How To Fix Driveway Erosion
Signs and Causes of Sinkholes in Driveways
Sinkholes in driveways can have various signs and causes. It is important to be aware of these signs to identify the presence of a sinkhole and understand the underlying causes. By recognizing the early warning signs, you can take timely action to prevent further damage. Here are some common signs and causes of sinkholes in driveways:
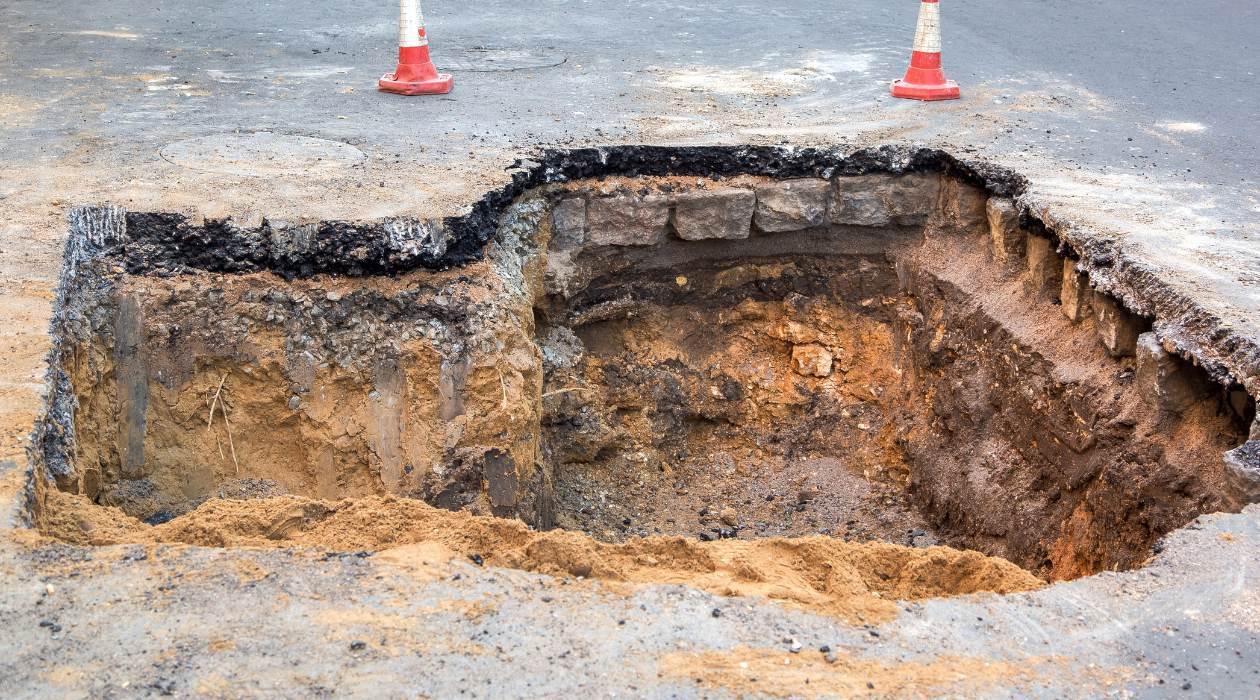
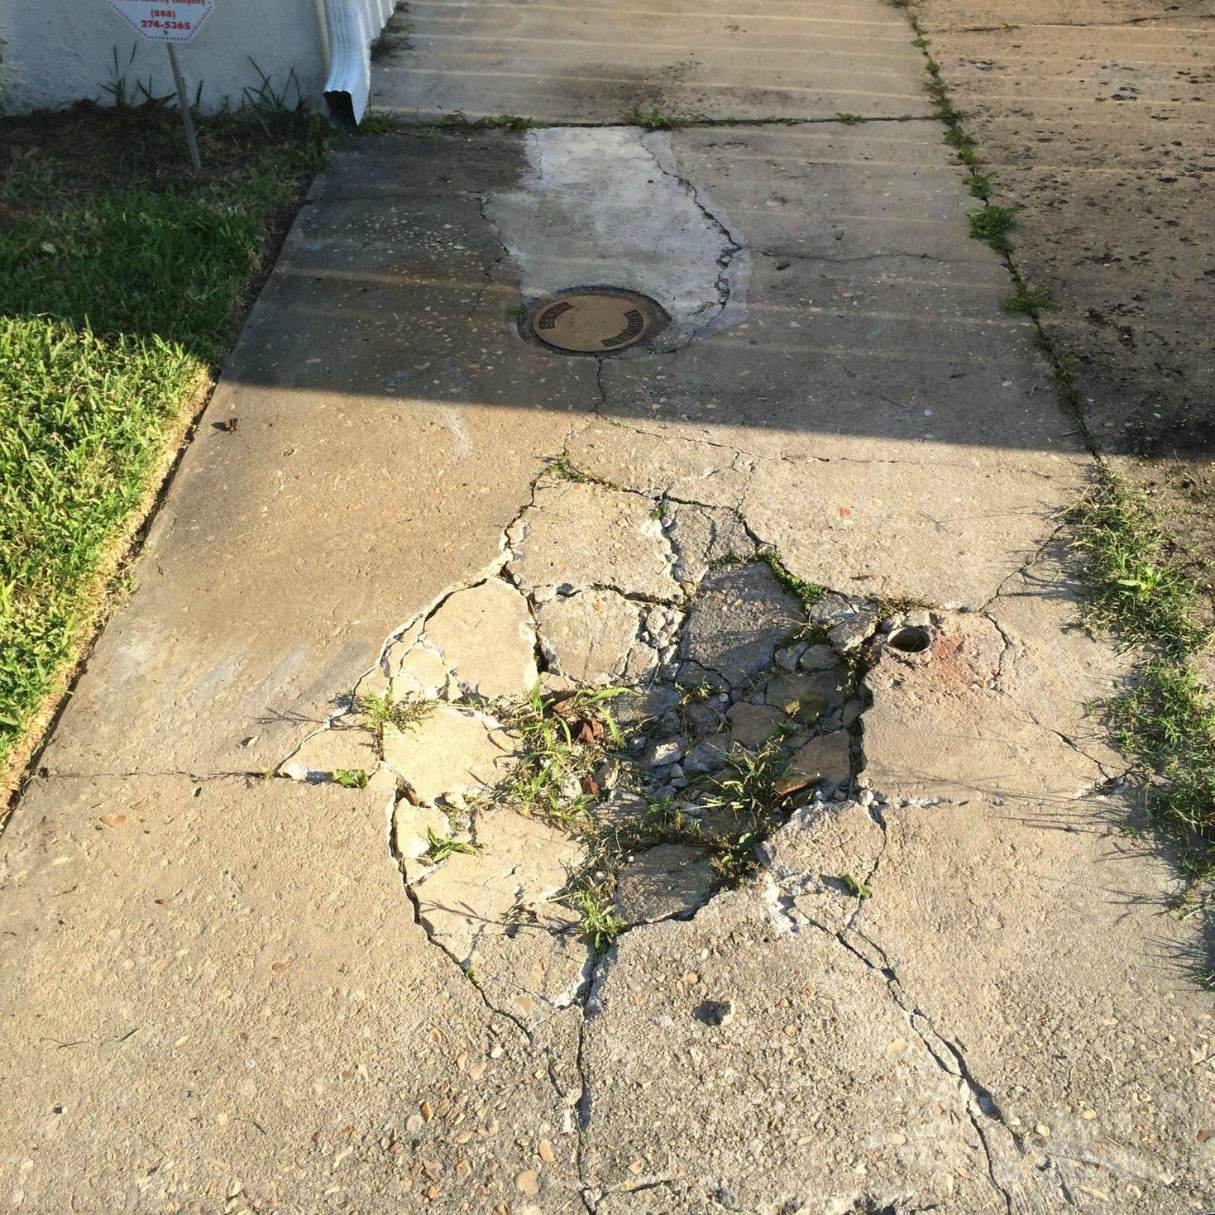
1. Depression or Sinking in the Driveway Surface: One of the most noticeable signs of a sinkhole is a visible depression or sinking in the surface of your driveway. This can vary in size and depth, depending on the severity of the sinkhole.
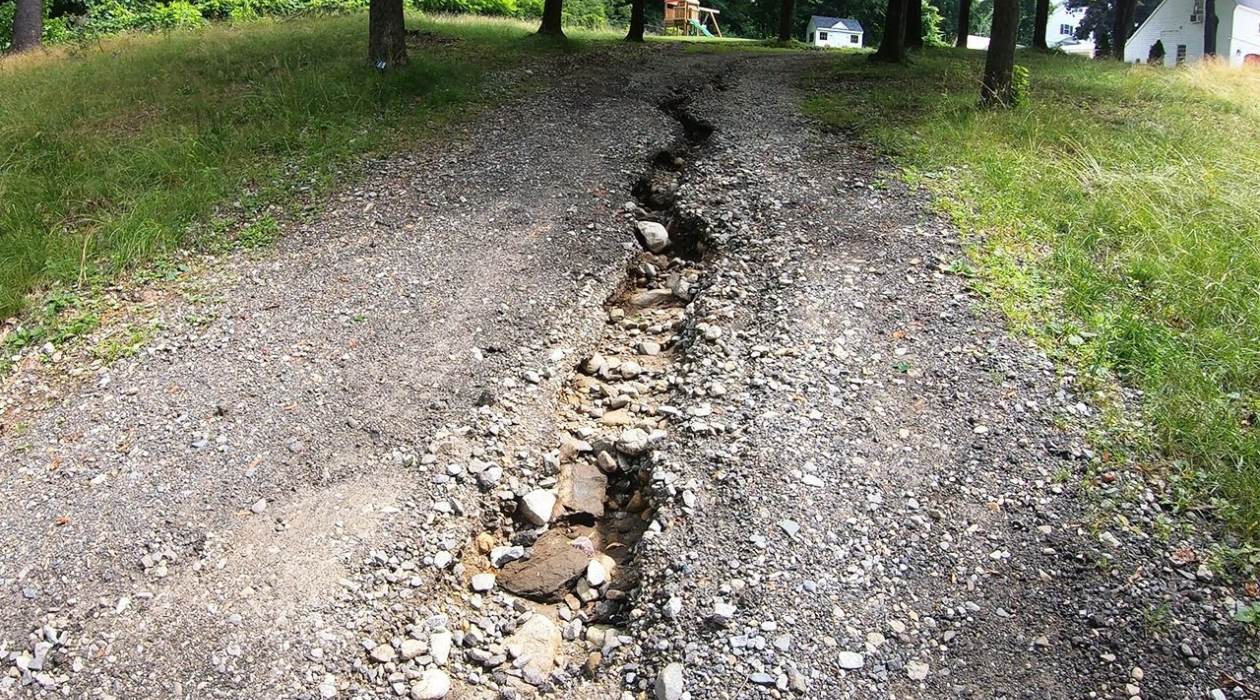
2. Cracks or Fractures in the Driveway: Another sign is the presence of cracks or fractures in the driveway surface, especially in a circular or irregular pattern. These cracks may appear gradually or suddenly, indicating shifting ground beneath the driveway.
3. Potholes or Pitting: Sinkholes can lead to the formation of potholes or pitting on the driveway surface. These indentations can be hazardous for vehicles and may worsen over time if left unaddressed.
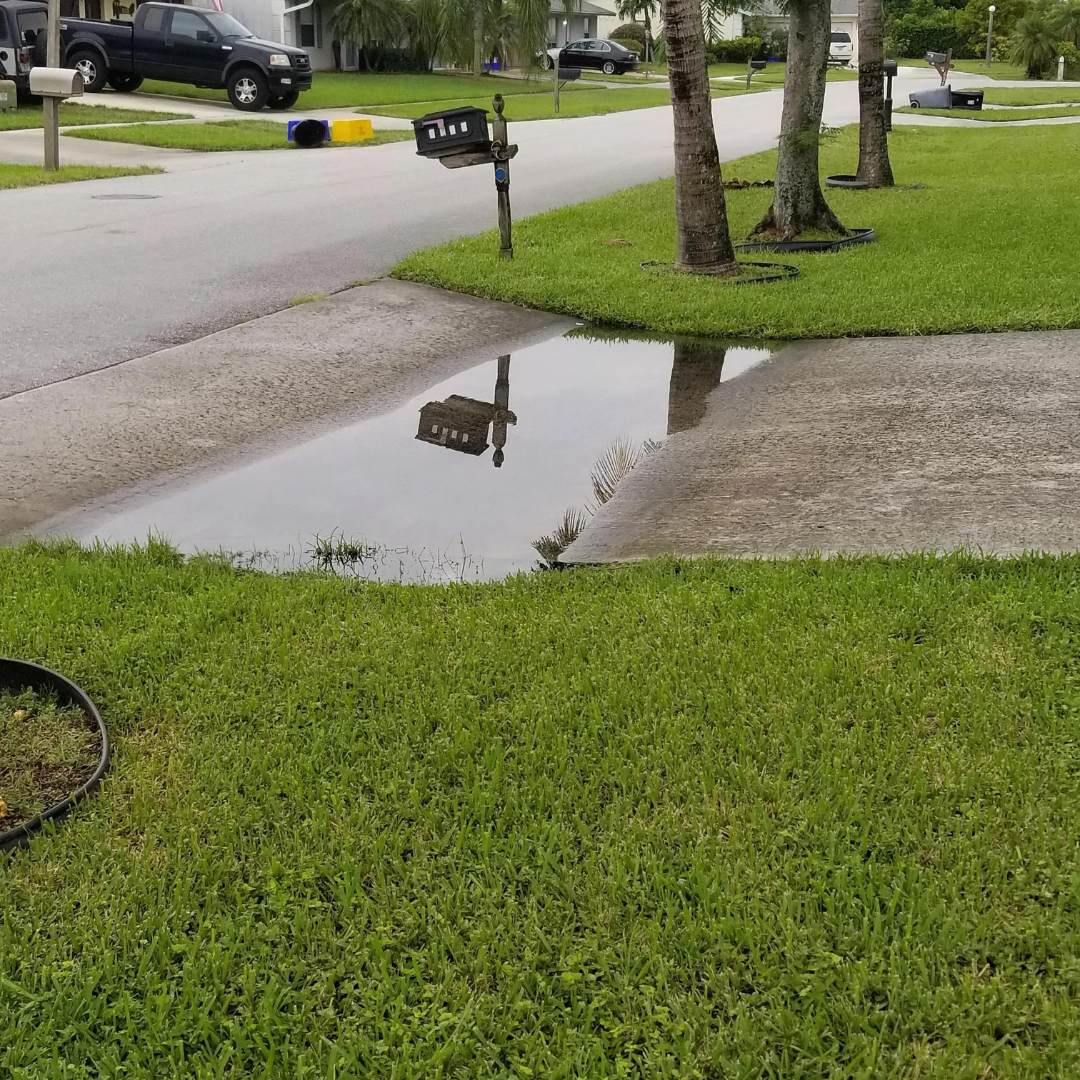
4. Water Accumulation or Drainage Issues: If you notice water accumulating on your driveway or experiencing drainage problems, it could be a sign of a sinkhole. Sinkholes can disrupt the natural flow of water, causing puddles or poor drainage in the affected area.
5. Underground Cavities or Voids: Sinkholes are often caused by the erosion or collapse of underground cavities or voids. These can be a result of various factors, including geological conditions, water infiltration, natural processes, or human activities such as excavation or improper construction.
6. Heavy Rainfall or Changes in Groundwater Levels: Excessive rainfall or significant fluctuations in groundwater levels can trigger the formation or enlargement of sinkholes. This is particularly common in areas with soluble rock formations, such as limestone or gypsum, which are prone to dissolution.
7. Poorly Compacted or Eroded Soil: Weak or eroded soil beneath the driveway can contribute to the formation of sinkholes. Soil compaction issues during construction or erosion due to water runoff can weaken the ground and increase the risk of sinkhole development.
It is important to understand that sinkholes can be unpredictable, and their causes can vary depending on the specific circumstances of each case. If you notice any of these signs or suspect the presence of a sinkhole in your driveway, it is crucial to take immediate action to assess the severity and address the issue.
Assessing the Severity of the Sinkhole
Before attempting to fix a sinkhole in your driveway, it is essential to assess the severity of the sinkhole to determine the appropriate course of action. This assessment will help you understand the size, depth, and potential risks associated with the sinkhole. Here are some steps to follow when assessing the severity of a sinkhole:
1. Safety First: Prioritize safety when dealing with sinkholes. Keep a safe distance from the sinkhole and avoid parking or driving near it until the issue is resolved. If you suspect a large or dangerous sinkhole, contact local authorities or a professional geotechnical engineer for assistance.
2. Examine the Surface: Carefully inspect the sinkhole and its surroundings. Measure the diameter and depth of the sinkhole, noting any visible cracks or signs of instability in the surrounding area. This will help determine the size of the sinkhole and the extent of the damage to your driveway.
3. Check for Water Flow: Assess the flow of water in and around the sinkhole. If water is flowing into the sinkhole or accumulating around it, it may indicate an ongoing erosion process or drainage issues. Understanding the water dynamics can help identify the underlying cause of the sinkhole and potential risks.
4. Consult with Experts: Consider seeking professional advice from a geotechnical engineer or a qualified contractor with experience in fixing sinkholes. They can provide a more accurate assessment of the sinkhole and recommend appropriate solutions based on your specific situation.
5. Monitor Changes: Keep a close eye on the sinkhole and document any changes in size, depth, or stability over time. This will help you track the progression and determine whether immediate action is required.
6. Consider Environmental Factors: Take into account any environmental factors that may contribute to the sinkhole formation, such as heavy rainfall, nearby construction projects, or changes in vegetation patterns. These factors can affect the stability and potential risks associated with the sinkhole.
Remember, assessing the severity of a sinkhole is crucial to ensure the safety of your property and the effectiveness of the repair process. If you are unsure about the severity or unable to assess it yourself, it is highly recommended to consult with professionals who can provide expert guidance and assistance.
Precautions and Safety Measures
Fixing a sinkhole in your driveway requires careful planning and adherence to safety measures. It is essential to prioritize your safety and take the necessary precautions to prevent any accidents or injuries. Here are some precautions and safety measures to keep in mind:
1. Evaluate the Risks: Before starting any repair work, assess the potential risks associated with the sinkhole. Consider factors such as the size and depth of the sinkhole, stability of the surrounding area, and the presence of any underground utilities. This evaluation will help you develop a safe and effective repair plan.
2. Use Protective Gear: Wear appropriate safety gear, including gloves, goggles, and a hard hat, when working near or in the sinkhole. This gear provides protection against potential hazards such as sharp objects, falling debris, or exposure to harmful substances.
3. Mark the Area: Clearly mark the perimeter of the sinkhole to alert others of the potential danger. Use caution tape or barriers to prevent access to the area and minimize the risk of accidents or further damage.
4. Secure the Work Area: Ensure that the work area is secure and free from any potential hazards. Remove any loose debris or objects that could pose a tripping or falling hazard. Keep the work area clear of vehicles and equipment to prevent accidental damage or injury.
5. Follow Proper Excavation Techniques: If excavation is required, follow proper techniques and guidelines to ensure stability and minimize the risk of collapse. Use appropriate equipment and techniques to safely remove soil or debris from the sinkhole area.
6. Involve Professionals if Needed: For larger or more complex sinkholes, it may be necessary to involve professionals such as geotechnical engineers or experienced contractors. Their expertise can help ensure proper assessment, planning, and execution of the repair process.
7. Adhere to Local Regulations: Familiarize yourself with any local regulations or permits required for sinkhole repairs. Some regions may have specific guidelines or restrictions regarding excavation or repair work, especially if the sinkhole is close to public property or utilities.
8. Maintain Communication: Keep communication lines open with your neighbors, local authorities, or relevant utility companies during the repair process. Inform them about the sinkhole and any planned repair work to ensure coordination and address any concerns or potential impacts.
Remember, safety should always be the top priority when dealing with sinkhole repairs. Do not hesitate to seek professional assistance or guidance if you are unsure about any aspect of the repair process.
Gather Necessary Tools and Materials
Before diving into the sinkhole repair process, it is crucial to gather all the necessary tools and materials. Having the right equipment at hand will save you time and ensure that the repair work is done efficiently. Here are some essential tools and materials you will need:
1. Shovel: A sturdy shovel is essential for excavating and removing soil or debris from the sinkhole. Choose a shovel with a strong handle and a durable blade for optimal digging performance.
2. Wheelbarrow or Bucket: Use a wheelbarrow or a large bucket to transport excavated materials or necessary materials to and from the sinkhole area. This will help keep the work area organized and make the process more manageable.
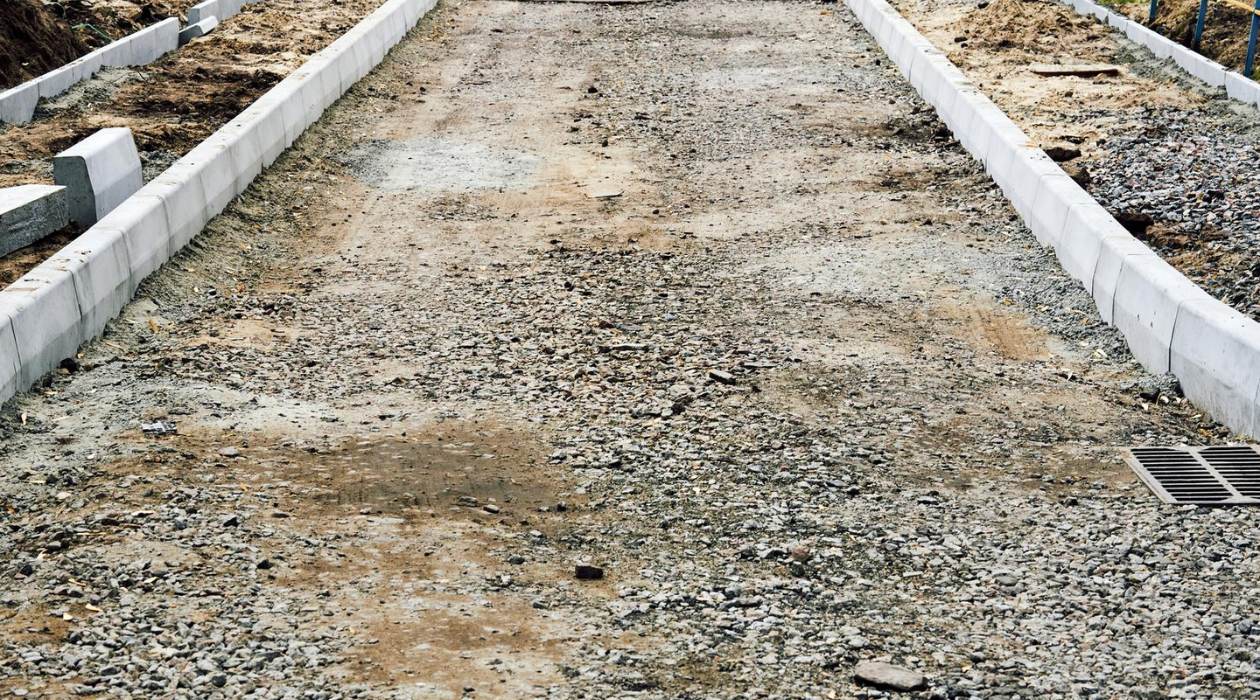
3. Gravel: Gravel is necessary for creating a stable base and providing adequate drainage in the repaired sinkhole. Choose coarse or crushed gravel that is appropriate for filling the sinkhole and enhancing the stability of the driveway surface.
4. Soil or Sand: Depending on the size and depth of the sinkhole, you may need additional soil or sand to fill the hole and provide a solid foundation for the driveway surface. Make sure to use compactable soil or sand that is suitable for the purpose.
5. Concrete or Asphalt Patch: If the sinkhole has caused damage to the driveway surface, you will need concrete or asphalt patching material to repair it. Choose a high-quality patching compound that matches the existing surface material for a seamless repair.
6. Tamper or Plate Compactor: A tamper or plate compactor helps to compact the soil, gravel, or patching material in the sinkhole. This ensures stability and proper blending with the surrounding area. Renting this equipment may be necessary for larger sinkholes.
7. Safety Gear: Remember to have the necessary safety gear, such as gloves, safety goggles, and a dust mask, to protect yourself during the repair process. Safety should always be a priority when handling any tools or materials.
8. Water Source: Having access to a water source, such as a hose or buckets filled with water, is essential for wetting the soil or sand during compaction. This helps achieve better compaction and improves the stability of the repaired area.
9. Level and Measuring Tools: Use a level and measuring tools, such as a tape measure or a ruler, to ensure accuracy and consistency in the repair process. This will help you maintain an even surface and avoid any discrepancies or unevenness in the repaired area.
10. Personal Protective Equipment (PPE): Lastly, don’t forget to equip yourself with appropriate personal protective equipment, such as work gloves, safety glasses, and a hard hat, to ensure your safety throughout the repair process.
By gathering these tools and materials beforehand, you will be well-prepared for the sinkhole repair process and can work efficiently to restore your driveway’s stability and functionality.
One tip for fixing a sinkhole in a driveway is to first fill the hole with a layer of gravel or crushed stone, then compact it with a tamper to create a stable base before adding additional layers of fill material.
Read more: How To Fix A Muddy Driveway
Step-by-Step Guide to Fixing a Sinkhole in a Driveway
Fixing a sinkhole in your driveway requires a systematic approach to ensure a successful repair. Following these step-by-step instructions will help you address the sinkhole and restore the stability and functionality of your driveway:
Step 1: Safety Precautions
Prioritize safety by wearing the necessary protective gear, marking off the work area, and ensuring proper lighting if you are working during low-light conditions.
Step 2: Assess the Sinkhole
Evaluate the severity of the sinkhole by measuring its size and depth. Assess the stability of the surrounding area and any risks that may be present.
Step 3: Excavation
Using a shovel, carefully remove the soil or debris from the sinkhole until you reach stable ground. Take caution not to disturb the surrounding area and avoid over-excavation.
Step 4: Compaction
Use a tamper or plate compactor to compact the soil at the bottom of the sinkhole. This will provide a solid base for filling and ensure stability.
Step 5: Fill the Sinkhole
Fill the sinkhole with layers of coarse gravel, compacting each layer with the tamper or plate compactor. Gradually add and compact the soil or sand until it reaches the desired level, ensuring proper compaction at each layer.
Step 6: Surface Repair
If the sinkhole has caused damage to the driveway surface, use concrete or asphalt patching material to repair it. Follow the manufacturer’s instructions for applying the patch, ensuring a smooth and even surface.
Step 7: Final Compaction
Once the sinkhole is filled and the surface is repaired, thoroughly compact the entire area using the tamper or plate compactor. This helps to ensure proper blending and stability.
Step 8: Clean Up
Remove any excess soil, gravel, or debris from the work area. Dispose of it properly or reuse it as applicable.
Step 9: Monitor and Maintain
Regularly check the repaired area for any signs of settlement or future sinkhole formation. Address any issues promptly to prevent further damage.
Step 10: Preventative Measures
Implement preventative measures to avoid future sinkhole formation. This may include proper drainage, regular inspection of the driveway, and addressing any underlying issues with the soil or construction.
Remember, the complexity of the repair process may vary depending on the size and severity of the sinkhole. Consulting with a professional may be necessary for larger or more complex repairs.
Filling the Sinkhole
Once the sinkhole has been excavated and the area has been prepared, it’s time to fill the sinkhole. This step is crucial to restore stability to the ground and provide a solid foundation for the driveway surface. Here is a step-by-step guide to filling the sinkhole:
Step 1: Add a Layer of Coarse Gravel
Start by adding a layer of coarse gravel at the bottom of the sinkhole. This layer helps with drainage and promotes stability. Use a shovel to evenly distribute the gravel, ensuring it covers the entire base of the sinkhole.
Step 2: Compact the Gravel Layer
Use a tamper or plate compactor to compact the gravel layer. This step helps to remove any air gaps and provides a solid base for the subsequent layers. Be sure to compact the entire surface of the gravel layer to achieve optimal stability.
Step 3: Gradually Fill with Soil or Sand
Add a layer of soil or sand on top of the compacted gravel layer. Gradually fill the sinkhole, ensuring even distribution of the soil or sand. Compact each layer individually using the tamper or plate compactor before adding the next layer. This process helps to achieve proper compaction and stability throughout the fill.
Step 4: Compact Each Soil or Sand Layer
As you fill the sinkhole with soil or sand, continue to compact each layer thoroughly. Use the tamper or plate compactor in a back-and-forth motion to achieve optimal compaction. Pay attention to the edges and corners of the sinkhole to ensure uniform compaction throughout.
Step 5: Repeat the Process
Repeat the process of adding layers of soil or sand and compacting until the sinkhole is completely filled. Take care to prevent overfilling, as this can lead to uneven surfaces or potential issues in the future. Aim to slightly overfill the sinkhole, as the soil or sand will naturally settle over time.
Step 6: Check for Compaction
Once the sinkhole is filled, use a level or measuring instrument to check for any unevenness or low spots. If necessary, add additional soil or sand and compact the area to achieve a level surface.
Step 7: Wetting the Soil or Sand
After filling the sinkhole, wet the soil or sand with water to aid compaction. This helps to settle the material and improve stability. Use a water hose or buckets filled with water to dampen the area evenly.
Step 8: Clean Up
Remove any excess soil, gravel, or debris from the work area. Dispose of it properly or reuse it as applicable. Clean the surrounding area to ensure a neat finish.
By following these steps, you can effectively fill the sinkhole and create a stable foundation for the repaired driveway surface. This will help prevent future sinkhole formation and ensure the longevity and functionality of your driveway.
Repairing the Surface of the Driveway
Once the sinkhole has been filled and the ground is stable, the next step is to repair the surface of the driveway. This is necessary if the sinkhole has caused damage to the driveway, such as cracks or fractures. Here is a step-by-step guide to repairing the surface of the driveway:
Step 1: Clean the Surface
Thoroughly clean the damaged area of the driveway by removing any loose debris, dirt, or vegetation. Use a broom, brush, or a high-pressure washer to ensure a clean surface for the repair.
Step 2: Prepare the Patching Material
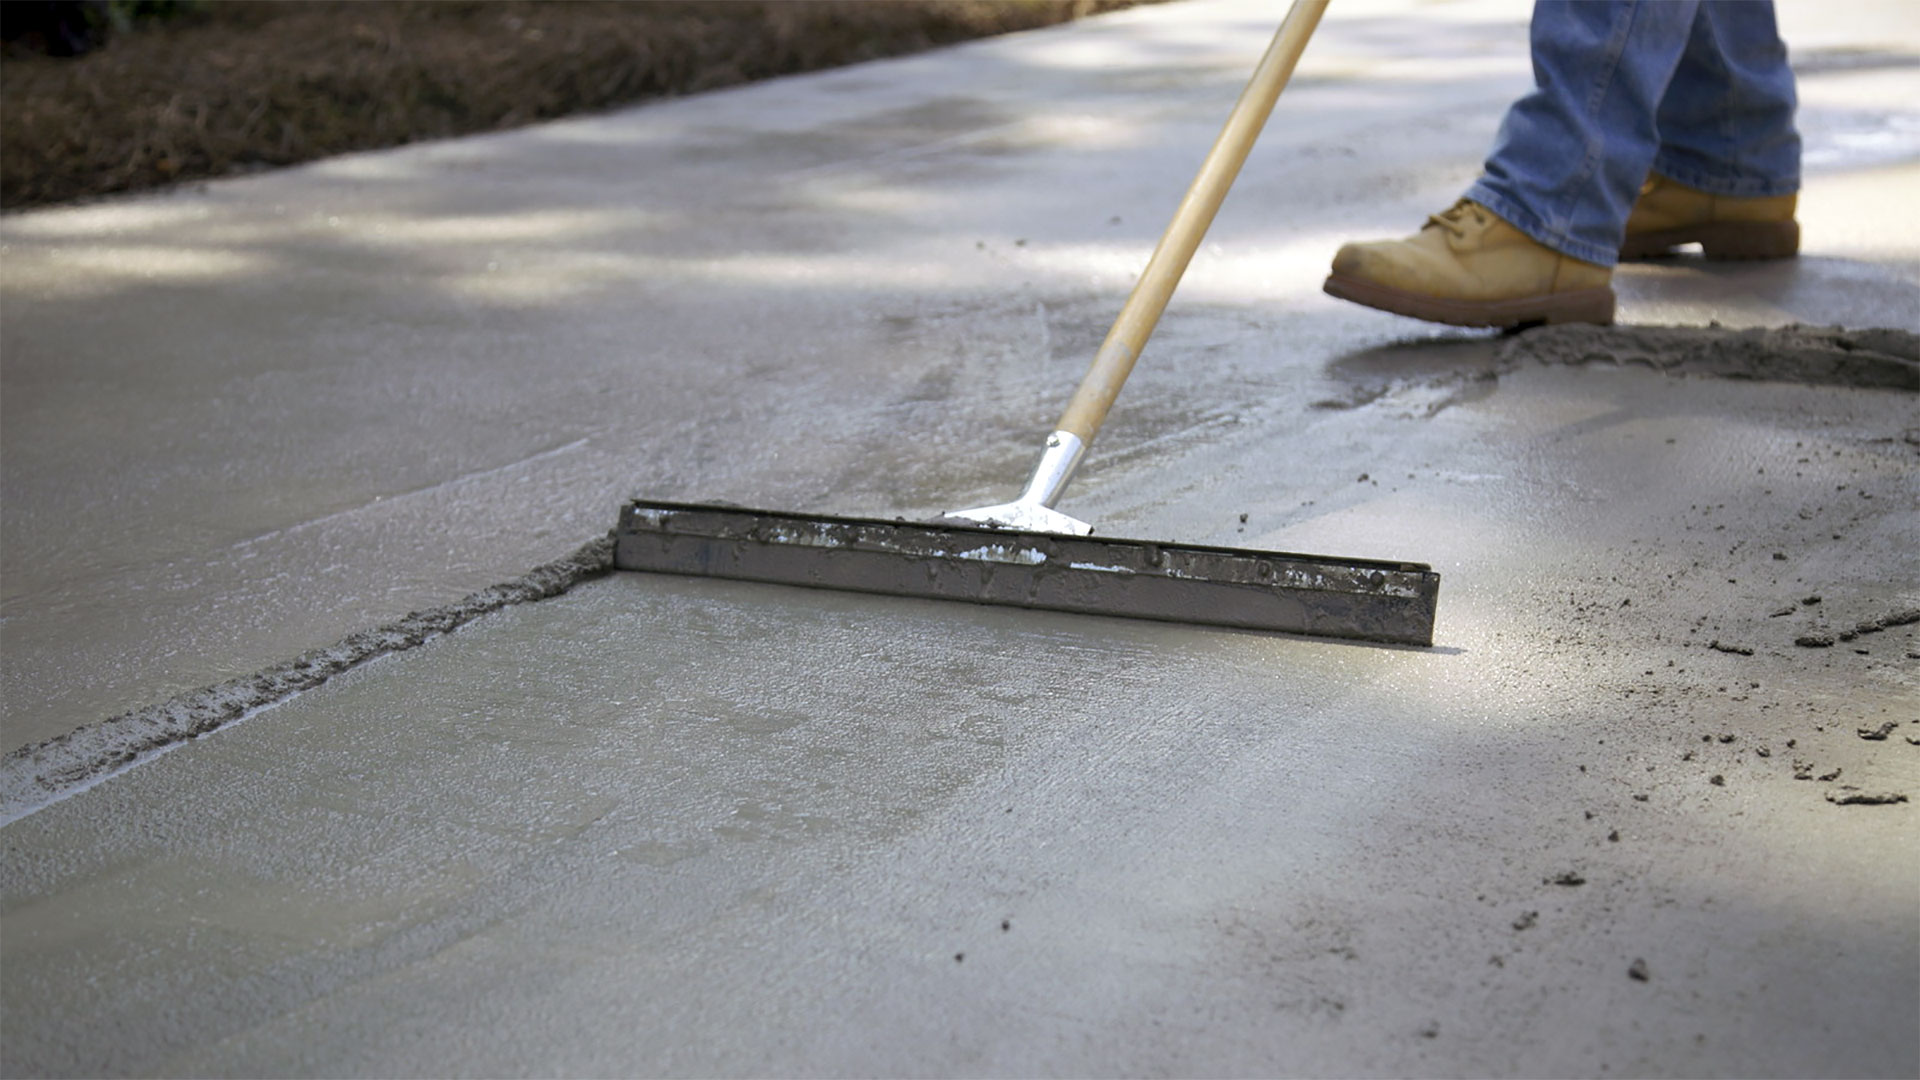
If your driveway is made of asphalt, prepare an asphalt patching compound according to the manufacturer’s instructions. For concrete driveways, mix a concrete patching compound following the manufacturer’s guidelines. Ensure the patching material matches the existing driveway surface.
Step 3: Apply the Patching Material
Using a trowel or suitable tool, apply the patching material to the damaged area of the driveway. Smooth it out evenly to achieve a level surface. Follow the manufacturer’s instructions for the appropriate thickness and application technique.
Step 4: Compact the Patch
Gently compact the patching material using a hand tamper or the bottom of a heavy tool. This helps to eliminate air pockets and ensures proper adhesion with the existing driveway surface. Continue compacting until the patch is firmly in place.
Step 5: Feather the Edges
To create a seamless transition between the patch and the surrounding driveway, feather the edges. Use a trowel or a suitable tool to blend the edges of the patch with the existing surface. This creates a smooth and visually appealing finish.
Step 6: Cure and Protect
Allow the patch to cure and dry according to the manufacturer’s instructions. This may involve applying a curing compound or covering the repaired area with a protective material, such as plastic or a tarp, to prevent premature drying or damage.
Step 7: Regular Maintenance
After the repair has dried and cured, maintain the repaired area and the rest of the driveway by regularly cleaning it and avoiding heavy loads or harsh chemicals that may damage the surface. Consider applying a sealant or protective coating to enhance the longevity and appearance of the repaired section.
By following these steps, you can effectively repair the surface of your driveway and ensure a seamless blend between the patched area and the rest of the pavement. This will not only restore the functionality of your driveway but also enhance the overall aesthetic appeal of your property.
Preventative Measures to Avoid Future Sinkholes
To minimize the risk of future sinkhole formation in your driveway, it is important to implement preventative measures that address the underlying causes. By taking proactive steps, you can protect your driveway and property from potential sinkhole-related damage. Here are some preventative measures to consider:
1. Improve Drainage: Proper drainage is key to preventing sinkholes. Ensure that your driveway and surrounding areas have adequate drainage systems in place. Clear any clogged or obstructed drainage channels and maintain proper gradients to prevent water accumulation and erosion.
2. Avoid Overwatering: Overwatering your lawn or garden can lead to excess water seeping into the ground, potentially weakening the soil beneath your driveway. Be mindful of your watering habits and avoid excessive or unnecessary water use.
3. Repair Underground Leaks: Address any underground leaks promptly, as they can contribute to soil erosion and instability. Regularly inspect your plumbing systems, including water lines and sewage pipes, for leaks and repair them as soon as detected.
4. Maintain Vegetation: Ensure proper vegetation management around your driveway. Trees with extensive root systems can extract moisture from the ground, potentially causing soil shrinkage. If you have trees near your driveway, consult with an arborist to ensure their roots do not pose a risk to the stability of the soil.
5. Monitor Soil Moisture Levels: Keep an eye on the moisture levels of the soil around your driveway. Excessive soil dryness or saturation can be indicators of potential soil instability. Consider using a moisture meter or consulting with a professional to assess the moisture content of the ground.
6. Reinforce Weak Soil: If your property is located in an area with naturally weak or unstable soil, consider reinforcing it to prevent sinkhole formation. Geotechnical solutions such as soil stabilization techniques or installing retaining walls can help improve soil strength and stability.
7. Regular Inspections: Conduct periodic inspections of your driveway and surrounding areas. Look out for any signs of sinkhole formation, such as depressions, cracks, or soil erosion. If you notice any issues, take immediate action to address them before they worsen.
8. Consult Professionals: For properties in sinkhole-prone areas or if you have concerns about potential sinkhole risks, consult with professionals such as geotechnical engineers or experienced contractors. They can assess your property, provide expert advice, and recommend appropriate preventative measures.
9. Obtain Insurance Coverage: Consider obtaining sinkhole insurance coverage, especially if you live in an area prone to sinkholes. Sinkhole damage can be costly to repair, and having insurance coverage can help mitigate the financial burden should a sinkhole occur.
By implementing these preventative measures, you can reduce the risk of sinkhole formation and protect your driveway from potential damage. Stay vigilant, perform regular maintenance, and address any issues promptly to maintain the long-term stability and functionality of your driveway.
Read more: How To Fix A Sinking Driveway
Conclusion
Dealing with a sinkhole in your driveway can be a challenging and concerning situation. However, by understanding the signs, causes, and repair process, you can effectively address the issue and restore the stability and functionality of your driveway. Throughout this article, we have covered the essential aspects of fixing a sinkhole in a driveway.
From identifying the signs of a sinkhole to assessing its severity, we discussed the importance of safety precautions and gathering the necessary tools and materials. We then provided a step-by-step guide to filling the sinkhole and repairing the surface of the driveway. Finally, we explored preventative measures to minimize the risk of future sinkhole formation.
While the information provided in this article serves as a comprehensive guide, it is crucial to recognize that fixing a sinkhole in a driveway can be a complex task. It is always advisable to consult with professionals or local authorities for expert guidance and support, especially in cases involving larger or more severe sinkholes.
Remember, the safety of yourself and others should be your top priority when dealing with sinkholes. Take appropriate precautions, use the necessary safety gear, and seek professional assistance if needed. Regular maintenance, proper drainage, and monitoring of the soil and surrounding areas can help prevent sinkhole formation and ensure the long-term stability of your driveway.
By taking proactive measures and addressing sinkhole-related concerns promptly, you can protect your property and reduce the risk of further damage. Stay informed, be vigilant, and take prompt action when needed to maintain a safe and secure driveway for years to come.
Frequently Asked Questions about How To Fix A Sinkhole In The Driveway
Was this page helpful?
At Storables.com, we guarantee accurate and reliable information. Our content, validated by Expert Board Contributors, is crafted following stringent Editorial Policies. We're committed to providing you with well-researched, expert-backed insights for all your informational needs.


0 thoughts on “How To Fix A Sinkhole In The Driveway”