Articles
How To Stain A Driveway
Modified: August 28, 2024
Learn how to stain your driveway with our informative and detailed articles. Enhance your curb appeal with these expert tips and techniques.
(Many of the links in this article redirect to a specific reviewed product. Your purchase of these products through affiliate links helps to generate commission for Storables.com, at no extra cost. Learn more)
Introduction
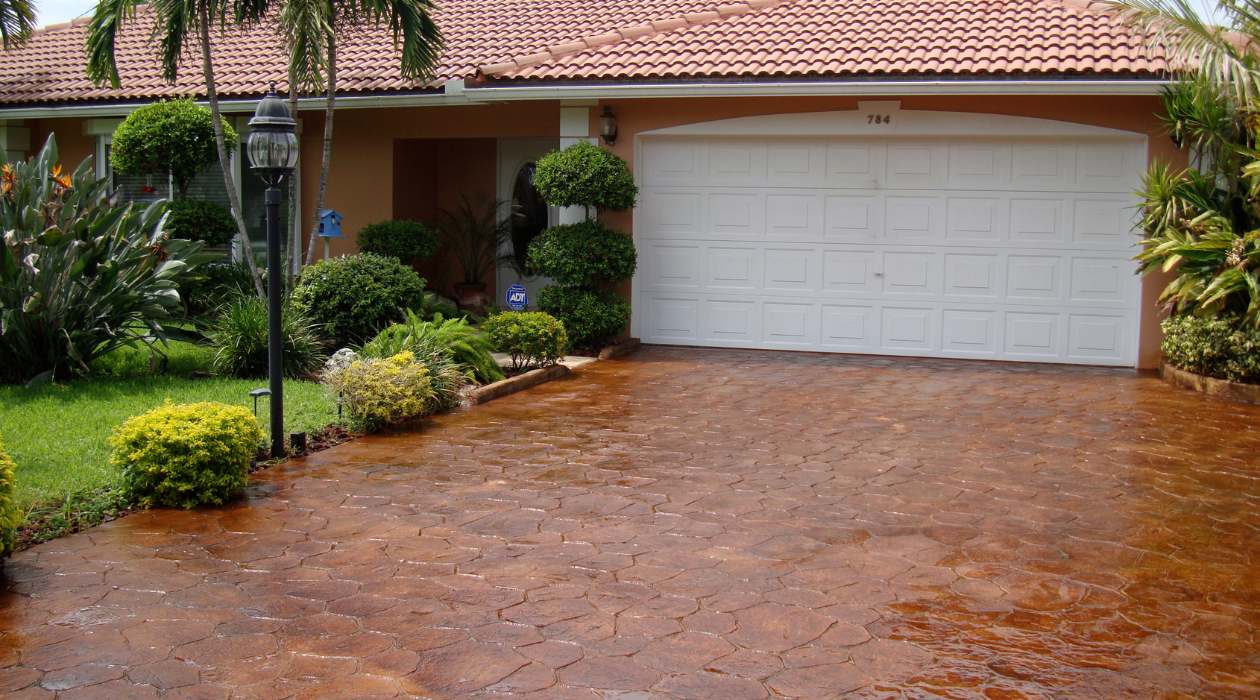
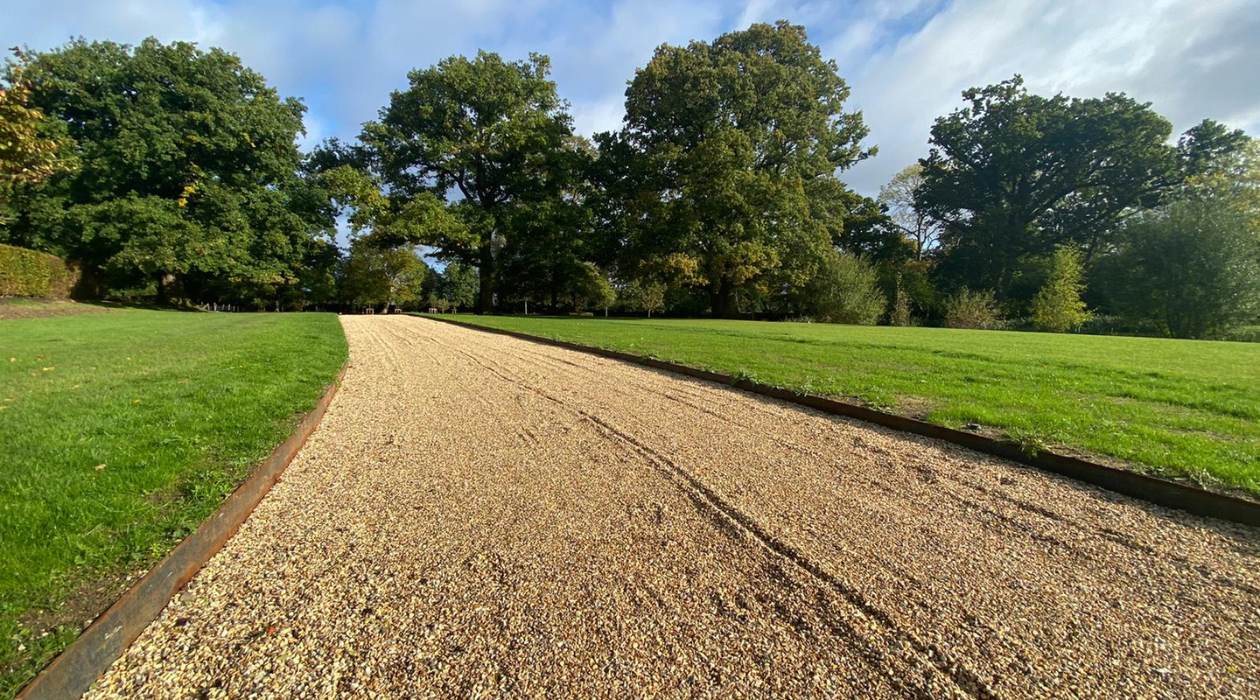
Welcome to our comprehensive guide on how to stain a driveway! Staining your driveway can be a great way to enhance its appearance, protect it from the elements, and increase its longevity. Whether you’re looking to restore the faded color of an old driveway or add a new vibrant hue to enhance your curb appeal, staining can be a rewarding DIY project.
In this article, we will walk you through the step-by-step process of staining a driveway, from preparing the surface to choosing the right stain and applying it correctly. We will also provide tips on how to maintain and care for your newly stained driveway, ensuring its longevity and durability.
So, let’s get started on transforming your dull, worn-out driveway into a beautiful and inviting entrance to your home!
Key Takeaways:
- Transform your worn-out driveway into a vibrant entrance with our step-by-step guide on staining. Enhance curb appeal, protect from elements, and increase longevity for a beautiful DIY project.
- Proper preparation, choosing the right stain, and regular maintenance are key to achieving professional results and preserving the beauty and durability of your stained driveway. Enjoy the enhanced curb appeal and longevity!
Read more: How To Remove Oil Stains From Your Driveway
Preparing the Driveway
Before you begin staining your driveway, it is crucial to ensure that the surface is properly prepared. Proper preparation will not only help the stain adhere better but also ensure a more even and durable finish. Here are the steps involved in preparing your driveway for staining:
- Clean the surface: Start by thoroughly cleaning the driveway to remove any dirt, debris, oil stains, or previous sealers. Use a pressure washer or a hose with a high-pressure nozzle to remove the loose dirt. For stubborn stains, you can use a concrete cleaner or degreaser and scrub the surface with a stiff brush. Rinse the driveway and allow it to dry completely.
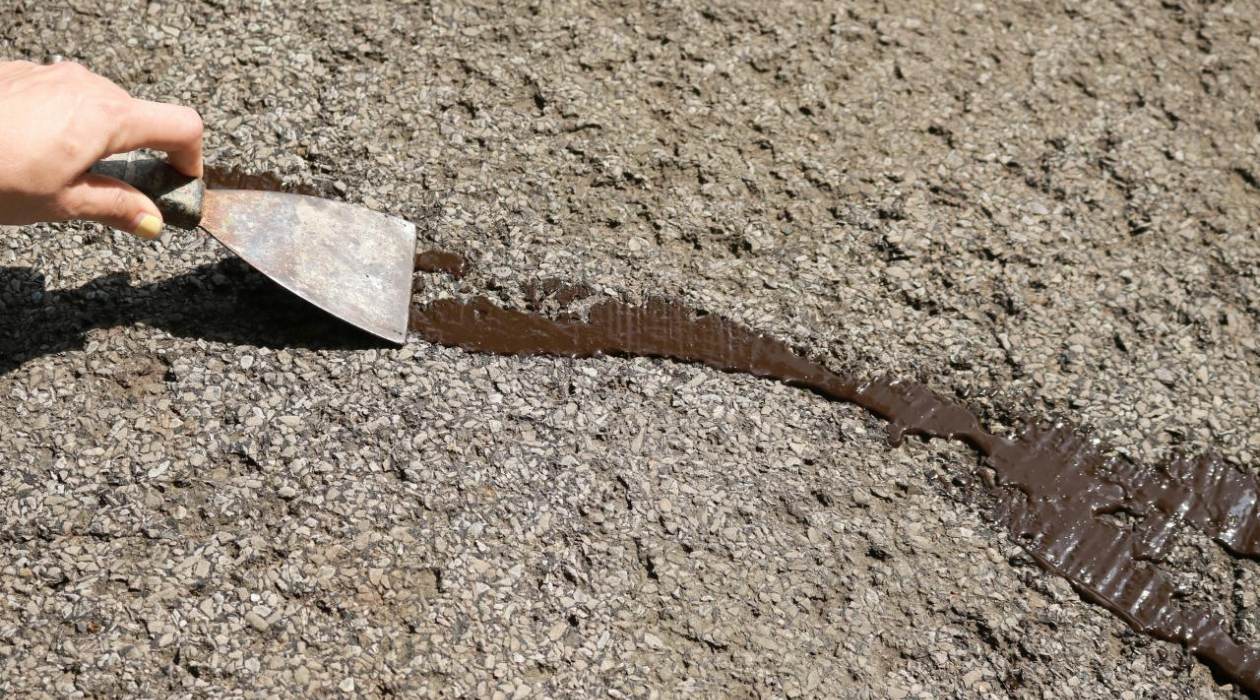
- Repair any cracks or damage: Inspect the driveway for cracks, potholes, or any other signs of damage. Fill in the cracks and repair any areas that require attention. You can use a concrete patching compound or a suitable driveway repair product. Follow the manufacturer’s instructions for the best results. Allow the repairs to dry and cure properly.
- Etch the surface: If your driveway has a smooth surface, it is advisable to etch it to enhance the adhesion of the stain. Etching involves the use of an acid-based etching solution, which helps open the pores of the concrete. This step is particularly important if you plan to stain a newly poured concrete driveway. Follow the instructions provided with the etching solution and take necessary safety precautions such as wearing protective gloves and eyewear.
- Protect surrounding areas: Take the necessary precautions to protect any adjacent surfaces or landscaping from the stain. Use plastic or drop cloths to cover any areas that may come into contact with the stain. It is also a good idea to tape off any decorative elements or edges to ensure clean and straight lines.
By following these steps, you will have a properly prepared driveway surface, ready to be stained. Proper preparation is essential for achieving professional-looking results and maximizing the performance and longevity of the stain.
Choosing the Right Stain
When it comes to choosing the right stain for your driveway, several factors should be considered. The type of stain you choose will depend on your desired look, the condition of your driveway, and the level of maintenance you are willing to undertake. Here are some key points to consider:
- Type of Stain: There are generally two types of stains available for driveways: acid-based stains and water-based stains. Acid-based stains create a chemical reaction with the concrete, resulting in a unique, variegated appearance. They often provide rich, earthy tones and have excellent durability. On the other hand, water-based stains offer a wide range of color options, are easier to apply, and have a shorter drying time. They are also more environmentally friendly and have a lower odor compared to acid-based stains.
- Color: Consider the color options available and choose a stain color that complements the style and aesthetics of your home. You can opt for neutral shades to achieve a classic look or go for bolder, more vibrant colors to create a striking focal point.
- Opacity and Finish: Stains come in various levels of opacity, ranging from translucent to solid. Translucent stains allow the natural variations and textures of the concrete to show through, while solid stains provide more uniform color coverage. Additionally, you can choose between a matte, satin, or glossy finish, depending on the level of sheen you prefer for your driveway.
- Protection and Maintenance: Consider the level of protection and maintenance the stain provides. Some stains offer additional benefits such as UV resistance, protection against oil and water stains, and easy cleaning. These factors can contribute to the longevity and overall appearance of your stained driveway.
It is recommended to consult with a reputable stain supplier or professional contractor who can guide you in selecting the best stain for your specific needs. They can provide valuable insights and recommendations based on factors such as the climate in your area, the condition of your driveway, and your desired outcome.
By carefully considering these factors and making an informed decision, you can choose a stain that not only enhances the beauty of your driveway but also provides long-lasting protection and requires minimal maintenance.
Gathering the Necessary Tools and Materials
Before you start the staining process, it’s essential to gather all the necessary tools and materials. Having everything prepared beforehand will ensure a smooth and efficient staining experience. Here is a list of the key items you will need:
- Stain: Purchase the appropriate amount of stain based on the size of your driveway and the manufacturer’s recommendations. Choose the stain type and color that you have decided upon during the previous step.
- Cleaning Supplies: You will need a pressure washer or a hose with a high-pressure nozzle to clean the driveway. Additionally, have concrete cleaner or degreaser, a stiff brush, and a bucket on hand for spot-cleaning any stubborn stains. Don’t forget to wear protective gloves and eyewear during the cleaning process.
- Repair Materials: If you identified any cracks or damaged areas during the preparation stage, make sure to have the necessary repair materials available. This can include concrete patching compound, epoxy filler, or a suitable driveway repair product, depending on the extent and type of damage.
- Etching Solution: If you have determined that etching is necessary for your driveway, acquire an acid-based etching solution. Follow the manufacturer’s instructions and safety precautions when using the etching solution.
- Protective Gear: Wear appropriate protective gear during the staining process. This includes gloves, safety glasses, a dust mask, and clothing that covers your skin to protect against contact with the stain, chemicals, and fumes.
- Brushes or Rollers: Depending on the size of your driveway, you will need either a long-handled brush or a roller to apply the stain. Brushes are ideal for smaller areas and intricate patterns, while rollers work well for larger expanses of concrete. Ensure that the brush or roller is suitable for use with concrete and stain application.
- Drop Cloths or Plastic Sheeting: Cover any adjacent surfaces or landscaping that you want to protect from the stain. Use drop cloths, plastic sheeting, or other suitable materials to create a barrier between the stain and these areas.
- Sealer: Depending on the type of stain you choose, you may also need a concrete sealer. The sealer helps protect the stained surface, enhances durability, and provides additional resistance against oil, water, and UV damage. Refer to the stain manufacturer’s recommendations for the specific sealer that complements the stain.
By gathering all the necessary tools and materials in advance, you can streamline the staining process and avoid interruptions or delays. It’s always better to be prepared and have everything on hand to ensure a successful and efficient staining project. Take the time to check your inventory and make any necessary purchases before starting.
Cleaning the Driveway
Cleaning the driveway is a crucial step in the staining process. Proper cleaning ensures that the surface is free of dirt, debris, oil stains, and any previous sealers, allowing the stain to adhere effectively. Here’s a step-by-step guide on how to clean your driveway:
- Remove loose debris: Start by clearing the driveway of any loose debris such as leaves, branches, or dirt. Use a broom or a leaf blower to sweep the surface and ensure that it is free of any loose particles.
- Pressure wash: Using a pressure washer or a hose with a high-pressure nozzle, thoroughly clean the driveway. Start from one end and work your way to the other, ensuring that you cover the entire surface. Pay extra attention to areas with oil stains or stubborn dirt. Hold the pressure washer nozzle at a slight angle to prevent damaging the concrete. Keep a consistent distance from the surface, typically around 6-10 inches.
- Spot clean stubborn stains: For oil stains or other stubborn stains that the pressure washer did not completely remove, use a concrete cleaner or degreaser. Apply the cleaner to the stain and scrub it with a stiff brush. Allow the cleaner to sit for a few minutes and then rinse thoroughly with water. Repeat the process if necessary until the stain is removed or significantly reduced.
- Dry the surface: After cleaning, allow the driveway to dry completely. This is crucial as any moisture on the surface can interfere with the adhesion and performance of the stain. Depending on the weather conditions, it may take several hours or even a full day for the driveway to dry completely.
Proper cleaning is essential to achieve a successful staining result. By removing dirt, debris, and stains, you create a clean canvas for the stain to adhere to. This improves the overall appearance and longevity of the stained driveway. Take your time during the cleaning process and ensure that the surface is thoroughly clean and dry before proceeding to the next step.
Before staining a driveway, make sure to thoroughly clean the surface to remove any dirt, oil, or debris. Use a pressure washer and a degreaser for best results.
Read more: How To Make A Driveway
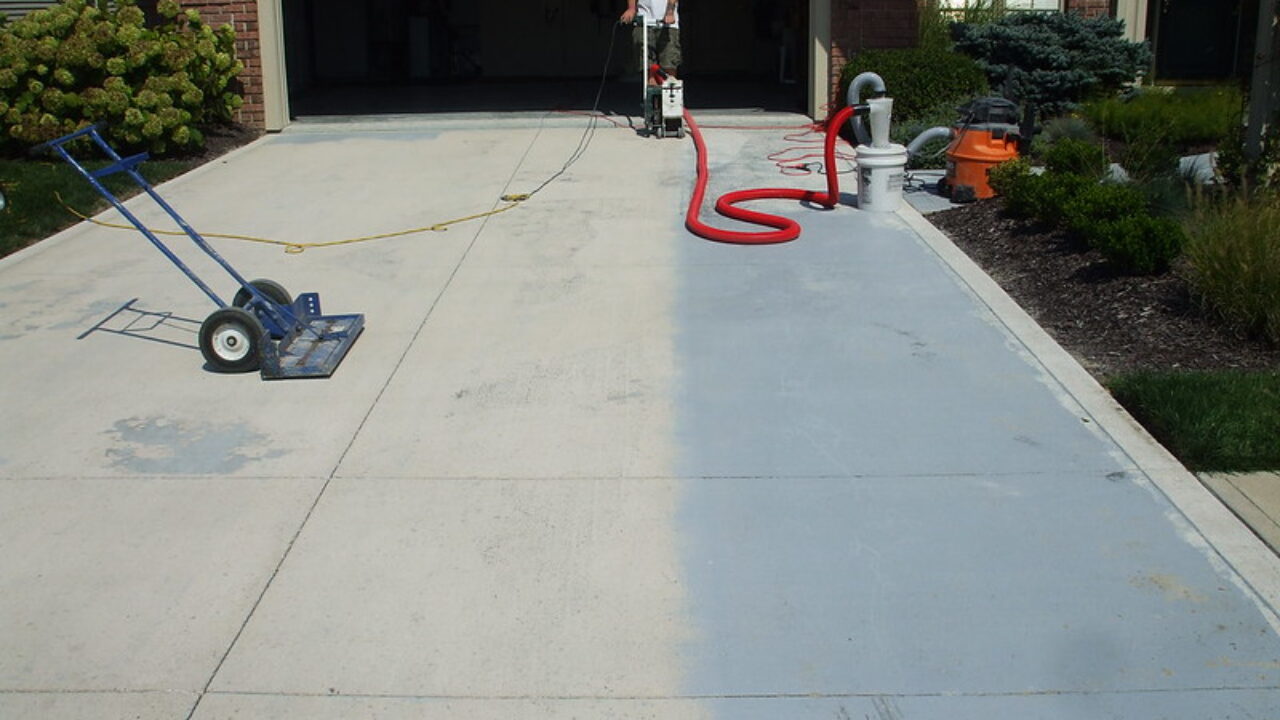
Applying the Stain
Now that your driveway is properly cleaned and prepared, it’s time to apply the stain. Applying the stain correctly is crucial for achieving an even and beautiful finish. Here’s a step-by-step guide on how to apply the stain to your driveway:
- Mix the stain: If you’re using a concentrated stain, follow the manufacturer’s instructions to mix it with water or another recommended solvent. Make sure to mix it thoroughly to ensure an even distribution of color.
- Start from the far end: Begin applying the stain from the far end of the driveway, working your way toward the exit. This prevents you from stepping on the freshly stained areas and allows you to work systematically without leaving footprints or smudges.
- Use a brush or roller: Dip a brush or roller into the stain and apply it to the driveway in smooth, even strokes. Brushes are ideal for smaller areas or detailed patterns, while rollers are more suitable for larger, flat surfaces. Work in manageable sections to ensure that the stain doesn’t dry before you can spread it evenly.
- Apply multiple coats if desired: Depending on the level of opacity and color saturation you desire, you may need to apply multiple coats of stain. Allow each coat to dry before applying the next one. Follow the stain manufacturer’s instructions for the recommended drying time between coats.
- Blend overlapping sections: To ensure a seamless finish, blend the edges of each section as you progress. This can be achieved by slightly overlapping the wet stain with the previously stained area. Work in small sections to maintain control and ensure consistency in color and coverage.
- Protect against foot traffic: Once you have finished applying the stain, it’s essential to protect the newly stained surface from foot traffic or any other disturbances. Place signs or barriers to prevent anyone from walking or driving on the driveway until the stain is fully dried and cured.
Remember to follow any specific instructions provided by the stain manufacturer, as different products may have unique application methods or requirements. Take your time during the application process to ensure that the stain is applied evenly and accurately. A well-applied stain can transform the appearance of your driveway and enhance the overall curb appeal of your home.
Sealing the Driveway
Once the stain has dried and cured, it is recommended to apply a sealer to protect the stained surface and enhance its longevity. Sealing the driveway provides an additional layer of protection against the elements, oil stains, and UV damage. Here’s a step-by-step guide on how to seal your newly stained driveway:
- Clean the surface: Before applying the sealer, make sure the driveway is clean and free of any dirt or debris. Sweep or blow away any loose particles and use a broom or a leaf blower to ensure the surface is pristine.
- Choose the right sealer: There are different types of sealers available, including acrylic sealers and penetrating sealers. Acrylic sealers provide a protective layer on the surface, enhancing the color and providing a glossy finish. Penetrating sealers, on the other hand, penetrate the concrete to provide moisture resistance without altering the appearance. Consult the sealer manufacturer’s instructions and choose the one that best suits your needs.
- Apply the sealer: Use a brush, roller, or sprayer to apply the sealer to the entire surface of the driveway. Follow the manufacturer’s guidelines for the recommended application method. Work in small sections, ensuring even coverage without leaving any pools or streaks. It is generally recommended to apply two or more coats for optimal protection.
- Allow to dry and cure: After applying the sealer, allow it to dry and cure according to the manufacturer’s instructions. This typically takes a few hours, but it may vary depending on the type of sealer and ambient conditions. Avoid walking or driving on the freshly sealed driveway until it is fully dry and cured.
Sealing your stained driveway not only protects the surface but also enhances its appearance and durability. The sealer acts as a barrier, preventing stains, moisture, and other contaminants from penetrating the concrete. Regularly resealing your driveway every few years, or as recommended by the sealer manufacturer, will help maintain its beauty and protect your investment over time.
Maintaining and Caring for the Stained Driveway
Proper maintenance and care are key to preserving the beauty and longevity of your stained driveway. Here are some tips to help you maintain and care for your newly stained driveway:
- Clean regularly: Regular cleaning is essential to keep your stained driveway looking its best. Sweep away debris and use a gentle detergent or concrete cleaner to remove any stains or dirt. Avoid harsh chemicals or abrasive cleaning tools that can damage the stain or sealer. Rinse thoroughly and allow the driveway to dry completely.
- Remove stains promptly: It’s important to address any stains or spills as soon as possible. Blot or wipe up oil, grease, or other spills before they have a chance to penetrate the stain. Use a mild detergent or specialized concrete cleaner to treat stubborn stains. Avoid using any acidic or harsh cleaners that can damage the stain or sealer.
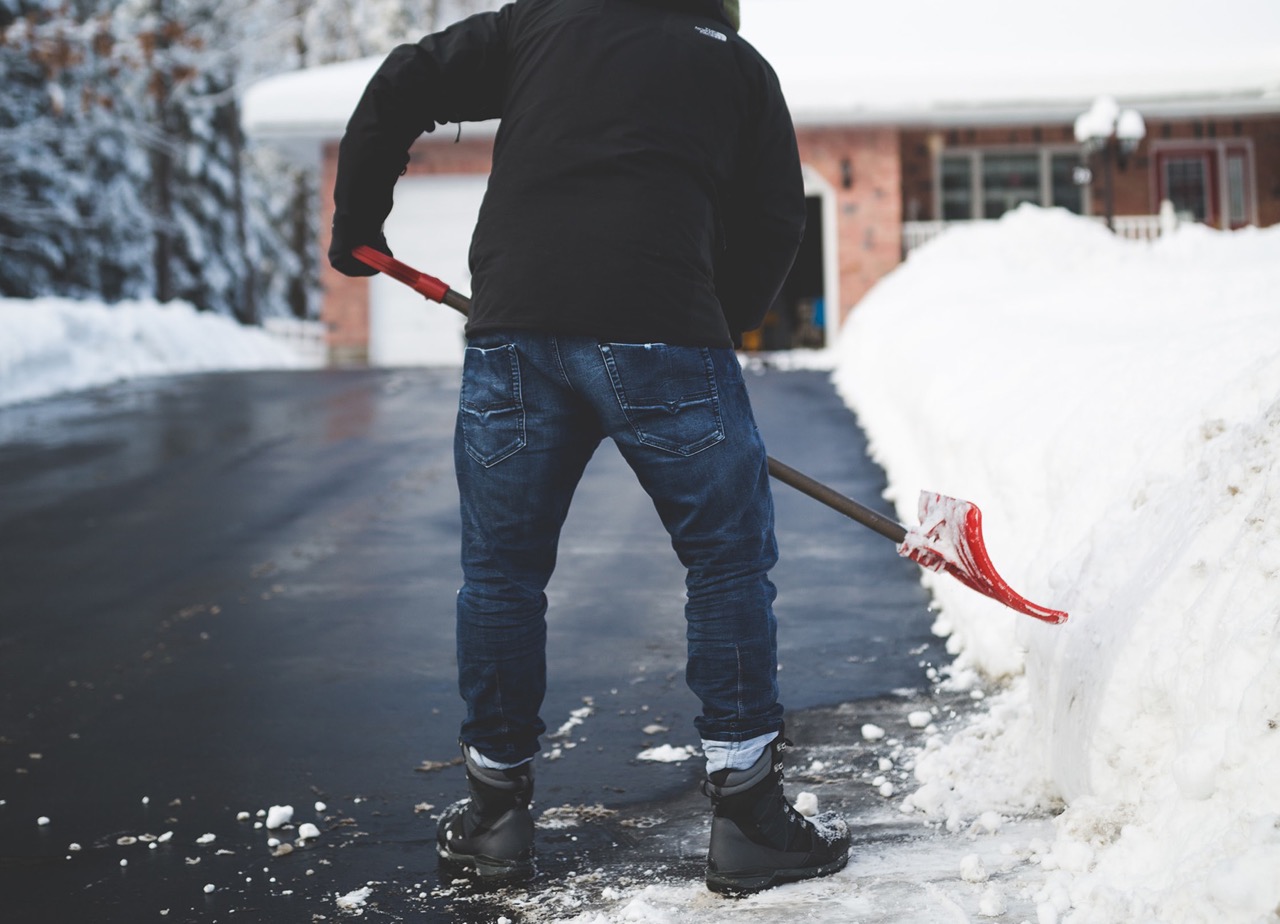
- Avoid heavy or sharp objects: Prevent damage to your stained driveway by avoiding heavy objects, sharp tools, or equipment that can scratch or chip the surface. Be cautious when using snow shovels, metal blades, or other tools that may cause abrasions on the stained concrete. Consider using a plastic shovel or a snow blower instead.
- Protect against UV damage: Exposure to sunlight and UV rays can contribute to the fading and discoloration of your stained driveway. Consider using a UV-resistant sealer or a topcoat to provide additional protection against UV damage. Regularly reapply the sealer as recommended by the manufacturer to maintain its effectiveness.
- Address cracks and damage: Inspect your driveway periodically for any cracks or signs of damage. Addressing them promptly will help prevent further deterioration. Fill in cracks with a suitable concrete patching compound and repair any damaged areas following the manufacturer’s instructions. Regular maintenance will help extend the life of your stained driveway.
- Avoid chemical exposure: Be cautious when using chemicals near your stained driveway. Some chemicals, such as de-icers, oil-based products, or strong solvents, can cause discoloration or damage to the stain and sealer. Clean any spills or splatters immediately and avoid using harsh chemicals in close proximity to the stained surface.
By following these maintenance tips, you can keep your stained driveway in excellent condition for years to come. Regular cleaning, prompt stain removal, and proactive maintenance will help preserve the color, shine, and durability of the stained surface. With proper care, your stained driveway will continue to enhance the curb appeal of your home and provide you with years of enjoyment.
Conclusion
Staining your driveway is an excellent way to enhance its appearance, protect it from the elements, and increase its longevity. By following the step-by-step guide provided in this article, you can achieve a beautifully stained driveway that adds curb appeal to your home.
Properly preparing the driveway, choosing the right stain, gathering the necessary tools and materials, cleaning the surface, applying the stain, and sealing the driveway are essential steps in achieving professional results. Additionally, maintaining and caring for your stained driveway through regular cleaning, prompt stain removal, and proactive maintenance will help preserve its beauty and durability over time.
Remember to always follow the manufacturer’s instructions for the stain and sealer you choose, as they may have specific guidelines and recommendations for application and maintenance. If you are unsure or unfamiliar with the staining process, consider consulting with a professional contractor or stain supplier who can provide guidance and ensure a successful outcome.
With a little time and effort, you can transform your dull and worn-out driveway into a vibrant and inviting entrance to your home. Enjoy the beauty and longevity of your stained driveway and take pride in the enhanced curb appeal it brings.
So, go ahead and embark on this exciting DIY project, and make your driveway the envy of the neighborhood!
Frequently Asked Questions about How To Stain A Driveway
Was this page helpful?
At Storables.com, we guarantee accurate and reliable information. Our content, validated by Expert Board Contributors, is crafted following stringent Editorial Policies. We're committed to providing you with well-researched, expert-backed insights for all your informational needs.


0 thoughts on “How To Stain A Driveway”