Articles
How To Fix A Slow Filling Toilet
Modified: October 19, 2024
Learn effective solutions to fix a slow filling toilet with helpful articles. Save time and hassle with our expert tips and advice.
(Many of the links in this article redirect to a specific reviewed product. Your purchase of these products through affiliate links helps to generate commission for Storables.com, at no extra cost. Learn more)
Introduction
A slow filling toilet can be a frustrating issue to deal with. Not only does it prolong the time it takes for the toilet tank to refill after each flush, but it can also affect the overall performance of your toilet. When a toilet takes longer than usual to fill, it can result in weak flushes, incomplete flushing, and even potential clogs.
Thankfully, there are several common causes for a slow filling toilet, and in many cases, they can be easily fixed without the need for professional assistance. By identifying and addressing the underlying issue, you can restore your toilet to its optimal performance and avoid any further inconvenience.
In this article, we will discuss the symptoms, potential causes, and step-by-step solutions to fix a slow filling toilet. Whether you are a DIY enthusiast or a beginner, these troubleshooting tips will help you diagnose and resolve the problem with ease.
Key Takeaways:
- Identifying symptoms such as extended fill times, weak flushes, and gurgling sounds can help diagnose a slow filling toilet. Troubleshooting steps include adjusting the fill valve and inspecting the flapper to resolve the issue.
- Regular maintenance and periodic inspections of toilet components, along with systematic troubleshooting, can effectively address slow filling issues. If problems persist, seeking professional assistance is advisable for complex repairs.
Read more: How To Fix A Slow Flushing Toilet
Symptoms of a Slow Filling Toilet
Before diving into the troubleshooting process, it’s important to identify the symptoms related to a slow filling toilet. Being aware of these signs will help you determine whether or not your toilet is experiencing a slow filling issue. Here are some common symptoms to look out for:
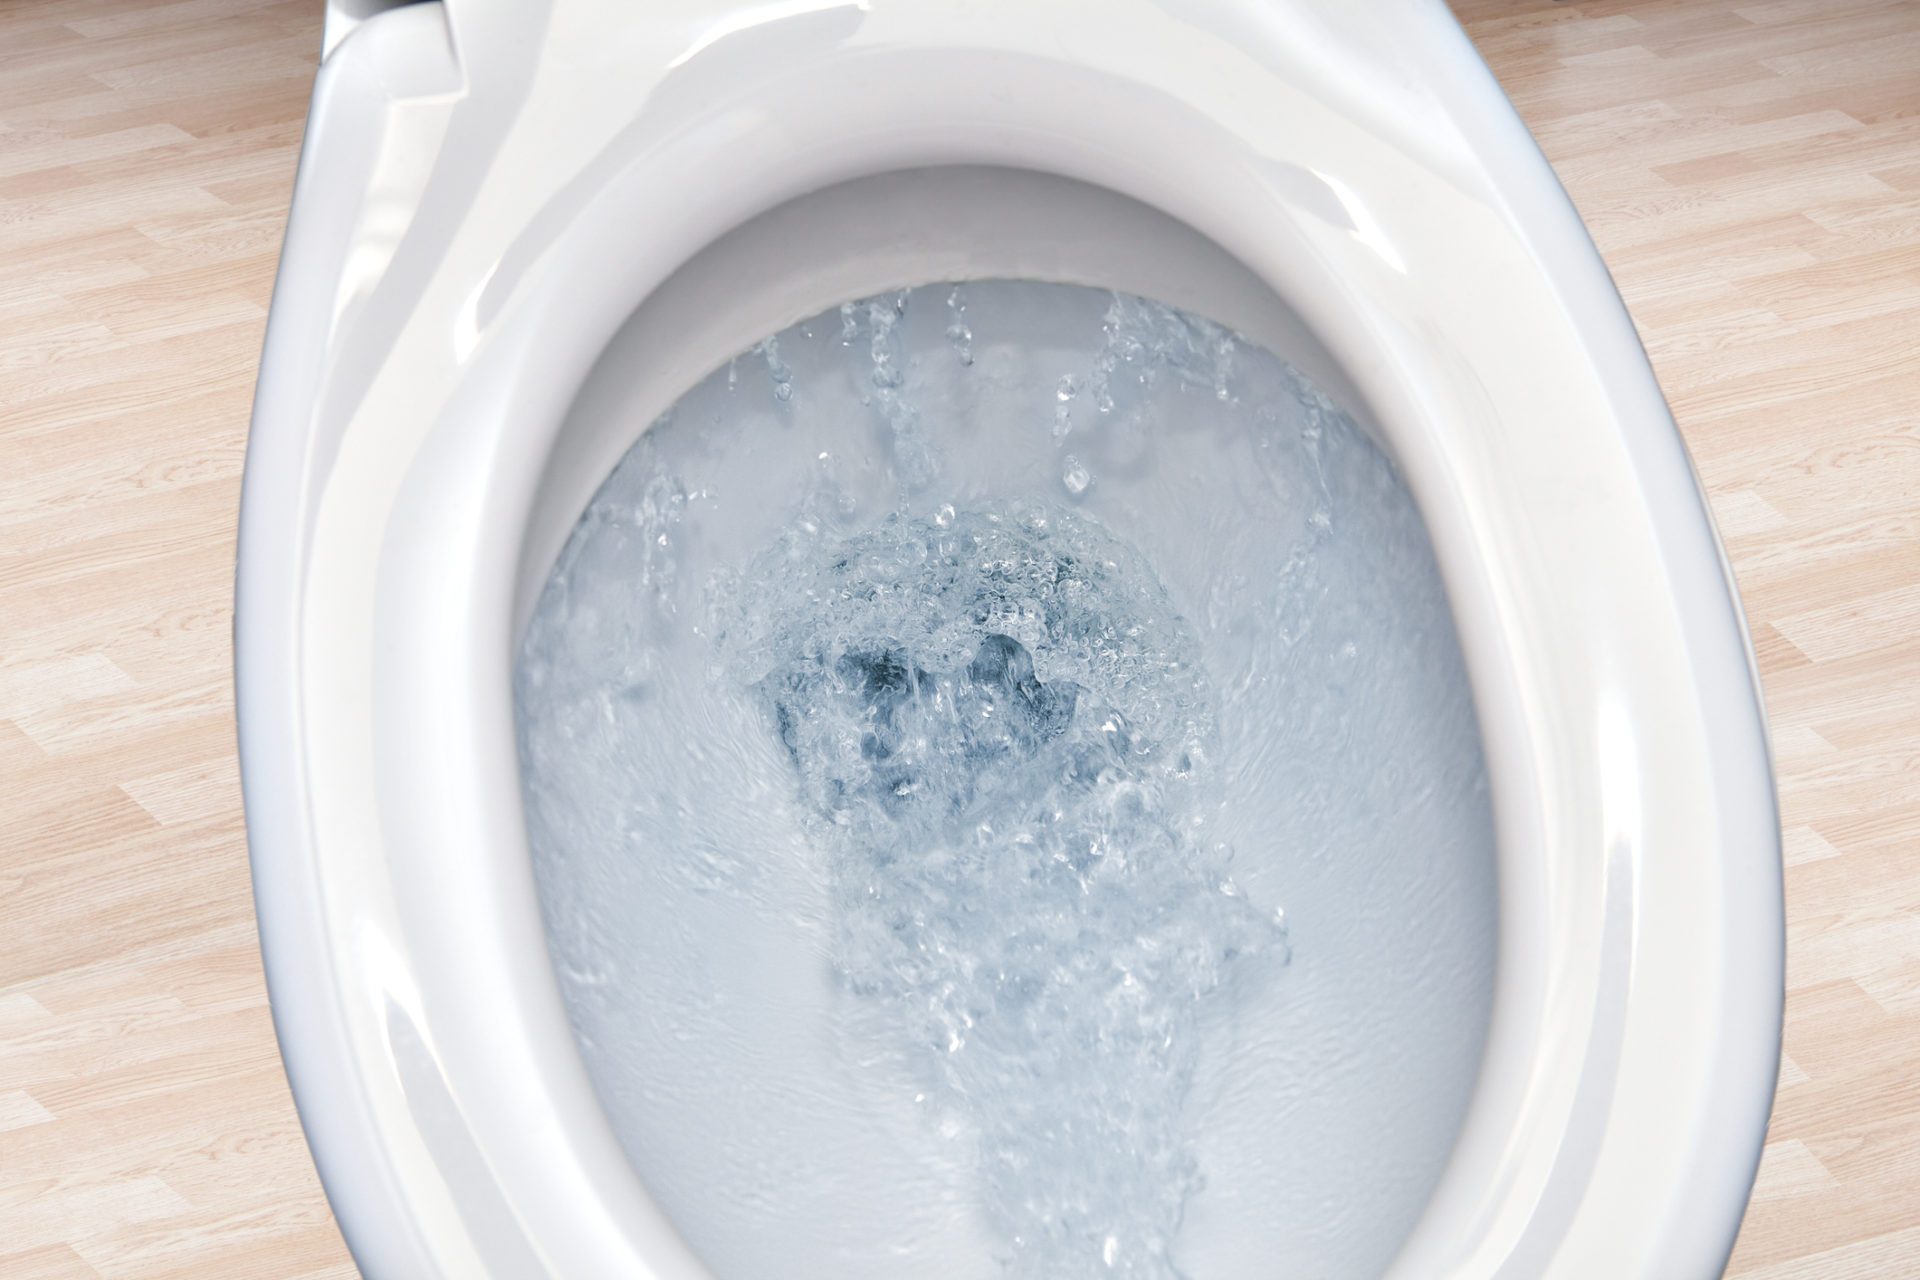
- Extended Fill Time: One of the most obvious signs of a slow filling toilet is the increased amount of time it takes for the toilet tank to refill after each flush. If you notice that the tank is taking significantly longer than usual to fill up, it is a clear indication that there is an issue affecting the fill rate.
- Low Water Level: Another symptom of a slow filling toilet is a consistently low water level inside the toilet bowl. After flushing, if you find that the water level is significantly lower than normal, it could be an indication that the tank is not refilling adequately.
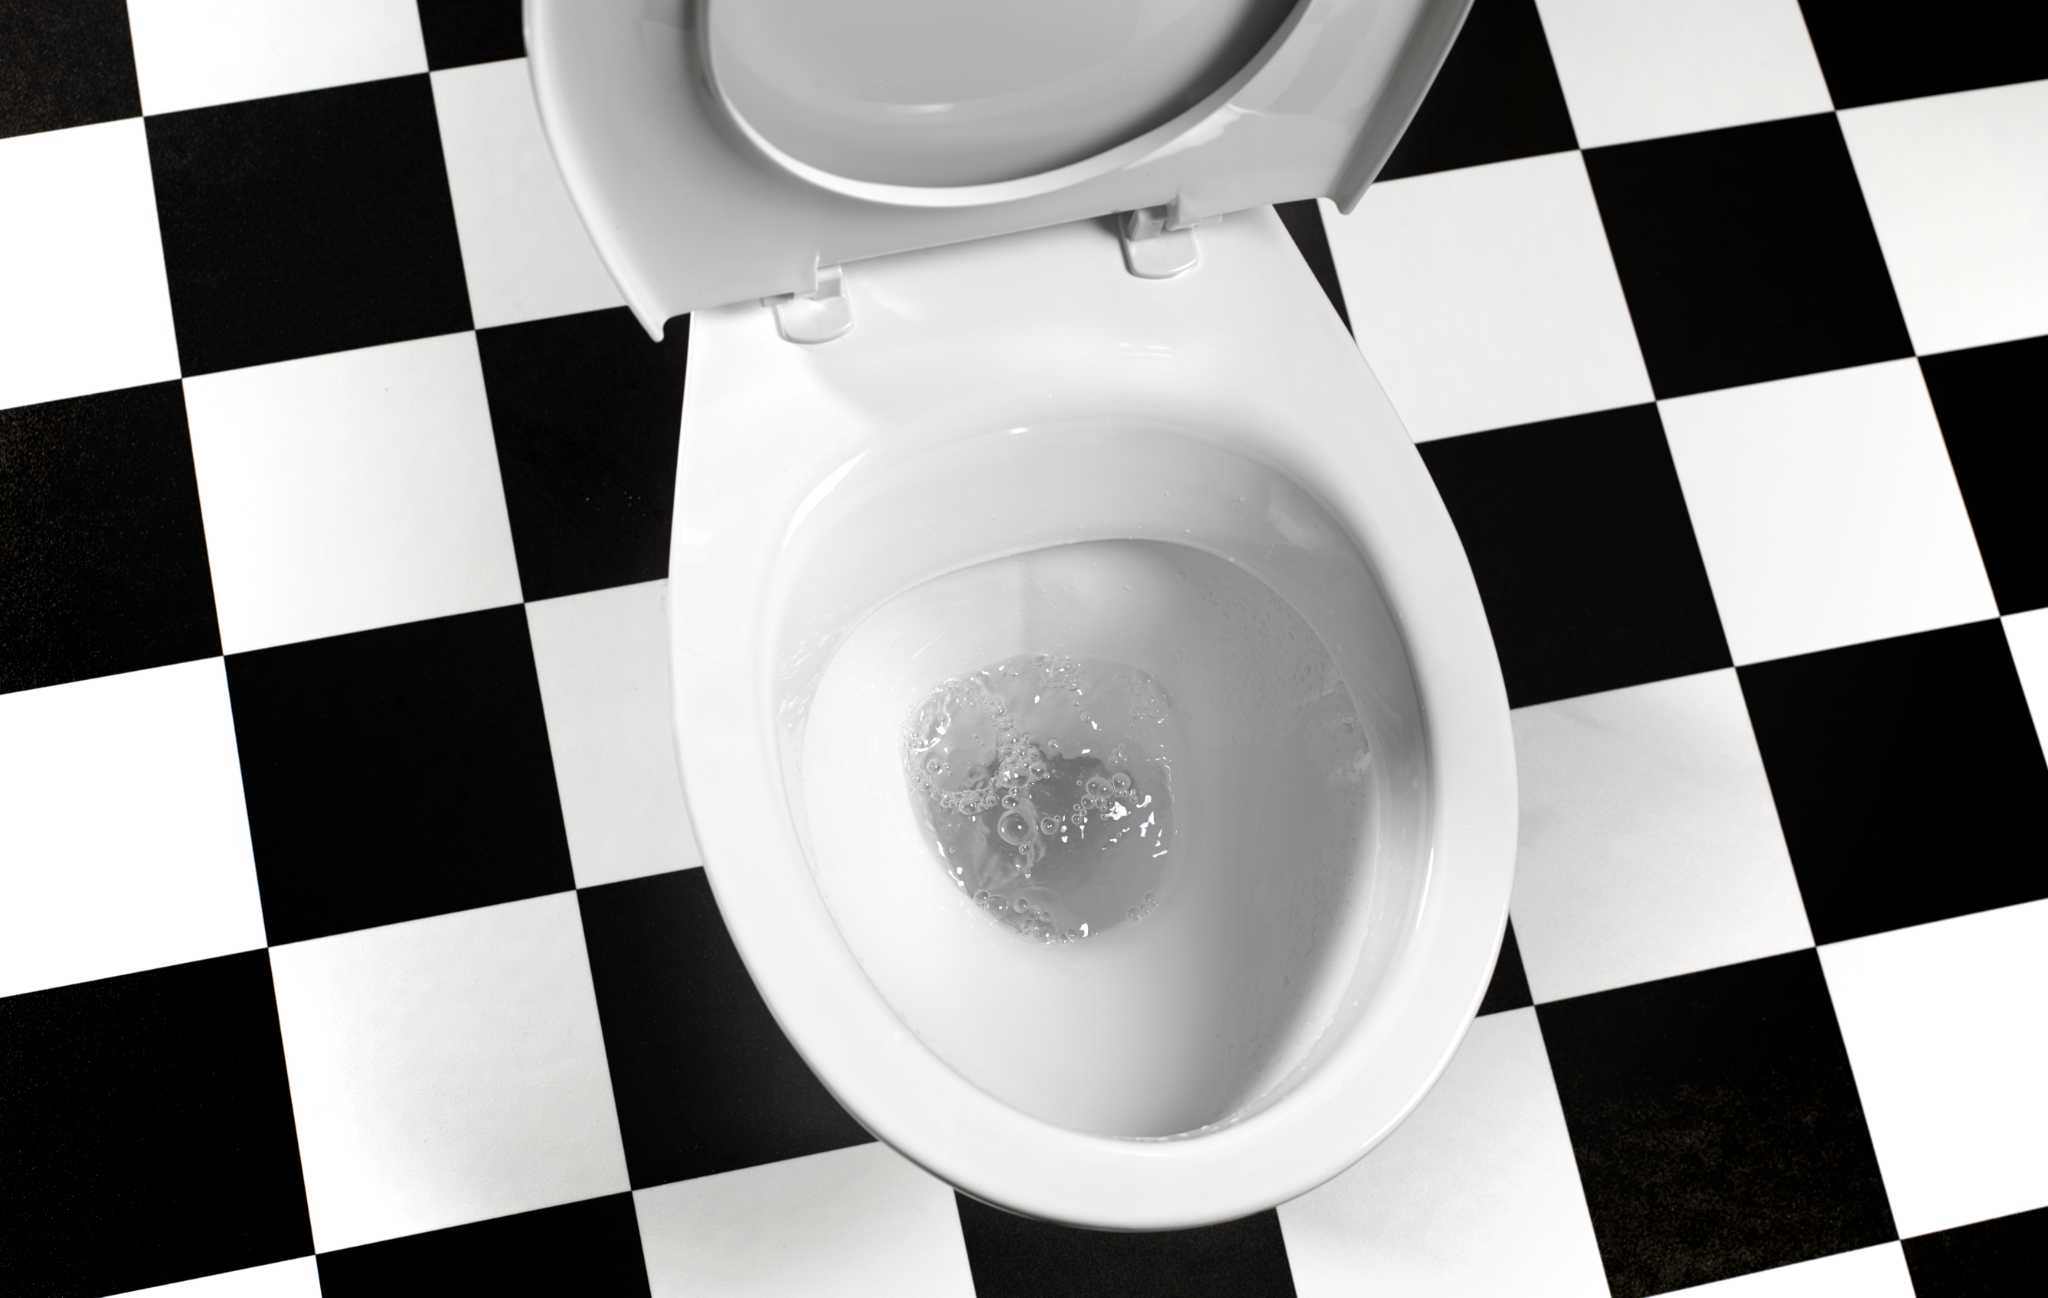
- Weak Flush: A slow filling toilet can also lead to weak flushes. If you notice that the flushing power has diminished and waste is not being efficiently cleared from the bowl, it could be due to insufficient water volume during the flushing process.
- Incomplete Flushing: Similarly, a slow filling toilet may result in incomplete flushing. This means that even after flushing, some waste may remain in the bowl instead of being fully removed. This can lead to recurring clogs and unsanitary conditions.
- Gurgling Sounds: Pay attention to any unusual gurgling sounds coming from the toilet after flushing. These noises may indicate that there is a problem with the water flow, which can contribute to a slow filling toilet.
- Visible Damage or Leaks: In some cases, a slow filling toilet can be caused by visible damage or leaks in the tank or water supply line. Keep an eye out for any cracks, rust, or signs of moisture around the toilet components, as these can be indicators of a larger issue affecting the fill rate.
By identifying these symptoms, you can confirm whether your toilet is indeed experiencing a slow filling problem. Understanding the symptoms will guide you in diagnosing the underlying cause and implementing the appropriate solutions to fix the issue. Now that we have identified the symptoms, let’s explore the potential causes of a slow filling toilet.
Potential Causes of a Slow Filling Toilet
There are several potential causes that can contribute to a slow filling toilet. Understanding these causes will help you narrow down the issue and determine the most appropriate solution. Here are some common reasons why your toilet may be filling slowly:
- Malfunctioning Fill Valve: The fill valve, also known as the ballcock or float valve, is responsible for regulating the water flow into the toilet tank. If the fill valve is not functioning properly, it can restrict the water flow and result in a slow filling toilet. This can be due to a faulty valve mechanism or a misadjusted float.
- Dirty Fill Valve: Over time, mineral deposits and debris can accumulate in the fill valve, obstructing the water flow and causing a slow fill. This is especially common in areas with hard water. Cleaning the fill valve can often resolve the issue and restore proper water flow.
- Issues with the Flapper: The flapper is a rubber seal that controls the flush cycle by releasing water from the tank into the bowl. If the flapper is worn out, misaligned, or not sealing properly, it can lead to a slow fill. This can be caused by mineral buildup, damage to the flapper, or a faulty flapper chain.
- Blockage in the Water Supply Line: A blockage in the water supply line can restrict the flow of water into the toilet tank, resulting in a slow fill. This can occur due to debris, sediment, or mineral buildup in the supply line. It is important to check for any obstructions and clear them if necessary.
- Water Pressure Issues: In some cases, low water pressure in the plumbing system can affect the fill rate of the toilet tank. This can be a result of issues with the main water supply, such as a partially closed shut-off valve or problems with the municipal water source.
- Other Mechanical Problems: There are various other mechanical issues that can contribute to a slow filling toilet. These can include problems with the flush valve, the overflow tube, or the tank-to-bowl gasket. It is important to inspect these components to rule out any potential causes.
Now that we have explored the potential causes of a slow filling toilet, it’s time to gather the necessary tools and materials to address the issue. In the next section, we will discuss the equipment you will need to fix a slow filling toilet.
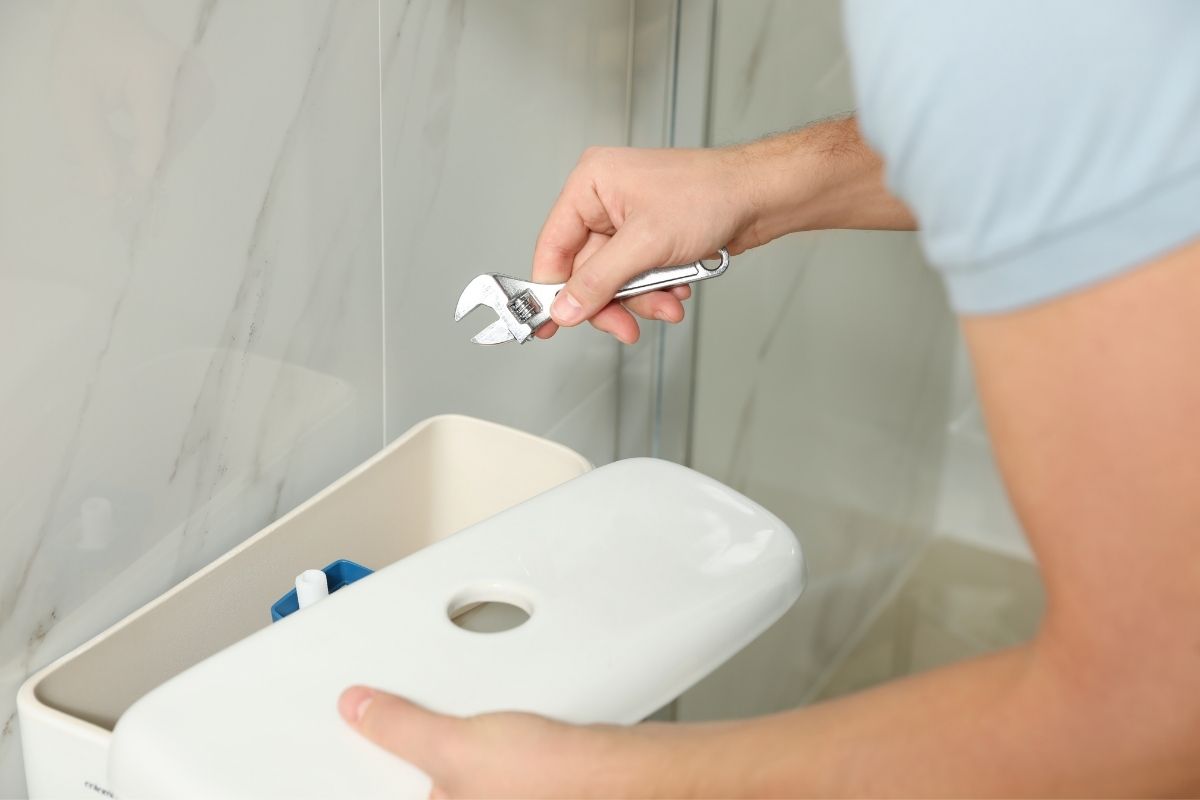
Tools and Materials Needed
Before embarking on the journey to fix a slow filling toilet, it is essential to gather the necessary tools and materials. Having everything prepared beforehand will save you time and prevent any interruptions during the troubleshooting process. Here are the tools and materials you will need:
- Adjustable Wrench: An adjustable wrench will come in handy for loosening and tightening various nuts and bolts during the repair process.
- Flathead Screwdriver: A flathead screwdriver is useful for prying off the caps and covers of toilet components, as well as manipulating small screws and clips.
- Bucket: A bucket will be useful for collecting any water that may spill during the repair process. It will help keep your work area clean and prevent any water damage.
- Clean Cloths or Rags: Keep some clean cloths or rags nearby to wipe up any spills or excess water. This will help keep your work area tidy and prevent slips or accidents.
- Vinegar or Descaling Solution: If mineral deposits are a common issue in your area, having vinegar or a descaling solution on hand will be beneficial for cleaning and removing any buildup in the toilet components.
- Replacement Parts: Depending on the specific cause of the slow filling issue, you may need to have replacement parts ready. This can include a new fill valve, flapper, flush valve, or any other toilet component that may be damaged or malfunctioning.
- Teflon Tape: Teflon tape is used to create a watertight seal when connecting plumbing fittings. It is commonly used for wrapping around threaded connections to prevent leaks.
- Plunger: A plunger can be helpful for clearing any minor blockages in the toilet drain. While it may not directly address the slow filling issue, it can contribute to improving overall toilet performance.
Having these tools and materials ready will ensure that you have everything you need to successfully troubleshoot and fix the slow filling toilet. Before starting any repairs, make sure to shut off the water supply to the toilet. In the next section, we will discuss the step-by-step process to fix a slow filling toilet.
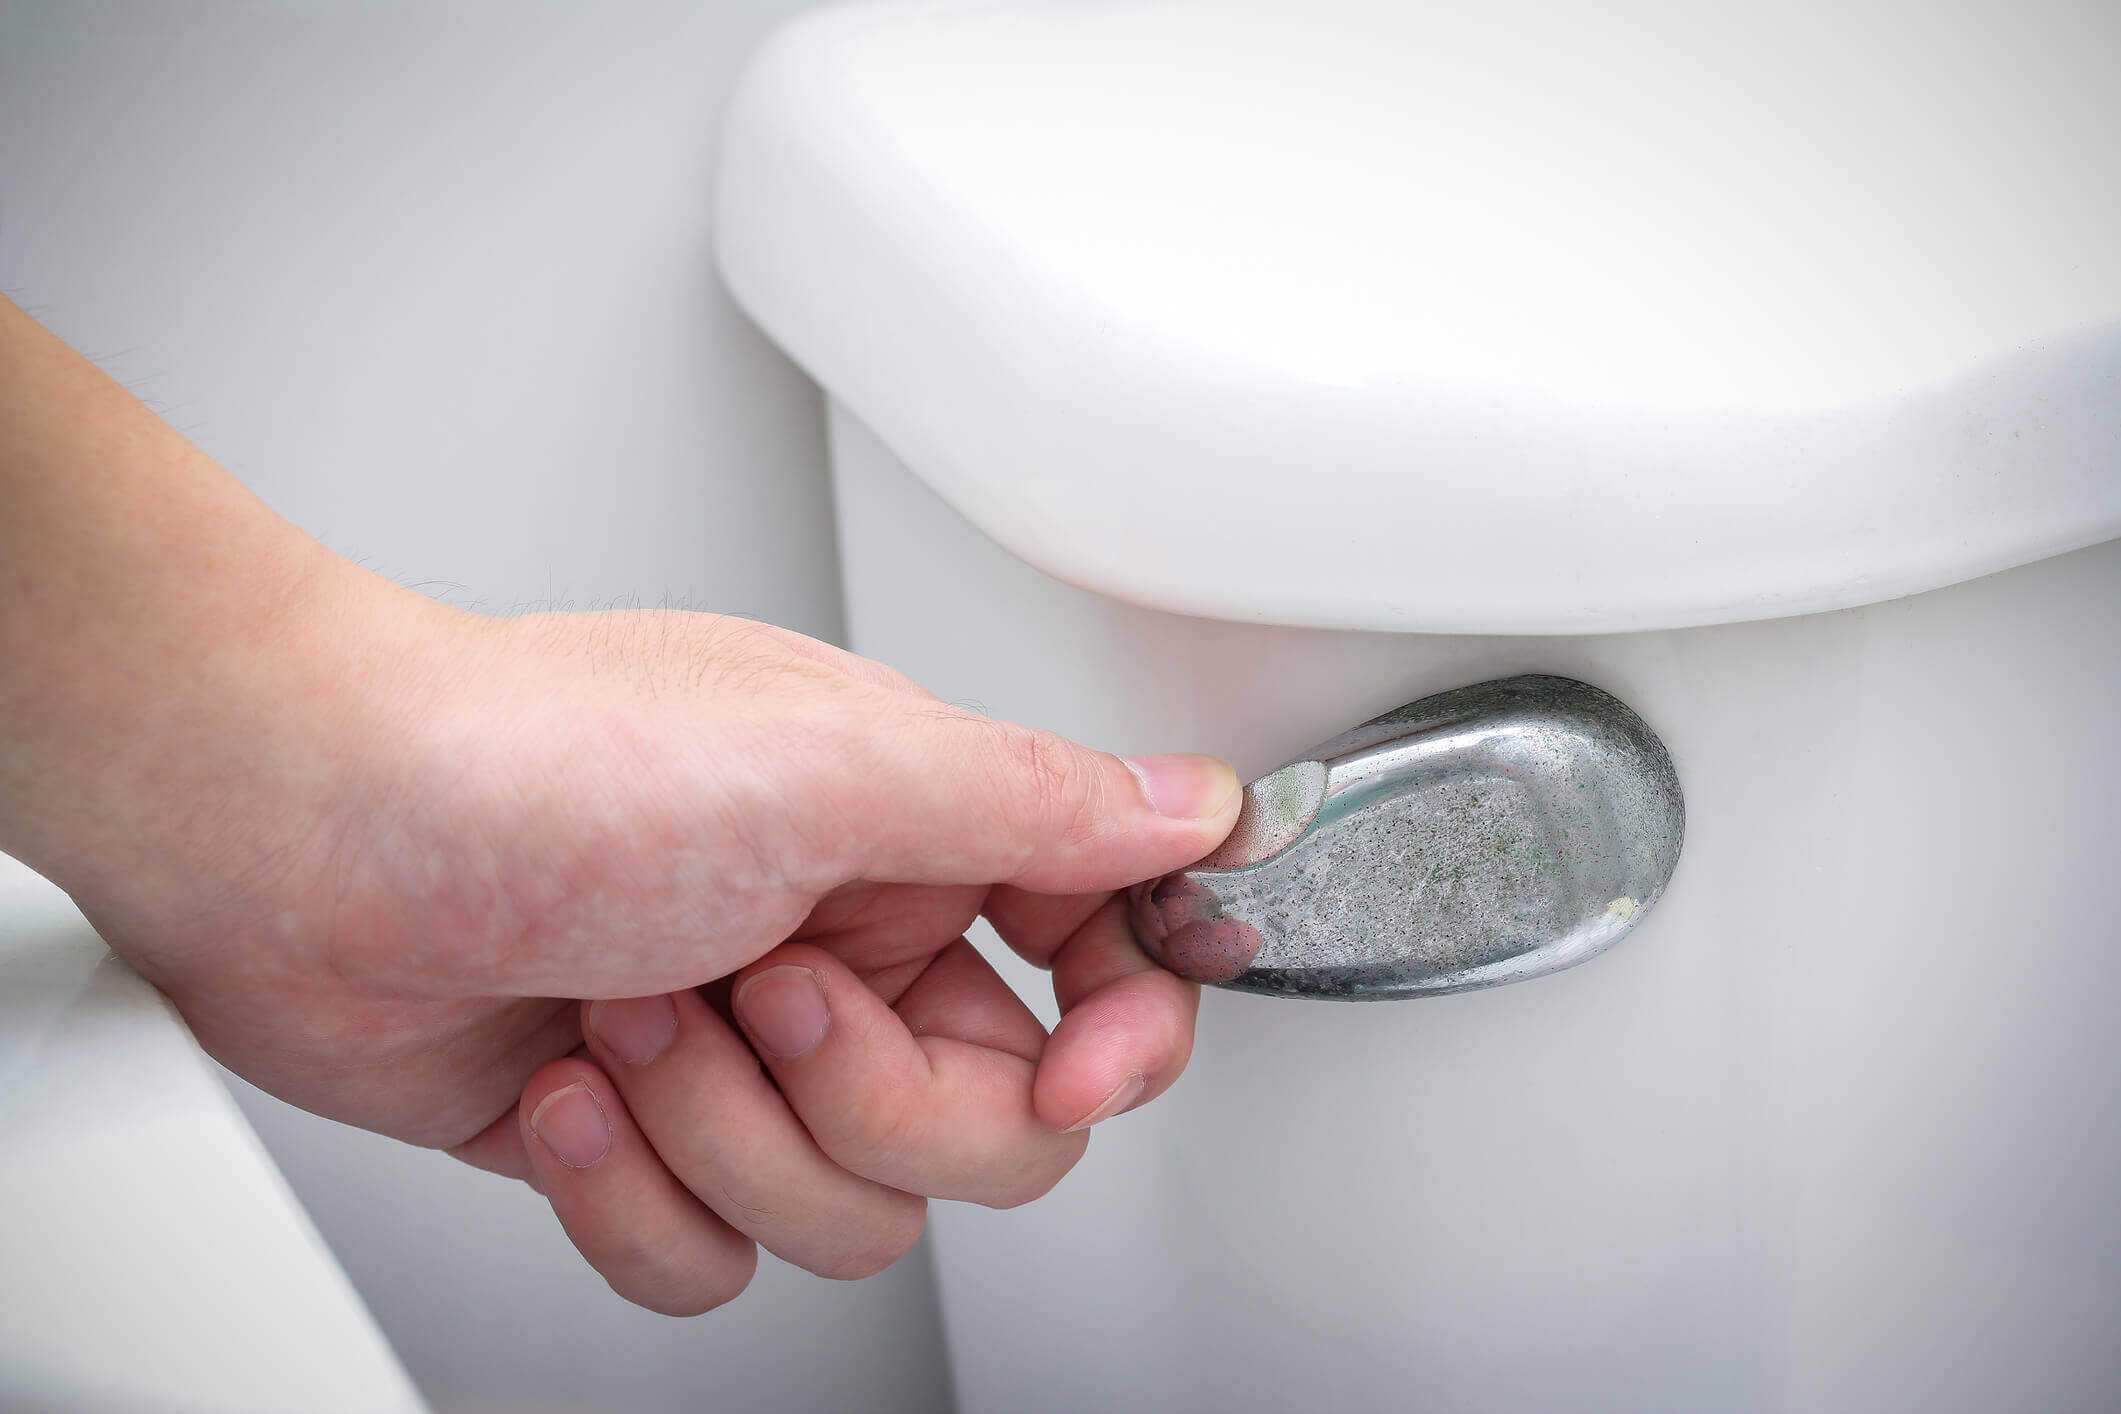
Step 1: Shut Off the Water Supply
Before you begin any repairs or troubleshooting steps, it is crucial to shut off the water supply to the toilet. This will prevent water from flowing into the tank while you are working, reducing the risk of spills and potential water damage. Here are the steps to follow:
- Locate the shut-off valve: The shut-off valve is usually located on the wall or floor behind the toilet. It is typically a small lever or knob that you can turn clockwise to shut off the water.
- Turn off the water: Rotate the shut-off valve clockwise until it is fully closed. This will stop the flow of water to the toilet tank.
- Flush the toilet: After shutting off the water supply, flush the toilet once or twice to drain the water from the tank and bowl. This will allow you to work on the toilet without any excess water present.
Once you have shut off the water supply and flushed the toilet, you can proceed with the next steps of troubleshooting and repairing the slow filling issue. Make sure to have all the necessary tools and materials ready, as discussed in the previous section. In the next step, we will check the water level in the toilet tank.
Read more: How To Fix Slow Close Toilet Seat
Step 2: Check the Water Level
After shutting off the water supply and flushing the toilet, the next step in troubleshooting a slow filling toilet is to check the water level in the toilet tank. The water level should be at the designated mark indicated on the inside of the tank. Here’s how to check the water level:
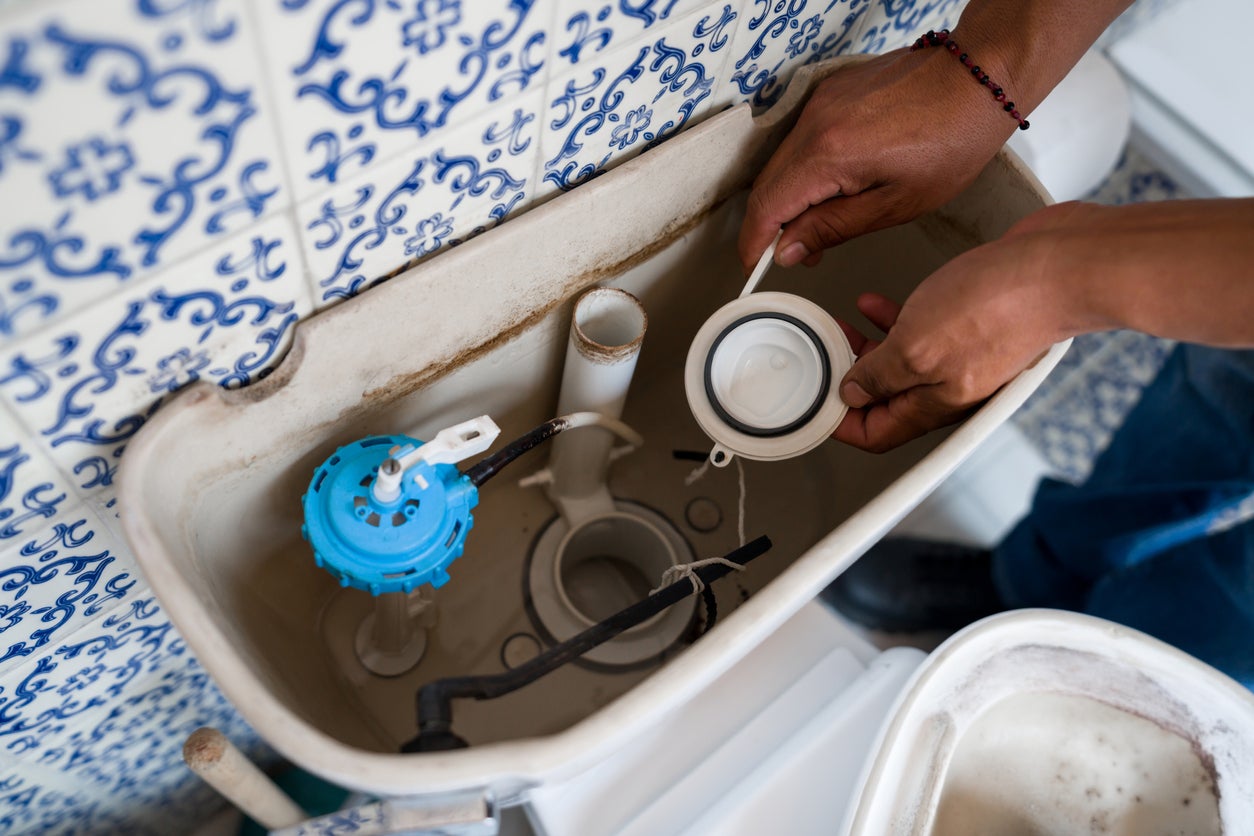
- Remove the tank lid: Carefully lift the tank lid off the toilet tank and set it aside on a stable surface.
- Observe the water level: Take a look inside the tank and observe the water level. It should be at or just below the fill line, which is typically marked on the inside of the tank.
- Adjust the water level if necessary: If the water level is too high, it can lead to constant water running or overflow issues. If the water level is too low, it can result in a weak flush and slow filling. To adjust the water level, look for an adjustment mechanism or float device attached to the fill valve.
- Adjust the fill valve or float mechanism: Depending on the type of fill valve in your toilet, there may be different ways to adjust the water level. Some fill valves have adjustable float arms or screws that can be turned to raise or lower the water level. Others may have a sliding mechanism or adjustment clip that allows you to set the desired water level.
- Test the water level: Once you have made the necessary adjustments, flush the toilet and monitor the water level during the refill process. It should now fill to the correct level indicated on the inside of the tank. Make any additional adjustments as needed until the water level is within the proper range.
Checking and adjusting the water level is an important step in resolving a slow filling toilet. If the water level was too low, this adjustment may fix the issue. However, if the problem persists, proceed to the next step where we will clean the fill valve to ensure it is functioning properly.
Step 3: Clean the Fill Valve
If adjusting the water level did not resolve the slow filling issue, it may be necessary to clean the fill valve. Over time, mineral deposits, debris, and sediment can accumulate inside the fill valve, obstructing the water flow and causing it to fill slowly. Cleaning the fill valve can help restore the proper functioning of the mechanism. Here’s how to clean the fill valve:
- Turn off the water supply: Before cleaning the fill valve, make sure to shut off the water supply to the toilet by turning the shut-off valve clockwise.
- Locate the fill valve: The fill valve is typically located near the bottom or side of the toilet tank, connected to the water supply line. It is responsible for regulating the water flow into the tank.
- Disconnect the supply line: Use an adjustable wrench to loosen the nut connecting the water supply line to the fill valve. Gently twist the nut counterclockwise to disconnect the supply line.
- Remove the fill valve cap or cover: The fill valve may have a cap or cover protecting the internal components. Remove the cap by either unscrewing it or prying it off with a flathead screwdriver.
- Inspect the fill valve assembly: Once the cap is removed, inspect the fill valve assembly for any visible debris, mineral buildup, or sediment. Use a clean cloth or brush to remove any loose particles.
- Clean the valve mechanism: Submerge the fill valve in a bowl or bucket filled with vinegar or a descaling solution. Let it soak for a few minutes to dissolve any stubborn mineral deposits. Then, use a small brush or toothbrush to scrub the valve mechanism and remove any remaining buildup. Pay attention to cleaning the float and float arm as well.
- Rinse and reassemble: After cleaning, rinse the fill valve thoroughly with water to remove any traces of vinegar or descaling solution. Then, reassemble the fill valve, ensuring that all components are properly aligned and tightened.
- Reconnect the supply line: Once the fill valve is cleaned and reassembled, reconnect the water supply line by tightening the nut with an adjustable wrench. Ensure that the connection is secure but not over-tightened to prevent any leaks.
- Turn on the water supply: Finally, turn on the shut-off valve to restore the water supply to the toilet. Allow the tank to refill and monitor if the slow filling issue has been resolved.
Cleaning the fill valve can often improve the flow of water into the toilet tank, resolving the slow filling problem. However, if the issue persists, proceed to the next step where we will adjust the fill valve to ensure proper functioning.
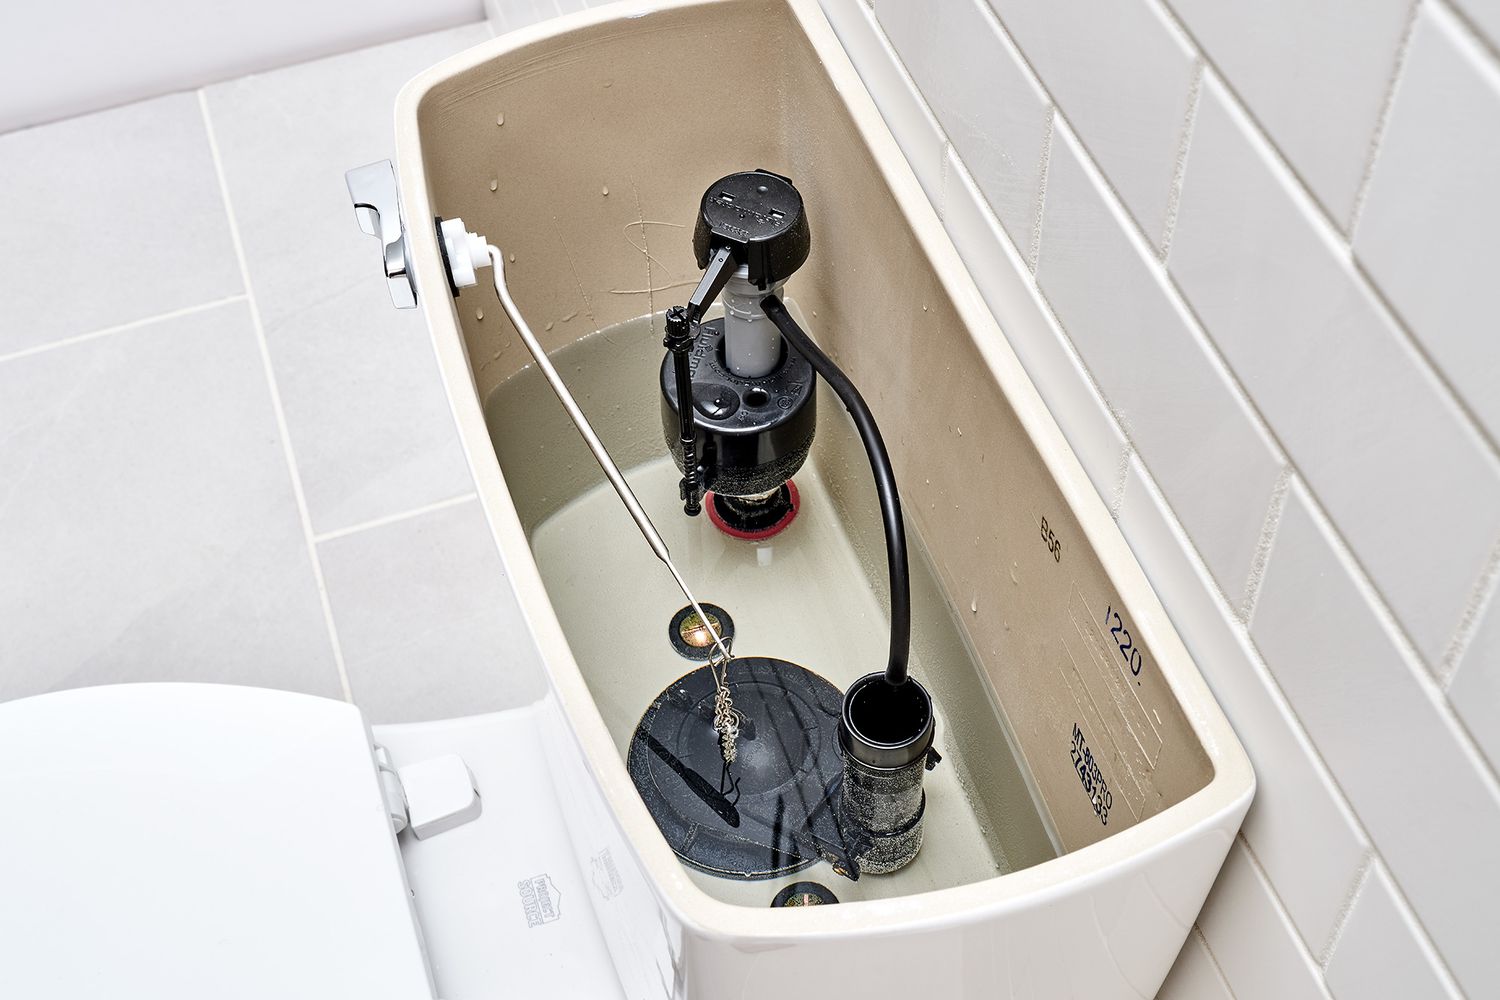
Check the water level in the tank and adjust the float to ensure it’s at the correct height. Also, clean or replace the fill valve if it’s clogged or worn out.
Step 4: Adjust the Fill Valve
If cleaning the fill valve did not resolve the slow filling issue, the next step is to adjust the fill valve. A misadjusted fill valve can restrict the water flow, leading to a slow fill. By correctly adjusting the fill valve, you can optimize the water flow and ensure efficient filling of the toilet tank. Here’s how to adjust the fill valve:
- Turn off the water supply: Before making any adjustments to the fill valve, turn off the water supply by rotating the shut-off valve clockwise.
- Remove the tank lid: Lift the tank lid and set it aside on a stable surface.
- Locate the adjustment mechanism: The fill valve may have a screw or float adjustment mechanism that can be used to control the water level. Depending on the type of fill valve, it may be located on top of the valve or on the side.
- Adjust the water level: Use a screwdriver or your hand to turn the adjustment screw or lever. By adjusting the screw or lever, you can raise or lower the water level in the tank. Gradually make small adjustments and test the water level each time until it reaches the desired level.
- Test the fill valve: After making the adjustments, turn on the water supply by rotating the shut-off valve counterclockwise. Allow the tank to fill, and observe if the fill valve is functioning properly. Check if the water level reaches the designated mark on the inside of the tank.
- Make additional adjustments if necessary: If the water level is still not reaching the desired mark, continue making small adjustments until you achieve the proper water level.
- Reposition the float: In some cases, the issue may be related to the position of the float. If the water level is still not adjusting correctly, try repositioning the float by bending the float arm slightly. This can help optimize the water flow and improve the fill rate.
- Secure the adjustment mechanism: Once you have achieved the desired water level, make sure to secure the adjustment mechanism in place. This will ensure that the fill valve retains the set water level and does not drift over time.
By properly adjusting the fill valve, you can optimize the water flow and resolve the slow filling issue. If adjusting the fill valve does not solve the problem, proceed to the next step where we will inspect the flapper.
Step 5: Inspect the Flapper
If adjusting the fill valve did not resolve the slow filling issue, it’s time to inspect the flapper. The flapper is a rubber seal that controls the flushing mechanism in the toilet tank. If the flapper is damaged, misaligned, or not functioning properly, it can lead to a slow fill. Here’s how to inspect the flapper:
- Turn off the water supply: Before inspecting the flapper, turn off the water supply by rotating the shut-off valve clockwise.
- Remove the tank lid: Lift the tank lid and set it aside on a stable surface.
- Observe the flapper: Take a look at the flapper inside the tank. Inspect it for any visible signs of damage, such as cracks, tears, or deterioration. A damaged flapper can let water escape continuously, causing the tank to fill slowly.
- Check the alignment: Ensure that the flapper is properly aligned and seated on the flush valve seat. If it is misaligned or not tightly sealing the flush valve, it can lead to water leakage and slow filling.
- Remove any debris: Clear any debris or mineral buildup present on the flapper or around the flush valve seat. Use a clean cloth or brush to gently wipe or scrub away any residue that may be affecting the flapper’s functionality.
- Test the flapper’s seal: To check the flapper’s seal, allow the tank to fill with water. Once the tank is full, carefully lift the flapper and observe if water is still running. If water continues to flow, it indicates that the flapper is not sealing properly and needs to be replaced.
- Replace the flapper if necessary: If the flapper is visibly damaged or not sealing properly, it is recommended to replace it. Remove the old flapper by disconnecting it from the flush valve chain. Install a new flapper by attaching it securely to the chain and ensuring it fits properly on the flush valve seat.
- Turn on the water supply: After replacing the flapper, turn on the water supply by rotating the shut-off valve counterclockwise. Allow the tank to fill and check if the slow filling issue has been resolved.
Inspecting the flapper is an important step in troubleshooting a slow filling toilet. If the flapper is damaged or misaligned, it can contribute to inconsistent water flow and slow filling. By replacing a faulty flapper, you can ensure a proper seal and improve the overall performance of the toilet. If the slow filling problem persists, proceed to the next step where we will clean the tank.
Step 6: Clean the Tank
If previous steps haven’t resolved the slow filling issue, it may be necessary to clean the tank. Over time, mineral deposits, debris, and sediment can accumulate inside the tank, affecting the fill rate and overall performance of the toilet. By cleaning the tank, you can remove any buildup and optimize the water flow. Here’s how to clean the tank:
- Turn off the water supply: Begin by turning off the water supply to the toilet by rotating the shut-off valve clockwise.
- Flush the toilet: Flush the toilet to drain as much water as possible from the tank. Hold down the flush lever to completely empty the tank.
- Remove any remaining water: Use a sponge or towel to sop up any remaining water in the tank. Wring out the excess water into a bucket or sink.
- Mix a cleaning solution: Prepare a cleaning solution by combining equal parts water and vinegar or a mild cleaning detergent. Alternatively, you can use a specialized tank cleaner that is safe for toilets.
- Apply the cleaning solution: Using a sponge or cloth, apply the cleaning solution to the inside surfaces of the tank. Pay special attention to areas where mineral deposits or stains are visible.
- Scrub the tank: Use a scrub brush or an old toothbrush to scrub away any stubborn stains or buildup. Focus on the walls, corners, and bottom of the tank. Be gentle so as not to damage any components inside the tank.
- Rinse the tank: After scrubbing, flush the toilet multiple times to thoroughly rinse the tank. This will help remove any remaining cleaning solution and loosened debris.
- Inspect for any issues: While the tank is empty, take the opportunity to inspect the components inside for any visible damage or issues. Check the fill valve, flapper, flush valve, and any other parts that may be contributing to the slow filling problem.
- Turn on the water supply: Once you are satisfied with the cleanliness of the tank and components, turn on the water supply by rotating the shut-off valve counterclockwise. Allow the tank to fill and check if the slow filling issue has been resolved.
Cleaning the tank can be an effective way to remove mineral deposits and debris that may be hindering the fill rate. By maintaining a clean tank, you can ensure smooth water flow and optimal performance of your toilet. If the slow filling problem persists, proceed to the next step where we will check the water supply line.
Step 7: Check the Water Supply Line
If you’re still experiencing a slow filling toilet, it’s time to check the water supply line. Blockages or obstructions in the water supply line can restrict the flow of water into the toilet tank, resulting in a slow fill. By inspecting and clearing the supply line, you can ensure a proper flow of water. Here’s how to check the water supply line:
- Turn off the water supply: Start by turning off the water supply to the toilet using the shut-off valve. Rotate it clockwise to shut off the water flow.
- Locate the supply line: The water supply line is typically connected to the bottom or side of the toilet tank. It is usually made of flexible tubing or metal piping.
- Inspect the supply line: Carefully examine the supply line for any kinks, twists, or visible blockages. Look for any signs of damage, leaks, or debris that may be affecting the water flow.
- Remove any blockages: If you find any debris or obstructions in the supply line, use a small brush, pipe cleaner, or compressed air to clear them. Be gentle to avoid damaging the supply line or causing leaks.
- Check the shut-off valve: While inspecting the supply line, also examine the shut-off valve for any issues. Make sure it is fully open and not partially closed, as this can restrict the water flow.
- Turn on the water supply: Once you have cleared any obstructions and checked the shut-off valve, turn on the water supply by rotating the shut-off valve counterclockwise. Allow the tank to fill and observe if the slow filling issue has been resolved.
Checking the water supply line is an important step in troubleshooting a slow filling toilet. If there are any blockages or issues with the supply line, it can hinder the flow of water into the tank. By clearing any obstructions and ensuring a proper water flow, you can effectively resolve the slow filling problem. If the issue persists, proceed to the final step where we will discuss the possibility of replacing the fill valve.
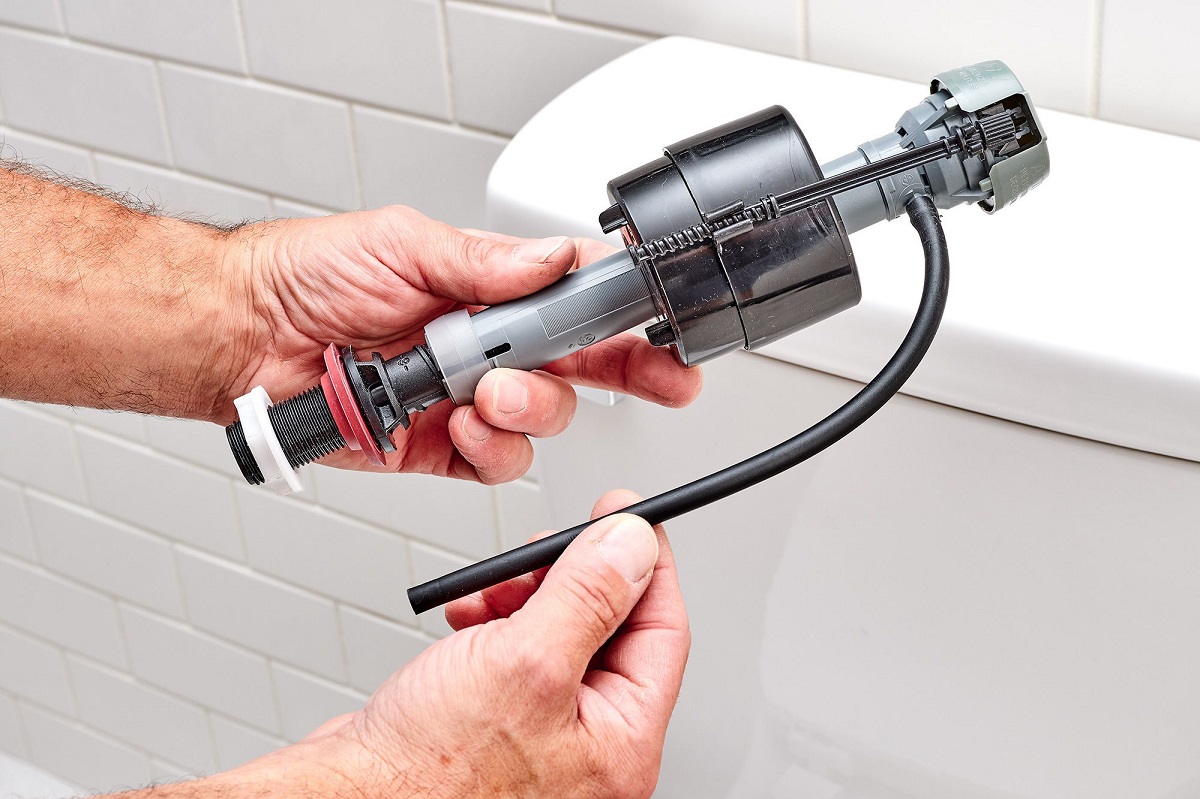
Step 8: Replace the Fill Valve
If you’ve reached this final step and the previous troubleshooting methods haven’t resolved the slow filling issue, it may be necessary to replace the fill valve. A faulty or malfunctioning fill valve can significantly impact the fill rate of the toilet, causing it to fill slowly. By replacing the fill valve, you can ensure a proper and efficient water flow. Here’s how to replace the fill valve:
- Turn off the water supply: Begin by turning off the water supply to the toilet using the shut-off valve. Rotate it clockwise to shut off the water flow.
- Drain the toilet tank: Flush the toilet to empty the water from the tank. Use a sponge or towel to soak up any remaining water in the tank.
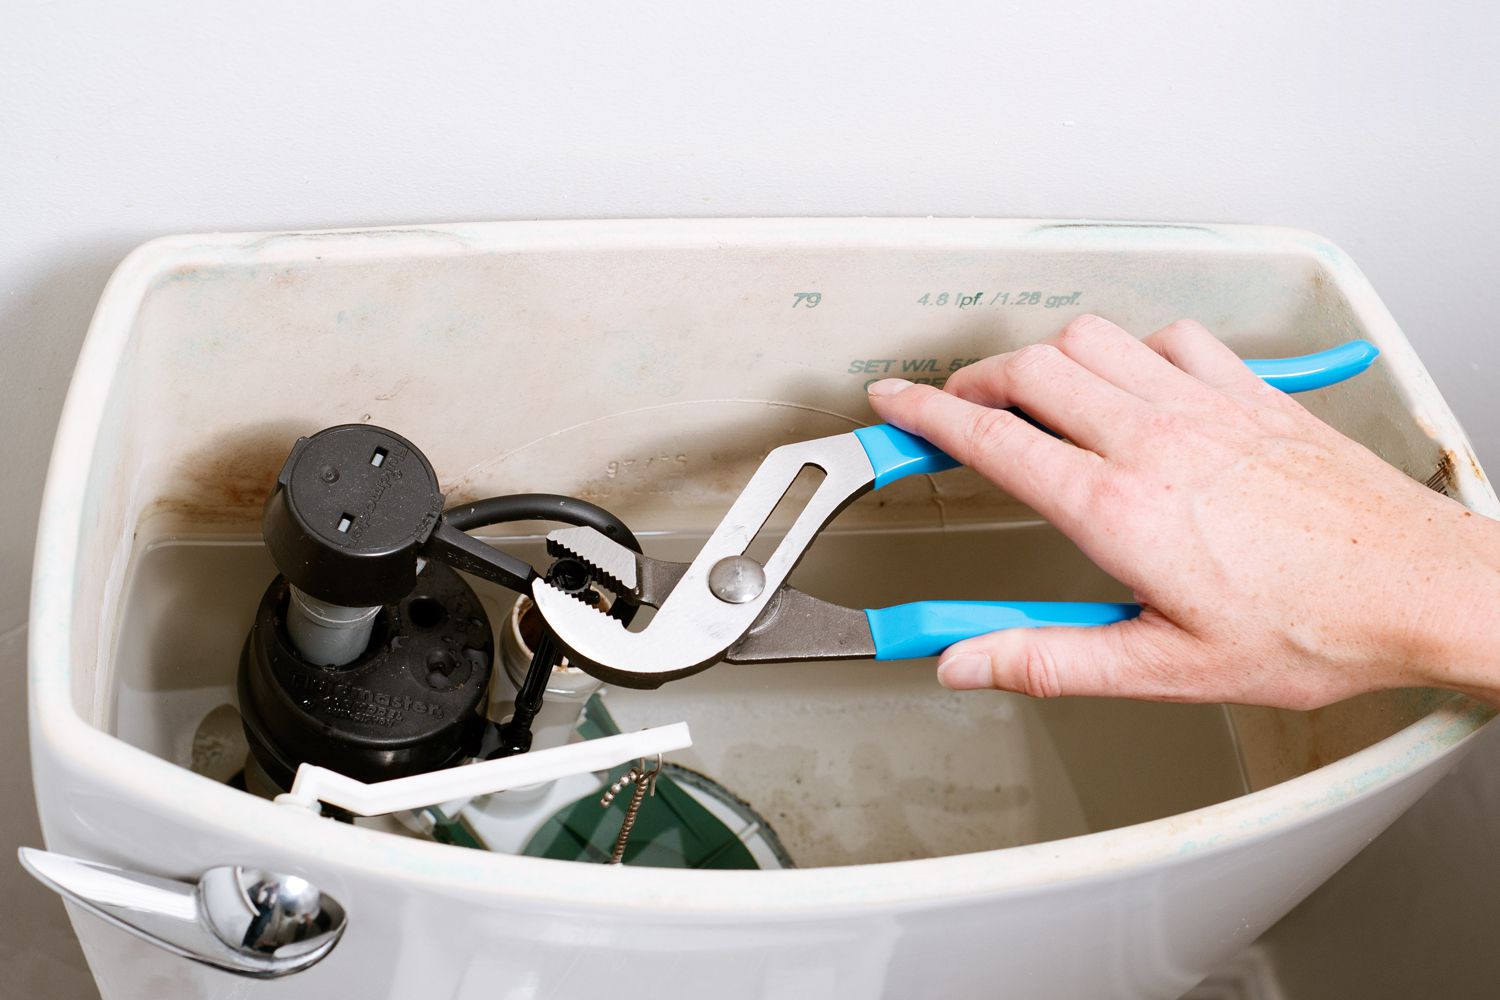
- Disconnect the supply line: Use an adjustable wrench to loosen and disconnect the supply line from the fill valve. Be prepared to catch any remaining water in a bucket or towel.
- Remove the old fill valve: Locate the mounting nut that secures the fill valve to the bottom of the tank. Loosen and remove the nut using an adjustable wrench or pliers. Lift the old fill valve out of the tank.
- Prepare the new fill valve: Take the new fill valve and ensure all parts are present and in good condition. Follow the manufacturer’s instructions for any pre-installation preparations.
- Install the new fill valve: Insert the new fill valve into the hole at the bottom of the tank, ensuring it rests securely. Hand-tighten the mounting nut onto the fill valve from underneath the tank. Use pliers or an adjustable wrench to give it a final tightening, but be cautious not to overtighten and risk damaging the tank.
- Connect the supply line: Reconnect the supply line to the new fill valve and tighten the nut with an adjustable wrench. Ensure it is secure but not too tight.
- Turn on the water supply: Open the shut-off valve by rotating it counterclockwise to restore the water supply to the toilet. Allow the tank to fill and check if the slow filling issue is resolved.
- Test and make adjustments: Once the tank is filled, flush the toilet and observe the fill rate. Ensure that the water level reaches the appropriate mark on the inside of the tank. If adjustments are necessary, follow the previous steps to fine-tune the fill valve.
Replacing the fill valve is a more advanced repair, so if you’re not confident in your abilities, it may be best to consult a professional plumber. However, if you feel comfortable and have the necessary tools and materials, replacing the fill valve can be an effective solution to a persistent slow filling toilet problem. Following these steps will help you complete the replacement process and restore proper water flow and toilet performance.
After completing these troubleshooting steps, you should have successfully resolved the issue of a slow filling toilet. By identifying the symptoms, exploring potential causes, and systematically addressing each one, you can restore optimal functionality to your toilet. Regular maintenance and periodic inspection of your toilet’s components, such as the fill valve and flapper, can help prevent such issues from recurring in the future. If you have attempted all the steps and the problem persists, it is advisable to seek the assistance of a professional plumber to diagnose and resolve any underlying problems.
We hope this guide has been helpful in your efforts to fix a slow filling toilet. Remember to always prioritize safety and ensure that the water supply is turned off before beginning any repairs. Happy troubleshooting!
Conclusion
A slow filling toilet can be a frustrating issue, but with the right knowledge and troubleshooting steps, you can resolve the problem and restore optimal functionality to your toilet. By identifying the symptoms, exploring potential causes, and systematically addressing each one, you can pinpoint the underlying issue and implement the necessary solutions.
Throughout this article, we have discussed the symptoms of a slow filling toilet, which include extended fill times, low water levels, weak flushes, incomplete flushing, gurgling sounds, and visible damage or leaks. We have also explored potential causes such as malfunctioning fill valves, dirty fill valves, issues with the flapper, blockages in the water supply line, water pressure problems, and other mechanical issues.
To resolve a slow filling toilet, we outlined a step-by-step approach that includes shutting off the water supply, checking the water level, cleaning the fill valve, adjusting the fill valve, inspecting the flapper, cleaning the tank, checking the water supply line, and finally, replacing the fill valve if necessary.
It’s important to remember that safety should always be a priority when troubleshooting and making repairs to your toilet. Before starting any repairs, remember to turn off the water supply and exercise caution to avoid any accidents or damage to the plumbing system.
If you have attempted all the steps outlined in this article and the slow filling issue persists, it may be best to seek the assistance of a professional plumber. They have the knowledge and experience to diagnose and resolve complex problems that may be affecting your toilet’s performance.
Regular maintenance and periodic inspections of your toilet’s components, such as the fill valve, flapper, and water supply line, can help prevent slow filling issues and ensure the long-term efficiency of your toilet.
By following the troubleshooting steps provided and being proactive in toilet maintenance, you can overcome the challenges of a slow filling toilet and enjoy a fully functional and efficient bathroom fixture once again.
We hope this article has been informative and helpful in guiding you through the process of fixing a slow filling toilet. Remember, a little knowledge and effort can go a long way in resolving plumbing issues and ensuring the smooth operation of your toilet.
Frequently Asked Questions about How To Fix A Slow Filling Toilet
Was this page helpful?
At Storables.com, we guarantee accurate and reliable information. Our content, validated by Expert Board Contributors, is crafted following stringent Editorial Policies. We're committed to providing you with well-researched, expert-backed insights for all your informational needs.


0 thoughts on “How To Fix A Slow Filling Toilet”