Home>Furniture & Design>Bathroom Accessories>How To Fix A Loose Toilet Bowl
Bathroom Accessories
How To Fix A Loose Toilet Bowl
Modified: April 22, 2024
Learn how to fix a loose toilet bowl with our step-by-step guide. Ensure your bathroom accessories are secure and stable for a safer and more functional space.
(Many of the links in this article redirect to a specific reviewed product. Your purchase of these products through affiliate links helps to generate commission for Storables.com, at no extra cost. Learn more)
Introduction
A loose toilet bowl can be a source of frustration and potential water damage if not addressed promptly. The telltale wobble or movement of the toilet can signal underlying issues that need attention. Fortunately, fixing a loose toilet bowl is a manageable task that can be accomplished with the right tools and a systematic approach.
In this comprehensive guide, we will walk you through the step-by-step process of addressing a loose toilet bowl. Whether you are a seasoned DIY enthusiast or a novice homeowner, this guide will equip you with the knowledge and confidence to tackle this common household issue.
By following the outlined steps, you can restore stability to your toilet and prevent potential water leaks or damage to the surrounding flooring. With a few simple tools and a methodical approach, you can effectively address the problem of a loose toilet bowl and ensure a secure and functional bathroom fixture.
Let's dive into the essential tools and materials needed to embark on this repair journey and restore stability to your toilet bowl.
Key Takeaways:
- Fixing a loose toilet bowl is manageable with the right tools and materials. By following the step-by-step process, you can restore stability and prevent potential water damage, ensuring a secure and functional bathroom fixture.
- Thorough inspection, meticulous replacement of the wax ring, and careful reinstallation are key to resolving the issue. Turning on the water supply and verifying proper functioning complete the repair journey, ensuring a durable and reliable toilet installation.
Read more: How To Fix A Toilet Bowl
Tools and Materials Needed
Before embarking on the task of fixing a loose toilet bowl, it's essential to gather the necessary tools and materials to ensure a smooth and efficient repair process. Here's a comprehensive list of items you'll need to have on hand:
Tools:
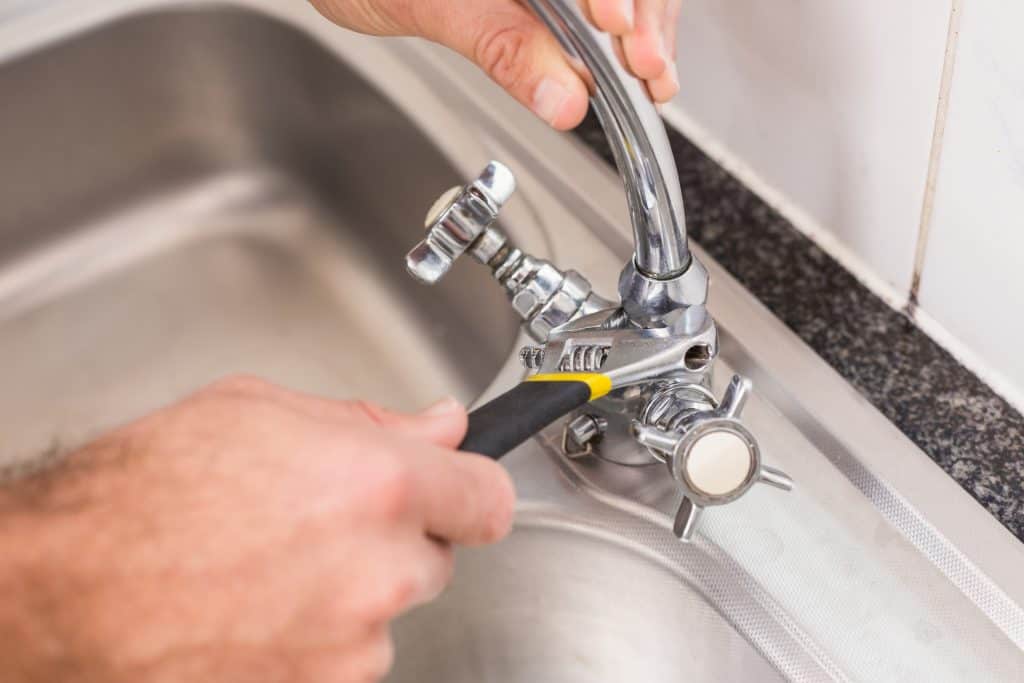
- Adjustable wrench: This versatile tool will be used to loosen and tighten nuts and bolts during the removal and reinstallation of the toilet.
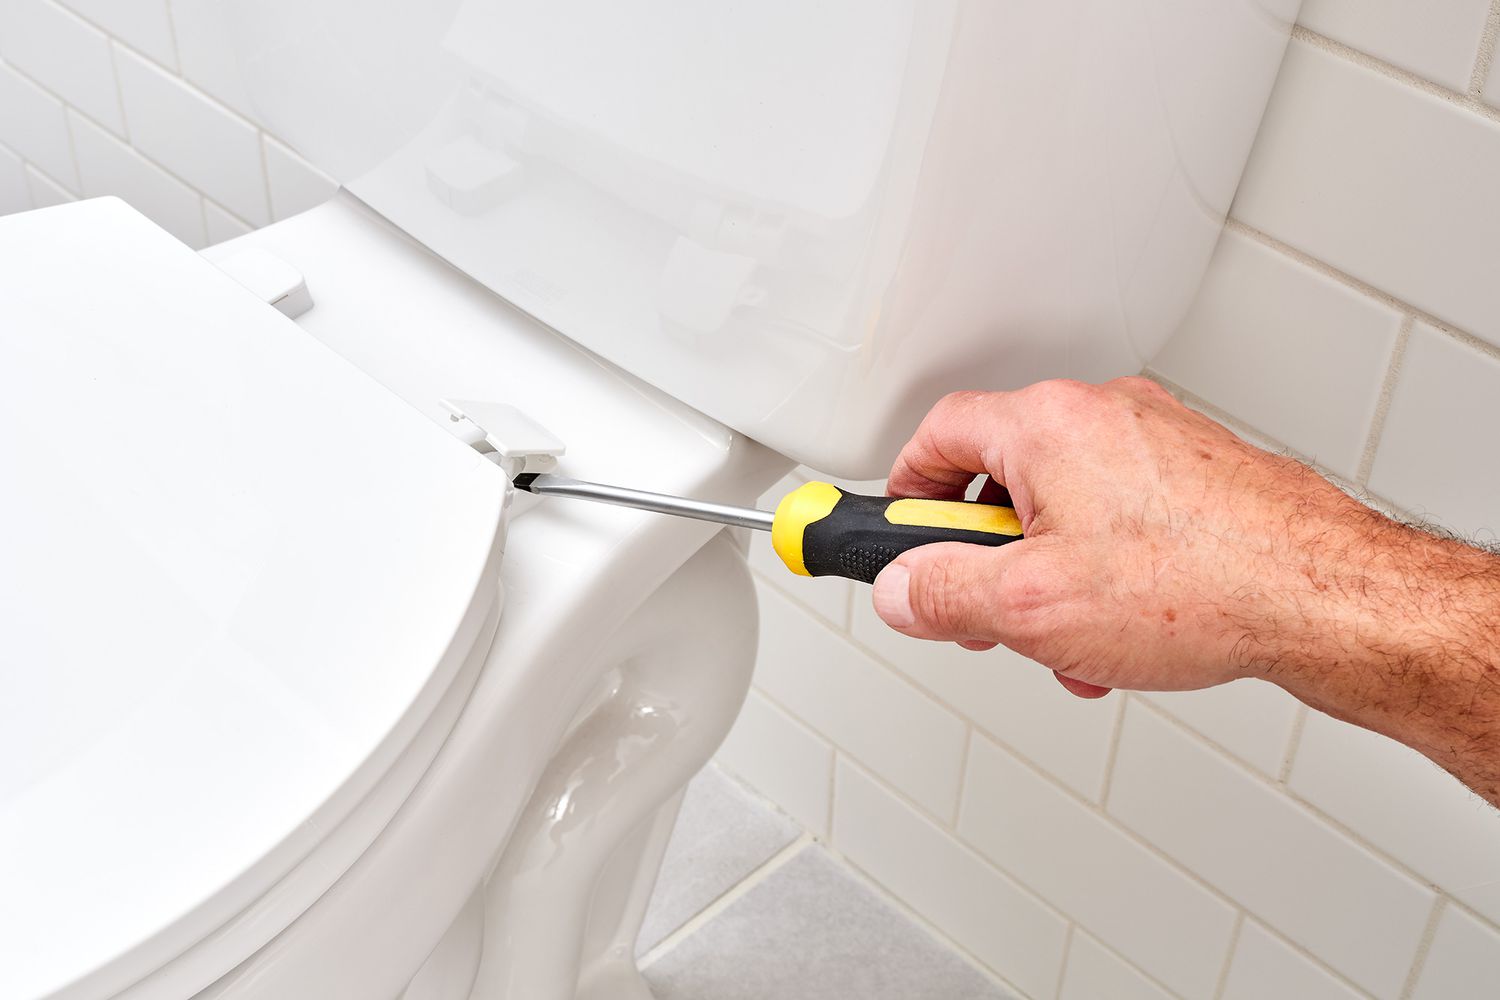
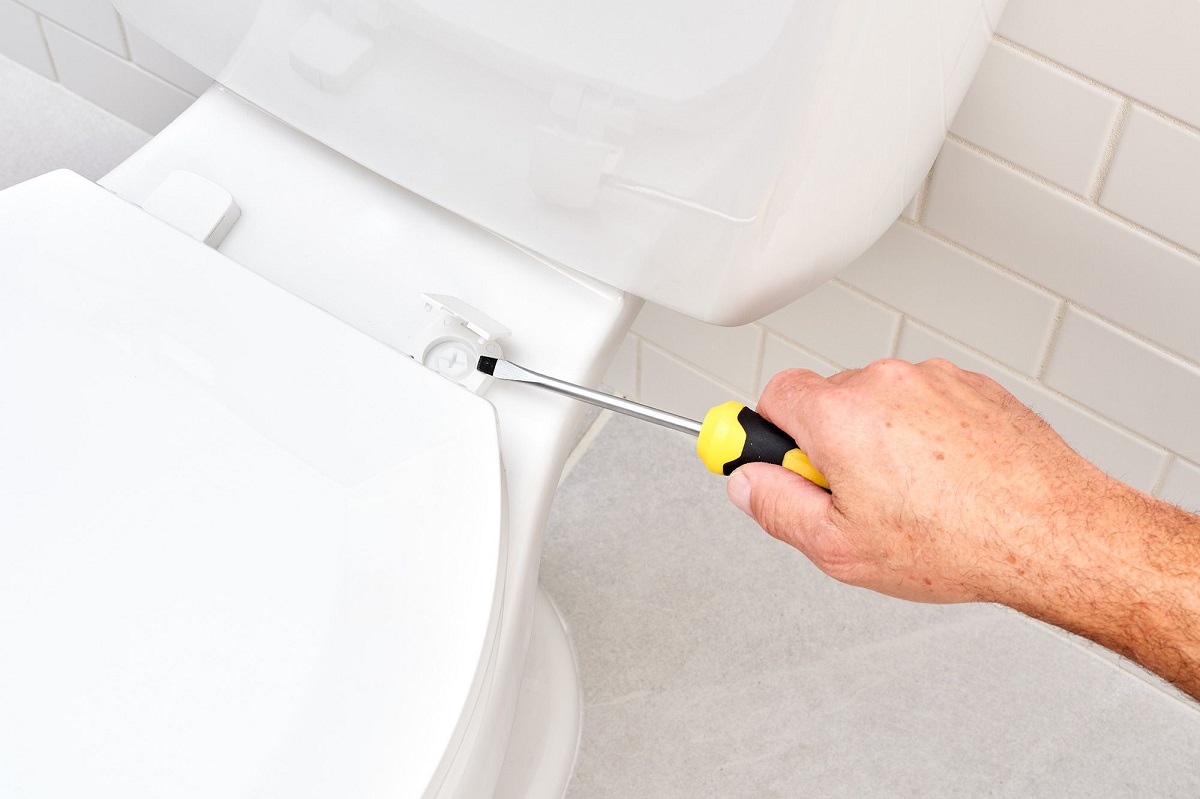
- Screwdriver: A flathead or Phillips screwdriver will come in handy for various tasks, such as removing the caps covering the bolts securing the toilet to the floor.
- Putty knife: Use a putty knife to scrape off the old wax ring and any residual wax from the flange and the bottom of the toilet.
- Hacksaw: In some cases, you may need a hacksaw to trim the closet bolts if they are too long or corroded.
- Level: A level will help ensure that the toilet is reinstalled evenly and securely, preventing future wobbling or instability.
- Gloves: It's advisable to wear protective gloves to maintain hygiene and protect your hands during the repair process.
Materials:
- New wax ring: A high-quality wax ring is essential for creating a watertight seal between the toilet and the flange, preventing leaks and odors.
- Closet bolts and caps: If the existing closet bolts are damaged or corroded, it's advisable to replace them with new ones for a secure installation.
- Toilet shims: These small, wedge-shaped pieces can be used to stabilize the toilet and eliminate rocking if the floor is uneven.
- Cleaning supplies: Have a supply of rags, a mild cleaning solution, and a bucket of water on hand to clean the toilet base, flange, and surrounding area before reinstallation.
- Silicone caulk (optional): While not always necessary, silicone caulk can be used to seal the base of the toilet to the floor, providing additional stability and preventing water seepage.
By ensuring that you have these tools and materials readily available, you'll be well-prepared to tackle the task of fixing a loose toilet bowl with confidence and efficiency. With everything in place, you can proceed to the next steps of the repair process, knowing that you have the necessary resources at your disposal.
Step 1: Turn Off the Water Supply
The first crucial step in fixing a loose toilet bowl is to turn off the water supply to the toilet. This is essential to prevent any potential water spillage or leaks during the repair process. The shut-off valve is typically located on the wall behind the toilet, near the floor. It is essential to locate this valve and turn it clockwise to shut off the water flow to the toilet.
Once the water supply is turned off, flush the toilet to drain the remaining water from the tank and the bowl. This step is important to minimize the amount of water that will spill out when the toilet is disconnected from the floor. After flushing, use a plunger to remove any remaining water from the bowl and the tank. It's advisable to have a bucket and a sponge on hand to soak up any residual water that may escape during the subsequent steps.
By turning off the water supply and emptying the toilet of water, you create a safer and more manageable environment for the subsequent repair tasks. This proactive measure helps to minimize the risk of water damage and ensures a smoother repair process.
With the water supply turned off and the toilet emptied of water, you are now ready to proceed to the next step of removing the toilet from its position. This marks the beginning of the hands-on repair process, where you will address the underlying issues causing the toilet to become loose and unstable.
Turning off the water supply is a fundamental step that sets the stage for the subsequent repair tasks. By taking this initial precaution, you establish a safe and controlled environment for the repair process, setting the foundation for a successful resolution to the issue of a loose toilet bowl.
Read more: How To Fix A Loose Fence Post
Step 2: Remove the Toilet
With the water supply turned off and the toilet emptied of water, you are now ready to proceed with the removal of the toilet. Removing the toilet is a critical step in addressing a loose toilet bowl, as it allows for a thorough inspection of the underlying components and facilitates the necessary repairs.
-
Disconnect the Water Supply Line: Start by disconnecting the water supply line from the bottom of the tank. Use an adjustable wrench to loosen the nut connecting the supply line to the tank. Have a small bucket or towel ready to catch any residual water that may drain from the line.
-
Remove the Caps and Nuts: Locate the caps covering the closet bolts at the base of the toilet. These caps are often made of plastic and can be pried off with a flathead screwdriver. Once the caps are removed, use the wrench to loosen and remove the nuts securing the toilet to the floor. It may be necessary to hold the bolts in place from inside the tank while loosening the nuts from below.
-
Lift and Remove the Toilet: With the nuts and closet bolts removed, carefully lift the toilet straight up to detach it from the flange and the wax ring seal. It's essential to approach this step with caution, as toilets can be heavy and awkward to maneuver. Enlist the help of a friend or family member if needed to safely lift and remove the toilet from its position.
-
Prepare the Toilet for Transport: Once the toilet is removed, place it on a protective surface, such as an old towel or cardboard, to prevent damage to the flooring or the toilet itself. Inspect the bottom of the toilet and the removed wax ring for any signs of damage or wear.
By following these steps, you can successfully remove the toilet from its position, allowing for a comprehensive assessment of the flange, wax ring, and surrounding floor. With the toilet removed, you are now prepared to inspect and address any issues contributing to the instability of the toilet bowl. This sets the stage for the subsequent repair steps, where you will work towards resolving the problem and restoring stability to the toilet installation.
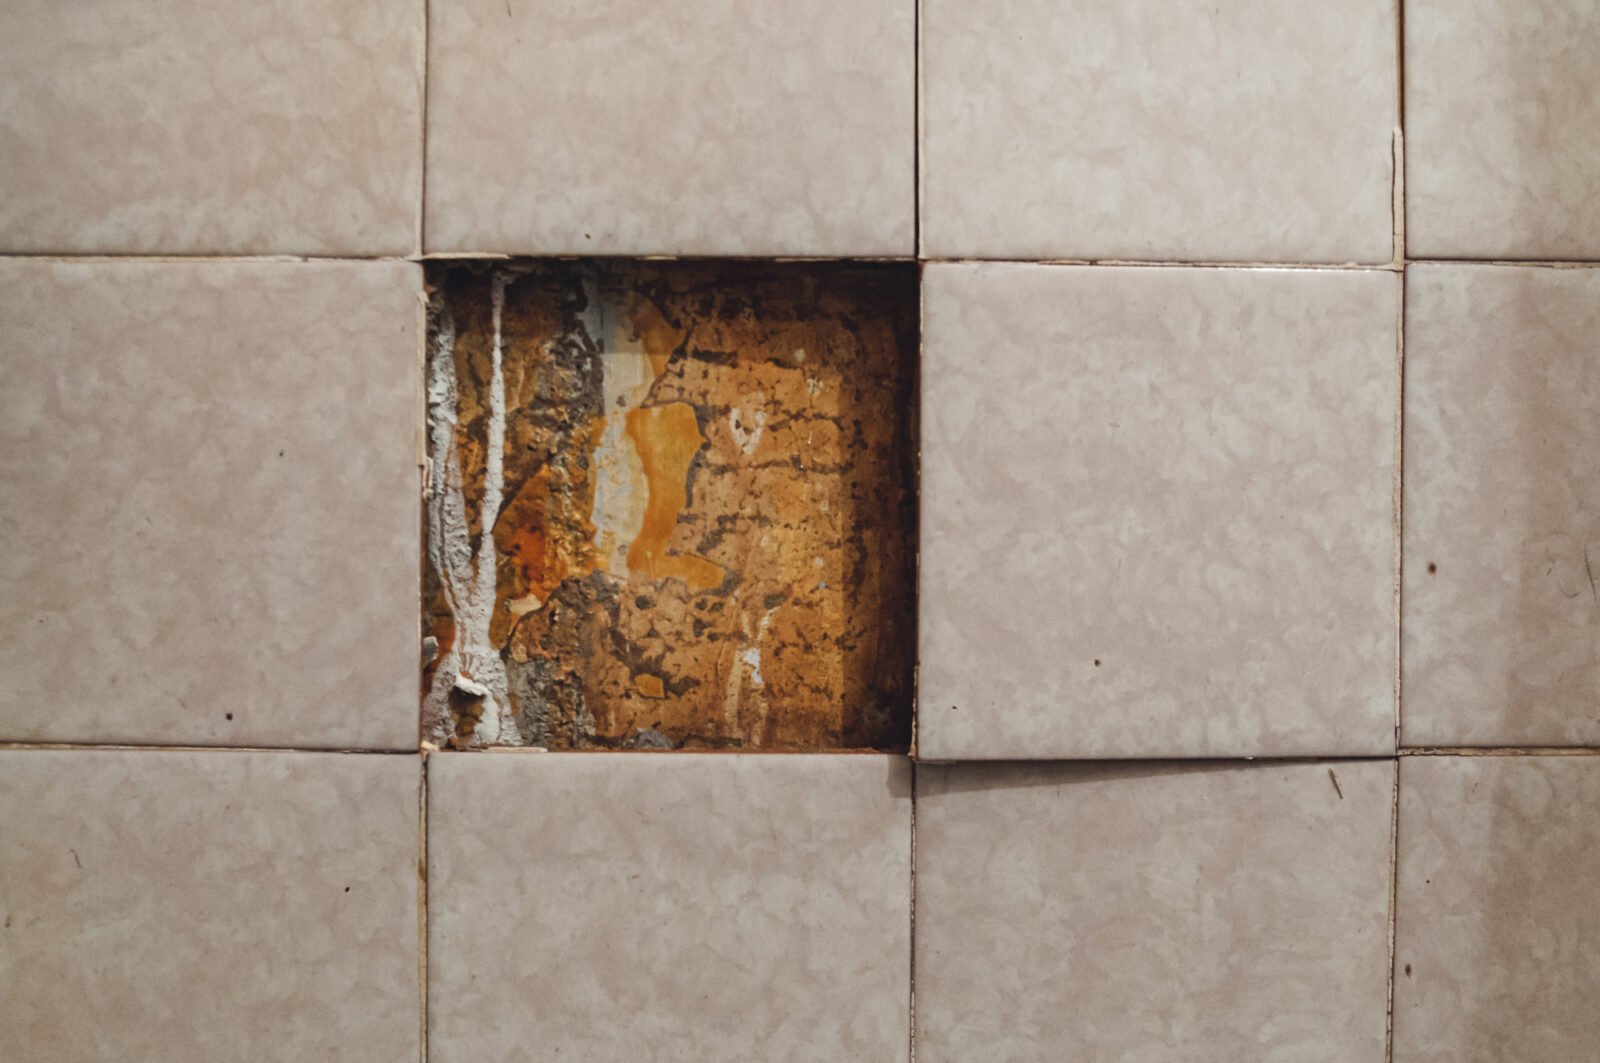
Step 3: Inspect the Flange and Floor
With the toilet successfully removed, the next crucial step in addressing a loose toilet bowl is to thoroughly inspect the flange and the condition of the flooring beneath it. The flange, a circular piece of plumbing hardware, serves as the connection point between the toilet and the waste pipe. It is essential to carefully examine the flange and the surrounding floor to identify any issues that may have contributed to the instability of the toilet.
Assessing the Flange:
Begin by closely examining the flange for signs of damage, corrosion, or misalignment. A damaged or broken flange can compromise the stability of the toilet and lead to leaks or rocking. Look for cracks, warping, or any indication of deterioration that may affect the flange's ability to securely anchor the toilet in place.
If the flange appears to be in good condition, check for proper alignment with the waste pipe. The flange should sit flush with the floor and be securely fastened to the subfloor or the underlying structure. Any misalignment or movement of the flange can result in an unstable toilet installation.
Inspecting the Floor:
In addition to examining the flange, it is essential to assess the condition of the flooring around the flange. Look for signs of water damage, rot, or deterioration that may have weakened the floor and compromised the stability of the toilet. Pay close attention to areas around the flange where water may have seeped through, potentially causing structural issues.
If the floor appears to be sound, check for levelness and stability. An uneven or deteriorated floor can contribute to the wobbling or rocking of the toilet. Use a level to determine if the floor surface is flat and even, as this will impact the reinstallation of the toilet and its long-term stability.
Read more: How To Fix A Leaking Toilet Bowl
Addressing Any Issues:
If any issues are identified during the inspection of the flange or the floor, it is crucial to address them before proceeding with the reinstallation of the toilet. Depending on the findings, repairs may involve reinforcing the subfloor, replacing damaged sections, or making adjustments to the flange to ensure a secure and stable foundation for the toilet.
By meticulously inspecting the flange and the floor, you can pinpoint any underlying issues that may have contributed to the instability of the toilet bowl. This thorough assessment sets the stage for targeted repairs and adjustments, laying the groundwork for a successful and long-lasting resolution to the problem of a loose toilet bowl.
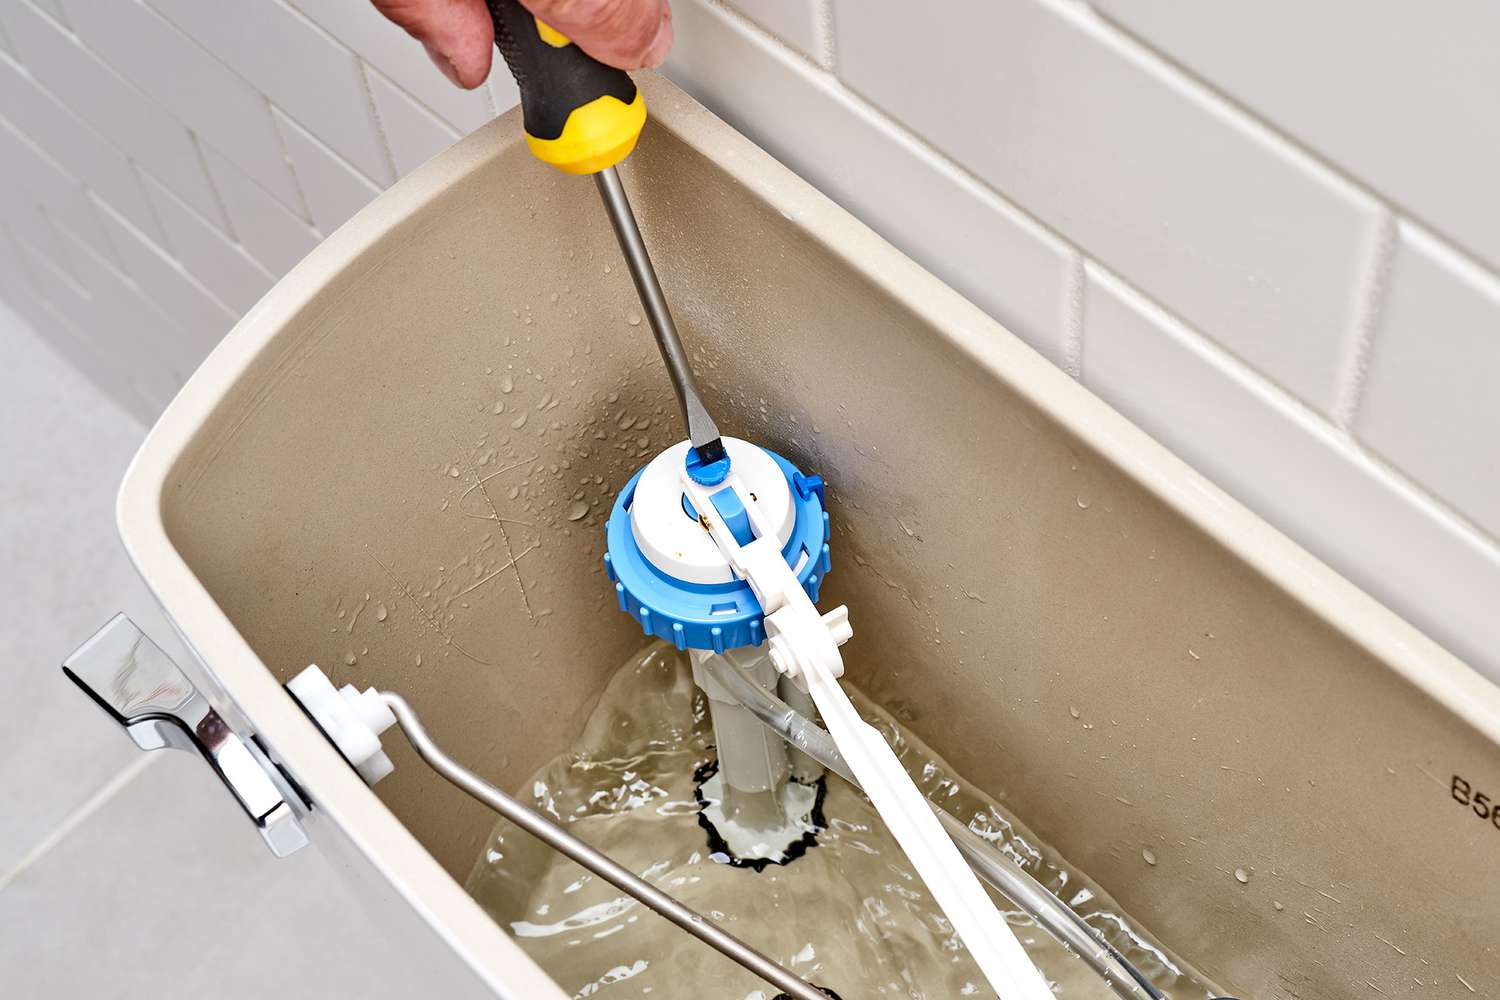
Step 4: Replace the Wax Ring
Replacing the wax ring is a critical step in addressing a loose toilet bowl and ensuring a secure and watertight seal between the toilet and the flange. The wax ring, positioned between the base of the toilet and the flange, plays a pivotal role in preventing water leaks and odors while maintaining the stability of the toilet installation.
To begin the process of replacing the wax ring, it is essential to remove the old wax ring and thoroughly clean the area to prepare for the installation of a new seal. Use a putty knife to carefully scrape off the residual wax from the flange and the bottom of the toilet. It's important to ensure that the surfaces are clean and free of any debris or old wax that could compromise the effectiveness of the new wax ring.
Once the area is clean and prepped, it's time to install the new wax ring. Select a high-quality wax ring that is compatible with your specific toilet model and the dimensions of the flange. Gently place the wax ring over the flange, ensuring that it is centered and positioned securely. The wax ring should form a complete seal around the flange, ready to receive the toilet.
With the new wax ring in place, carefully lift the toilet and position it directly over the flange, aligning it with the closet bolts. Lower the toilet onto the wax ring, applying even pressure to create a secure and effective seal. It's important to ensure that the toilet is properly aligned and seated on the flange, as this will impact the stability and functionality of the installation.
Once the toilet is in position, press down firmly to compress the wax ring and create a watertight seal. This step is crucial for establishing a secure connection between the toilet and the flange, preventing any potential leaks or instability. With the wax ring successfully replaced, you have taken a significant stride towards resolving the issue of a loose toilet bowl and restoring the integrity of the installation.
By meticulously following the steps to replace the wax ring, you have addressed a key component contributing to the instability of the toilet. The new wax ring provides a reliable seal, ensuring that the toilet is securely anchored to the flange and minimizing the risk of water leaks or odors. With the wax ring replaced, you are now prepared to proceed with the reinstallation of the toilet, bringing you closer to a stable and fully functional toilet fixture.
Step 5: Reinstall the Toilet
With the wax ring successfully replaced and the flange and floor thoroughly inspected and prepared, the next crucial step in addressing a loose toilet bowl is the careful reinstallation of the toilet. This process involves securely positioning the toilet over the flange, aligning it with the closet bolts, and ensuring a stable and level fit to prevent future wobbling or movement.
To begin the reinstallation, carefully lift the toilet and position it directly over the flange, taking care to align it with the closet bolts protruding from the floor. It's important to approach this step with caution and precision, as the toilet can be heavy and awkward to maneuver. Enlist the help of a friend or family member if needed to safely position the toilet over the flange.
Once the toilet is aligned with the closet bolts and positioned directly over the flange, gently lower it onto the wax ring and the flange. Apply even pressure to the base of the toilet to ensure that it forms a secure and stable connection with the wax ring and the flange. It's crucial to verify that the toilet is seated evenly and securely, as any misalignment at this stage can lead to future instability and potential leaks.
After the toilet is in position, check its alignment and stability using a level. Place the level across the bowl of the toilet in both directions to ensure that it is sitting evenly and squarely on the floor. Adjust the position as needed to achieve a level fit, as this will contribute to the long-term stability and functionality of the toilet installation.
With the toilet securely in place and level, it's time to reattach the nuts to the closet bolts. Use an adjustable wrench to tighten the nuts, ensuring that the toilet is firmly anchored to the floor. It's important to exercise caution and avoid over-tightening, as this can lead to damage or cracking of the porcelain base.
Once the nuts are securely fastened, place the plastic caps over the closet bolts to provide a finished and streamlined appearance. These caps not only contribute to the aesthetic appeal of the toilet installation but also serve to protect the bolts and provide a smooth surface.
By meticulously following the steps to reinstall the toilet, you have taken a significant stride towards resolving the issue of a loose toilet bowl and restoring stability to the fixture. The careful alignment, secure fastening, and level fit of the toilet contribute to a durable and reliable installation, ensuring that the toilet remains stable and functional for years to come.
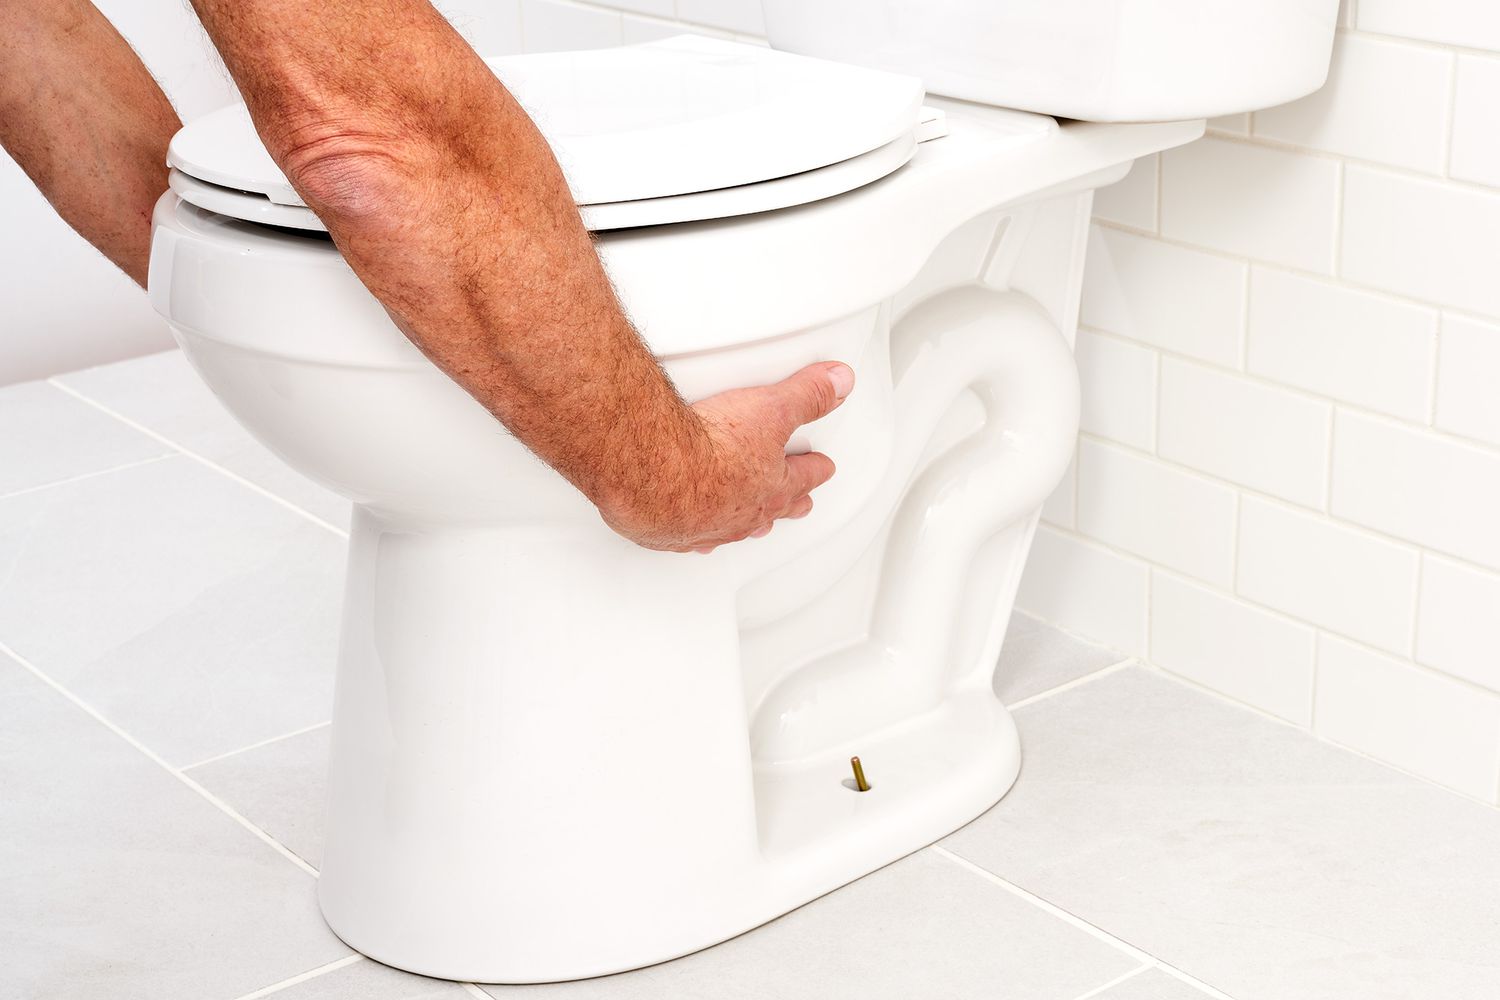
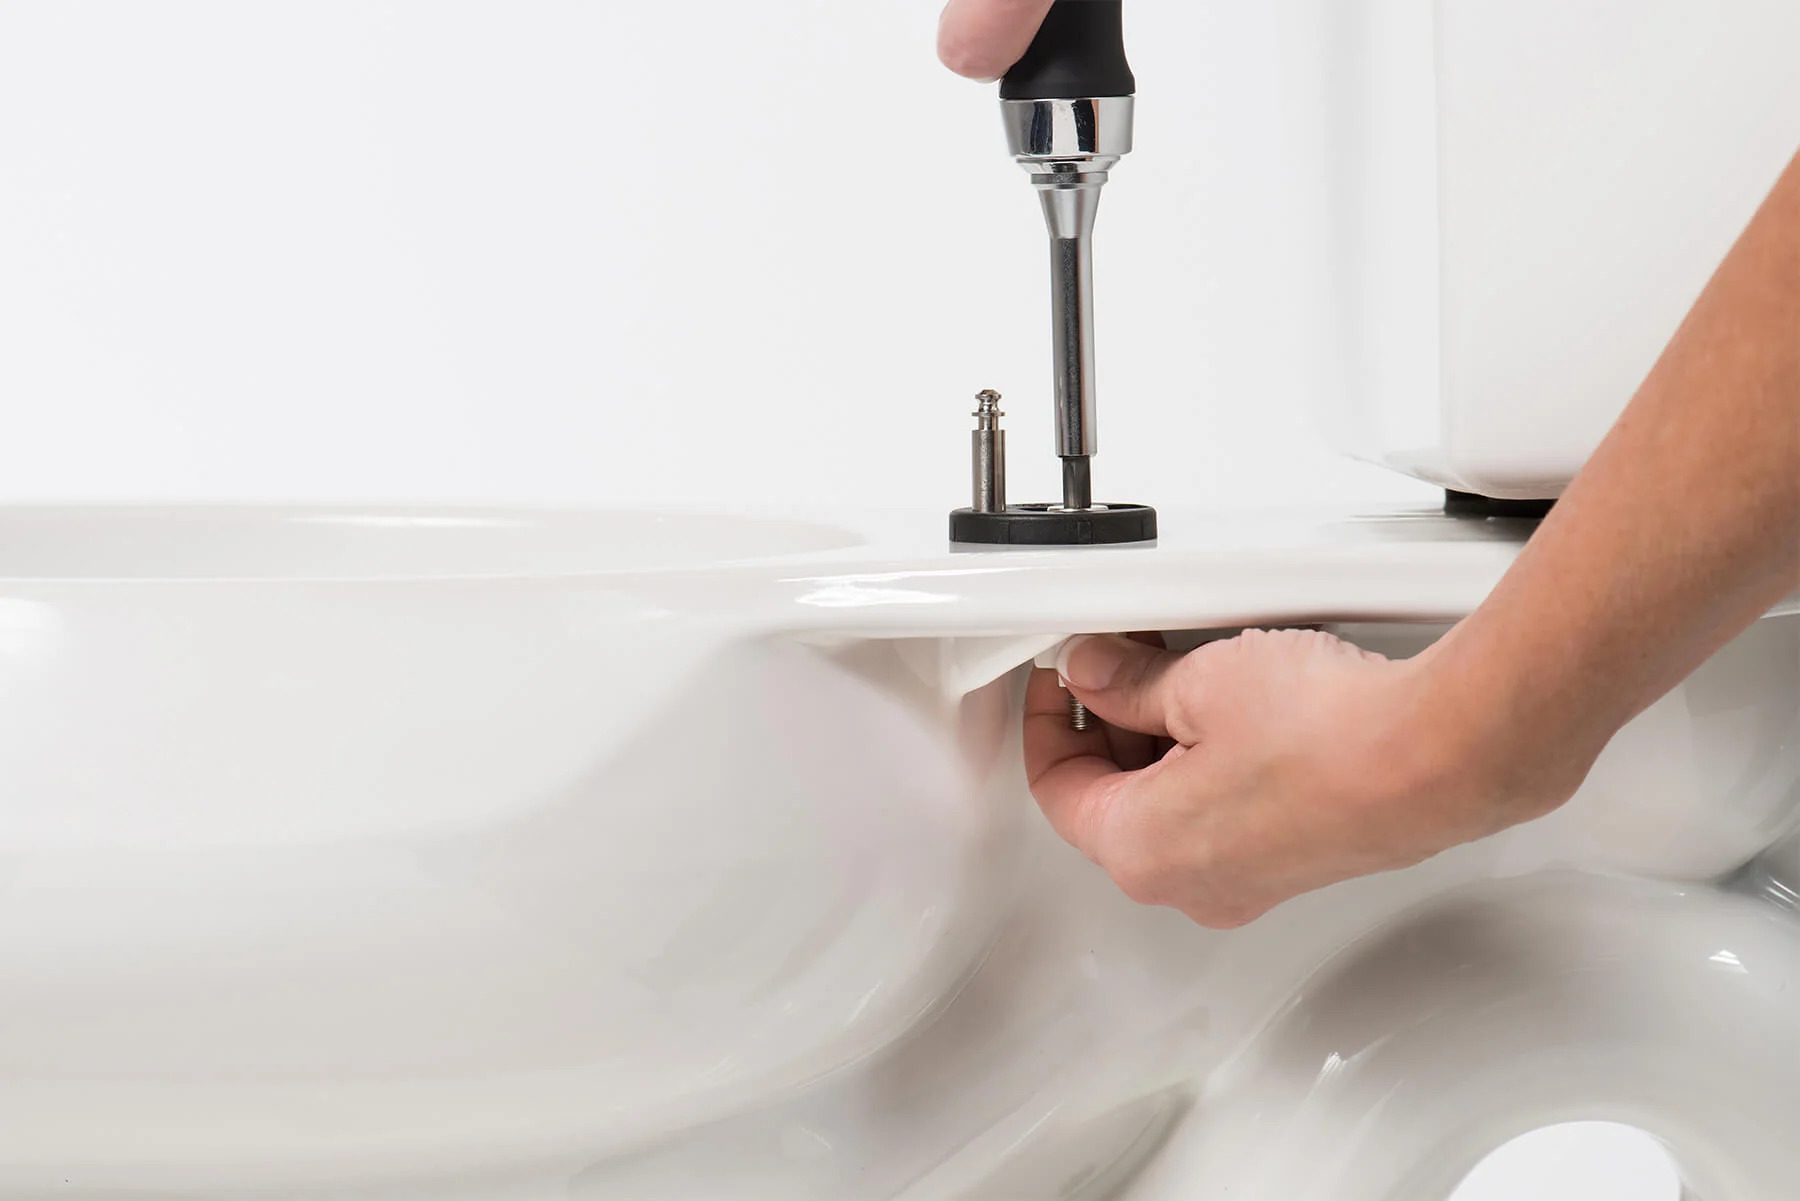
Step 6: Secure the Toilet to the Floor
Securing the toilet to the floor is a critical step in ensuring the long-term stability and functionality of the fixture. By firmly anchoring the toilet to the floor, you can minimize the risk of wobbling, rocking, or potential water leaks, providing a secure and reliable installation for years to come.
To begin the process of securing the toilet to the floor, it's essential to verify that the toilet is sitting evenly and squarely on the floor. Using a level, check the alignment of the toilet in both directions to ensure that it is stable and level. Any unevenness or instability at this stage can lead to future issues, making it crucial to address any discrepancies before proceeding.
Once the alignment is confirmed, it's time to secure the toilet in place using the closet bolts and nuts. Position the plastic caps over the closet bolts and carefully lower them into the slots on the base of the toilet. Gently press down to ensure that the bolts are seated securely and aligned with the corresponding holes in the base of the toilet.
With the closet bolts in place, use an adjustable wrench to tighten the nuts, securing the toilet to the floor. It's important to exercise caution and avoid over-tightening, as this can lead to damage to the porcelain base of the toilet. Aim for a firm and secure fit that prevents any movement or rocking of the toilet while avoiding excessive force that could compromise the integrity of the fixture.
After the nuts are securely fastened, trim any excess length from the closet bolts using a hacksaw if necessary. The bolts should be trimmed to a length that allows the plastic caps to be placed over them without protruding excessively, providing a clean and finished appearance to the toilet installation.
Once the closet bolts are trimmed, place the plastic caps over them to provide a polished and streamlined finish. These caps not only contribute to the aesthetic appeal of the toilet but also serve to protect the bolts and provide a smooth surface, minimizing the risk of injury or snagging.
By meticulously following the steps to secure the toilet to the floor, you have taken a significant stride towards ensuring the stability and functionality of the fixture. The secure anchoring and level fit of the toilet contribute to a durable and reliable installation, providing peace of mind and long-term satisfaction with your repaired toilet.
Use a wrench to tighten the bolts at the base of the toilet. If the bolts are rusted or damaged, replace them with new ones. Check the wax ring and replace it if it’s worn out.
Read more: How To Fix A Loose Toilet Paper Holder
Step 7: Turn On the Water Supply
With the toilet securely reinstalled and anchored to the floor, the final step in addressing a loose toilet bowl is to turn on the water supply and restore functionality to the fixture. This pivotal step marks the culmination of the repair process, allowing you to verify the effectiveness of the repairs and ensure that the toilet is fully operational.
To turn on the water supply, locate the shut-off valve on the wall behind the toilet. This valve, typically a small knob or lever, controls the flow of water to the toilet. Turn the valve in a counterclockwise direction to gradually restore the water supply to the fixture. It's important to turn the valve slowly and attentively, allowing the water to flow into the tank and the bowl without causing any sudden surges or pressure buildup.
As the water supply is restored, listen for any unusual sounds or signs of water leakage. It's advisable to closely monitor the area around the base of the toilet and the shut-off valve for any indications of water seepage. Additionally, check the tank and the bowl for proper filling and functioning, ensuring that the water flow is consistent and without any irregularities.
Once the water supply is fully restored and the toilet is functioning as expected, flush the toilet to verify that the flushing mechanism is operating smoothly and effectively. Observe the flushing process and listen for any unusual noises or issues that may indicate underlying problems. It's essential to ensure that the toilet is flushing properly and that the water is draining and refilling as intended.
After confirming that the toilet is functioning as expected, inspect the base of the toilet for any signs of water leakage or seepage. It's important to verify that the new wax ring and the reinstalled toilet are effectively preventing any water from escaping and causing damage to the surrounding floor. A thorough visual inspection can provide reassurance that the repairs have been successful and that the toilet is now stable and leak-free.
By turning on the water supply and verifying the functionality of the toilet, you have completed the comprehensive process of addressing a loose toilet bowl. The successful restoration of the water supply and the proper functioning of the toilet signify the effective resolution of the issue, providing confidence in the stability and reliability of the repaired fixture.
Conclusion
In conclusion, addressing a loose toilet bowl is a manageable task that can be accomplished with the right tools, materials, and a systematic approach. By following the step-by-step process outlined in this guide, you can effectively resolve the issue of a wobbly or unstable toilet, restoring stability and functionality to this essential bathroom fixture.
Throughout the repair process, careful attention to detail and thorough inspection of the flange, wax ring, and floor have been instrumental in identifying and addressing the underlying issues contributing to the instability of the toilet. The meticulous replacement of the wax ring, along with the secure reinstallation and anchoring of the toilet to the floor, has ensured a durable and reliable repair that minimizes the risk of future wobbling or water leaks.
By turning on the water supply and verifying the proper functioning of the toilet, you have completed the comprehensive repair journey, culminating in the successful restoration of stability and reliability to the fixture. The careful alignment, secure fastening, and level fit of the toilet contribute to a durable and reliable installation, providing peace of mind and long-term satisfaction with your repaired toilet.
It's important to note that while fixing a loose toilet bowl may seem daunting at first, the process is well within the capabilities of a determined DIY enthusiast or a homeowner looking to tackle household repairs. With the right tools, materials, and a methodical approach, you can address this common issue and ensure a secure and functional bathroom fixture.
In the event that you encounter challenges beyond your comfort level or expertise, it's always advisable to seek professional assistance to ensure the proper resolution of the issue. Additionally, regular maintenance and inspection of the toilet and its components can help prevent future instances of instability, prolonging the lifespan of the fixture and minimizing the need for extensive repairs.
By taking proactive steps to address a loose toilet bowl, you can maintain a safe, functional, and aesthetically pleasing bathroom environment, enhancing the overall comfort and convenience of your home. With the knowledge and confidence gained from this guide, you are well-equipped to tackle this common household issue and ensure a stable and reliable toilet installation for years to come.
Frequently Asked Questions about How To Fix A Loose Toilet Bowl
Was this page helpful?
At Storables.com, we guarantee accurate and reliable information. Our content, validated by Expert Board Contributors, is crafted following stringent Editorial Policies. We're committed to providing you with well-researched, expert-backed insights for all your informational needs.
0 thoughts on “How To Fix A Loose Toilet Bowl”