Articles
How To Fix A Toilet Flange
Modified: February 11, 2024
Looking for articles on how to fix a toilet flange? Explore our informative guides and step-by-step tutorials to get your toilet back in working order.
(Many of the links in this article redirect to a specific reviewed product. Your purchase of these products through affiliate links helps to generate commission for Storables.com, at no extra cost. Learn more)
Introduction
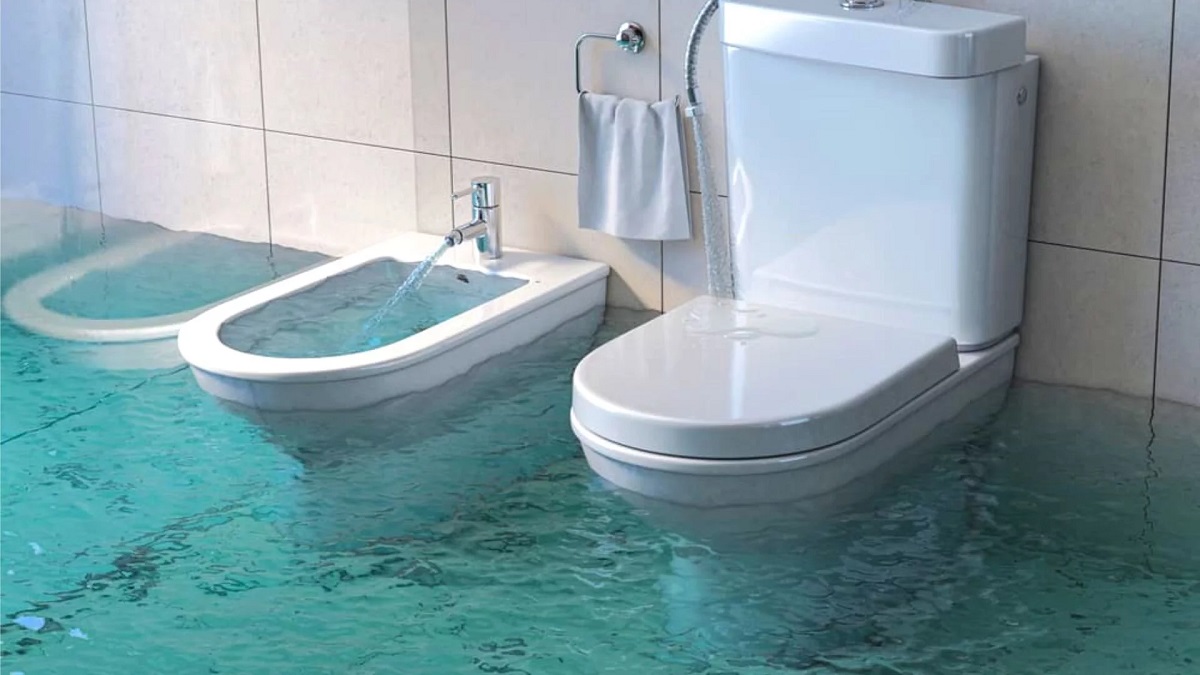
The toilet flange is a crucial component in any residential or commercial bathroom. It is the round disc that connects the toilet bowl to the floor and ensures a secure and watertight seal. Over time, the flange may become damaged or worn out, leading to leaks, wobbling toilets, or even complete toilet failure. In such cases, it becomes essential to fix or replace the flange to maintain the functionality and integrity of the toilet.
Fixing a toilet flange does not necessarily require professional plumbing skills. With the right tools, materials, and a step-by-step approach, you can confidently tackle this DIY project. This article will guide you through the process of fixing a toilet flange, from identifying the signs of a damaged flange to reinstalling the toilet after repairs. So, let’s dive in and learn how to fix a toilet flange like a pro!
Key Takeaways:
- Repairing or replacing a damaged toilet flange is a manageable DIY project that can be accomplished with the right tools and materials. By following the step-by-step process, you can restore the integrity and functionality of your toilet without the need for professional plumbing services.
- Identifying the signs of a damaged flange, inspecting for damage, and properly reinstalling the toilet are crucial steps in fixing a toilet flange. Testing for leaks after the repair or replacement ensures a watertight and secure connection, allowing you to enjoy a properly functioning toilet.
Read more: What Is A Toilet Flange
Understanding the Toilet Flange
Before we jump into the process of fixing a toilet flange, it is essential to understand what exactly a flange is and its role in the functioning of a toilet.
The toilet flange, also known as a closet flange or closet bend, is the pipe fitting that connects the toilet bowl to the sewage pipe. It is typically made of PVC or cast iron and is secured to the floor using screws or bolts.
The flange has two primary functions. First, it acts as a secure base for the toilet bowl, keeping it firmly in place. Second, it provides a watertight seal to prevent leaks and odors from escaping into the bathroom.
The flange has a circular opening that matches the shape of the toilet bowl’s base. This allows the toilet to sit flush against the flange, creating a tight connection. The flange also extends above the floor level to accommodate the wax ring, a crucial component that forms a watertight seal between the toilet and the sewage pipe.
Understanding the anatomy of a toilet flange is important for diagnosing issues and making the necessary repairs. Now that we have a basic understanding of the toilet flange, let’s move on to learning about the signs of a damaged flange.
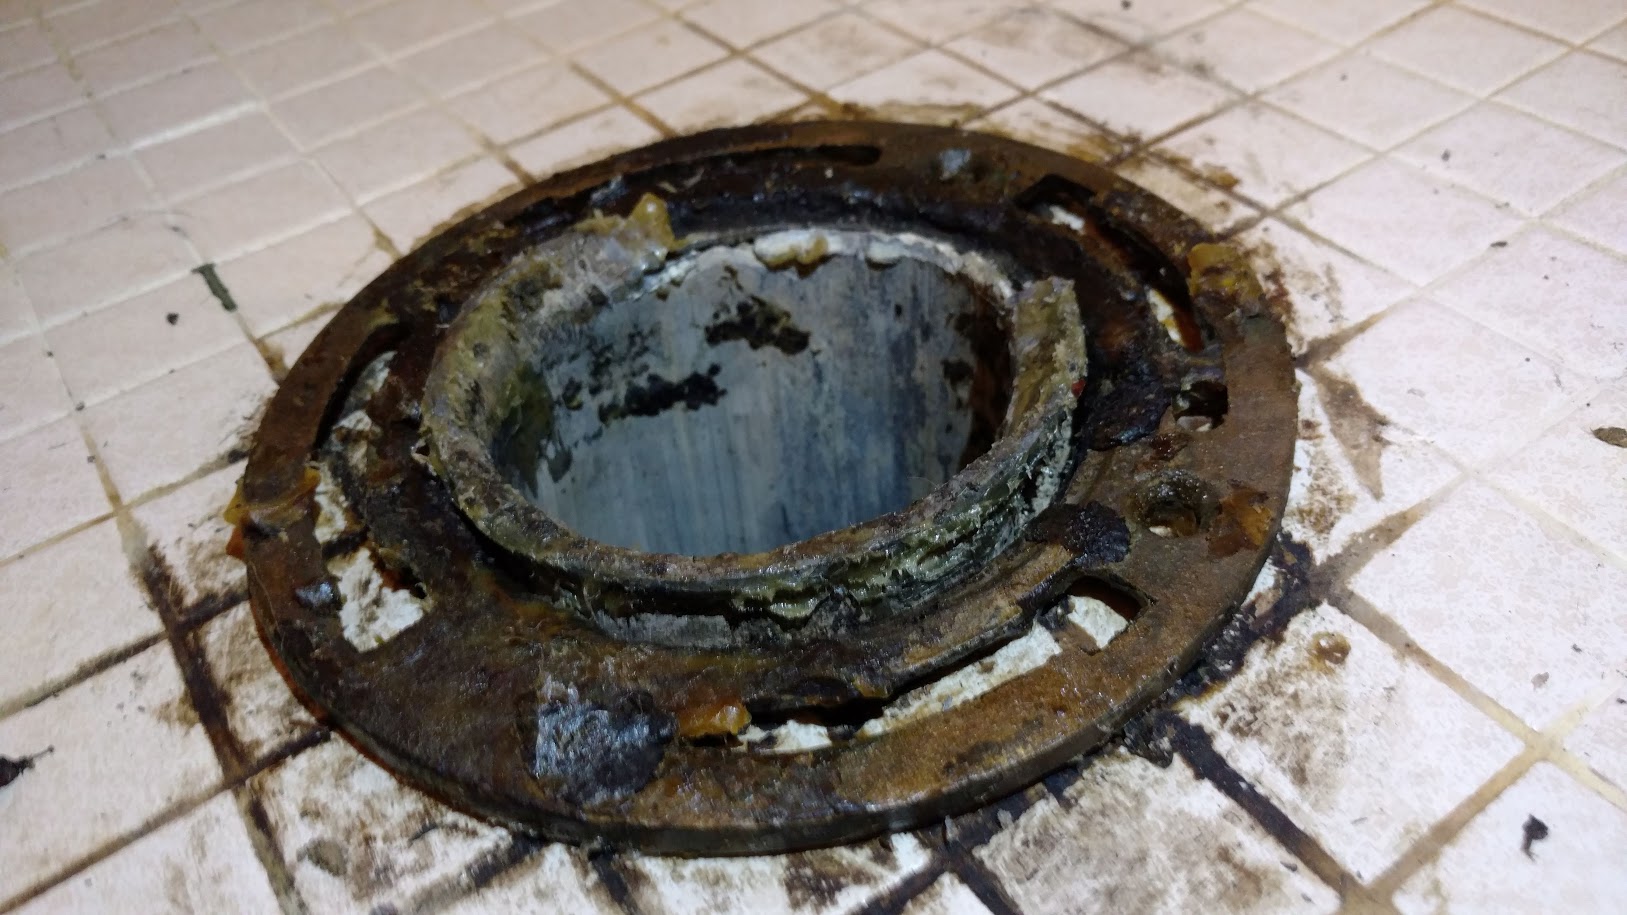
Signs of a Damaged Toilet Flange
Identifying the signs of a damaged toilet flange is crucial in determining whether it needs to be repaired or replaced. Here are some common signs that indicate a problem with the flange:
- Leaking water: If you notice water pooling around the base of the toilet, it could be a sign of a damaged flange. The flange may have cracks or breaks, causing water to seep out.
- Loose or wobbly toilet: A damaged flange may not provide a stable base for the toilet, resulting in a wobbly seat or bowl. This can be a safety hazard and should be addressed promptly.
- Foul odors: A damaged flange can cause sewer gases to escape into the bathroom, leading to unpleasant odors. If you notice a persistent smell near the toilet, it may be a sign of a faulty flange.
- Visible damage: Inspect the flange visually for any visible signs of damage, such as cracks, breaks, or corrosion. These issues can compromise the integrity of the flange and require immediate attention.
- Uneven toilet installation: If the toilet bowl sits unevenly or rocks when pressure is applied, it could be due to an improperly installed or damaged flange.
- Difficulty flushing: A damaged flange may affect the flushing mechanism of the toilet, resulting in weak or incomplete flushes. If you notice consistent issues with flushing, it may be a sign that the flange needs repair.
If you observe any of these signs, it is essential to address the problem promptly to prevent further damage and ensure the proper functioning of your toilet. In the next section, we will discuss the tools and materials you will need to fix a toilet flange.
Tools and Materials Needed
Before you begin repairing or replacing a toilet flange, it is important to gather all the necessary tools and materials. Here is a list of items you will need:
Tools:
- Adjustable wrench
- Screwdriver
- Hacksaw or reciprocating saw
- Putty knife
- Plunger
- Socket wrench
- Plumbers’ tape
Read more: How To Install Toilet Flange
Materials:
- New toilet flange
- Replacement wax ring
- Flange repair kit (if opting for repairs)
- Plumber’s epoxy (if needed)
- Caulk (for sealing)
Having the right tools and materials will make the process smoother and more efficient. Make sure to gather everything before you start the flange repair or replacement. Additionally, it is always a good practice to wear gloves and safety goggles when working with plumbing materials.
With the necessary tools and materials at hand, you are now ready to proceed with fixing your toilet flange. In the following steps, we will guide you through the process of repairing or replacing the flange. It is important to note that the specific steps may vary depending on the type of flange and plumbing setup you have, so always refer to the manufacturer’s instructions when available.
Step 1: Shut Off the Water
Before you begin working on the toilet flange, it is essential to shut off the water supply. This will prevent any accidental water flow and make the process safer and more manageable.
The water shut-off valve is usually located behind or near the toilet. Look for a small, knob-shaped valve connected to a water pipe. Turn it clockwise (right) to close the valve and stop the water flow.
If your toilet does not have an individual shut-off valve, you can shut off the main water supply to your house. The main valve is typically located near the water meter or where the water supply enters your home. Turn the valve clockwise to shut off the water to the entire house.
Once the water supply is shut off, flush the toilet to drain any remaining water in the tank and bowl. You can use a plunger to remove excess water if needed. Emptying the toilet will make it easier to remove and work on.
Remember, it is important to ensure that there is no water flowing into the toilet before proceeding to the next steps. This will minimize the risk of water damage and allow you to work on the toilet flange more effectively.
In the next step, we will cover the process of emptying the toilet bowl.
Step 2: Empty the Toilet Bowl
Now that the water supply is shut off, it’s time to empty the toilet bowl. This step is necessary to avoid any spills or mess during the flange repair or replacement process.
Start by using a plunger to force out as much water as possible from the toilet bowl. Place the plunger over the drain hole at the bottom of the bowl and vigorously push and pull to create suction. This should help dislodge any remaining water.
If the plunger doesn’t completely empty the bowl, use a sponge or a bucket to remove the remaining water. Absorb as much water as possible using the sponge and wring it out into a bucket. Repeat this process until the bowl is empty.
Dispose of the water properly, either by pouring it into a sink or drain, or by dumping it outside away from any living areas.
Emptying the toilet bowl will make it easier to detach the toilet from the floor without the risk of water spillage. It will also prevent any water damage to the surrounding area during the flange repair or replacement process.
Once the toilet bowl is empty, we can move on to the next step, which involves removing the toilet itself.
Step 3: Remove the Toilet
With the toilet bowl empty, it’s time to remove the toilet from its position. Removing the toilet will allow you to access the toilet flange and inspect it for damage.
Here are the steps to remove the toilet:
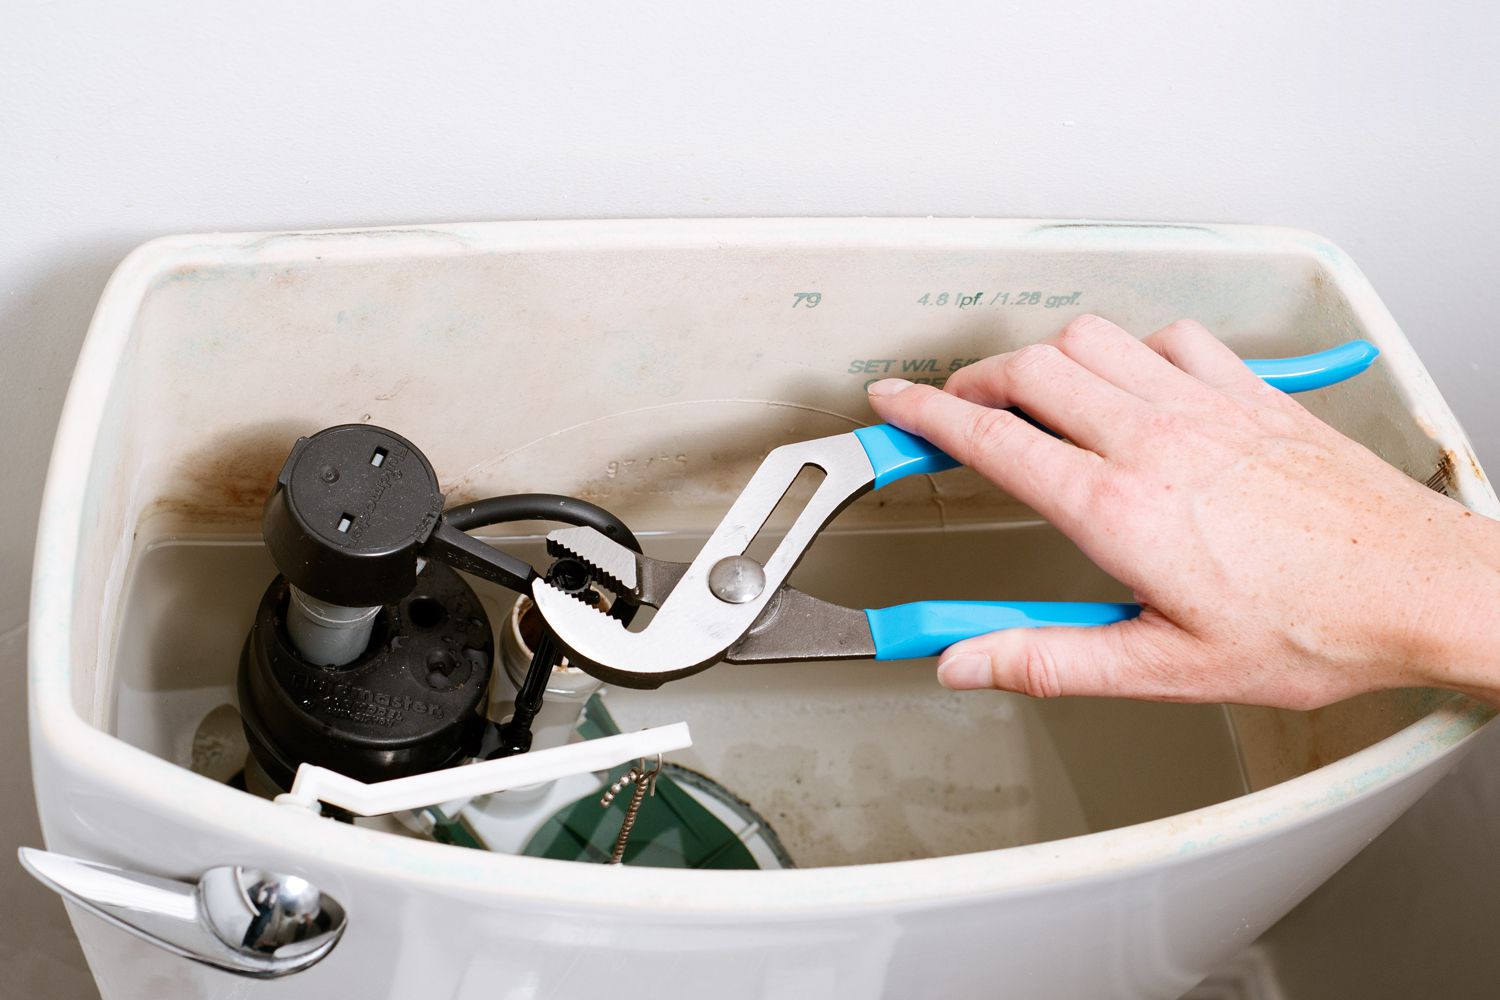
- Disconnect the water supply: Start by disconnecting the water supply line from the bottom of the toilet tank. Use an adjustable wrench to loosen the nut connecting the supply line to the fill valve. Once loosened, you should be able to lift the supply line off the fill valve.
- Remove the tank lid and flush: Lift the tank lid and place it in a safe location. Then, press down on the flush lever to flush the toilet. This will remove any remaining water in the tank and prevent spills during the removal process.
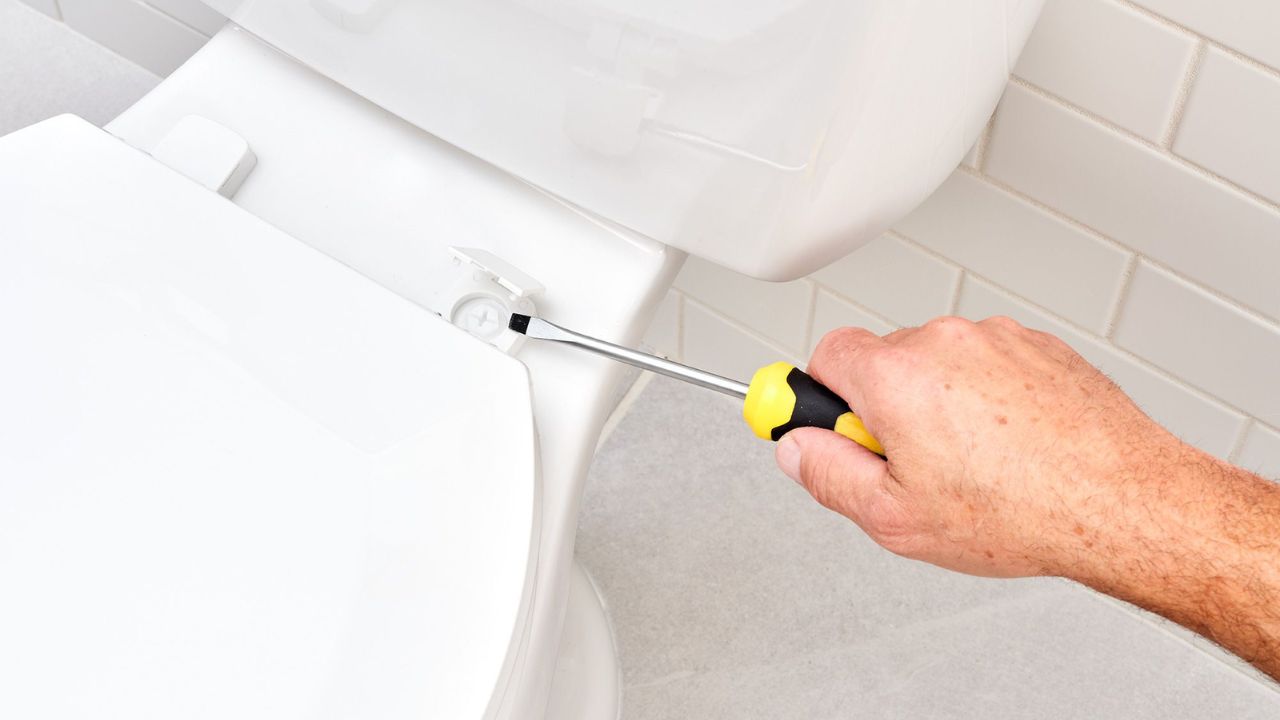
- Disconnect the tank from the bowl: Locate the bolts at the bottom of the tank that connect it to the toilet bowl. Use a screwdriver or a socket wrench to loosen and remove the nuts securing the bolts. Once the nuts are removed, lift the tank straight up and set it aside.
- Separate the bowl from the floor: Now, focus on the toilet bowl. Look for the nuts at the base of the toilet bowl that secure it to the floor bolts. Loosen and remove these nuts using a wrench or pliers. Once the nuts are off, carefully lift the bowl straight up to detach it from the floor.
Be cautious when lifting and carrying the toilet as it can be heavy and cumbersome. It’s a good idea to have someone assist you during this step to ensure a safe removal process.
Once the toilet is removed, place it on a protective surface or cover it with a plastic bag to prevent any mess or damage. With the toilet out of the way, you can now proceed to inspect the toilet flange for any damage or issues.
In the next step, we will discuss how to inspect the flange for damage.
Read more: How To Remove Old Toilet Flange
Step 4: Inspect the Flange for Damage
Now that the toilet is removed, it’s time to inspect the toilet flange for any signs of damage or wear. This step is crucial in determining the extent of the flange issue and what repairs or replacements may be required.
Here’s how to inspect the flange:
- Inspect the flange for cracks or breaks: Carefully examine the flange for any visible signs of damage. Look for cracks, breaks, or corrosion that may have compromised the integrity of the flange. Pay close attention to the area where the toilet bolts attach to the flange, as this is a common area for damage to occur.
- Check the flange level: Place a level on top of the flange to ensure it is level and not tilted in any direction. A tilted or uneven flange can result in an improper seal between the toilet and the sewage pipe, leading to leaks and instability.
- Inspect the wax ring: Take a look at the wax ring that was previously sealing the toilet to the flange. Look for any signs of damage or wear, such as cracks or a flattened shape. If the wax ring is in poor condition, it is recommended to replace it with a new one.
If you notice any significant damage or issues with the flange, it may be necessary to replace it completely. However, if the damage is minor, you may be able to repair it using a flange repair kit or plumber’s epoxy. The course of action will depend on the severity of the damage and your comfort level with DIY repairs.
Once you have assessed the condition of the flange, you can move on to the next step, which involves repairing or replacing the flange.
Step 5: Repair or Replace the Flange
After inspecting the toilet flange and determining the extent of the damage, it’s time to decide whether you need to repair or replace the flange. The course of action will depend on the severity of the damage and your preferred approach.
If the flange has minor damage, such as a small crack or corrosion, you may be able to repair it using a flange repair kit or plumber’s epoxy. These products are designed to provide a temporary or permanent fix, depending on the specific kit or epoxy you choose.
To repair the flange using a repair kit, follow the instructions provided with the kit. Typically, the process involves cleaning the flange surface, applying adhesive or epoxy, and affixing the repair plate over the damaged area. This will reinforce the flange and restore its structural integrity.
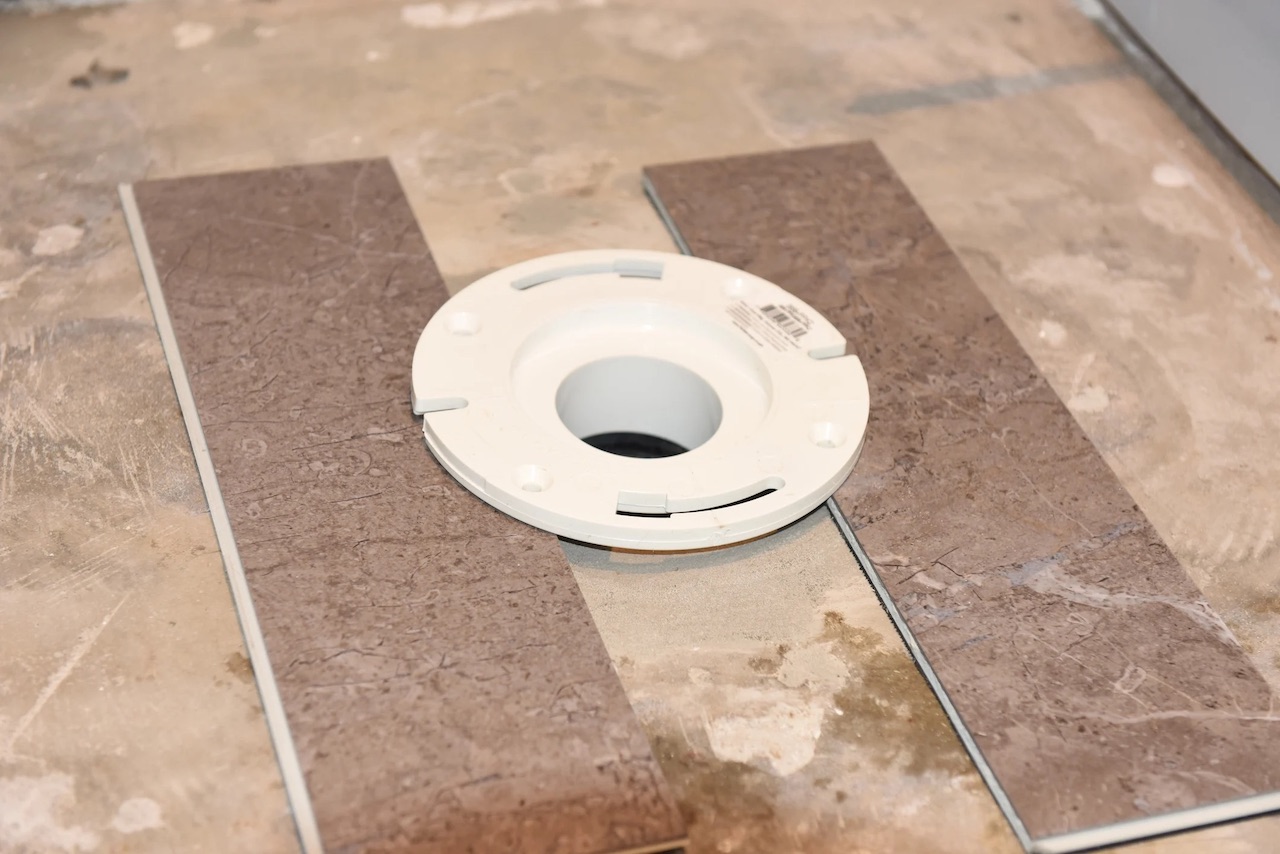
If the damage to the flange is significant or if you prefer a more long-term solution, it may be best to replace the flange entirely. To replace the flange, you will need to remove the old flange from the floor using a wrench or pliers. Once the old flange is removed, you can install a new flange in its place.
When choosing a replacement flange, consider using a PVC or cast iron flange that matches the dimensions and configuration of the original flange. This will ensure a proper fit and make the installation process easier. Your local hardware store or home improvement center should have various options available.
Whether you choose to repair or replace the flange, make sure to follow the manufacturer’s instructions carefully and take the recommended safety precautions. This will help ensure a successful repair or replacement and minimize the risk of further damage.
Once the flange repair or replacement is completed, you can proceed to the next step, which involves installing the new flange.
When replacing a toilet flange, be sure to use a wax ring with a rubber sleeve to create a watertight seal between the flange and the toilet. This will prevent leaks and ensure a secure fit.
Step 6: Install the New Flange
With the damaged flange repaired or replaced, it’s time to install the new flange. Proper installation of the flange is crucial to ensure a secure and watertight connection between the toilet bowl and the sewage pipe.
Here’s how to install the new flange:
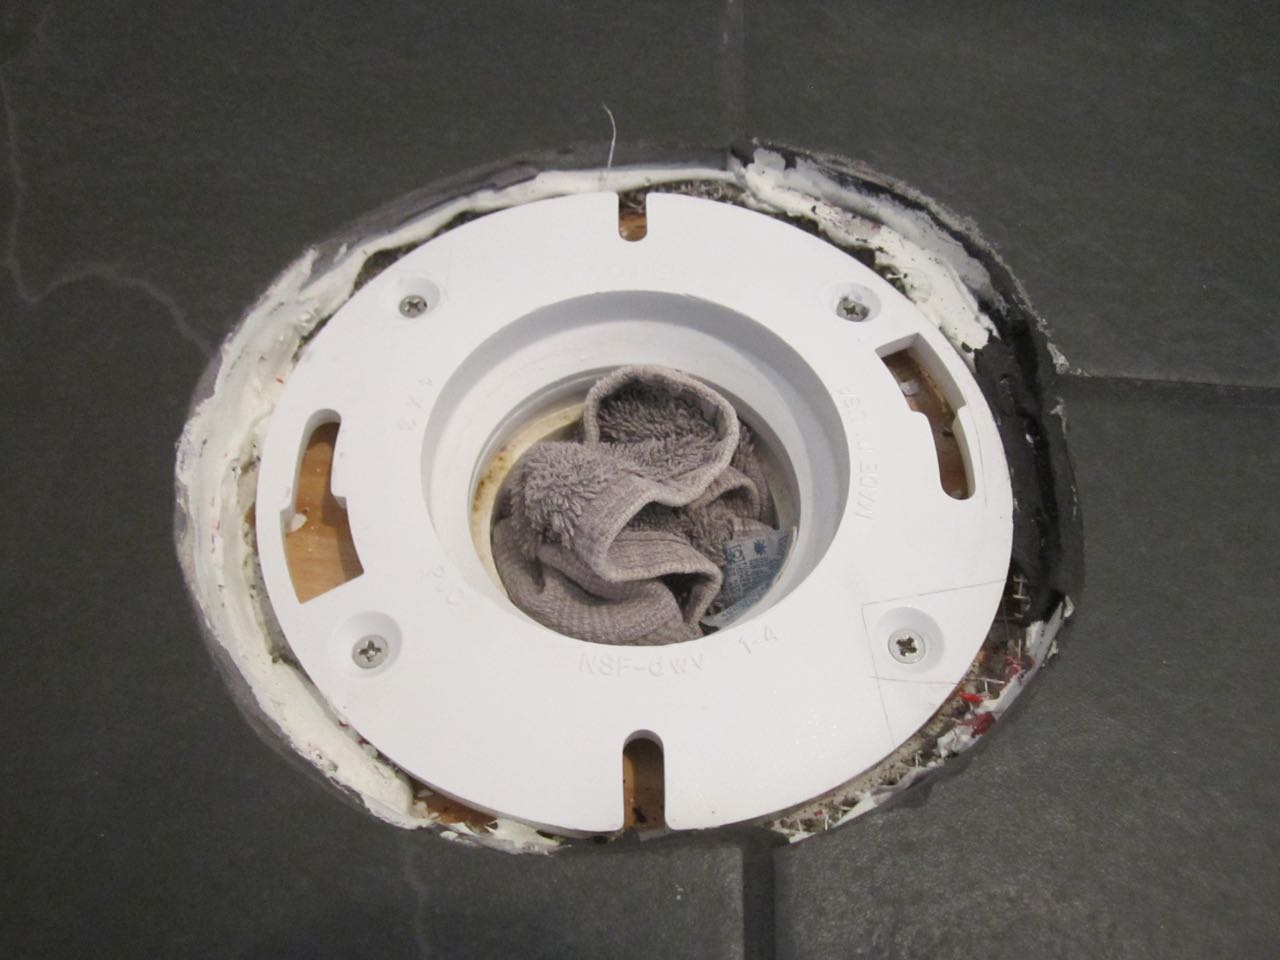
- Clean the flange area: Start by cleaning the area around the flange. Remove any debris, old wax ring remnants, or adhesive that may interfere with the installation.
- Position the new flange: Carefully place the new flange over the drainage pipe, ensuring that it is aligned properly. The flange should sit flush with the floor and have the same orientation as the previous flange.
- Secure the flange: Once the new flange is in position, secure it to the floor using screws or bolts. Tighten the screws or bolts evenly to ensure a stable and secure attachment.
- Apply plumber’s tape: Wrap plumber’s tape around the threads of the floor bolts that extend upwards from the flange. This will help create a watertight seal and prevent leaks.
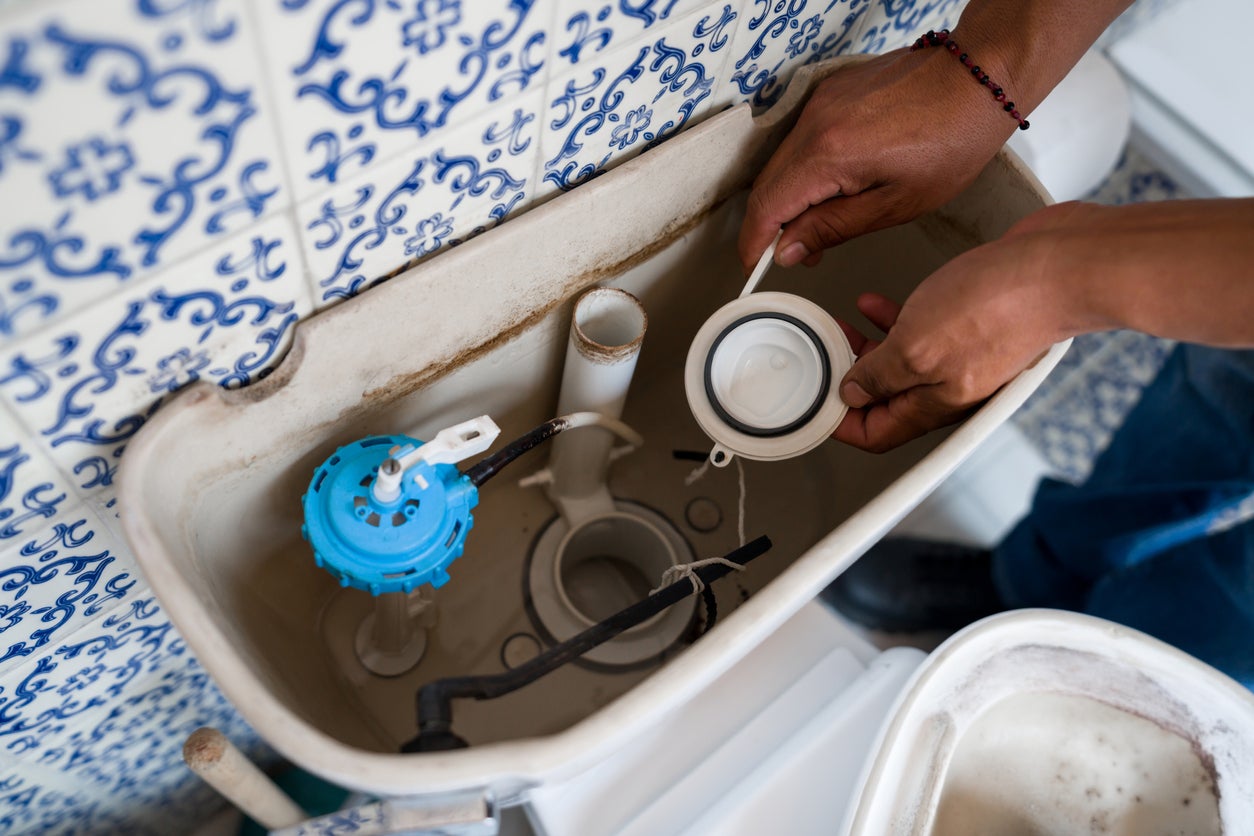
- Install a new wax ring: Place a new wax ring directly on top of the flange. Ensure that it is centered and properly aligned with the flange opening. The wax ring creates a seal between the toilet base and the flange, preventing water leaks.
Make sure to follow the manufacturer’s instructions when installing the new flange and wax ring. Different flanges and wax rings may have specific guidelines that you need to adhere to for optimal performance.
With the new flange securely installed, you are now ready to move on to the next step, which involves reinstalling the toilet.
Step 7: Reinstall the Toilet
Now that the new flange is installed and the wax ring is in place, it’s time to reinstall the toilet. Properly reinstalling the toilet will ensure a secure and leak-free connection to the flange.
Follow these steps to reinstall the toilet:
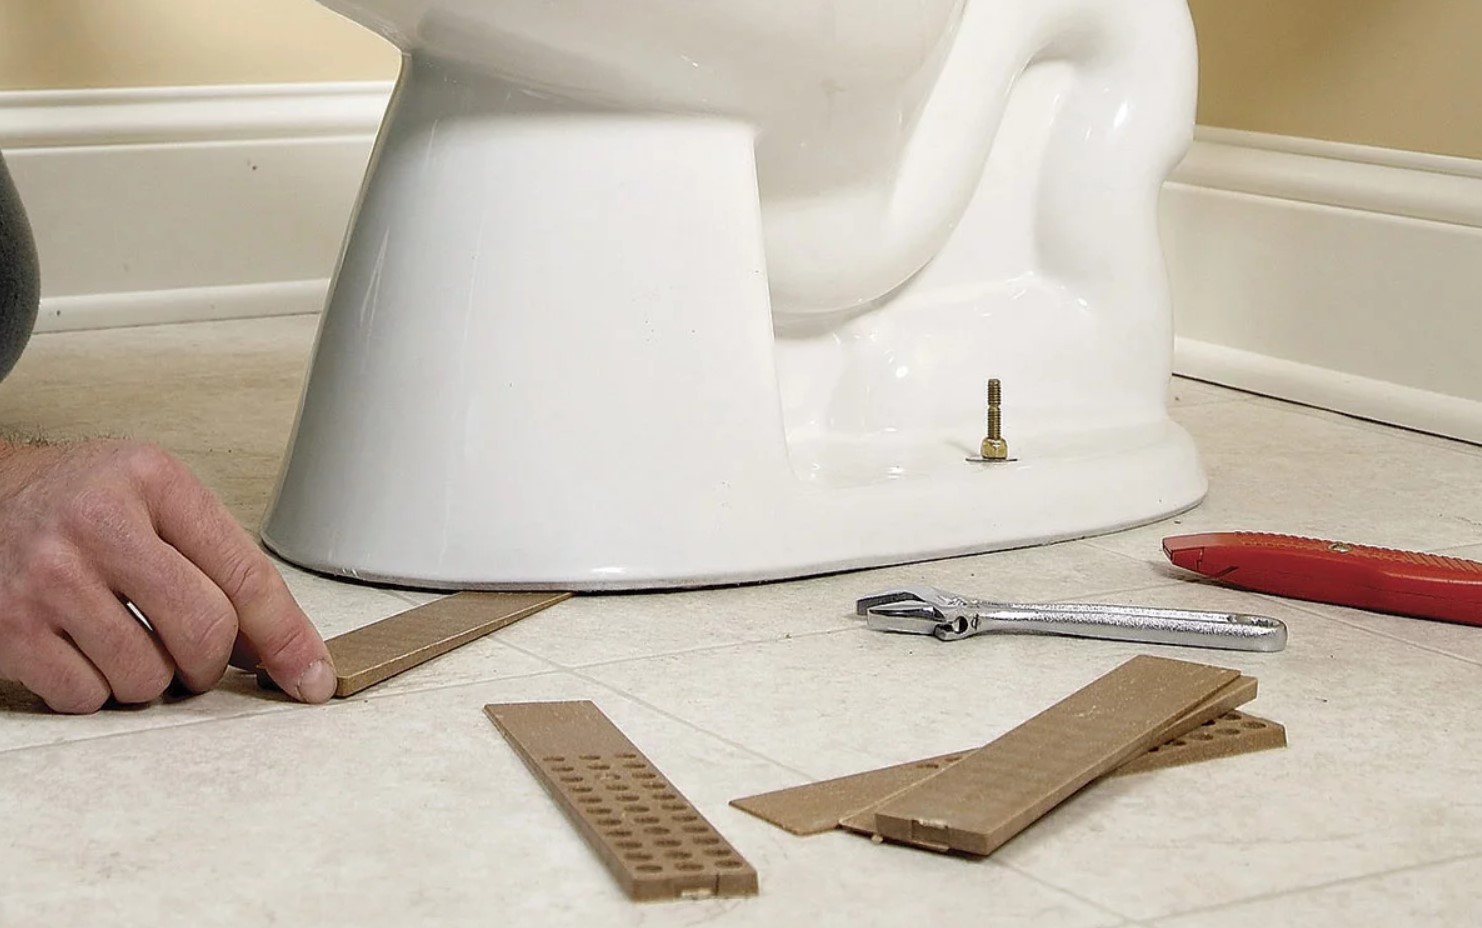
- Position the toilet: Carefully lower the toilet bowl onto the flange, aligning the mounting bolts with the holes on the base of the toilet. Make sure the toilet is centered over the flange opening.
- Apply pressure: Apply gentle pressure to the toilet bowl to compress the wax ring. This will create a secure seal between the toilet and the flange for a watertight connection.
- Secure the toilet: Begin tightening the nuts onto the floor bolts. Alternate between each nut, turning them a little at a time, to ensure even pressure and avoid damaging the toilet. Use caution to not overtighten the nuts, as this can crack the toilet.
- Reconnect the water supply line: Reconnect the water supply line to the fill valve on the bottom of the toilet tank. Use an adjustable wrench to tighten the nut securely, ensuring there are no leaks.
Double-check all the connections and bolts to ensure everything is securely fastened. The toilet should be stable with no wobbling or movement.
Once the toilet is firmly in place, place the tank lid back on top of the tank. Ensure it is aligned correctly and securely in place.
Now onto the final step, which involves testing for leaks and ensuring everything is functioning properly.
Step 8: Test for Leaks
After reinstalling the toilet, it’s crucial to test for leaks to ensure that the flange repair or replacement was successful. Testing for leaks will help identify any potential issues before they cause further damage or inconvenience.
Follow these steps to test for leaks:
- Turn on the water supply: Turn the water supply back on by either reopening the individual shut-off valve for the toilet or by turning on the main water supply for the house. Do this slowly and check for any immediate leaks around the flange or the water supply line.
- Monitor for leaks: Allow the toilet tank to refill, and then carefully inspect the area around the base of the toilet for any signs of water. Look for drips, puddles, or wet spots on the floor. It’s also important to check for leaks at the water supply connection and the tank bolts.
- Flush the toilet: After visually inspecting for leaks, flush the toilet and observe the base and surrounding area for any signs of leakage. Listen for any unusual sounds or water running when the tank refills.
If you notice any leaks or abnormal behavior during the testing process, it may indicate an issue with the flange, the wax ring, or the water supply connection. In such cases, you may need to repeat the steps or seek professional assistance to fix the problem.
However, if there are no leaks and the toilet flushes properly without any issues, congratulations! You have successfully repaired or replaced the toilet flange and ensured a watertight and secure connection.
It’s recommended to periodically check for leaks even after the initial testing to catch any potential problems early on and prevent water damage.
Finally, give the toilet a thorough clean and enjoy your newly repaired or replaced flange, knowing that your bathroom is functioning properly once again!
By following these steps, you can confidently fix a toilet flange and restore the proper functioning of your toilet without the need for professional plumbing services.
Read more: How To Raise A Toilet Flange
Conclusion
Fixing a damaged toilet flange is a task that can be successfully accomplished with the right tools, materials, and knowledge. By following the step-by-step process outlined in this guide, you can effectively repair or replace a toilet flange and restore the integrity and functionality of your toilet.
Understanding the importance of the toilet flange and recognizing the signs of a damaged flange are essential first steps. With the proper tools and materials in hand, you can shut off the water supply and empty the toilet bowl to prepare for the repair or replacement process.
Removing the toilet allows for a thorough inspection of the flange, where any necessary repairs or replacement can be determined. Whether you opt for a repair kit or choose to replace the flange entirely, ensuring a secure and level installation is crucial to prevent leaks and instability.
Once the new flange is in place, reinstalling the toilet involves aligning the mounting bolts, applying pressure to compress the wax ring, and securely fastening the toilet to the flange. After reconnecting the water supply line, testing for leaks is necessary to ensure the effectiveness of the repair or replacement.
By successfully completing these steps and addressing any leaks or issues that arise, you can confidently enjoy a properly functioning toilet without the need for professional assistance.
Remember, safety is paramount throughout the process, and if you encounter any difficulties beyond your expertise, it’s always advisable to seek the help of a professional plumber.
With this comprehensive guide, you now have the knowledge and skills to fix a toilet flange and maintain the functionality and reliability of your bathroom plumbing.
Frequently Asked Questions about How To Fix A Toilet Flange
Was this page helpful?
At Storables.com, we guarantee accurate and reliable information. Our content, validated by Expert Board Contributors, is crafted following stringent Editorial Policies. We're committed to providing you with well-researched, expert-backed insights for all your informational needs.

0 thoughts on “How To Fix A Toilet Flange”