Articles
How To Fix Fan
Modified: October 18, 2024
Learn how to fix a fan with our informative articles. Get step-by-step guides and helpful tips to troubleshoot and repair your fan efficiently.
(Many of the links in this article redirect to a specific reviewed product. Your purchase of these products through affiliate links helps to generate commission for Storables.com, at no extra cost. Learn more)
Introduction
When your fan starts acting up, it can be quite frustrating. A malfunctioning fan can disrupt the comfort of your home and make the hot summer days unbearable. However, before you rush to replace your fan, it’s worth exploring some common issues that can be fixed with a little troubleshooting and maintenance.
In this guide, we’ll walk you through step-by-step how to fix a fan that’s not working properly. Whether it’s a ceiling fan, a floor fan, or a desk fan, these troubleshooting techniques can be applied to most types of fans.
Please remember that electrical repairs can be dangerous, and it’s crucial to take necessary safety precautions to avoid accidents. If you’re unsure or uncomfortable working with electrical components, it’s best to consult a professional.
So, let’s dive in and learn how to fix your fan and restore the cool breeze that you’ve been missing.
Key Takeaways:
- Keep your fan in top shape by regularly cleaning the blades and lubricating the motor. This simple maintenance can improve performance and extend the fan’s lifespan.
- Prioritize safety and follow manufacturer’s guidelines when troubleshooting and repairing your fan. If in doubt, seek professional assistance to ensure optimal results.
Read more: How To Fix An Attic Fan
Safety Precautions
Before you start working on your fan, it’s essential to prioritize your safety. Here are some important safety precautions to keep in mind:
- Always unplug the fan from the power source before attempting any repairs or maintenance.
- Wear protective gloves and safety goggles to shield your hands and eyes from potential hazards.
- If you’re working on a ceiling fan, use a sturdy ladder and have someone to assist you to prevent accidents.
- Avoid wearing loose clothing or jewelry that could get caught in the fan’s moving parts.
- Read and follow the manufacturer’s instructions and warnings for your specific fan model.
- If you encounter any electrical wiring issues, it’s best to hire a licensed electrician to handle the repairs.
- If you’re unsure about any step or feel uncomfortable working on the fan, it’s better to seek professional assistance.
By adhering to these safety precautions, you can minimize the risk of accidents and ensure a safe working environment while fixing your fan.
Tools and Materials Needed
Before you start troubleshooting your fan, make sure you have the following tools and materials on hand:
- Screwdriver set: You will need different types and sizes of screwdrivers to disassemble and reassemble your fan.
- Lubricating oil: A suitable lubricating oil will be required to lubricate the fan motor.
- Cleaning cloth or brush: To remove dust and debris from the fan blades and other components.
- Wire brush: This will come in handy for cleaning any rust or grime from the fan parts.
- Replacement parts: If you identify any damaged or broken parts during the troubleshooting process, you may need to purchase replacement parts. Visit the manufacturer’s website or a local hardware store to find the right parts for your fan model.
It’s important to have these tools and materials ready before you begin the repair process. This will help you work efficiently and avoid any unnecessary delays or frustrations.
Step 1: Identify the Issue
The first step in fixing your fan is to identify the specific issue causing it to malfunction. Here are some common problems you may encounter:
- Fan not turning on: If your fan is not turning on at all, the issue could be with the power supply or the fan’s motor.
- Fan not spinning properly: If your fan is turning on but not spinning or spinning irregularly, there may be an issue with the fan blades, motor, or bearings.
- Fan making unusual noises: If your fan is making grinding, squeaking, or rattling noises, it could be due to loose or worn-out parts, such as blades or motor components.
- Fan vibrating excessively: Excessive vibration is often caused by unbalanced blades or loose parts.
- Fan not oscillating: If your oscillating fan is not moving side to side, there may be an issue with the oscillating mechanism or gears.
To identify the issue with your fan, start by visually inspecting it. Look for any obvious signs of damage, loose parts, or excessive dirt and dust. In some cases, the issue may be apparent, such as a frayed cord or a loose screw.
If everything looks intact visually, you can try turning on the fan and listening for any unusual sounds or observing how it operates. Taking note of the specific symptoms will help you narrow down the problem.
Once you have identified the issue, you can proceed to the next step to begin troubleshooting and resolving it.
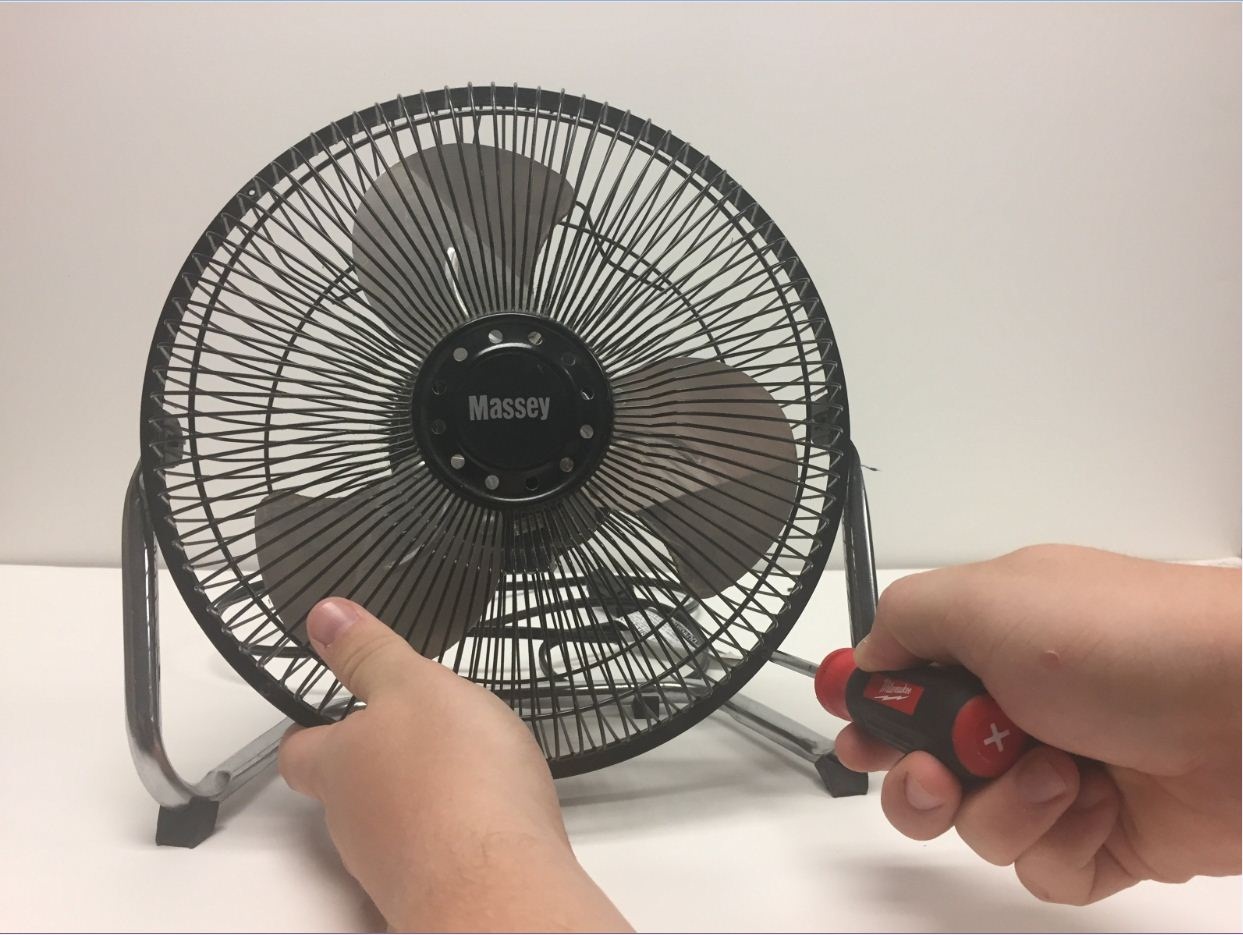
Step 2: Cleaning the Fan Blades
Dust and debris can accumulate on the fan blades over time, causing them to become unbalanced and affecting the fan’s performance. Cleaning the fan blades is a simple yet effective way to improve its functionality. Here’s how to do it:
- Make sure the fan is unplugged and turned off before you begin.
- Use a step stool or ladder to reach the fan blades safely.
- Secure the fan blades using a clamp or have someone hold them in place to prevent them from moving during cleaning.
- Dampen a cleaning cloth or use a soft brush to wipe off the dust from the fan blades. Be thorough in removing all the dirt and debris, making sure to reach all the nooks and crevices.
- If the fan blades are removable, you can also detach them for easier cleaning. Follow the manufacturer’s instructions for removing and reattaching the blades.
- Once the blades are clean, allow them to dry completely before reassembling the fan.
Remember to use gentle pressure and avoid applying excessive force when cleaning the fan blades to prevent damage. Additionally, avoid using liquid cleaners directly on the blades, as this can cause electrical issues or damage the finish.
By regularly cleaning the fan blades, you can enhance the airflow and reduce the strain on the motor, resulting in a quieter and more efficient fan.
Check for any obstructions in the fan blades and clean them if necessary. Also, ensure that the fan is securely mounted and balanced to prevent any wobbling or noise.
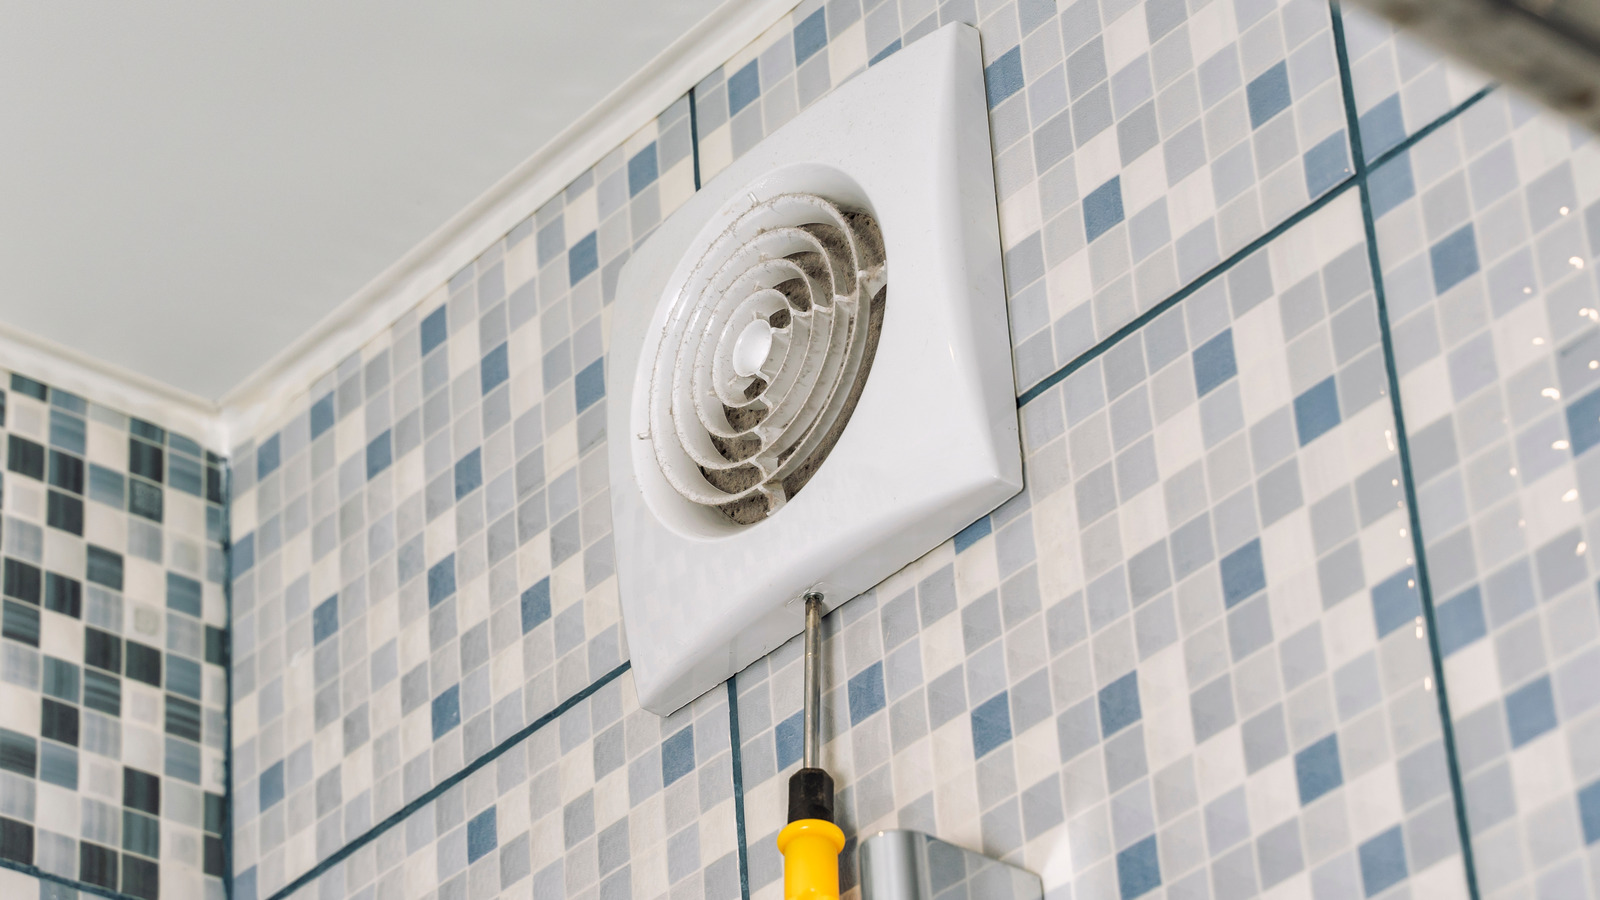
Read more: How To Fix Bathroom Exhaust Fan
Step 3: Lubricating the Fan Motor
Lubricating the fan motor is an essential maintenance step that can help to reduce friction and keep the motor running smoothly. Here’s how you can do it:
- Ensure that the fan is unplugged and turned off before you begin.
- Locate the motor housing of the fan. It is usually located near the base or behind the fan blades.
- Using a screwdriver, carefully remove the screws or clips that secure the motor housing. Set them aside in a safe place.
- Once the motor housing is removed, inspect the motor for any visible signs of dirt, dust, or debris. Use a clean cloth or a soft brush to gently remove any buildup.
- Locate the oil ports on the motor. These are small holes or caps that allow access to the motor’s internal components.
- Refer to the manufacturer’s instructions or consult a user manual to determine the type of lubricating oil recommended for your fan motor. Apply a few drops of the appropriate lubricant into each oil port.
- Carefully reassemble the motor housing by attaching the screws or clips.
Note that not all fan motors require lubrication, so it’s crucial to check the manufacturer’s guidelines. Over-lubricating or using the wrong type of lubricant can lead to motor damage.
By properly lubricating the fan motor, you can improve its performance, reduce noise, and extend the lifespan of the fan.
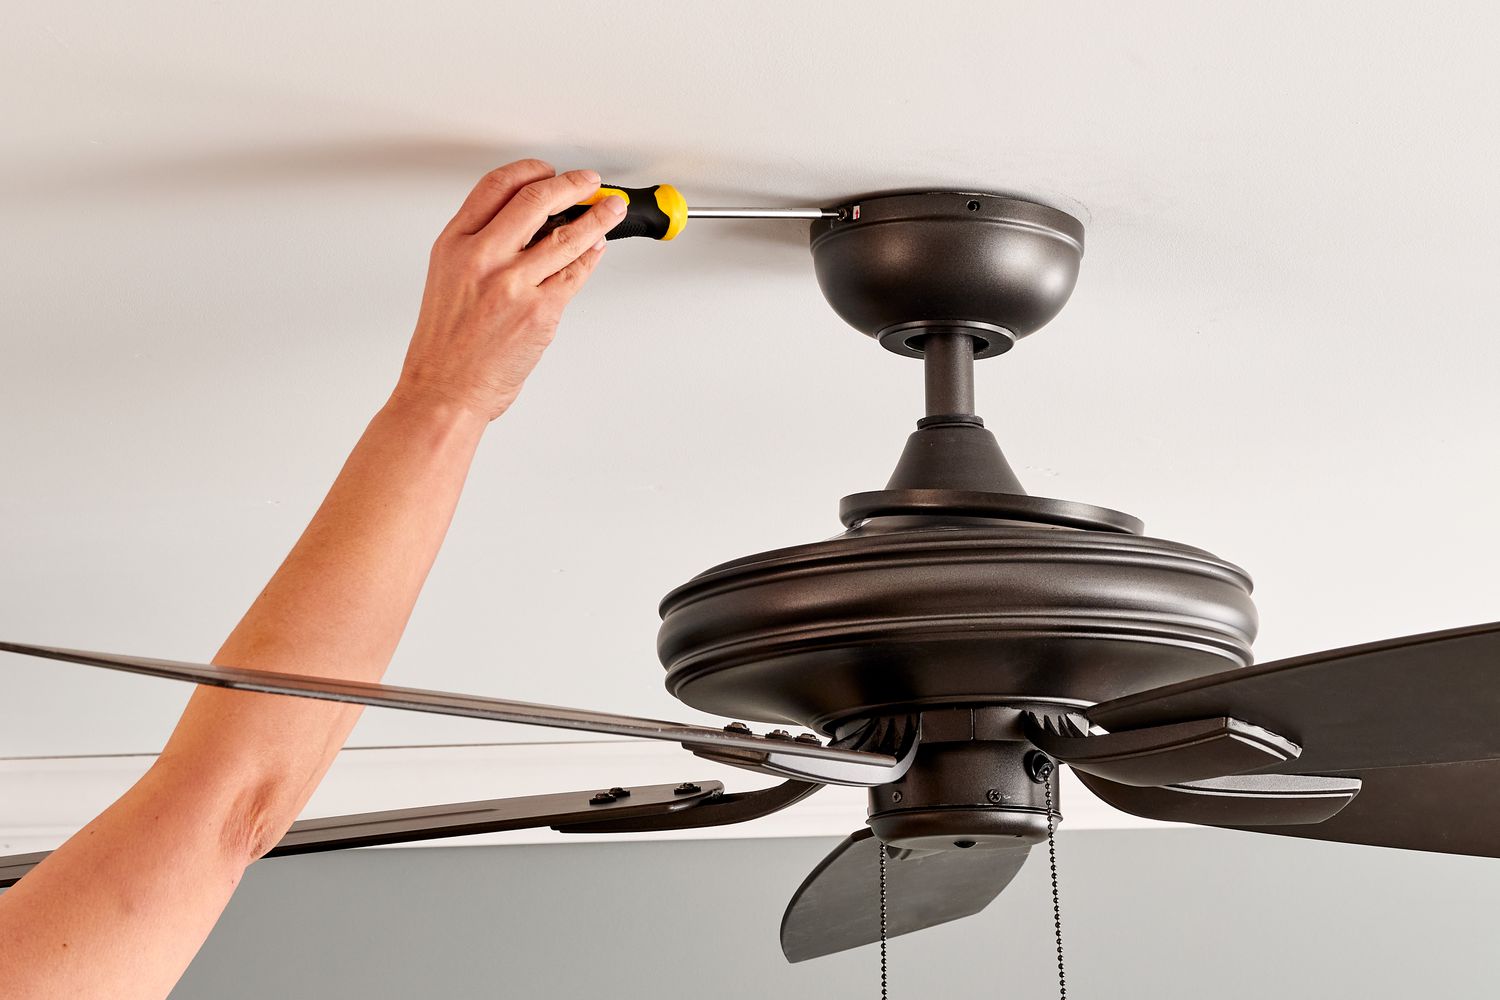
Step 4: Replacing the Fan Motor
If your fan motor is damaged beyond repair or if lubricating it doesn’t resolve the issue, you may need to replace the motor. Here’s how you can replace the fan motor:
- Make sure the fan is unplugged and turned off.
- Disconnect the fan from any power source and remove any screws or clips that secure the motor housing.
- Gently pull out the fan motor from its housing, being careful not to damage any wires or connectors.
- Take note of the motor’s model number and specifications. This information is typically printed on a label or tag attached to the motor.
- Order a replacement motor that matches the same model number and specifications. You can find fan motors at appliance repair shops or by contacting the fan’s manufacturer.
- Once you have the replacement motor, carefully connect the wires and connectors, following the manufacturer’s instructions or a wiring diagram if provided.
- Secure the motor in place by reattaching the screws or clips.
- Reassemble the motor housing, ensuring that it is securely fastened.
- Plug in the fan and test it to see if the new motor has resolved the issue.
Replacing a fan motor can be more complex and may require basic electrical wiring knowledge. If you are unsure or uncomfortable with this process, it’s advisable to seek assistance from a professional technician or an electrician.
By replacing a faulty fan motor, you can restore the functionality and performance of your fan, prolonging its lifespan and ensuring optimal airflow.
Step 5: Fixing Loose Fan Parts
If your fan is shaking, vibrating, or making unusual noises, it might be due to loose or misaligned parts. Follow these steps to fix loose fan parts:
- Turn off the fan and unplug it from the power source.
- Inspect the fan for any loose screws, bolts, or other fasteners. Tighten them using the appropriate screwdriver or wrench.
- Check for any loose fan blades. If you notice any blades that are wobbling or not aligned properly, tighten the screws that secure them to the motor hub.
- If the fan oscillates but doesn’t rotate smoothly or gets stuck, check the oscillating mechanism. It may require tightening, lubrication, or adjustment.
- If you have a ceiling fan, check the mounting bracket and ensure it’s securely attached to the ceiling. Tighten any loose screws or bolts.
- If the fan has a light fixture, make sure the bulbs are securely screwed in and not causing any vibrations due to loose connections.
By fixing loose fan parts, you can eliminate vibrations, reduce noise, and improve the overall stability and performance of the fan.
If you have tightened all the screws and still experience issues, it’s possible that internal components are damaged. In such cases, you may need to consult a professional or consider replacing the fan.
Step 6: Testing and Troubleshooting
After you have completed the necessary repairs and maintenance on your fan, it’s important to test it and troubleshoot any remaining issues. Here’s what you can do:
- Plug in the fan and turn it on to see if it operates smoothly.
- Observe the fan blades to ensure they are spinning evenly and without any wobbling.
- Listen for any unusual noises or vibrations that may indicate a persistent problem.
- If the fan is not working or still experiencing issues, double-check all the connections, screws, and other components to ensure everything is properly tightened and aligned.
- Refer to the fan’s user manual or consult the manufacturer’s website for specific troubleshooting tips related to your fan model.
- If you are unable to fix the problem or are unsure about the next steps, consider contacting a professional technician or reaching out to the fan’s manufacturer for further assistance.
Remember that troubleshooting and resolving fan issues may require patience and multiple attempts. It’s essential to approach the process systematically and follow the necessary steps to identify and address the problem.
By thorough testing and troubleshooting, you can ensure that your fan is working optimally and providing the cooling and comfort you desire.
Read more: How To Fix Noisy Bathroom Fan
Conclusion
Repairing a fan that’s not working properly can save you the hassle and expense of buying a new one. By following the steps outlined in this guide, you can troubleshoot and fix common issues with your fan, whether it’s a ceiling fan, floor fan, or desk fan.
Remember to prioritize safety by following the necessary precautions and seeking professional assistance if needed. Taking care of your fan’s maintenance, such as cleaning the blades and lubricating the motor, can help prolong its lifespan and ensure optimal performance.
If you encounter more complex problems or are unable to resolve the issues on your own, don’t hesitate to reach out to a professional technician or contact the manufacturer for support.
With proper maintenance and timely repairs, your fan can continue providing you with a cool and refreshing breeze, making those hot summer days a little more tolerable.
Now, armed with the knowledge and steps outlined in this guide, you can confidently tackle the task of fixing your fan and enjoy its benefits for years to come.
Frequently Asked Questions about How To Fix Fan
Was this page helpful?
At Storables.com, we guarantee accurate and reliable information. Our content, validated by Expert Board Contributors, is crafted following stringent Editorial Policies. We're committed to providing you with well-researched, expert-backed insights for all your informational needs.


0 thoughts on “How To Fix Fan”