Articles
How To Fix Noisy Bathroom Fan
Modified: October 20, 2024
Discover effective articles to fix a noisy bathroom fan and enjoy a peaceful and relaxing environment in your home.
(Many of the links in this article redirect to a specific reviewed product. Your purchase of these products through affiliate links helps to generate commission for Storables.com, at no extra cost. Learn more)
Introduction
A noisy bathroom fan can be a nuisance that disrupts the peace and quiet of your home. Whether it’s a rattling sound, a high-pitched squeal, or an annoying vibration, a noisy bathroom fan can be not only irritating but also a sign of an underlying issue that needs to be addressed. Luckily, there are steps you can take to fix a noisy bathroom fan and restore tranquility to your bathroom.
Before you begin troubleshooting and attempting any repairs, it’s important to understand the common causes of noisy bathroom fans. By identifying the root cause, you can effectively address the problem and implement the appropriate solution.
There are several potential culprits when it comes to a noisy bathroom fan. One common cause is dirt and debris that accumulates on the fan blades over time, causing them to become unbalanced and resulting in noise during operation. Another culprit could be a lack of lubrication on the fan motor, leading to friction and noise. Additionally, loose screws or fasteners can cause vibrations and rattling sounds. Lastly, obstructions in the ductwork can restrict airflow and cause noise as the fan struggles to push air through.
In this article, we will guide you through the step-by-step process of fixing a noisy bathroom fan. We will provide you with the necessary tools and materials you’ll need, as well as detailed instructions on how to carry out each step effectively. By following these instructions, you will be able to troubleshoot and resolve the noise issue in your bathroom fan, restoring a peaceful and relaxing environment to your space.
Key Takeaways:
- Keep your bathroom fan clean and well-lubricated to prevent noise issues. Regular maintenance and troubleshooting can restore peace and quiet to your bathroom oasis.
- Prioritize safety and follow step-by-step repairs to fix a noisy bathroom fan. Enjoy a serene and tranquil bathroom environment with a little DIY maintenance.
Read more: How To Fix Bathroom Exhaust Fan
Common Causes of Noisy Bathroom Fans
When it comes to noisy bathroom fans, it’s important to identify the root cause of the problem. By understanding the common causes of noise in bathroom fans, you can effectively address the issue and find the appropriate solution. Here are some of the most common culprits:
- Accumulated dirt and debris: Over time, dust, lint, and other debris can accumulate on the fan blades, causing them to become unbalanced. This imbalance leads to noise during operation, such as rattling or scraping sounds. Cleaning the fan blades can often resolve this issue, restoring smooth and quiet operation.
- Lack of lubrication: The fan motor relies on lubrication to operate smoothly. If the motor lacks proper lubrication, it can generate friction and noise. Adding lubricant to the motor can help reduce noise and improve the fan’s performance.
- Loose screws or fasteners: Loose screws or fasteners can cause vibrations and rattling sounds in the fan. Over time, these components may loosen due to constant operation or general wear and tear. Tightening these screws or fasteners can eliminate the noise and stabilize the fan.
- Obstructions in the ductwork: Sometimes, the noise may not originate from the fan itself, but rather from obstructions in the ductwork. These obstructions can restrict airflow, causing the fan to work harder and produce noise. Inspecting and removing any blockages in the duct can alleviate the noise issue.
- Worn-out fan components: Continuous use can cause certain components of the fan, such as the bearings or motor assembly, to wear out over time. When these components deteriorate, they may produce excessive noise. In such cases, replacing the worn-out components is necessary to restore quiet operation.
Identifying the specific cause of noise in your bathroom fan is crucial for effectively resolving the issue. By considering these common causes, you can narrow down the potential culprits and take the appropriate measures to fix the noisy bathroom fan.
Tools and Materials Needed
Before you begin fixing your noisy bathroom fan, it’s important to gather the necessary tools and materials. Having the right equipment on hand will ensure that you can complete the task efficiently and effectively. Here is a list of tools and materials you may need:
- Step ladder: A step ladder will allow you to safely access the bathroom fan, especially if it is located on the ceiling or in a high position.
- Screwdriver: A screwdriver will be essential for removing the fan cover and accessing the internal components of the fan.
- Clean cloth or brush: To clean the fan blades and remove any accumulated dust or debris, a clean cloth or brush will be necessary.
- Lubricant: Depending on the fan motor type, you may need a specific lubricant. Check the manufacturer’s recommendations or consult a professional to ensure you choose the appropriate lubricant for your bathroom fan.
- Wrench: If you need to tighten any loose screws or fasteners, a wrench will be necessary. Make sure you have the appropriate size for the screws used in your fan.
- Replacement components: If you determine that certain components of the fan are worn out and need replacement, such as bearings or the motor assembly, be sure to have the necessary replacement parts on hand.
- Duct inspection mirror: To check for obstructions in the ductwork, a small mirror on a telescopic handle can be helpful. This will allow you to see into the duct and identify any blockages.
- Duct cleaning brush: If you find obstructions in the duct, a flexible duct cleaning brush can help you remove any debris and restore proper airflow.
- Safety equipment: Last but not least, it’s important to prioritize safety. Wear safety goggles and gloves to protect your eyes and hands while working on your bathroom fan.
Having these tools and materials ready before you begin the repairs will streamline the process, making it easier to fix your noisy bathroom fan and restore peace and quiet to your bathroom.
Step 1: Turn Off the Power
Before you begin any work on your bathroom fan, it is crucial to ensure your safety by turning off the power supply to the fan. Working with electrical components without disconnecting the power can be extremely dangerous. Follow these steps to turn off the power:
- Locate the circuit breaker: Identify the circuit breaker that controls the power supply to your bathroom fan. This is typically labeled as “bathroom” or “exhaust fan” on the circuit breaker panel.
- Flip the switch: Once you’ve identified the correct circuit breaker, switch it to the “off” position. This will cut off the power supply to the fan and prevent any accidental electrical shocks during the repair process.
- Double-check the power: After flipping the switch, it is essential to verify that the power to the bathroom fan is indeed turned off. You can do this by attempting to turn on the fan switch or by using a voltage tester to confirm the absence of electrical current.
- Secure the breaker: To ensure that the power to the fan remains off while you’re making repairs, consider securing the circuit breaker with a lock or a piece of tape. This extra precaution will prevent anyone from accidentally turning the power back on while you’re working.
Once you’ve followed these steps to turn off the power, you can proceed with the repair process confidently, knowing that you have minimized the risk of electric shock. Remember, safety should always be your top priority when working with electrical components.
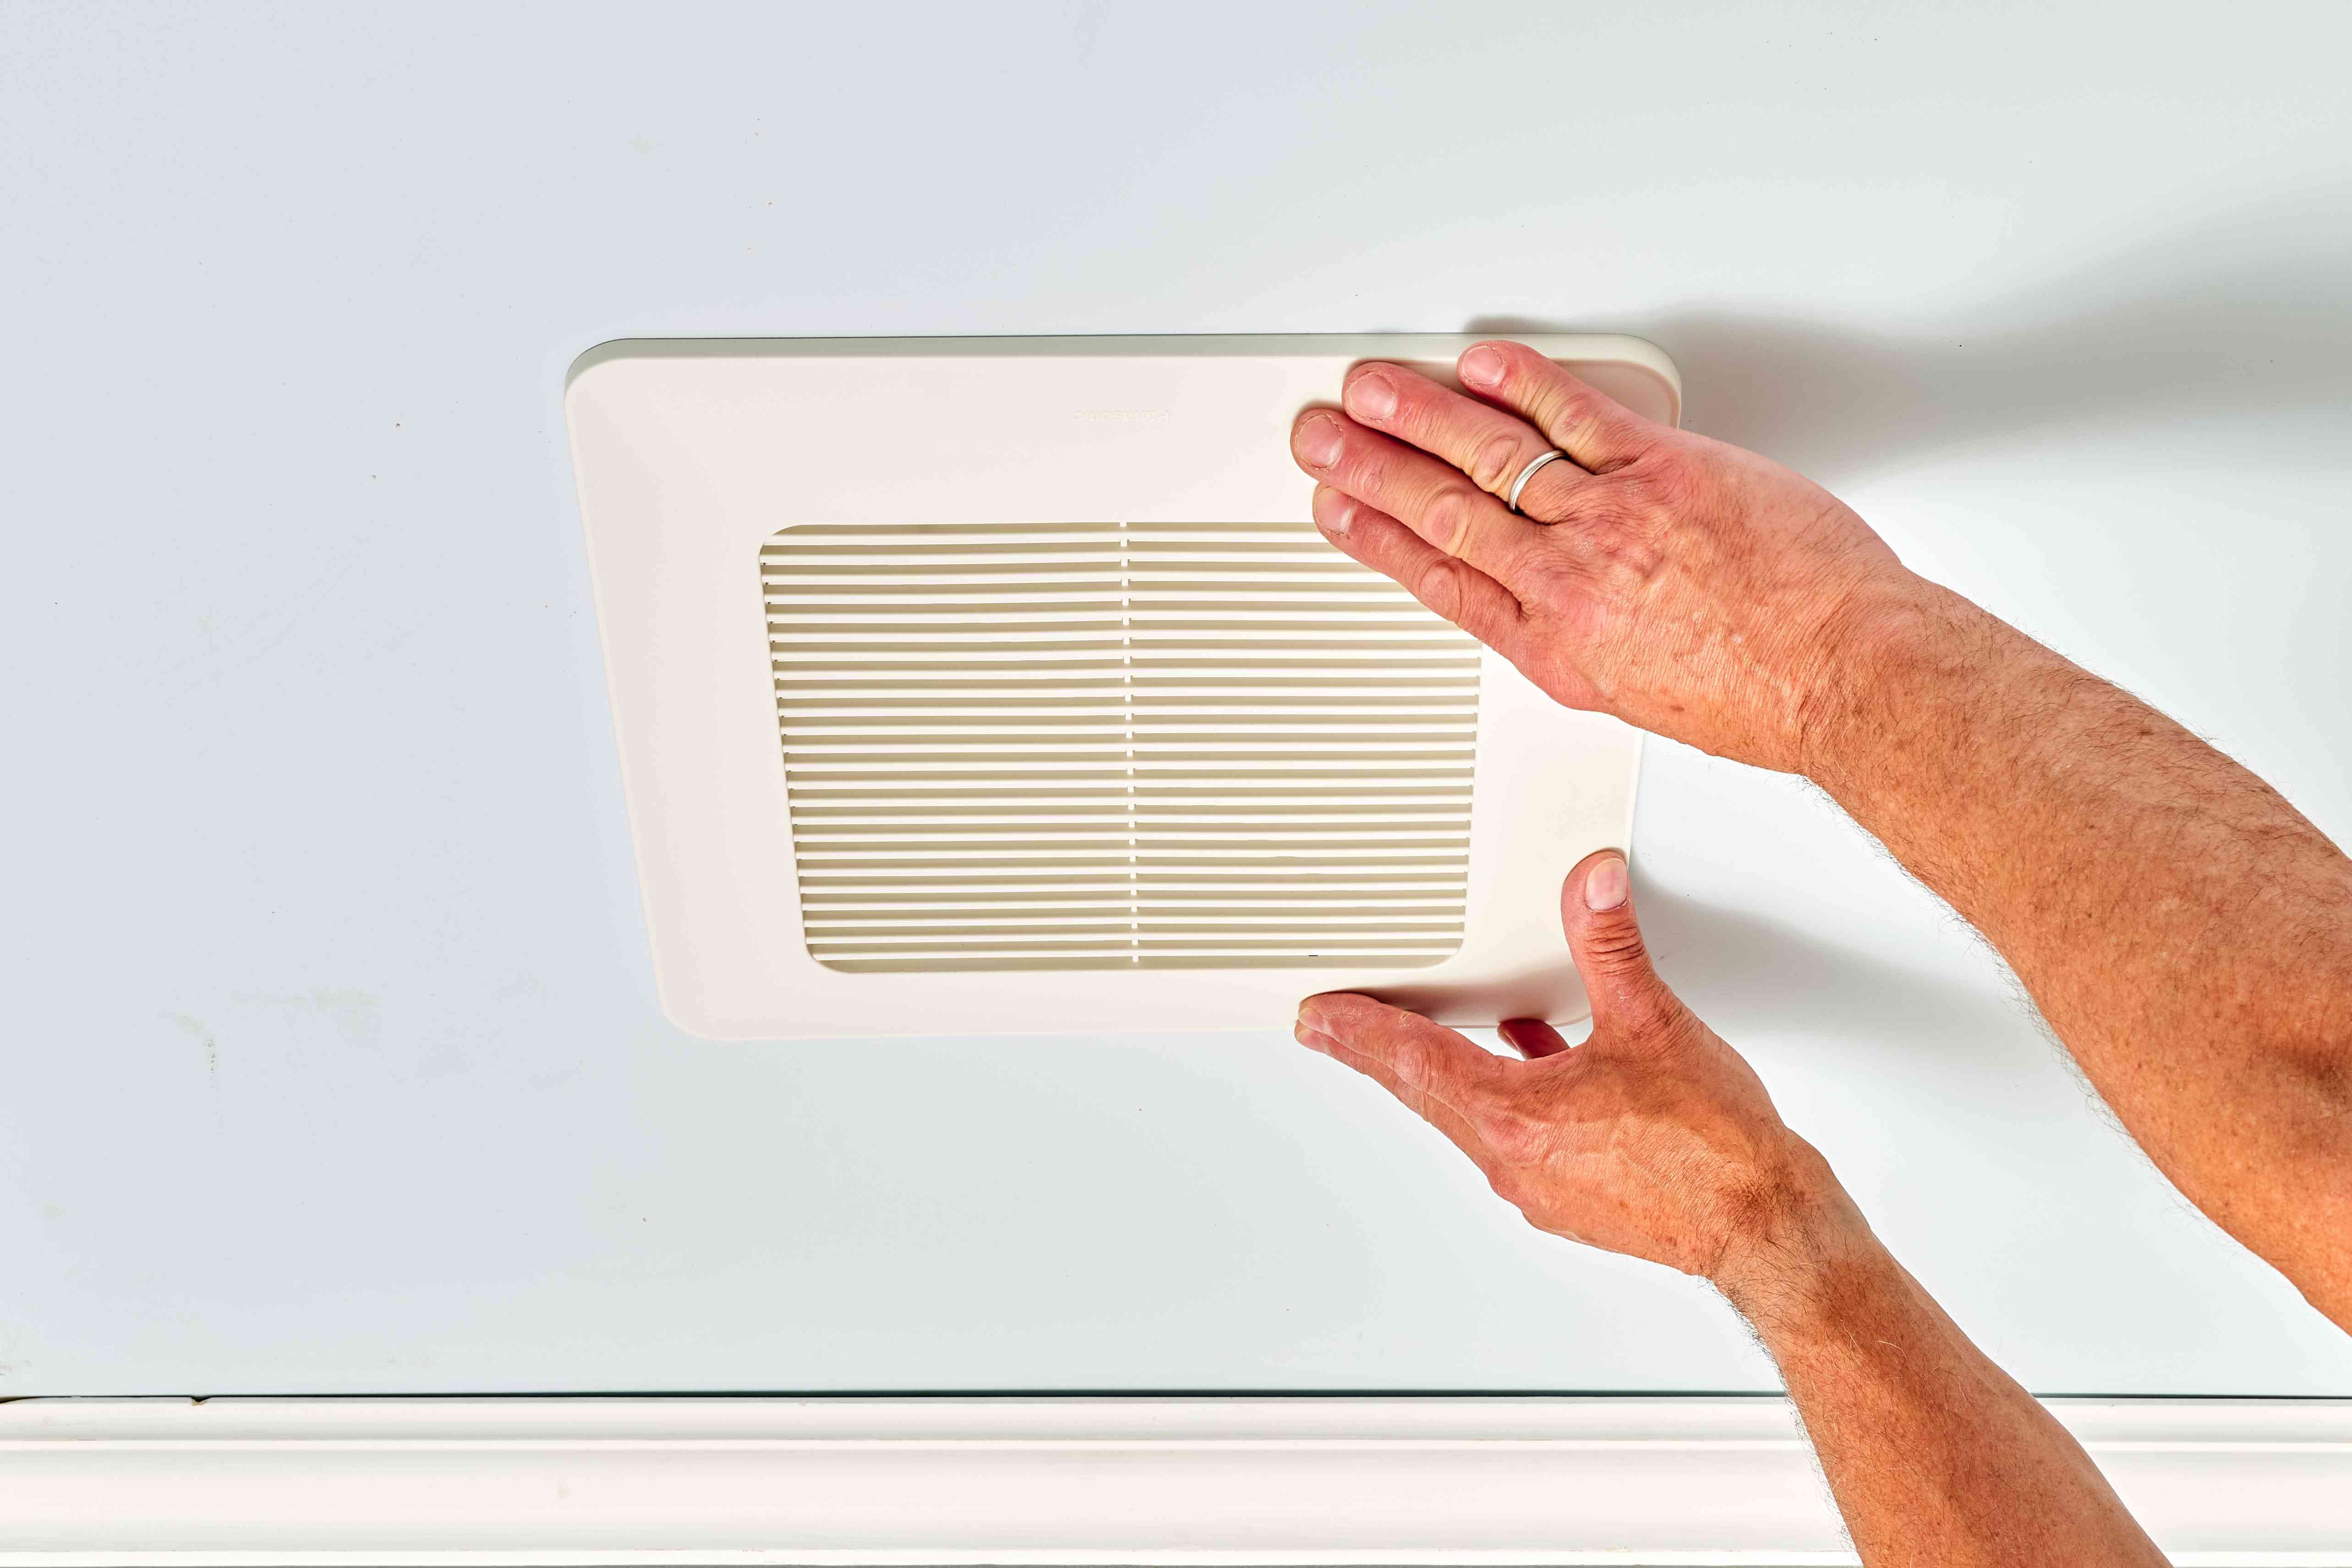
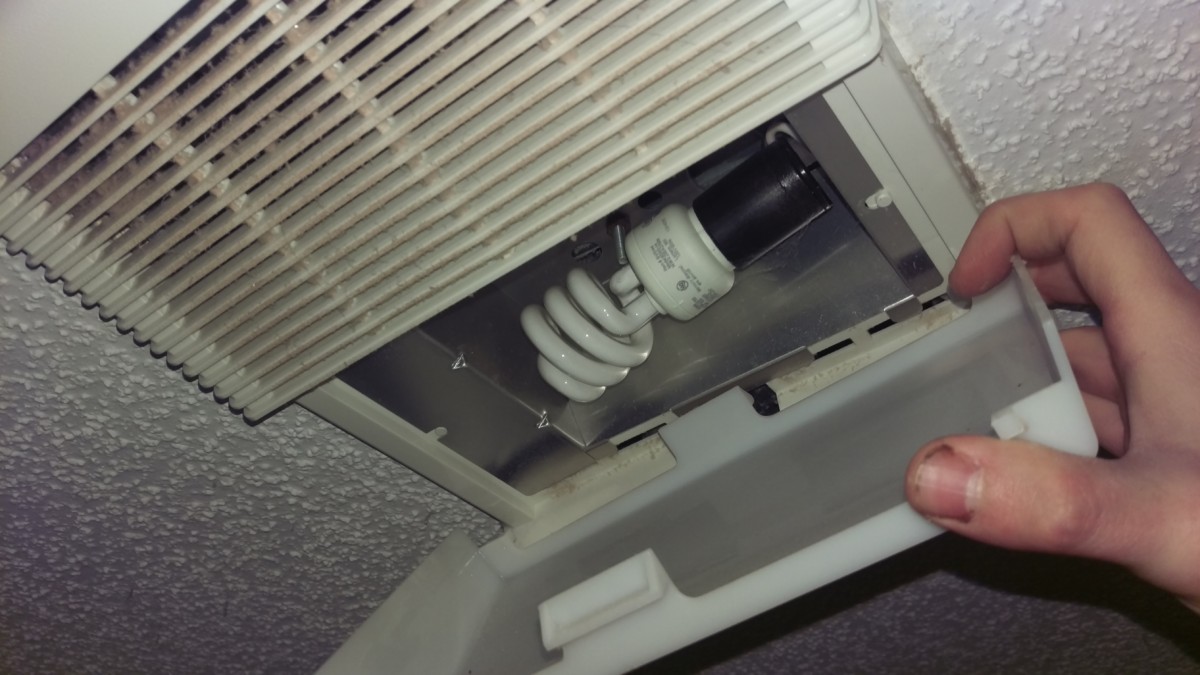
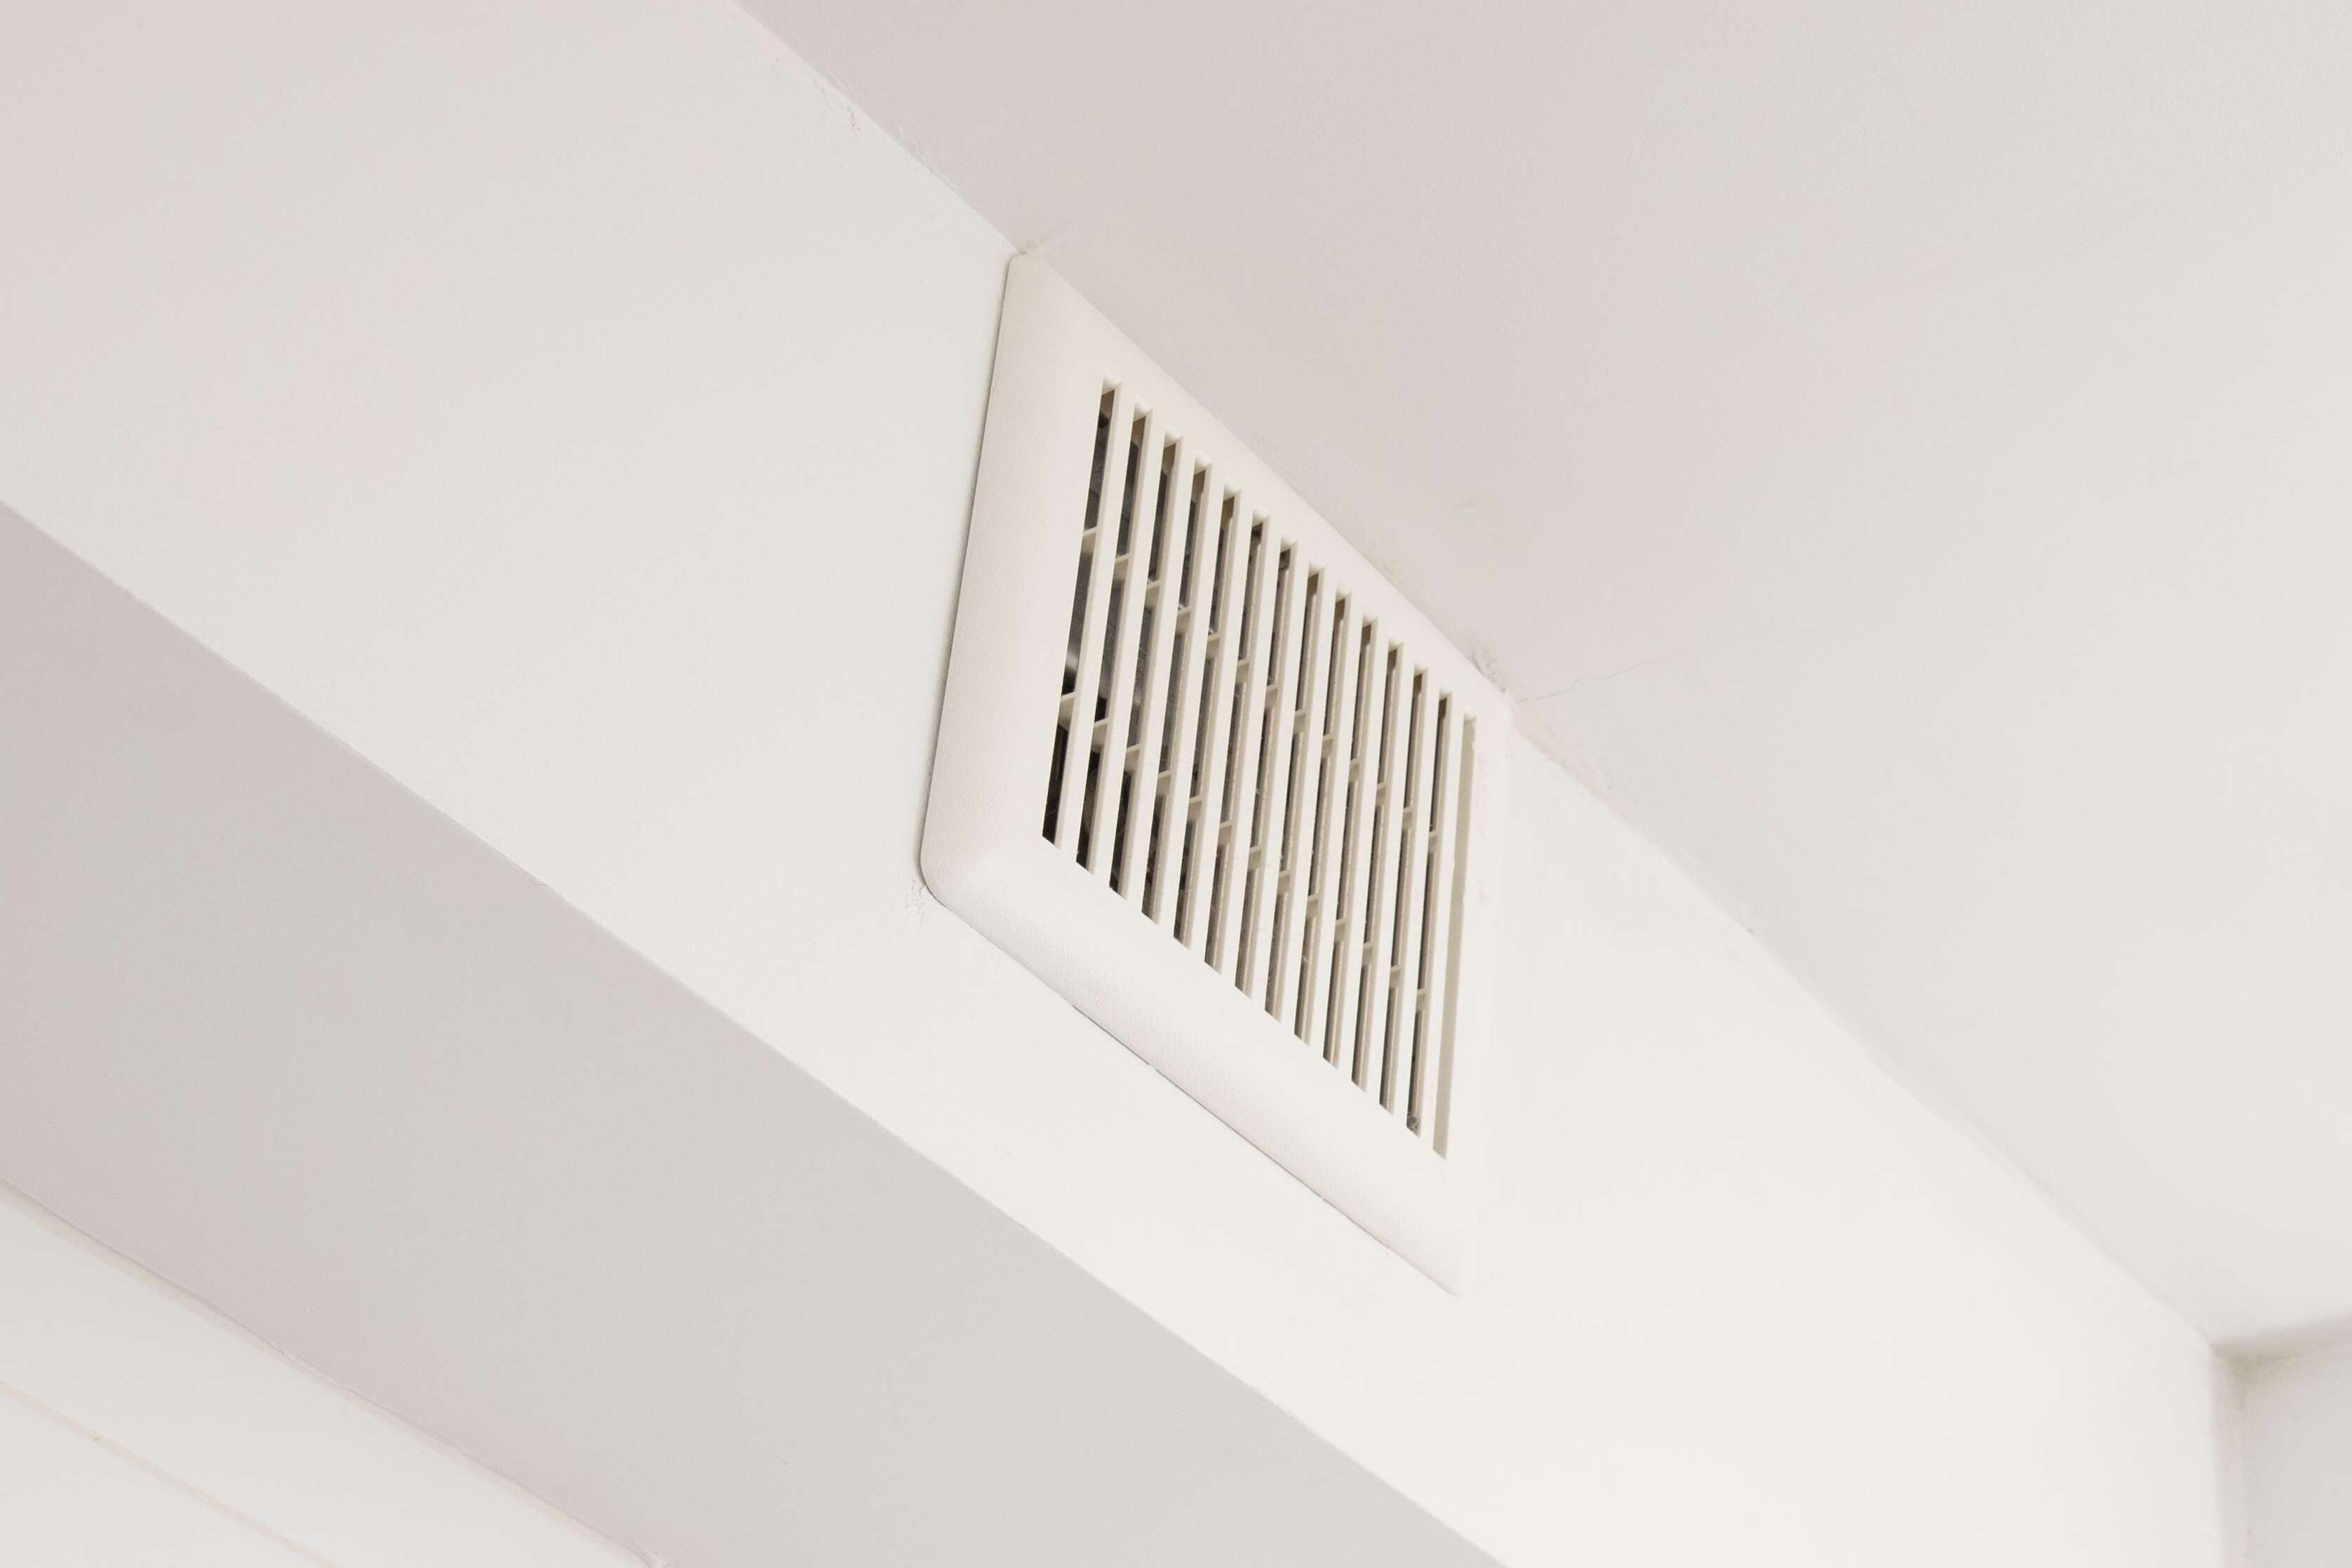
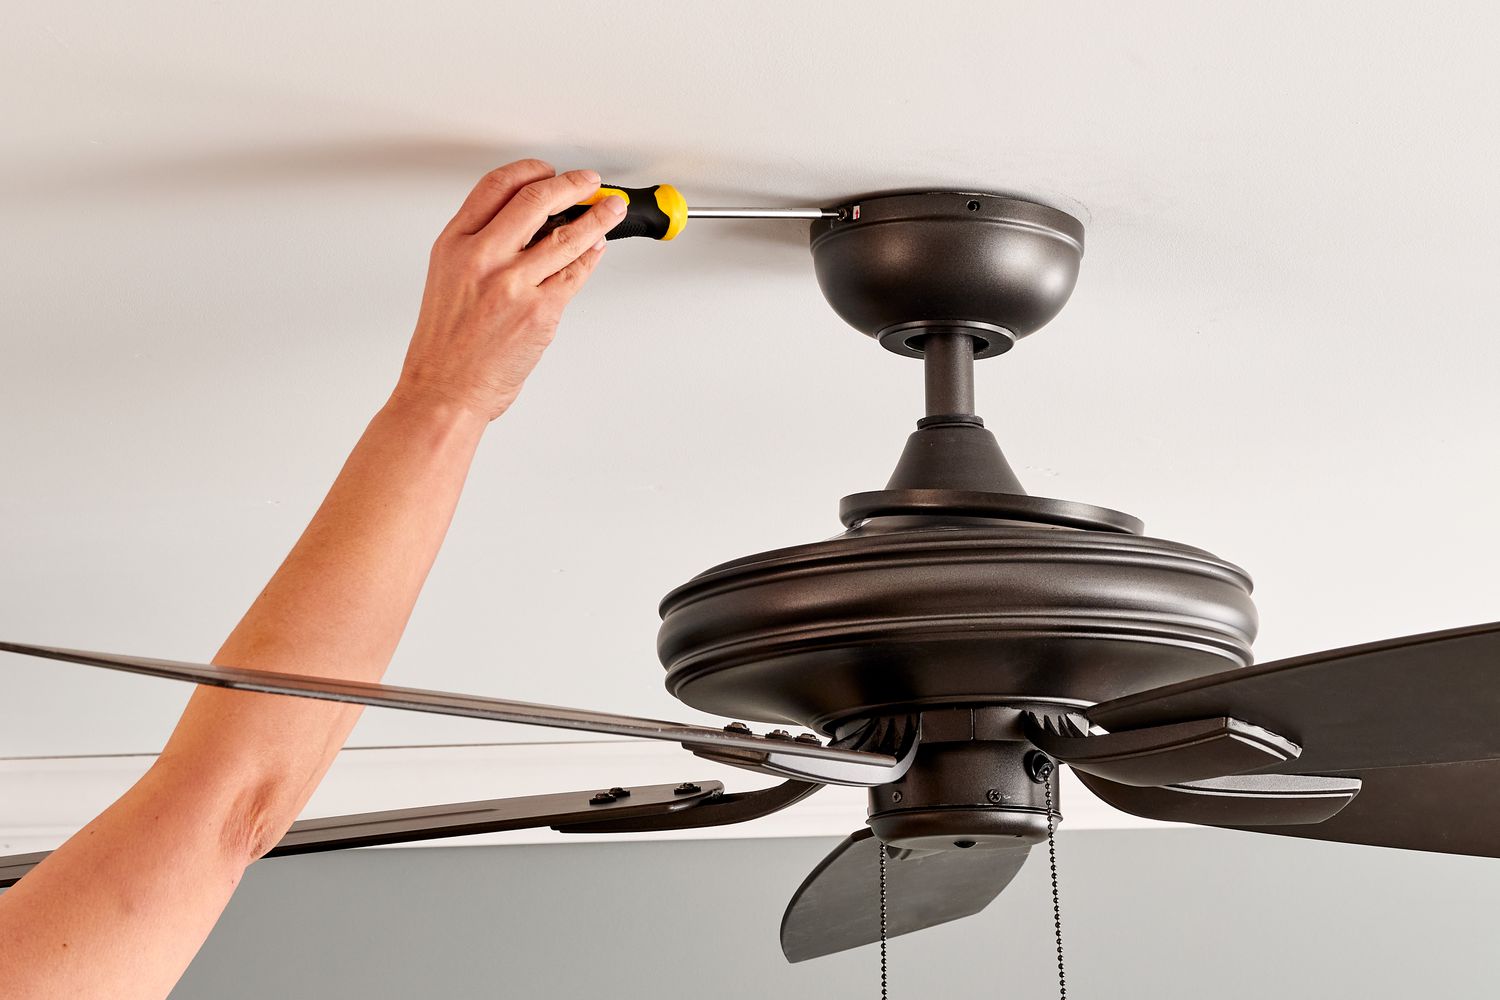
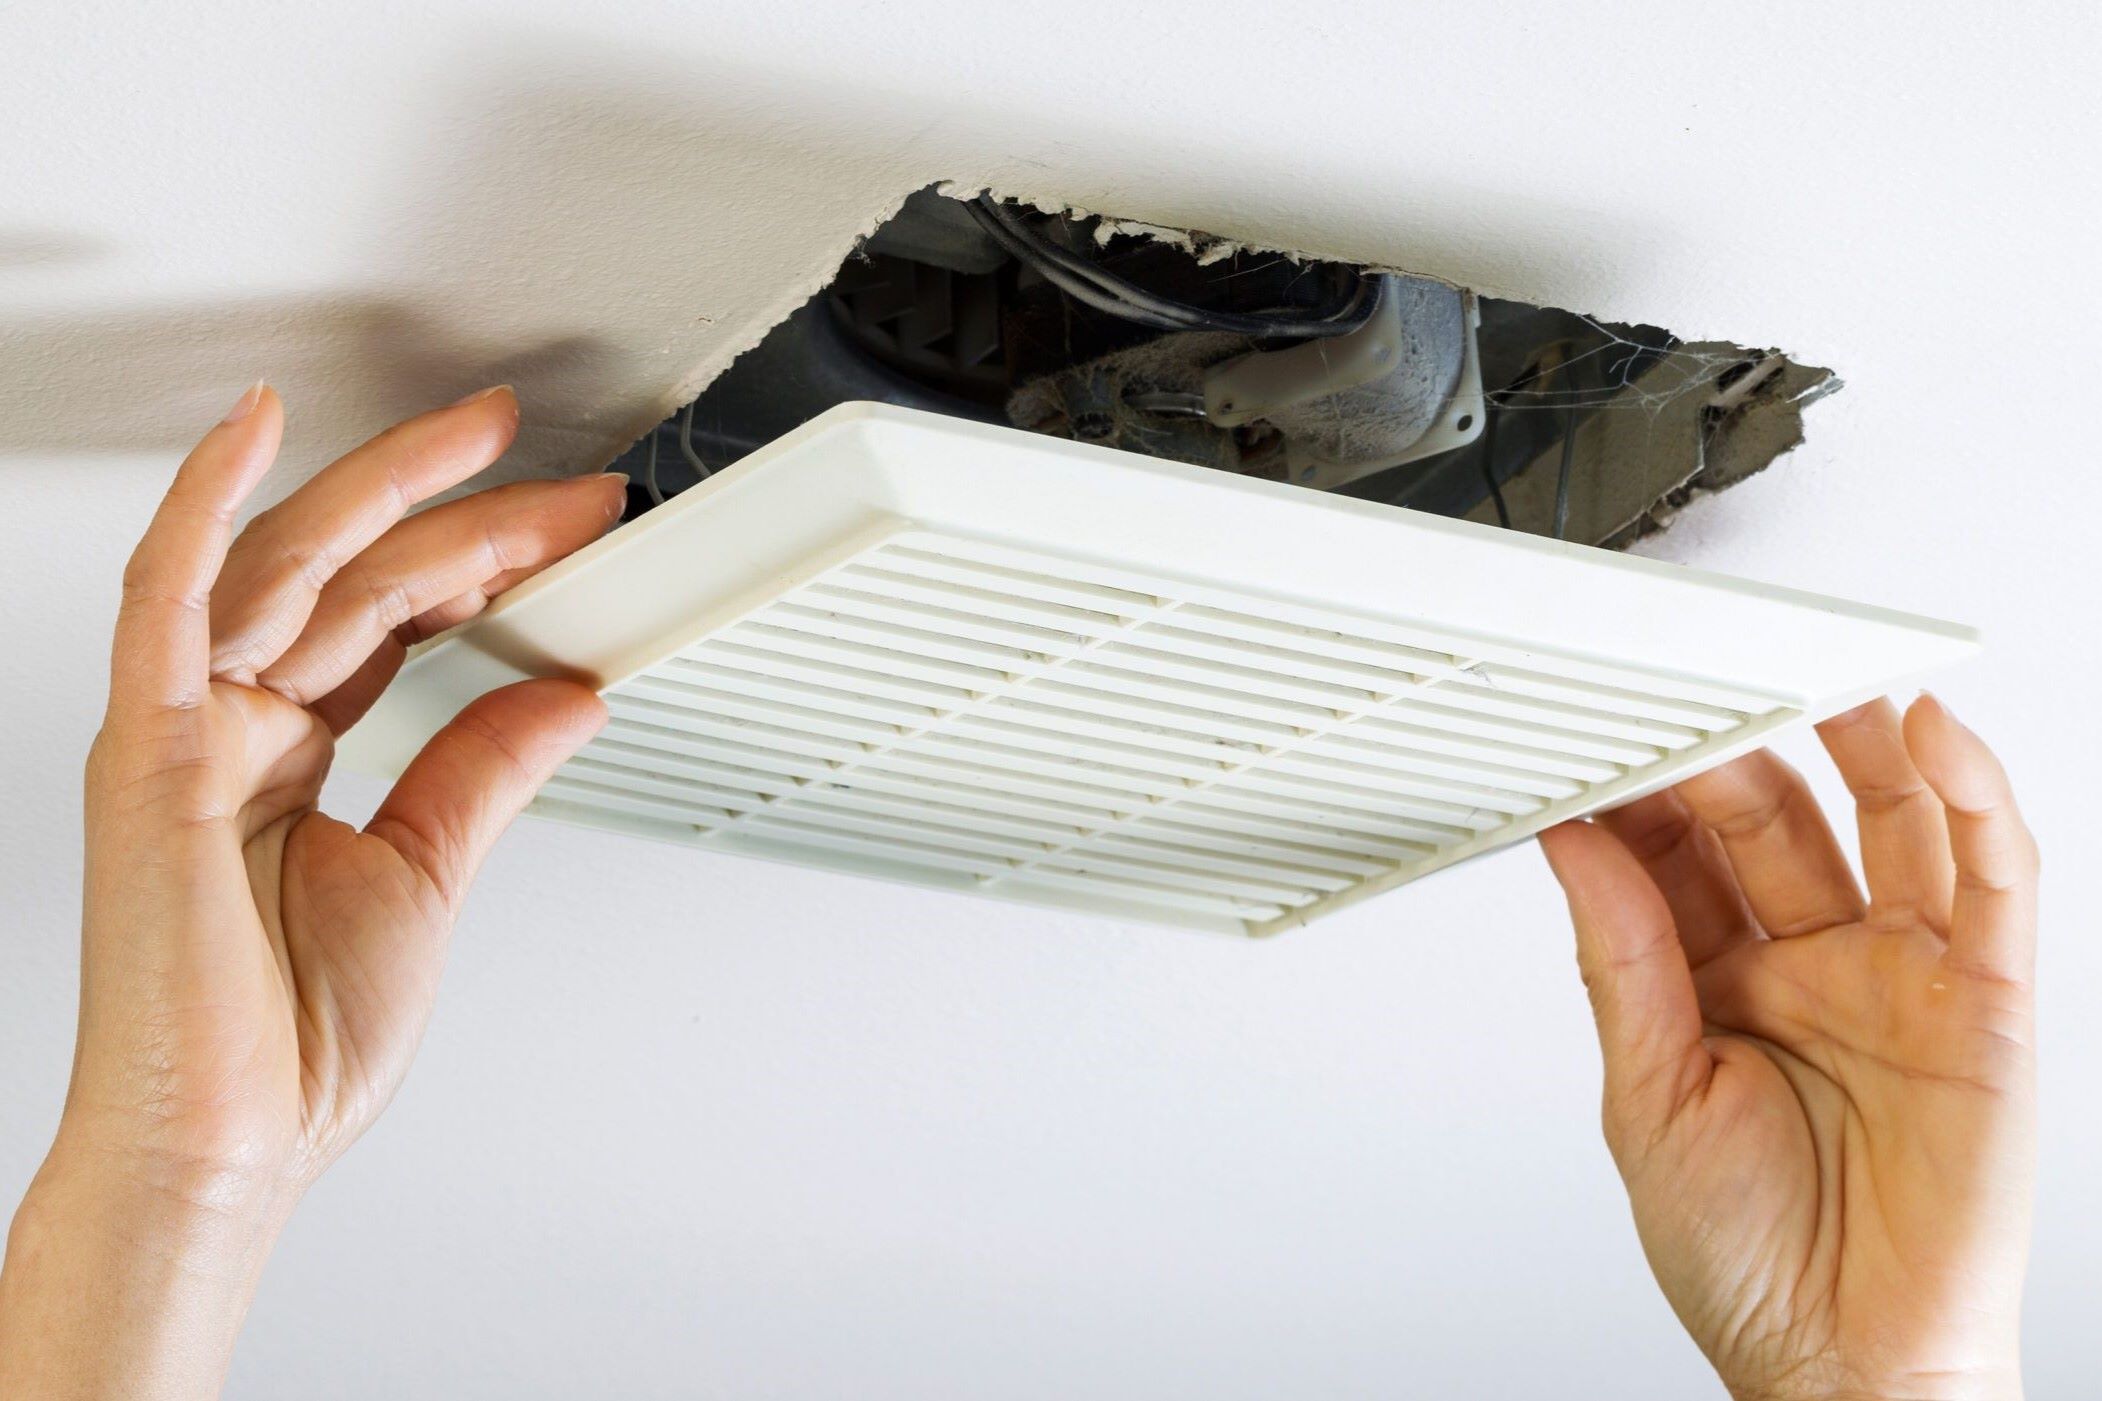
Step 2: Remove the Fan Cover
After ensuring the power is turned off, you can now proceed to remove the fan cover. The fan cover protects the internal components of the fan and is typically held in place by screws or clips. Follow these steps to remove the fan cover:
- Locate the screws: Inspect the fan cover to identify the screws that secure it. The number and placement of the screws may vary depending on the make and model of your bathroom fan.
- Use a screwdriver: Select the appropriate screwdriver (typically a Phillips head) and begin removing the screws that hold the fan cover in place. Be sure to place the screws in a safe location to prevent them from getting lost.
- Check for clips: In some cases, the fan cover may be held in place by clips instead of screws. If this is the case, carefully press or squeeze the clips to release the cover from its position. Take caution as excessive force may damage the clips or the cover.
- Remove the fan cover: Once all the screws have been removed or the clips have been released, gently lift or pull the fan cover away from the fan housing. Pay attention to any wiring or connections that may be attached to the cover and disconnect them if necessary.
- Set aside the fan cover: Place the fan cover in a safe location. You may want to clean it later or inspect it for any damage or signs of wear.
By following these steps, you will be able to safely remove the fan cover and gain access to the internal components of the bathroom fan. Remember to handle the cover with care and avoid damaging any wiring or connections.
Read more: How To Fix A Noisy Air Conditioner
Step 3: Clean the Fan Blades
Once you have removed the fan cover, it’s time to clean the fan blades. Dust, dirt, and debris can accumulate on the blades over time, causing them to become unbalanced and noisy during operation. Follow these steps to effectively clean the fan blades:
- Inspect the fan blades: Take a closer look at the fan blades to assess the level of dirt and debris buildup. If the blades appear heavily covered or clogged, cleaning is necessary.
- Prepare a cleaning solution: Fill a small container or basin with warm water and add a mild detergent. Stir the mixture to create a soapy solution that will help break down the dirt and grime on the blades.
- Dampen a clean cloth or brush: Dip a clean cloth or brush into the soapy solution. Squeeze out any excess liquid, leaving the cloth or brush damp but not dripping wet.
- Gently wipe or brush the blades: Begin cleaning the fan blades by gently wiping or brushing them with the damp cloth or brush. Start from the base of the blades and work your way towards the tips, removing any visible dirt or debris. Take care not to apply excessive pressure or force, as this may damage the blades.
- Rinse with clean water: After cleaning the blades, rinse them with clean water to remove any remaining detergent or residue. You can use a separate damp cloth or sponge for this step.
- Dry the fan blades: Once the blades have been thoroughly rinsed, use a dry cloth or towel to dry them off. Ensure that the blades are completely dry before reassembling the fan.
Cleaning the fan blades will help remove dust and dirt that can cause imbalance and noise. By following these steps, you can ensure smooth and quiet operation of your bathroom fan. Regularly cleaning the fan blades will also help maintain its performance and prolong its lifespan.
Check if the fan is properly secured to the ceiling and tighten any loose screws. Clean the fan blades and housing to remove any dust or debris that may be causing the noise. If the problem persists, consider replacing the fan motor or the entire unit.
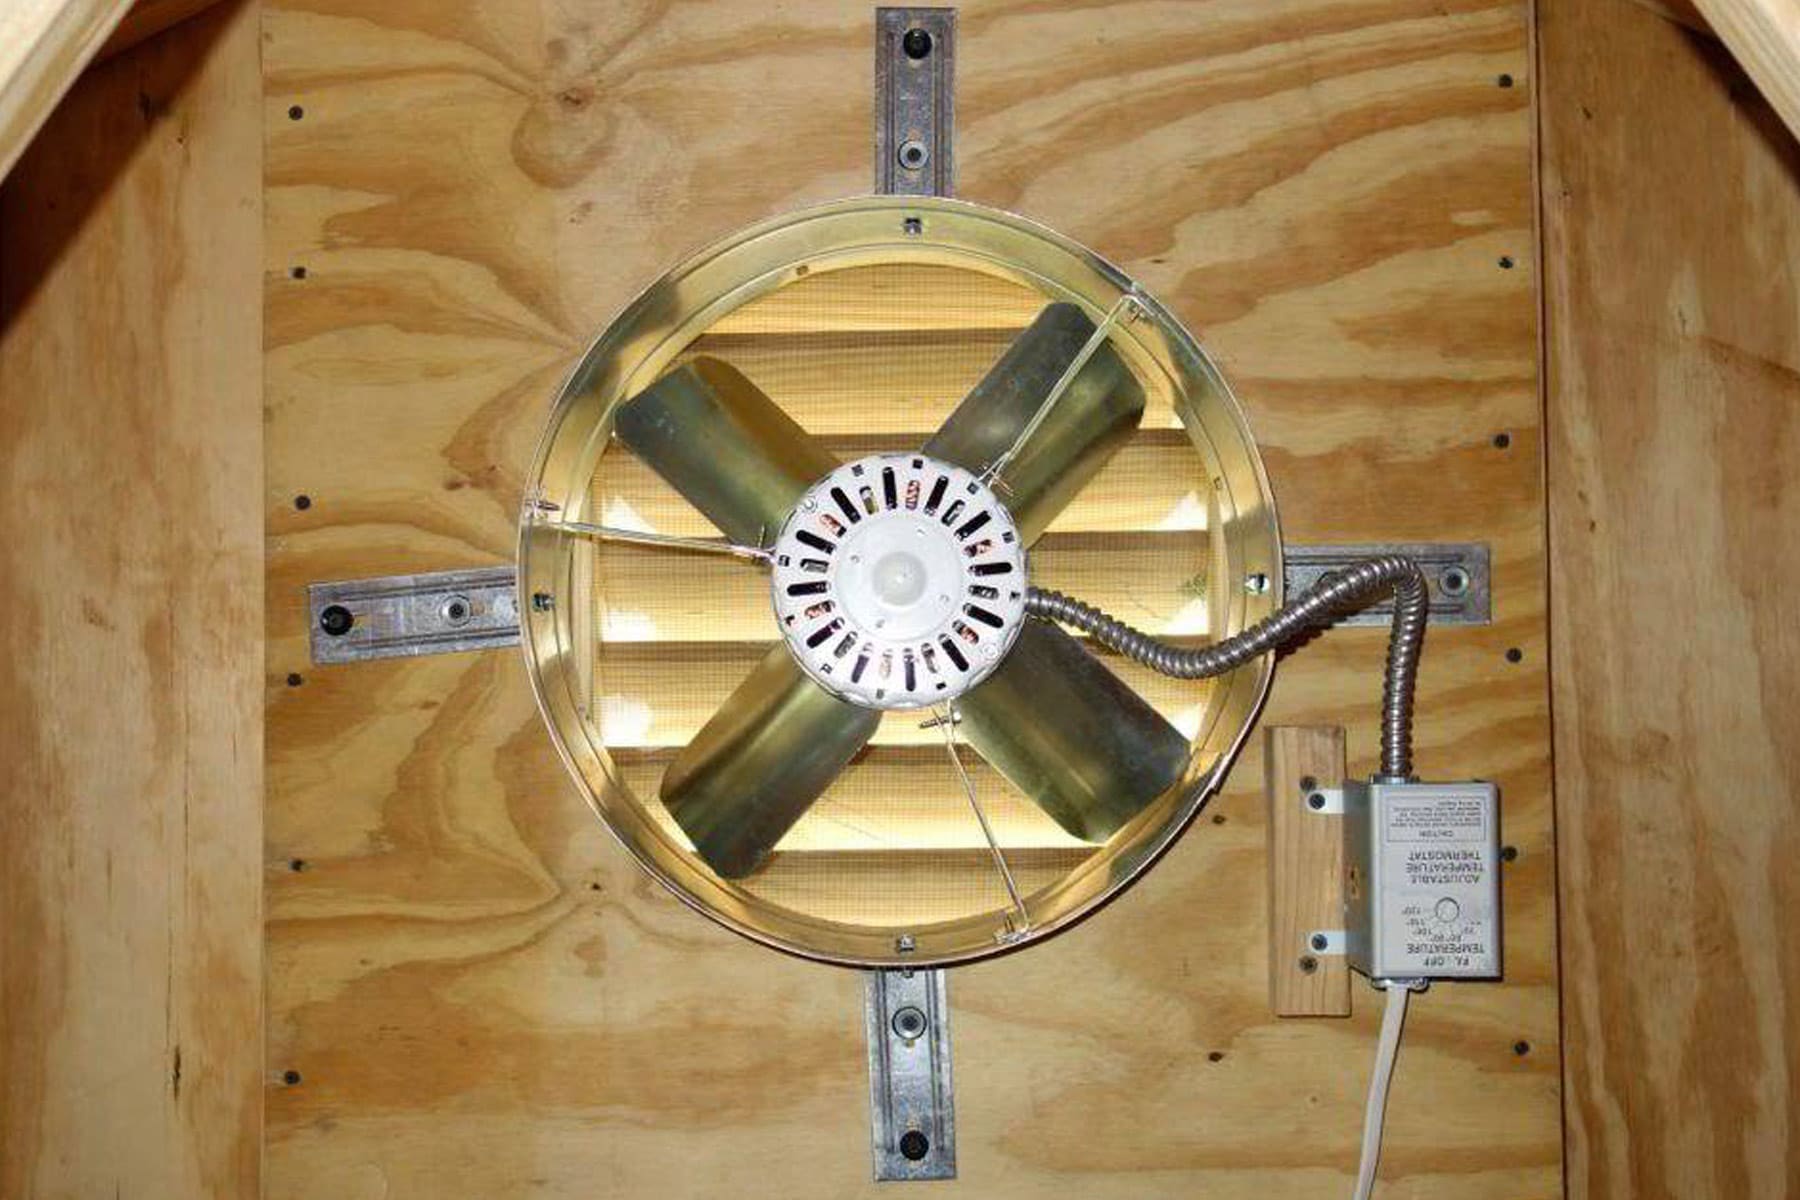
Step 4: Lubricate the Fan Motor
Lubricating the fan motor is an important step in reducing noise and maintaining the smooth operation of your bathroom fan. Over time, the motor can become dry and friction can build up, leading to increased noise. Follow these steps to effectively lubricate the fan motor:
- Identify the motor: Locate the fan motor inside the fan housing. Depending on the model of your bathroom fan, the motor may be easily accessible or may require some disassembly of additional components.
- Use the appropriate lubricant: Consult the manufacturer’s instructions or check the fan’s documentation to determine the recommended lubricant for your specific model. Some fans may require oil-based lubricants, while others may use a dry lubricant or silicone-based lubricant.
- Apply lubricant to the motor shaft: If your fan motor has a lubrication port, follow the manufacturer’s instructions to apply the lubricant directly onto the motor shaft. If there is no lubrication port, you may need to remove the motor cover or access panel to access the motor shaft.
- Rotate the motor shaft: Once you have applied the lubricant, gently rotate the motor shaft by hand to ensure that the lubricant is evenly distributed. This will help lubricate the bearings and other moving parts of the motor.
- Wipe off excess lubricant: Use a clean cloth to wipe off any excess lubricant from the motor shaft or surrounding components. It is important not to leave excess lubricant, as it can attract dust and debris, potentially causing additional noise or performance issues.
- Reassemble any disassembled components: If you had to disassemble any additional components to access the motor, carefully reassemble them according to the manufacturer’s instructions.
Lubricating the fan motor will help reduce friction and minimize noise. It is recommended to consult the manufacturer’s instructions or seek professional guidance to ensure you use the correct type of lubricant and apply it appropriately. Regularly lubricating the fan motor can help prolong its lifespan and maintain optimal performance.
Step 5: Tighten Loose Screws or Fasteners
A common cause of noise in a bathroom fan is loose screws or fasteners. Over time, vibrations and normal usage can cause these screws or fasteners to become loose, resulting in rattling or vibrating sounds. Follow these steps to tighten any loose screws or fasteners and eliminate the noise:
- Inspect the fan housing: Carefully examine the fan housing to identify any visible screws or fasteners that may be loose. These may be located on the fan cover, mounting brackets, or other components of the fan.
- Use the appropriate tool: Select the appropriate tool, such as a screwdriver or wrench, depending on the type of screws or fasteners used in your bathroom fan. Ensure that the tool matches the size and type of the screws to avoid damaging them during the tightening process.
- Tighten the screws or fasteners: Begin tightening the identified screws or fasteners using the selected tool. Apply gentle but firm pressure, being careful not to overtighten, as this can strip the threads or damage the components.
- Recheck all screws and fasteners: After tightening the initially identified screws or fasteners, go back and check all other visible screws and fasteners on the fan. Keep an eye out for any additional loose ones and tighten them as necessary.
- Test the fan: Once all the screws and fasteners have been tightened, test the fan to ensure that the noise has been eliminated. Turn on the fan and listen for any unusual sounds. If the noise persists, further troubleshooting may be required.
Tightening loose screws or fasteners is a simple yet effective way to address noise issues in your bathroom fan. Regularly inspecting and tightening screws can help prevent them from loosening in the future, ensuring smooth and quiet operation.
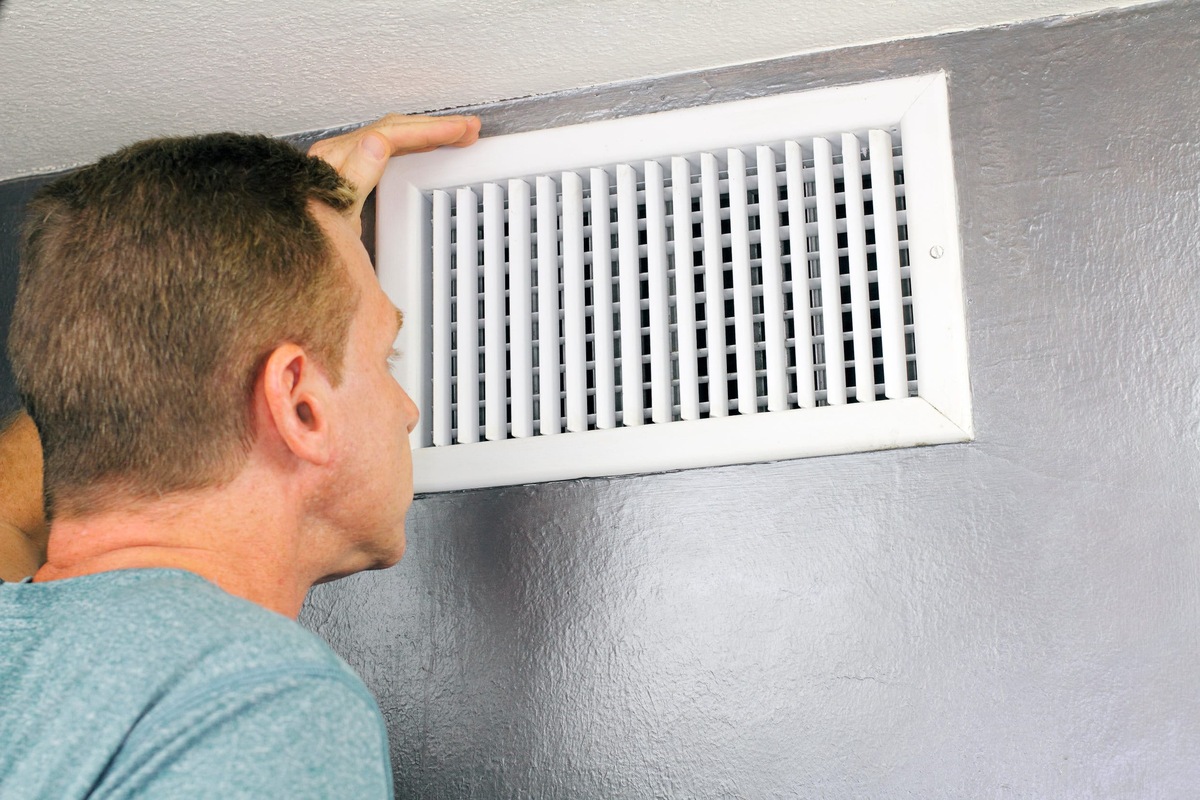
Step 6: Check for Obstructions in the Duct
If your bathroom fan is still making noise after performing the previous steps, it’s essential to check for any obstructions that may be present in the ductwork. Blockages in the duct can restrict airflow, causing the fan to work harder and produce noise. Follow these steps to inspect and clear any obstructions in the duct:
- Access the duct: Locate the access point to the ductwork, which is typically located near the fan housing. This may be a removable grille or vent cover that provides access to the duct.
- Remove the grille or vent cover: Use a screwdriver or the appropriate tool to remove any screws or fasteners securing the grille or vent cover. Set these aside in a safe place to avoid misplacing them.
- Inspect the duct: Look inside the duct using a flashlight to identify any obstructions, such as dust, debris, or objects that may have fallen into the ductwork. Pay close attention to bends or areas where airflow may be restricted.
- Remove the obstructions: Using a clean cloth, brush, or a duct cleaning brush, carefully remove any visible obstructions present in the duct. Gently brush away or wipe off any dust or debris that may have accumulated.
- Clean the grille or vent cover: As you have the grille or vent cover removed, take the opportunity to clean it using a damp cloth or brush. This will help improve airflow and maintain proper ventilation.
- Reassemble the grille or vent cover: Once the obstructions have been removed and the grille or vent cover is clean, reattach it securely using the screws or fasteners you removed earlier.
- Test the fan: Turn on the fan and listen for any noise. If the noise has been eliminated, you have successfully cleared the obstructions in the duct. If the noise persists, further troubleshooting may be required.
Checking for obstructions in the ductwork is an essential step in resolving noise issues in your bathroom fan. Clearing any blockages will improve airflow and allow your fan to operate smoothly and quietly.
Read more: How To Fix Fan
Step 7: Replace Worn Out Fan Components
If you have followed the previous steps and your bathroom fan is still making noise, it may be a sign that certain components of the fan have become worn out or damaged. Components such as bearings, motor assembly, or fan blades can deteriorate over time, resulting in increased noise during operation. Follow these steps to identify and replace any worn-out fan components:
- Inspect the fan components: Carefully examine the fan blades, motor assembly, and other components for any visible signs of wear or damage. Look for cracks, excessive dirt buildup, or misalignment of the blades.
- Consult the fan’s documentation: Refer to the fan’s documentation, user manual, or the manufacturer’s website to identify the specific replacement parts needed for your model. It’s important to ensure that you choose components that are compatible with your fan.
- Order the replacement parts: Purchase the necessary replacement parts from a reputable supplier or the manufacturer directly. Take note of the part numbers or specifications to ensure you order the correct items.
- Disconnect the power: Before replacing any fan components, make sure to turn off the power supply to the fan and follow proper safety protocols to prevent electrical accidents.
- Remove the worn-out components: Using the appropriate tools, carefully remove the worn-out components from the fan. This may involve removing screws, disconnecting wiring, or disassembling certain parts of the fan.
- Install the replacement components: Follow the manufacturer’s instructions or guidelines to properly install the new components. Pay close attention to the correct alignment and attachment methods to ensure optimal performance.
- Reassemble the fan: Once the new components are installed, reassemble the fan by reversing the disassembly process. Make sure all screws are tightened securely and all connections are properly reconnected.
- Test the fan: After reassembling the fan, turn on the power and test it to check if the noise has been resolved. If the fan operates quietly and smoothly, you have successfully replaced the worn-out components.
Replacing worn-out fan components can be a more involved and technical process. If you are unsure or uncomfortable performing the replacement yourself, it is recommended to seek the assistance of a professional technician who specializes in fan repairs.
Step 8: Reassemble and Test the Fan
After completing the necessary repairs and replacements, it’s time to reassemble the fan and test it to ensure that the noise issue has been resolved. Follow these final steps to reassemble and test your bathroom fan:
- Gather all the components: Ensure that you have all the fan components, including the fan cover, screws, and any other parts that were removed during the repair process.
- Attach the fan cover: Carefully align the fan cover with the fan housing and secure it in place using the screws or clips. Make sure the cover is securely fastened, but avoid overtightening the screws, which could damage the cover or housing.
- Turn on the power supply: Restore the power supply to the bathroom fan by flipping the circuit breaker switch back to the “on” position. This will provide electricity to the fan and allow it to operate.
- Turn on the fan: Flip the switch or use the fan control to turn on the bathroom fan. Listen closely for any noise or unusual sounds during operation. If the fan operates quietly and smoothly, the repair process has been successful.
- Observe fan performance: Monitor the performance of the fan over several minutes to ensure that it continues to operate without producing any noise. Pay attention to any signs of vibration, rattling, or other abnormal behavior.
- Make final adjustments if necessary: If you notice any lingering noise or issues with the fan, double-check the components and connections to ensure they are properly installed. Tighten any loose screws or address any other potential causes for noise.
- Enjoy a quiet and functional bathroom fan: If the fan operates silently and efficiently, you can now enjoy a peaceful and functional bathroom without the annoyance of noise.
By following these final steps, you can reassemble and test your bathroom fan, ensuring that the noise issue has been successfully addressed. Remember to periodically clean and maintain your fan to prevent future noise problems and maximize its performance and longevity.
Conclusion
A noisy bathroom fan can be a frustrating issue that disrupts the tranquility of your home. However, by following the steps outlined in this article, you can effectively troubleshoot and fix the noise problem in your bathroom fan. From cleaning the fan blades to lubricating the motor, tightening loose screws, checking for obstructions in the duct, and replacing worn-out components, each step has been designed to help restore quiet and efficient operation to your fan.
Regular maintenance and care are key to ensuring the long-term performance of your bathroom fan. By incorporating these repair techniques and maintaining a clean and functional fan, you can prevent future noise issues and ensure that your bathroom remains a peaceful oasis.
Remember, when working with electrical components, always prioritize safety. Turn off the power supply to the fan before attempting any repairs, and if you’re unsure or uncomfortable with the process, seek the assistance of a professional technician.
With a bit of patience and the right tools, fixing a noisy bathroom fan is a task that anyone can tackle. Enjoy the serenity of a quiet bathroom fan and create a more peaceful environment in your home.
Frequently Asked Questions about How To Fix Noisy Bathroom Fan
Was this page helpful?
At Storables.com, we guarantee accurate and reliable information. Our content, validated by Expert Board Contributors, is crafted following stringent Editorial Policies. We're committed to providing you with well-researched, expert-backed insights for all your informational needs.


0 thoughts on “How To Fix Noisy Bathroom Fan”